Create Plan
The cluster fleet plan is designed to benefit users involved in cluster management, deployment, and operations, enabling them to efficiently manage resources, implement custom operations, and track fleet execution across projects and clusters.
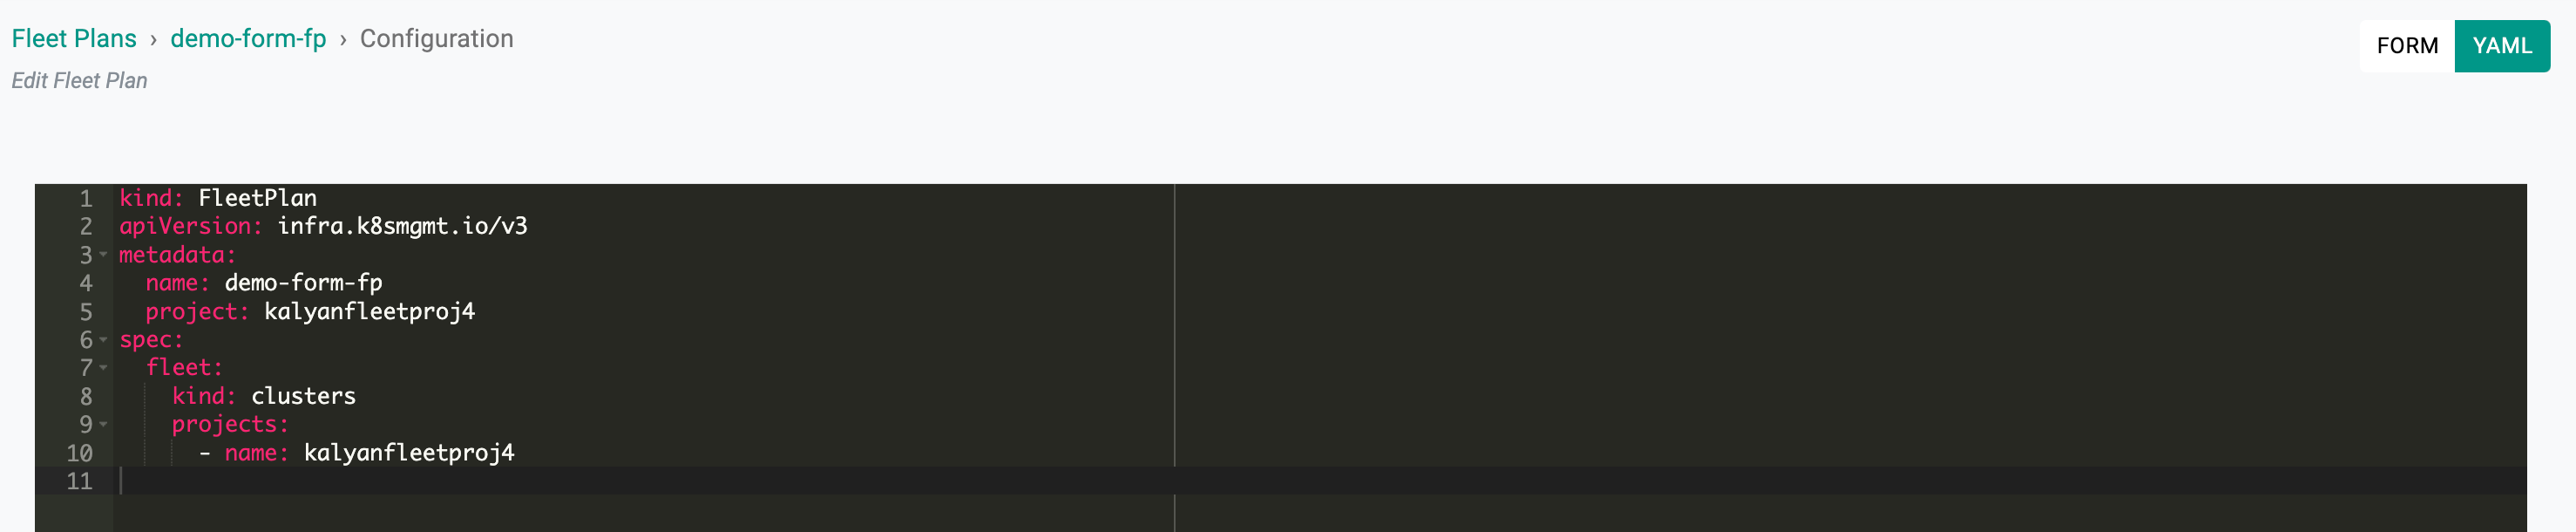
Users have the flexibility to create or edit a fleet plan using two different options: the Form and YAML Editor. Each option offers distinct advantages and allows users to tailor the configuration specifications according to their requirements.
While the Form option offers a straightforward and guided approach, the YAML Editor option empowers users with greater flexibility and control over their fleet plan configuration. Users can choose the option that best suits their expertise and requirements.
Form
The Form option provides a user-friendly interface where users can conveniently input information for each field in the fleet plan configuration. The Form option ensures that users don't miss any essential information and simplifies the fleet plan creation process.
YAML Editor
The YAML Editor option empowers users to create or edit a config spec for a fleet plan using YAML syntax. This method is ideal for users who are comfortable working directly with code and prefer a more granular level of control over their configurations.
Both the Form and YAML Editor options cater to users with different preferences and skill levels. ensuring a seamless and efficient fleet plan creation or editing experience.
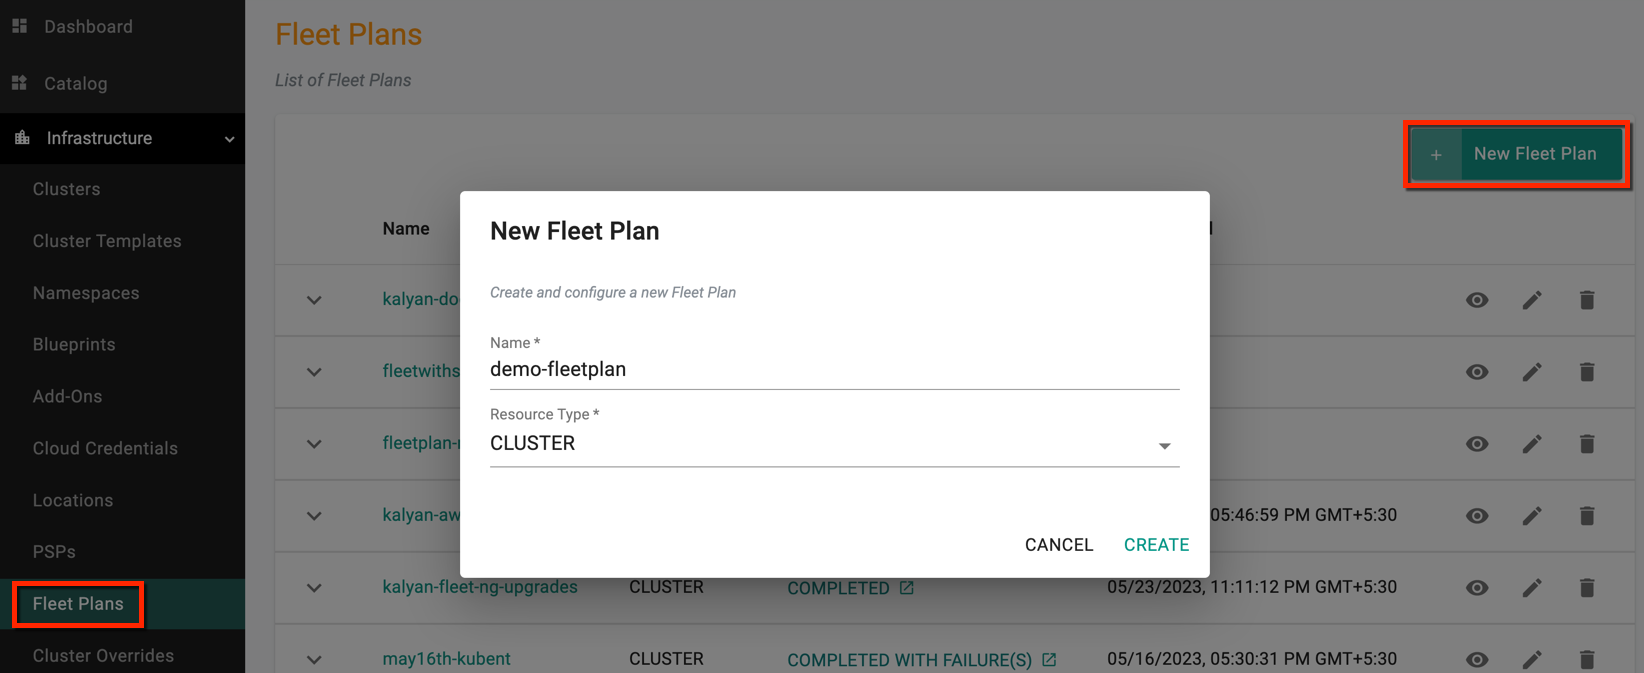
New Fleet Plan
Perform the below steps to create a New Fleet Plan:
- Login to the controller and select Infrastructure → Fleet Plans
- Click New Fleet Plan
- Provide a name for the fleet plan and select the resource type Cluster
Fleet Plan Configuration page appears
Optionally, you can provide the configuration details for Operation Workflow, Fleet, and Agents
Operation Workflow
Users often require custom operations in cases where they want to send commands and receive responses from resources. For example, upgrading a bunch of clusters at once or applying certain security policies to a group of clusters, users can create a single operation to apply on all clusters in a fleet.
- Click New Operation and provide a name.
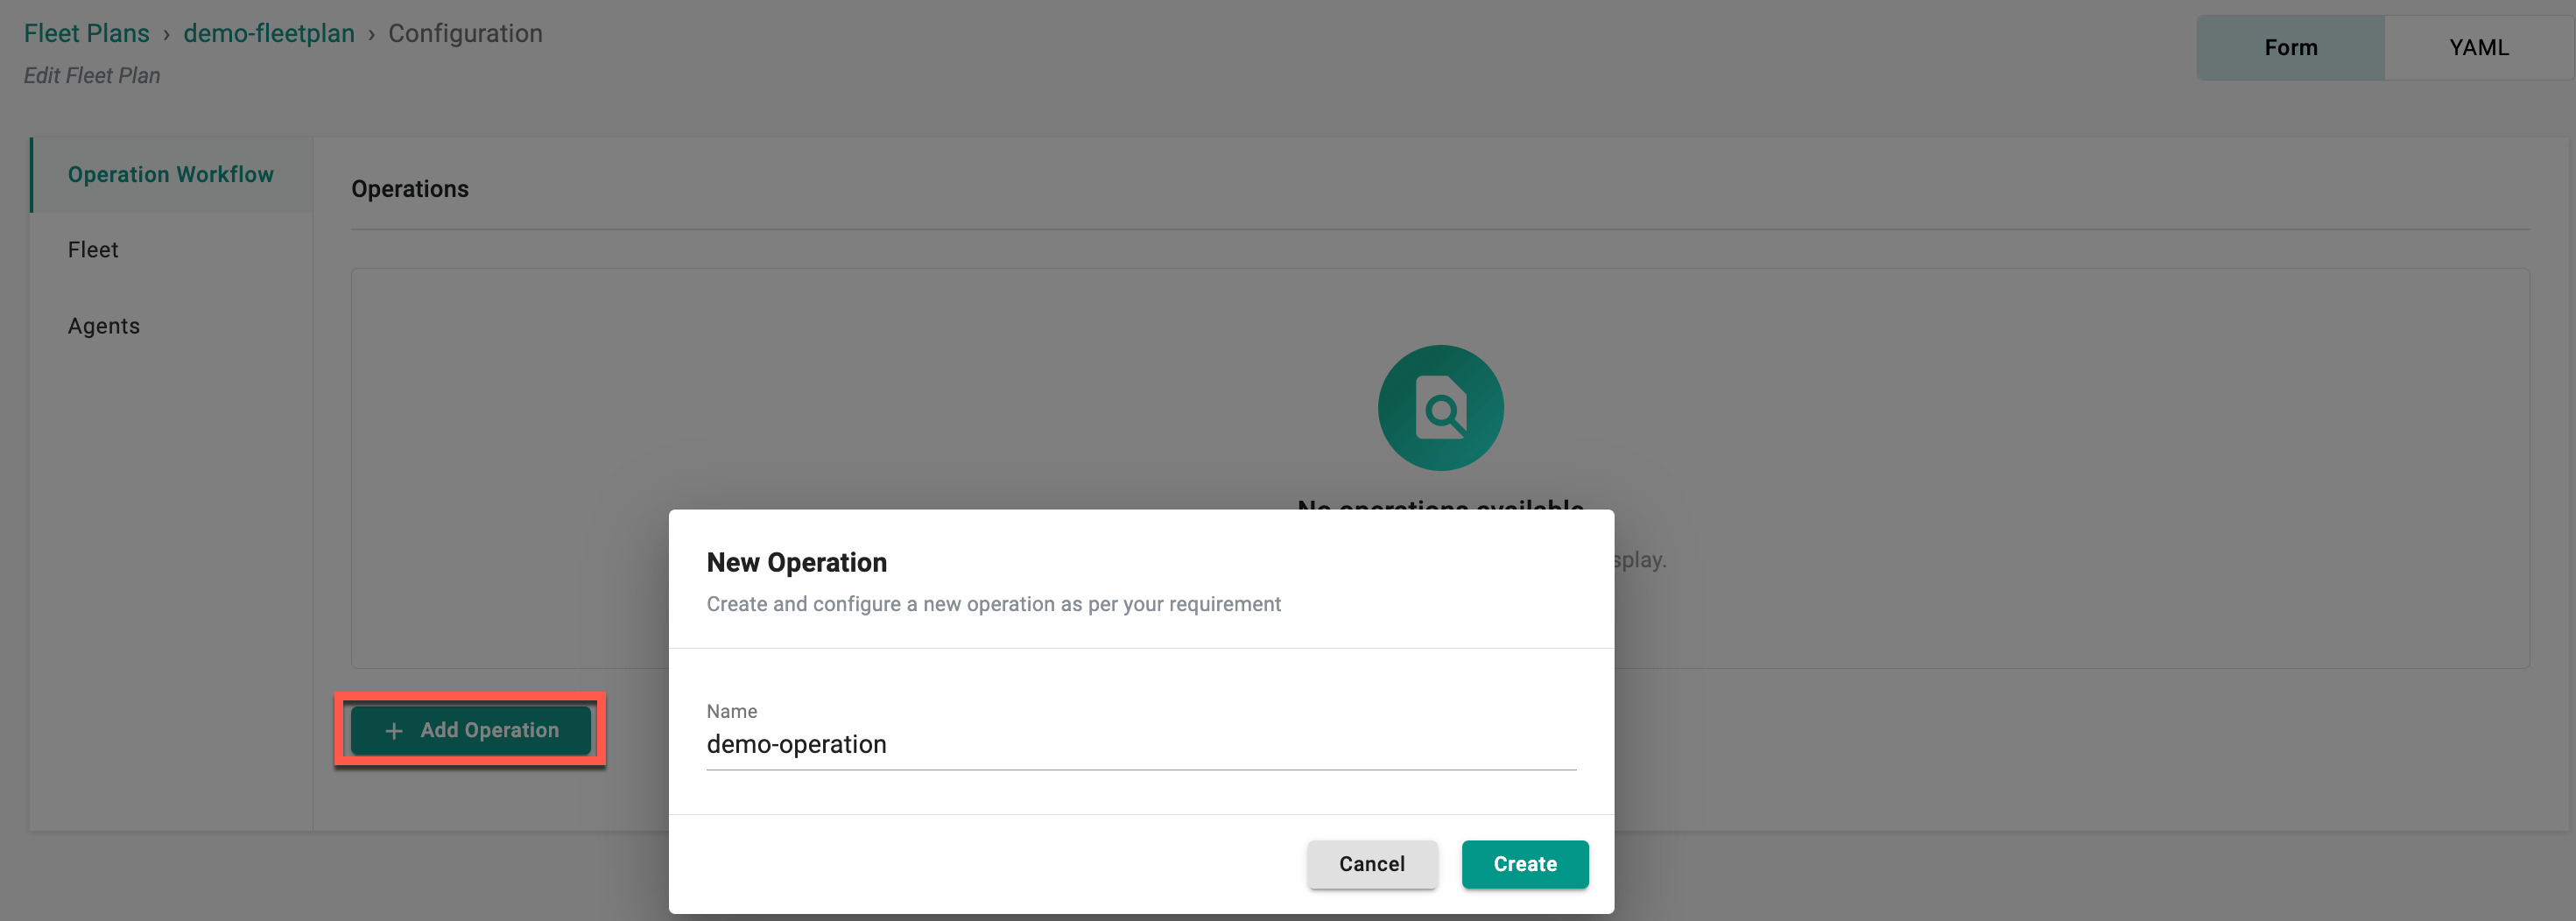
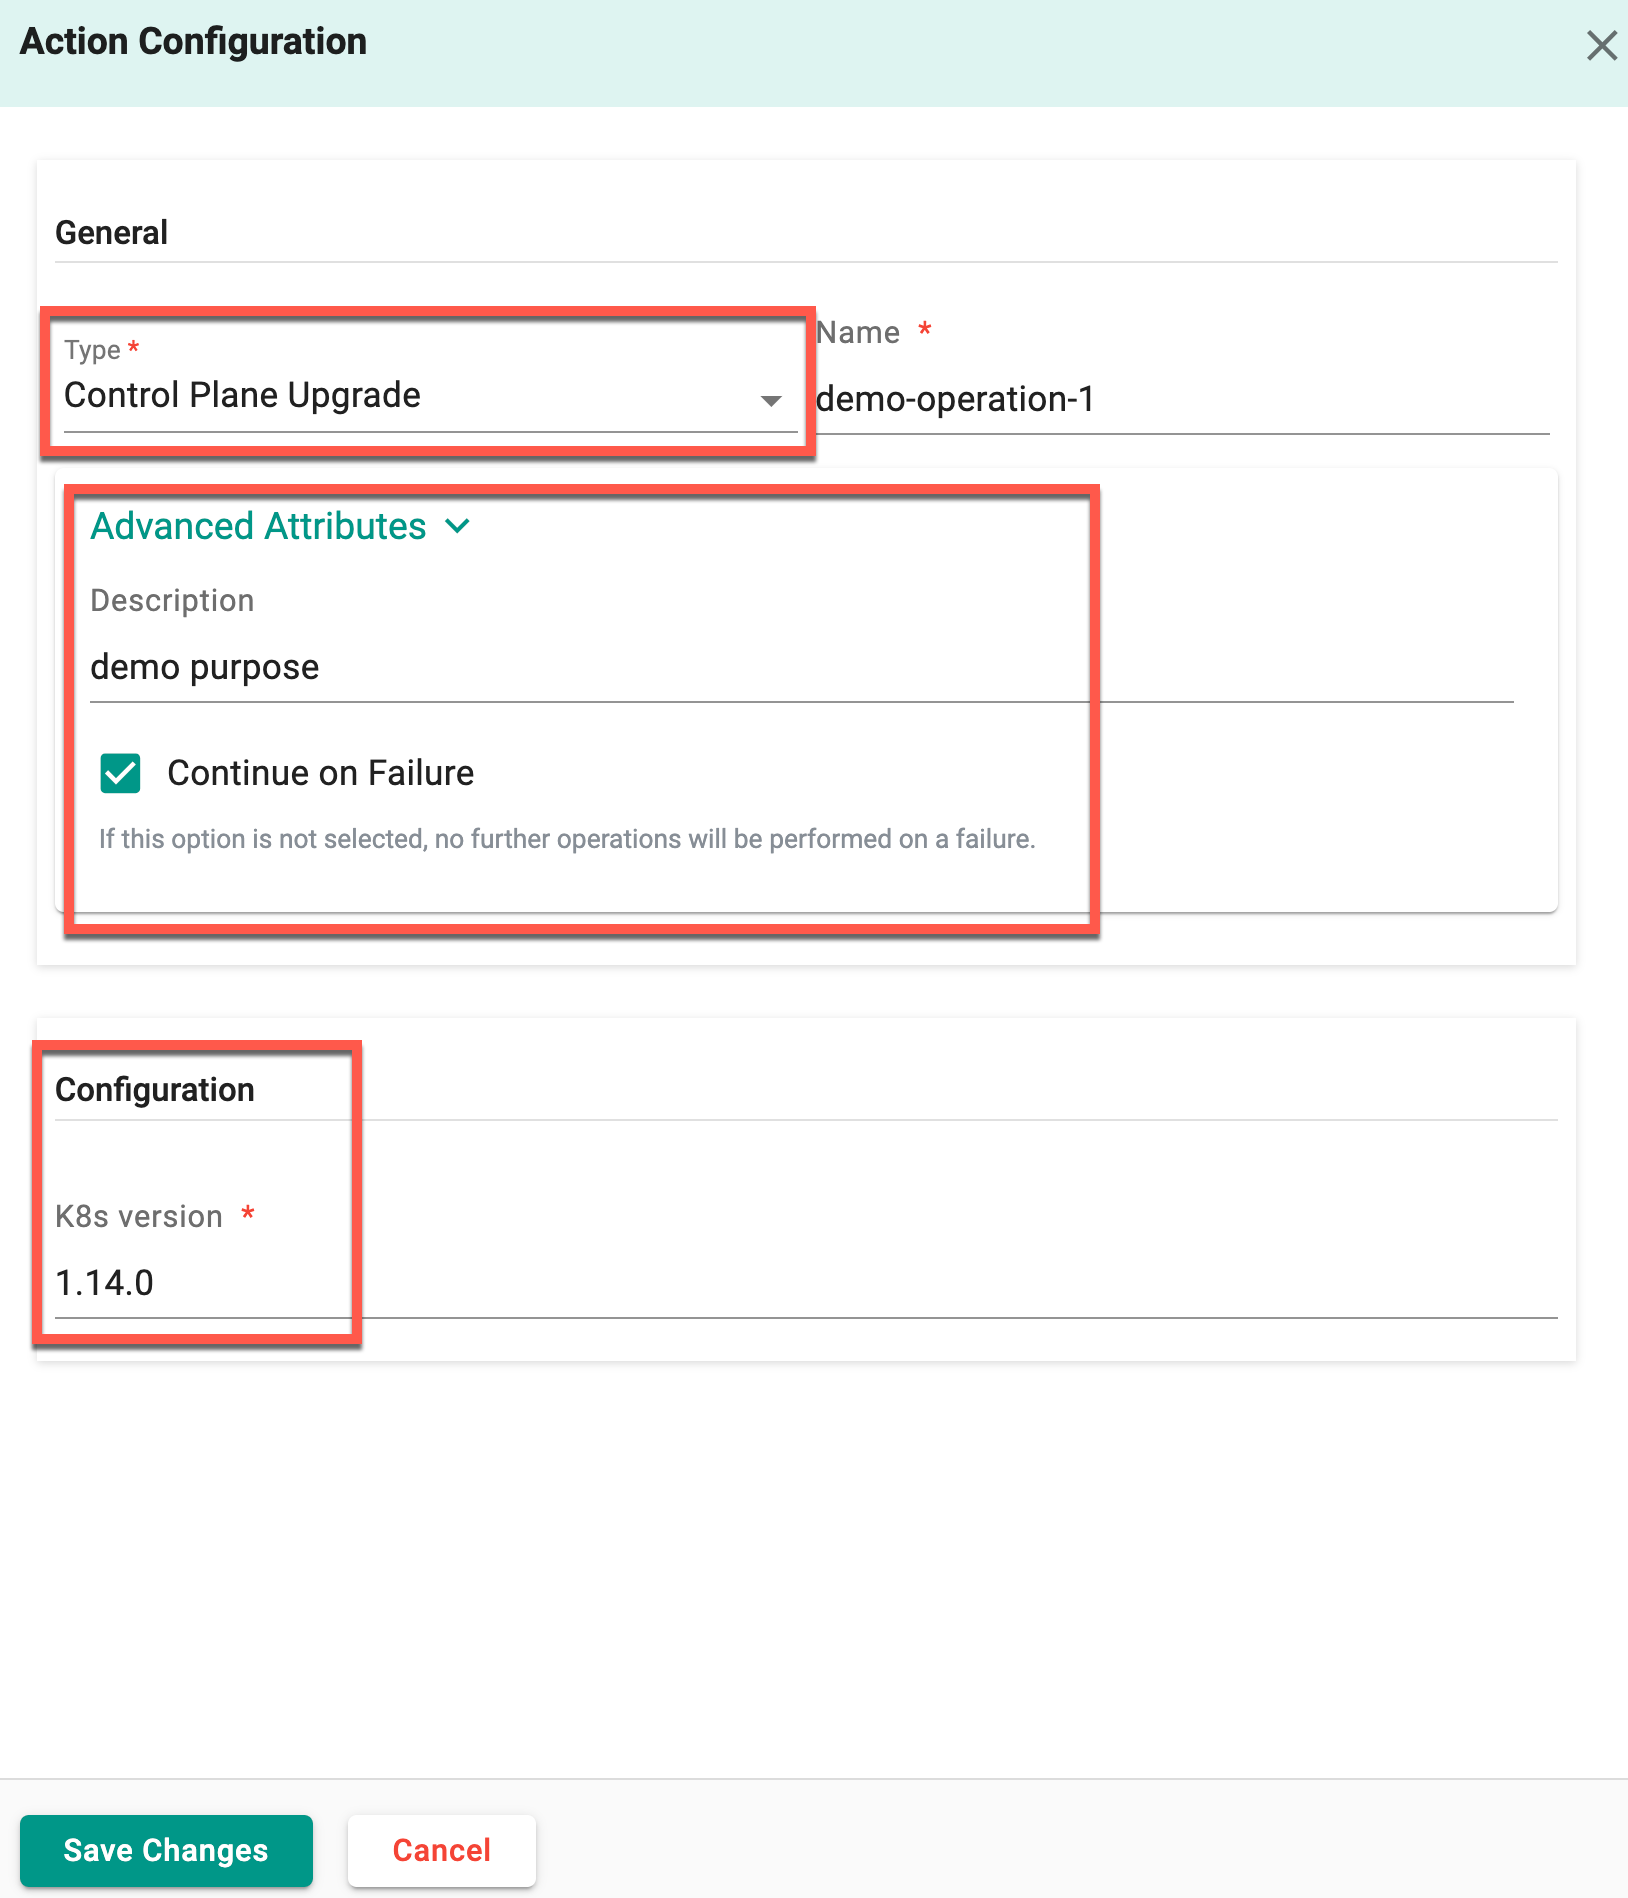
Action Configuration appears
- Select the required Type. The four available types are Control Plane Upgrade, Node Groups Upgrade, Node Group And Control Plane Upgrade, and Patch
- Provide a name for this action and optionally, a description
-
Config details is based on the Type selection:
-
On selecting the named operations Control Plane Upgrade, and Node Group And Control Plane Upgrade, specify the K8s version
- On selecting the named operation Node Groups Upgrade, provide one or more node groups and specify the K8s version
- On selecting Blueprint Update, provide a name for the operation, and specify the blueprint name (e.g., minimal, default). The version is optional for the global blueprint, whereas it is mandatory for a custom blueprint. This will update all the cluster blueprints within this fleet according to the provided configuration details
- On selecting Patch, specify the path(s) to the field in your cluster config schema and the desired value of that field. For example, to update a blueprint version in a config yaml file, mention the path as .spec.blueprintConfig.version and value as V4. Similarly, users can update more fields using this patch type
Note: The types Control Plane Upgrade, Node Group And Control Plane Upgrade, Node Groups Upgrade, and Patch are applicable for all types of clusters except Imported Clusters. However, the type Blueprint is applicable for all clusters, including Imported Clusters.
- Advanced Attributes encompass a set of advanced settings and it offer users the ability to toggle the Continue on Failure option. When this option is enabled, the system proceeds with executing the next operations, even if a specific operation fails. The overall success of the fleet operation relies on the successful completion of all subsequent operations within the cluster. If any of the cluster's operations fail, it would be considered an overall failure. If this option is not selected, in the event of a failure during an operation, no further operations will be executed within that specific cluster. The failure halts operations exclusively within the affected cluster, without impacting other parts of the fleet.
If this option is enabled:
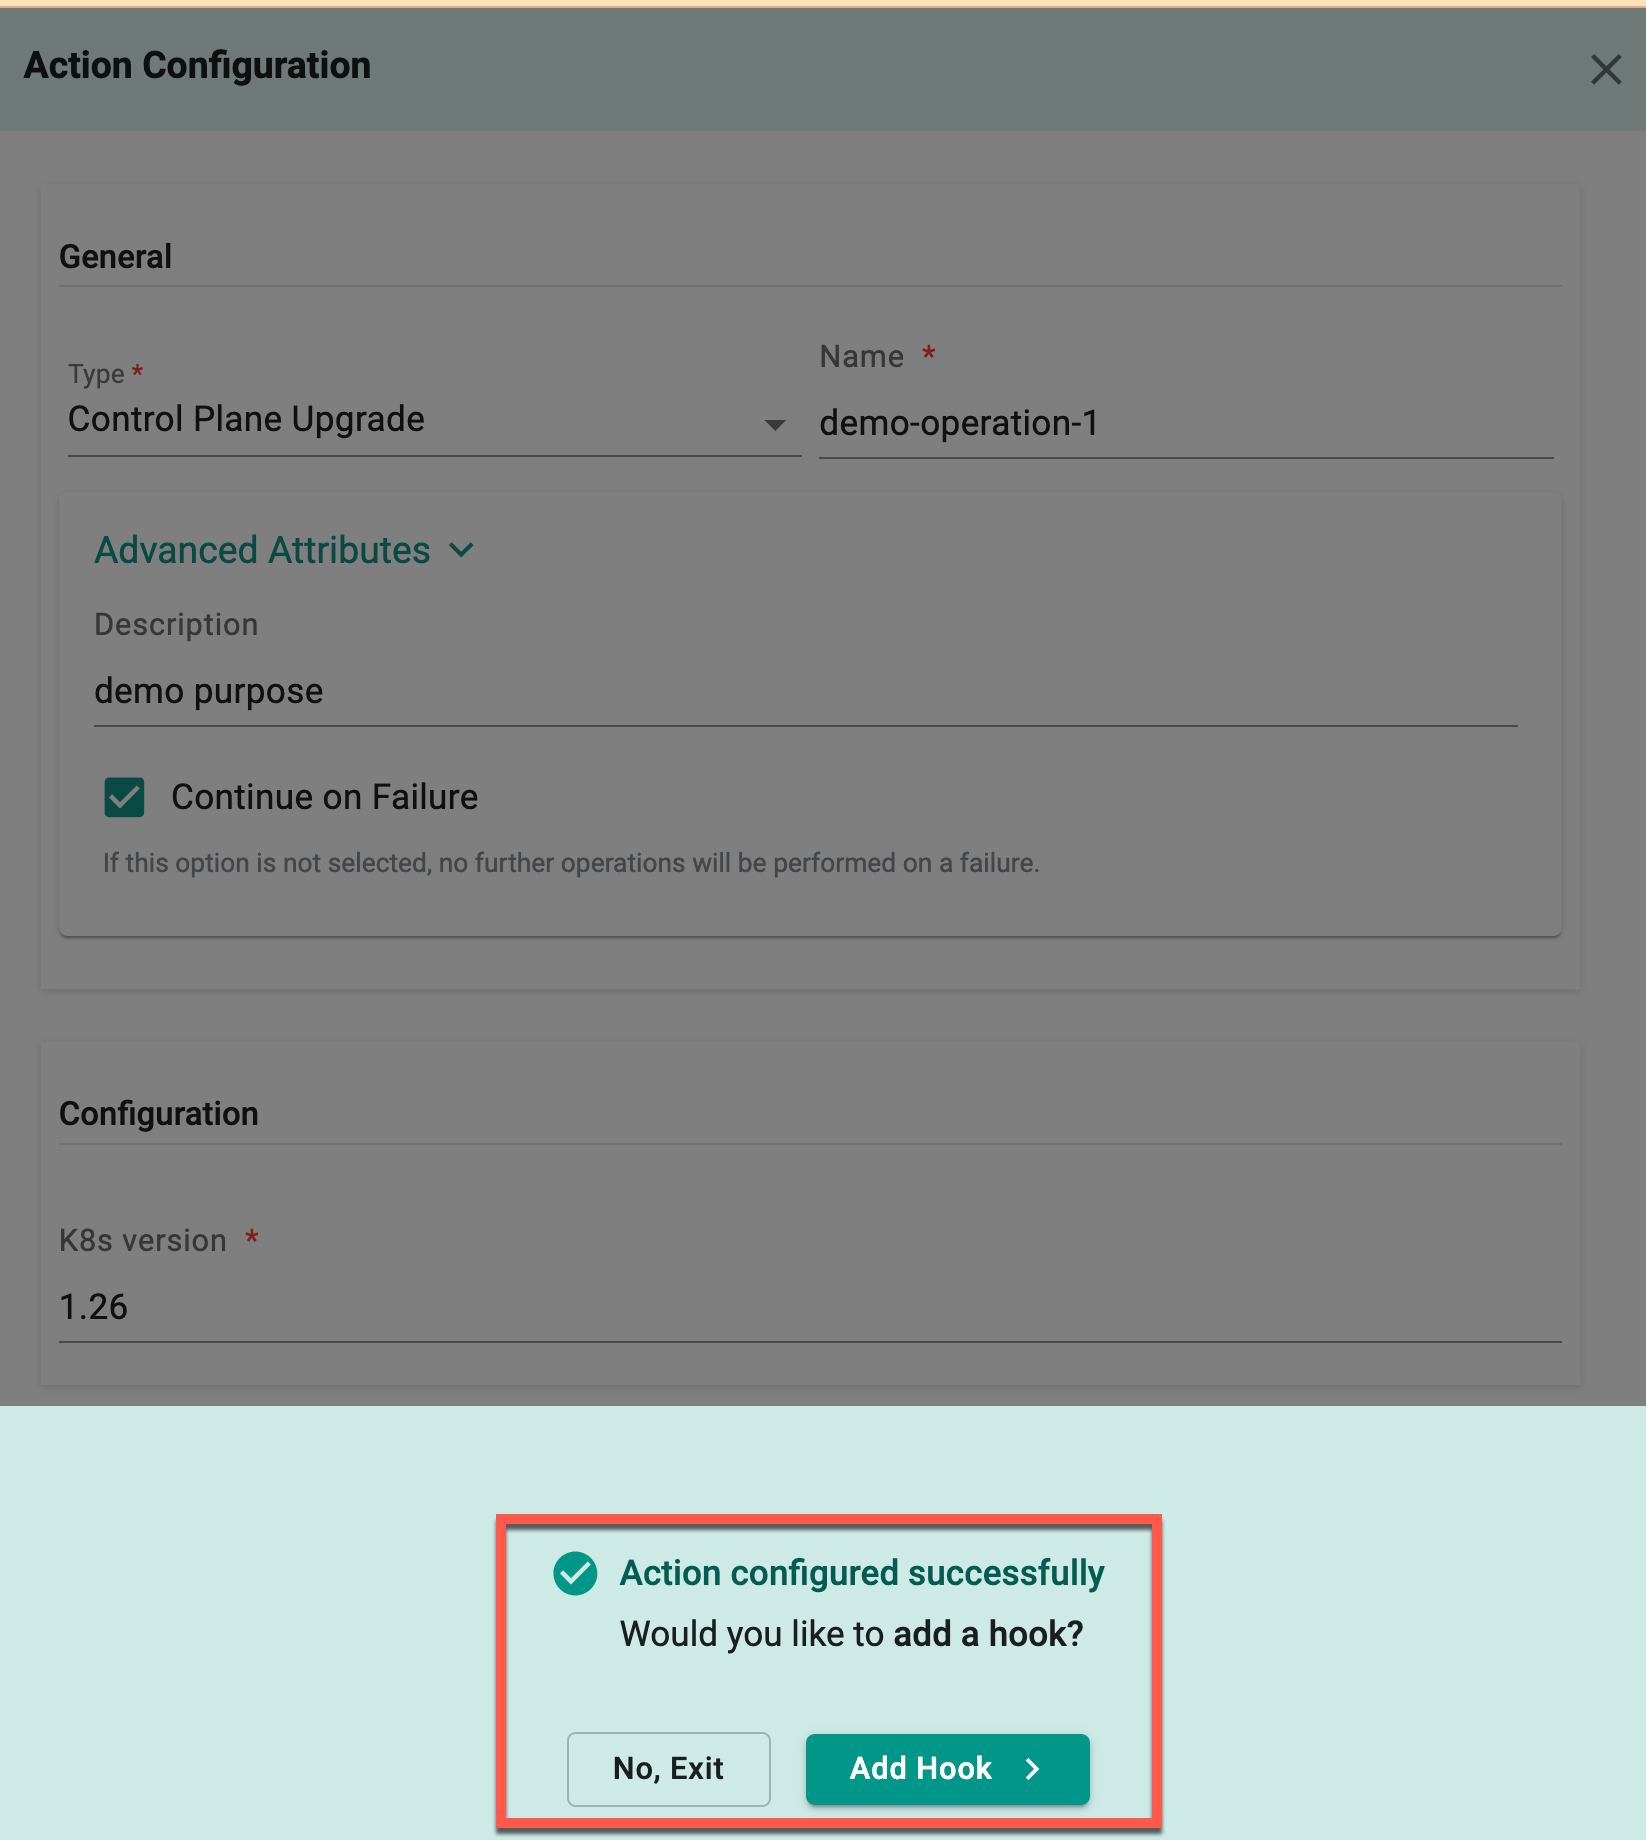
- Click Save or Save and Add Hook. Users are allowed to create one or more operation(s).
Clicking Save allows users to add hooks if necessary. If not needed, select No, Exit.
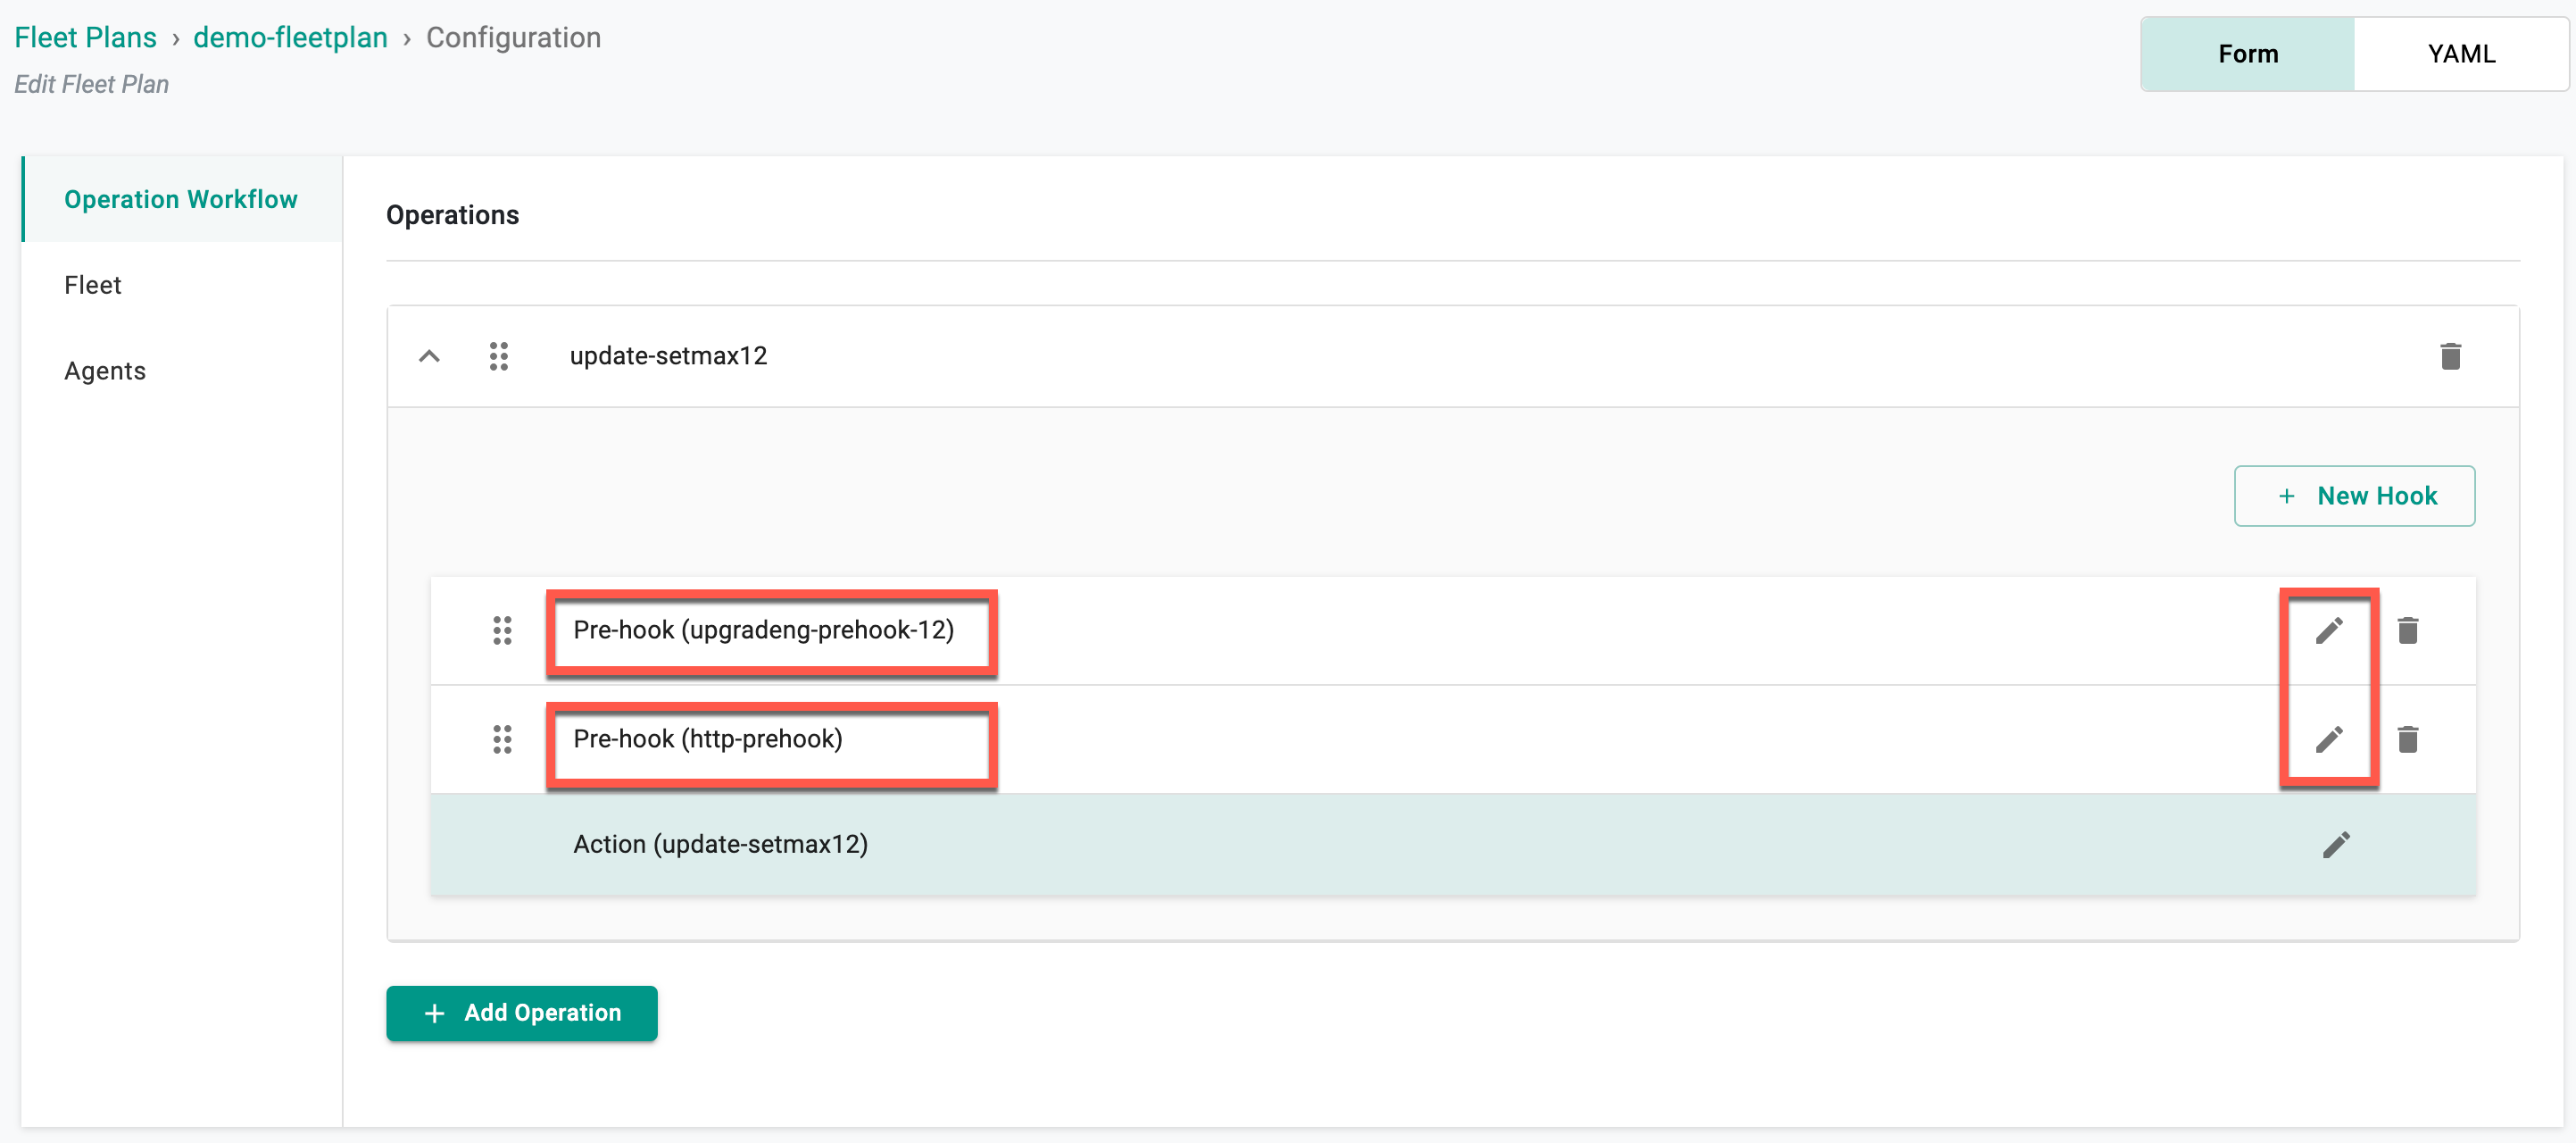
Hook Configuration (Optional)
Hooks offer users the capability to perform actions either before and after the execution of an operation. While it is possible to achieve this by writing a custom operation, utilizing hooks provides a more intuitive approach for implementing pre- or post-operation tasks.
Users can either Save and Add Hook from the Action Configuration page or use New Hook button available in the Operations section as shown below

Pre-hook and Post-hook
The inclusion of pre-hooks and post-hooks provides users with the flexibility to incorporate custom functionality before and after various fleet operations.
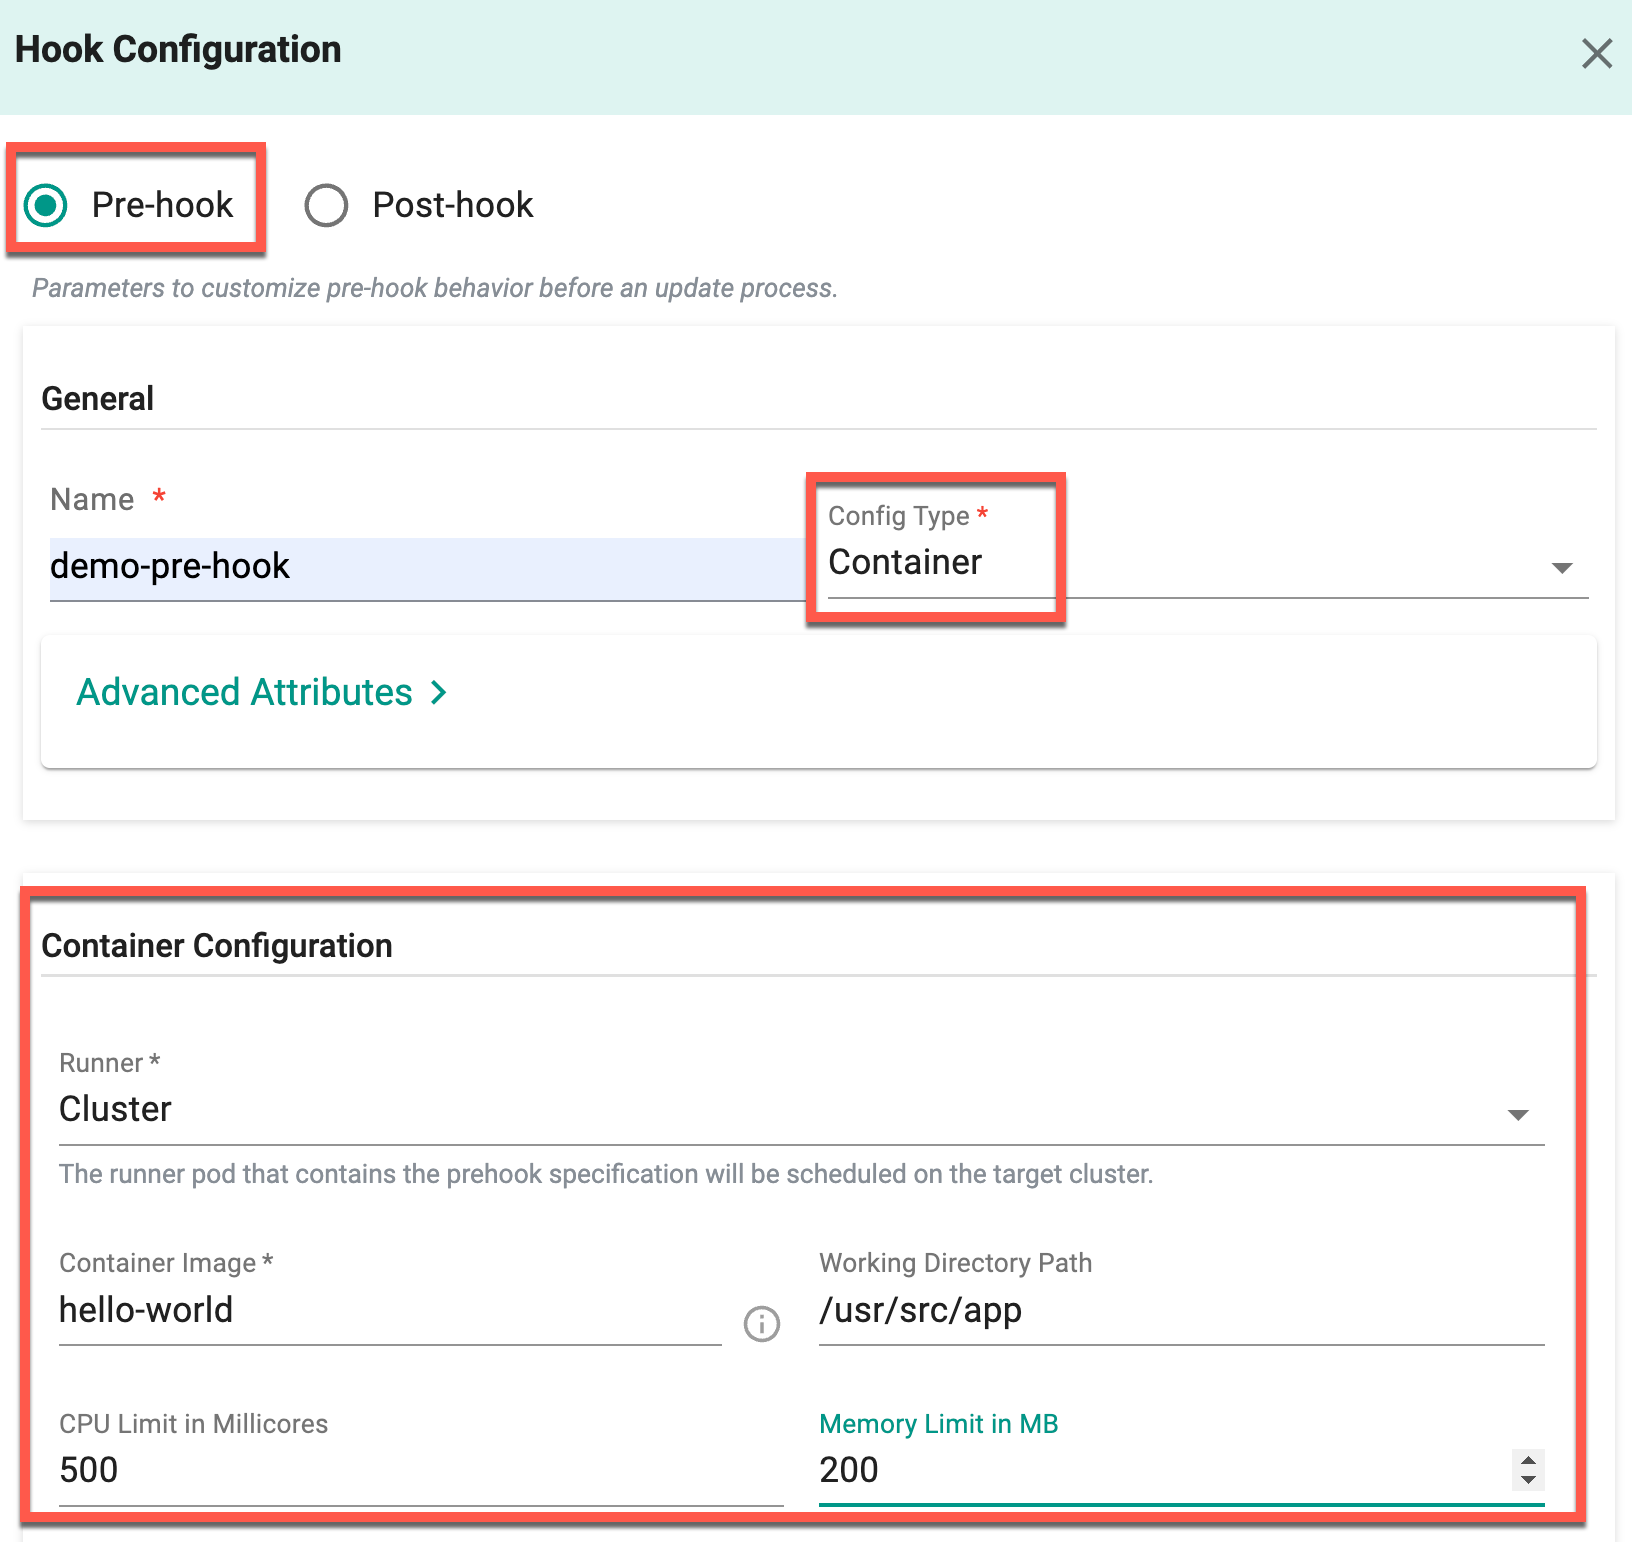
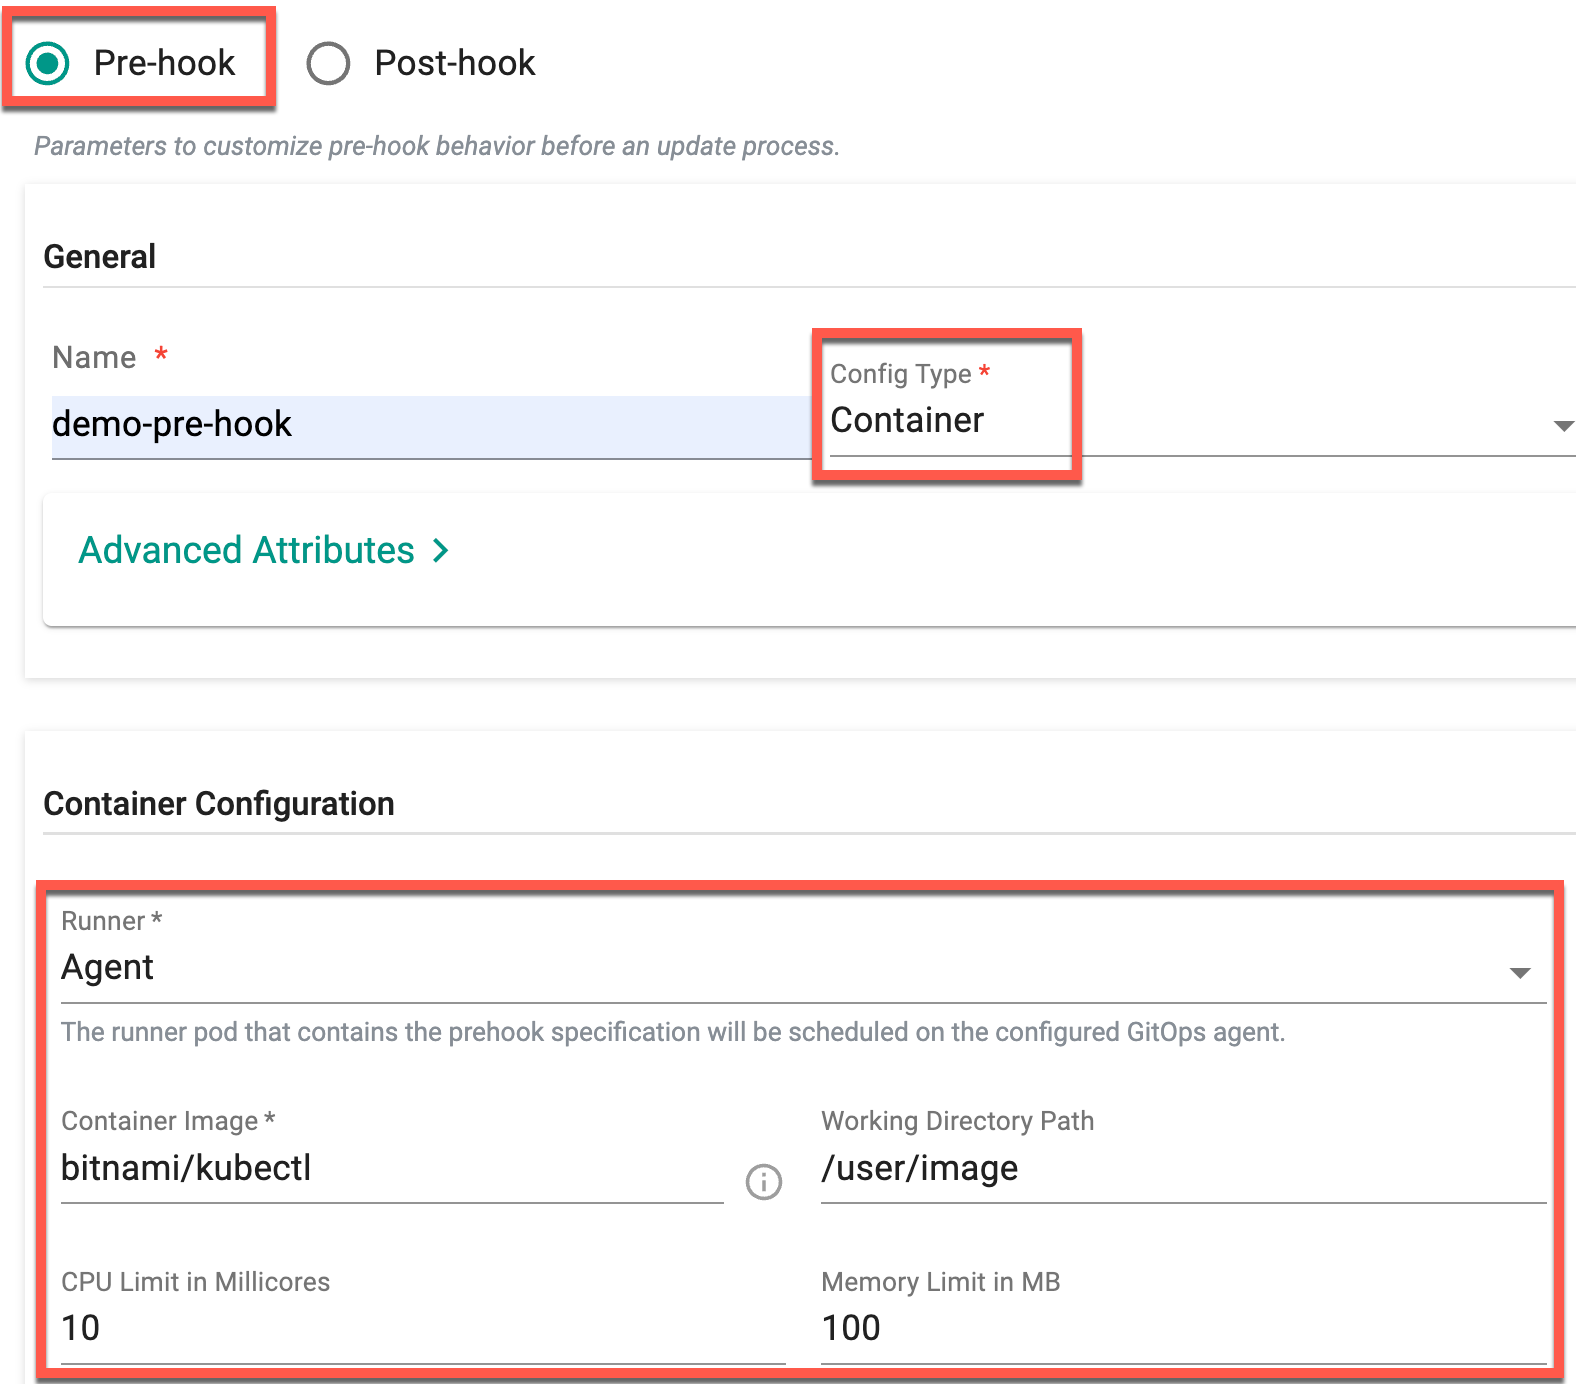
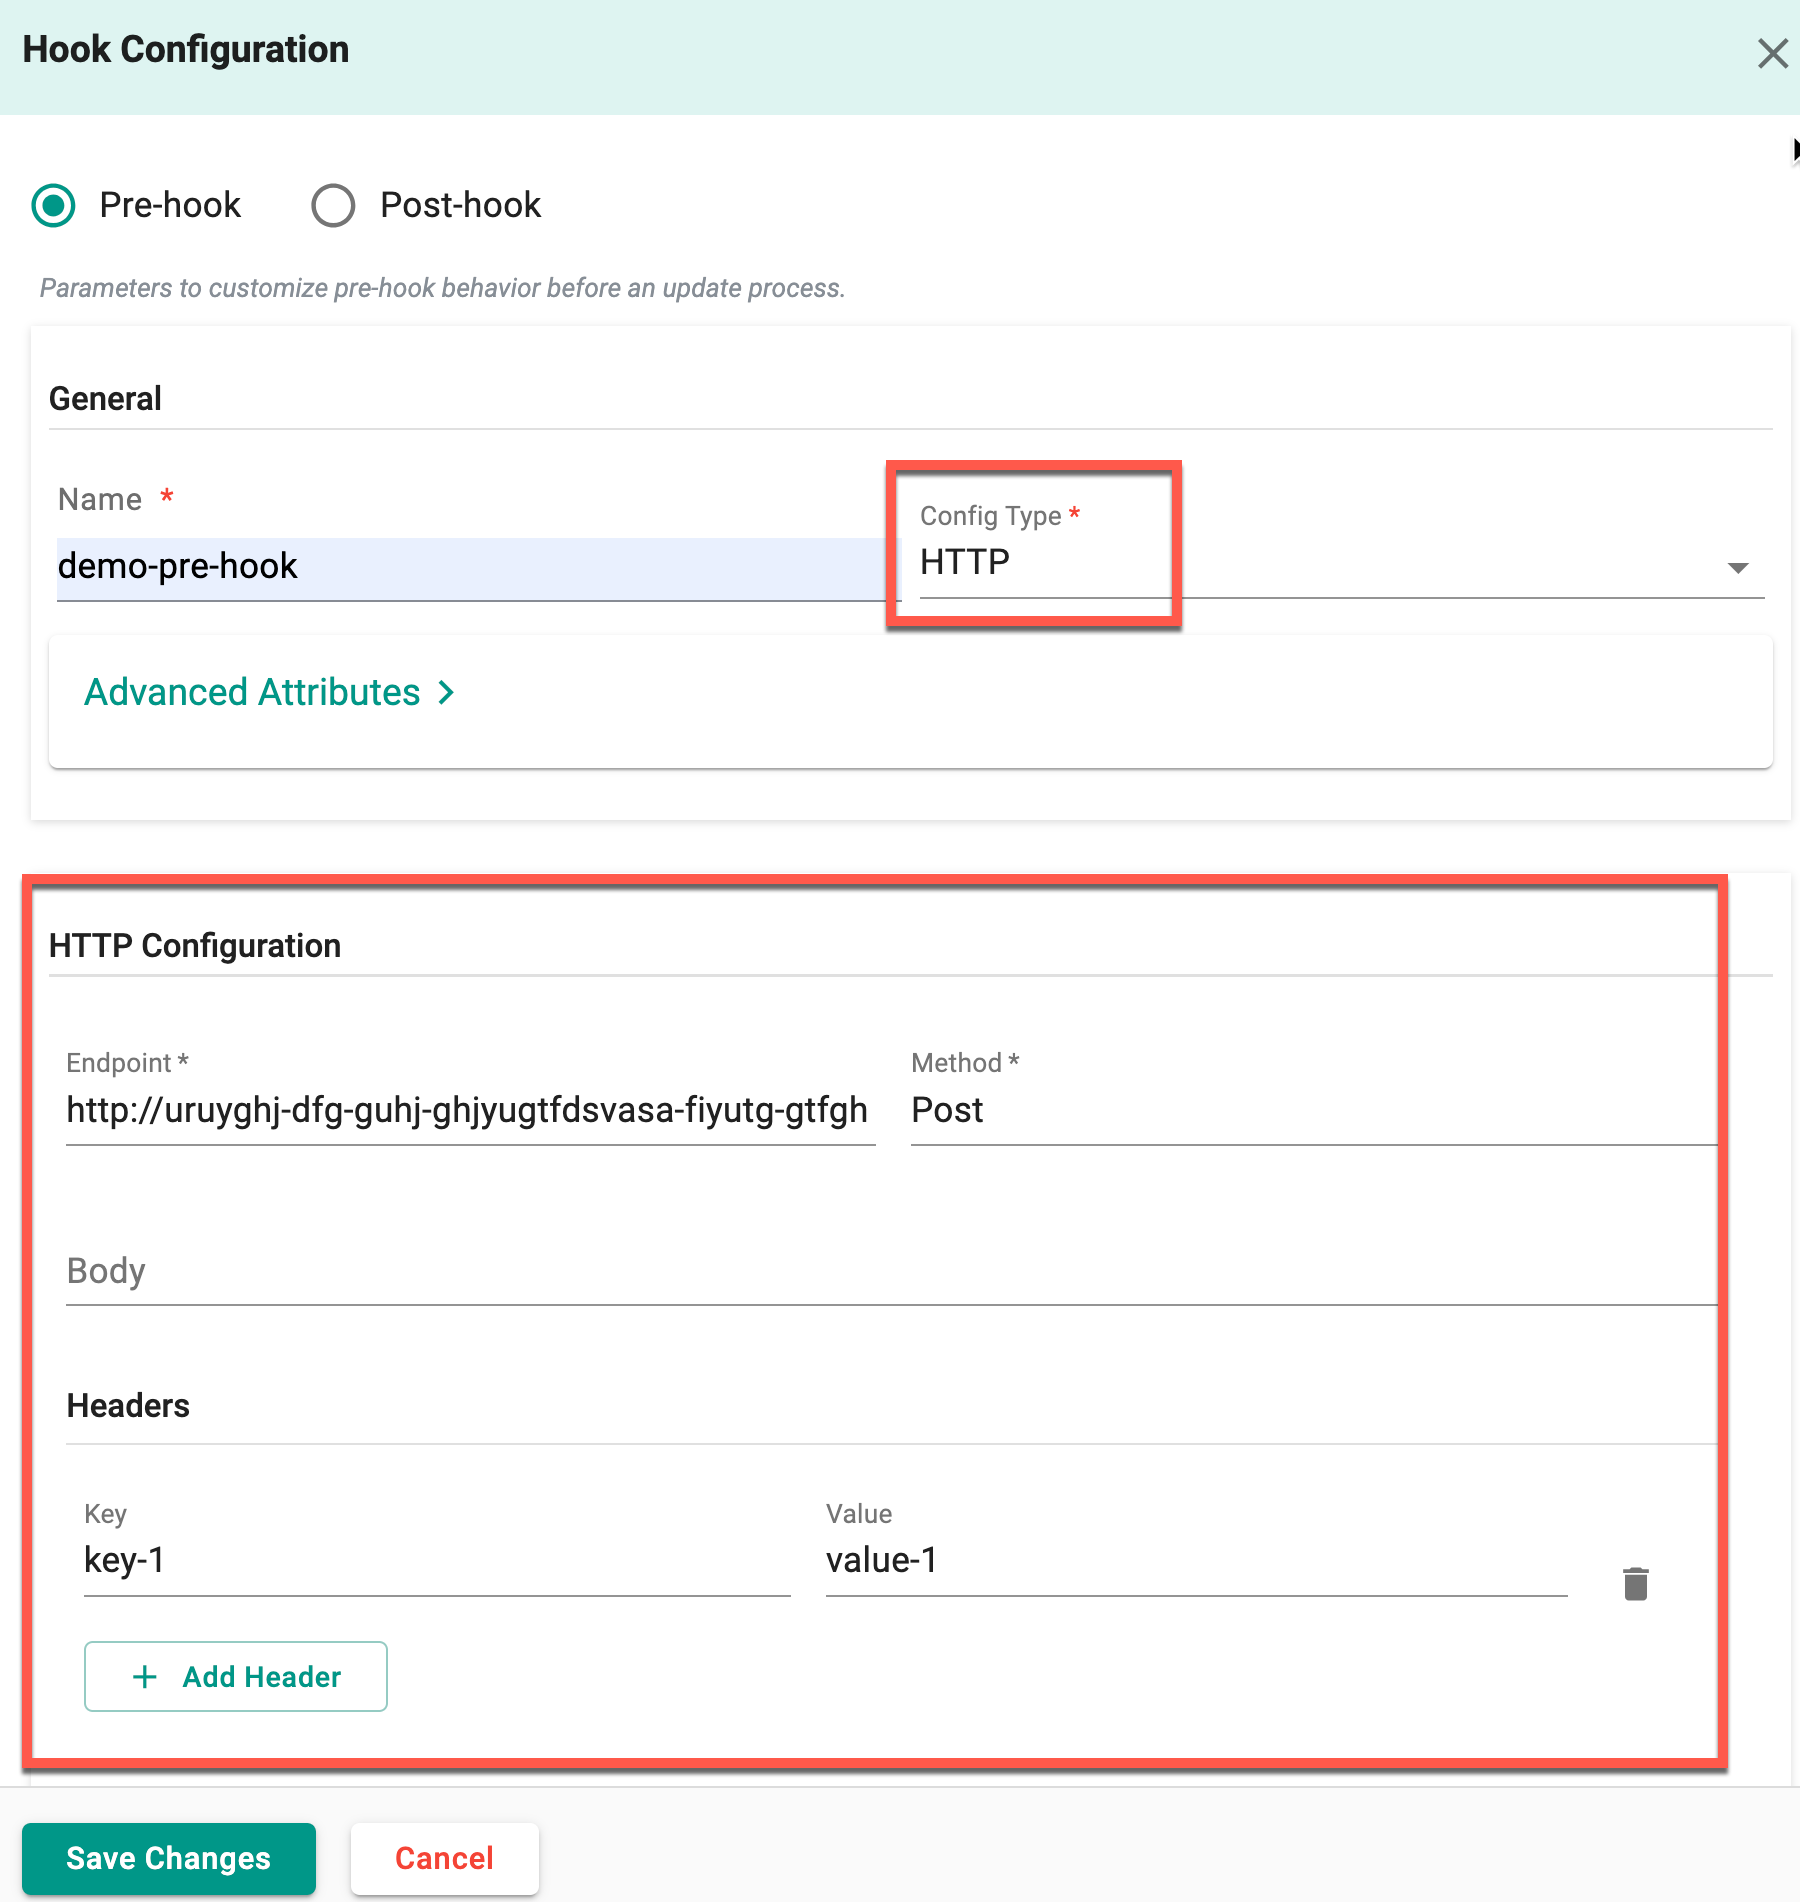
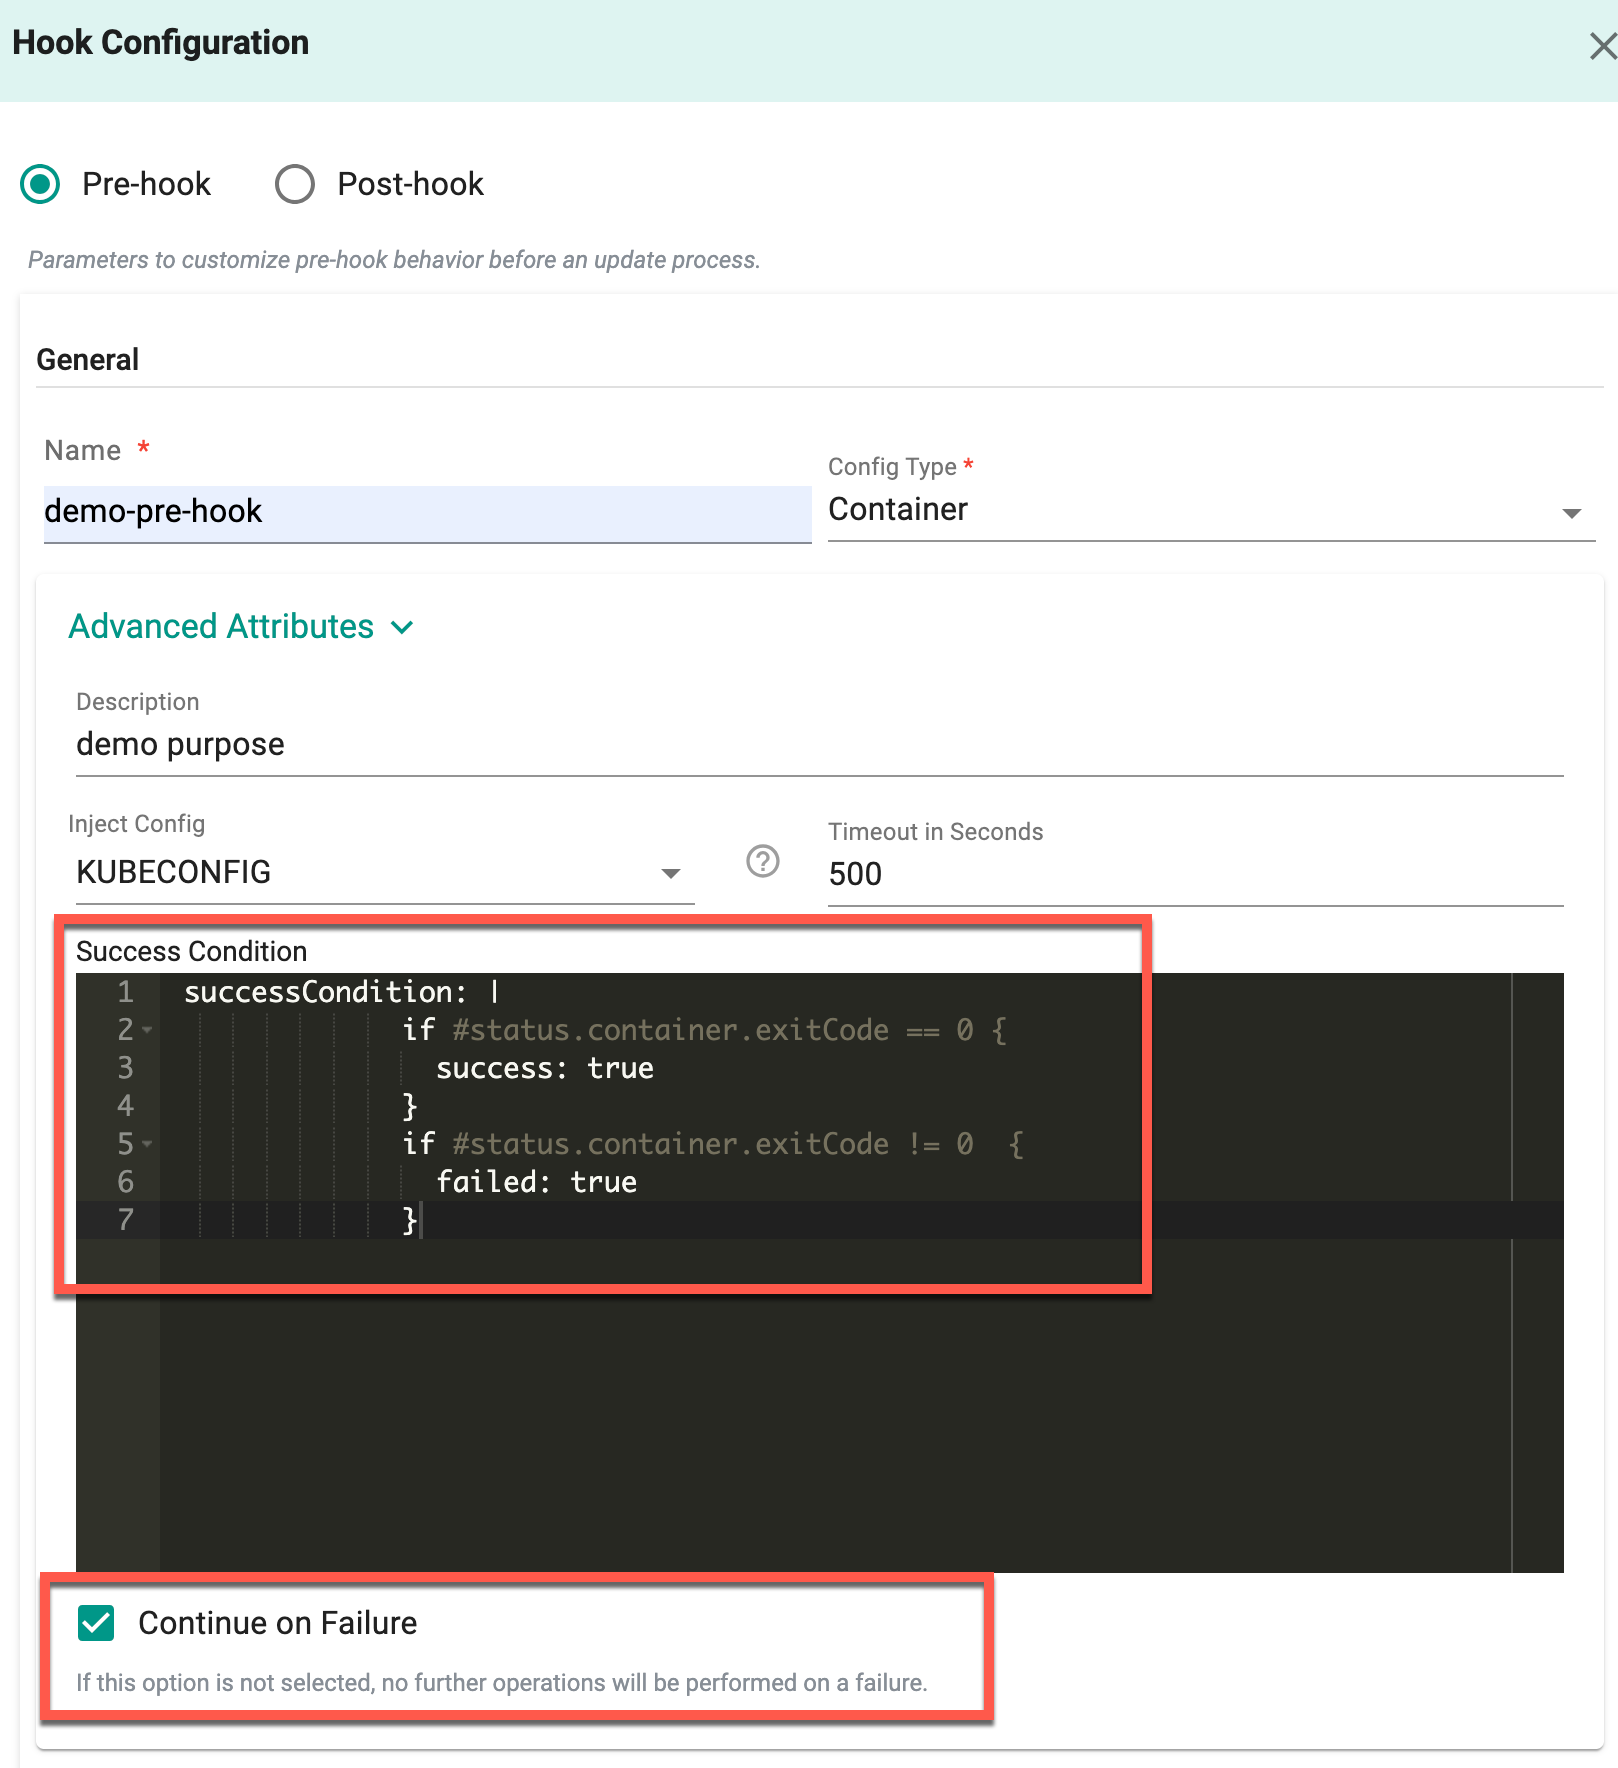
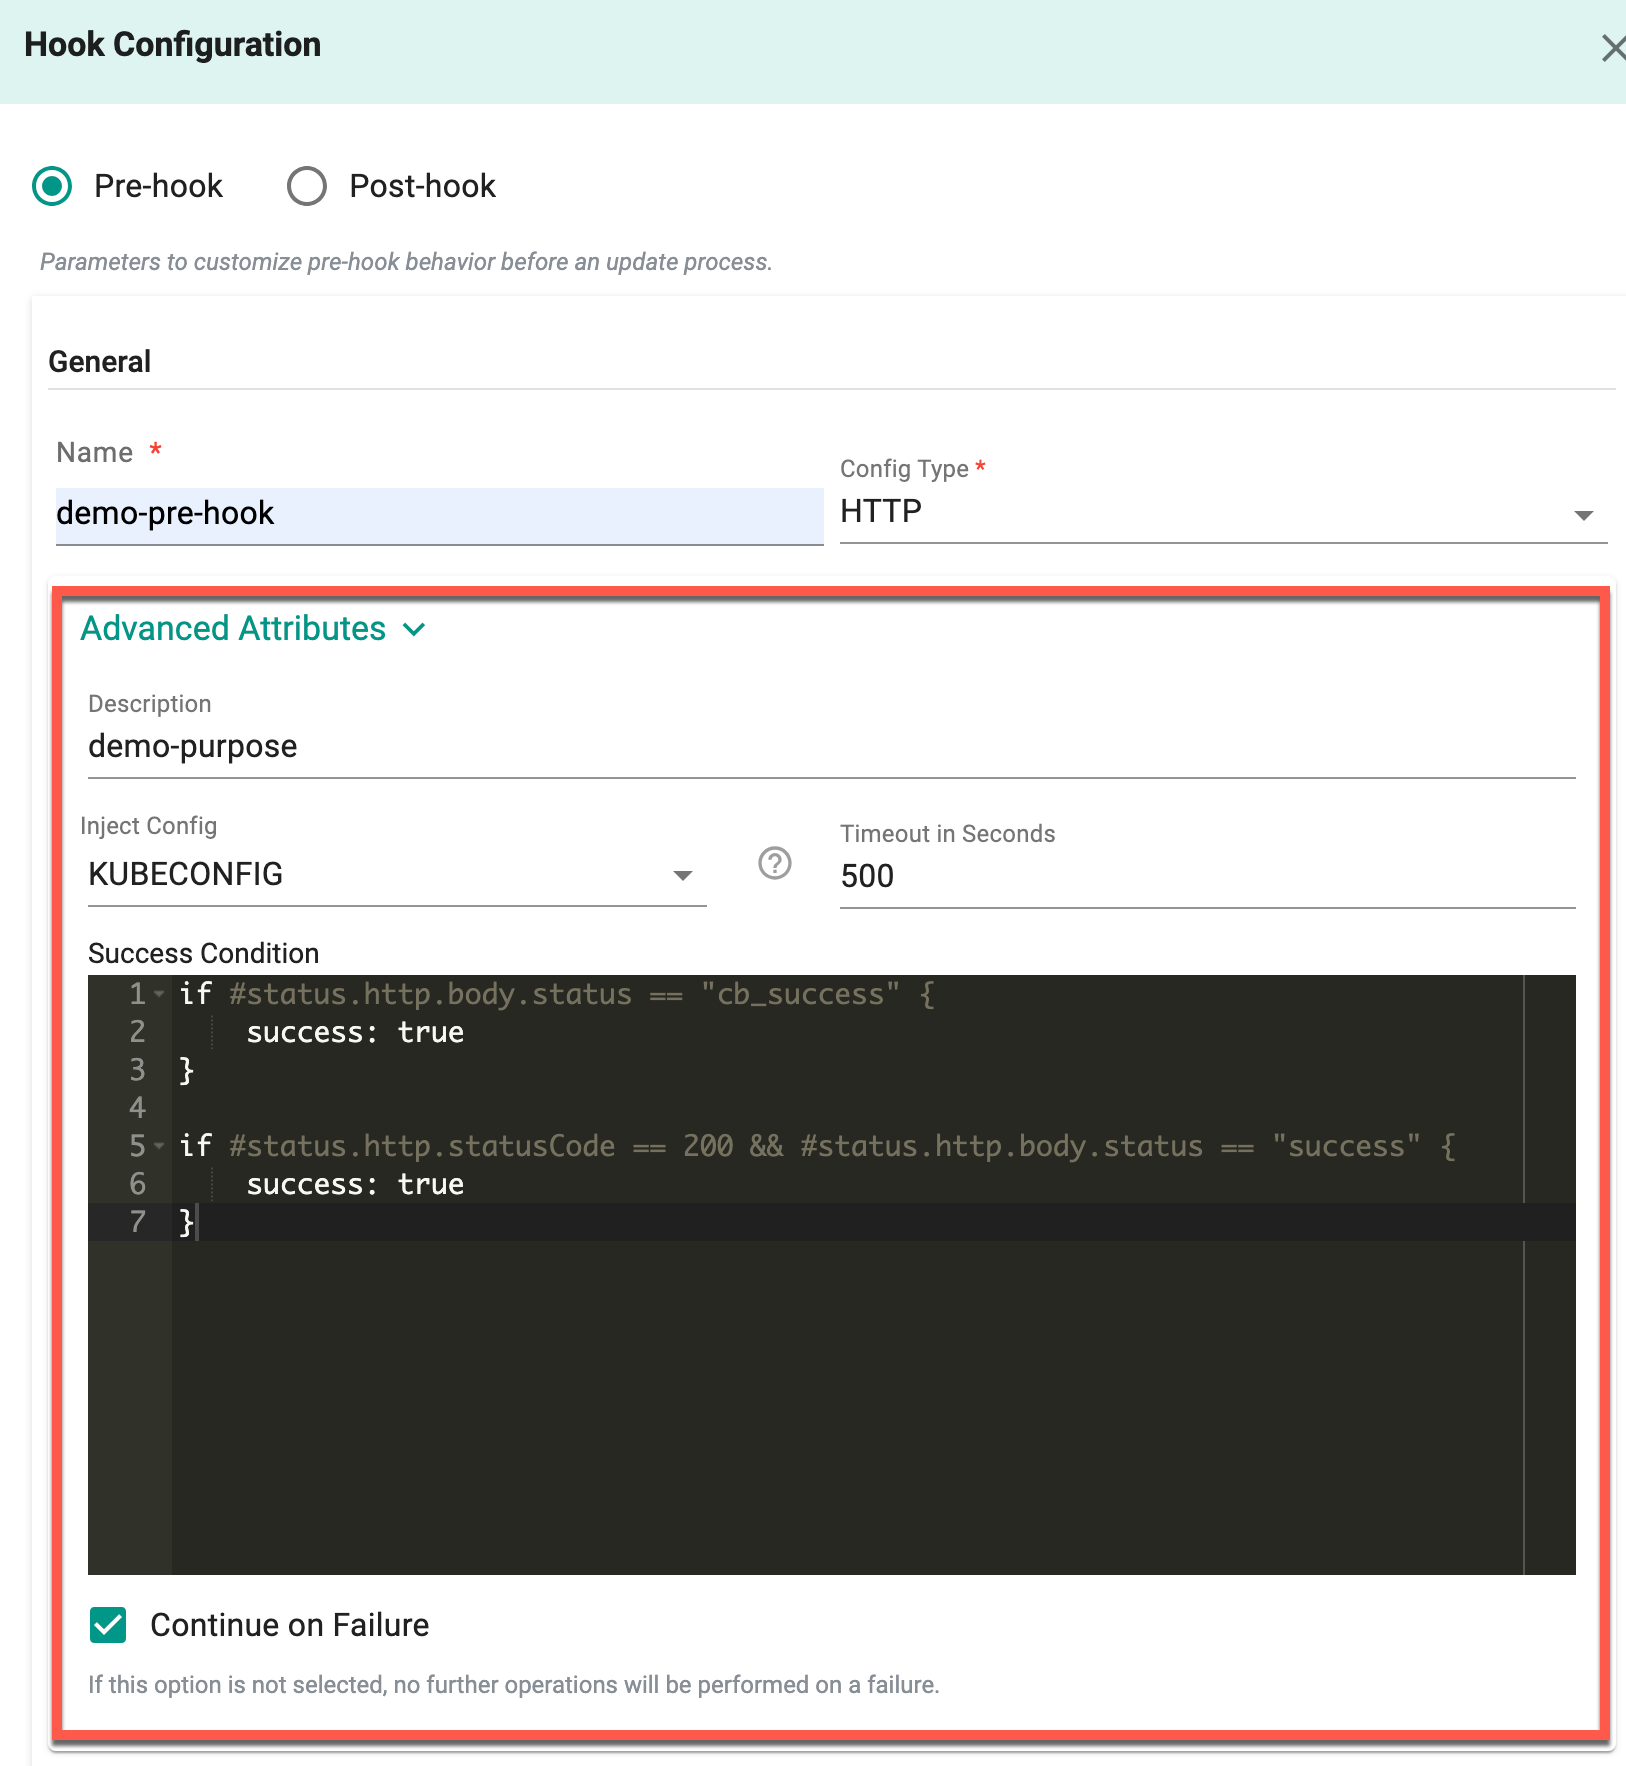
- Provide a name, and select the Config Type, either Container or HTTP
- Optionally, provide the Advance Attributes
- Enter a Description and select Inject Config Kubeconfig
- Enter the timeout in seconds to prevent the container from running for an excessively long time in certain cases. The timeout sets a limit and terminates the run accordingly
- Enable or disable Continue on Failure. When this option is enabled, the system proceeds with executing the operations, even if a specific hook fails. The overall fleet operation is considered successful as long as subsequent operations are completed successfully. If this option is not selected, in the event of a failure during a hook execution, no further operations will be executed. The failure halts the entire fleet operation
-
On selecting Container Config type, provide the container configuration
-
Select the required Runner, Cluster and Agent
- On selecting Cluster runner type, a runner pod is brought up on all the target clusters with the provided configuration details, and the hook gets executed. For example, if a fleet plan has 10 clusters, a pod is brought up on all the target clusters and the hook is executed
- On selecting Agents runner type, multiple runner pods are brought up on the selected GitOps agent with the provided configuration details. Refer Agents action to know how to add the GitOps agents. For example, if a fleet plan has 10 clusters, 10 pods are brought up on the cluster where the GitOps agent is running and the hook is executed
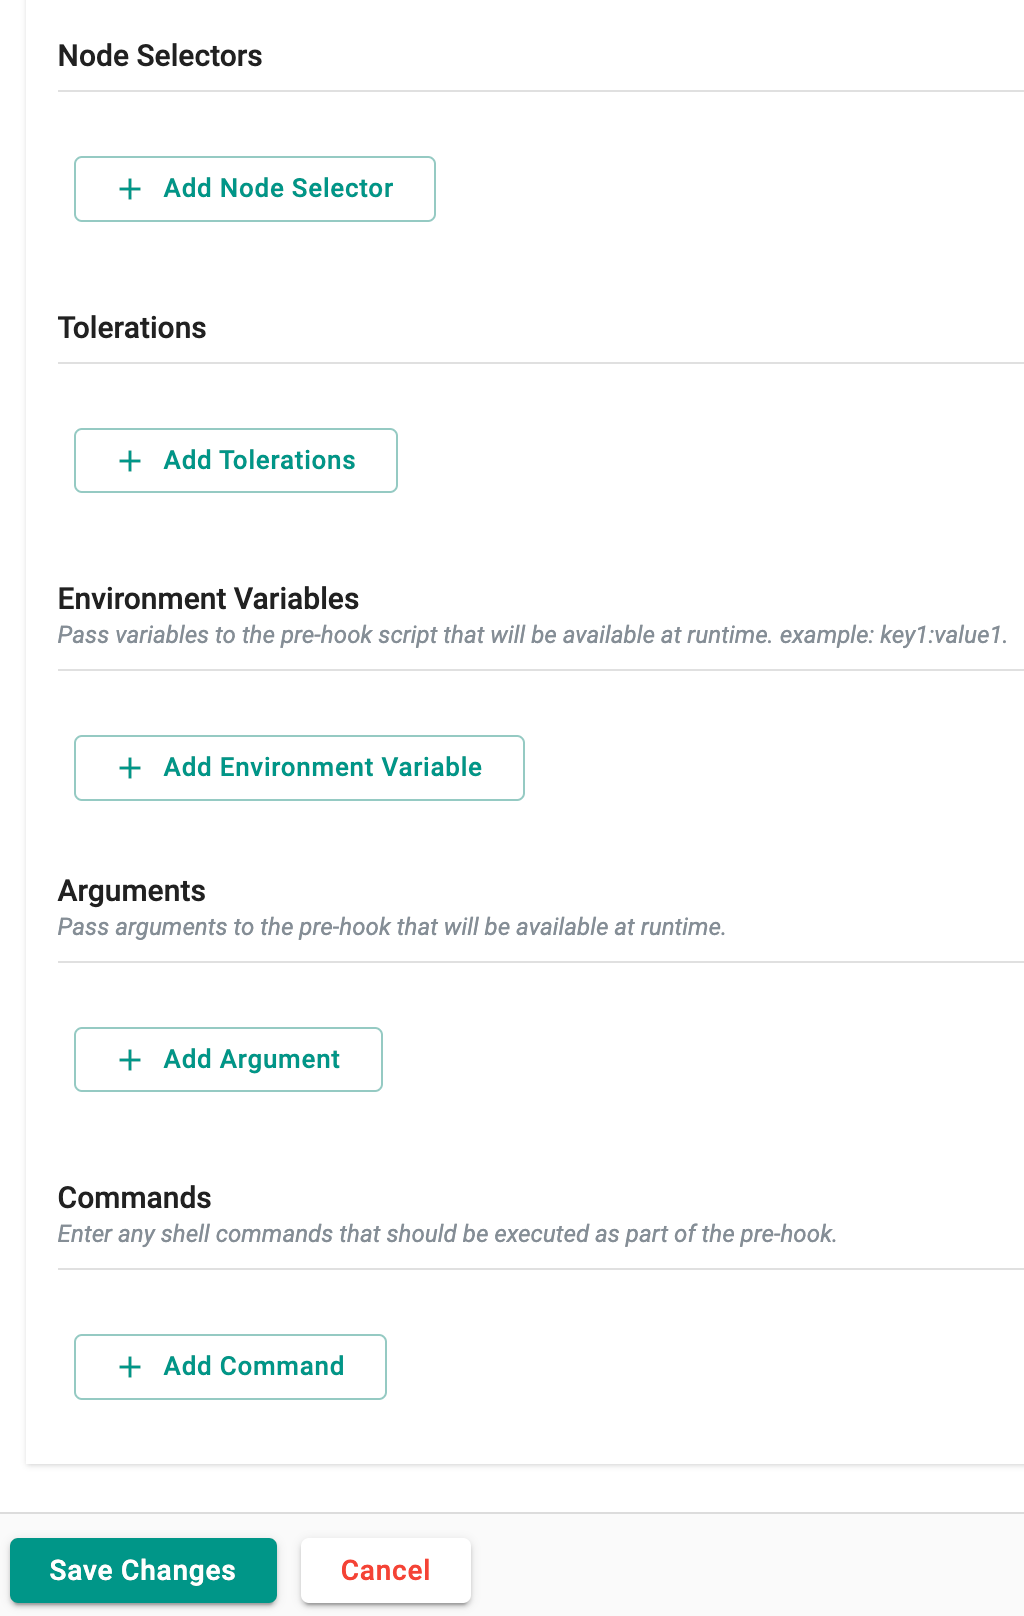
Fleet Tolerations
-
Optionally, add Tolerations as per the requirement. Adding tolerations to fleet operations allows pre-hooks and post-hooks to be scheduled on reserved nodes in the cluster, even if those nodes are tainted. Tolerations enable these operations to run without competing for resources with regular workloads, ensuring reliable execution by allowing hook containers to be placed on nodes that match the specified toleration criteria.
-
Optionally, add Node Selectors, Environment Variables, Argument, and Command as per the requirement
Note: Node Selectors and Tolerations are applicable only when the Runner type is set to Cluster.
-
-
On selecting the HTTP Config type, provide the HTTP configuration.
- Specify the endpoint where the hook operations are defined
- Enter a method to pull the operations from the endpoint
- Optionally, provide the body and headers
-
Optionally, provide the Advance Attributes
- Enter a Description and select Inject Config Kubeconfig
- Enter the Timeout in Seconds to prevent the container from running for an excessively long time in certain cases. The timeout sets a limit and terminates the run accordingly
- When adding pre-hook and post-hook actions, users have the ability to define the Success Conditions for a task. While there are default success conditions, such as an HTTP response with a status code of 200 and a container exit code of 0, users have the flexibility to establish their own success/failure conditions. This customization allows users to specify criteria that, when met, indicate the success/failure of a task
- Enable or disable Continue on Failure. When this option is enabled, the system proceeds with executing the operations, even if a specific hook fails. The overall fleet operation is considered successful as long as subsequent operations are completed successfully. If this option is not selected, in the event of a failure during a hook execution, no further operations will be executed. The failure halts the entire fleet operation
Success Condition for Container based Hooks
Success Condition for HTTP based Hooks
Important
To utilize the fleet prehooks feature with runner type Agent, it is necessary to upgrade GitOps to the latest version
-
Click Save or Save and Add Another Hook
Important
If no hooks are added, the actions are applied to the fleet of clusters without any checks
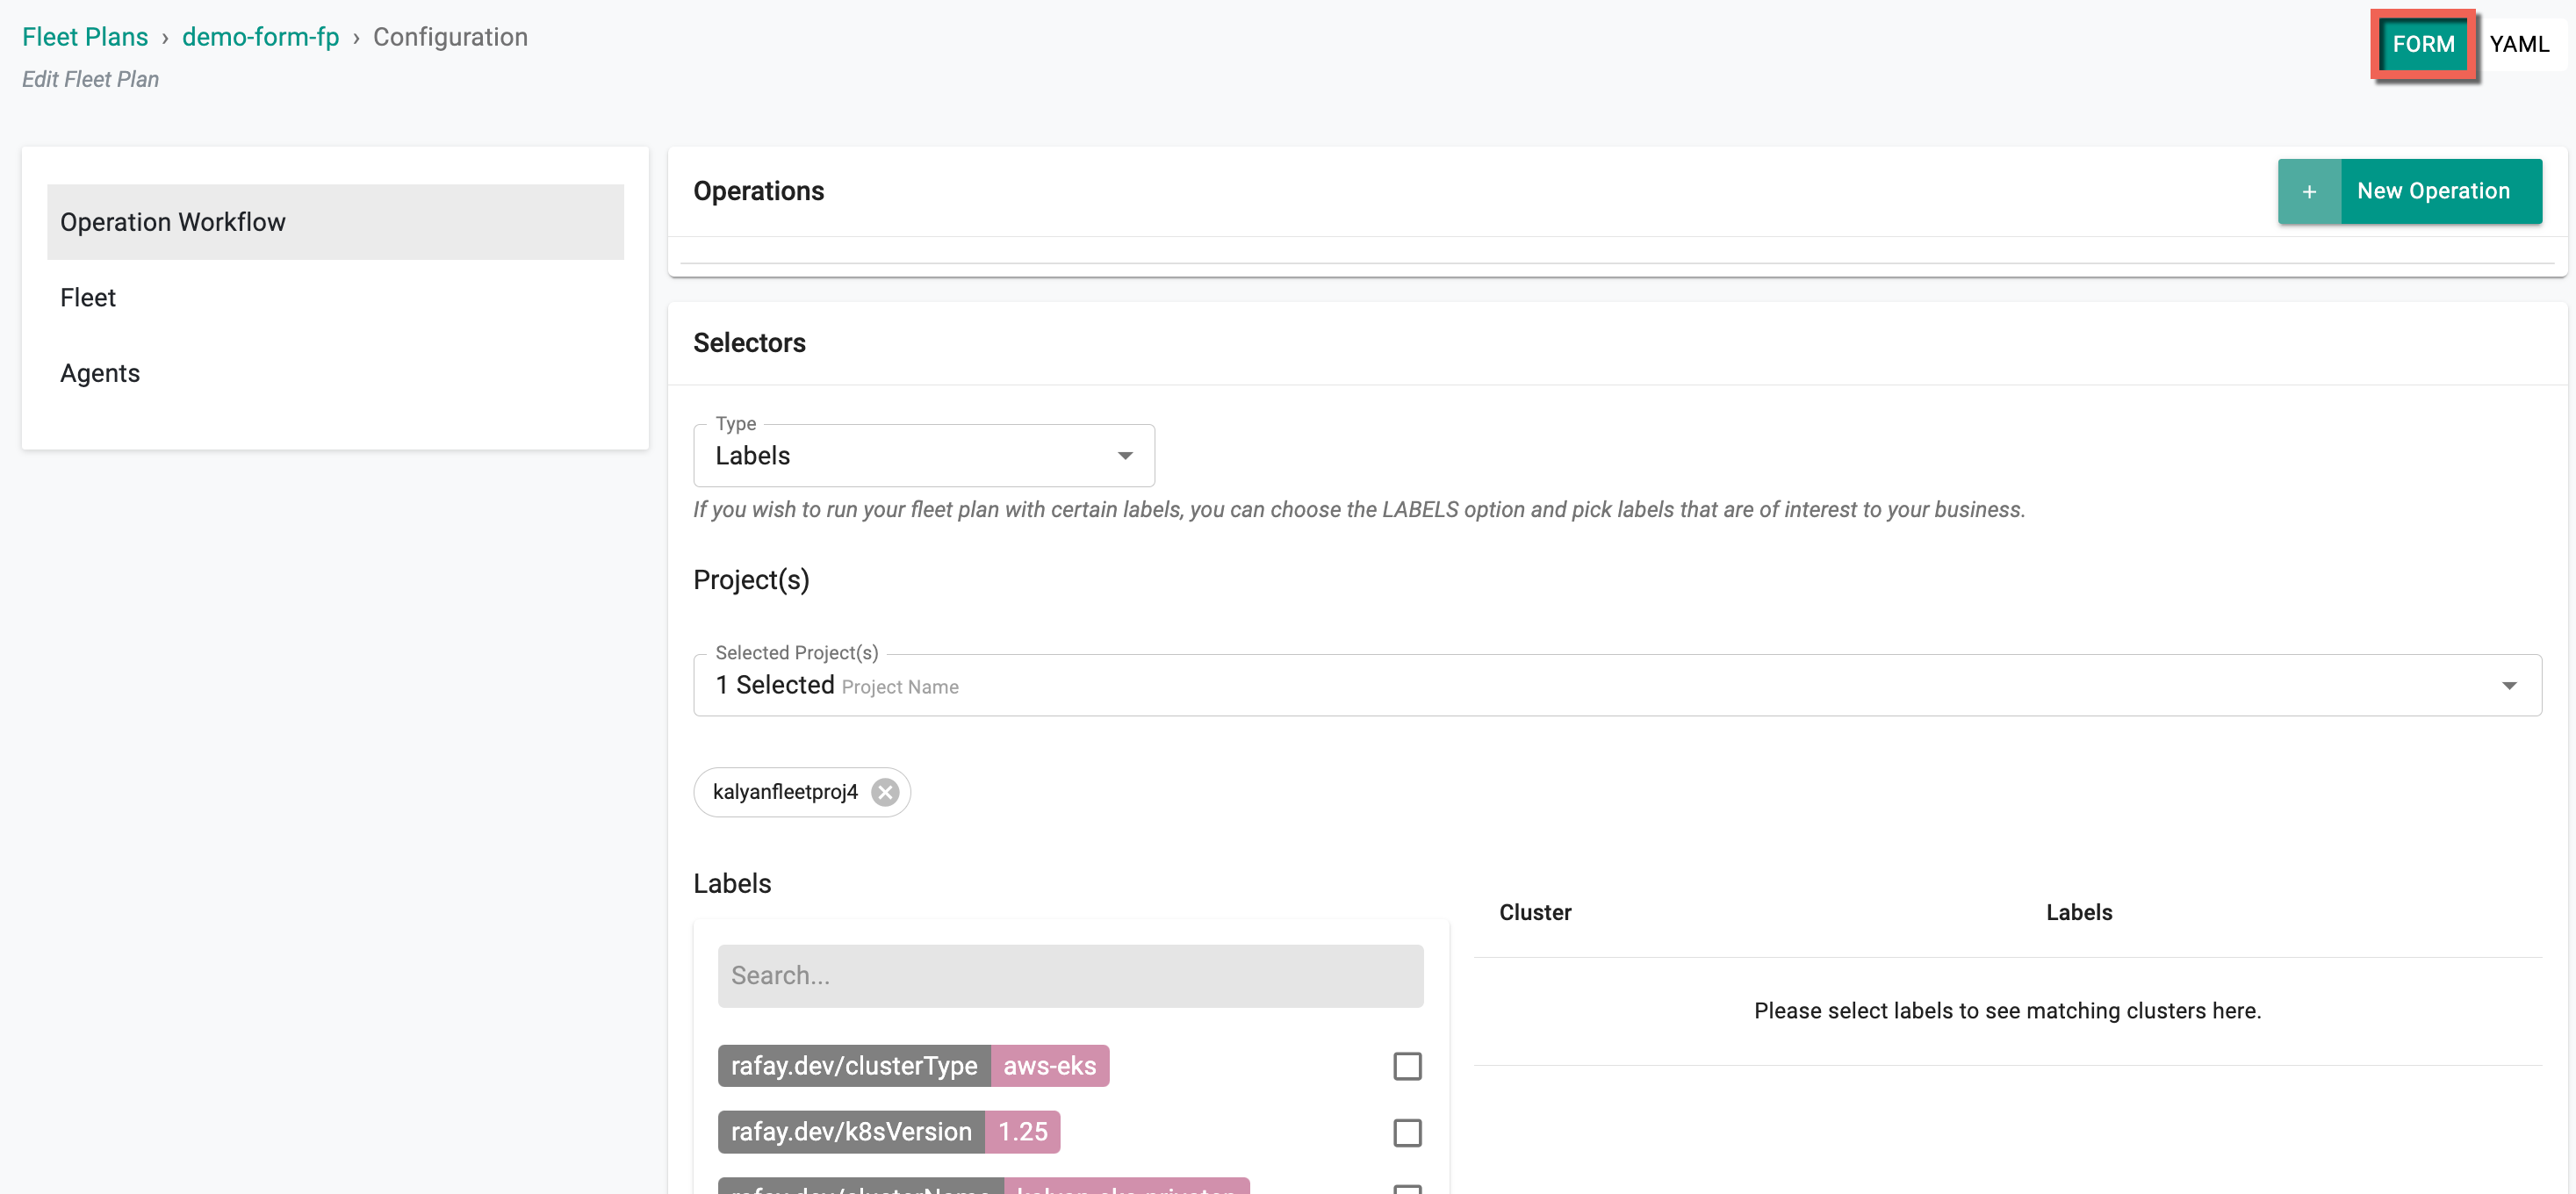
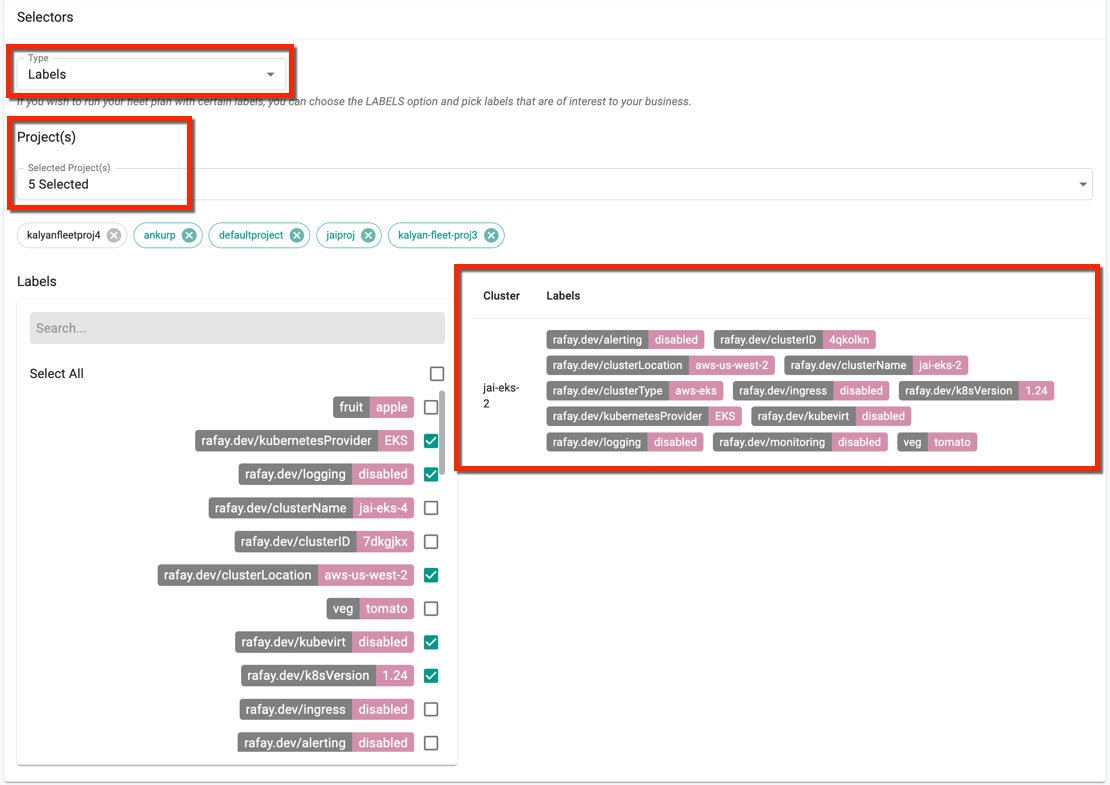
Fleet
Selection of multiple clusters from multiple projects is possible via the mapped labels and projects.
- By default, the selector type is Labels
- Select the required project(s) from the drop-down and select the required label(s). The selected labels matched with the clusters appears in the right pane as shown below
Agents
Add Agent is mandatory when a user adds an agent to configure Runner type Agent in hook configuration. Multiple agents are supported.

Click Save
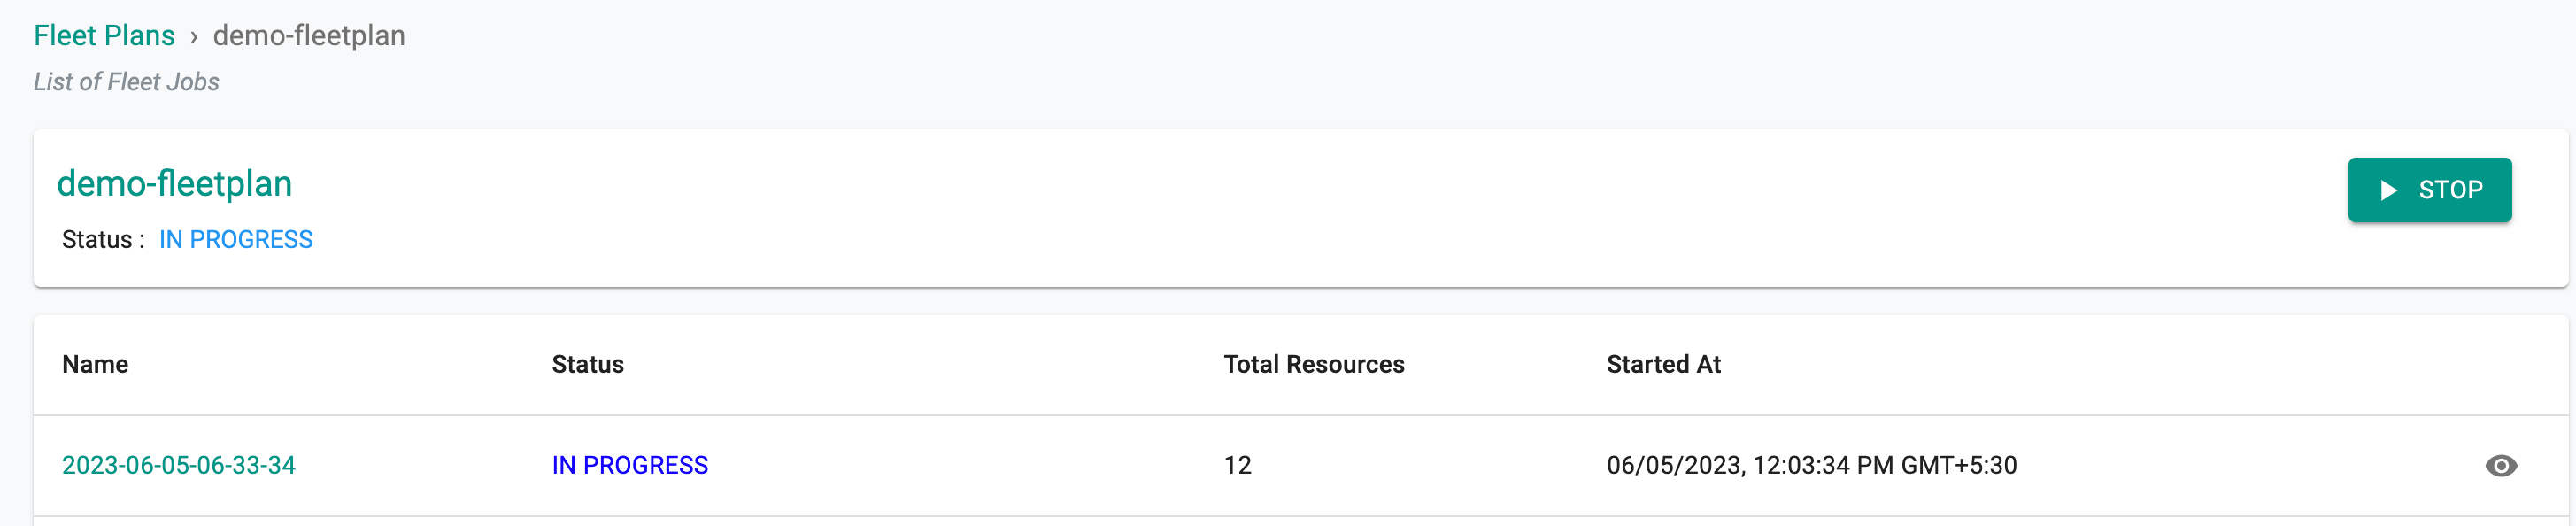
Once the Fleet Plan is saved, execute the operations job using the Run button
Edit Fleet Plan
Authorized users can edit and update existing fleet jobs anytime.
- Click on Edit. The Fleet Plan Configuration screen will appear, displaying all the operations and hooks (both pre and post hooks). To make edits to the hooks, click on the edit icon next to each hook and make the necessary modifications.
Run Fleet Jobs
- Use the Run button to launch fleet jobs manually to complete the operations on the selected targets.

- On running the job, the status shows In Progress. To view the operation status on each target, click the job id
- Once the job is completed, the status changes to Completed as shown below
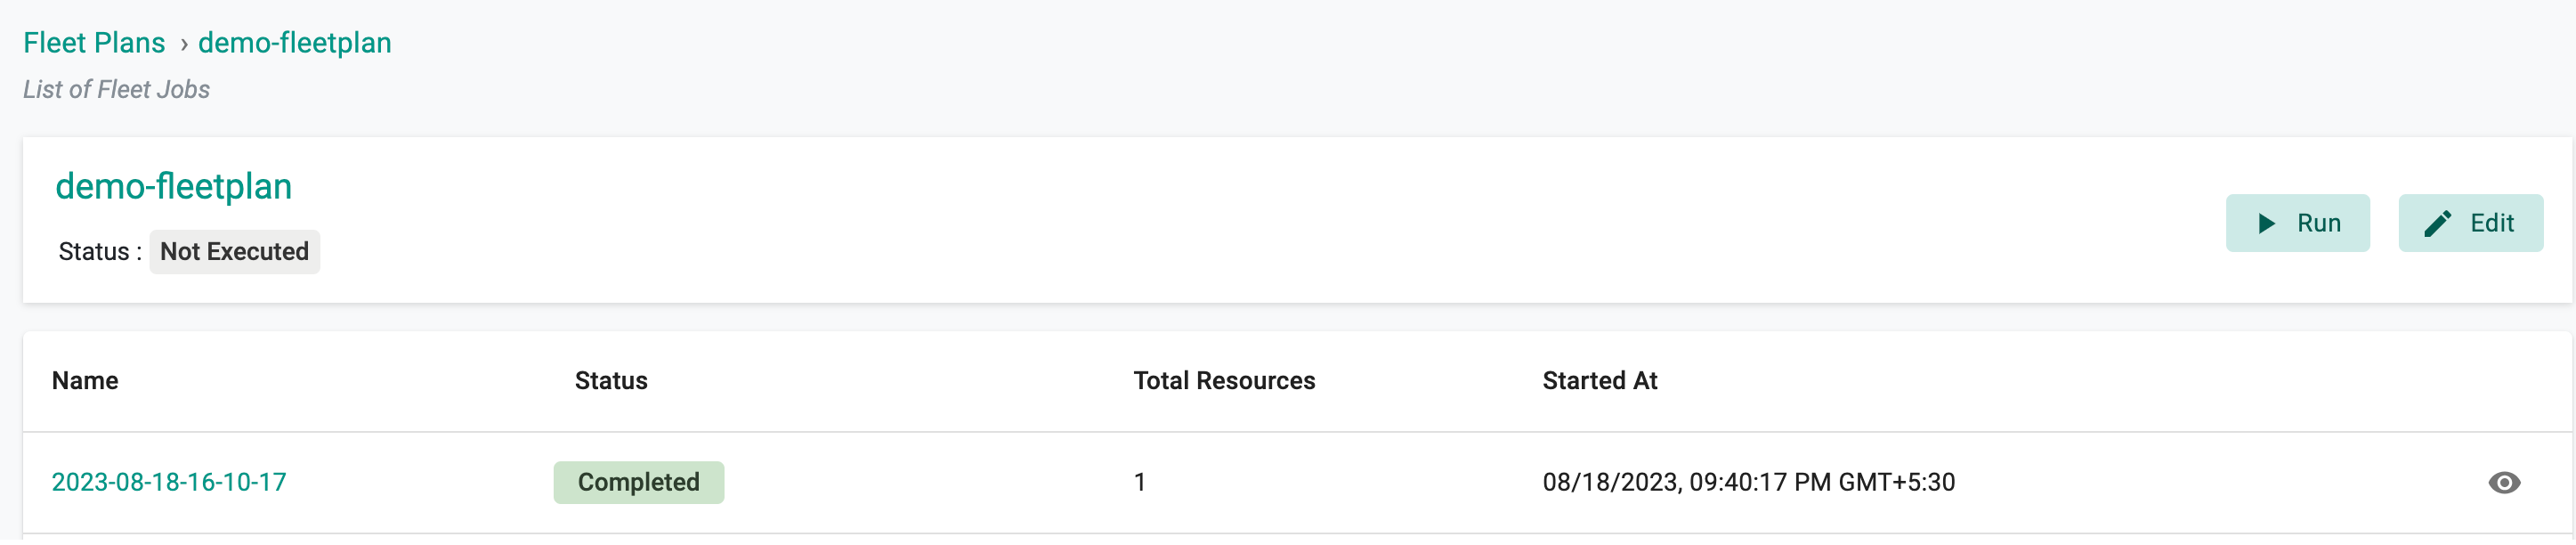
Here is an illustration featuring a fleet containing a single target, marked with a successful status. A visual depiction presents both the total resource count and its corresponding status.
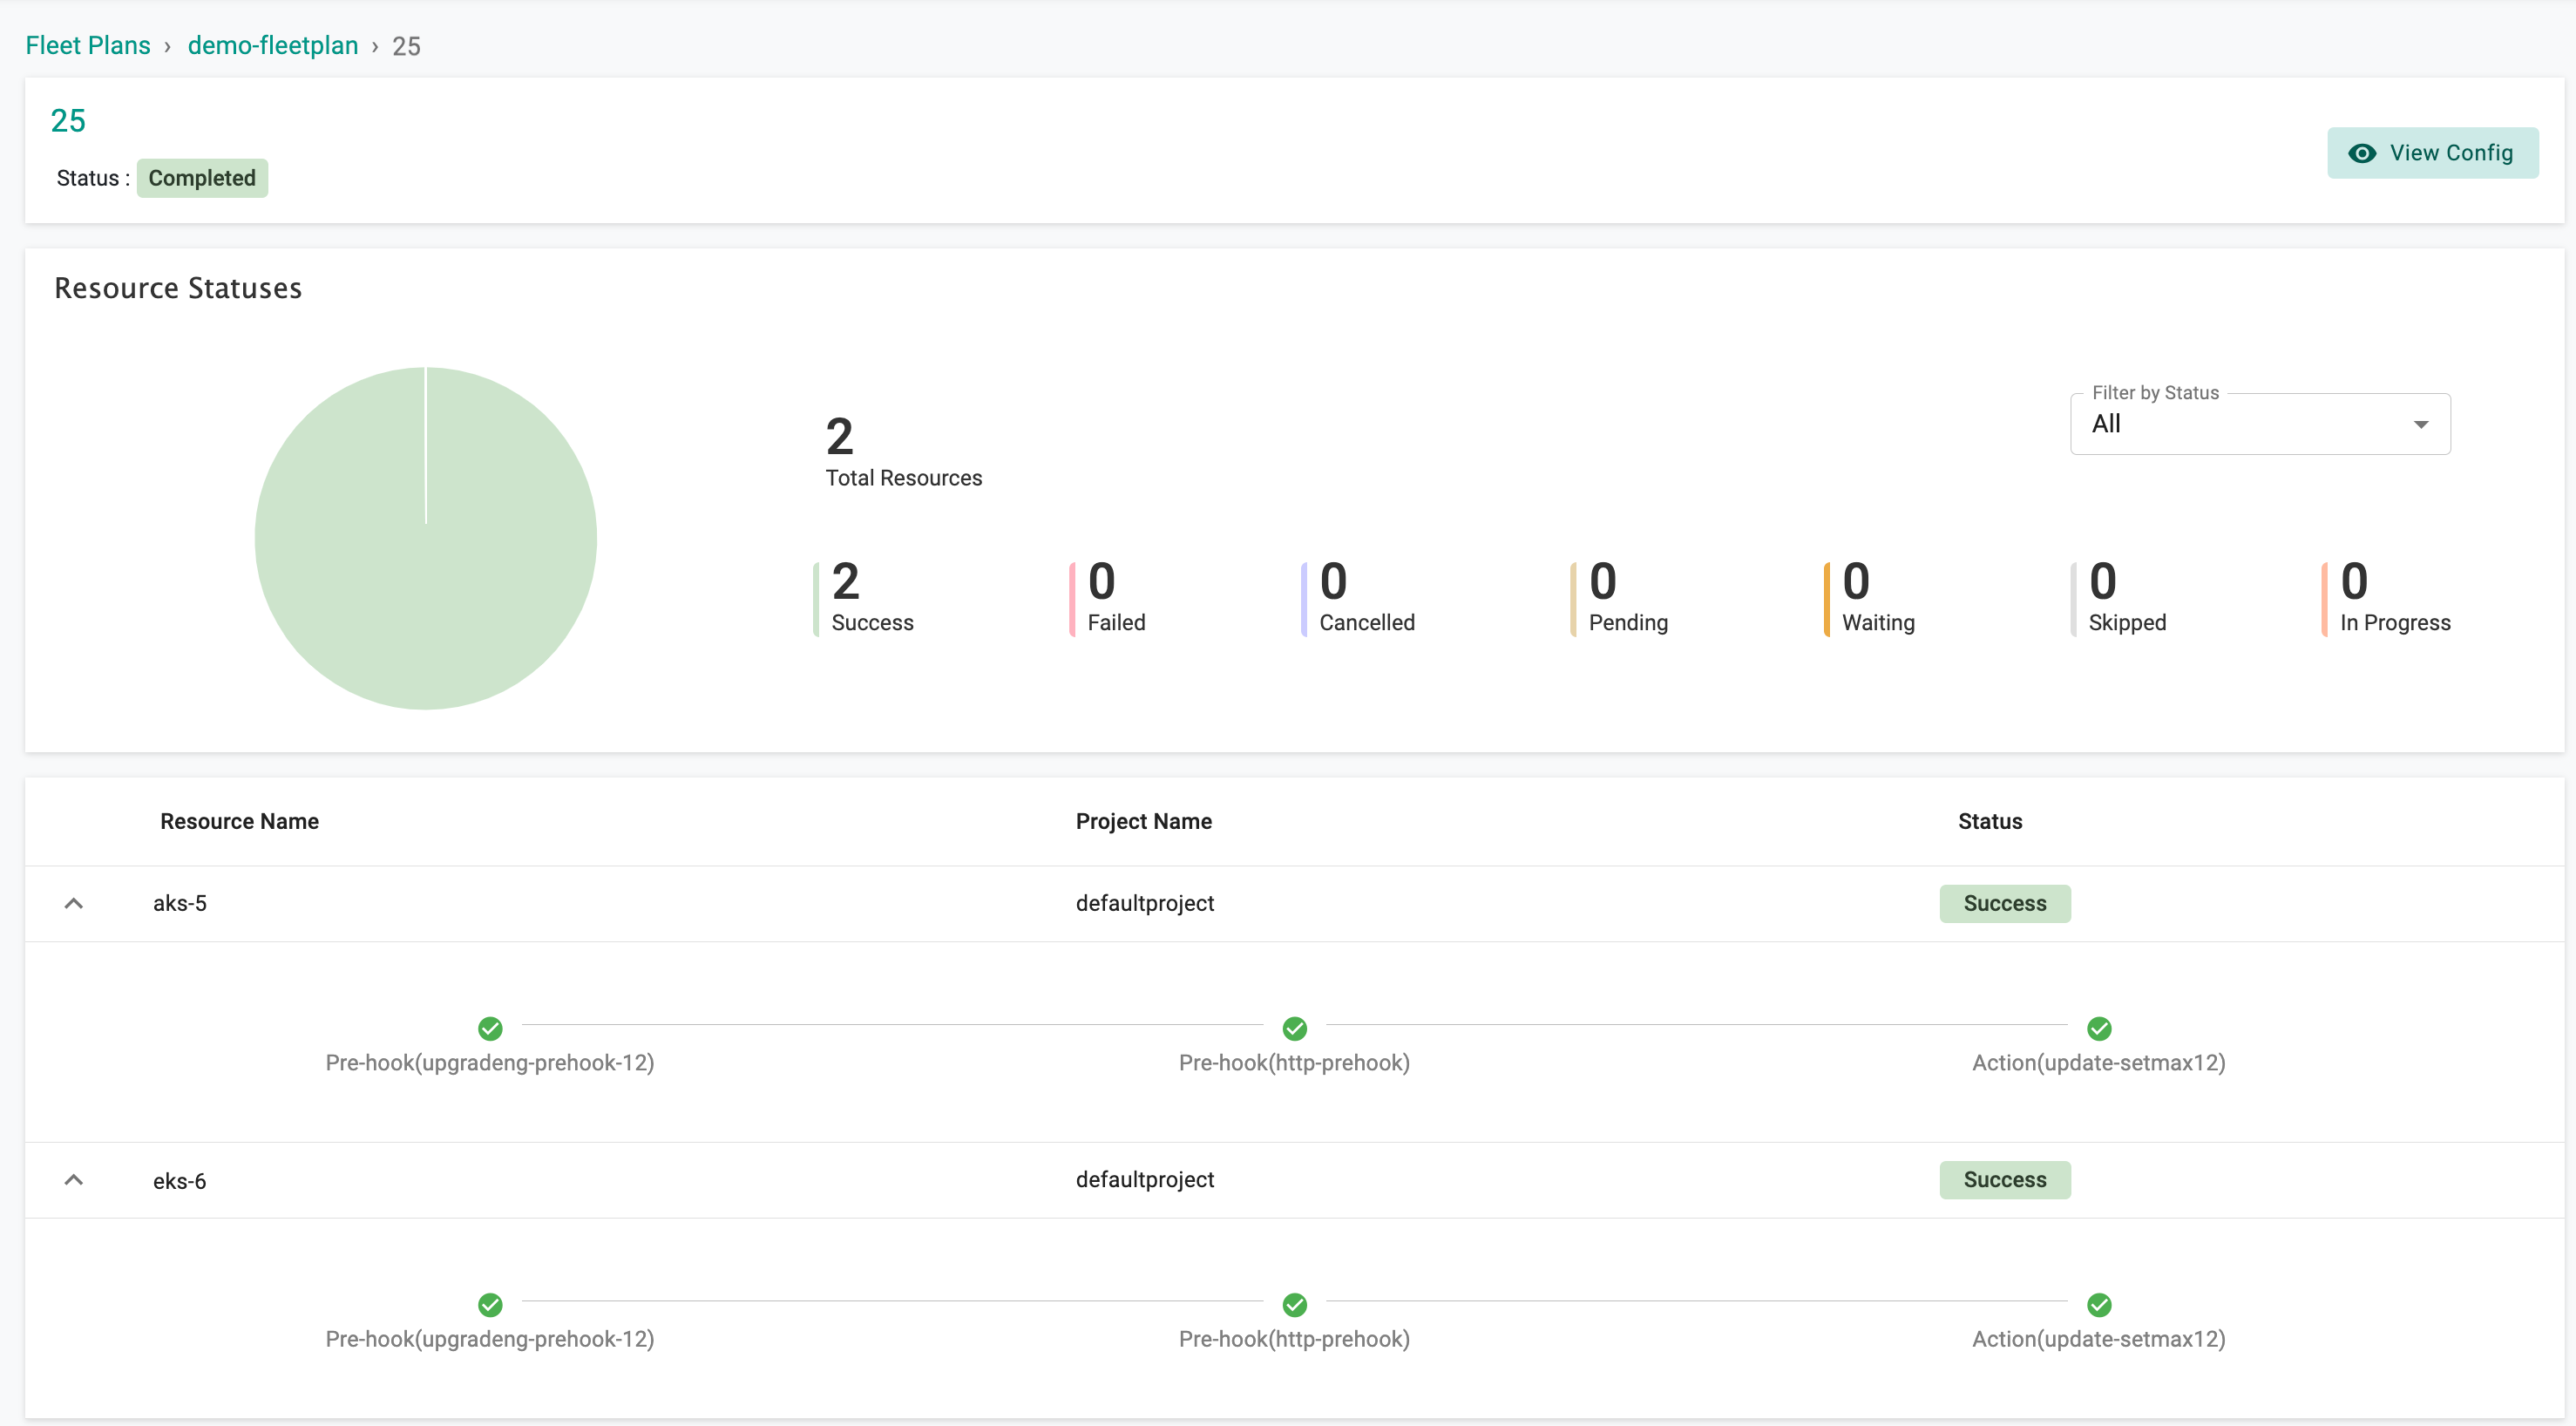
Use the View Config eye icon to get the detailed config spec of this specific fleet plan.
Important
View the Fleet operations logs in the Audit Logs page