Part 3: Workload
What Will You Do
In this part of the self-paced exercise, you will deploy a workload that will access the secrets stored in the AWS Secrets Manager store previosuly created.
Step 1: Deploy Workload
In this step, you will deploy an NGINX workload which contains supported annotations to dynamically retrieve secrets from the secret store.
- Navigate to the "defaultproject" project in your Org
- Select Applications -> Workloads
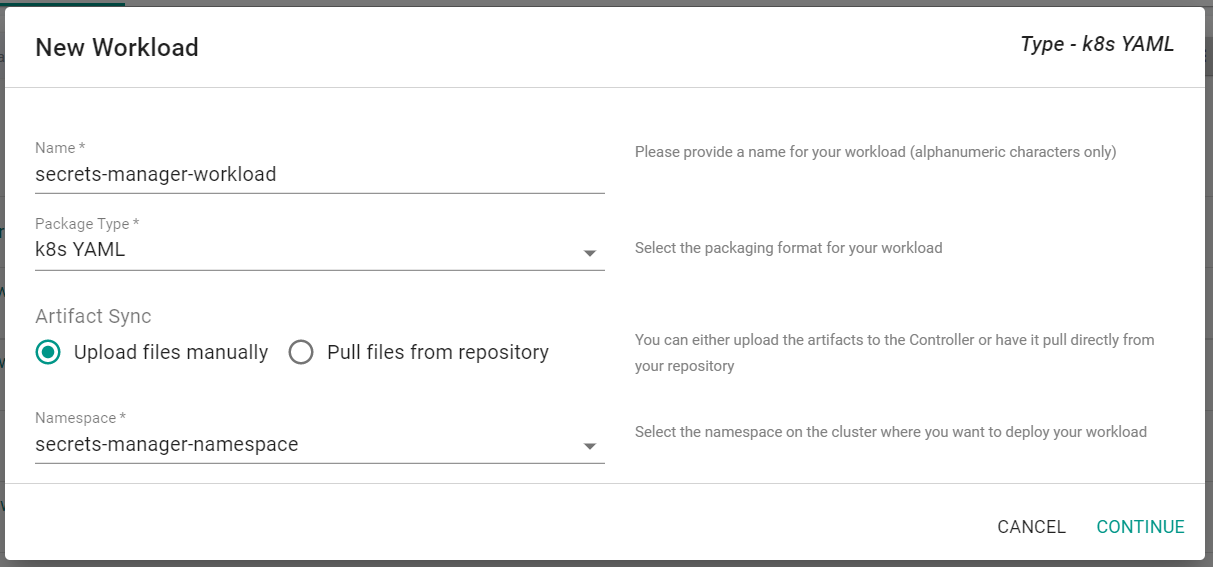
- Click "New Workload" -> "Create New Workload"
- Provide a name for the workload
- Select "k8s YAML" as the package type
- Select "Upload files manually"
- Select the previously created namespace where the IRSA was created
- Click "Continue"
- Save the below YAML to a file
The following items will need to be updated/customized to match the values in your environment.
- "secretproviderclass-name": "secret-provider-class-getstarted",
- serviceAccountName: secrets-manager-sa
apiVersion: apps/v1
kind: Deployment
metadata:
  name: nginx-deployment
  labels:
    app: nginx
  annotations:
    rafay.dev/secretstore: csi-aws
    csi-aws.secretstore.rafay.dev/config-1: |
             {
                     "secretproviderclass-name": "secret-provider-class-getstarted",
                     "mount-path": "/mnt/secrets-store"
             }
spec:
  replicas: 1
  selector:
    matchLabels:
      app: nginx
  template:
    metadata:
      labels:
        app: nginx
    spec:
      serviceAccountName: secrets-manager-sa
      containers:
      - name: nginx-deployment
        image: nginx
        ports:
        - containerPort: 80
Note: The secrets files will be present on the workload pods in the namespace where the IRSA is located. The files will be located in the "mount-path" defined in the workload annotations.
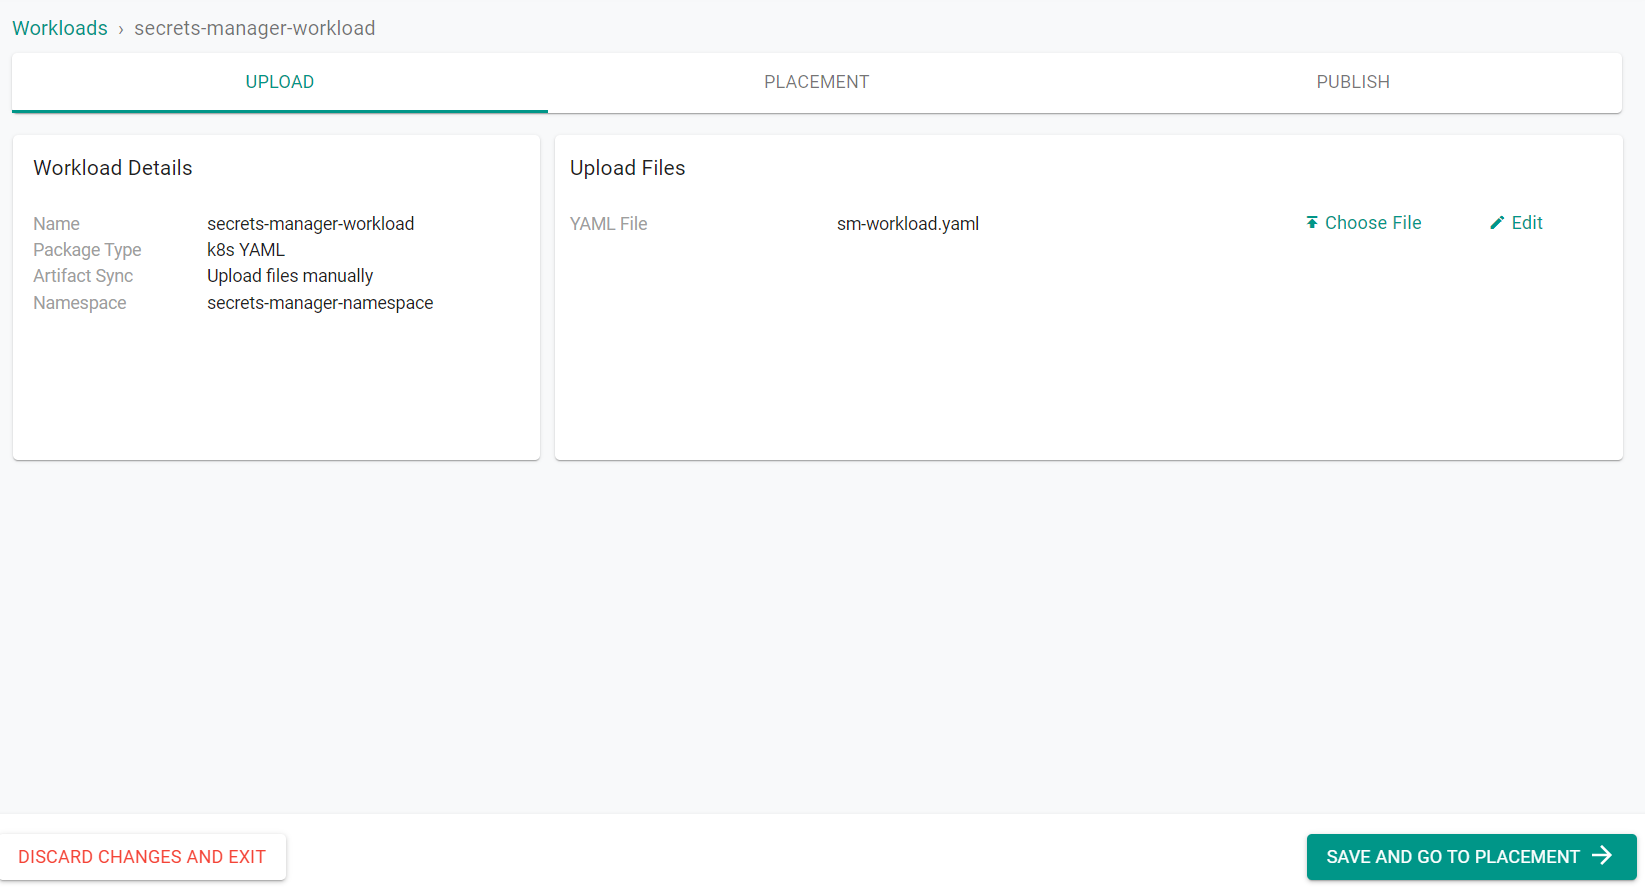
- Click "Choose File"
- Select the previously saved YAML file
- Click "Save and go to Placement"
- Select the EKS cluster from the list
- Click "Save and go to Publish"
- Click "Publish"
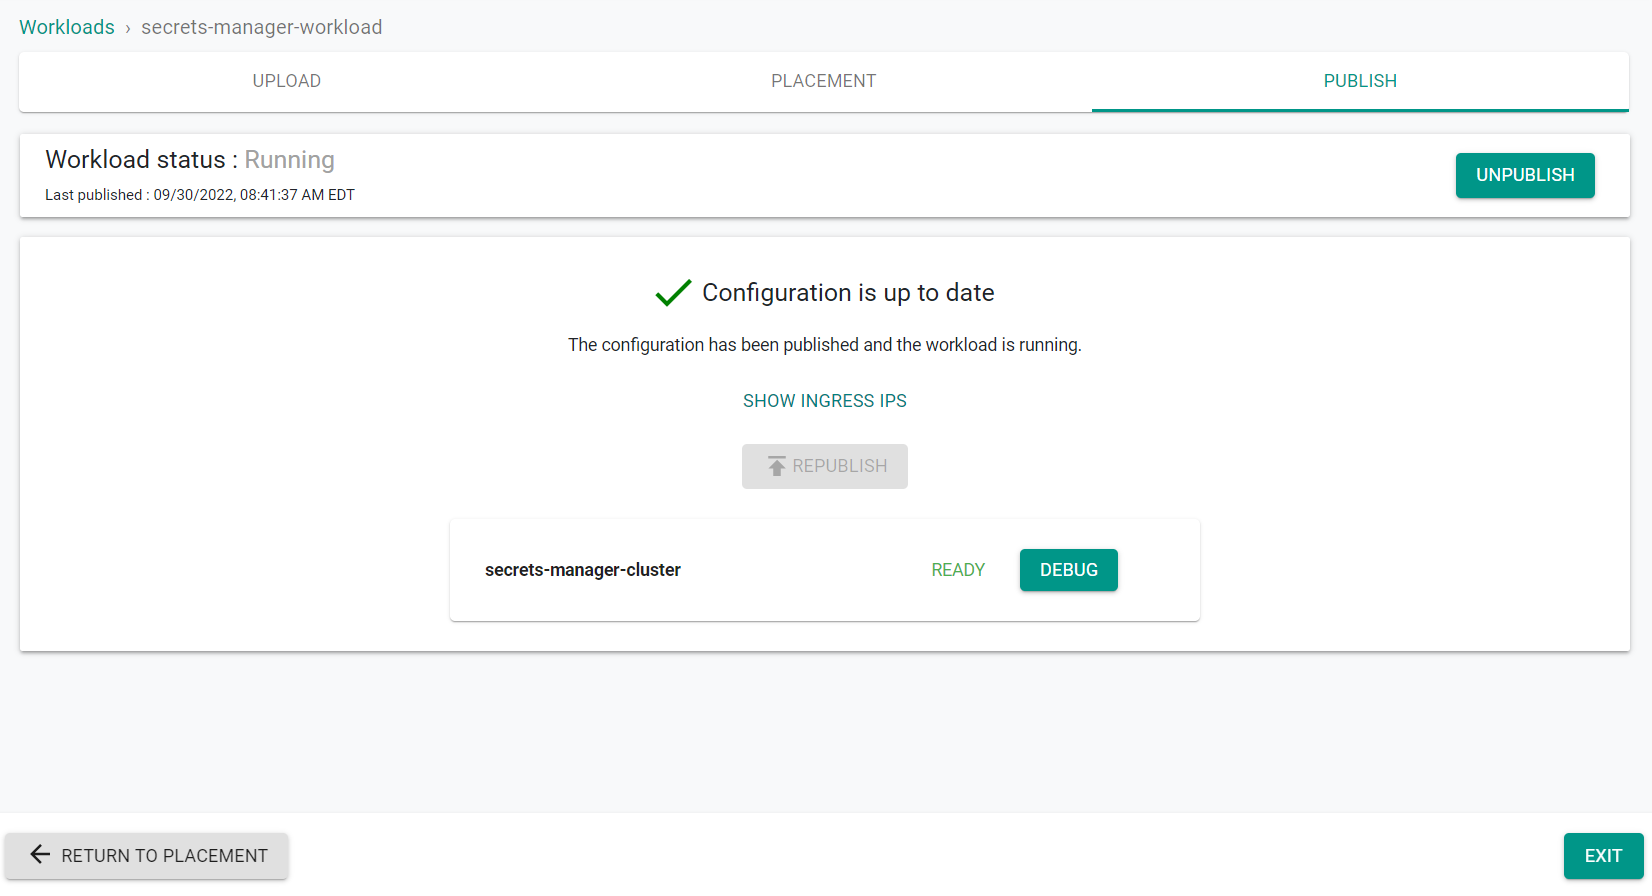
- Click "Exit"
Step 2: Verify Secrets
In this step, you will connect to the prevsiously deployed workload pods and verify the AWS Secrets Manager secrets are accessible.
- Navigate to the "defaultproject" project in your Org
- Select Infrastructure -> Clusters
- Click the EKS cluster name
- Click "Resources" tab
- Click "Pods" and select the namespace where the workload is deployed
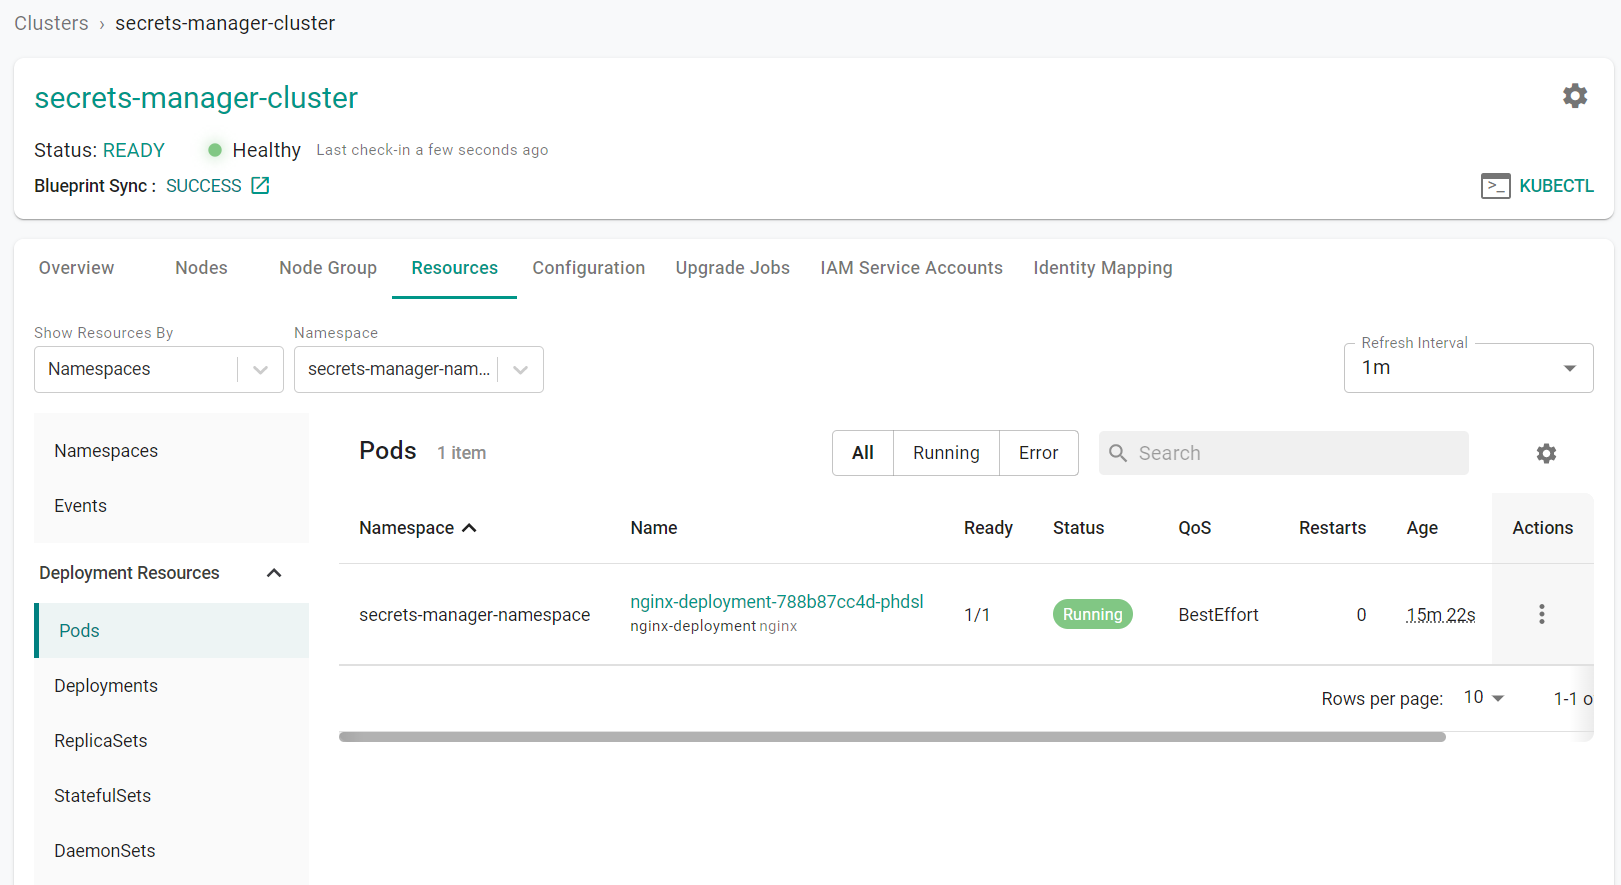
- Click the "Actions" icon of the pod and select "Shell and Logs"
- Click the "Exec" icon
A kubectl window will open with a shell into the pod
- Run the following command to list the secrets files
ls -1 /mnt/secrets-store

You will see four files, the main secrets file which contains all of the secrets in the secrets store and the three key secrets we identified in the secret provider class configuration. You can access these files to see the value of the secret
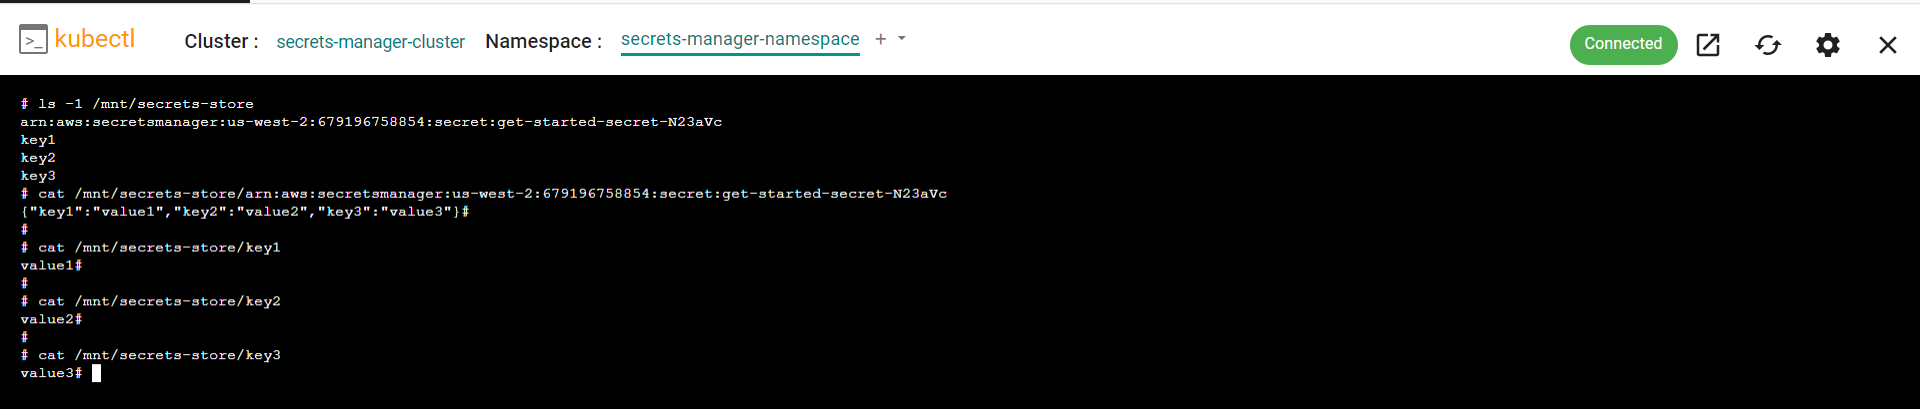
Your application can now access these secrets and use them as needed.
Recap
Congratulations! You have successfully created and AWS Secrets Manager store and securely provided the secrets in the store to a running workload in your EKS cluster using an IRSA.