Create Config Context
A context can be used to define global variables that will be used across different environment templates and resource templates. Config contexts are used in environment or resource templates.
Examples for using Contexts include:
-
Platform team wants to provide the option of spinning up instances only in a couple of regions for the QE team. Platform team creates a Context, specifies the allowed regions as part of Input Variables and sets Override Type as Restricted. This Context can then be attached to an Environment Template. The QE team can select from one of the options (for region) when creating the Environment
-
Platform team can specify the registry endpoint for pulling container images as an Environment Variable using Context
Did you know ?
Context can be managed through various methods:
- UI
- CLI (RCTL)
- Terraform
- API
- GitOps
Create a Context
- In a project, select Environments > Contexts
- Select New Config Context
- Enter a name for the context. Optionally, type a description
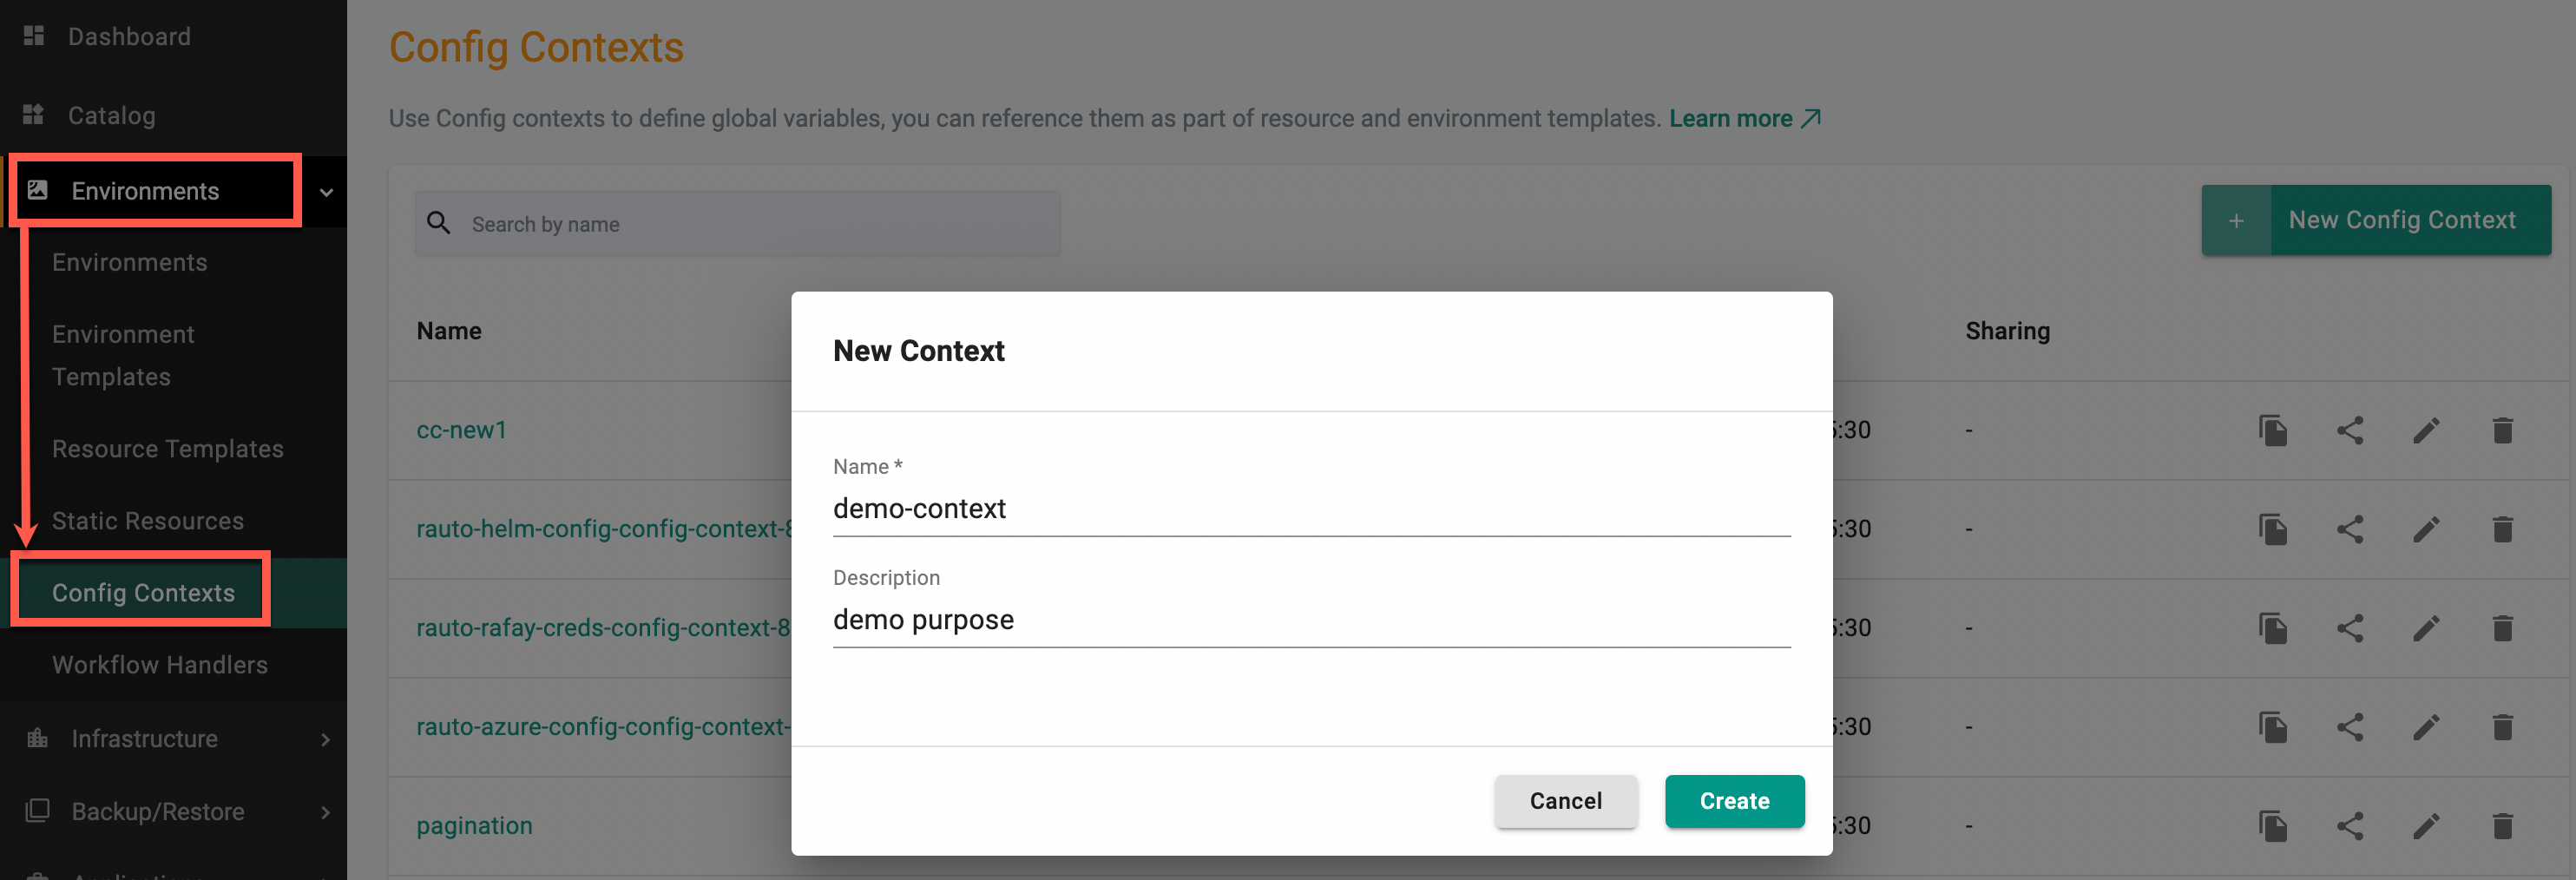
- Select Create
General
The context is created and the General configuration page displays
| Setting | Description |
|---|---|
| Name | Enter a name for the context |
| Description | Enter a description for the resource. This is optional |
Environment Variables
- Select Environment variables and Add Environment variable
- Enter an environment key and value. Examples of environment variables include providing credentials (secrets and keys), which are used by agents to create, provision, and manage resources programmatically
- Select Sensitive or Required for the provided value
- Select the Override Type and add Selector(s)
Selectors
| Setting | Description |
|---|---|
| Environment Key | Enter the environment key |
| Value | Enter the value for the environment key |
| Description | Provide a description for the Environment Variable |
| Sensitive/ Required | Selecting Sensitive will obfuscate the value so it cannot be read after saving the context. If 'required' is selected, providing the value is mandatory during the environment deployment |
| Override Type | Specify the level of permissions for overrides with three choices: Allowed (all changes permitted), Not Allowed (no changes permitted), and Restricted (changes allowed with specific limitations) |
| -- Allowed | Allows the user to override the value |
| -- Not Allowed | Does not allow the user to override the value |
| -- Restricted | Allows the user to override the value by selecting a different, pre-defined value |
| -- Restricted Key Values | Allows the user to override the value only by selecting from a specific list of permitted key-value pairs |
| Selectors | Selectors enable the targeting and customization of specific environment variables within the configuration context. By using selectors, users can alias environment variables and restrict the override scope, allowing them to override only specific environment variables |

If not willing to configure environment variables (secrets and keys) here and provisioning on AWS, there is an alternate method.
Using docker cd-agent
- Create a Docker agent on the machine running in the cloud environment.
- Create an IAM role with access to the necessary cloud resources (this policy changes based on the resources defined in the template) and assign it to the machine running the Docker agent.
- Create a Resource Template and add the agent.
- Create an Environment Template that deploys the required resources.
- Publish the Environment and validate that the resources are created (without passing cloud access keys and secrets through the config context).
Using K8s cd-agent
- Provision a Kubernetes cluster and deploy the Kubernetes CD-agent.
- Create an IAM Service Account with a policy granting access to the necessary cloud resources (this policy changes based on the resources defined in the template).
- Create a Custom Workflow Handler in EaaS, provide the namespace and service account name, and associate the Workflow Handler with the Resource Template.
- Create an Environment Template that deploys the required resources.
- Publish the Environment and validate that the resources are created (without passing cloud access keys and secrets through the config context).
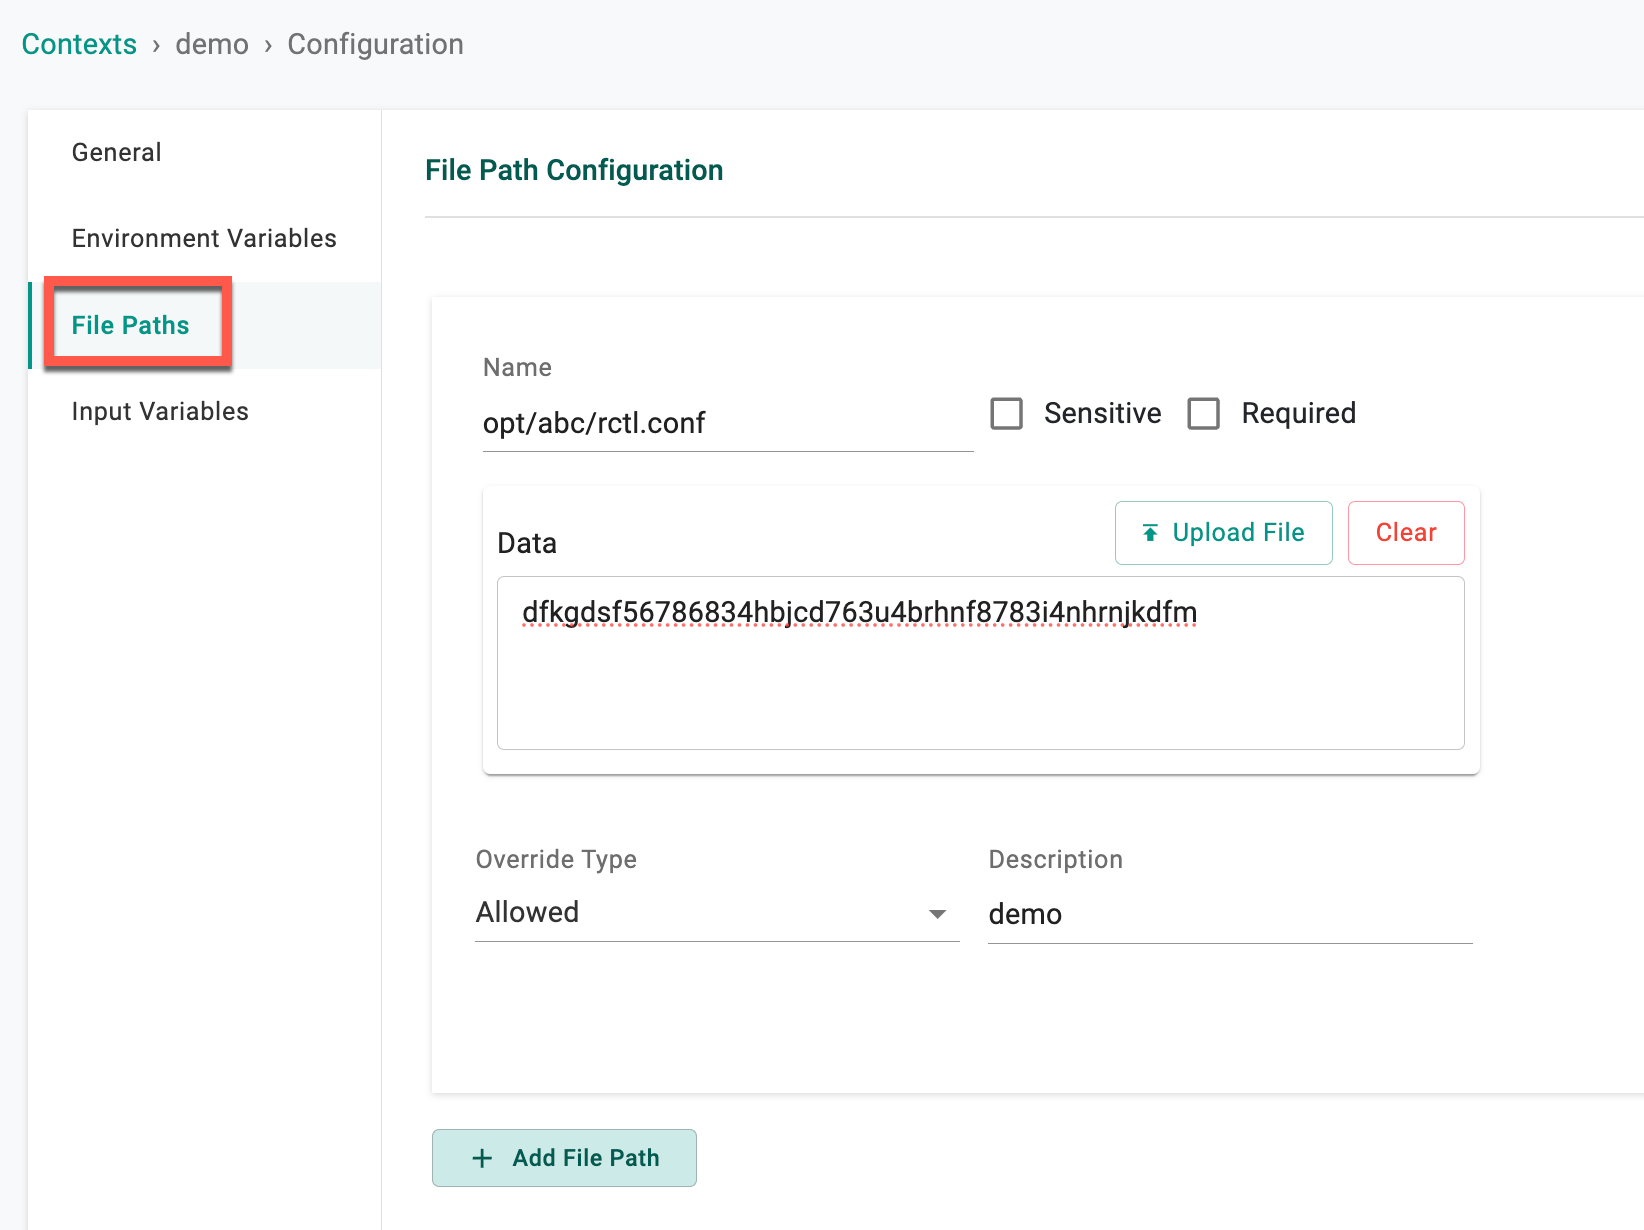
File Paths
- Select File paths and click Add File Paths
- Select Sensitive to obfuscate the information
- Enter a base64 encoded content for the file path or click Upload File to upload a data file.
- Select the Override Type and provide a description
| Setting | Description |
|---|---|
| Name | Enter a name for the file path |
| Sensitive/ Required | Selecting Sensitive will obfuscate the value so it cannot be read after saving the context. If 'required' is selected, providing the value is mandatory during the environment deployment |
| Data | Either enter the data as plain text or upload a data file |
| Override Type | Specify the level of permissions for overrides with two choices |
| -- Allowed | Allows the user to override the value |
| -- Not Allowed | Does not allow the user to override the value |
| Description | Provide a description for the selected Override Type |
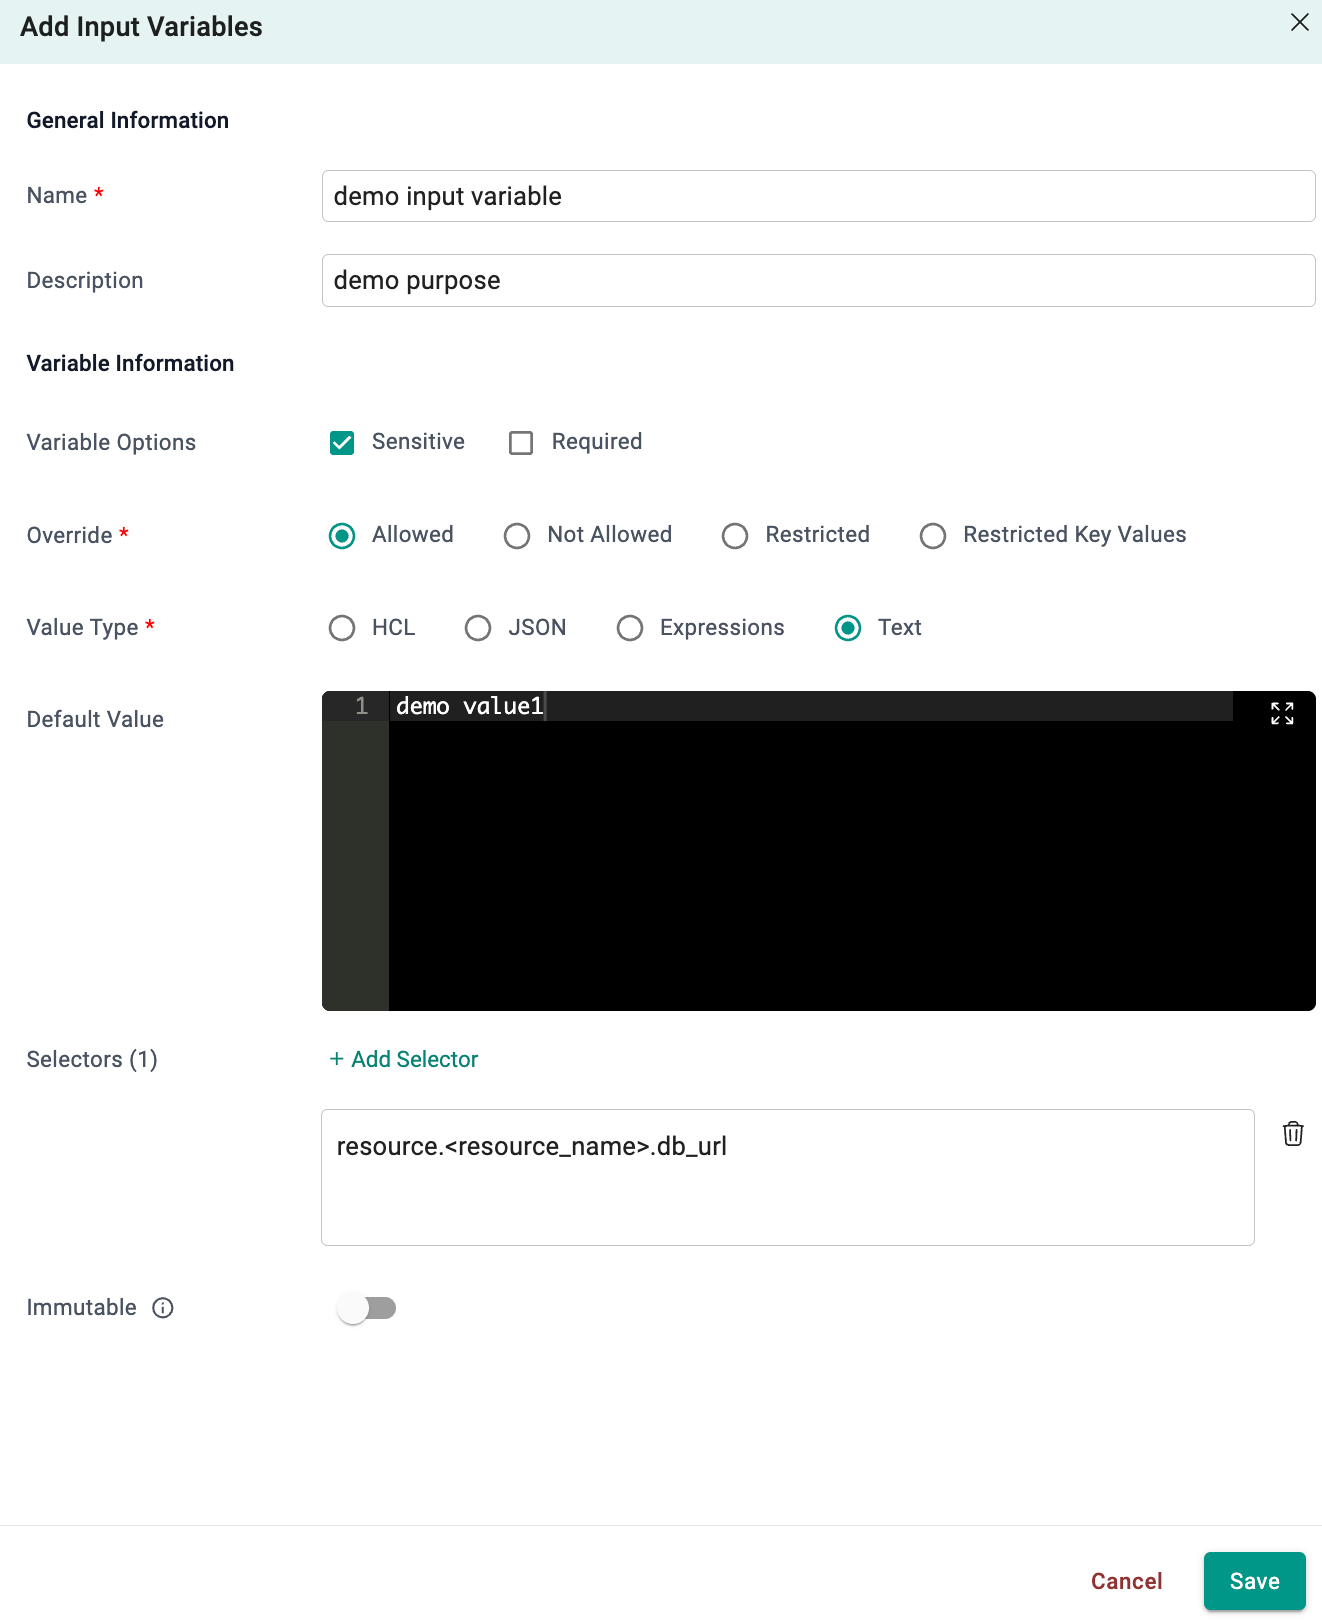
Input Variables
- Select Variables and click Add Variable
- Enter a name for the variable. Optionally, type a description
- Enter the values and select the types for this variable
- Add one (or) more selector(s). See below for more details about values and types
Selectors
| Setting | Description |
|---|---|
| Name | The name of the variable |
| Description | A brief description of the variable |
| Sensitive | Does not display the value in the UI |
| Required | The variable is required when using this Context |
| Override Type | Controls if a user can change a variable or not |
| -- Allowed | Allows the user to override the value |
| -- Not Allowed | Does not allow the user to override the value |
| -- Restricted | Allows the user to override the value by selecting a different, pre-defined value |
| -- Restricted Key Values | Allows the user to override the value only by selecting from a specific list of permitted key-value pairs |
| -- HCL | Hashicorp configuration language |
| -- JSON | JavaScript Object Notation (JSON) is a lightweight data-interchange format |
| -- Expressions | Expressions are valid units of code that resolve to a value |
| -- Text | Text value |
| Value Type | The type of value |
| Selectors | Selectors enable the targeting and customization of specific variables within the configuration context. Using variable selectors, users can alias existing variables or override their values. If the specified variable exists, its value is updated; if it does not exist, a new variable is created |
Select Save to save the context. Click Cancel to close the configuration and go back to the context list