Loader Utility
The purpose of the loader utility is to assist in loading Environment Manager resources into an organization. The loader utility can be found here.
The loader utility is composed of the following main components:
- README - This file provides detail on the usage of the utility
- values.yaml - This file contains the user specific configuration parameters used by the script
- createtemplates.sh - This script is the file that is executed to run the utility
- Environment Manager Templates - These are the templates that the script can import into Environment Manager. The templates are located here
The utility has two modes of operation. The first mode uses the Environment Manager public repository and the second mode uses a user defined private repository to load the Environment Manager templates into the organization.
Public Repository
If using the Environment Manager public repository to load templates, the backing IaC for the templates cannot be modified as the IaC is stored in a public repository.
Private Repository
If using a private repository to load templates, the backing IaC for the templates can be modified. Also, since this is a private repository, a System Sync pipeline will be automatically created to allow for bidirectional synchronization of the Environment Manager resources to the private Git repository.
Step 1: Install Prerequisites
The following tools will need to be installed on the machine running the utility.
- docker
- docker-compose
- git
- grep
- awk
- jq
- yq
- rctl
Install RCTL
The RCTL CLI allows you to programmatically interact with the controller enabling users to construct sophisticated automation workflows.
- Login into your Org
- Navigate to "My Tools" to download both the RCTL CLI and the "CLI Config" file
- Initialize RCTL using the step-by-step instructions
- Ensure you update your OS's Path environment variable for RCTL
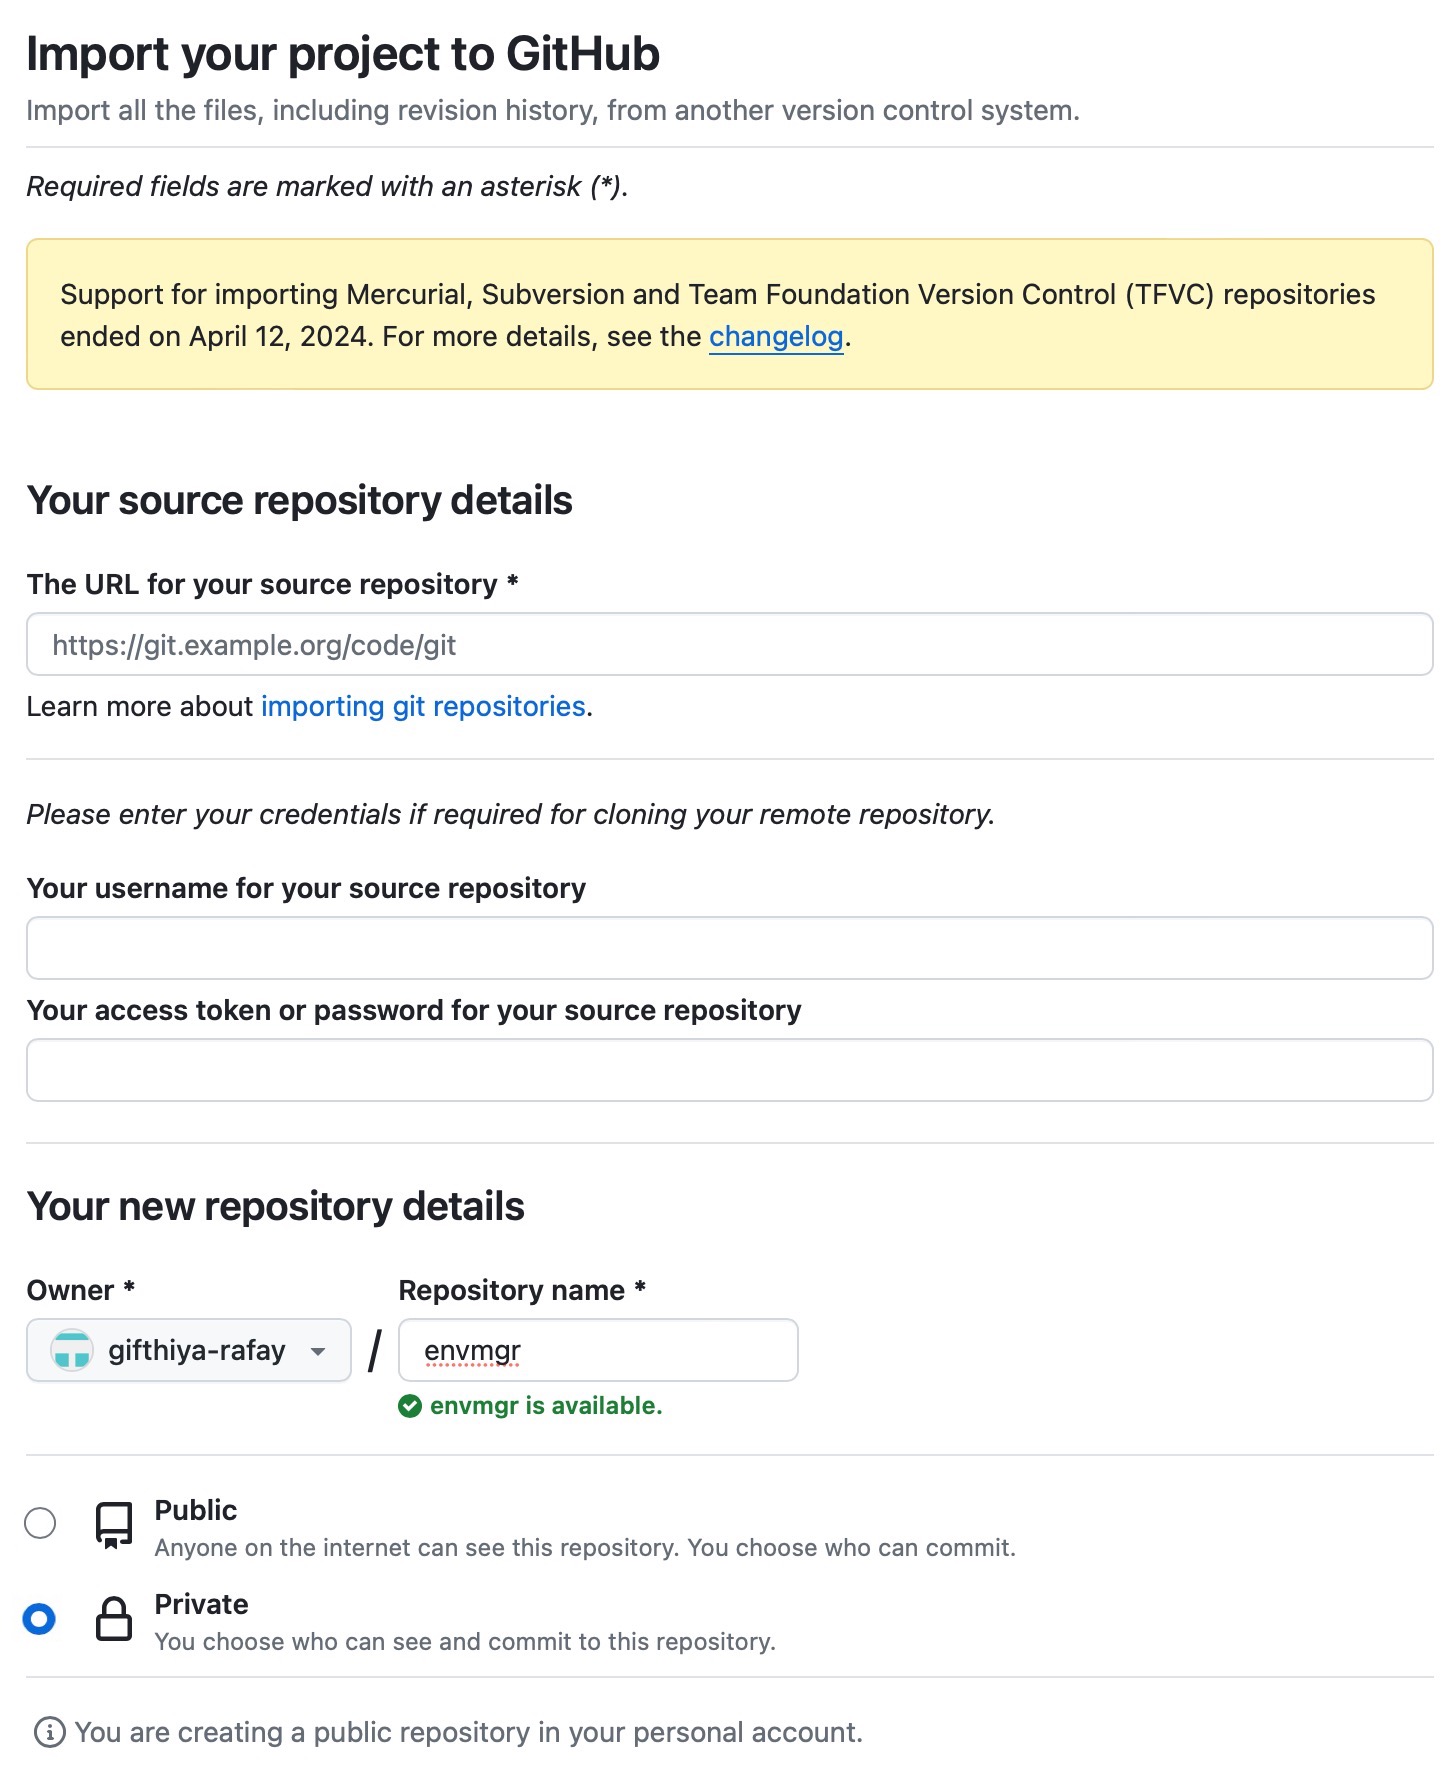
Step 2: Import Git Repository
This step is only required if you will be using a private repository. A private repository will first need to be created by importing the Environment Manager public repository into your GitHub account. The imported repository will contain the contents of the Environment Manager public repository. A GitOps System Sync pipeline will be created later in this guide which will be triggered by commits to this repository.
- Ensure you are logged into your GitHub.com account
- Navigate here to begin the import
- Enter the following URL into the input on the page: https://github.com/RafaySystems/envmgr.git
- Enter envmgr for the repository name
- Select Private
- Click Begin Import
- Once complete, you should see a copy of the repository in GitHub
Note that the Rafay agent automatically writes back changes to Git if you make any changes to the resources via the web console or other supported interfaces.
- The resources (esp. secrets) you identify as sensitive. will be automatically encrypted using a secret sealer before being synced to your Git repo.
- If you forget to mark resources as sensitive, they will not be encrypted
Important
We recommend that users DO NOT use public Git repositories to avoid accidental exposure of sensitive data in your Git repository.
Step 3: Clone Git Repository
In this step, you will clone a Git repository to your local machine to simplify interacting with the repository.
- Clone the Git repository to your laptop using the command below. Be sure to update the repository URL with either the imported repository's URL or the public Environment Manager repository's URL, depending on the mode you are using.
git clone <Repository URL>
- Once complete, you should see a directory with the name of the repository. This directory contains the resources needed for the loader utility.
Step 4: Configure Environment Parameters
In this step, you will configure a values file that will then be used by the loader utility.
- Open a Terminal (on macOS/Linux) and navigate to the directory where you cloned the Git repository
-
Navigate to the folder < Repo_Name >/setup
-
Update the values in the "values.yaml" file with the values from your environment. Use the README for assistance.
Important
Be sure to uncomment any of the directories for the templates that are intended to be loaded into the organization.
Note The following parameters only need to be configured if isPrivateRepo is set to true: userName, token, endPoint, branch and path
Create GitHub Token
If needed, create a Personal Access Token in Github to allow access to the GitHub repository.
- Ensure you are logged into your GitHub.com account
- Go to the GitHub Account Settings
- Click "Generate new token (classic)"
- Provide a note for the token,
- Select the repo scope
- Click Generate token
- Copy and save the access token for use later in this guide
Step 5: Run Utility
In this step, you will run the utility which will assist in creating the resources for this guide.
- Navigate to the folder < Repo_Name >/setup
- Execute the createtemplates.sh script
The script will begin to run and create the resources in the organization.
Note If you choose to use a private repository, the script will provide webhook details at the end of the output. Use these webhook details in the next step.
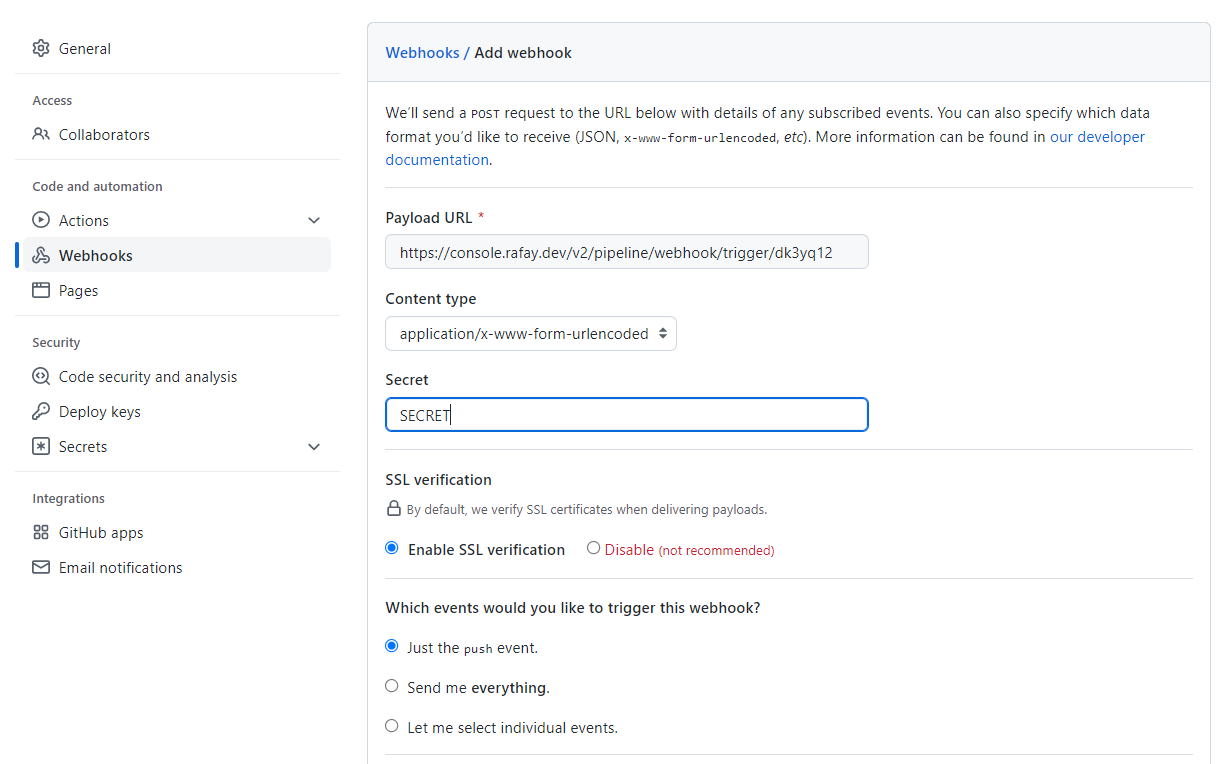
Step 6: Setup GitHub Webhook
This step is only required if you will be using a private repository. In this step, you will configure your repository webhook. The webhook will be used to trigger the System-Sync pipeline in the controller.
- Navigate to your GitHub repository -> Settings -> Webhooks
- Click Add webhook
- Copy and Paste the "Payload URL" and "Secret" from the script output
- Click Add webhook