About
MySQL is an open-source relational database management system (RDBMS) that is widely used for managing and storing data in various applications and websites. Deploying a MySQL database on a Kubernetes cluster involves leveraging Kubernetes resources to manage and orchestrate MySQL containers efficiently.
Assumptions
You must have the following access.
- A user with Org Admin privileges to create users.
- One managed Rafay cluster with ebs-csi-driver installed.
- Kubectl access to Cluster Ztka
Install MySQL Database on Kubernetes clusters
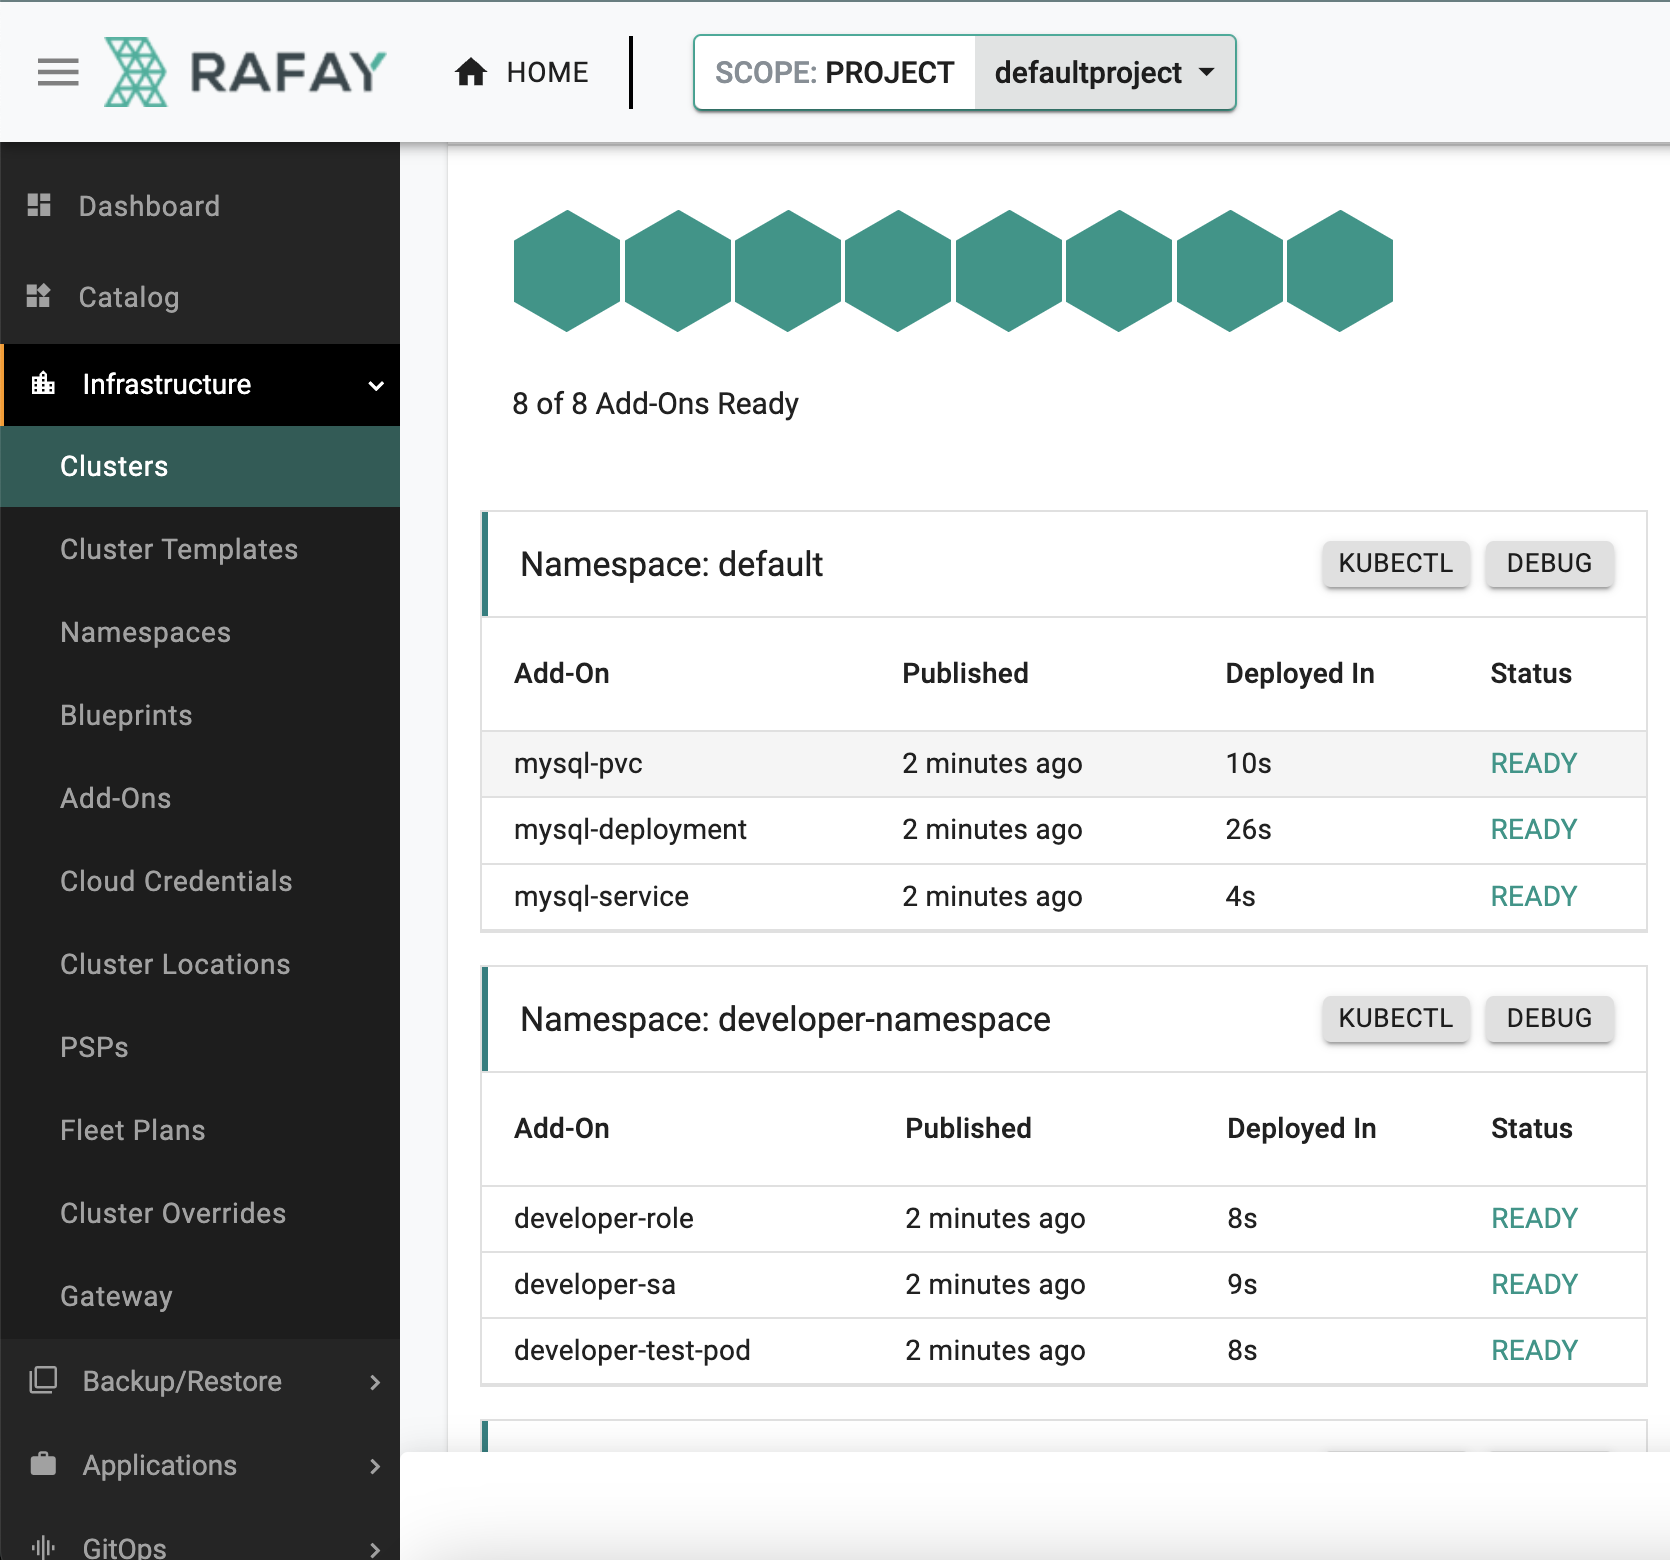
In this example we will create a namespace for clusters and add-ons necessary for mysql database deployment, then we will create a blueprint containing the add-ons newly created and apply it to the cluster. We will use Rafay ztka to access database and test the admin access. After that we will create user with restricted access to a specific namespace which can be then used to access database running on the pod within the newly created namespace.
Follow the steps described below:
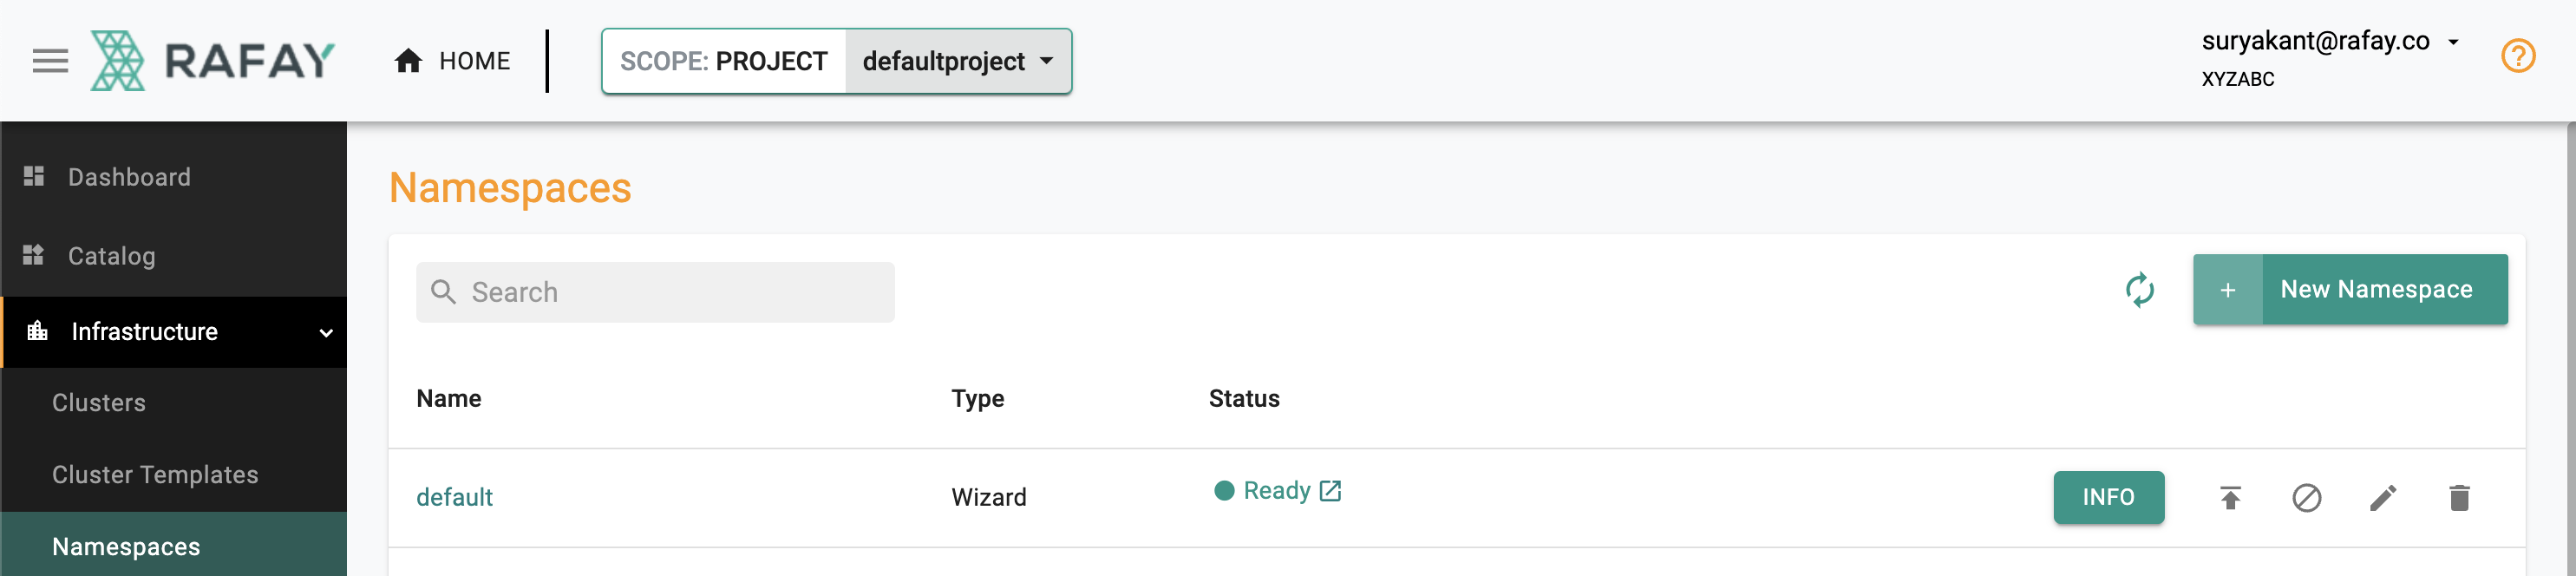
Step 1: Create Namespaces
default Namespace
We will deploy need to deploy the mysql database to the default namespace. We will create this in our project and take over management of the default namespace on the EKS cluster.
- Click on Infrastructure -> Namespaces
- Click New Namespace
- Enter "default" in the "Name" section
- For "Type" Select "Wizard" from the dropdown
- Click "SAVE"
- Click "SAVE & GO TO PLACEMENT"
- Select the specific cluster
- Click "SAVE & GO TO PUBLISH"
- Select "PUBLISH"
- Select "EXIT" once namespace has published
Similarly create a separate namespace for the developer
developer-namespace Namespace
- Click on Infrastructure -> Namespaces
- Click New Namespace
- Enter "developer-namespace" in the "Name" section
- For "Type" Select "Wizard" from the dropdown
- Click "SAVE"
- Click "SAVE & GO TO PLACEMENT"
- Select the specific cluster
- Click "SAVE & GO TO PUBLISH"
- Select "PUBLISH"
- Select "EXIT" once namespace has published
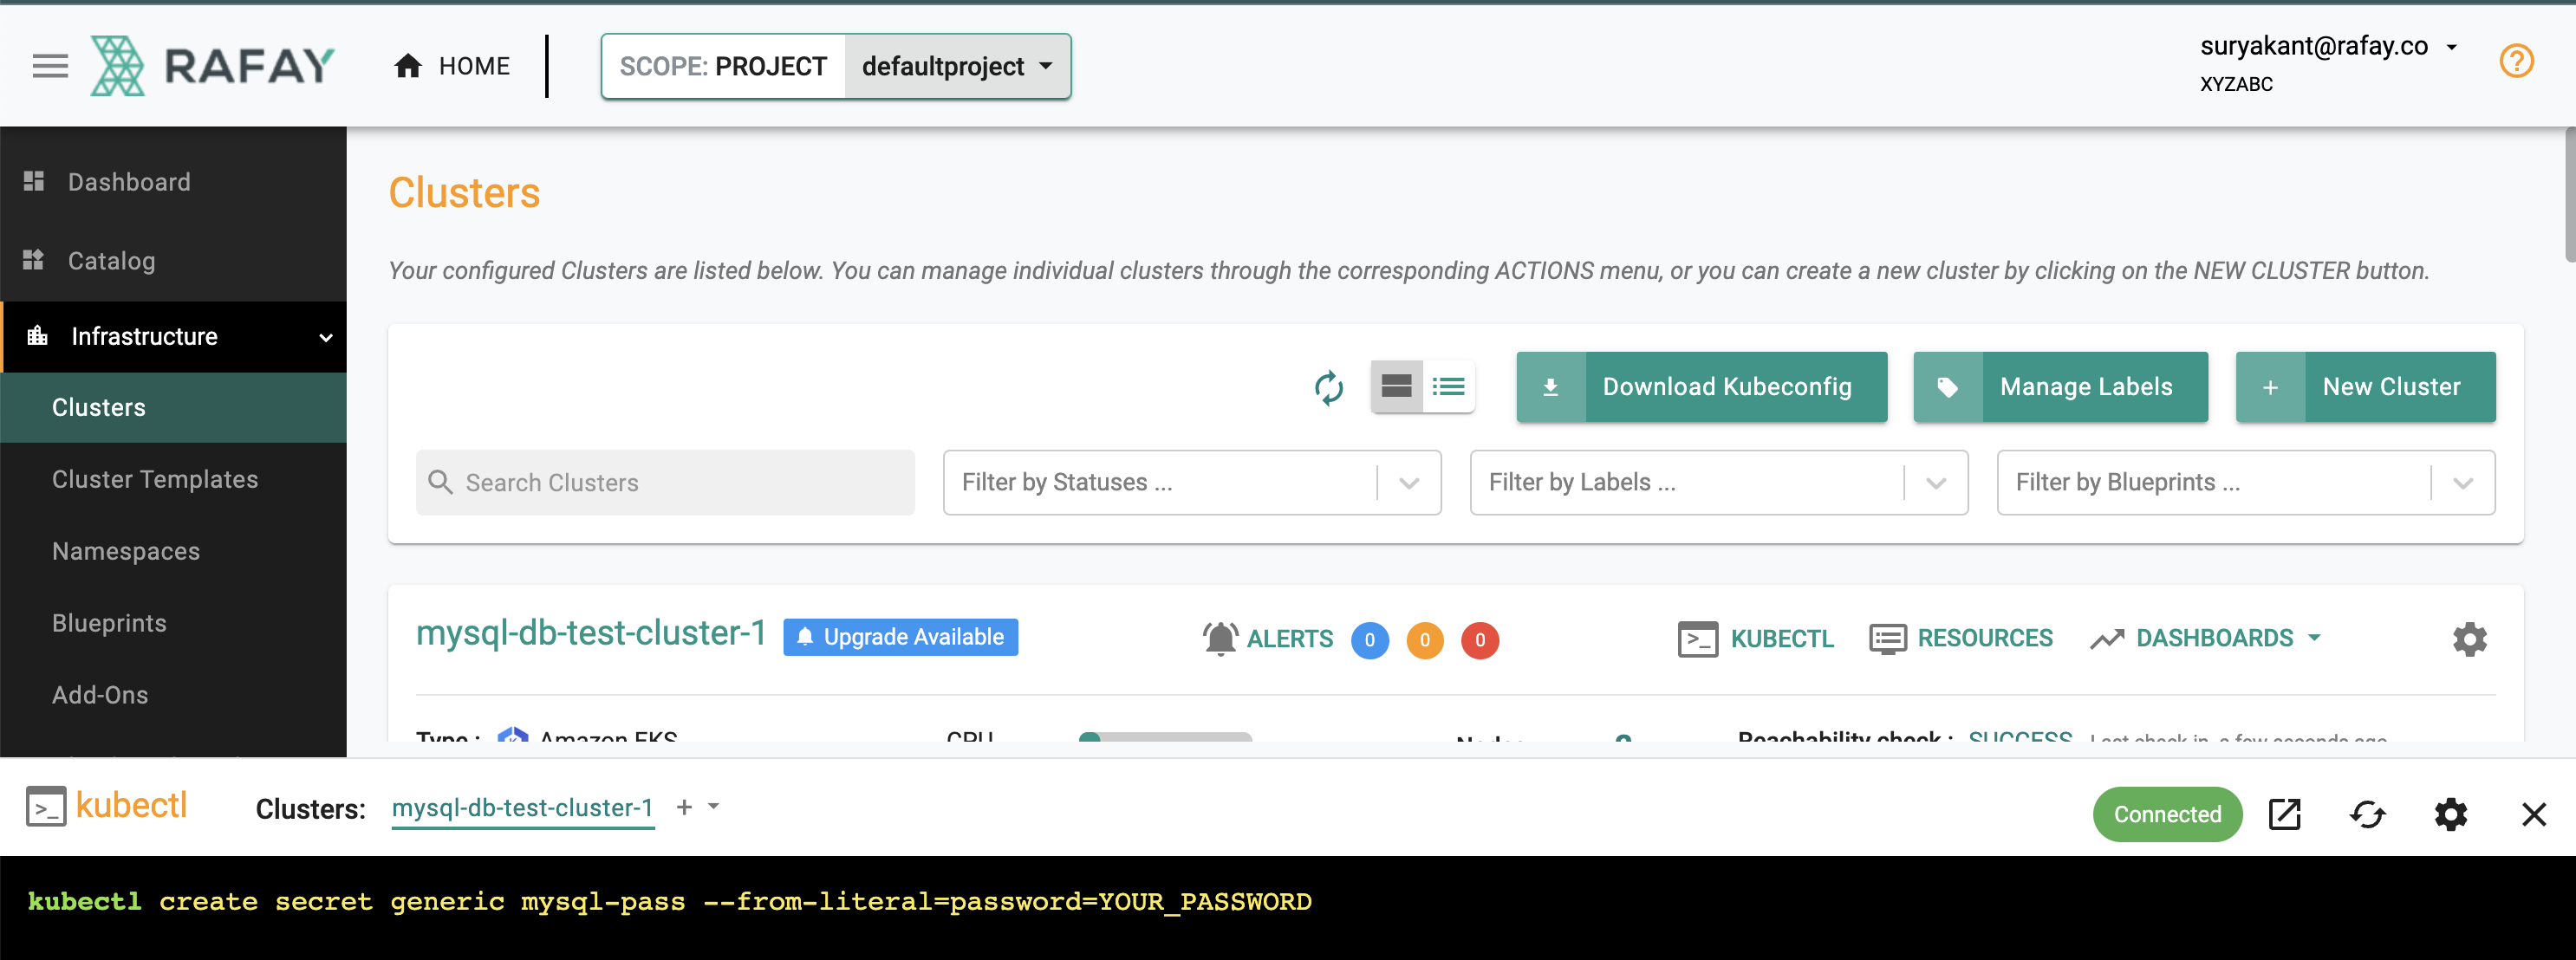
Step 2: Create Secret
- Click on the project "GO TO PROJECT" where Rafay cluster is deployed
- Click on "KUBECTL" to access the rafay cluster ZTKA
- run the below command and replace "YOUR_PASSWORD" with the password to be used to access MySQL database
kubectl create secret generic mysql-pass --from-literal=password=YOUR_PASSWORD
Step 3: Create add-Ons
PersistentVolumeClaim Add-on
Define a PersistentVolumeClaim to ensure that the MySQL data persists even if the pod restarts.
- Click on Infrastructure -> Add-Ons
- Click on "Create New Add-on" from the dropdown "New Add-On"
- Select the "Bring your own" add-on
- Enter "mysql-pvc" for the name
- Type "K8s YAML"
- Select "Upload files manually"
- Select "default" for the namespace
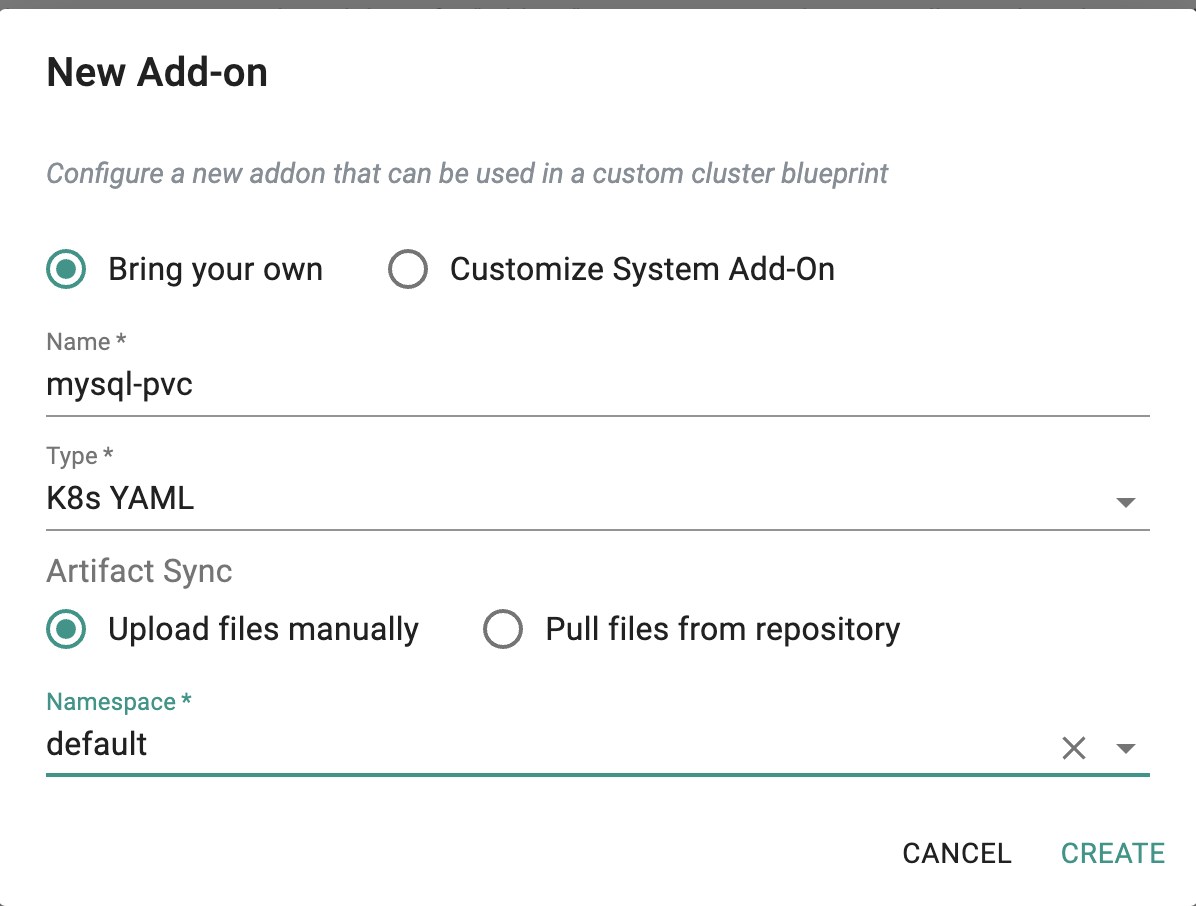
- Click on "CREATE"
Custom Values
For this exercise we will use the following file.
- Copy the following contents to a file called "mysql-pvc.yaml"
# mysql-pvc.yaml
apiVersion: v1
kind: PersistentVolumeClaim
metadata:
  name: mysql-pvc
spec:
  accessModes:
    - ReadWriteOnce
  resources:
    requests:
      storage: 1Gi
New Version
- Click on "New Version"
- Enter a version name, for this add-on we will user "v1"
- Upload the file "mysql-pvc.yaml" we created earlier
- Click on "Save Changes"

Deployment Add-on
Create a Deployment and Service for MySQL using the Secret and PVC created.
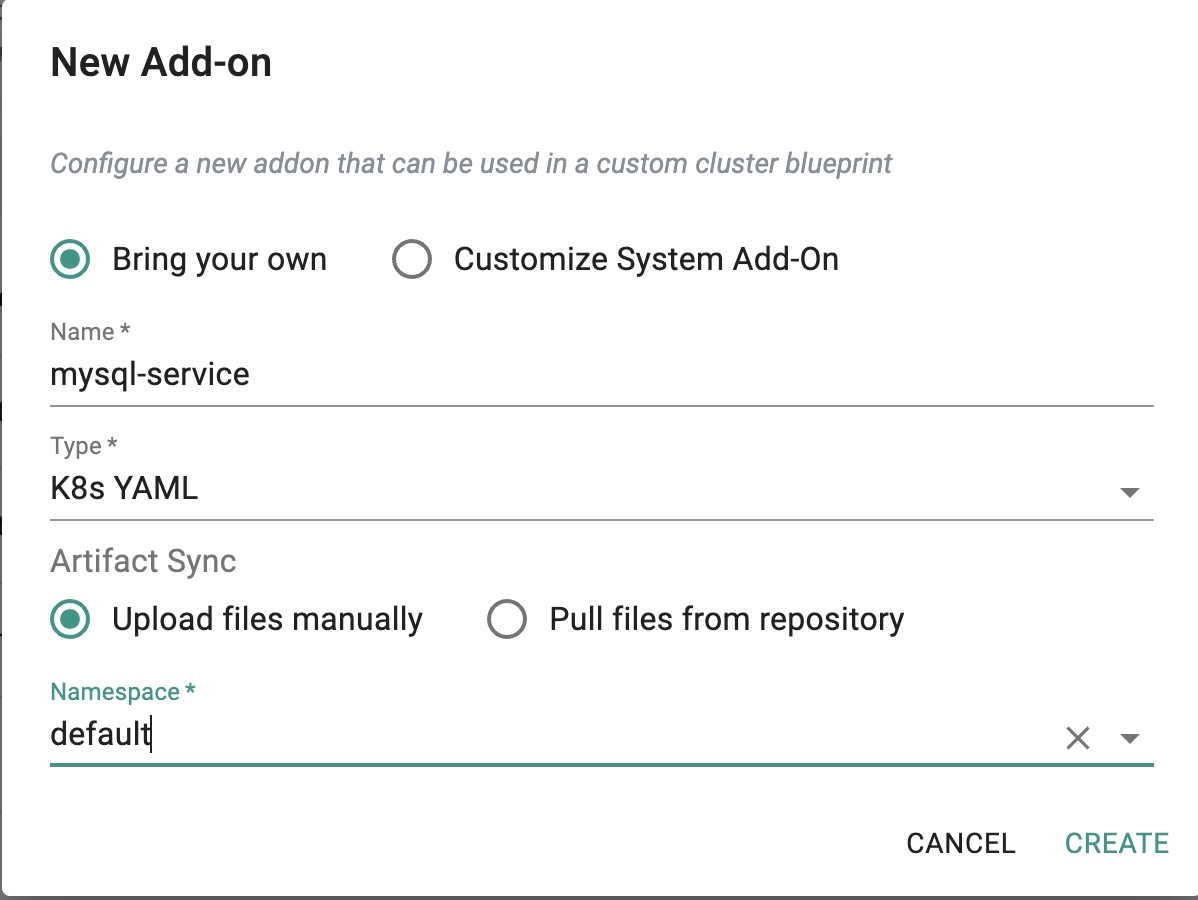
- Click on Infrastructure -> Add-Ons
- Click on "Create New Add-on" from the dropdown "New Add-On"
- Select the "Bring your own" add-on
- Enter "mysql-deployment" for the name
- Type "K8s YAML"
- Select "Upload files manually"
- Select "default" for the namespace
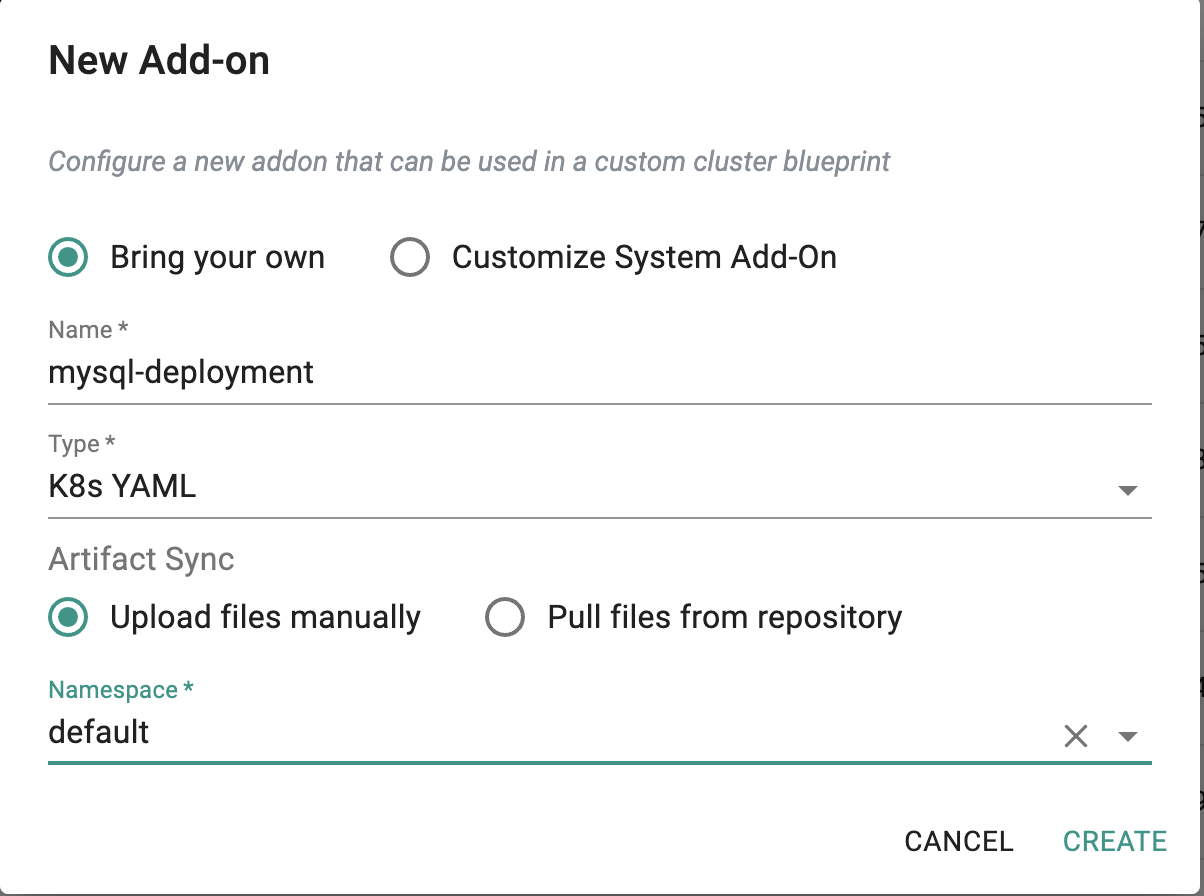
- Click on "CREATE"
Custom Values
For this exercise we will use the following file.
- Copy the following contents to a file called "mysql-deployment.yaml"
# mysql-deployment.yaml
apiVersion: apps/v1
kind: Deployment
metadata:
 name: mysql
spec:
 replicas: 1
 selector:
 matchLabels:
 app: mysql
 template:
 metadata:
 labels:
 app: mysql
 spec:
 containers:
 - name: mysql
 image: mysql:latest
 env:
 - name: MYSQL_ROOT_PASSWORD
 valueFrom:
 secretKeyRef:
 name: mysql-pass
 key: password
 ports:
 - containerPort: 3306
 volumeMounts:
 - name: mysql-persistent-storage
 mountPath: /var/lib/mysql
 volumes:
 - name: mysql-persistent-storage
 persistentVolumeClaim:
 claimName: mysql-pvc
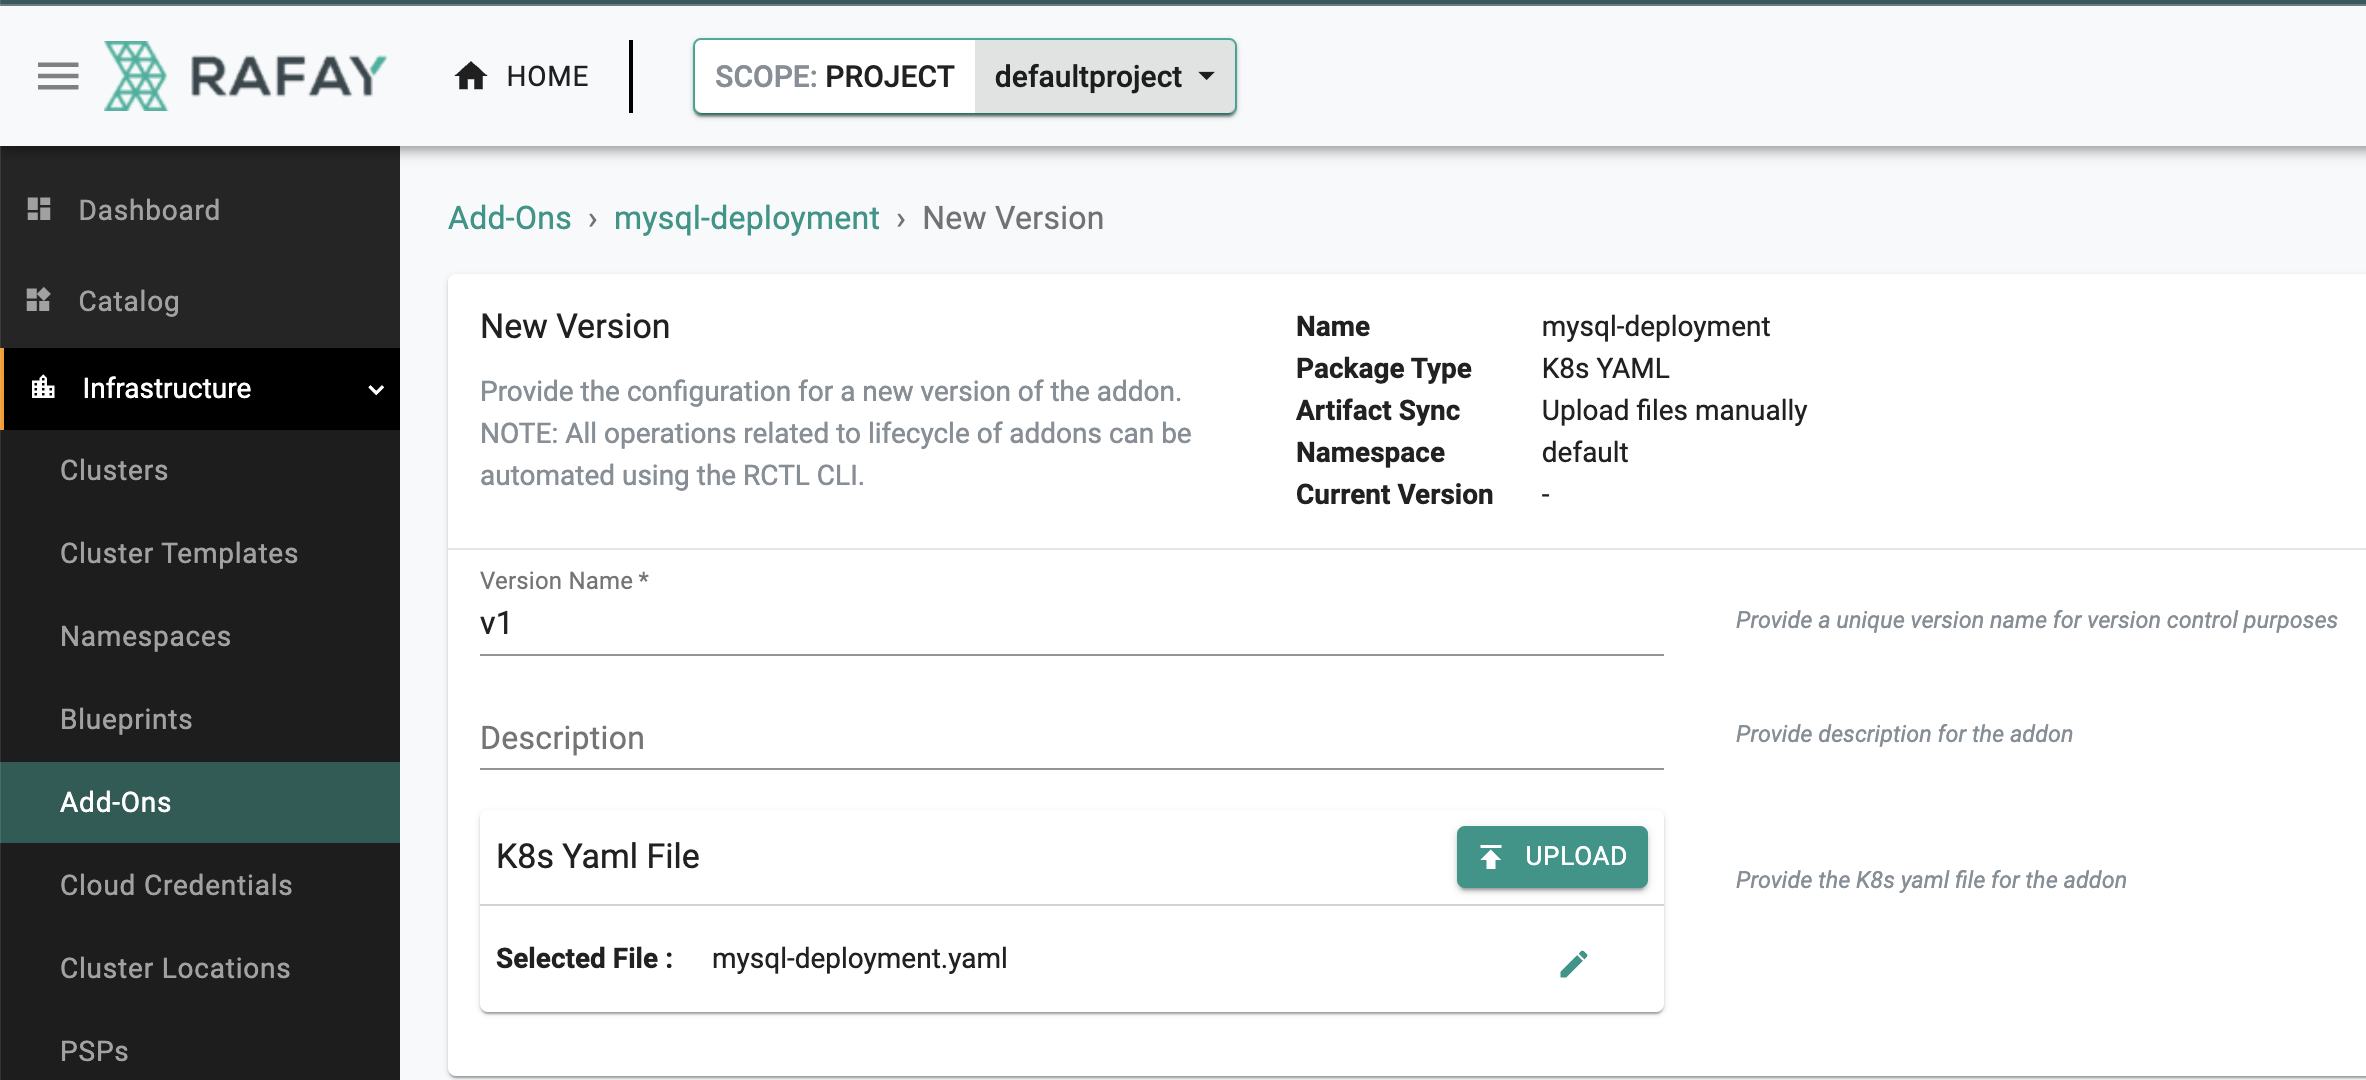
New Version
- Click on "New Version"
- Enter a version name, for this add-on we will user "v1"
- Upload the file "mysql-deployment.yaml" we created earlier
- Click on "Save Changes"
Service Add-on
Create a Deployment and Service for MySQL using the Secret and PVC created.
- Click on Infrastructure -> Add-Ons
- Click on "Create New Add-on" from the dropdown "New Add-On"
- Select the "Bring your own" add-on
- Enter "mysql-service" for the name
- Type "K8s YAML"
- Select "Upload files manually"
- Select "default" for the namespace
- Click on "CREATE"
Custom Values
For this exercise we will use the following file.
- Copy the following contents to a file called "mysql-service.yaml"
# mysql-service.yaml
apiVersion: v1
kind: Service
metadata:
 name: mysql
spec:
 selector:
 app: mysql
 ports:
 - protocol: TCP
 port: 3306
 targetPort: 3306
New Version
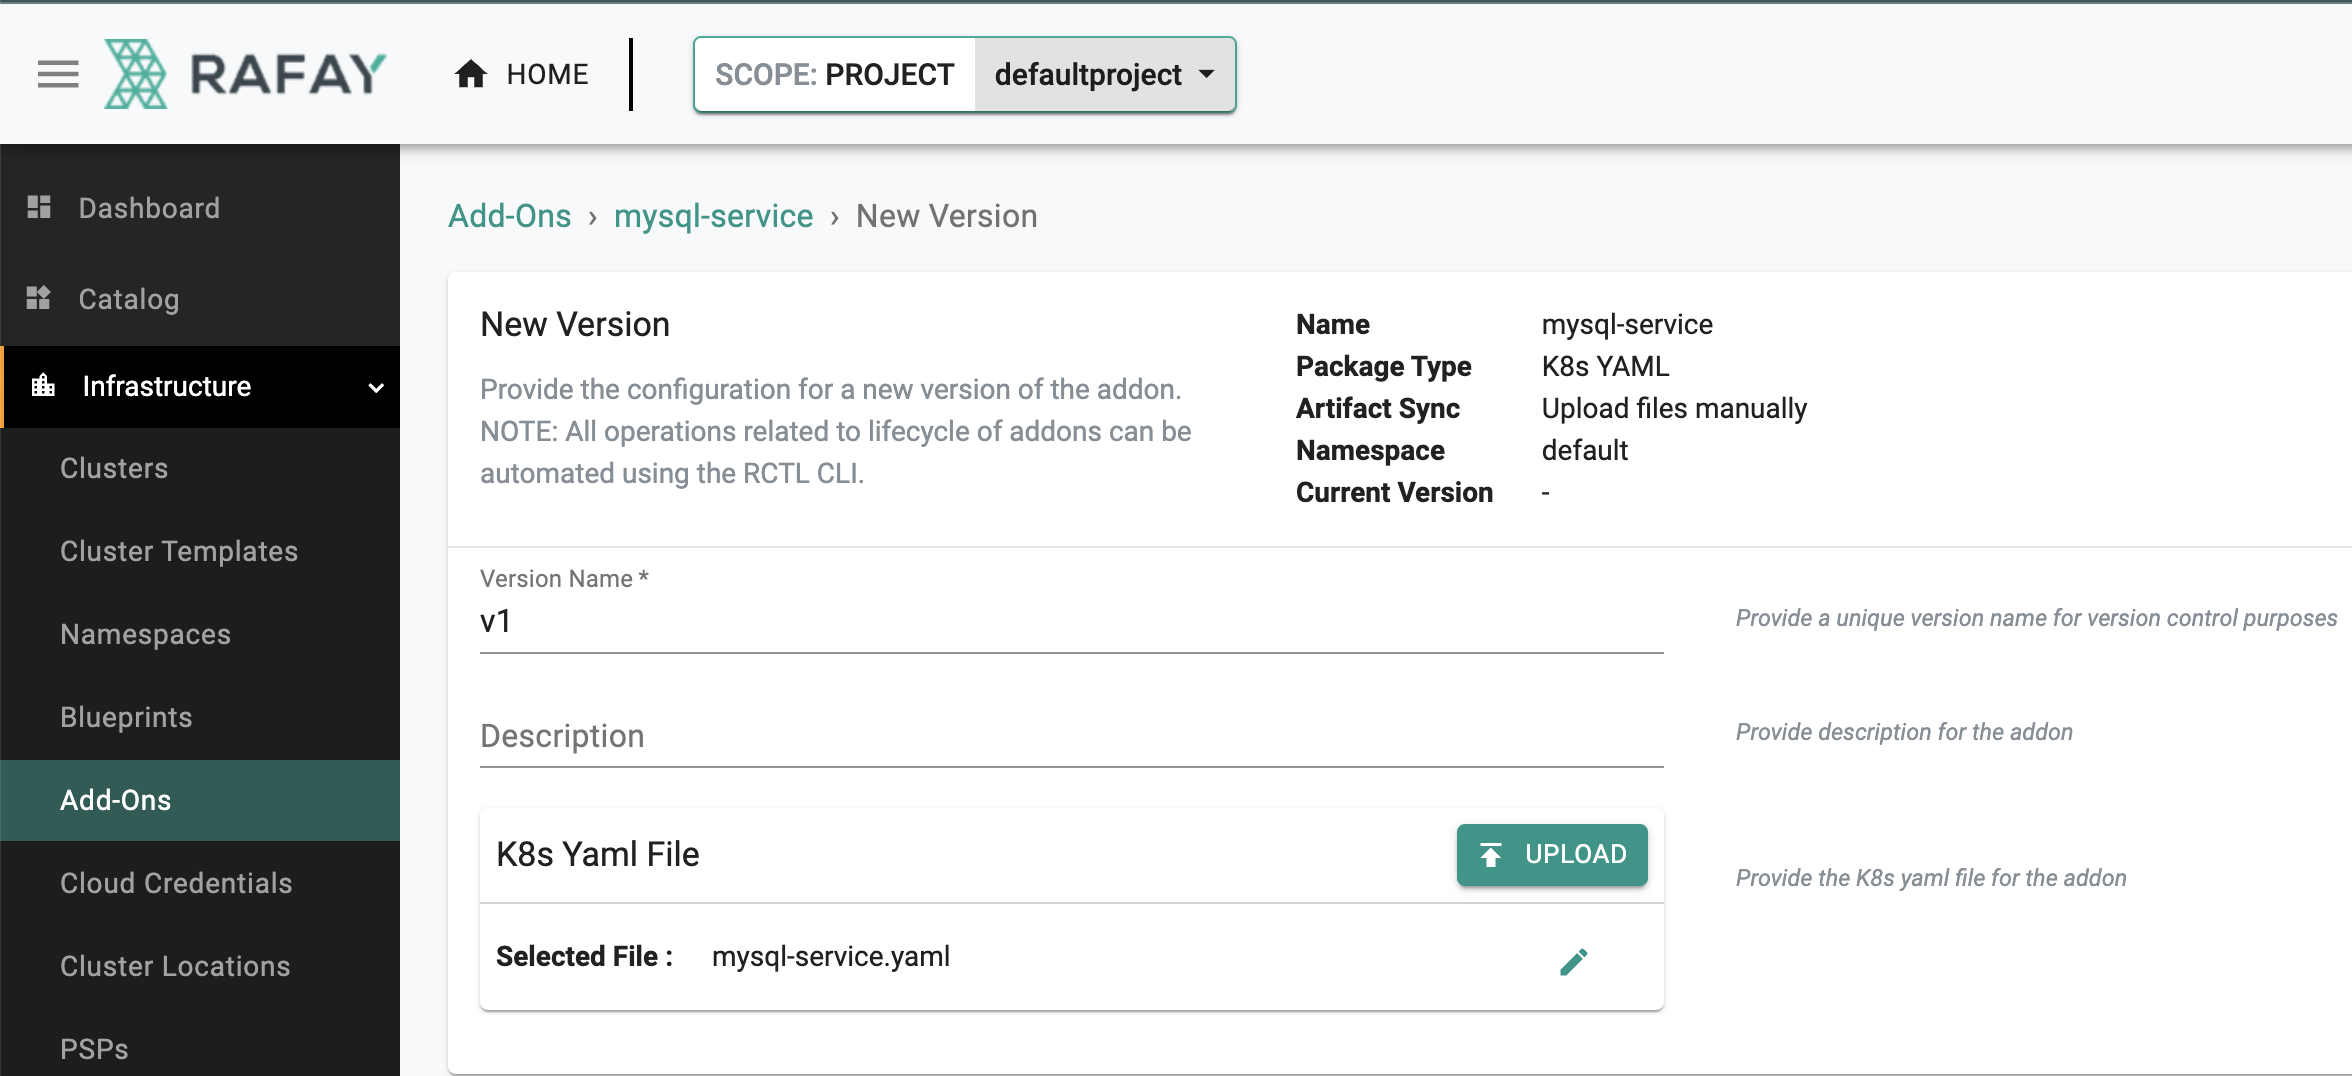
- Click on "New Version"
- Enter a version name, for this add-on we will user "v1"
- Upload the file "mysql-service.yaml" we created earlier
- Click on "Save Changes"
Developer-role Add-On
Define a Role granting access to the MySQL database.
- Click on Infrastructure -> Add-Ons
- Click on "Create New Add-on" from the dropdown "New Add-On"
- Select the "Bring your own" add-on
- Enter "developer-role" for the name
- Type "K8s YAML"
- Select "Upload files manually"
- Select "developer-namespace" for the namespace
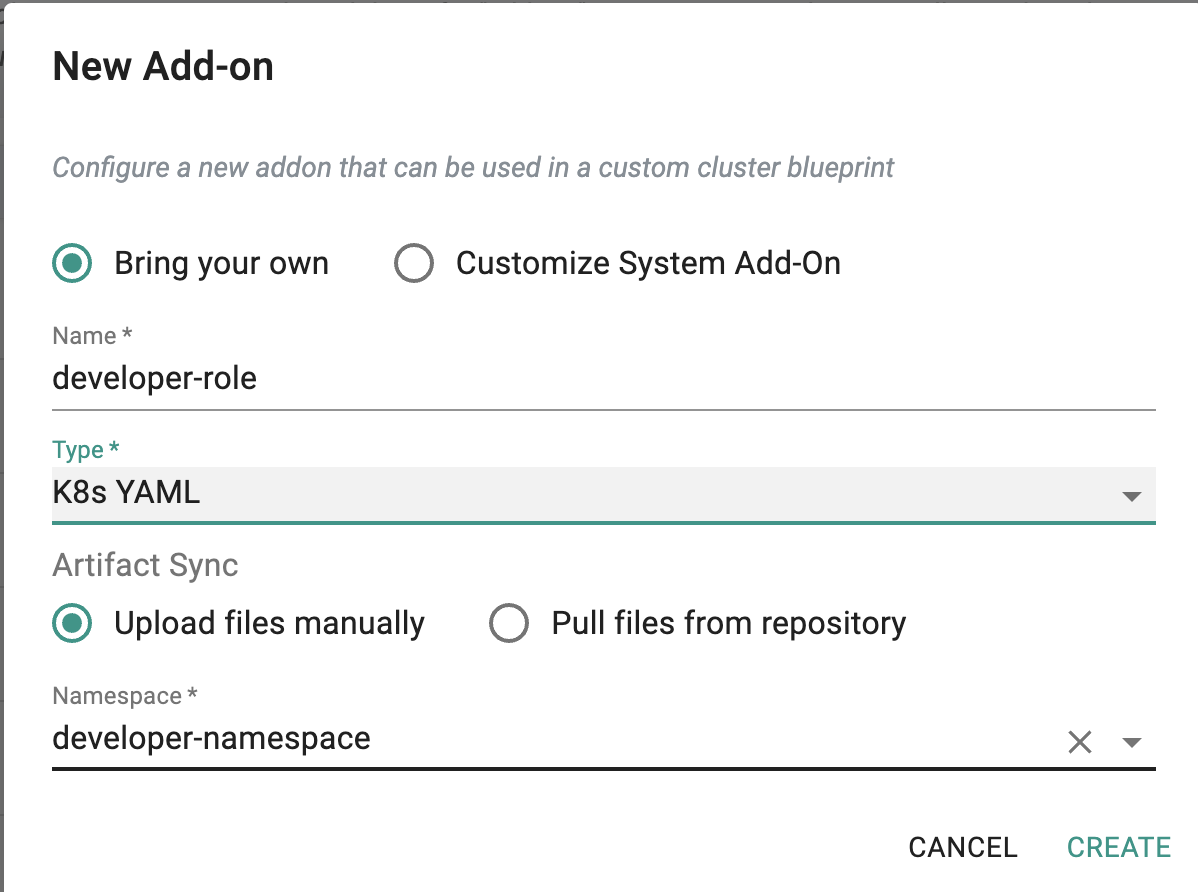
- Click on "CREATE"
Custom Values
For this exercise we will use the following file.
- Copy the following contents to a file called "developer-role.yaml"
# developer-role.yaml
apiVersion: rbac.authorization.k8s.io/v1
kind: Role
metadata:
 namespace: developer-namespace
 name: mysql-read-only
rules:
- apiGroups: [""]
 resources: ["pods"]
 verbs: ["get", "list", "watch"]
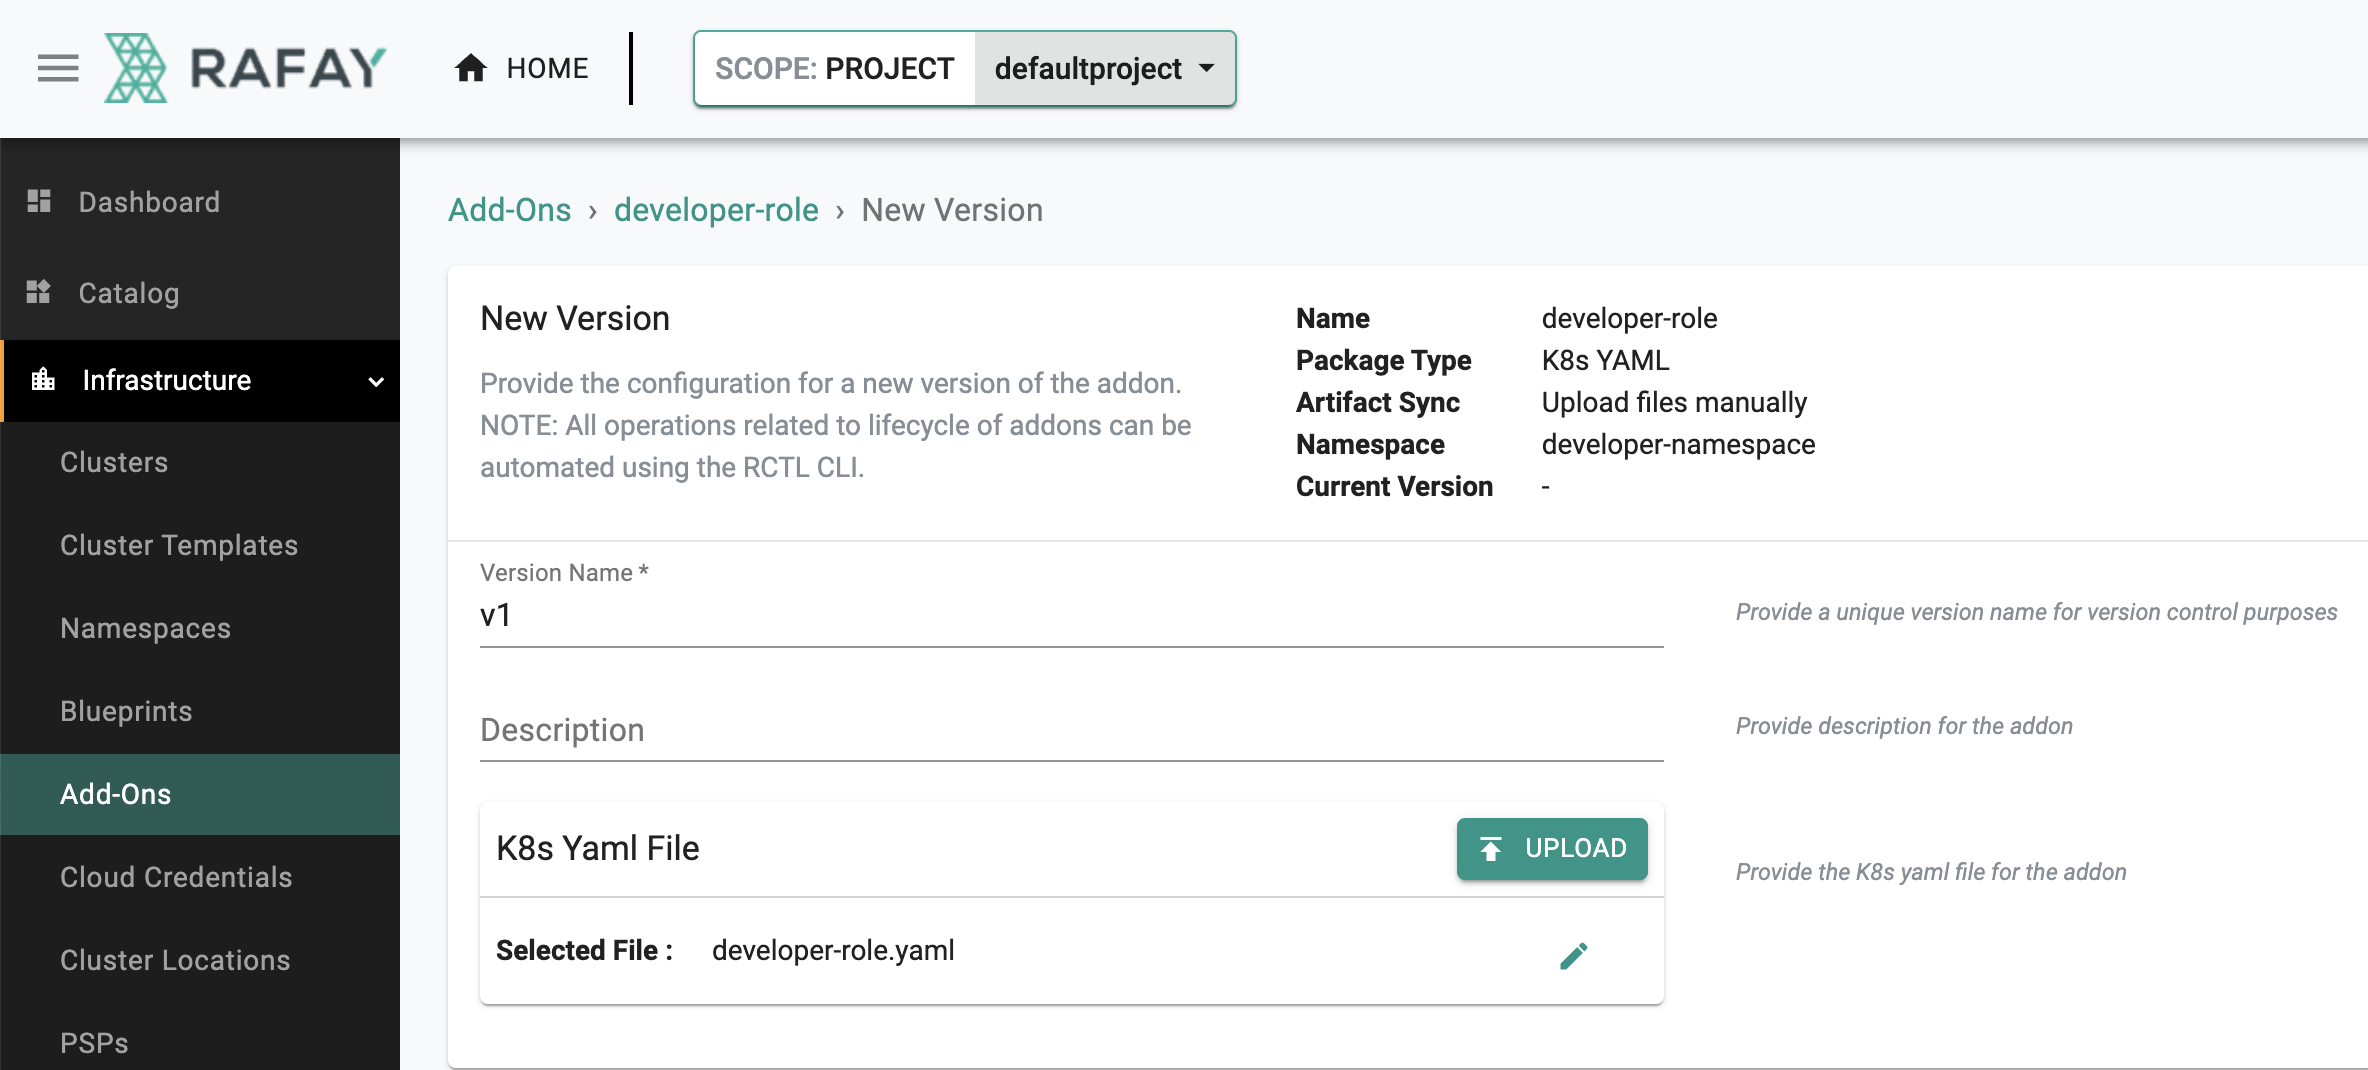
New Version
- Click on "New Version"
- Enter a version name, for this add-on we will user "v1"
- Upload the file "developer-role.yaml" we created earlier
- Click on "Save Changes"
Developer-sa Add-On
Define a Role granting access to the MySQL database.
- Click on Infrastructure -> Add-Ons
- Click on "Create New Add-on" from the dropdown "New Add-On"
- Select the "Bring your own" add-on
- Enter "developer-sa" for the name
- Type "K8s YAML"
- Select "Upload files manually"
- Select "developer-namespace" for the namespace
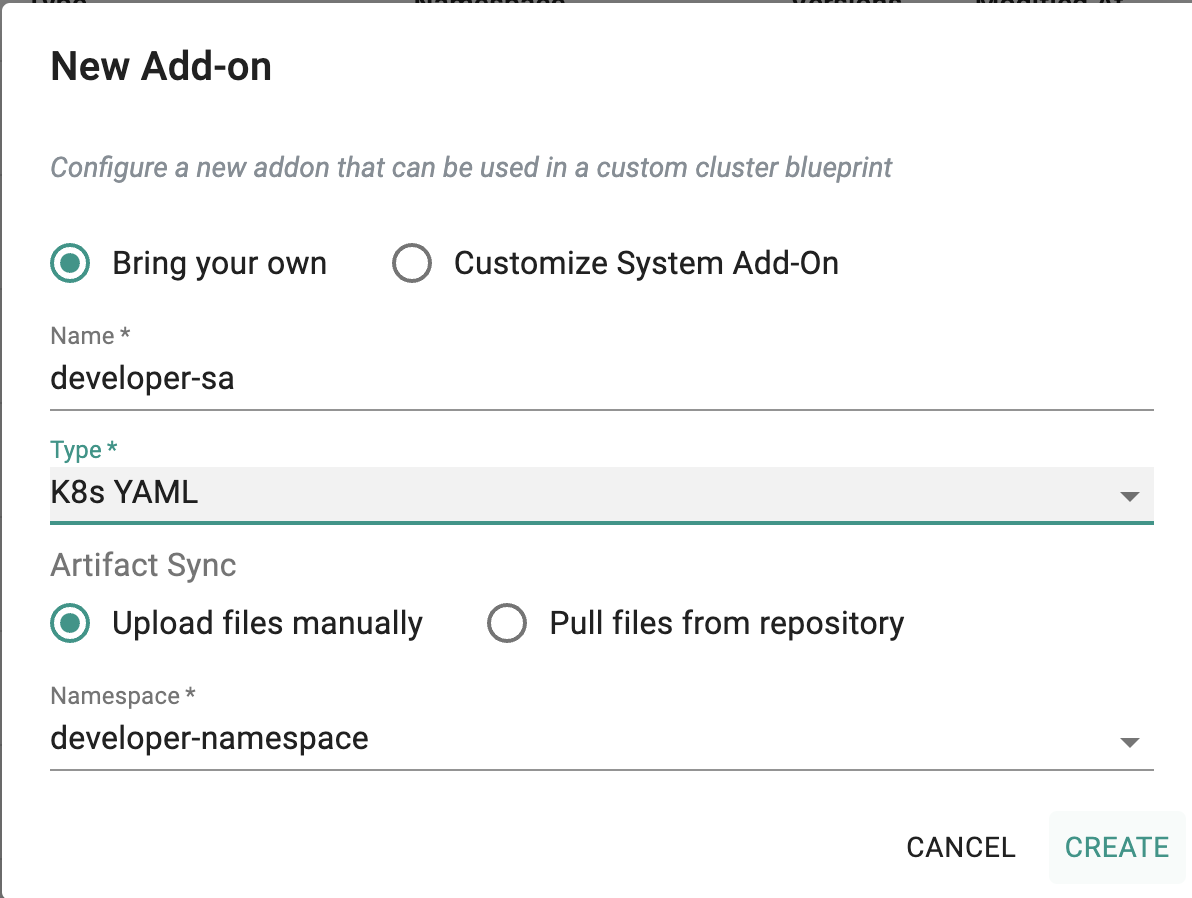
- Click on "CREATE"
Custom Values
For this exercise we will use the following file.
- Copy the following contents to a file called "developer-sa.yaml"
# developer-sa.yaml
apiVersion: v1
kind: ServiceAccount
metadata:
 namespace: developer-namespace
 name: mysql-developer
---
apiVersion: rbac.authorization.k8s.io/v1
kind: RoleBinding
metadata:
 name: mysql-read-only-binding
 namespace: developer-namespace
roleRef:
 apiGroup: rbac.authorization.k8s.io
 kind: Role
 name: mysql-read-only
subjects:
- kind: ServiceAccount
 name: mysql-developer
 namespace: developer-namespace
New Version
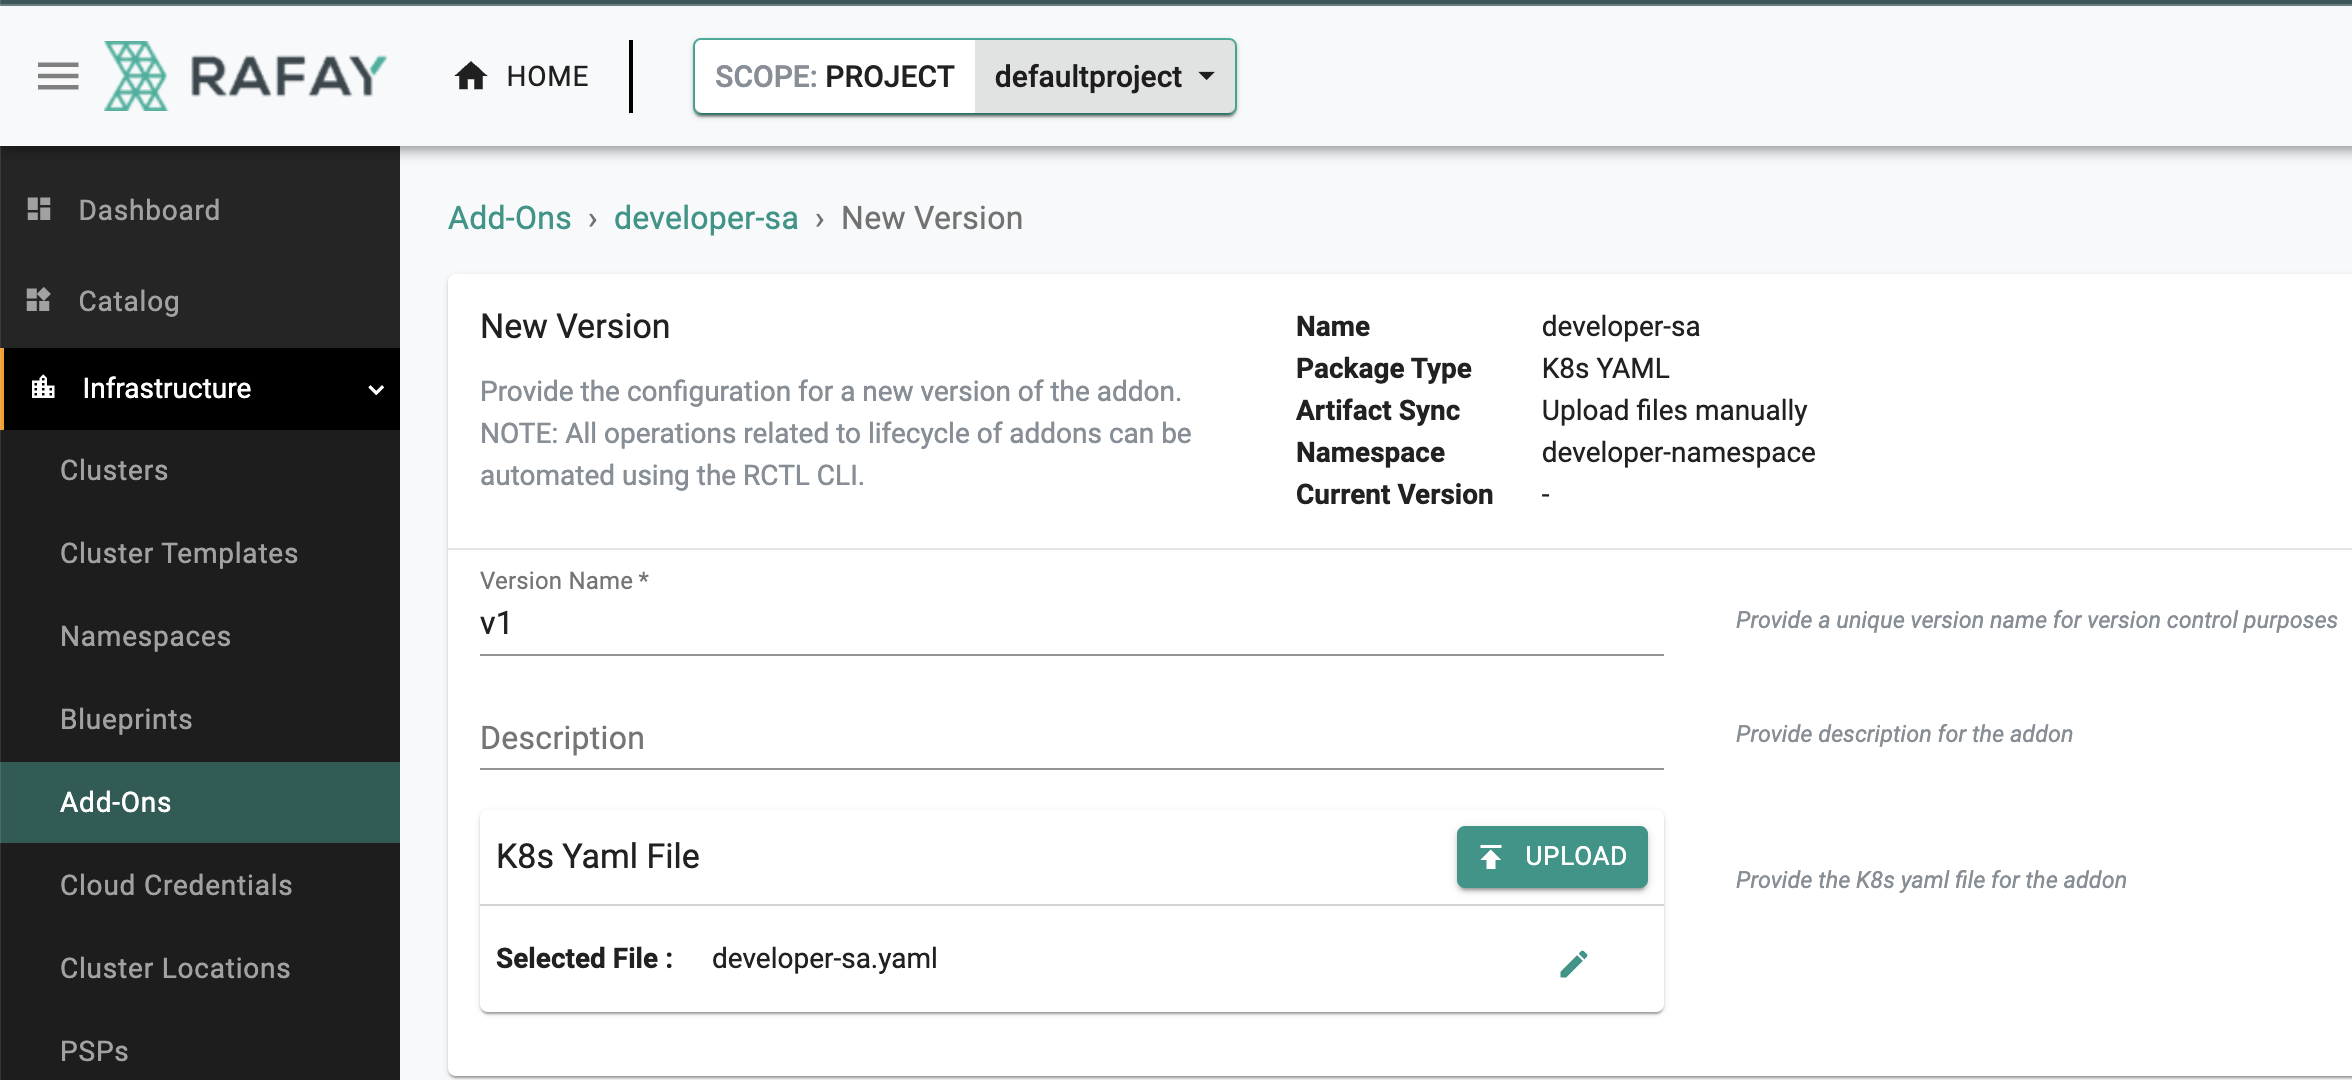
- Click on "New Version"
- Enter a version name, for this add-on we will user "v1"
- Upload the file "developer-sa.yaml" we created earlier
- Click on "Save Changes"
Developer-test-pod Add-On
To test, you can deploy a pod in the developer namespace and attempt to access the MySQL database.
- Click on Infrastructure -> Add-Ons
- Click on "Create New Add-on" from the dropdown "New Add-On"
- Select the "Bring your own" add-on
- Enter "developer-test-pod" for the name
- Type "K8s YAML"
- Select "Upload files manually"
- Select "developer-namespace" for the namespace
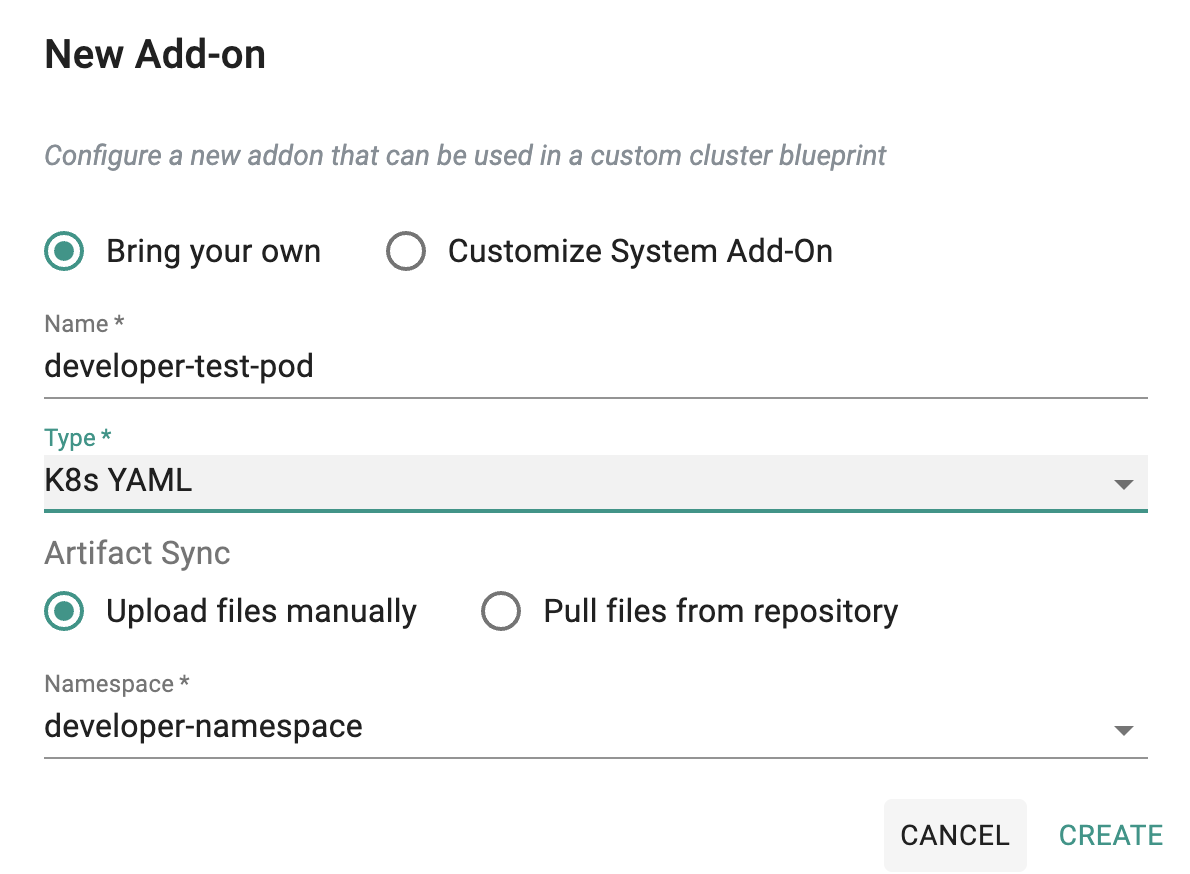
- Click on "CREATE"
Custom Values
For this exercise we will use the following file.
- Copy the following contents to a file called "developer-test-pod.yaml"
# developer-test-pod.yaml
apiVersion: v1
kind: Pod
metadata:
  name: mysql-test-pod
  namespace: developer-namespace
spec:
  containers:
  - name: mysql-client
    image: mysql:latest
    command: ["/bin/sh"]
    args: ["-c", "sleep infinity"]
New Version
- Click on "New Version"
- Enter a version name, for this add-on we will user "v1"
- Upload the file "developer-test-pod.yaml" we created earlier
- Click on "Save Changes"

Step 4: Create blueprint
In this step, you will create a custom cluster blueprint with the add-ons created in the previous steps
- Click on Infrastructure -> Blueprints
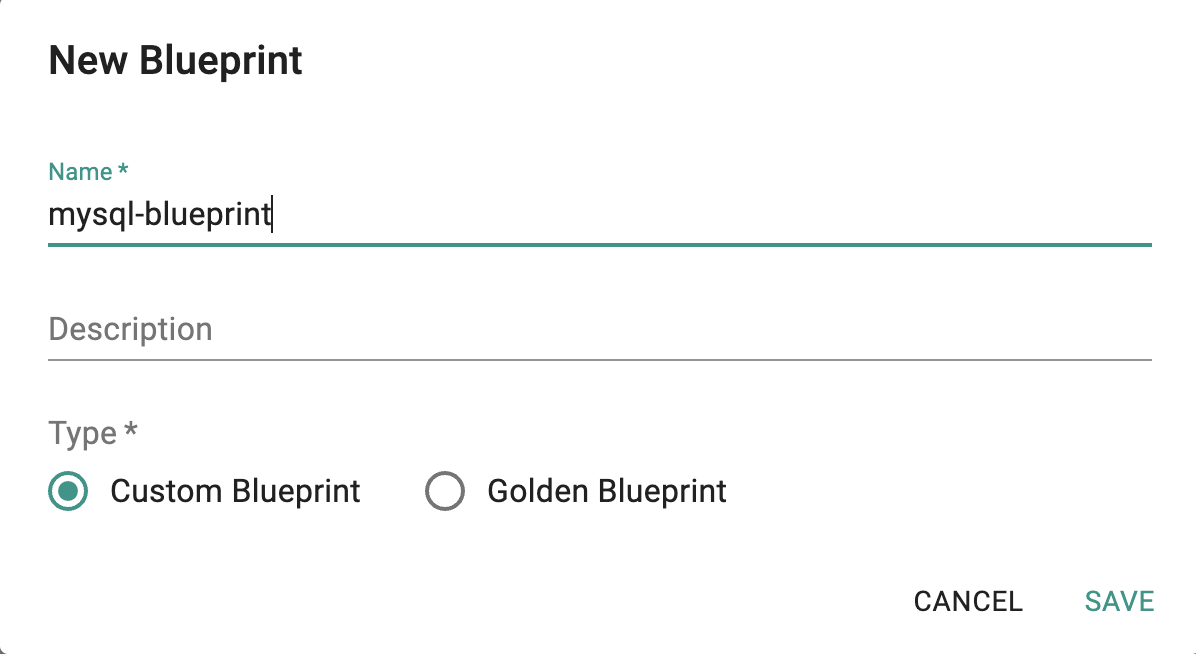
- Select "New Blueprint"
- Enter "mysql-blueprint" for the Name
- Select "Custom Blueprint" for the Type
- Click on "SAVE"
- Enter a Version Name such as "v1"
- Set the "Base Blueprint" to the "minimal" and latest Version in "Bluerpint" and "Version" section respectively
- Set "Drift Action" to "BlockAndNotify"
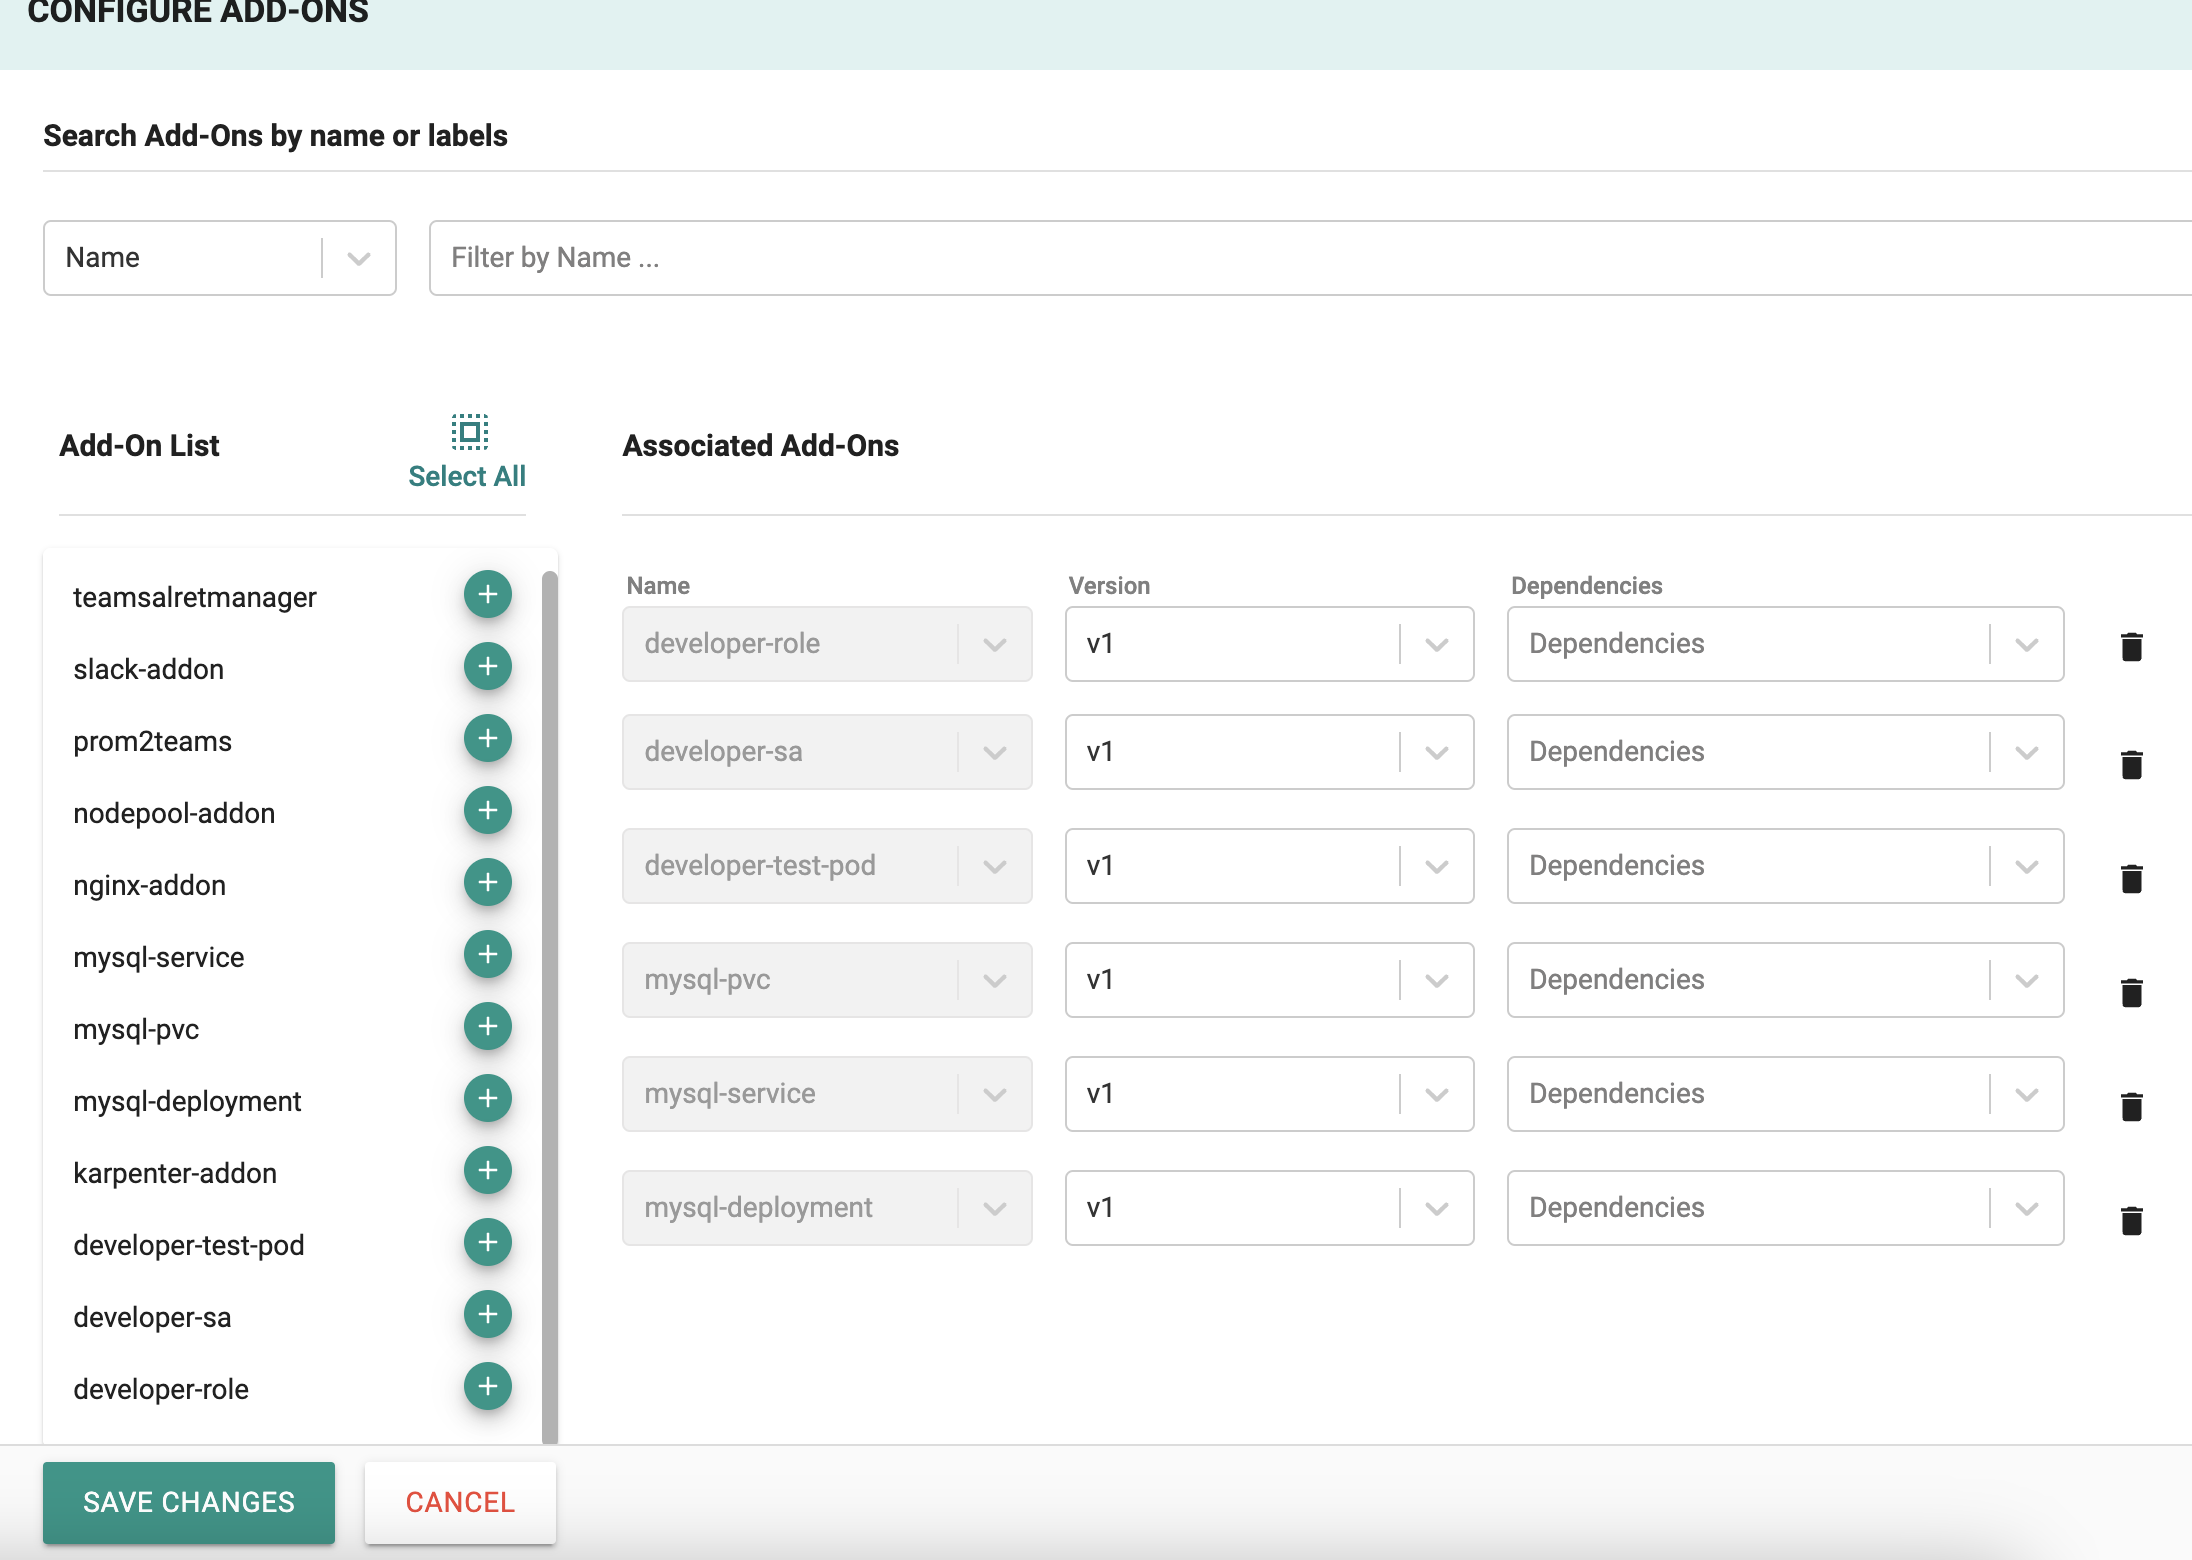
- Click on "Configure Add-ons"
- Add the add-on developer-test-pod, developer-sa, developer-role, mysql-deployment, mysql-service & mysql-pvc created in the previous step
-
Click on "SAVE CHANGES"
-
Click on "SAVE CHANGES"
Step 5: Apply Blueprint
Now, we are ready to apply the newly created custom blueprint to our EKS cluster.
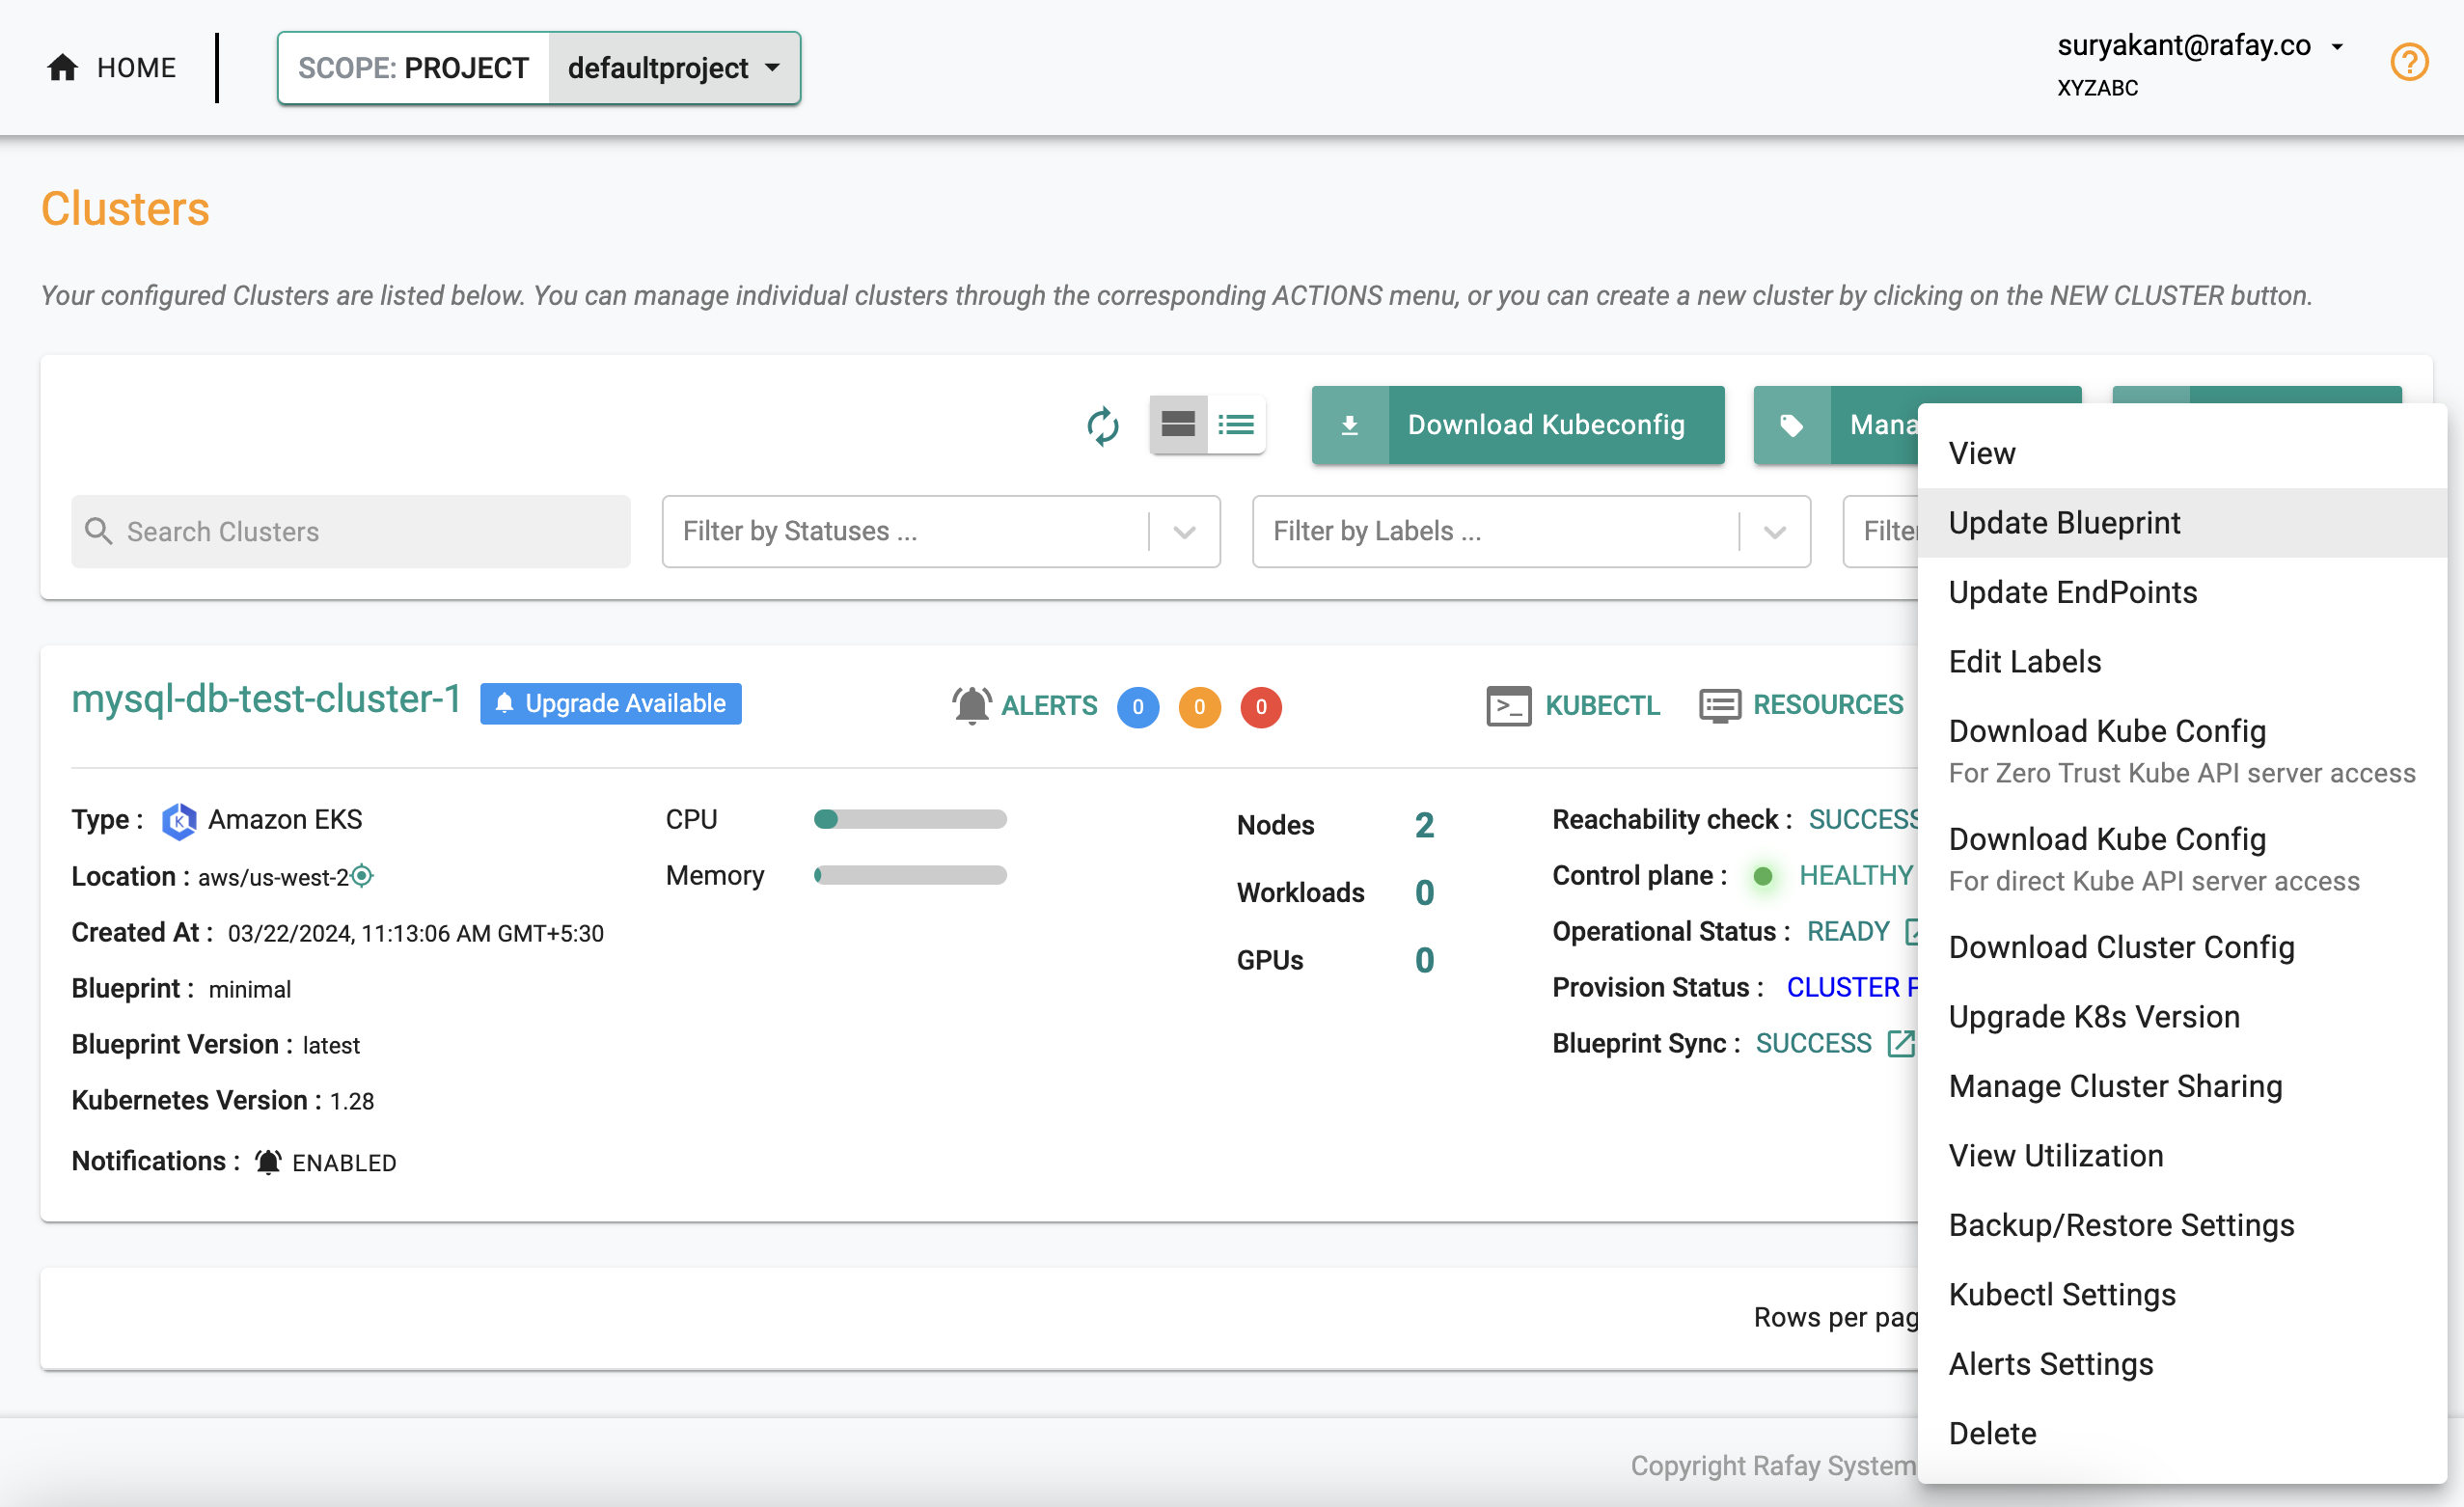
- Select Infrastructure -> Clusters
- Click on the gear icon on the far right of the EKS cluster
- Update blueprint and select the new blueprint and version
- Select "SAVE AND PUBLISH"
In a few minutes, all the k8s resources matching the custom cluster blueprint will become operational on the cluster.
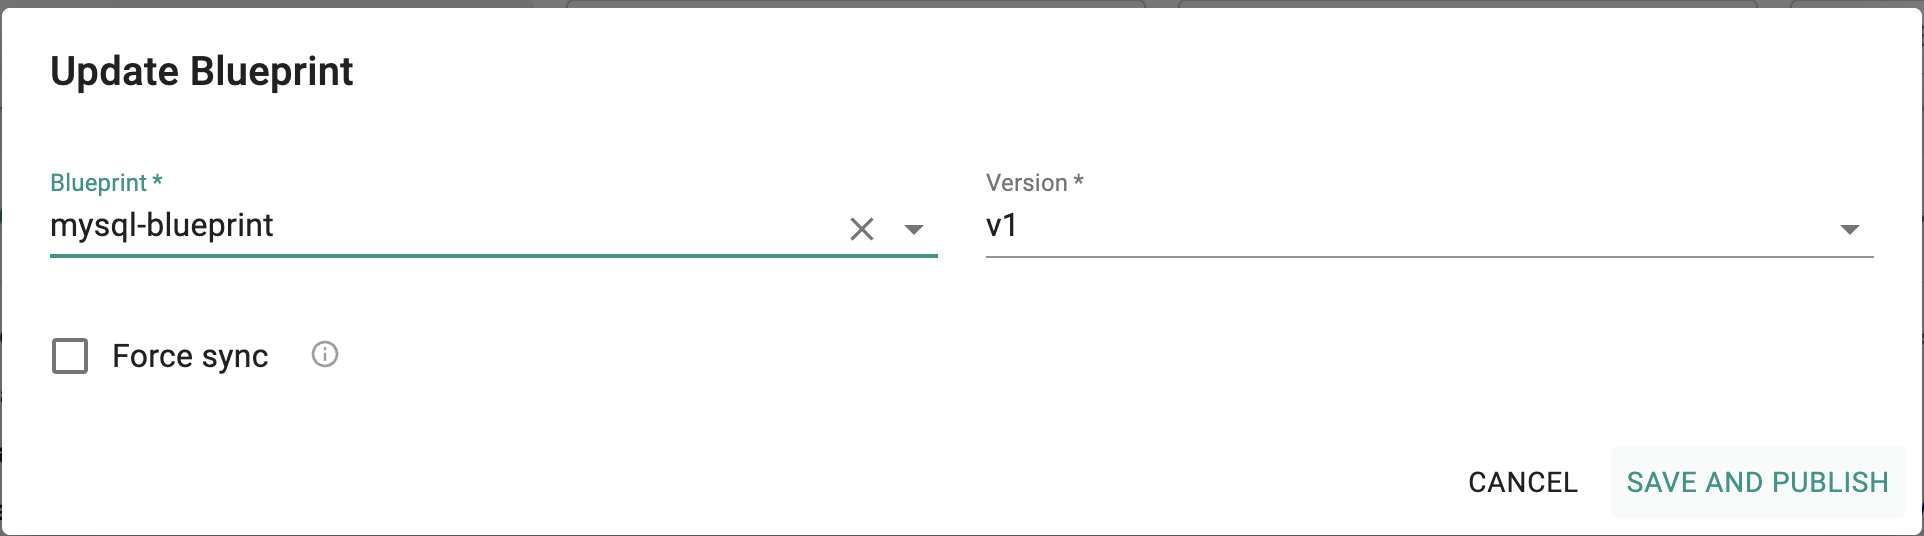
Notice that the cluster's blueprint name and version match what you created in the prior step.
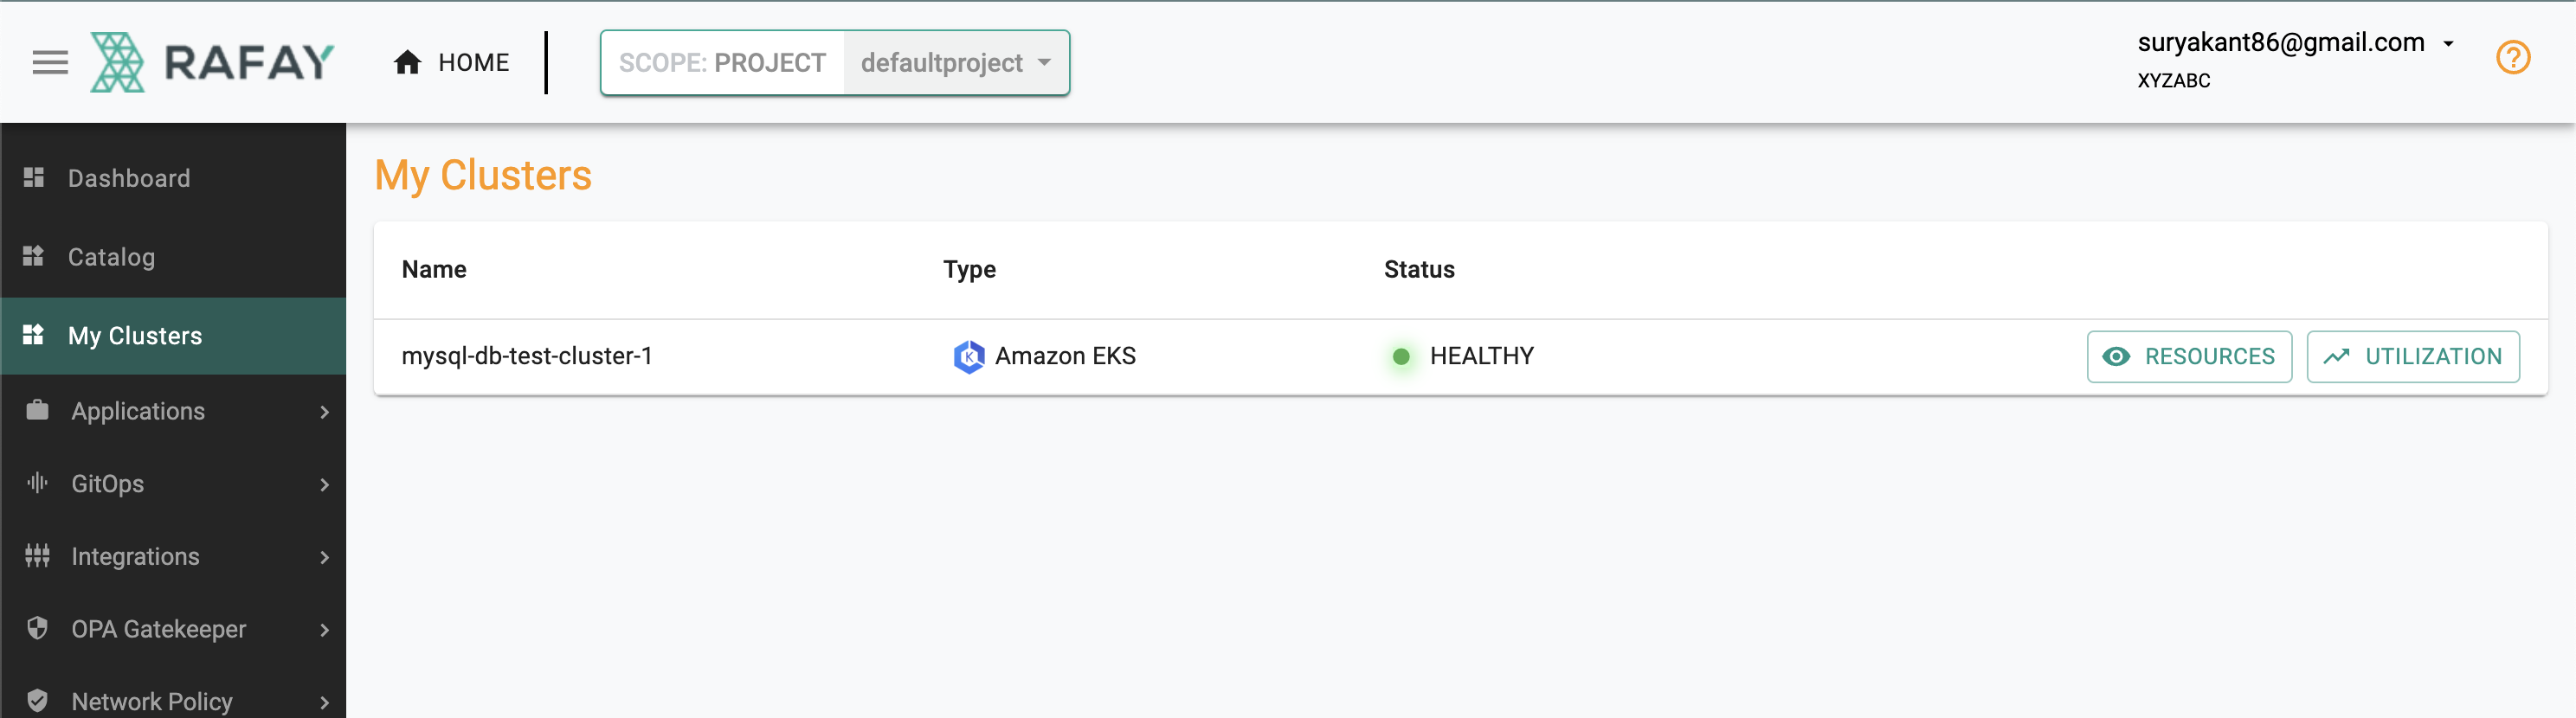
Steps 6: Test the kubectl access to the cluster
- Click on Infrastructure -> clusters
- Click on KUBECTL of the cluster deployed
Run the below commands to check the pods status in default ( mysql-575d797c98-w9gfz) and developer-namespace (mysql-test-pod) namespace
kubectl get pods -A
NAMESPACE             NAME                                    READY   STATUS    RESTARTS   AGE
default               mysql-575d797c98-w9gfz                  1/1     Running   0          26m
developer-namespace   mysql-test-pod                          1/1     Running   0          26m
kube-system           aws-node-8x54f                          2/2     Running   0          7h43m
kube-system           aws-node-jpws8                          2/2     Running   0          7h43m
kube-system           coredns-5cf9b97cd9-c4gvg                1/1     Running   0          7h37m
kube-system           coredns-5cf9b97cd9-vnzkr                1/1     Running   0          7h37m
kube-system           ebs-csi-controller-7dcbff4c57-5dzsc     6/6     Running   0          7h31m
kube-system           ebs-csi-controller-7dcbff4c57-jtbb8     6/6     Running   0          7h31m
kube-system           ebs-csi-node-bsq8x                      3/3     Running   0          7h31m
kube-system           ebs-csi-node-nt65t                      3/3     Running   0          7h31m
kube-system           kube-proxy-8rqrl                        1/1     Running   0          7h43m
kube-system           kube-proxy-vc98p                        1/1     Running   0          7h43m
rafay-system          controller-manager-v3-557b9f665-544bx   1/1     Running   0          7h36m
rafay-system          edge-client-56f4cbcd68-62sxp            1/1     Running   0          7h36m
rafay-system          rafay-connector-v3-d7485d47f-zhgg6      1/1     Running   0          7h36m
rafay-system          v2-relay-agent-79d7b7d69b-bv2fp         1/1     Running   0          7h36m
kubectl get pods -A
NAMESPACE NAME READY STATUS RESTARTS AGE
default mysql-575d797c98-w9gfz 1/1 Running 0 26m
developer-namespace mysql-test-pod 1/1 Running 0 26m
kube-system aws-node-8x54f 2/2 Running 0 7h43m
kube-system aws-node-jpws8 2/2 Running 0 7h43m
kube-system coredns-5cf9b97cd9-c4gvg 1/1 Running 0 7h37m
kube-system coredns-5cf9b97cd9-vnzkr 1/1 Running 0 7h37m
kube-system ebs-csi-controller-7dcbff4c57-5dzsc 6/6 Running 0 7h31m
kube-system ebs-csi-controller-7dcbff4c57-jtbb8 6/6 Running 0 7h31m
kube-system ebs-csi-node-bsq8x 3/3 Running 0 7h31m
kube-system ebs-csi-node-nt65t 3/3 Running 0 7h31m
kube-system kube-proxy-8rqrl 1/1 Running 0 7h43m
kube-system kube-proxy-vc98p 1/1 Running 0 7h43m
rafay-system controller-manager-v3-557b9f665-544bx 1/1 Running 0 7h36m
rafay-system edge-client-56f4cbcd68-62sxp 1/1 Running 0 7h36m
rafay-system rafay-connector-v3-d7485d47f-zhgg6 1/1 Running 0 7h36m
rafay-system v2-relay-agent-79d7b7d69b-bv2fp 1/1 Running 0 7h36m
Step 7: Access mysql database
- Type the command below commands to access the MySQL database
kubectl exec -it mysql-575d797c98-w9gfz -- /bin/bash
bash-4.4# mysql -uroot -p
Enter password:
Welcome to the MySQL monitor.  Commands end with ; or \g.
Your MySQL connection id is 8
Server version: 8.3.0 MySQL Community Server - GPL

Copyright (c) 2000, 2024, Oracle and/or its affiliates.

Oracle is a registered trademark of Oracle Corporation and/or its
affiliates. Other names may be trademarks of their respective
owners.

Type 'help;' or '\h' for help. Type '\c' to clear the current input statement.

mysql>
Enter the password configured in the create secret step (YOUR_PASSWORD) to access the MySQL database, run few below command to create tables.
Type 'help;' or '\h' for help. Type '\c' to clear the current input statement.

mysql>
mysql> show schemas;
+--------------------+
| Database           |
+--------------------+
| information_schema |
| mysql              |
| performance_schema |
| sys                |
+--------------------+
4 rows in set (0.00 sec)

mysql> CREATE DATABASE cluster;
Query OK, 1 row affected (0.01 sec)
mysql> use cluster;
Database changed
mysql>
mysql> CREATE TABLE cluster_details(name VARCHAR(50) NOT NULL,type VARCHAR(30) NOT NULL,blueprint VARCHAR(60) NOT NULL,version INT NOT NULL,PRIMARY KEY(name));
Query OK, 0 rows affected (0.03 sec)

mysql> INSERT INTO cluster_details VALUE ("mysqlcluster1", "aks", "minimal", 1.29);
Query OK, 1 row affected (0.02 sec)

mysql> SELECT *FROM cluster_details;
+---------------+------+-----------+---------+
| name          | type | blueprint | version |
+---------------+------+-----------+---------+
| mysqlcluster1 | aks  | minimal   |       1 |
+---------------+------+-----------+---------+
1 row in set (0.00 sec)

mysql>
- You can try deleting the pod in the default namespace.
- A new cluster is created.
- You can login again to pod and reverify the data has persisted.
Step 8: Access MySQL database with namespace admin role
Refer the document to create the a user with namespace admin previledge create-user.
- Once you login with the namespace admin user, you will only see the project, cluster and namespace you have been provided access for
- Click on GO TO PROJECT
- Click on Resources
- Click on KUBECTL
- Trying running the below Commands
- You can only run the commands in a particular name space.
kubectl get pods -A
kubectl get namespace
kubectl get pods -n developer-namespace
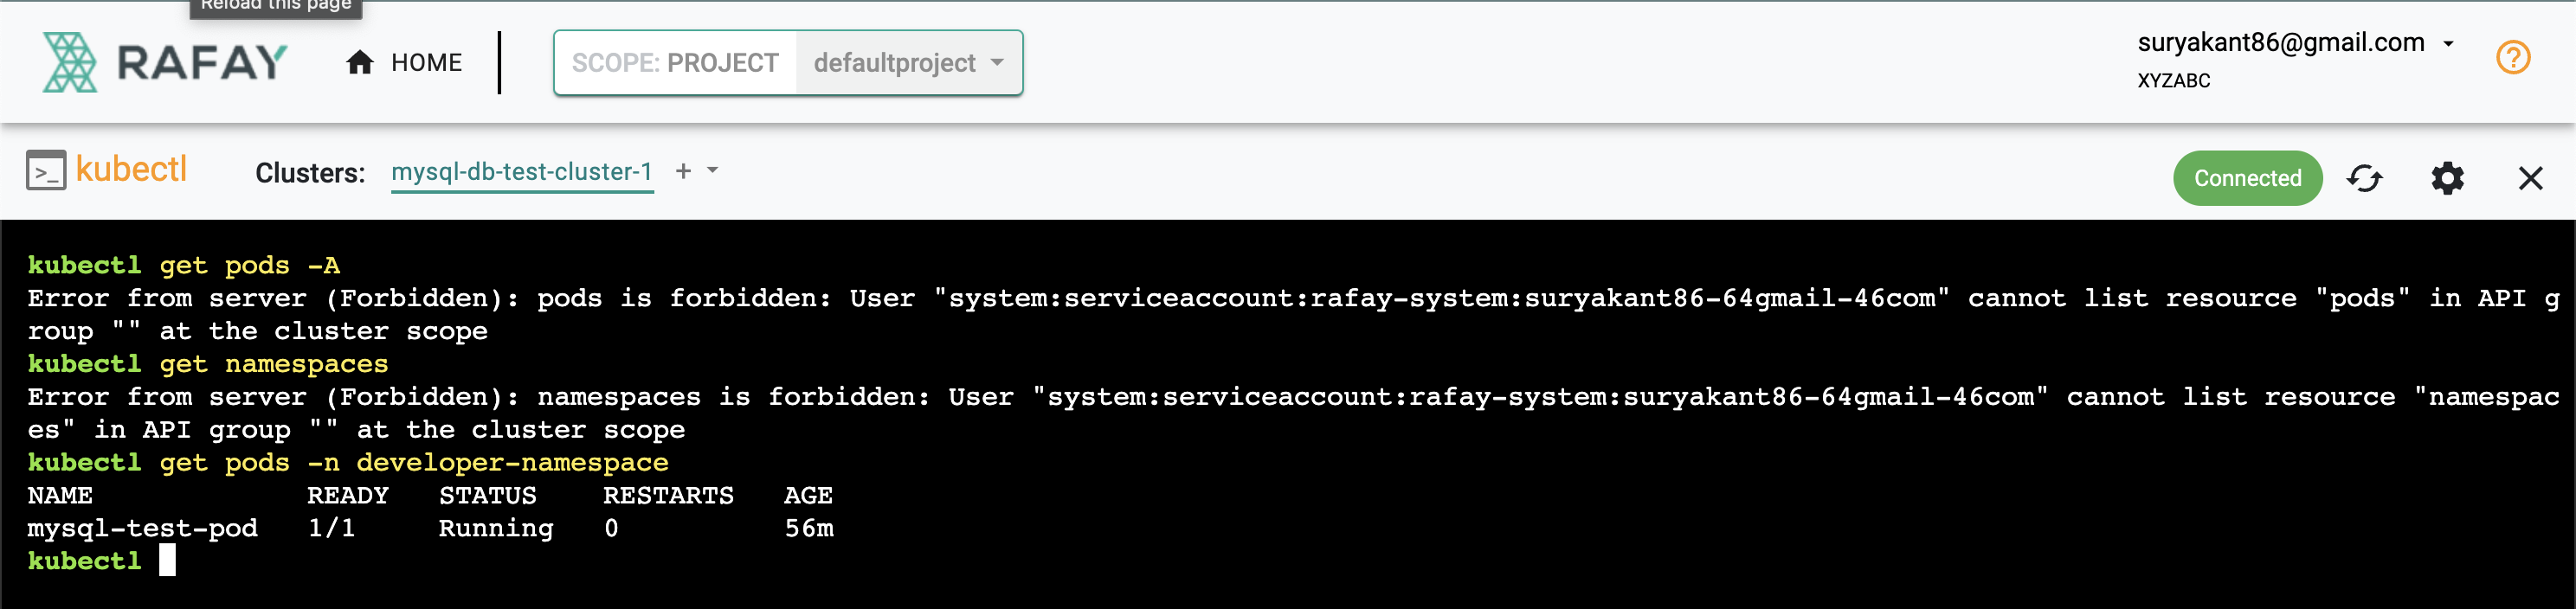
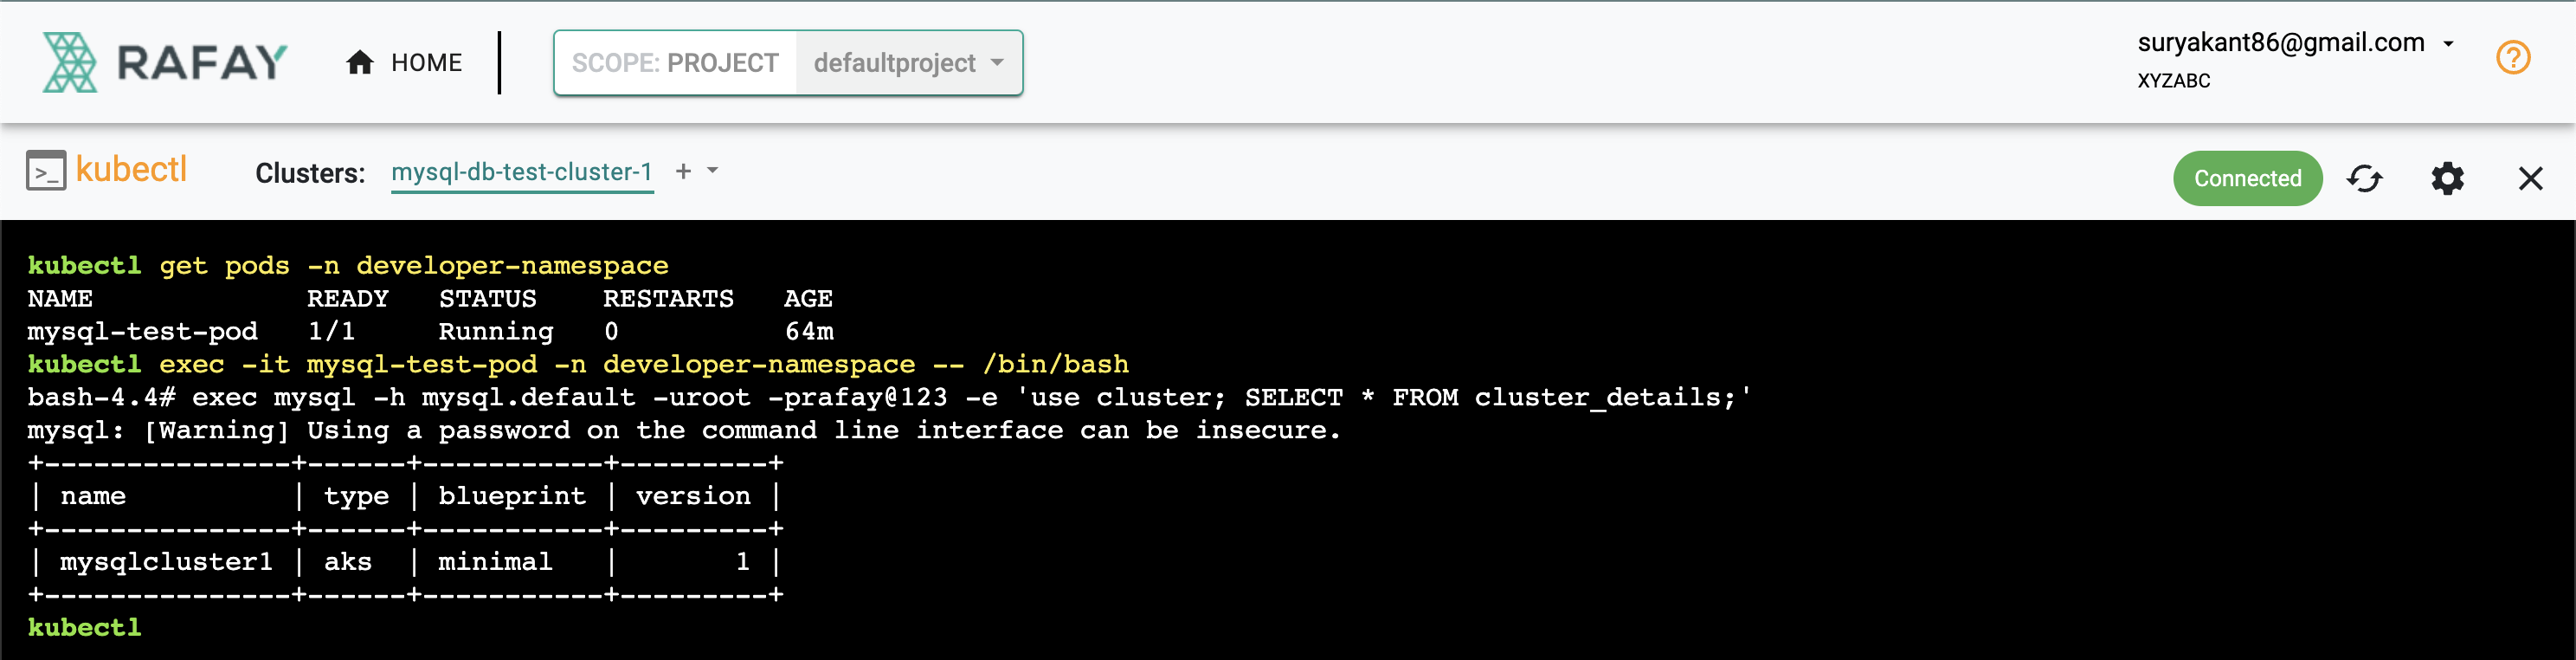
You can still access the database with the help of the pod deployed on the developer-namespace, The data created by the admin is now visible to the namespace admin user as well
kubectl get pods -n developer-namespace
NAME             READY   STATUS    RESTARTS   AGE
mysql-test-pod   1/1     Running   0          64m
kubectl exec -it mysql-test-pod -n developer-namespace -- /bin/bash
bash-4.4# exec mysql -h mysql.default -uroot -p<YOUR_PASSWORD> -e 'use cluster; SELECT * FROM cluster_details;'
mysql: [Warning] Using a password on the command line interface can be insecure.
+---------------+------+-----------+---------+
| name          | type | blueprint | version |
+---------------+------+-----------+---------+
| mysqlcluster1 | aks  | minimal   |       1 |
+---------------+------+-----------+---------+
kubectl
Note
The user can still create and modify data on the database, the user's priviledge of database needs to be managed by Database Admin.
Step 9 : Deprovision
You can deprovision/delete your EKS cluster from the web console
- Click on the gear icon on the far right of the cluster
- Select "Delete" and acknowledge
Note
The delete operation can take some time so that it can delete all the infrastructure associated with your EKS Cluster.