Integration with SAML
Follow the steps documented below to integrate your Org and KeyCloak Organizations for Single Sign On (SSO).
Important
Only users with "Organization Admin" privileges can configure SSO in the Web Console.
Step 1: Create IdP
- Log in to the Web Console as an Organization Admin.
- Click System and select Identity Providers.
- Click New Identity Provider.
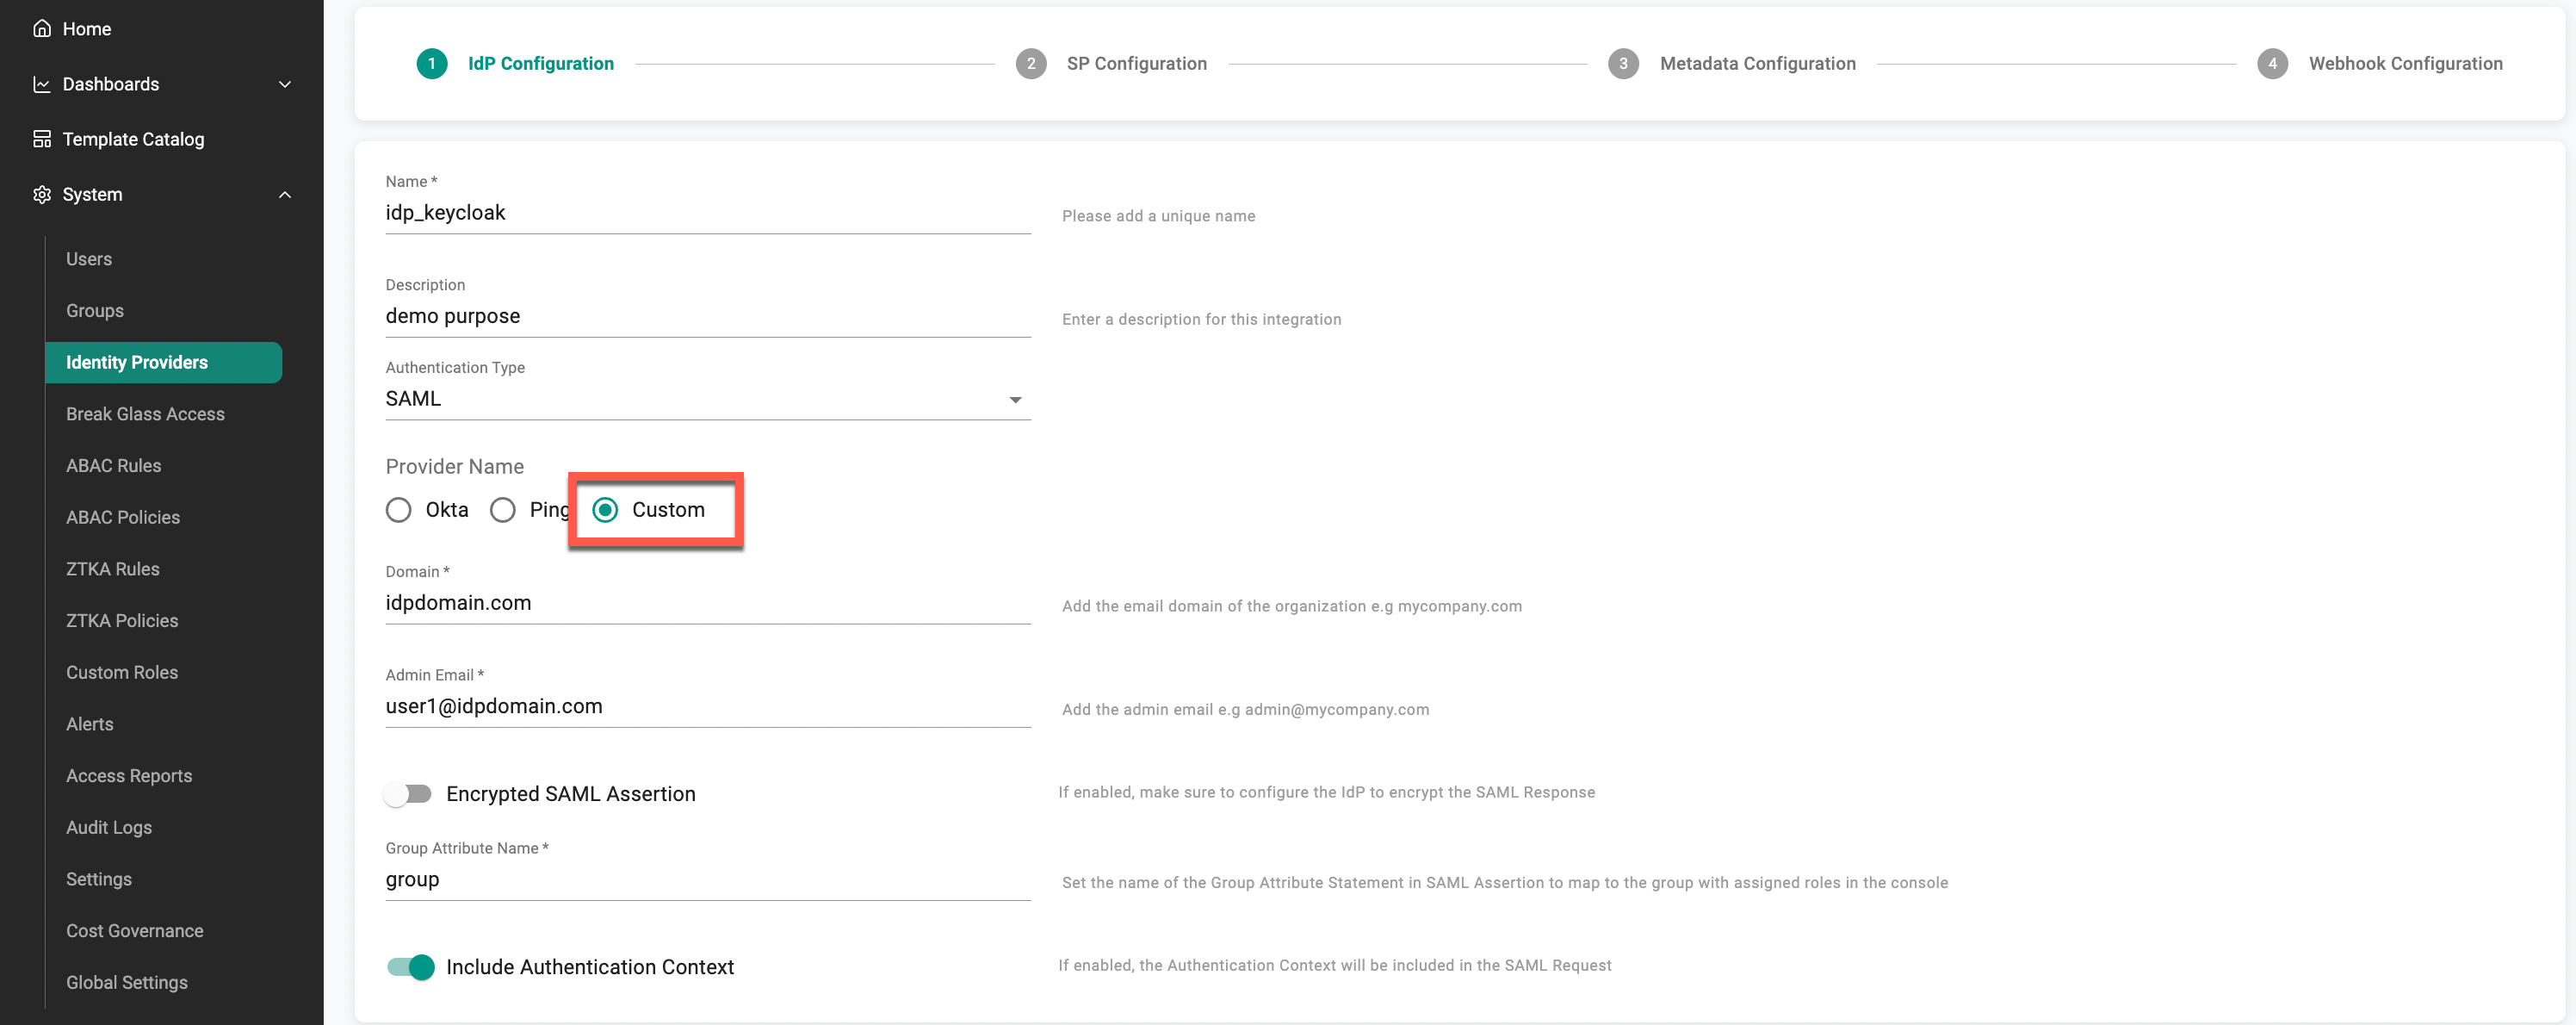
- Provide a unique Name and an optional Description for the IdP configuration.
- Select SAML as the Authentication Type.
- Under Provider Name, select Custom (required for Keycloak integration).
- Enter the Domain for which SSO needs to be enabled.
- Provide the Admin Email associated with the domain.
Important
The Domain and Admin Email must belong to the same domain. Within an organization, the same domain cannot be used for multiple IdPs. However, the same domain can be used across different organizations (for one IdP per organization).
- (Optional) Enable Encrypted SAML Assertion to send and receive encrypted SAML responses.
- Provide a name for the Group Attribute Name to map group roles.
- (Optional) Enable Include Authentication Context if authentication context information should be included in the SAML request.
- Click Update & Continue to proceed to the next configuration step.
Important
Encrypting SAML assertions is optional because privacy is already provided at the transport layer using HTTPS. Encrypted assertions provide an additional layer of security on top ensuring that only the SP (Org) can decrypt the SAML assertion.
Step 2: View SP Details
The IdP configuration wizard will display critical information that you need to copy/paste into your KeyCloak Org. Provide the following information to your KeyCloak administrator.
- Assertion Consumer Service (ACS) URL
- SP Entity ID
- Name ID Format
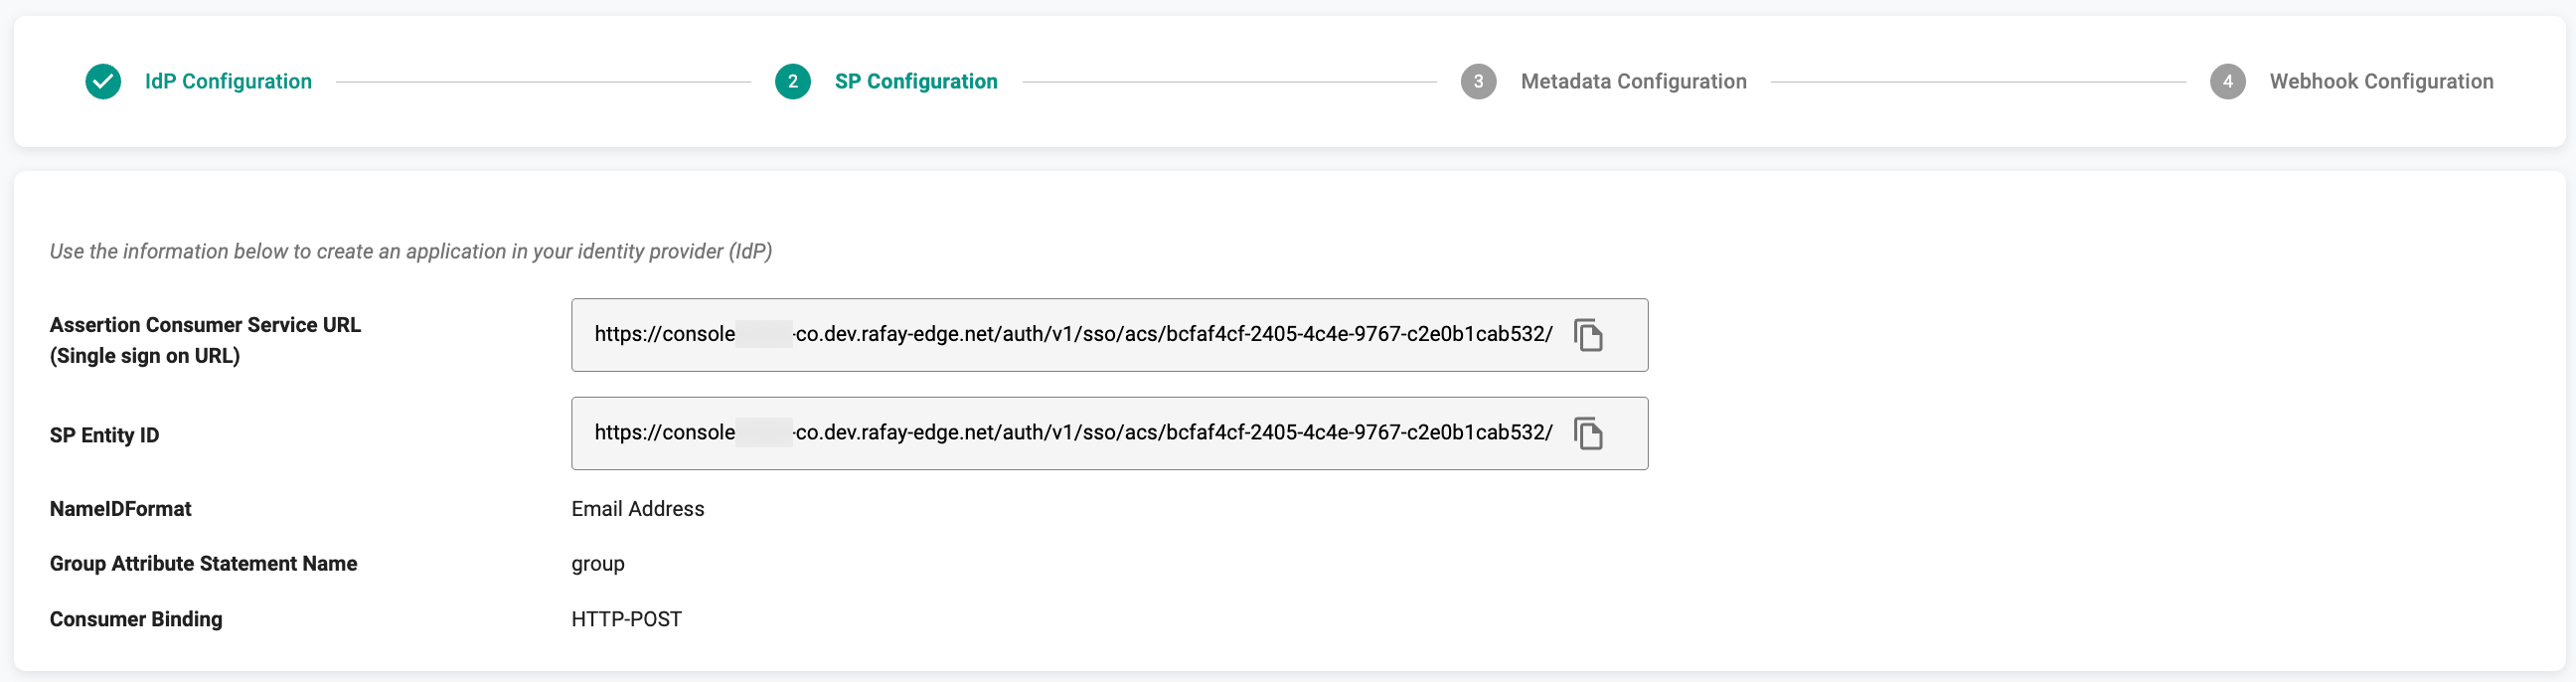
Click Update & Continue
Step 3: Create Client in Keycloak
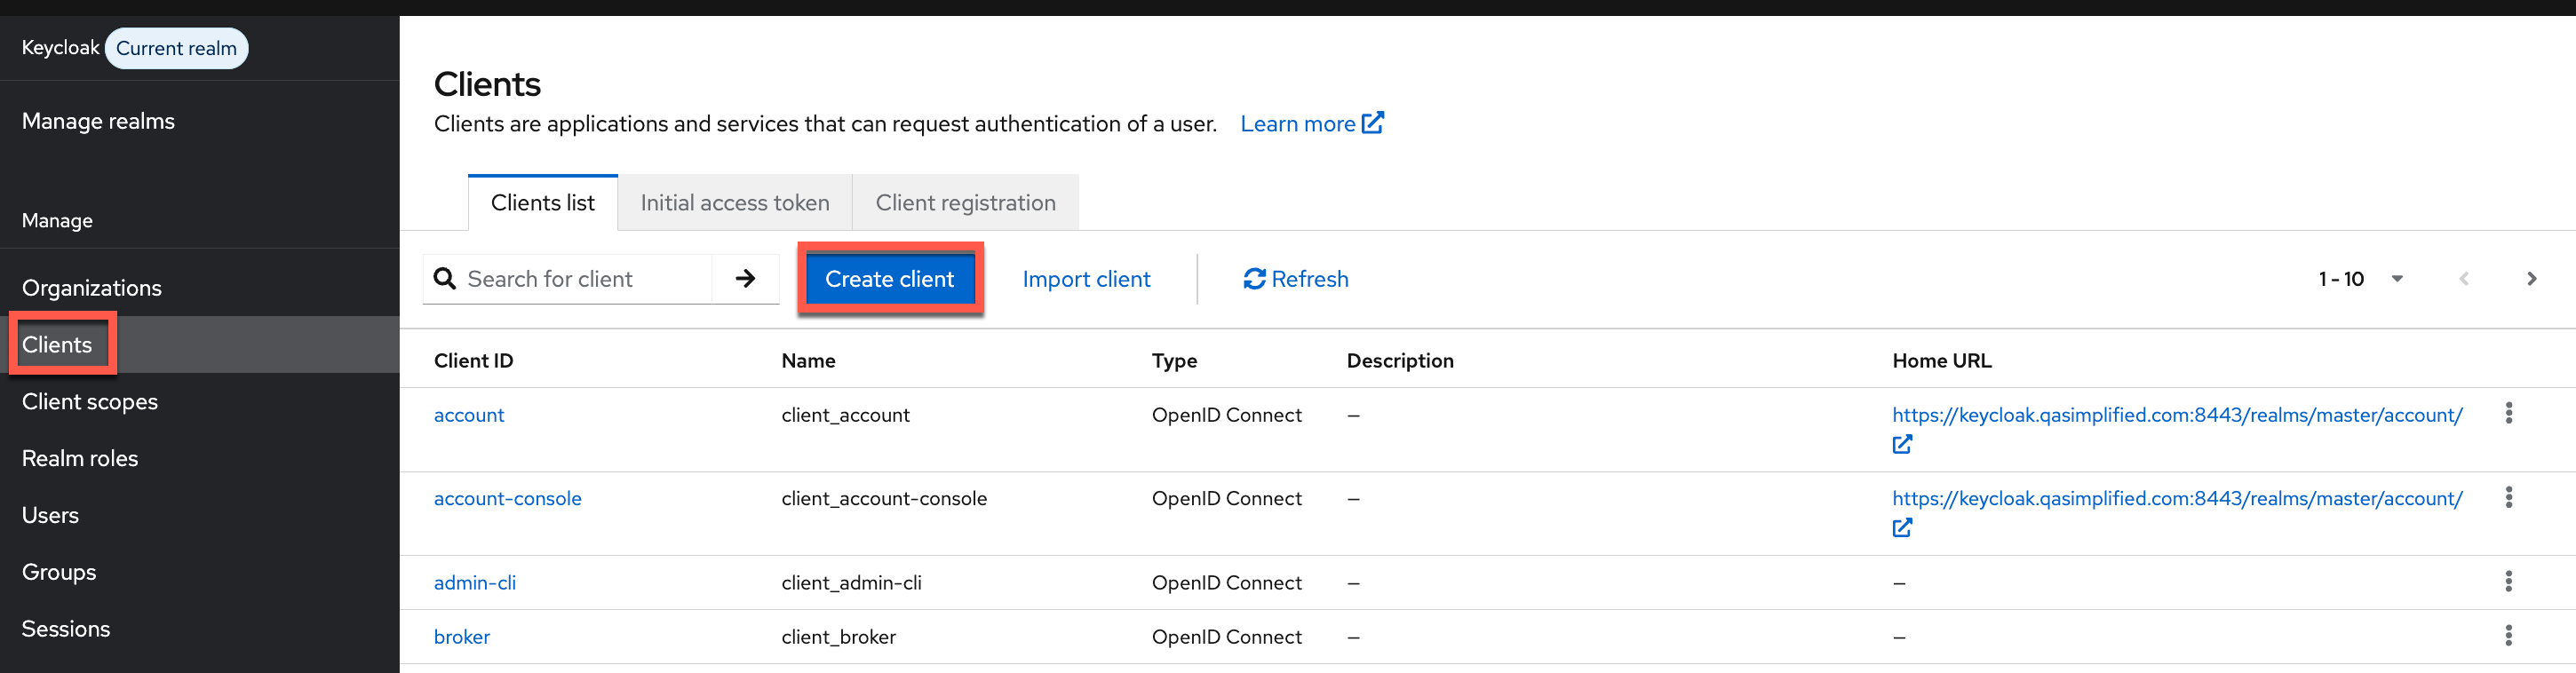
- Log in to the Keycloak console as an Administrator.
- Navigate to Clients and click Create client.
-
Under General Settings, configure the following fields:
-
Client Type: Select
SAML. - Client ID: Paste the Assertion Consumer Service (ACS) URL retrieved from the Controller (as described in Step 2).
- Name: Provide a suitable name for the client.
- Description: Optionally, add a short description.
- Toggle ON/OFF the Always display in UI
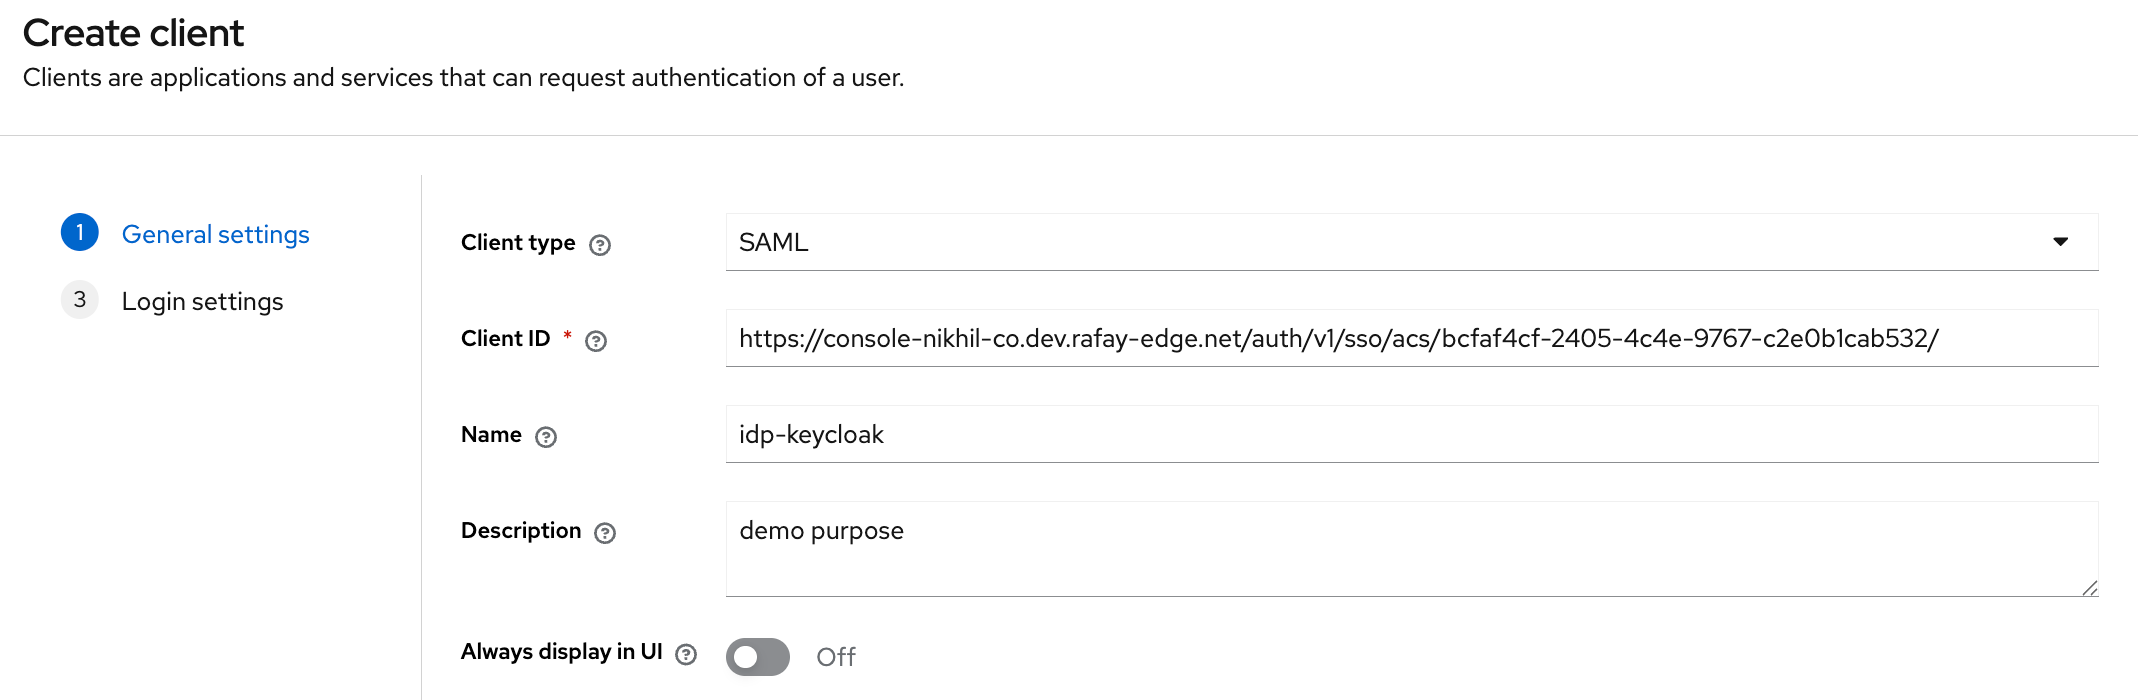
- Click Next to proceed to Login Settings and configure additional parameters as required.
Step 4: Settings
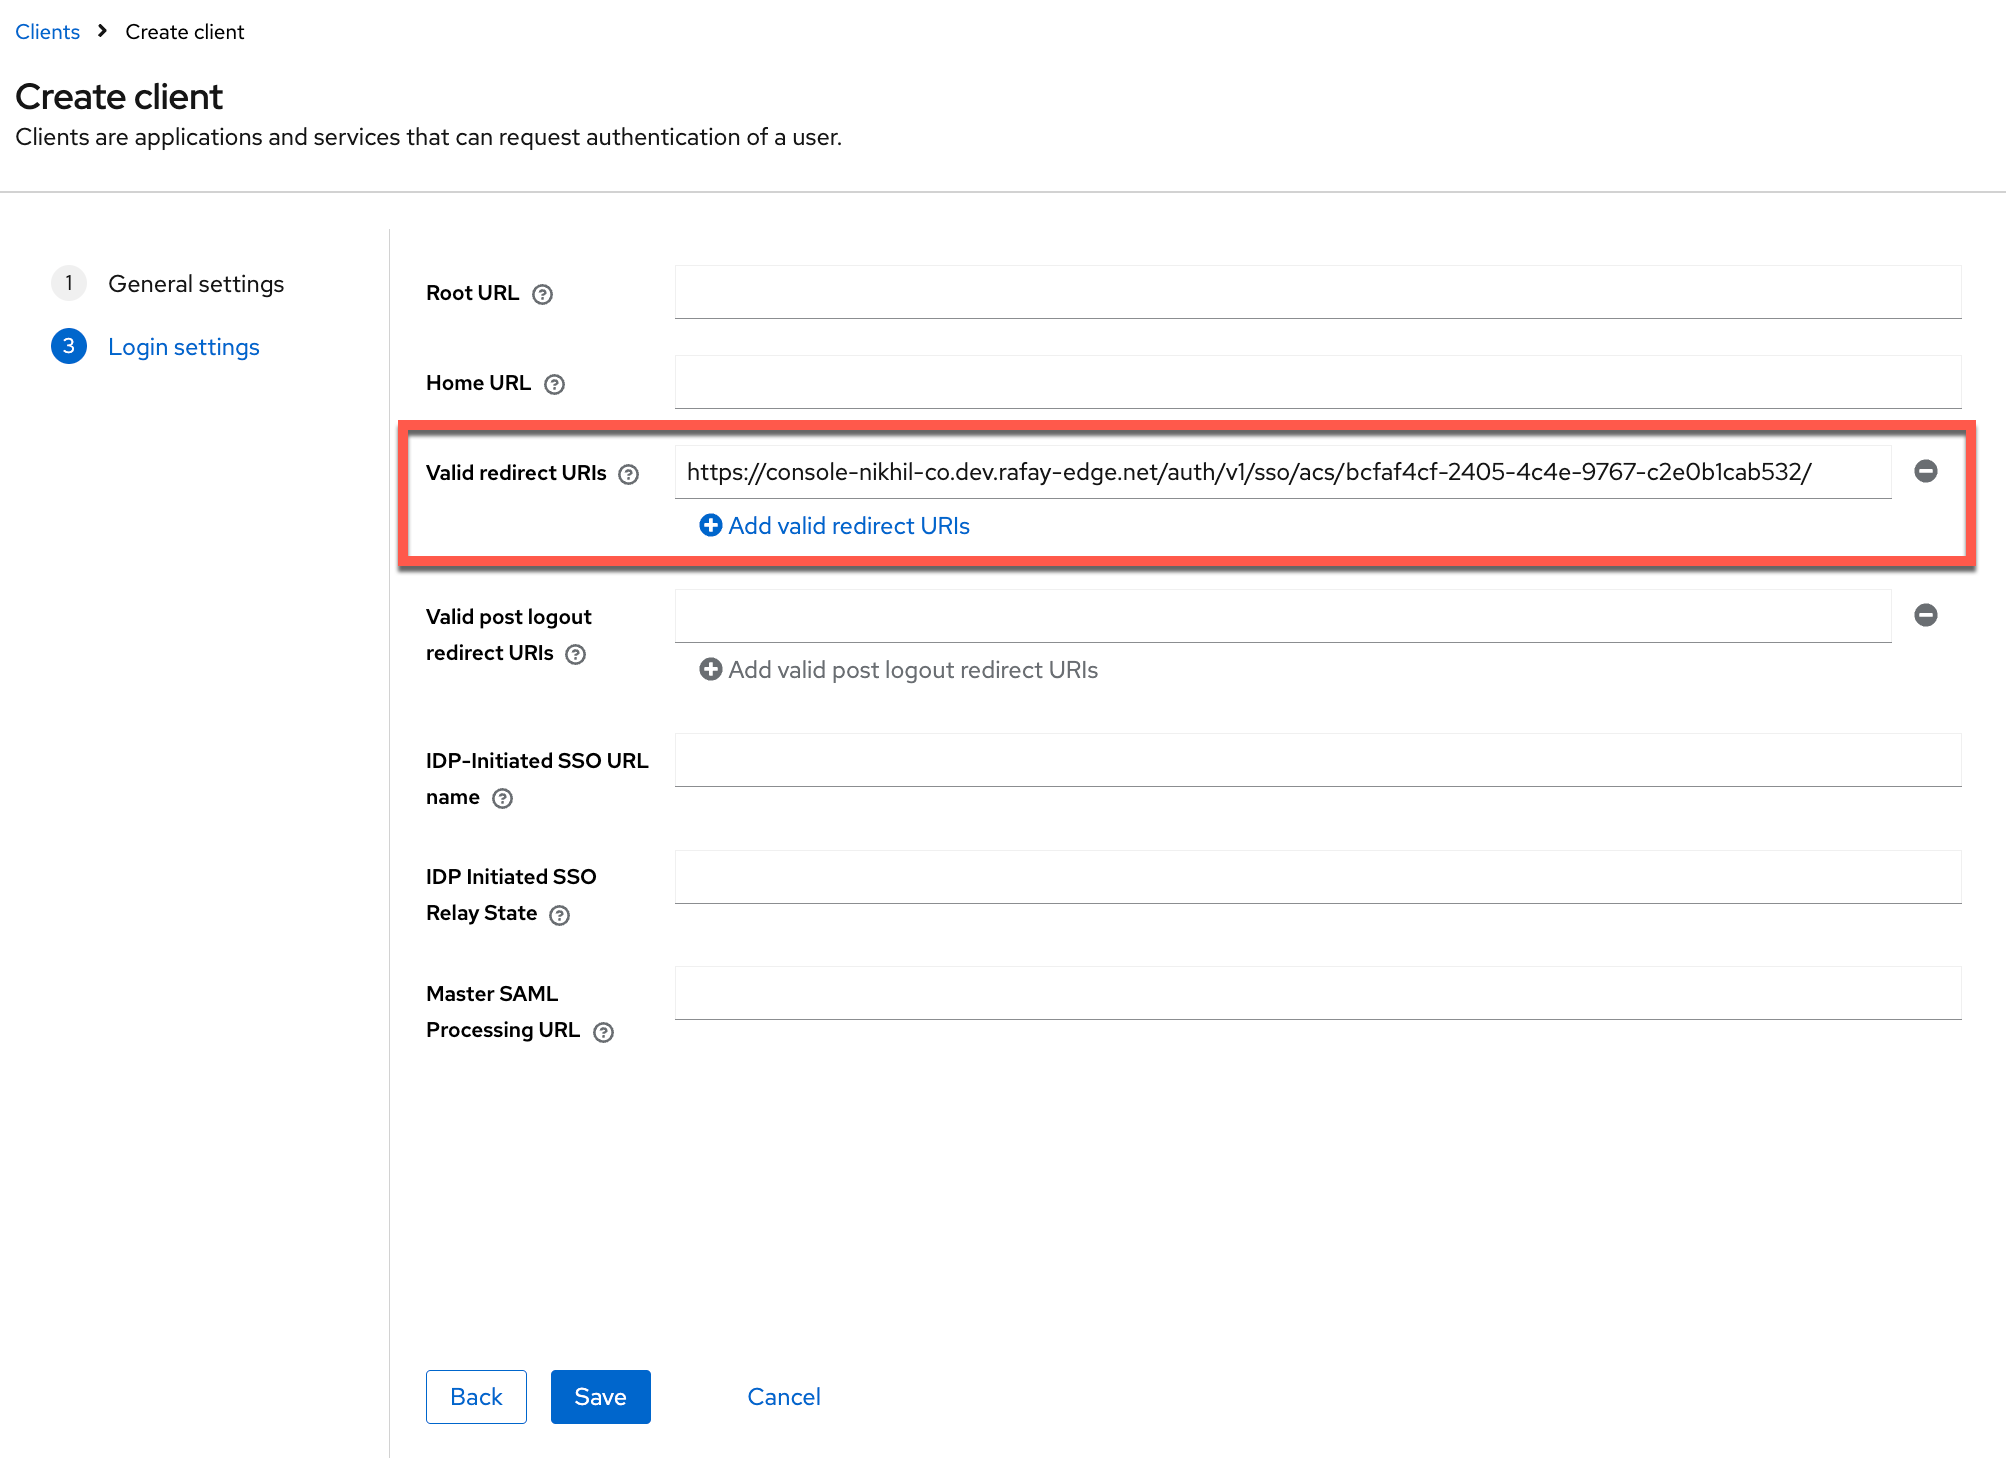
- In the Login Settings section, provide the required and optional details for the client.
- In the Valid Redirect URIs field, paste the same Assertion Consumer Service (ACS) URL retrieved from the Controller in Step 2.
- Other fields such as Root URL, Home URL, Valid post logout redirect URIs, IDP-Initiated SSO URL name, IDP Initiated SSO Relay State, and Master SAML Processing URL are optional.
- Click Save
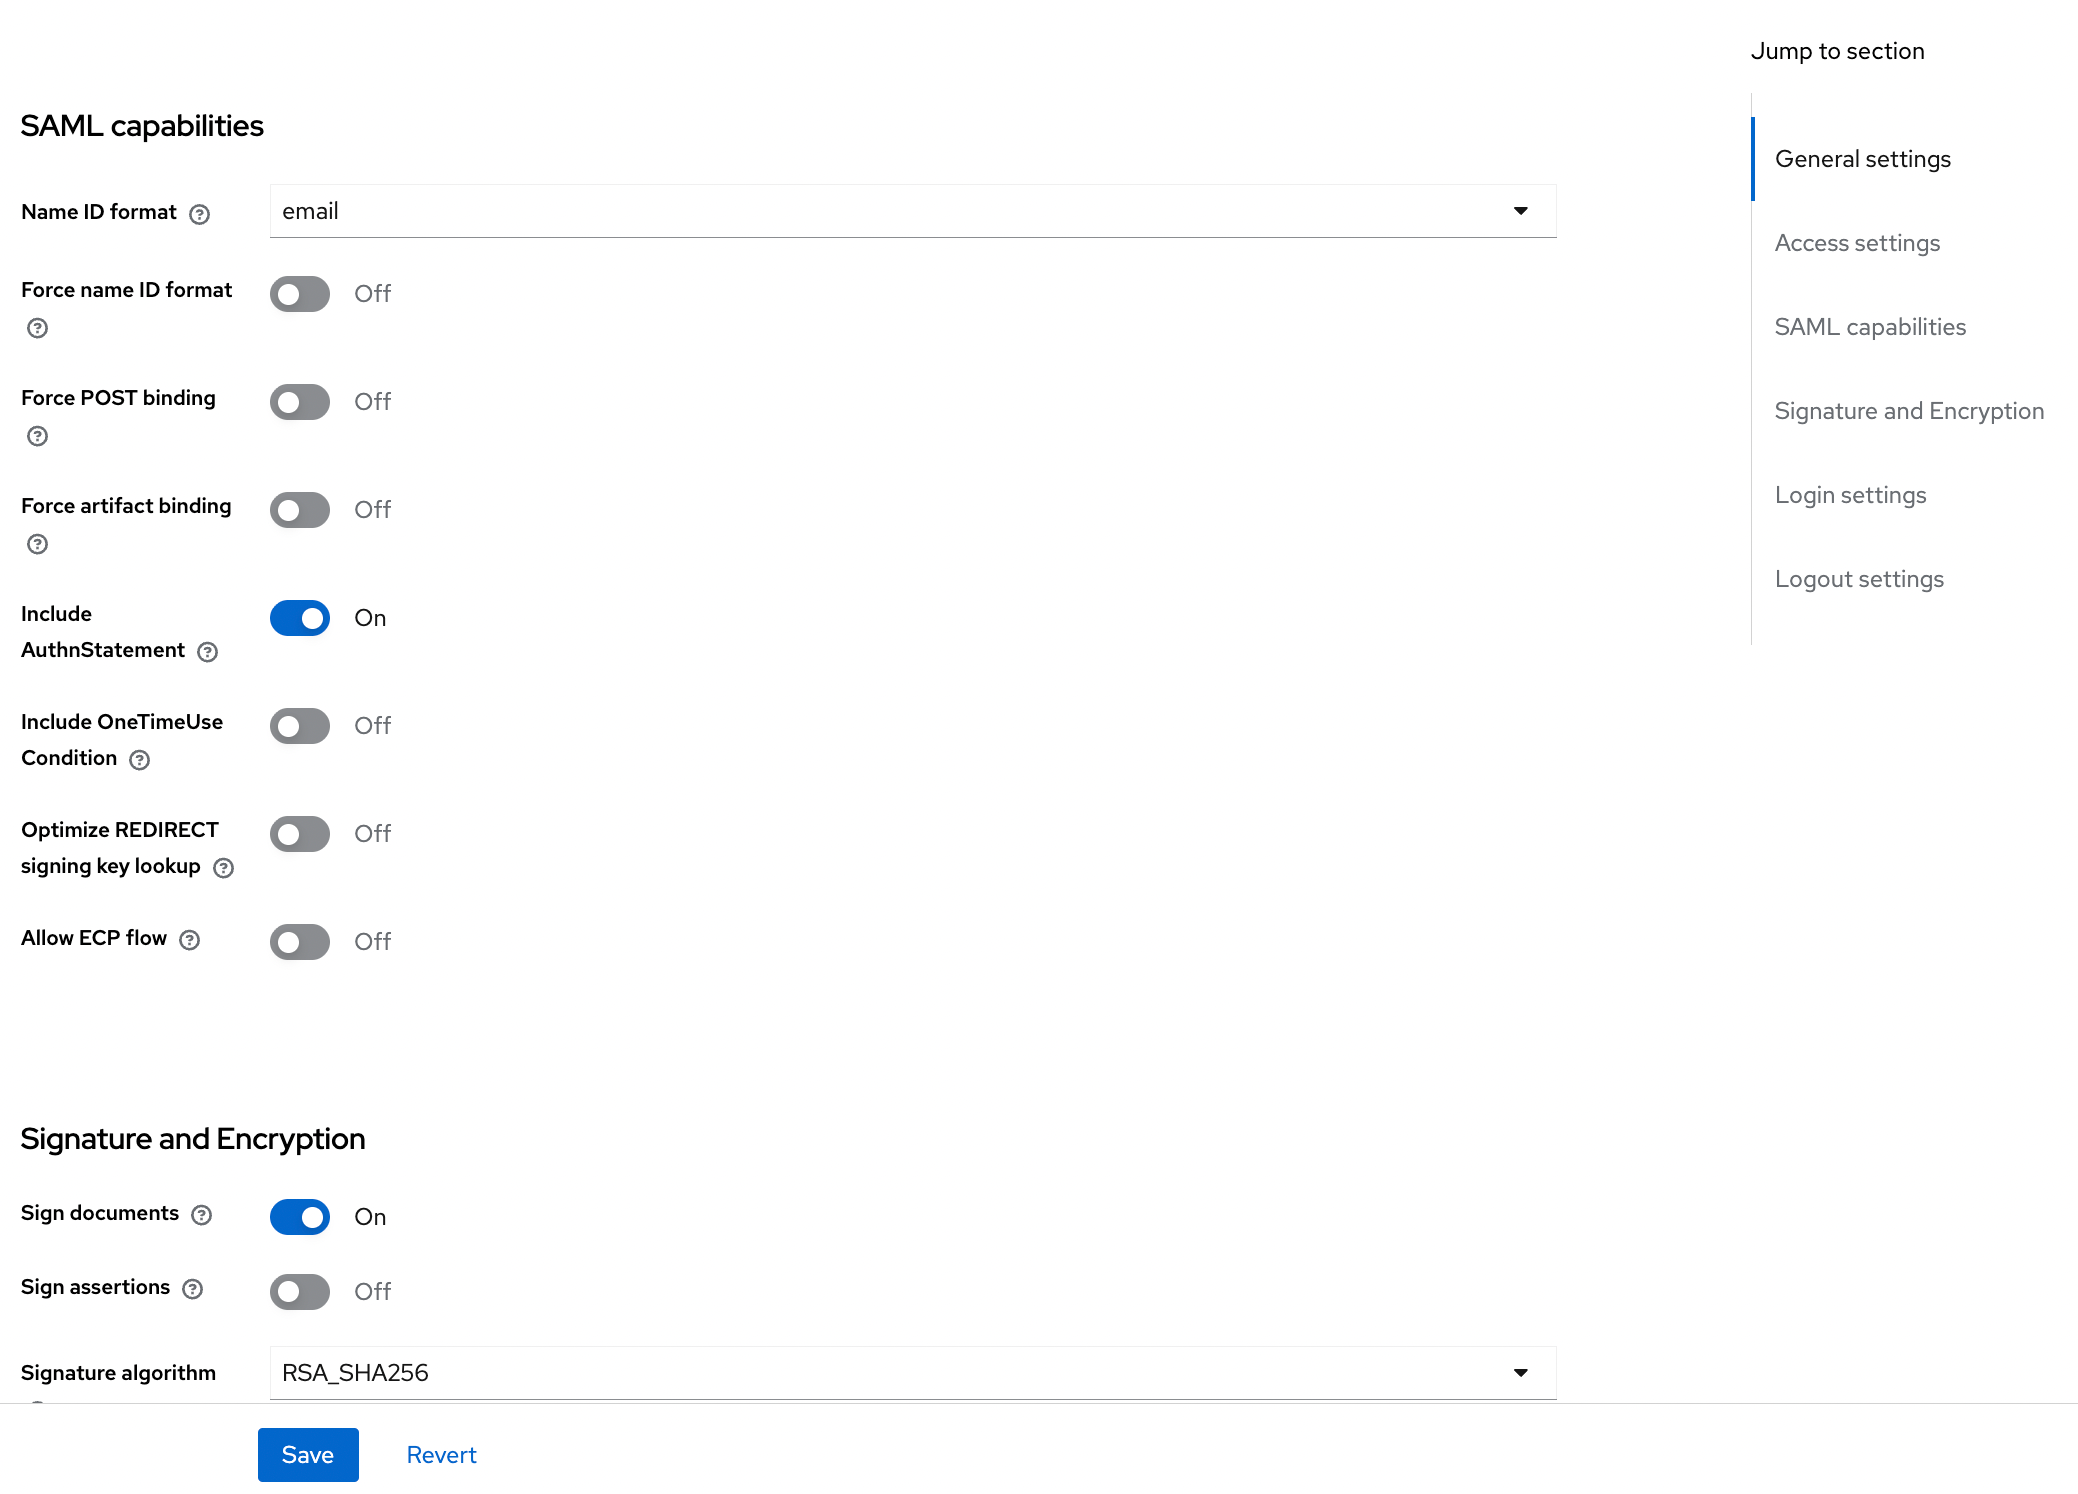
Once saved, all other setting options are displayed.
⚠️ Important: Ensure that the ACS URL begins with
http://orhttps://to make it a valid URL. Otherwise, the configuration cannot proceed.
- Select
Emailfrom the Name ID Format drop-down. - Disable the below options:
- Force POST Binding
- Front Channel Logout
- Copy/Paste the same URL (Assertion Consumer Service (ACS) URL) in Valid Redirect URIs as described in Step 2.
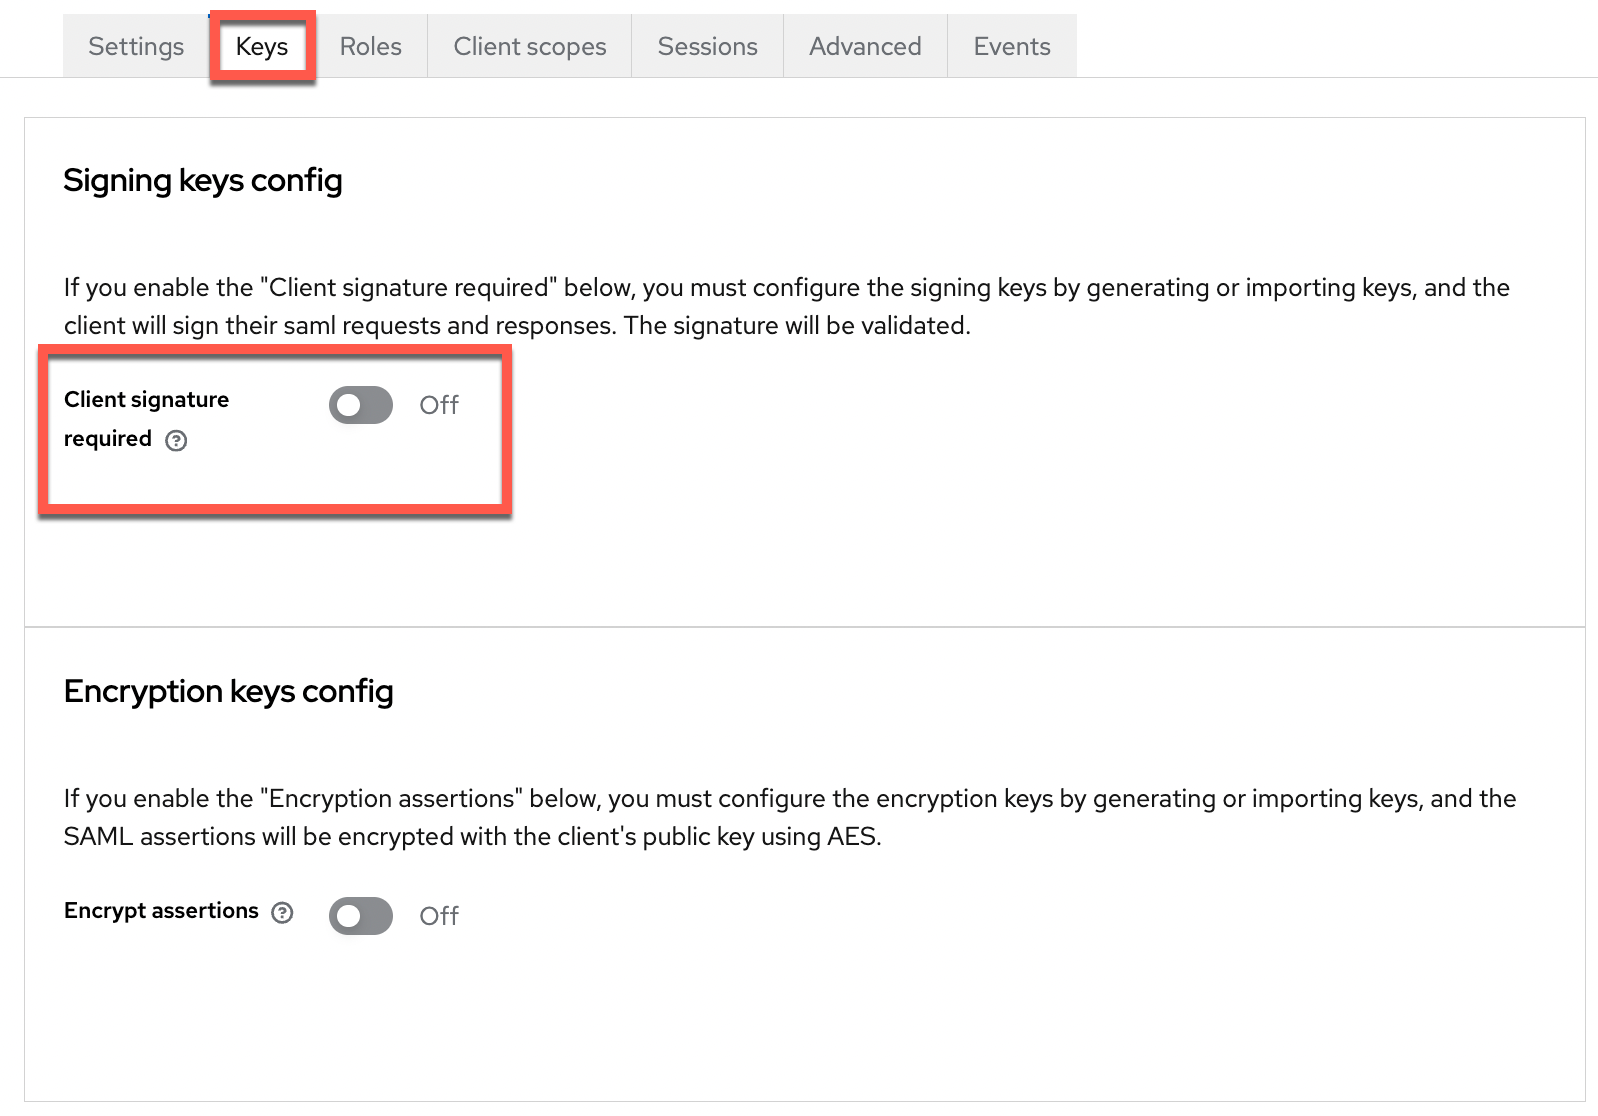
Step 5: Configure Signing Keys
- Go to the Keys tab for the created client.
- In the Signing keys config section, disable the Client signature required option.
⚠️ Note: Disabling this option ensures that the client does not require signing for SAML requests or responses, which simplifies the authentication flow when signing keys are not configured.
Step 6: Configure Client Scope
- Navigate to the Client scopes tab.
- In the Setup section, locate the role_list scope.
- From the Assigned type drop-down, select Optional.
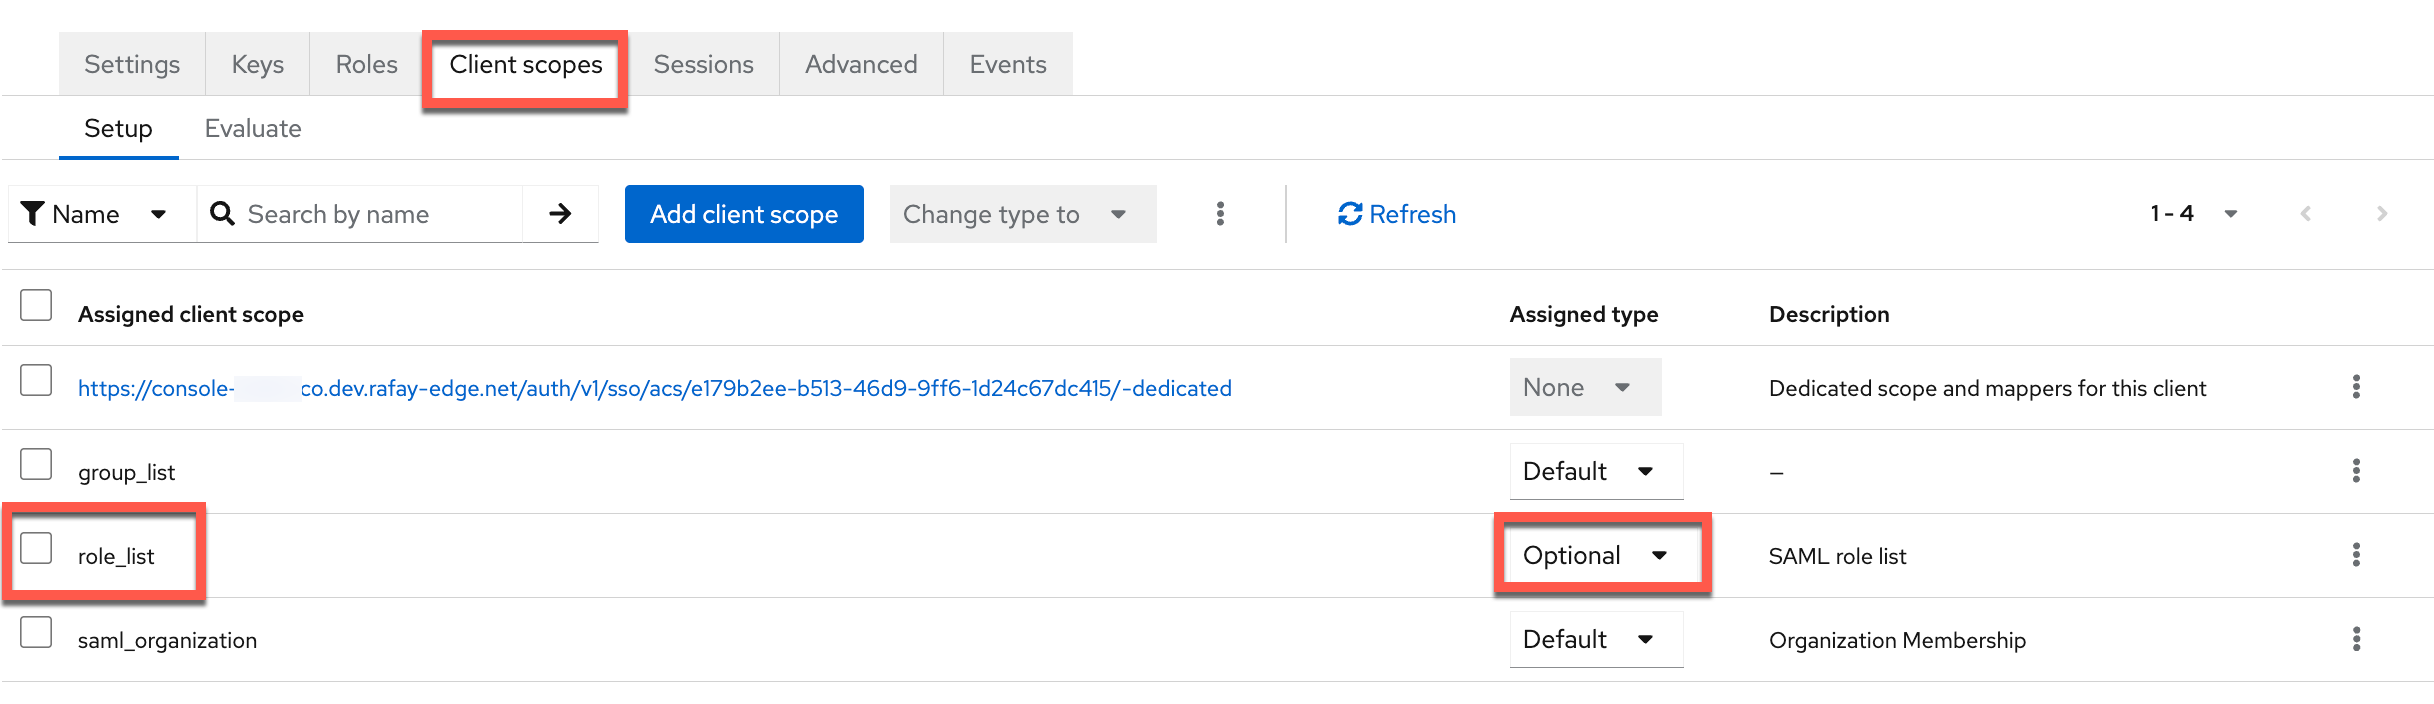
ℹ️ Note: When a SAML response is sent, it includes the roles and group list. The role_list scope is marked as Optional because even if this role is not received, it does not affect authentication or access.
The group list displayed on the screen corresponds to the group membership client scope, which must be created as described in Step 7, where a client scope named group-scopes is configured.
Step 7: Create Client Scope
- Navigate to Client Scopes and click Create Client Scope.
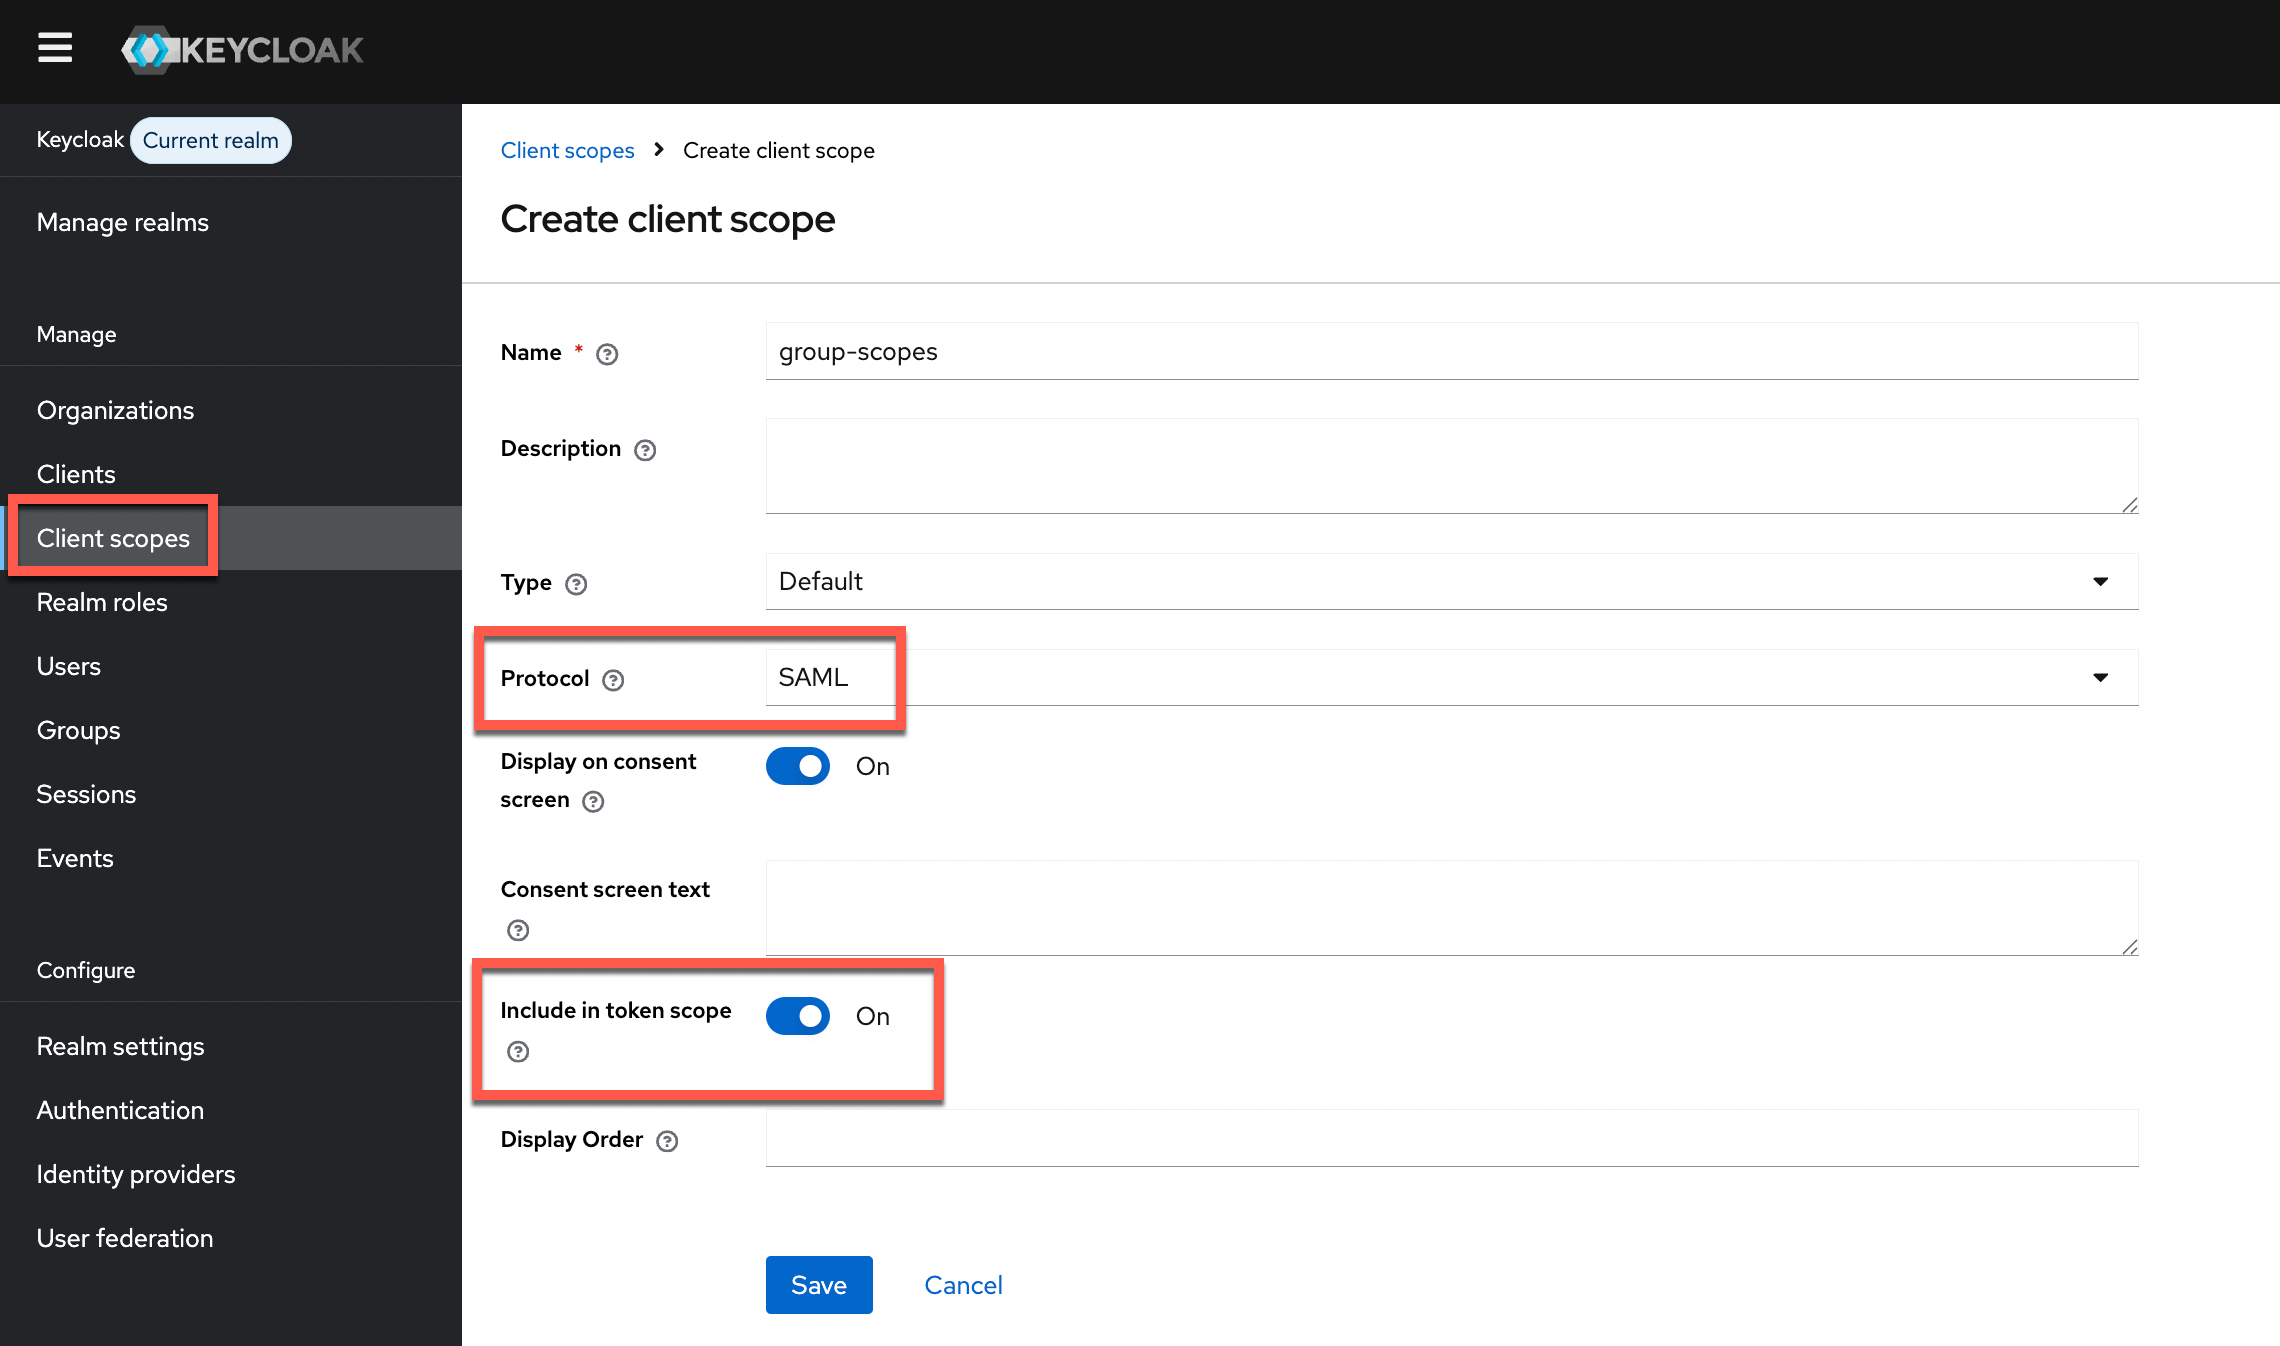
- Provide a Name and select Default from Type drop-down
- Select SAML from Protocol drop-down and enable Include in token scope
- Click Save
To create a New Mapper,
- Select the created client scope and click on the Mappers tab
- Click Add Mapper and select Group list
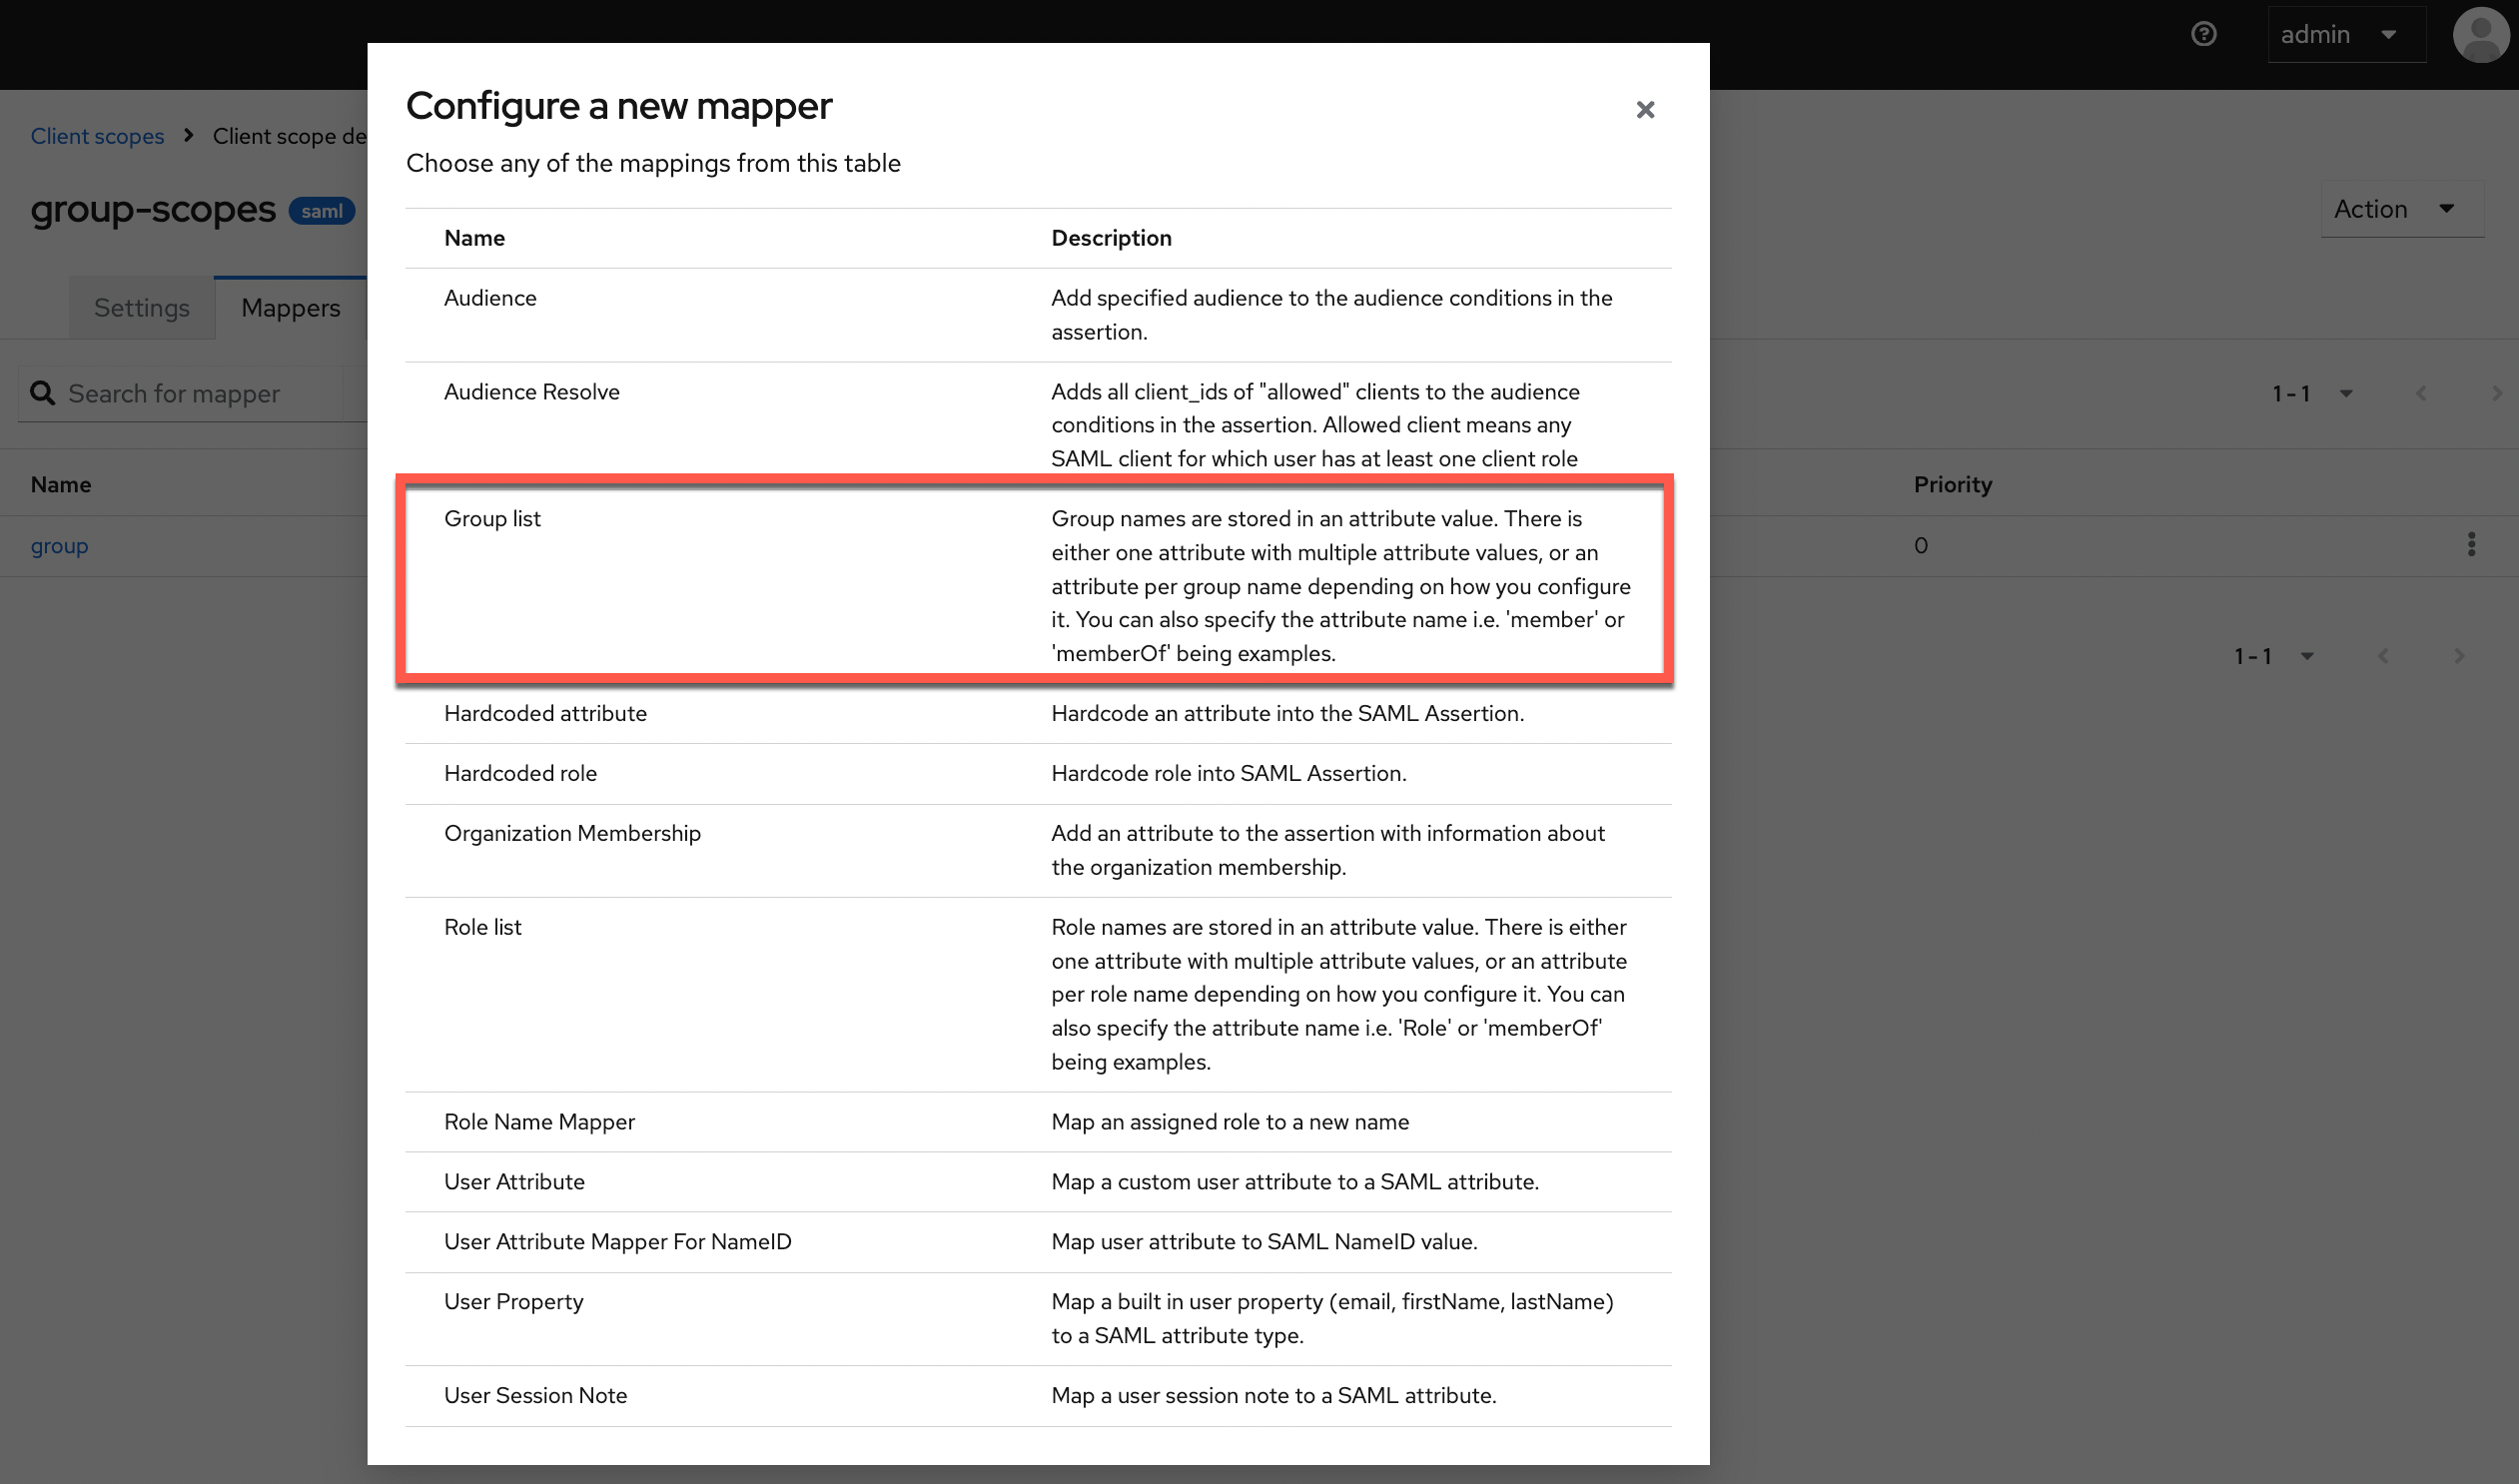
- Copy/Paste the Group Attribute Name from the Controller SP Configuration page
- Disable the below options and click Save
- Single Group Attribute
- Full group path
- Click Save
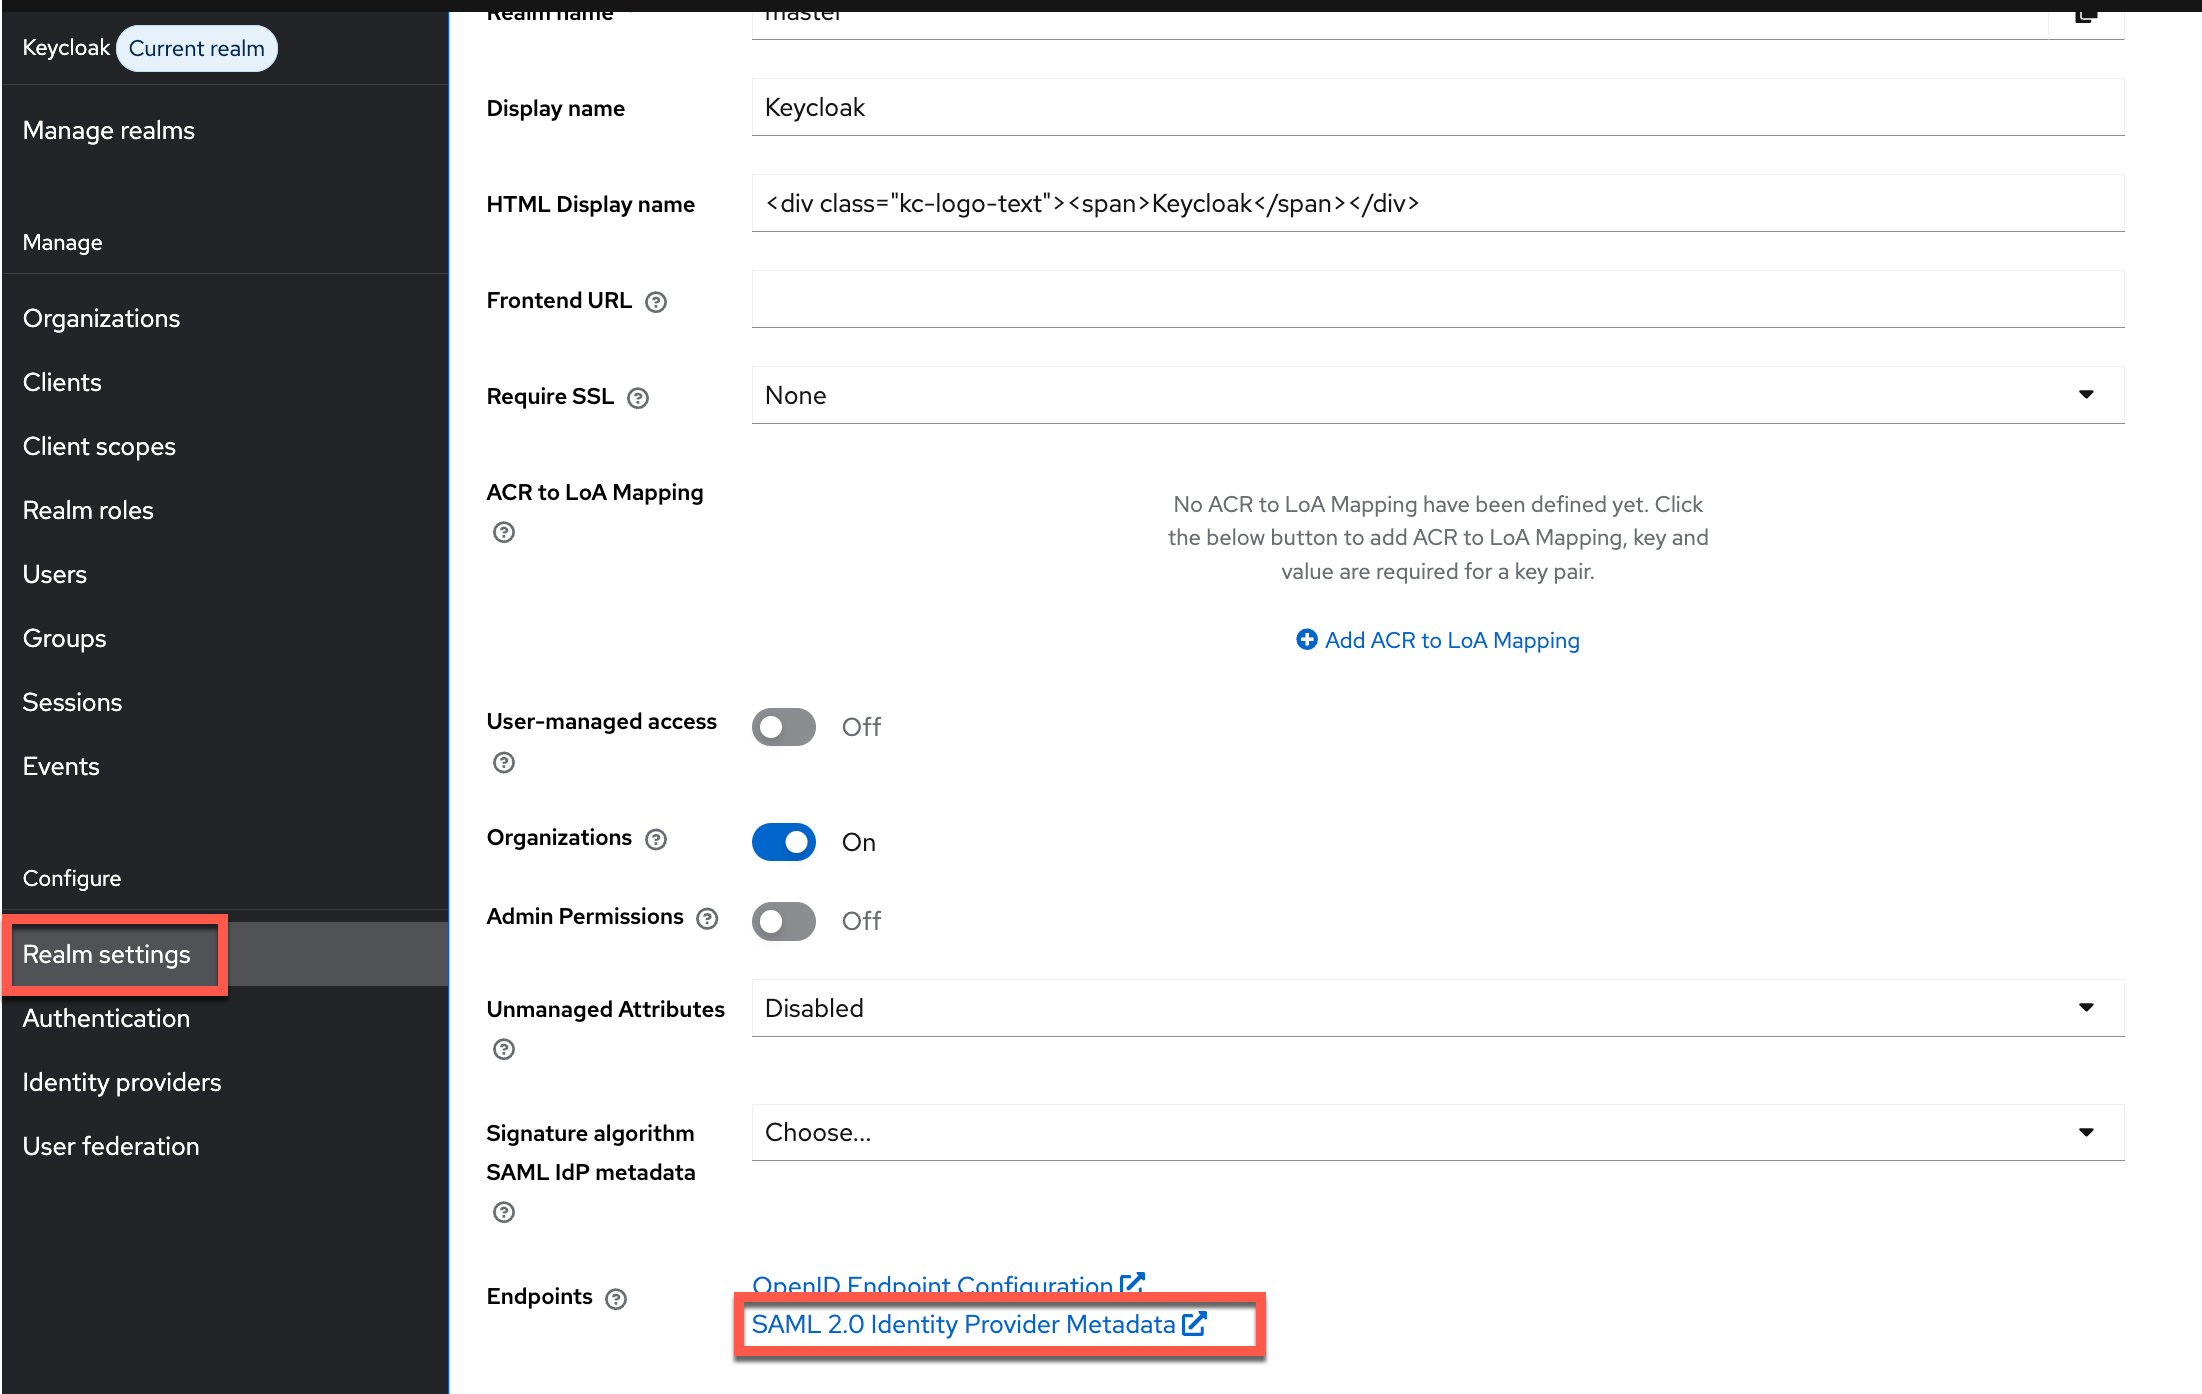
Step 8: Configure SAML Metadata
- In the Keycloak console, navigate to Realm settings → scroll down to the Endpoints section → click SAML 2.0 Identity Provider Metadata. Copy the displayed URL.
- In the controller, under Metadata Configuration, select IdP Metadata Link and paste the copied URL in the Metadata Link field.
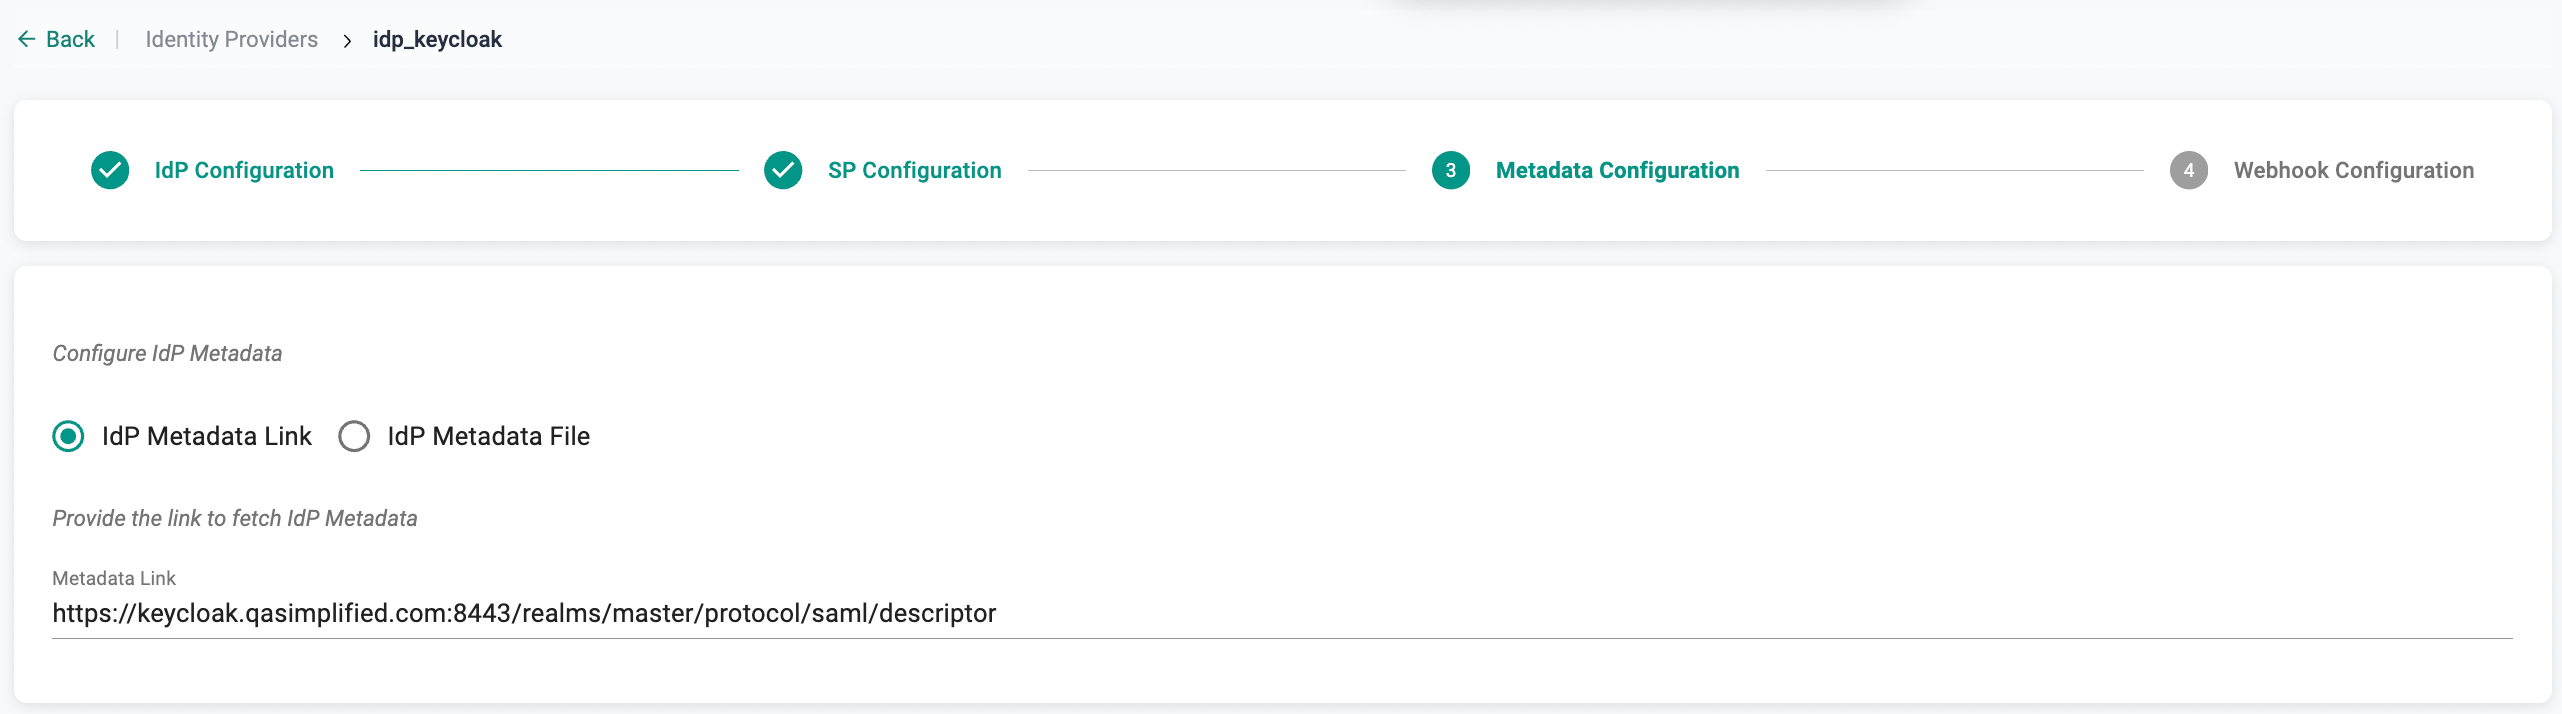
- Click Update & Continue
Step 9: Configure Webhook (Optional)
Webhook configuration allows sending user login or SSO event details to an external system. This step is optional and can be configured if webhook-based notifications are required.
- Enter the Webhook URL that will receive payload data when triggered.
- Provide the Webhook Secret used to sign the payload sent to the webhook endpoint.
- Select a Trigger Type from the dropdown (default is None).
- (Optional) Select additional parameters to include in the webhook payload, such as First Name, Last Name, or Trigger Type.
- (Optional) Under Custom, click + Add Key-Value to define additional fields to be sent with the webhook payload.
- Review the Example Payload section to view the structure of the data that will be sent for the selected configuration.
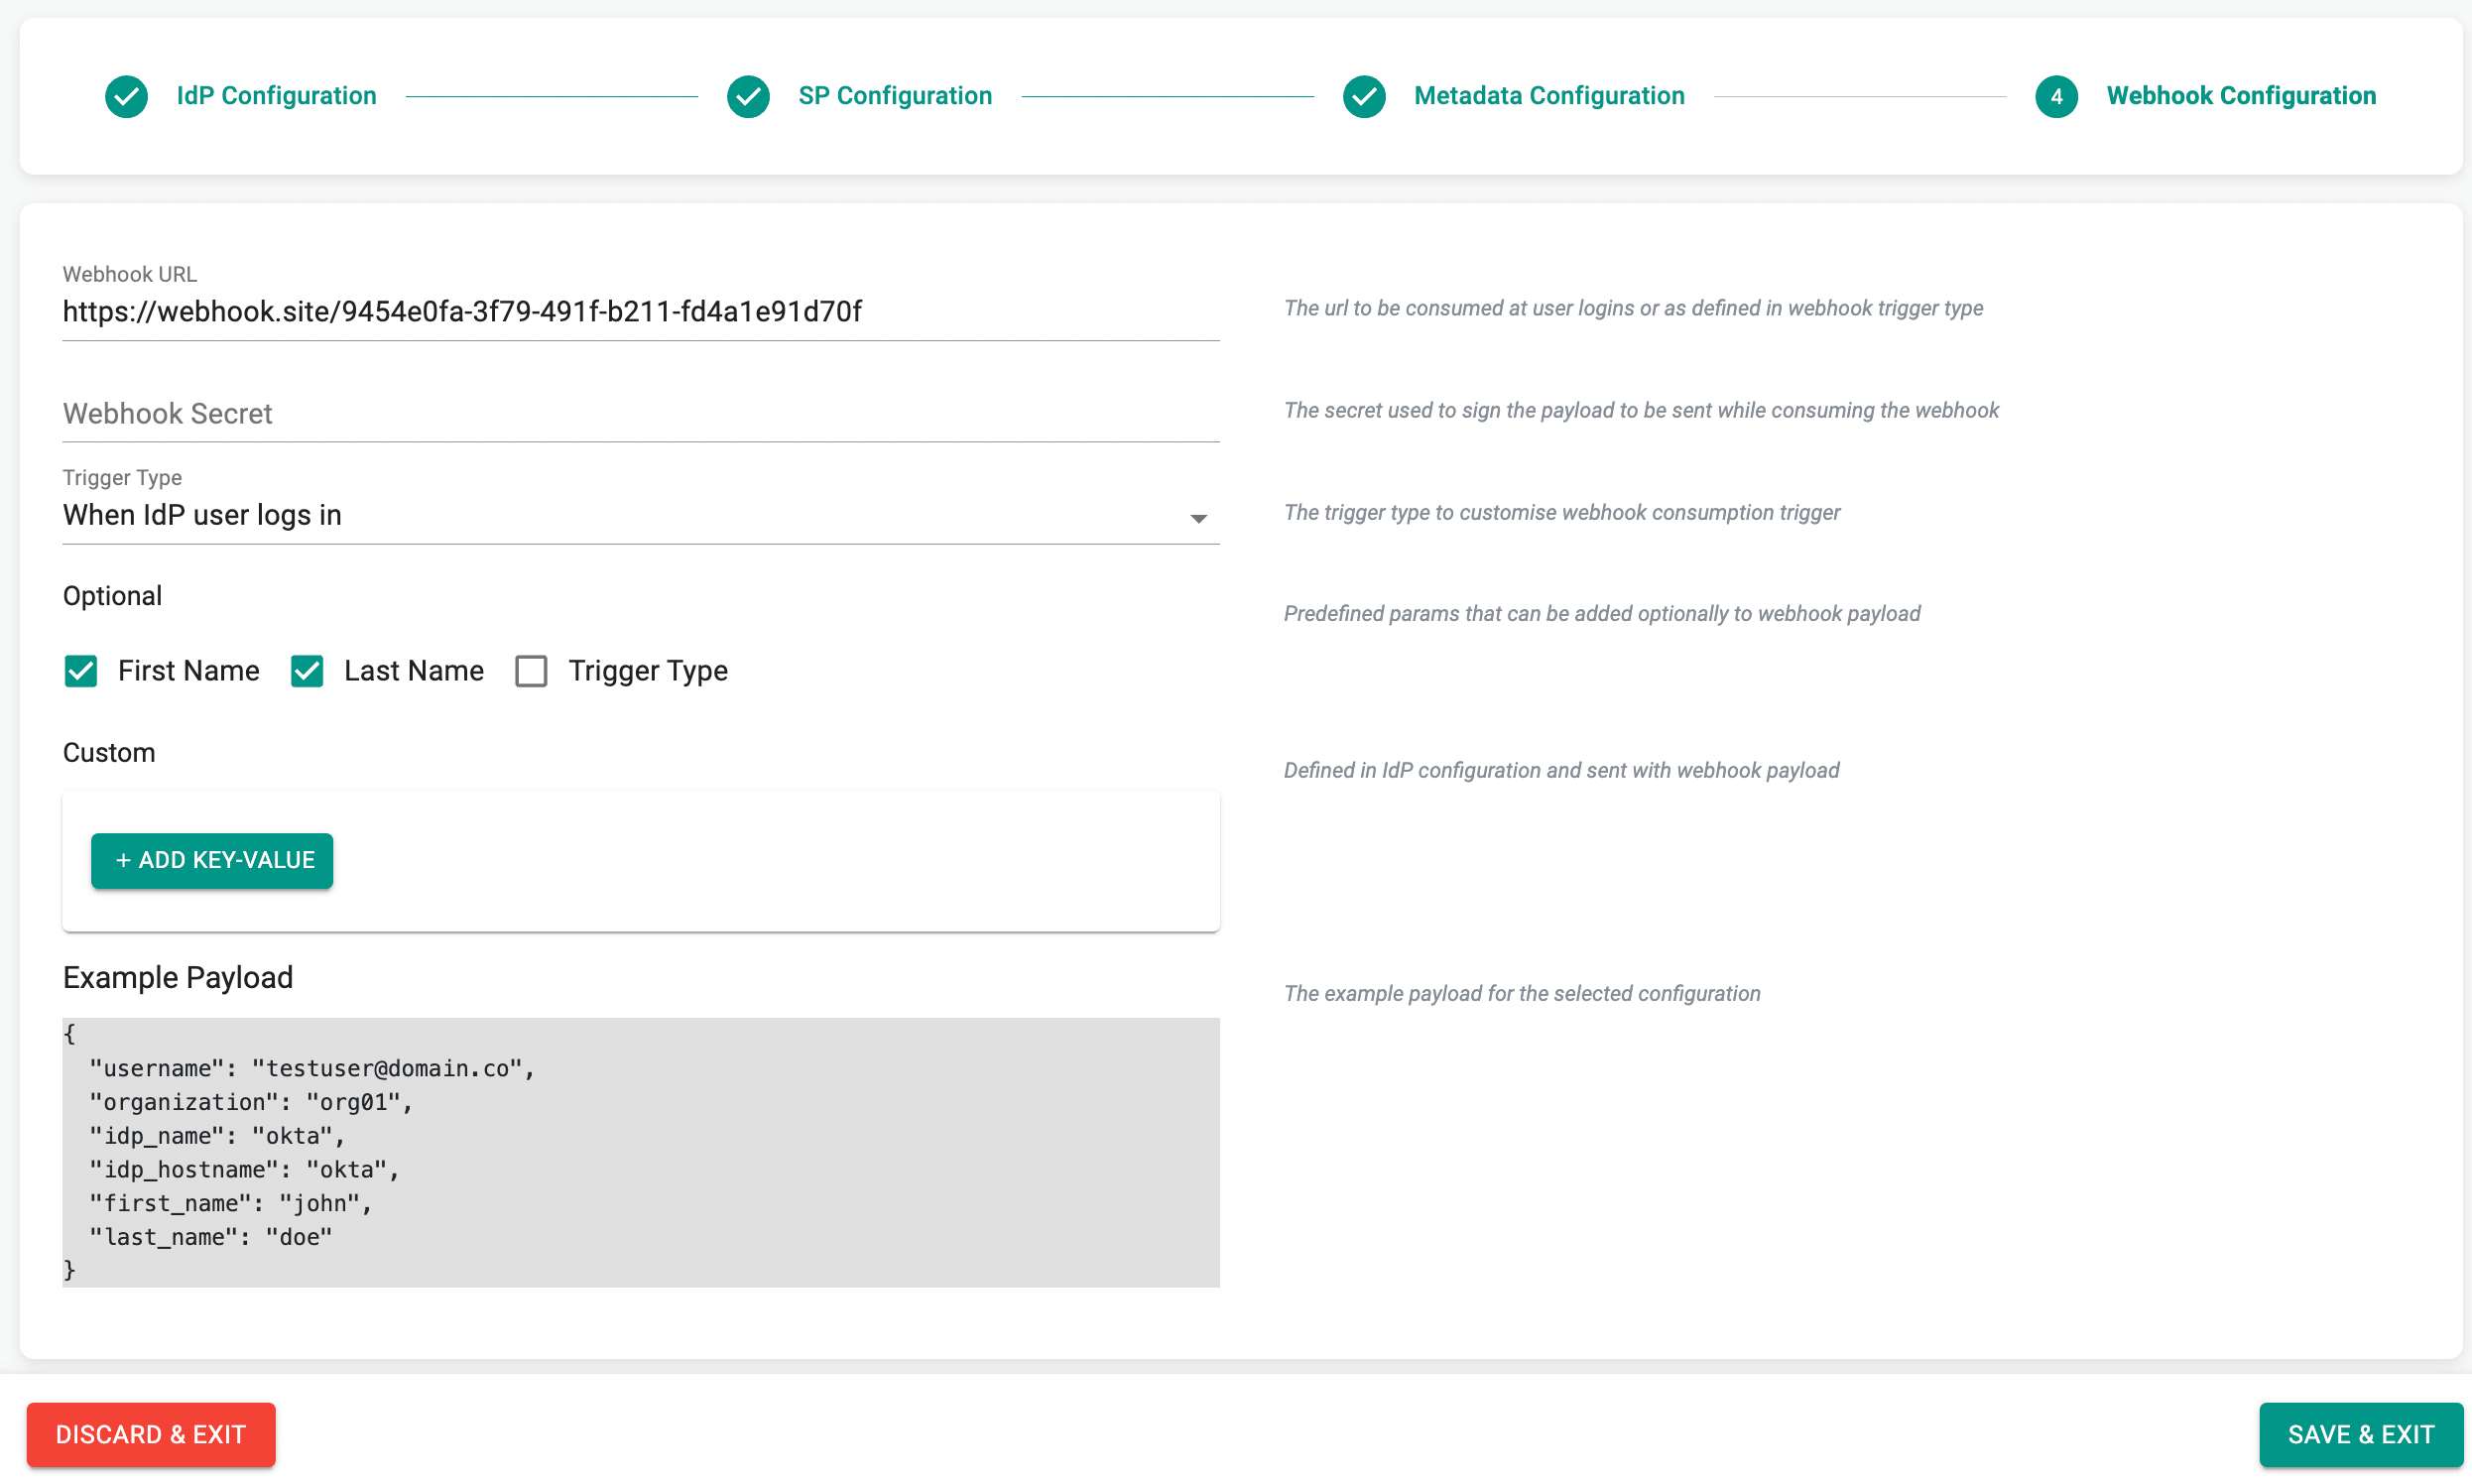
Click Save & Exit
Once the configuration is complete, a verification email is sent to the mentioned email ID specified on the IdP Configuration page. Complete the verification before log in.
Step 10: Assign Users and Groups
Once your Org and KeyCloak are integrated using the steps documented above, customers need to create and assign "Groups" in KeyCloak to the application. Multiple KeyCloak users can be added/removed from this group.
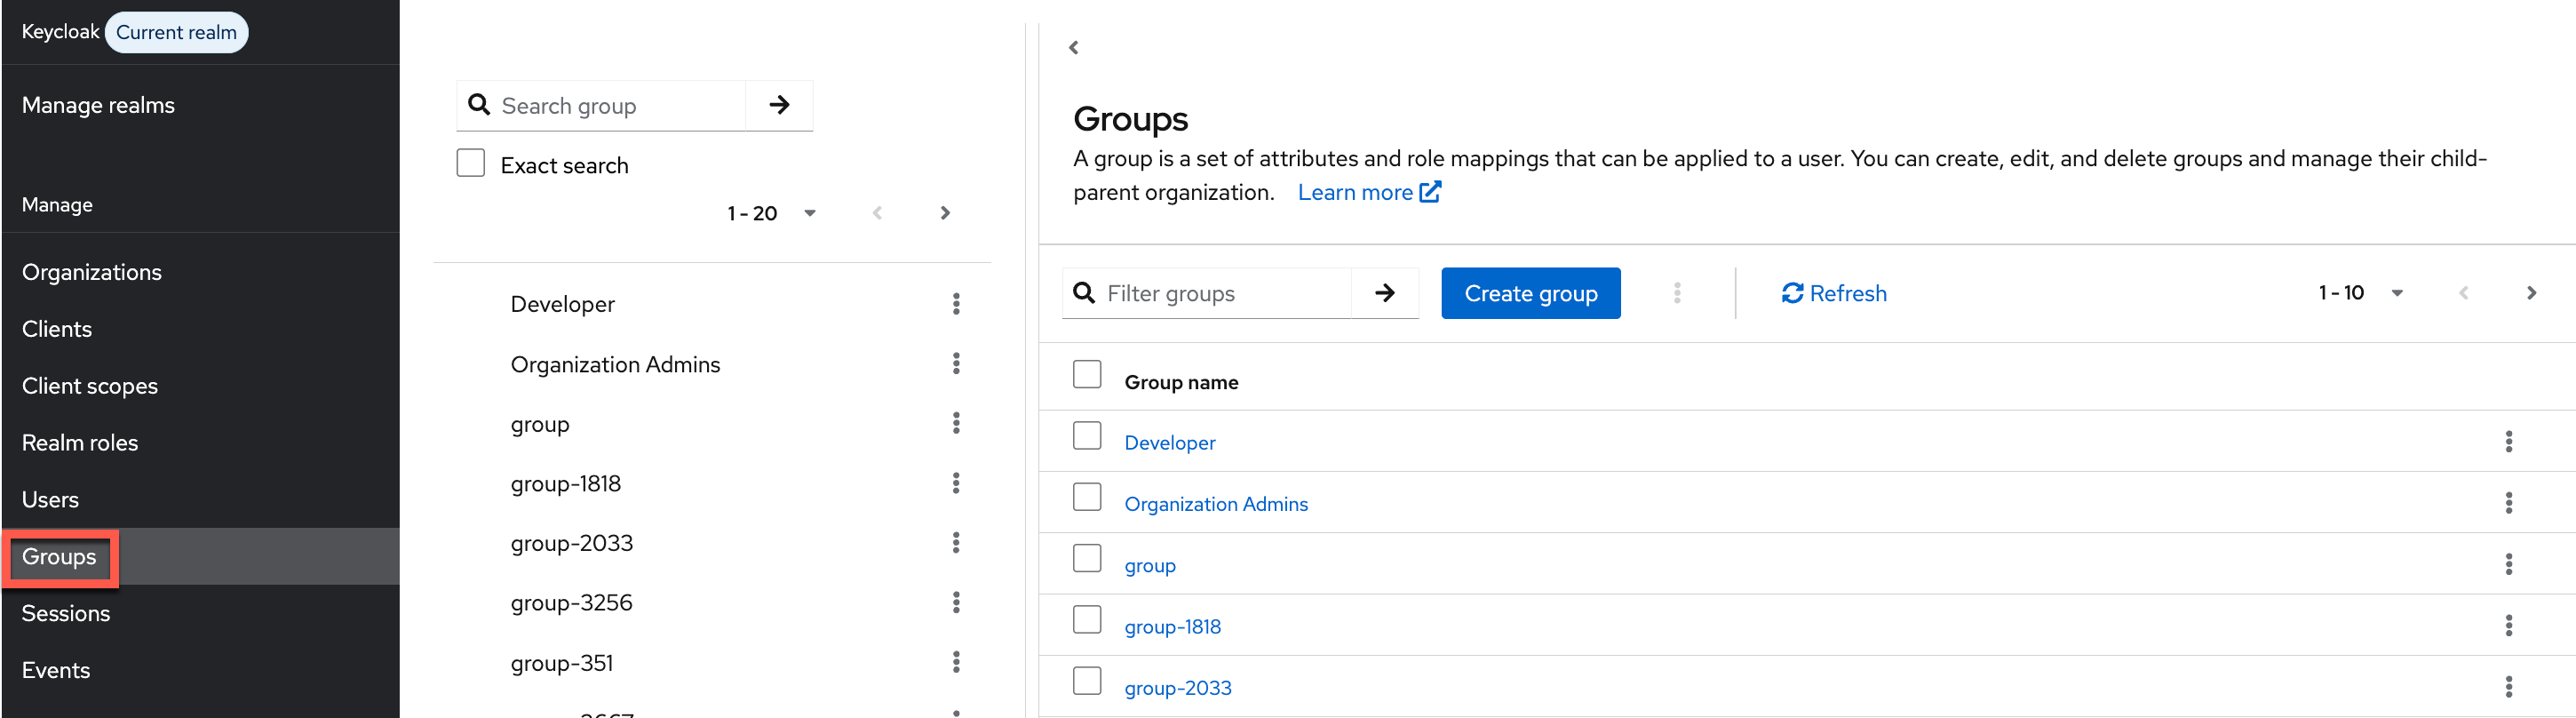
An identically named group needs to be created on your Org. Ensure that this group is mapped to the appropriate Projects with the correct privileges.
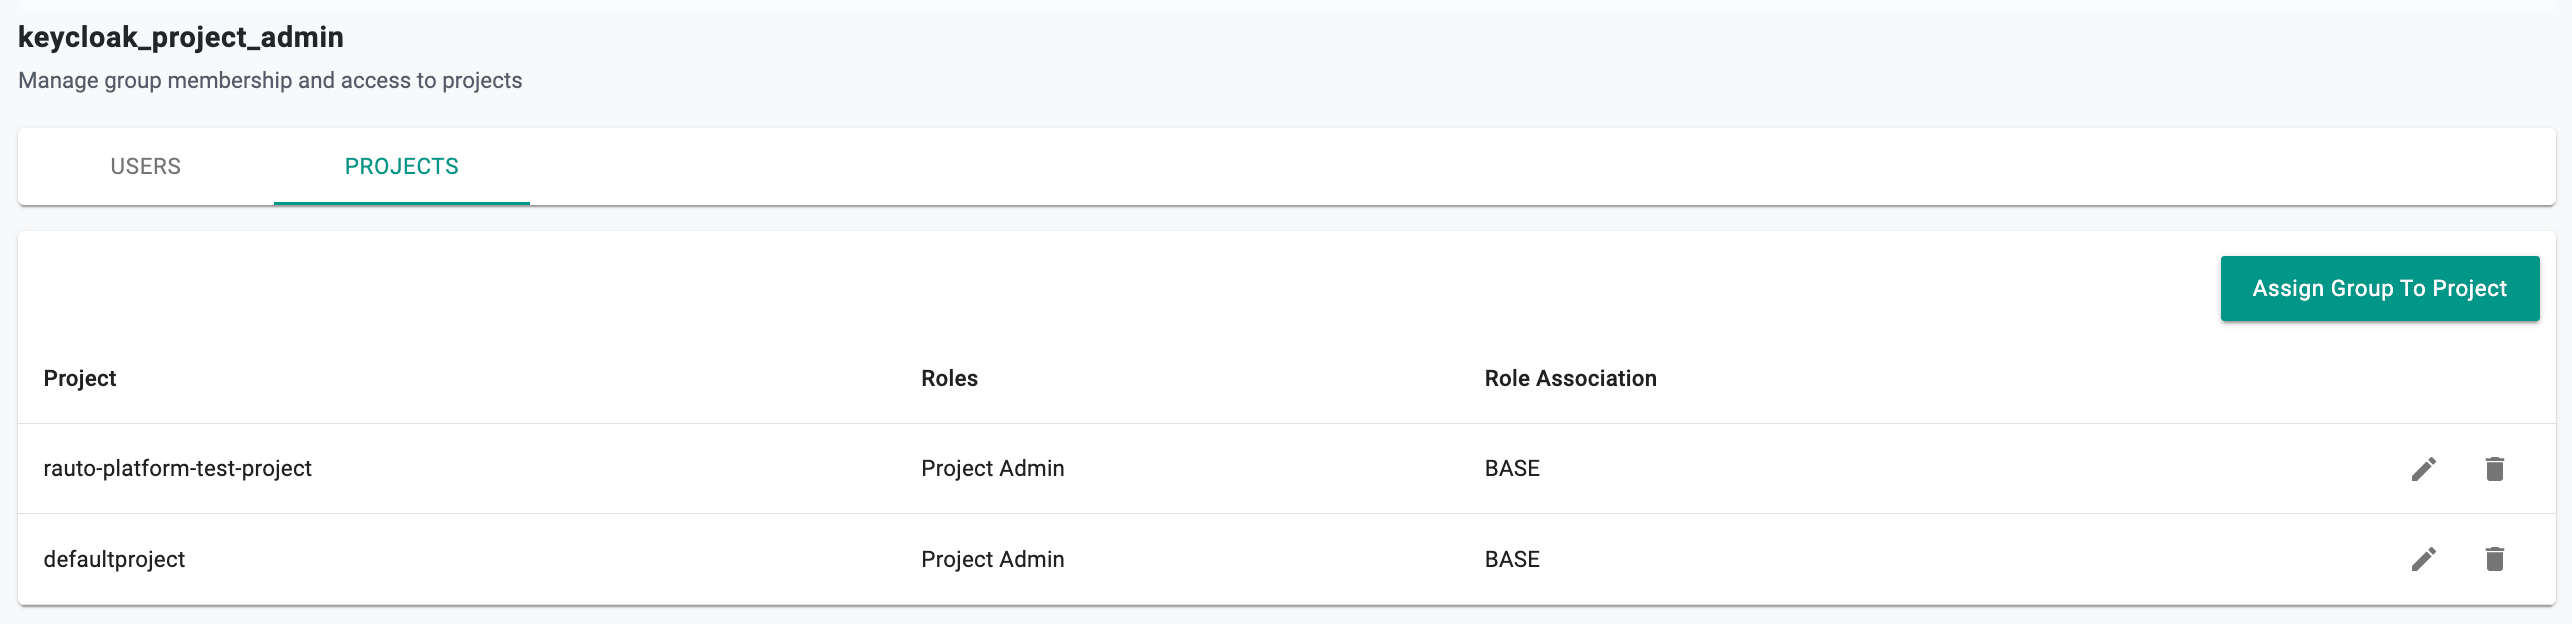
It is important to add user(s) to the KeyCloak group(s).