Create
Resource templates are the building blocks of Environment templates and include Infrastructure as Code (IaC) that defines a resource, including variables, lifecycle hooks (pre/post actions upon completion, deployment, etc.), policies, whether the resource will be dedicated per workload or shared, and more.
Did you know ?
Resource Templates can be managed through various methods:
- UI
- CLI (RCTL)
- Terraform
- GitOps
- API
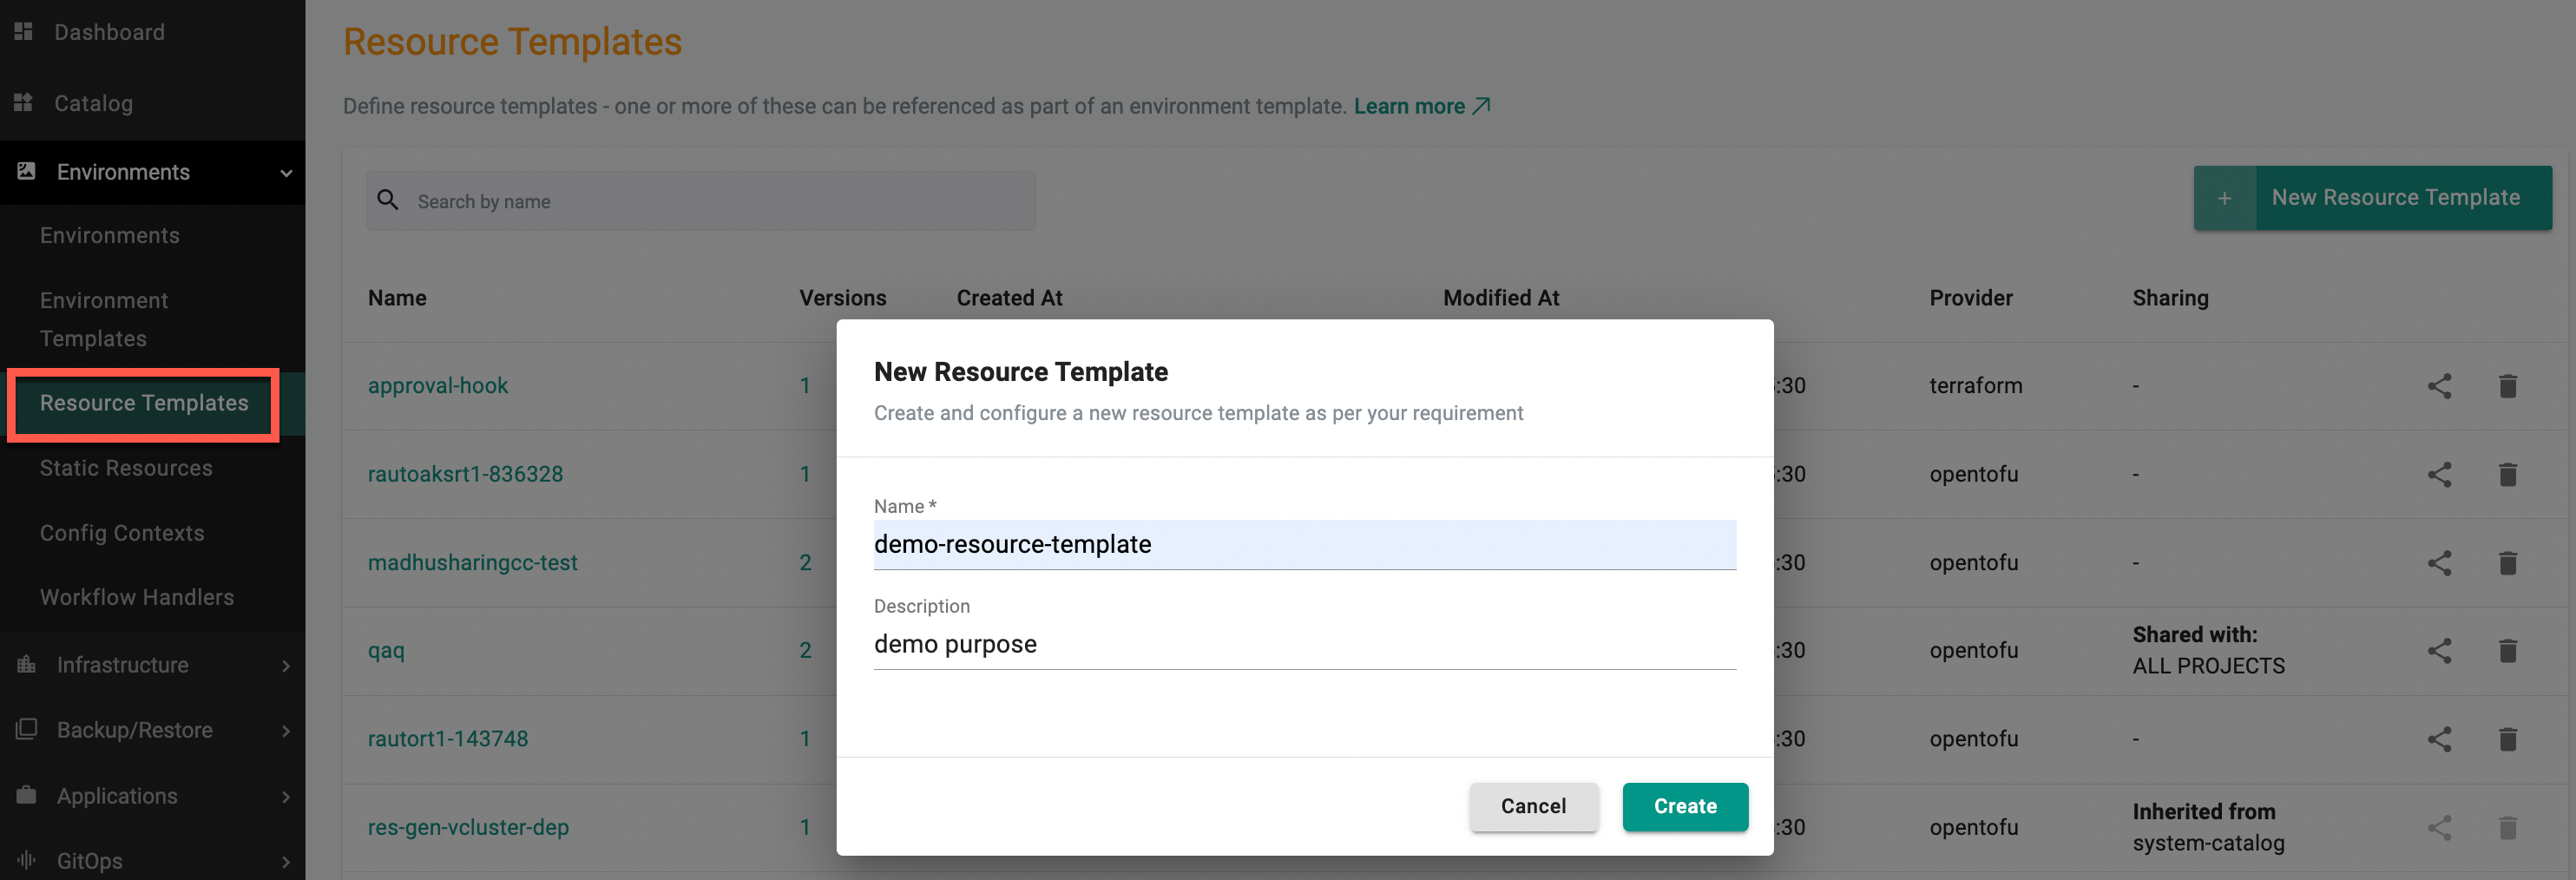
Create a Resource Template
- In a project, select Environments > Resource Templates.
- Select New Resource Template
- Type a name for the resource template. Optionally, type a description
- Select Create. The resource template is created and the configuration page displays
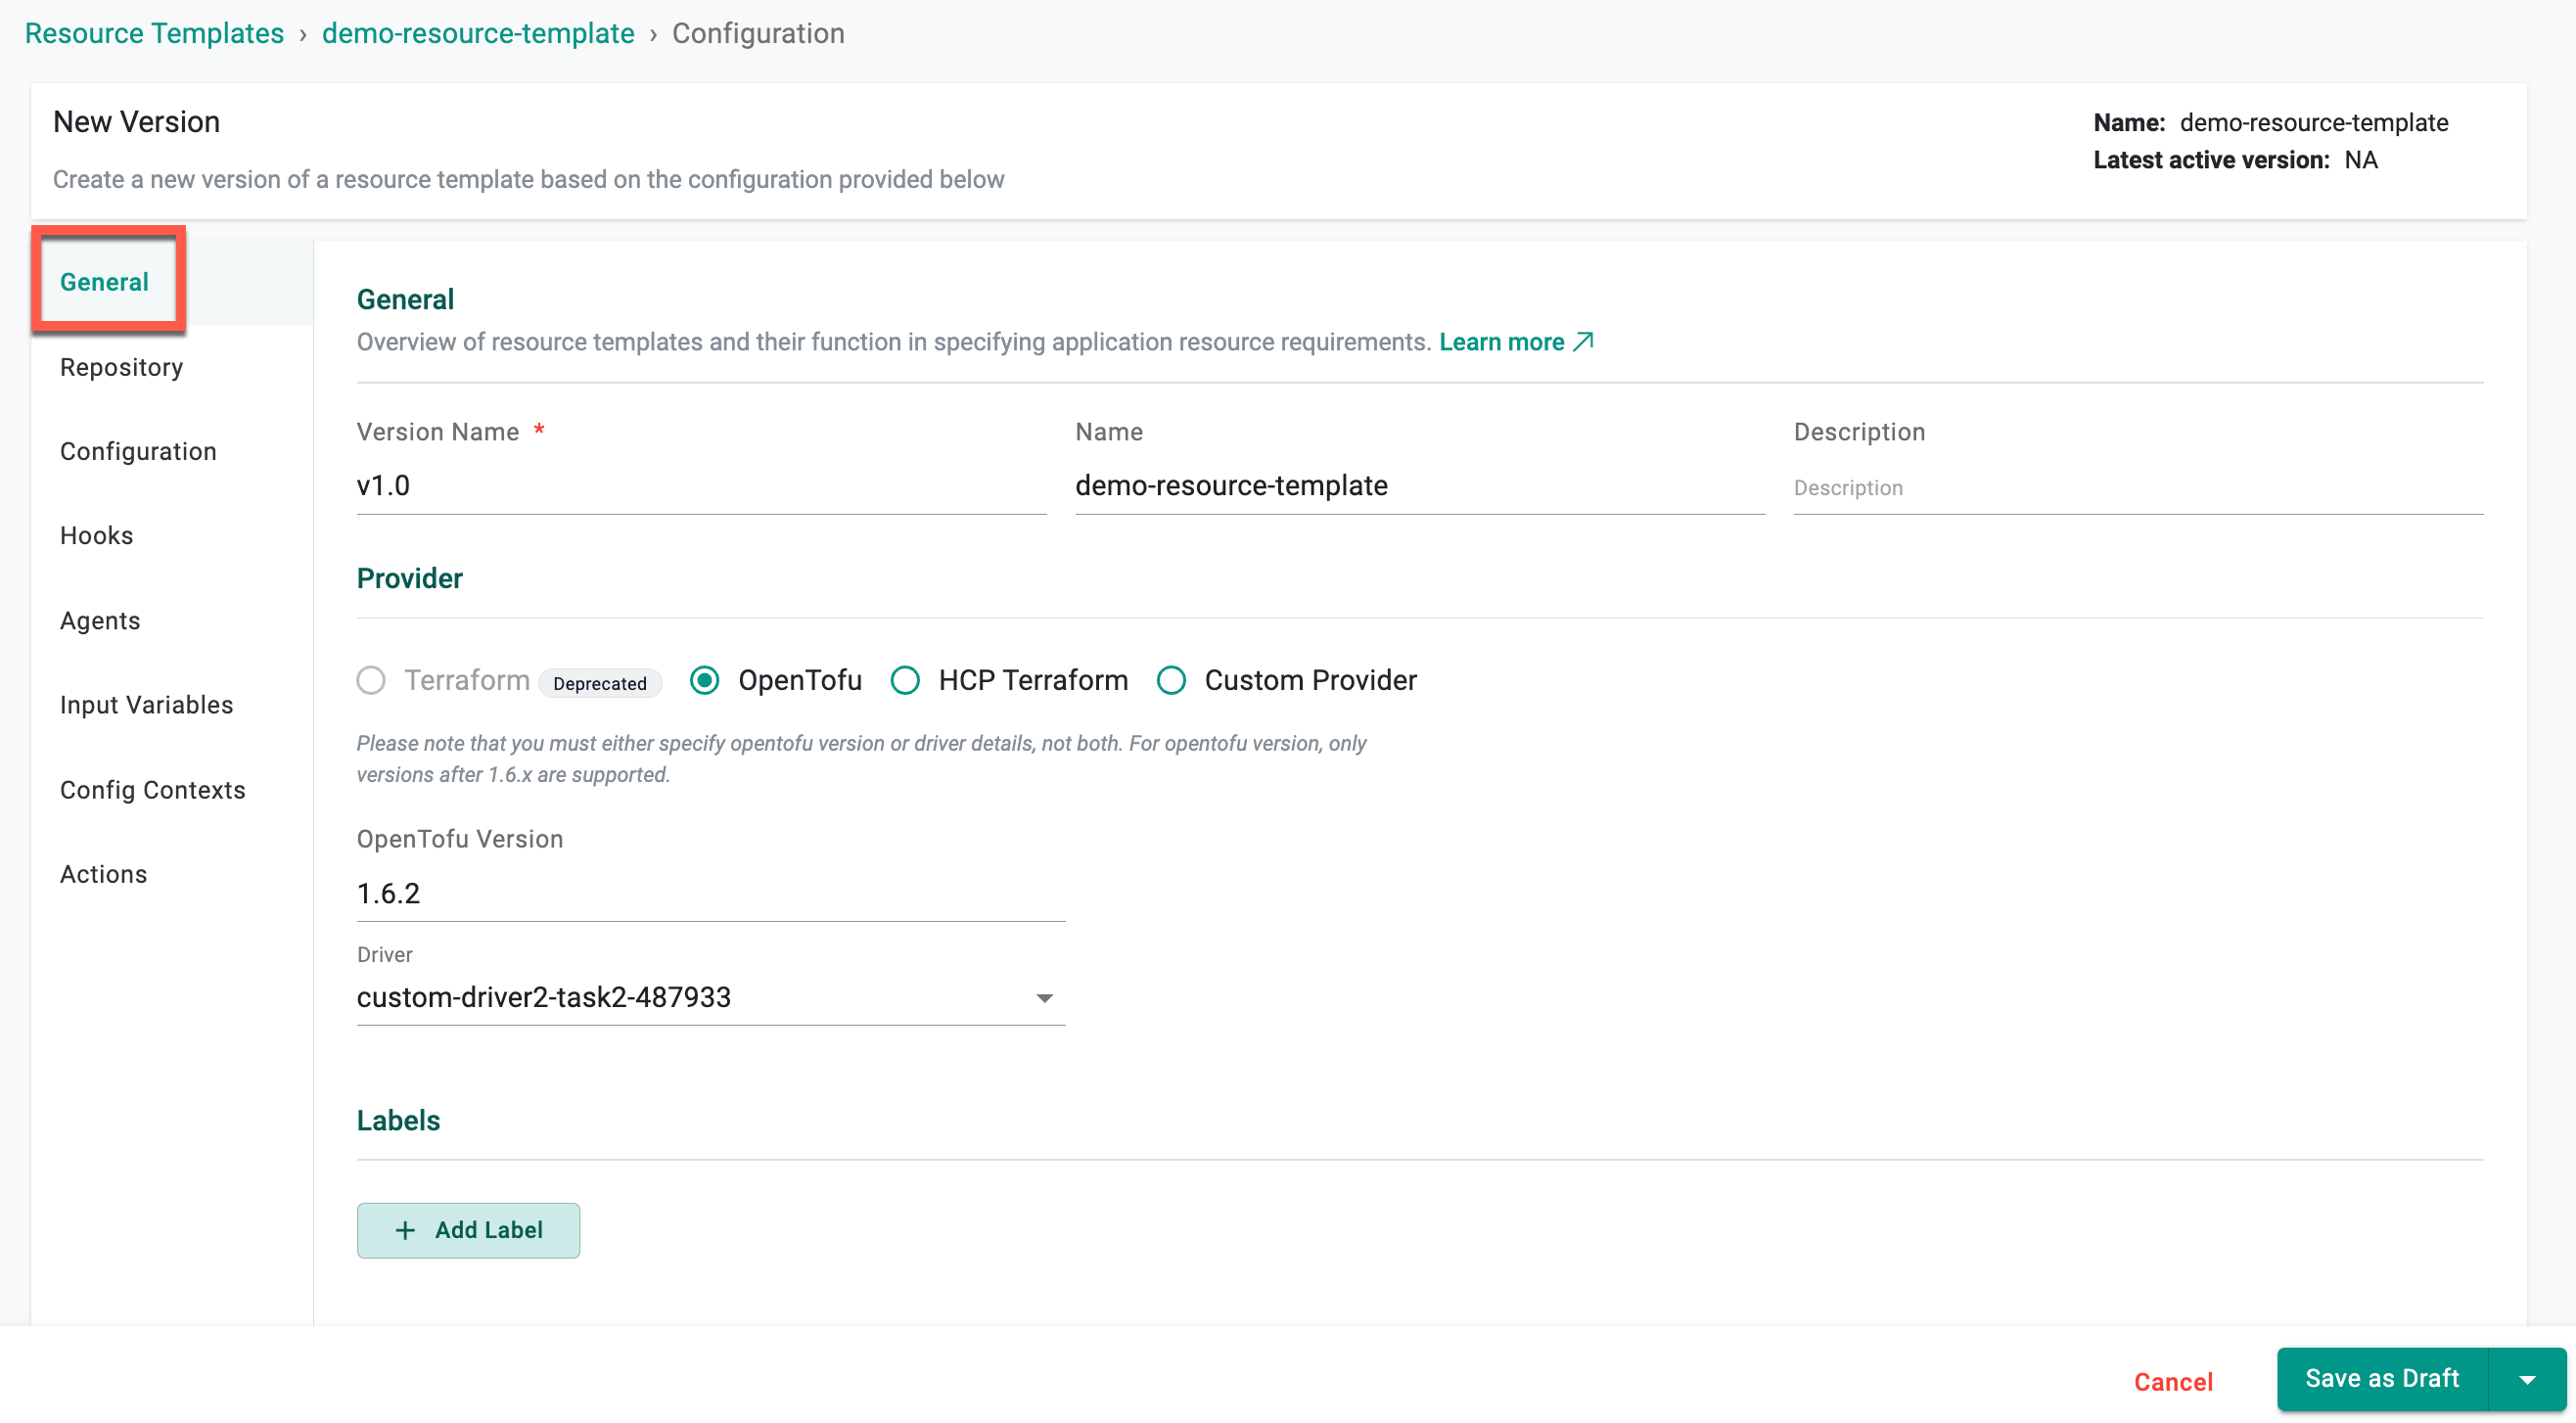
General
- Version Name: Enter the version for the resource. Examples:
v1,0.1,3. - Name: Enter a name for the resource.
- Description: Enter a description for the resource (optional).
- Provider: Select the provider for the resource. Supported values are Terraform (Deprecated), OpenTofu, HCP Terraform, System, and Custom. Refer to the Providers page for detailed instructions.
- Provider Version: Versions
1.6.2,1.7.2, orlatestfor the OpenTofu provider. - Driver: Applicable for OpenTofu and HCP Terraform providers only. Select the required driver.
- Task: Applicable for the Custom provider only. Add tasks to define individual steps in a workflow, each executed based on specified drivers, agents, and dependencies.
- Labels: Add labels to the resource as key-value pairs. Labels specify identifying attributes that are meaningful and relevant, but do not directly imply semantics to the core system. Example:
environment=dev. - Annotations: Add annotations to the resource as key-value pairs to attach non-identifying metadata. Example:
imageregistry=https://hub.docker.com/.
Annotations
Annotations support defining custom deployment status messages for resources. These messages are displayed on the instance detail page based on the deployment state of the resource.
Custom deployment status messages can be defined using the following supported annotation keys in the resource template. Multiple annotations can be added to the same resource template at the same time.
eaas.envmgmt.io/inprogress: Displayed when the resource deployment is in progresseaas.envmgmt.io/success: Displayed when the resource deployment is successfuleaas.envmgmt.io/failed: Displayed when the resource deployment failseaas.envmgmt.io/waiting: Displayed when the resource deployment is waiting for approval
Each annotation accepts a string value that is evaluated per resource template when it is attached to an environment template. When multiple resources transition to different deployment states, the corresponding message for each resource is displayed, with access to detailed environment logs for further troubleshooting.

Note: These deployment status annotations are supported for both compute instances and service instances.
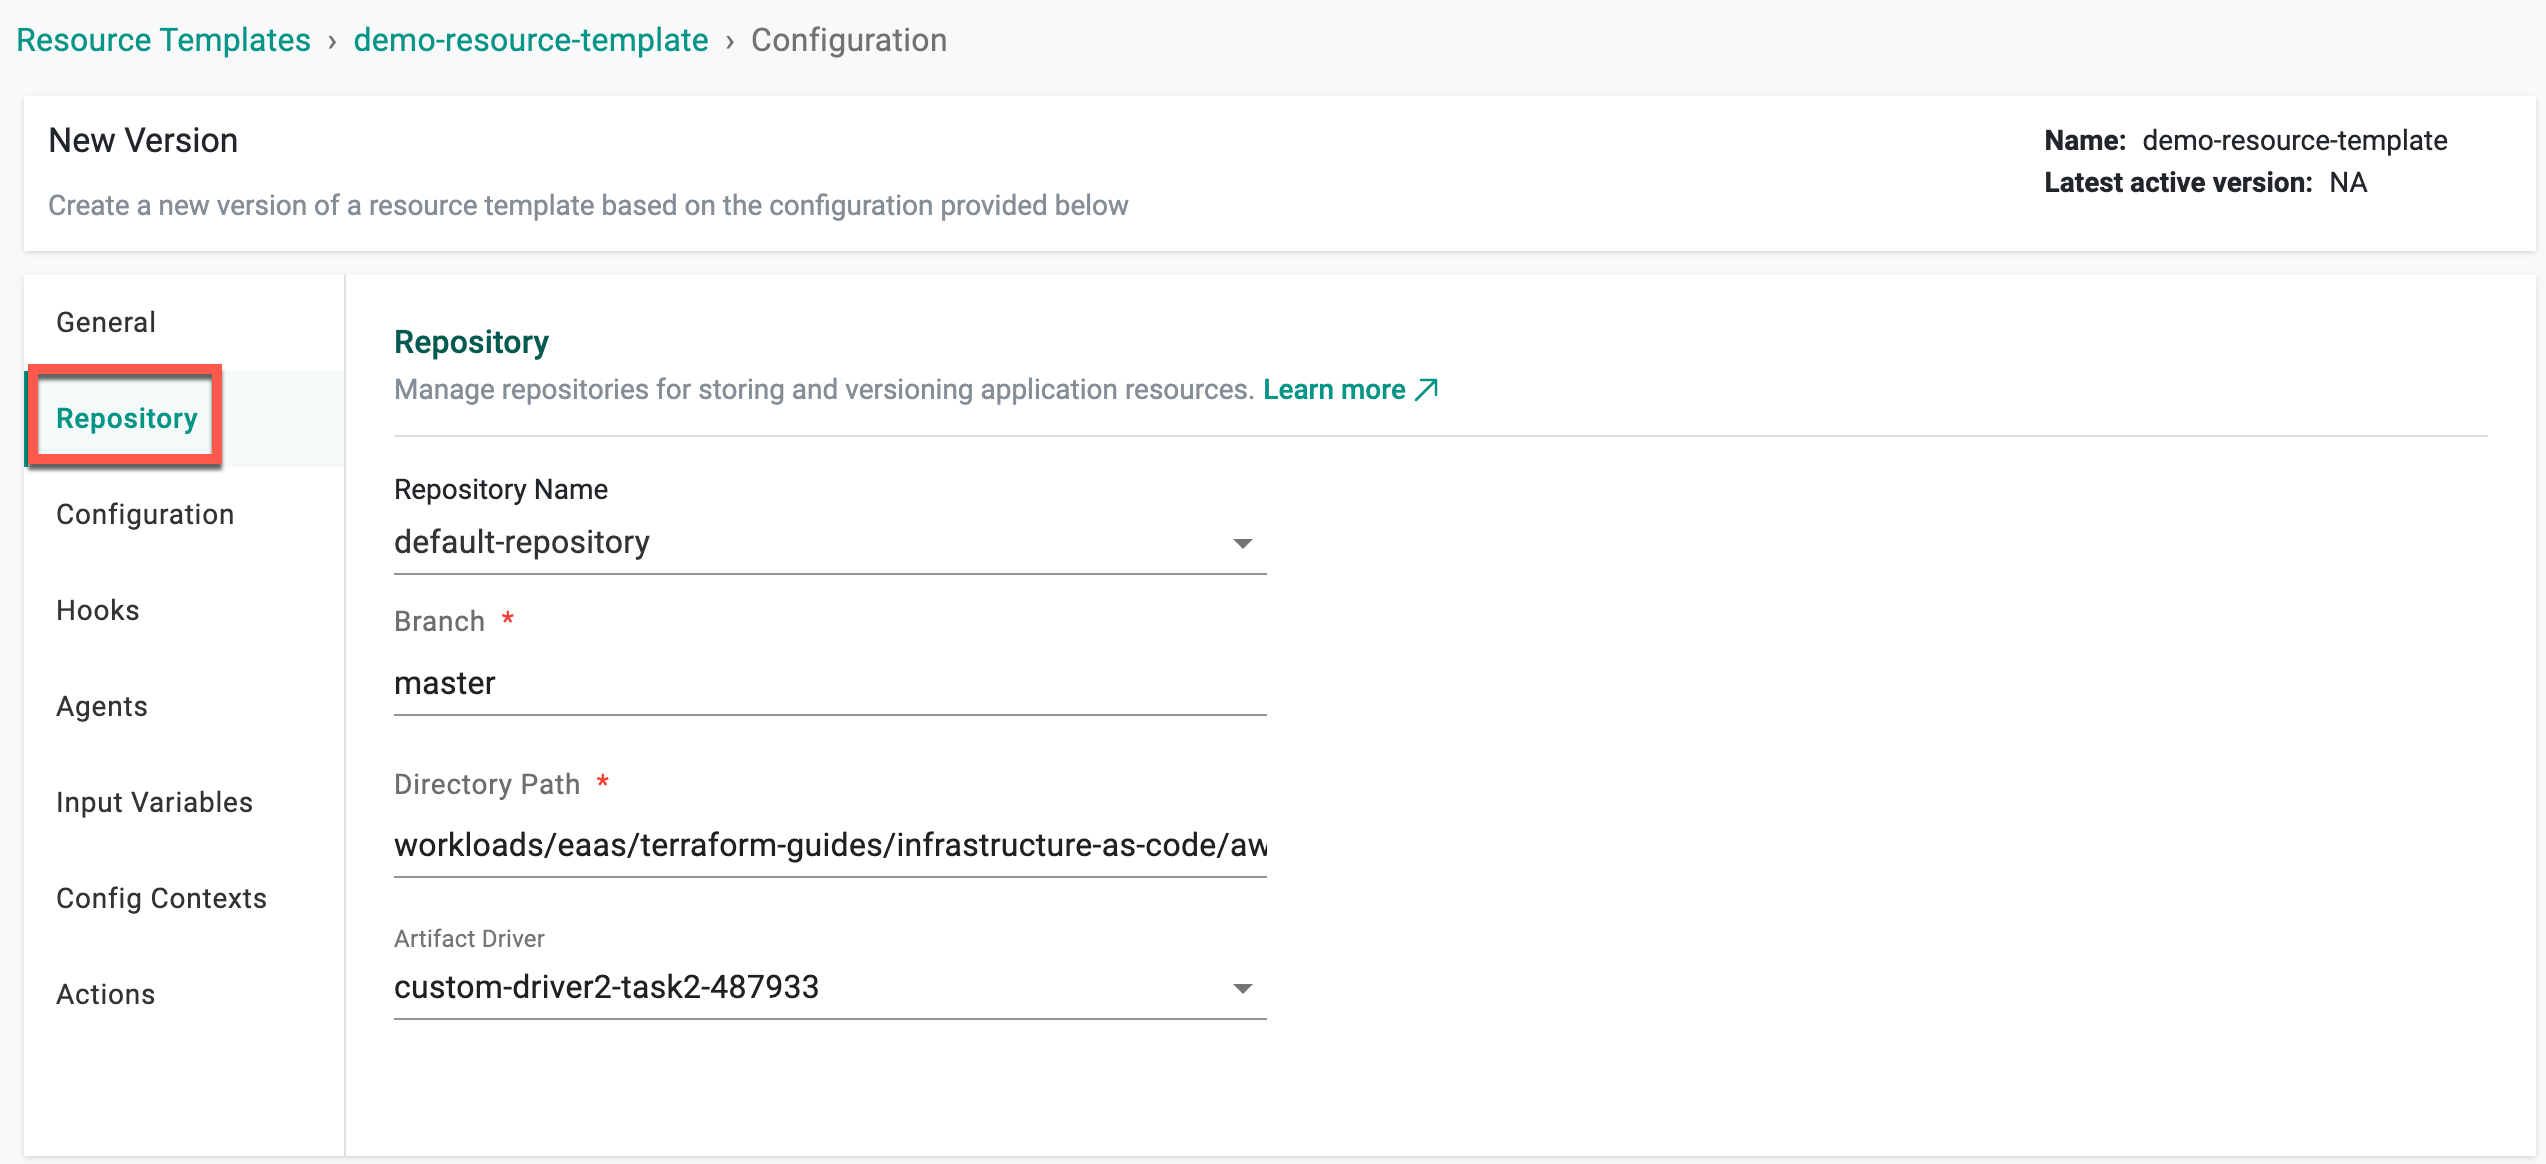
Repository
| Setting | Description |
|---|---|
| Repository Name | Select the name for the repository |
| Branch | Enter the branch to use for the repository. Example: master |
| Directory Path | Enter the directory path for the configuration file in the repository |
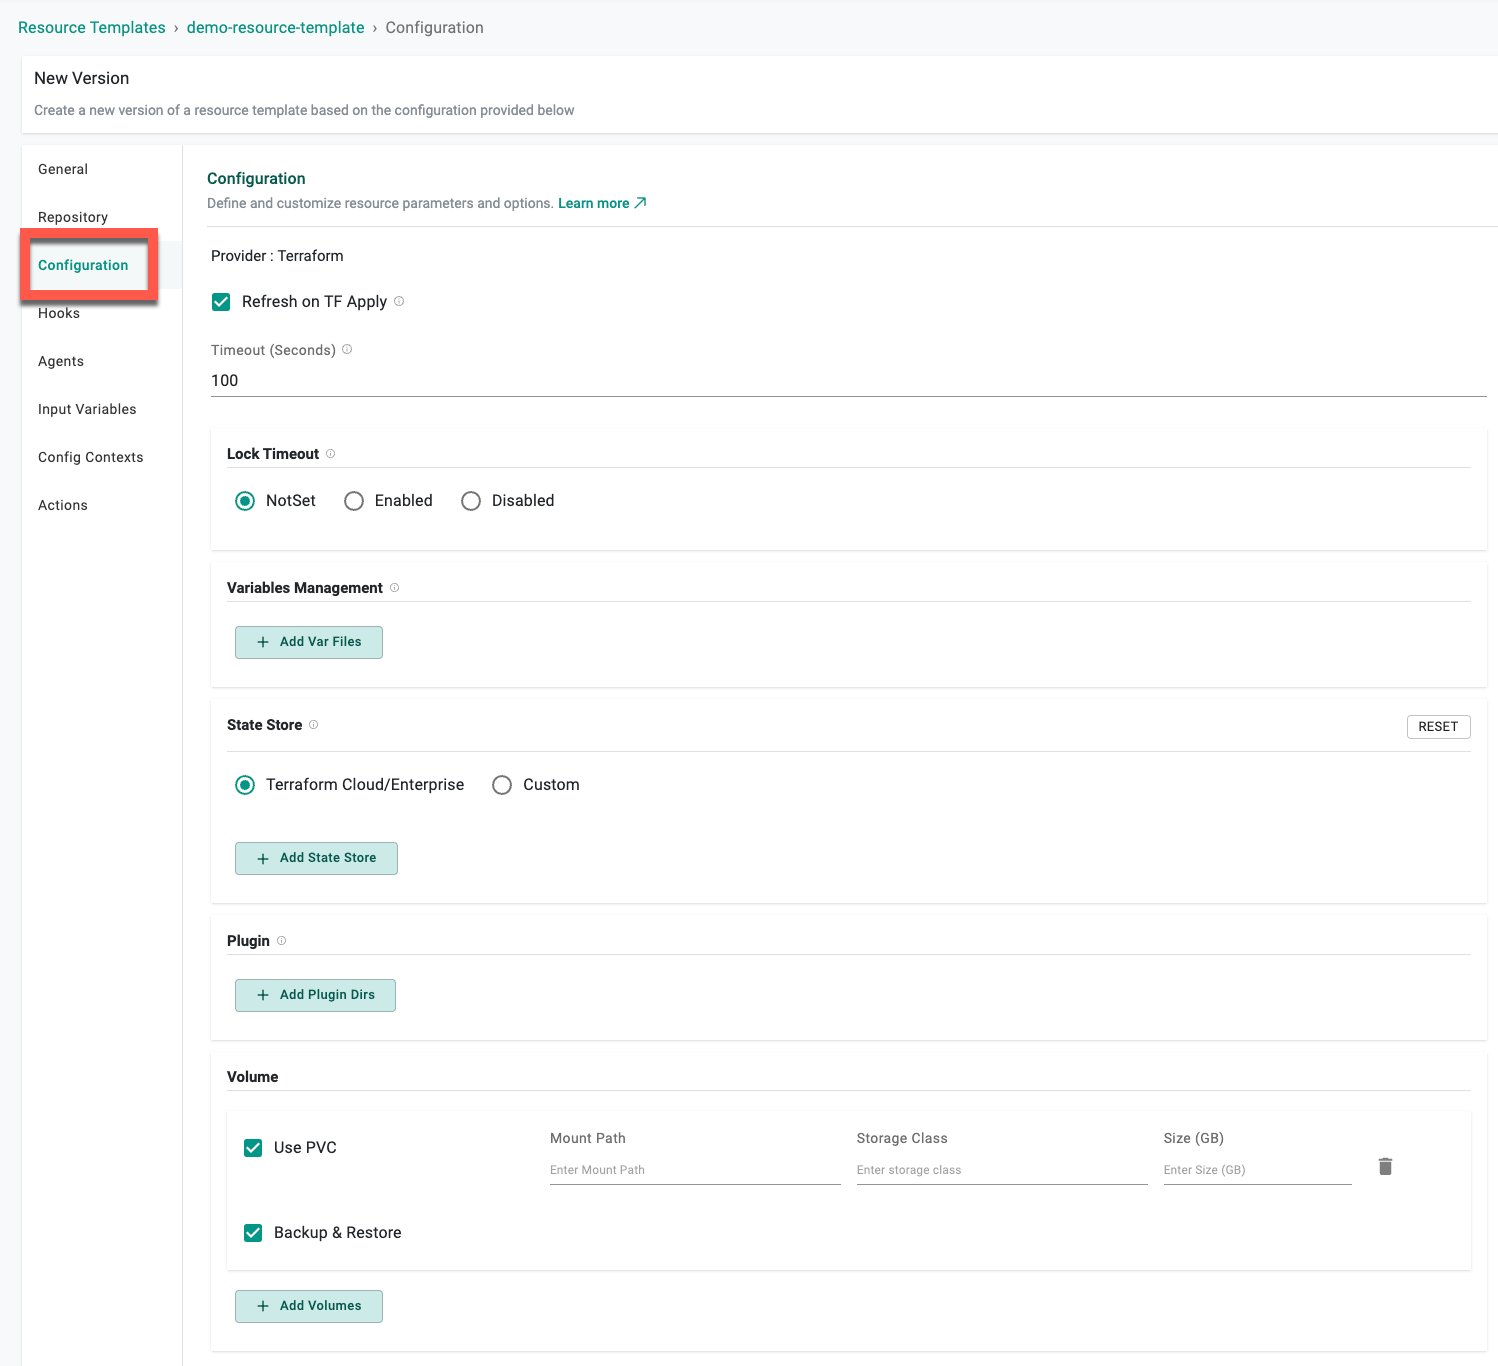
Configuration
| Setting | Description |
|---|---|
| Refresh | Read the current settings from the resource and update if necessary |
| Lock Timeout | Lock a resource to prevent accidental modifications or deletion |
| State Store | State Store options differ based on the Provider selection in the General settings |
| Variables Management | Add var files to the resource |
| Plugin | Enter the plugin directory for the resource. This is optional. See Managing Plugins for more details |
| Volume | Configure volume settings VPC usage (mount path, storage class, and size in GB) and Backup & Restore (mount path). Users can enable the Backup & Restore during subsequent environment deployments. The volumes will be used in the deploy operation and their content will be restored. When destroying the environment, these volumes will be cleaned up |
Important
If a user does not specify a custom “state file store,” the system will default to using Rafay’s state file store. This default option is primarily intended for demos and Proofs of Concept (POCs). However, users should configure a custom state store if they require specific security measures, visibility, and other organizational requirements.
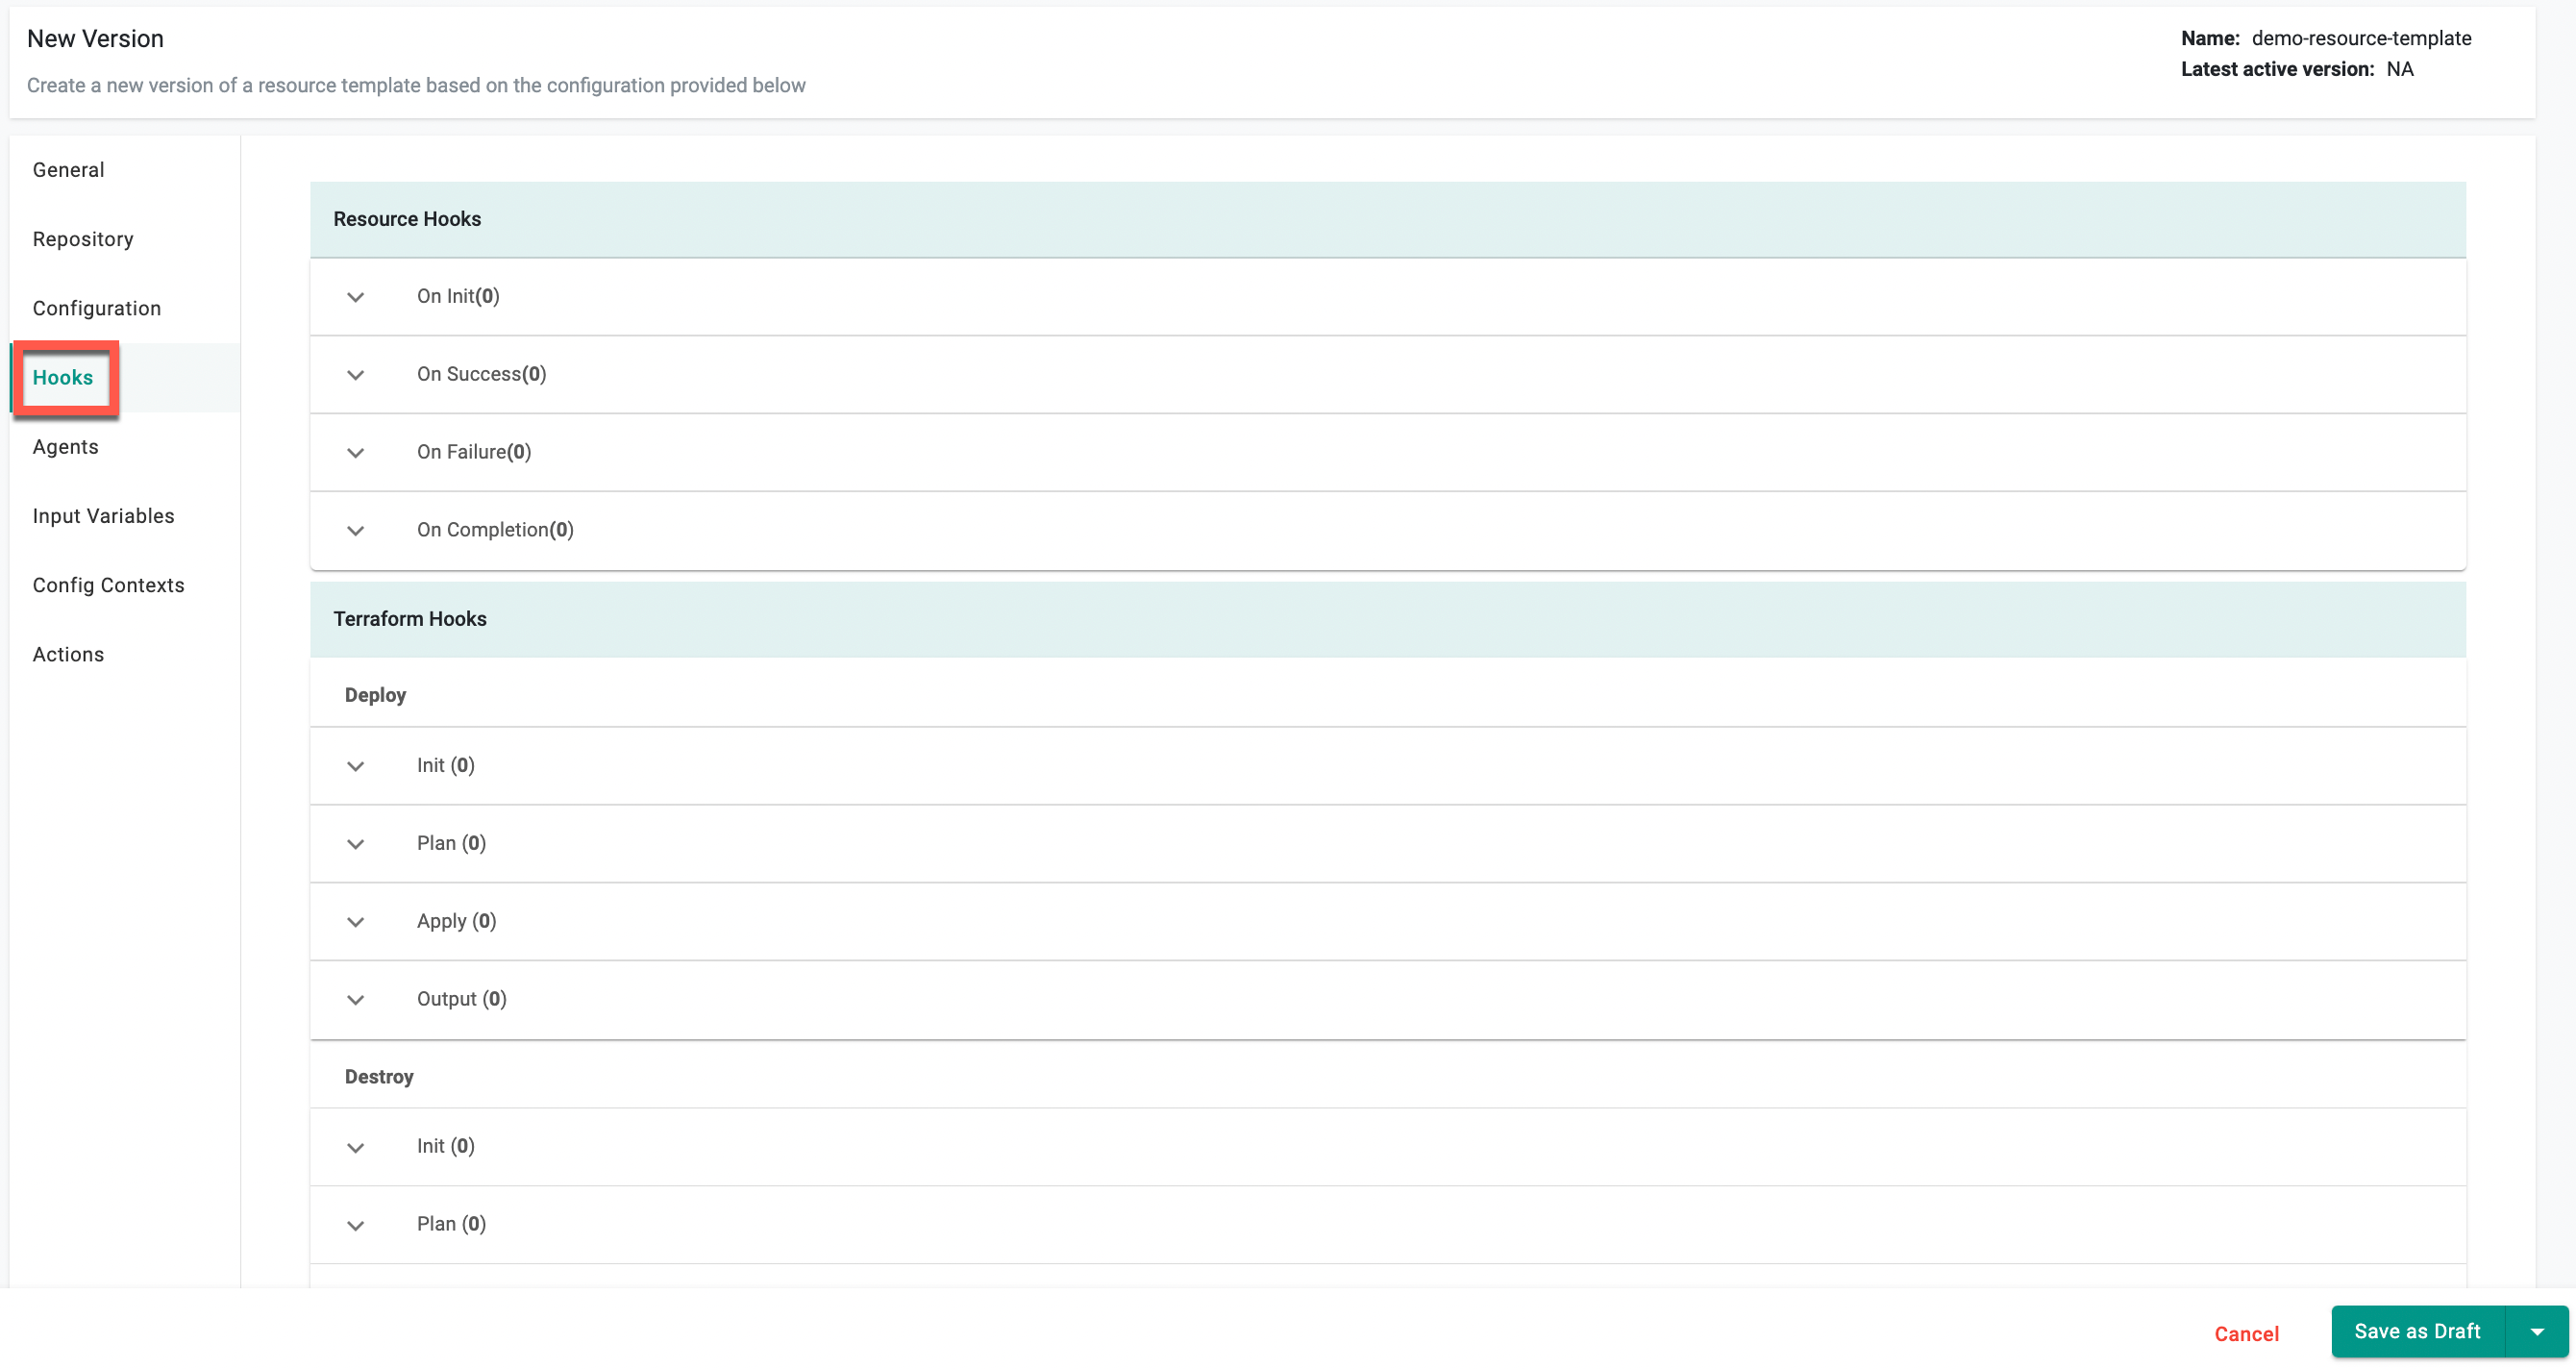
Hooks
A hook runs during a specified point when creating a resource from a template. Hooks can extend the functionality of creating a resource, like sending an HTTP request to a system.
Resource Hooks
Create a resource hook. See Hook Type for parameter details about each hook type.
| Setting | Description |
|---|---|
| On Completion | Set a hook that is triggered when resource creation or updating is complete. |
| On Failure | Set a hook that is triggered when resource creation or updating fails to complete. |
| On Init | Set a hook that is triggered when resource creation or updating is initialized. |
| On Success | Set a hook that is triggered when resource creation or updating is successful. |
Terraform Hooks
Create a Terraform hook. See Hook Type for parameter details about each hook type.
Deploy
Create a Terraform hook that is triggered when the resource is deployed.
| Setting | Description |
|---|---|
| Init | Deploy the resource when terraform init is used. |
| Plan | Deploy the resource when terraform plan is used. |
| Apply | Deploy the resource when terraform apply is used. |
| Output | Deploy the resource when an output is used. |
Destroy
Create a Terraform hook that is triggered when the resource is destroyed.
| Setting | Description |
|---|---|
| Init | Destroy the resource when terraform init is used. |
| Plan | Destroy the resource when terraform plan is used. |
| Destroy | Destroy the resource when terraform destroy is used. |
System Hooks
Create a System hook. See Hook Type for parameter details about each hook type.
Deploy
Create a System hook that is triggered when the resource is deployed
| Setting | Description |
|---|---|
| Apply | Deploy the resource when system apply is used. |
Destroy
Create a System hook that is triggered when the resource is destroyed.
| Setting | Description |
|---|---|
| Destroy | Destroy the resource when system destroy is used. |
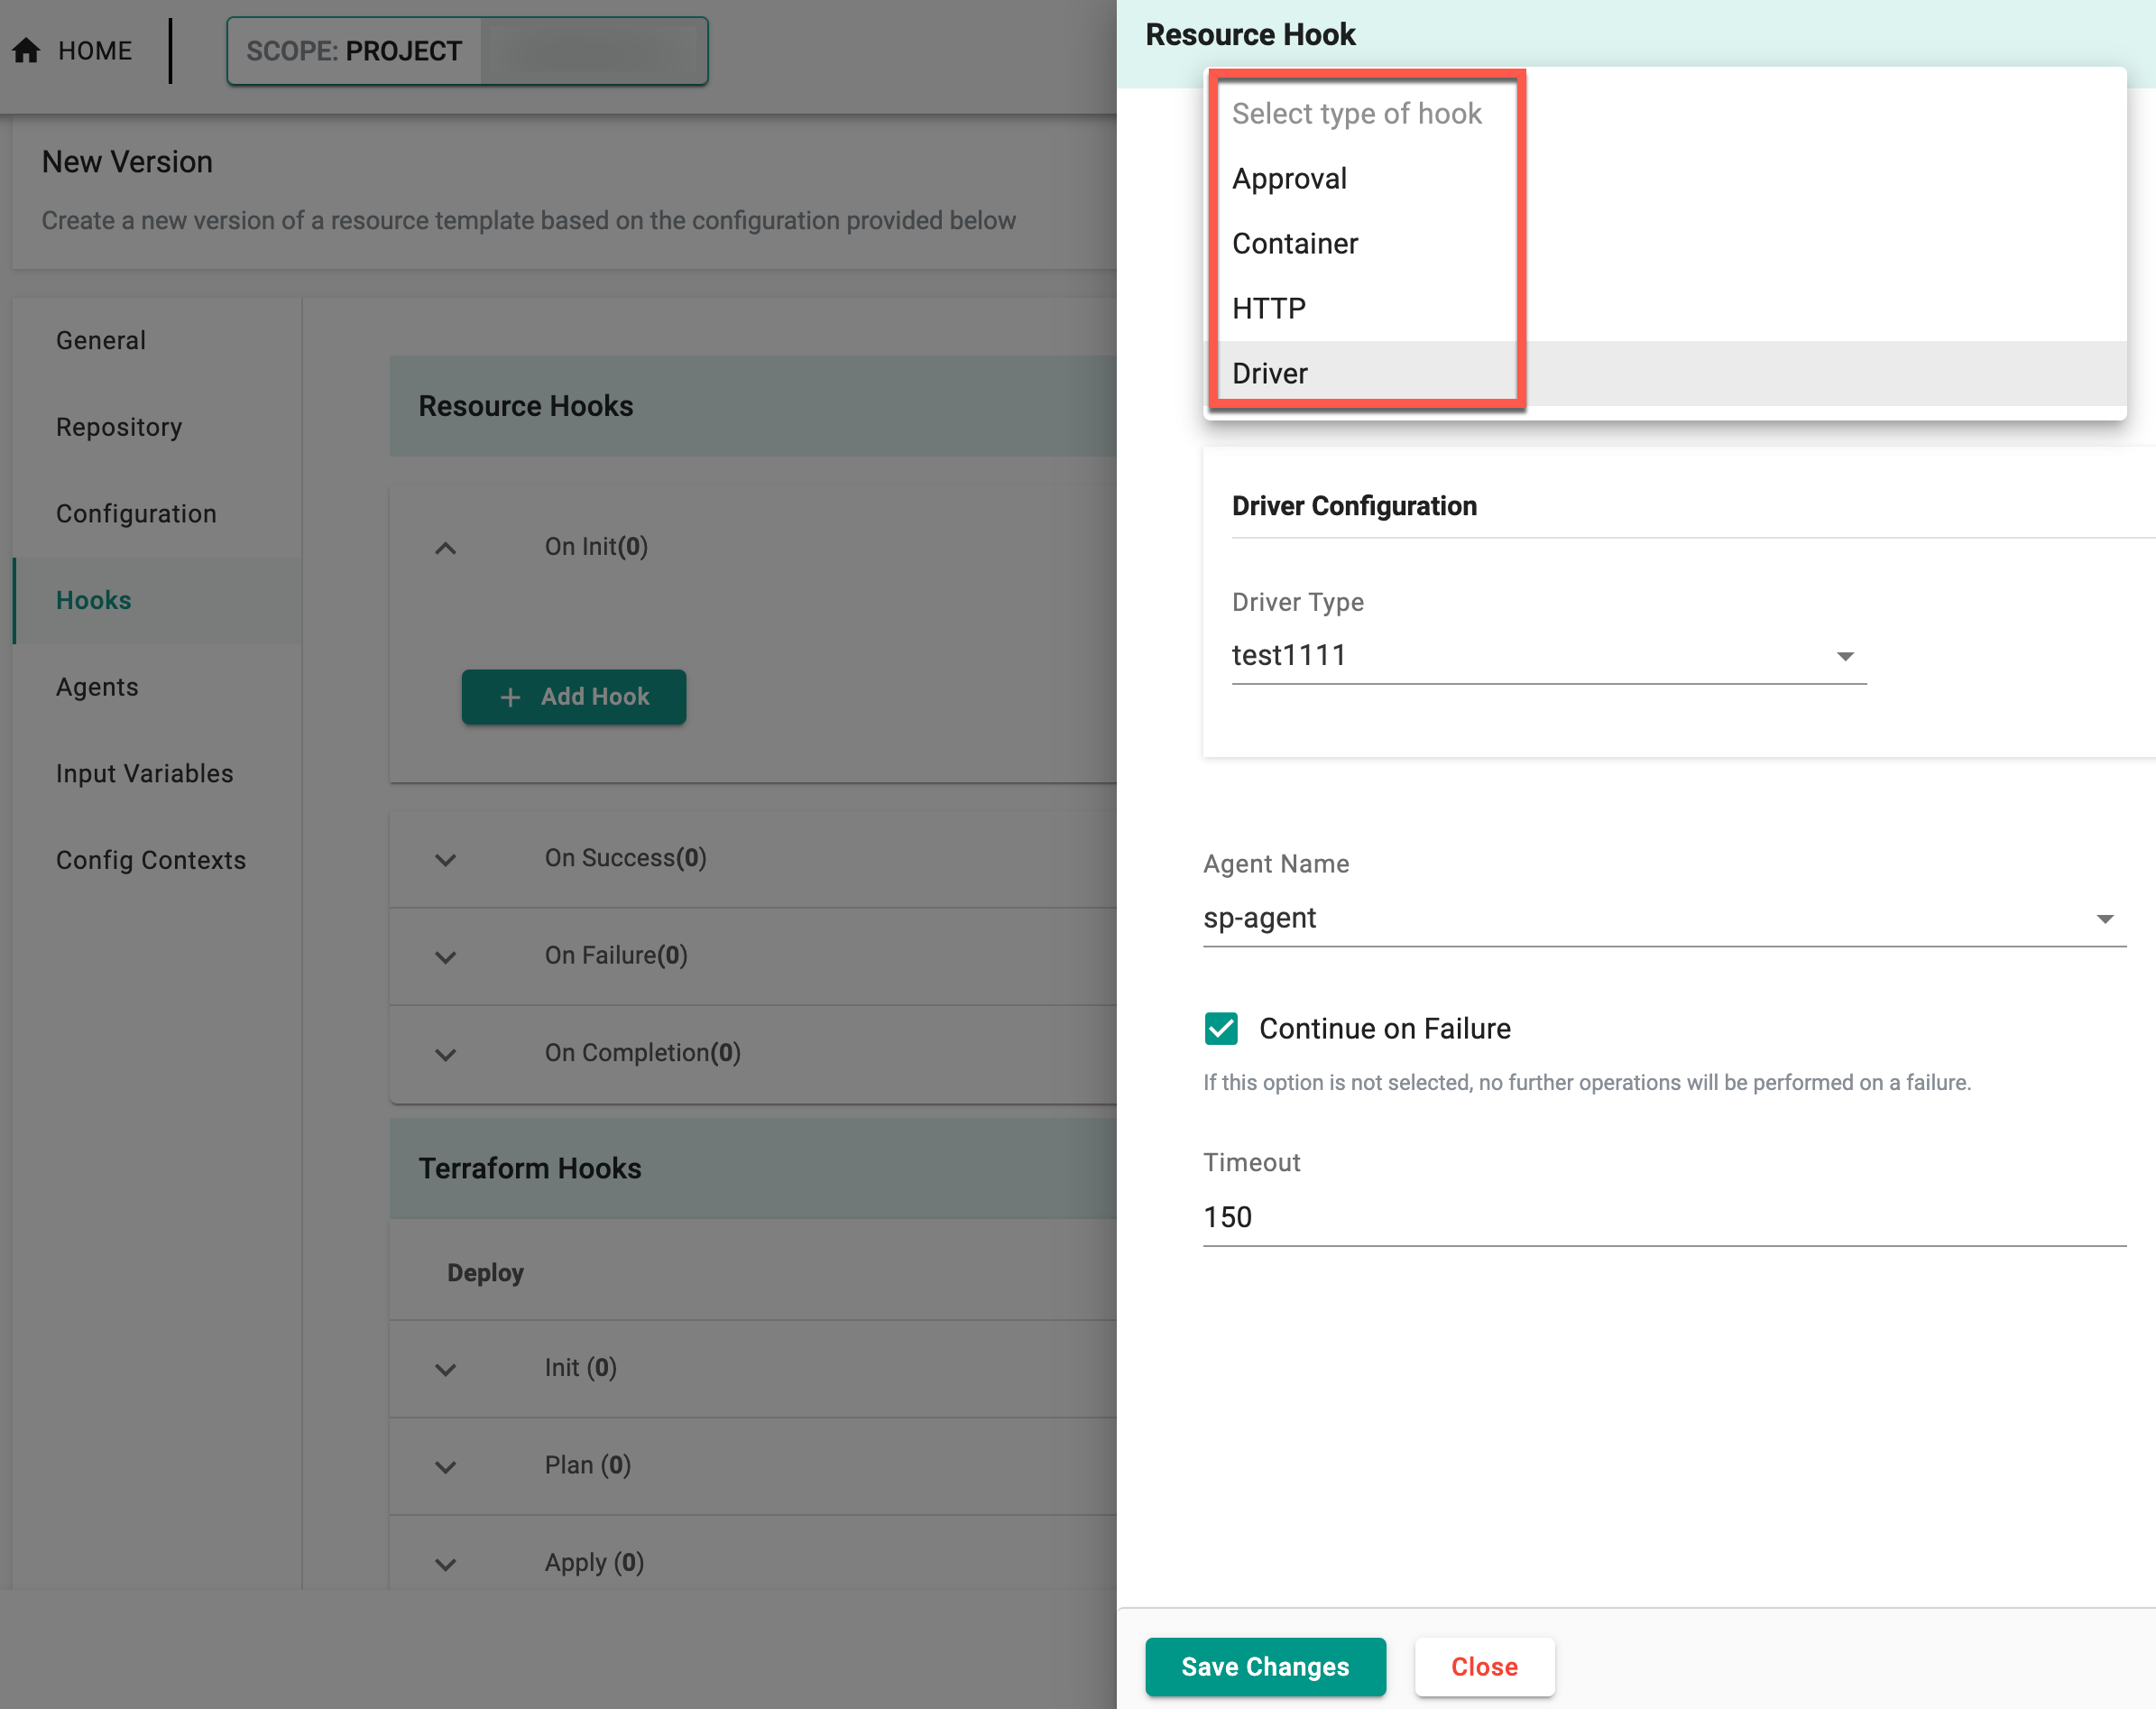
Hook Type
When adding a Resource or Terraform hook, select a hook type and set the appropriate parameters.
Workflow Handler
| Setting | Description |
|---|---|
| Name | Enter a name for the Workflow Handler hook |
| Description | Provide a description for the workflow handler hook |
| Workflow Handler Configuration | |
| -- Type | Select the Workflow Handler type. Supported values are: container, http |
| Agent Name | Name of the agent responsible for execution |
| Execute Once | Enable to execute the hook once. For next workflow run, this activity will be skipped |
| Continue on Failure | Set the hook to continue execution even in case of failure |
| Skip On Destroy | Enable Skip on Destroy to prevent the execution of hooks or tasks during the destroy action, avoiding unnecessary operations |
| Skip Condition | Define rules to control task execution dynamically. The Skip Condition field enables conditional execution of tasks or hooks based on runtime parameters, ensuring that operations such as notifications, approvals, or workflow handlers are triggered only when necessary. This prevents redundant executions and improves workflow efficiency |
| Timeout | Specify the duration in the Timeout field for HTTP or Container. When a user specifies a timeout in both Hooks and Workflow Handlers, the timeout specified in Hooks takes precedence |
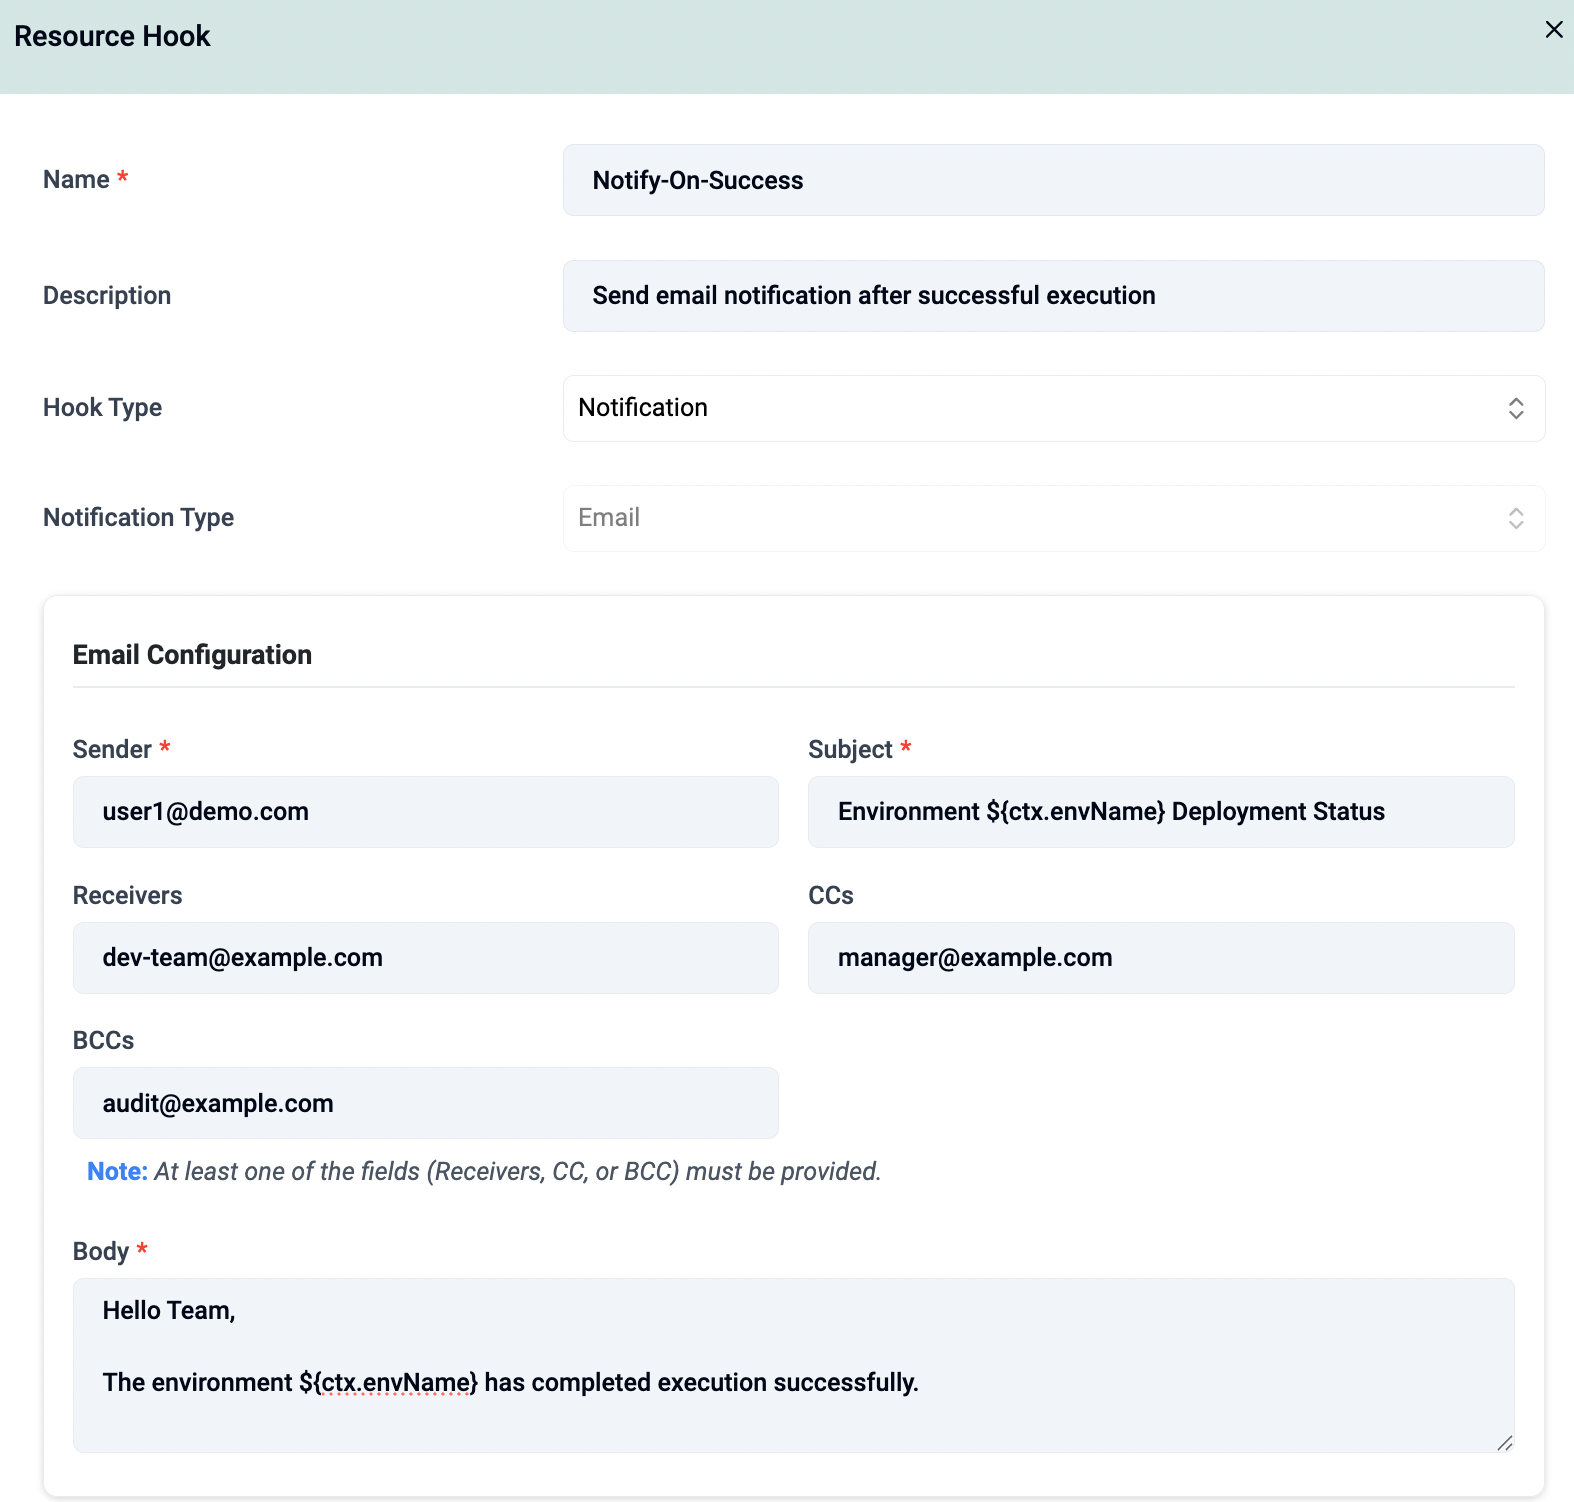
Notification
| Setting | Description |
|---|---|
| Name | Enter a name for the notification hook |
| Description | Provide a description for the notification hook |
| Hook Type | Select Notification |
| Notification Type | Email (Default Type) |
| Email Configuration | |
| -- Sender | Specify the sender email address |
| -- Subject | Specify the subject of the email |
| -- Receivers | Specify one or more recipient email addresses (comma-separated) |
| -- CCs | Specify one or more CC email addresses (comma-separated) |
| -- BCCs | Specify one or more BCC email addresses (comma-separated) |
| -- Body | Specify the email body. Template expressions can be used |
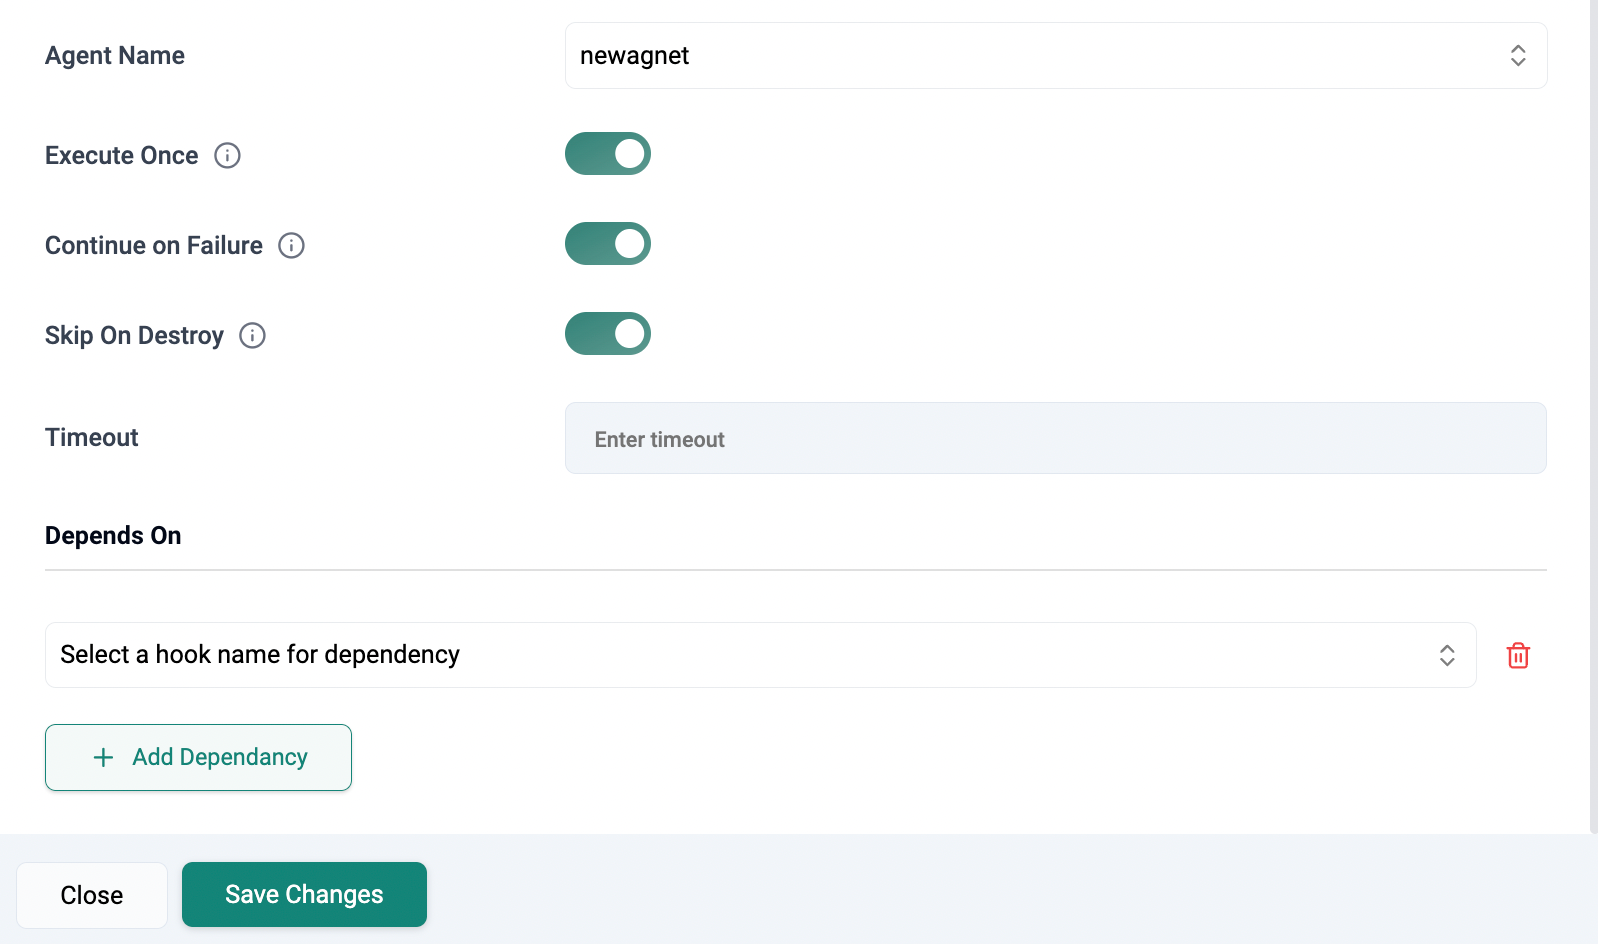
| Agent Name | Select the agent responsible for execution |
| Execute Once | Enable to execute the hook only once. For subsequent workflow runs, this activity is skipped |
| Continue on Failure | Enable to continue workflow execution even if the notification hook fails |
| Skip On Destroy | Enable to prevent the execution of the notification hook during the destroy action |
| Skip Condition | Define conditions to dynamically control whether the notification hook is executed |
| Timeout | Specify the duration after which the notification execution is considered timed out |
| Depends On | Add dependencies to control execution order relative to other hooks |
Notes
- At least one of Receivers, CCs, or BCCs must be specified.
- All email fields support templating using expressions.
- SMTP configuration must be enabled and configured for notifications to work.
Container
| Setting | Description |
|---|---|
| Name | Enter a name for the container hook |
| Container Configuration | |
| -- cpuLimitMilli | Specify the CPU Limit to be used by the container |
| -- Image | Specify the underlying container image to be used |
| -- Memory Limit in MB | Specify the container memory limit to be set (in MB) |
| -- Working Directory Path | The working directory for commands to run in |
| -- Success Condition | Specify the success condition to be evaluated when a container completes execution |
| Arguments | Arguments to the entrypoint. The docker image's CMD is used if this is not provided |
| Commands | Entrypoint array. Not executed within a shell. The docker image's ENTRYPOINT is used if this is not provided |
| Environment Variables | Provide list of environment variables to set in the container |
| Agent Name | Name of the agent responsible for execution |
| Execute Once | Enable to execute the hook once. For next workflow run, this activity will be skipped |
| Continue on Failure | Set the hook to continue execution even in case of failure |
| Skip On Destroy | Enable Skip on Destroy to prevent the execution of hooks or tasks during the destroy action, avoiding unnecessary operations |
| Skip Condition | Define rules to control task execution dynamically. The Skip Condition field enables conditional execution of tasks or hooks based on runtime parameters, ensuring that operations such as notifications, approvals, or workflow handlers are triggered only when necessary. This prevents redundant executions and improves workflow efficiency |
| Timeout | Enter a value to set the timeout duration for container execution, if this exceeds container execution will be terminated |
HTTP
| Setting | Description |
|---|---|
| Name | Enter a name for the http hook |
| HTTP Configuration | |
| -- Body | Provide message body which is the data bytes transmitted during an HTTP transaction message |
| -- Endpoint | Specify the http endpoint which is a targetable URL to be invoked |
| -- Method | Specify the http method e.g. PUT, POST, GET that corresponds to the endpoint provided |
| -- Success Condition | Specify the success condition to be evaluated when a http call completes execution |
| Headers | Specify additional context and metadata about the request |
| Agent Name | Name of the agent responsible for execution |
| Execute Once | Enable to execute the hook once. For next workflow run, this activity will be skipped |
| Continue on Failure | Set the hook to continue execution even in case of failure |
| Skip On Destroy | Enable Skip on Destroy to prevent the execution of hooks or tasks during the destroy action, avoiding unnecessary operations |
| Skip Condition | Define rules to control task execution dynamically. The Skip Condition field enables conditional execution of tasks or hooks based on runtime parameters, ensuring that operations such as notifications, approvals, or workflow handlers are triggered only when necessary. This prevents redundant executions and improves workflow efficiency |
| Timeout | Enter a value to set the timeout duration for http call, if this exceeds execution will be terminated |
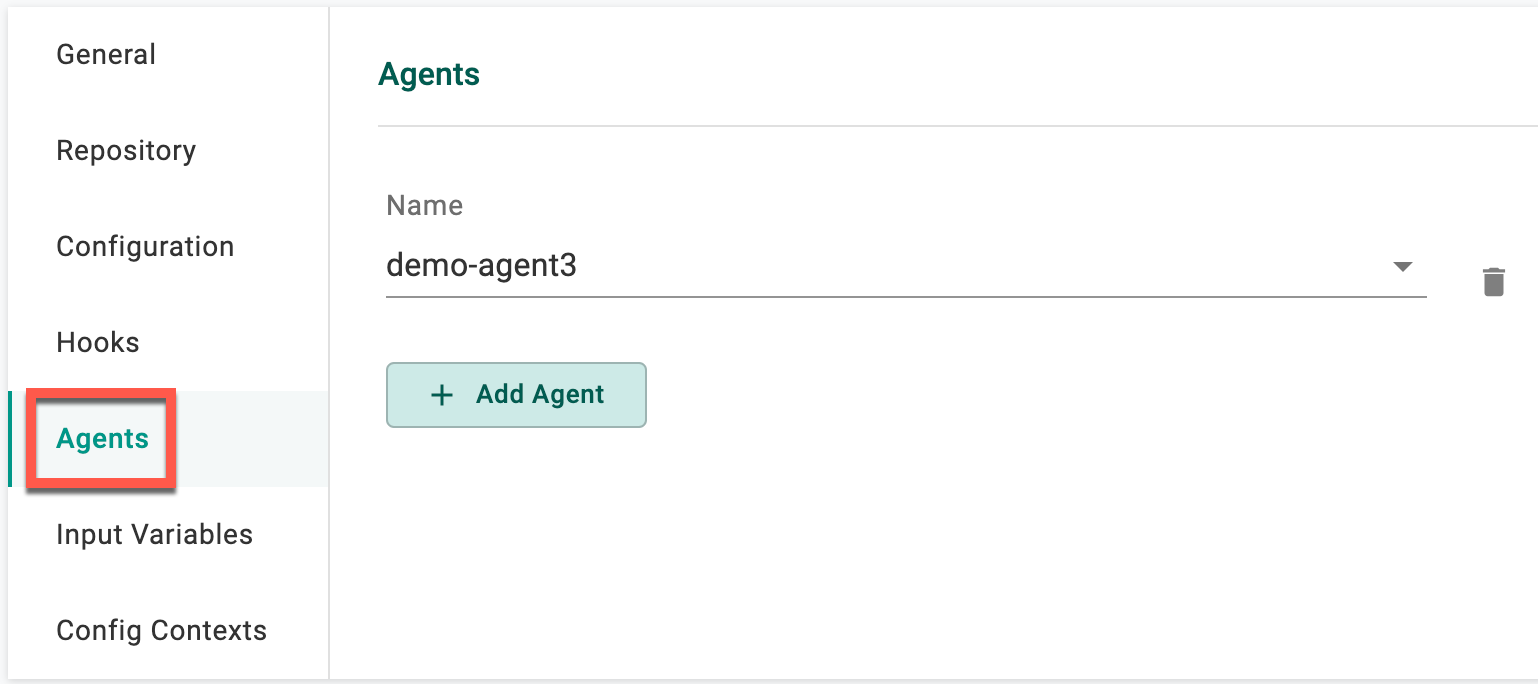
Agents
Add Agents
| Parameter | Description |
|---|---|
| Name | Select an agent to associate with this resource |
Add Agent Pools
| Parameter | Description |
|---|---|
| Name | Select an agent pool to associate with this resource |
Input Variables
OpenTofu and HCP Terraform Providers
- Click + Variable to add the required variable(s) to this resource template
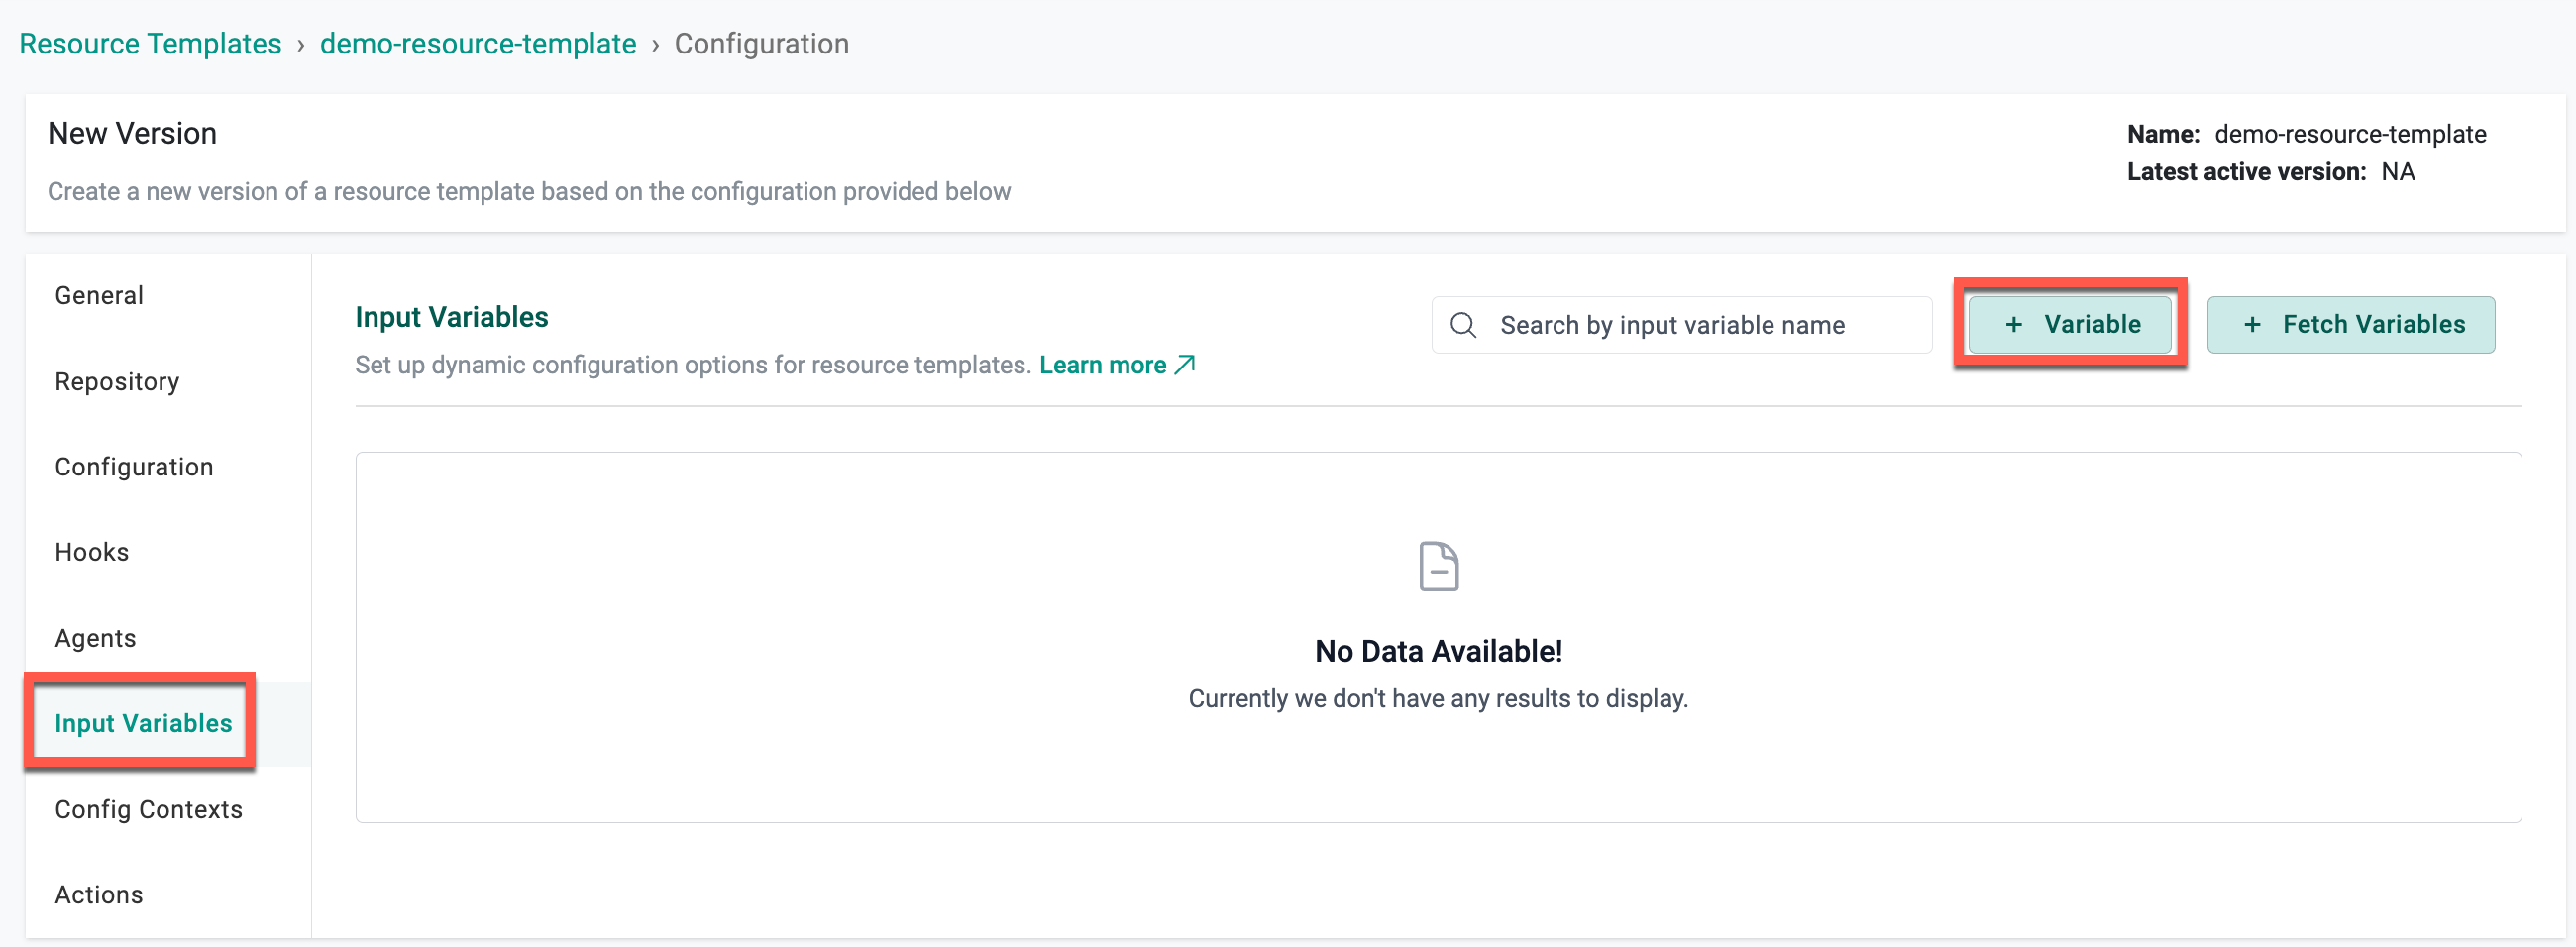
Here are the variables that the user can configure for OpenTofu and HCP Terraform providers:
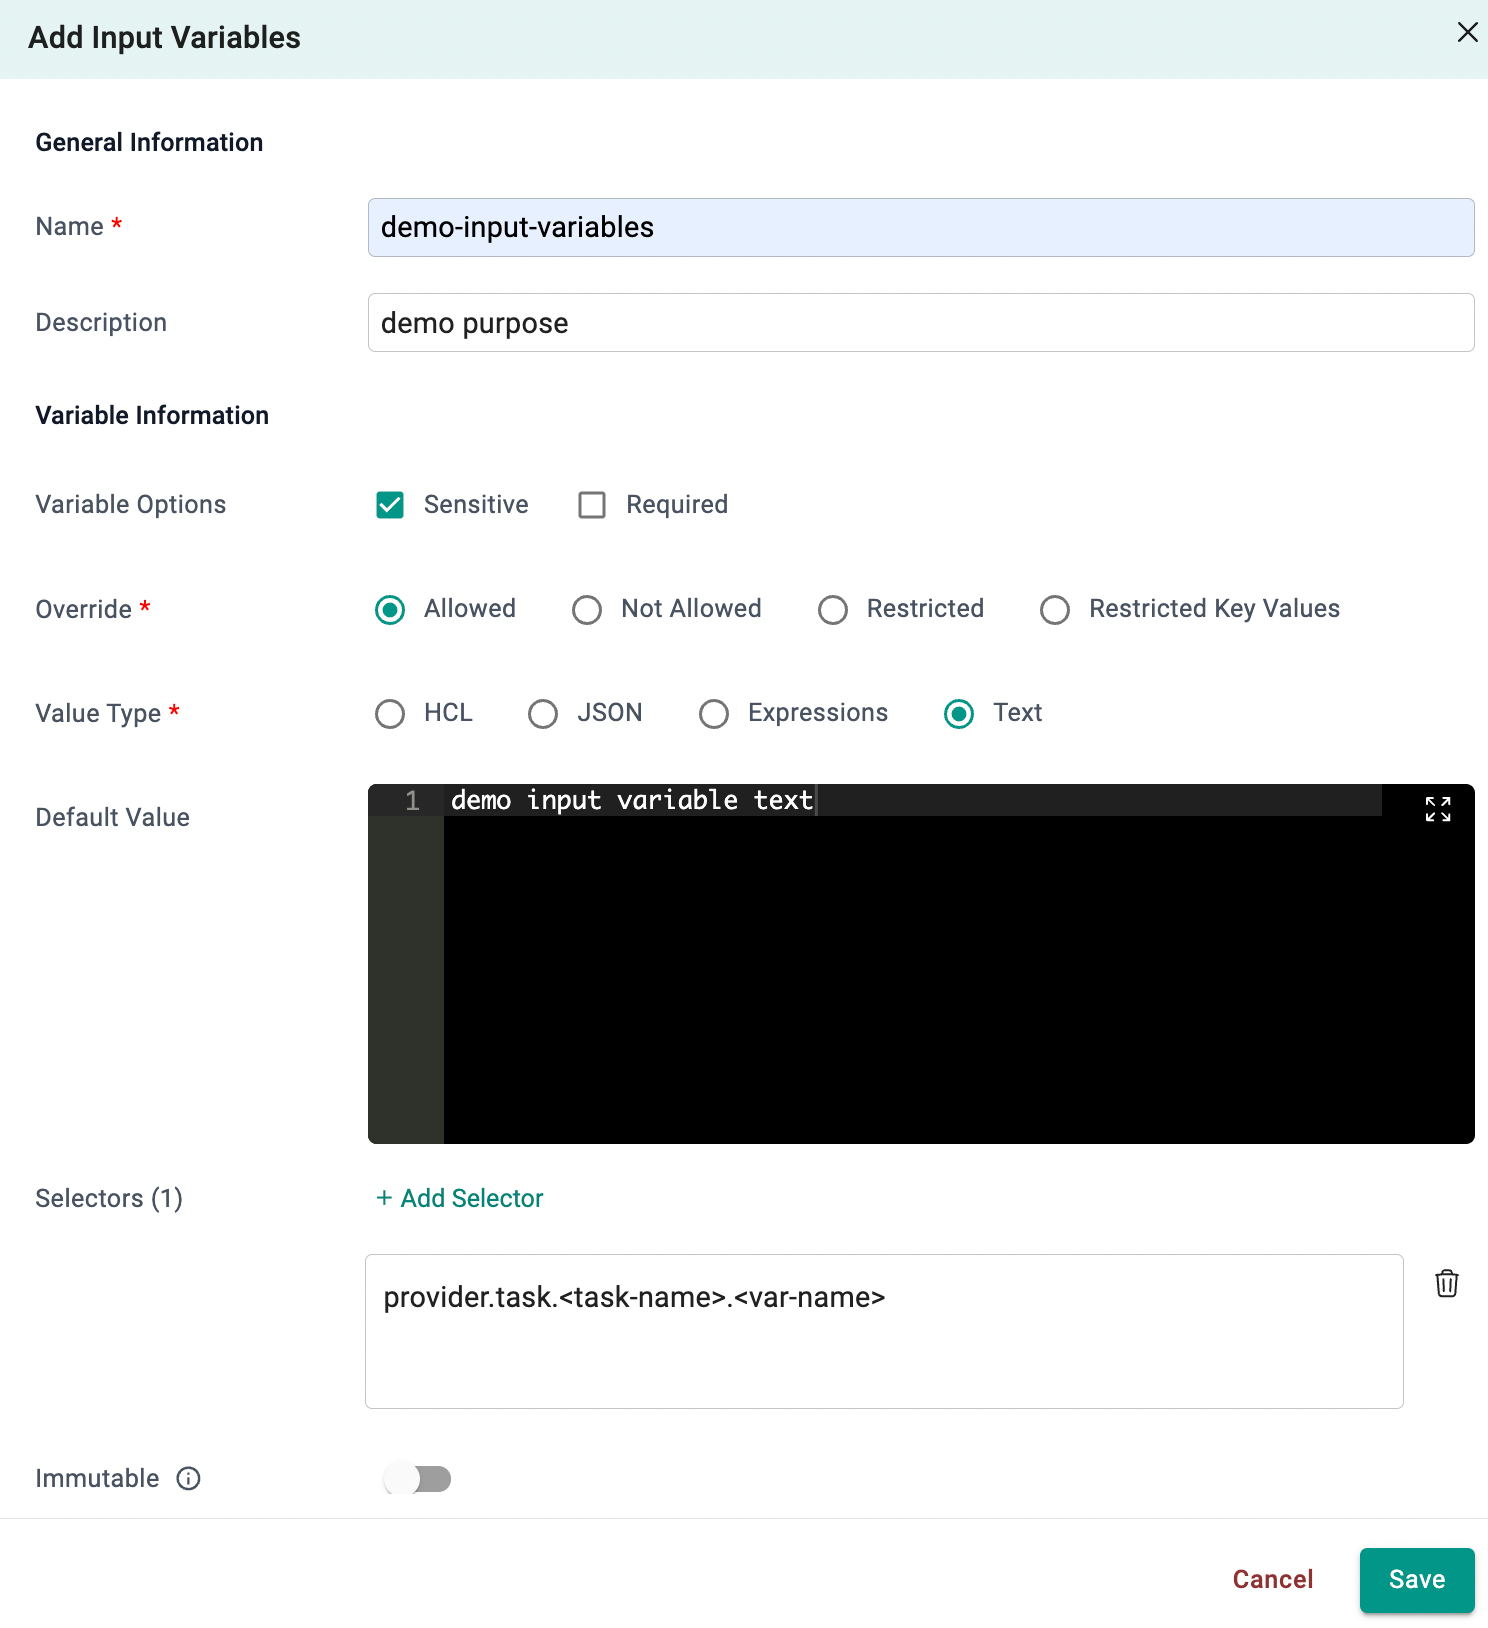
Selectors
| Setting | Description |
|---|---|
| Name | The name of the variable |
| Description | A brief description of the variable |
| Sensitive | Does not display the value in the UI |
| Required | The variable is required when using this Context |
| Override Type | Controls if a user can change a variable or not |
| -- Allowed | Allows the user to override the value |
| -- Not Allowed | Does not allow the user to override the value |
| -- Restricted | Allows the user to override the value by selecting a different, pre-defined value |
| -- Restricted Key Values | Allows the user to override the value only by selecting from a specific list of permitted key-value pairs |
| Value Type | The type of value |
| -- HCL | Hashicorp configuration language |
| -- JSON | JavaScript Object Notation (JSON) is a lightweight data-interchange format |
| -- Expressions | Expressions are valid units of code that resolve to a value |
| -- Text | Text value |
| Default Value | The variable value |
| Selectors | Selectors enable the targeting and customization of specific resource variables within the resource template. By using selectors, users can alias resource variables and restrict the override scope, allowing them to override only specific resource variables |
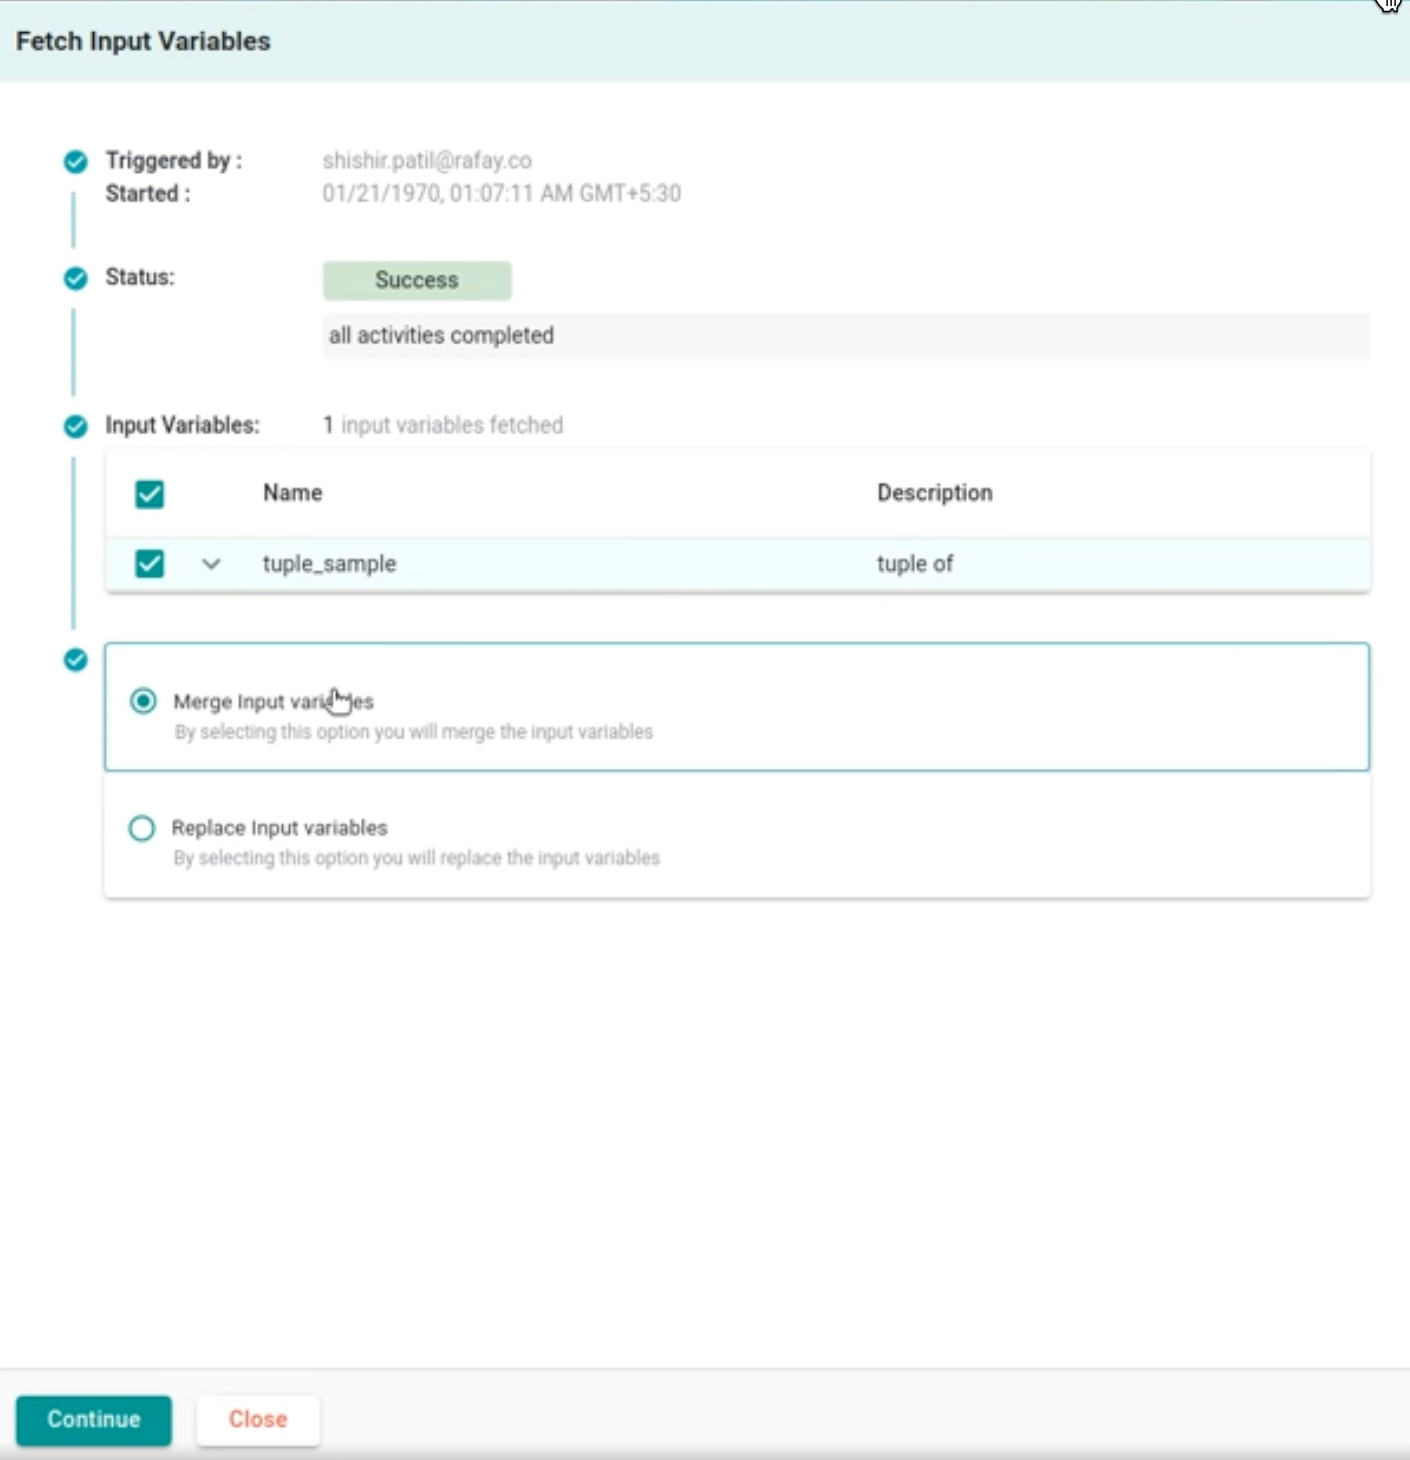
Fetch Variables
The Fetch Variables feature allows automatic retrieval of variables defined in a Git repository linked to the resource template.
- Clicking on + Fetch Variables displays a screen that shows who triggered the Fetch Variables action, along with the status and a list of input variables. The initial status displayed is Evaluating Status.
- Once the input variables are fetched, select either Merge Input Variables or Replace Input Variables, depending on your requirements.
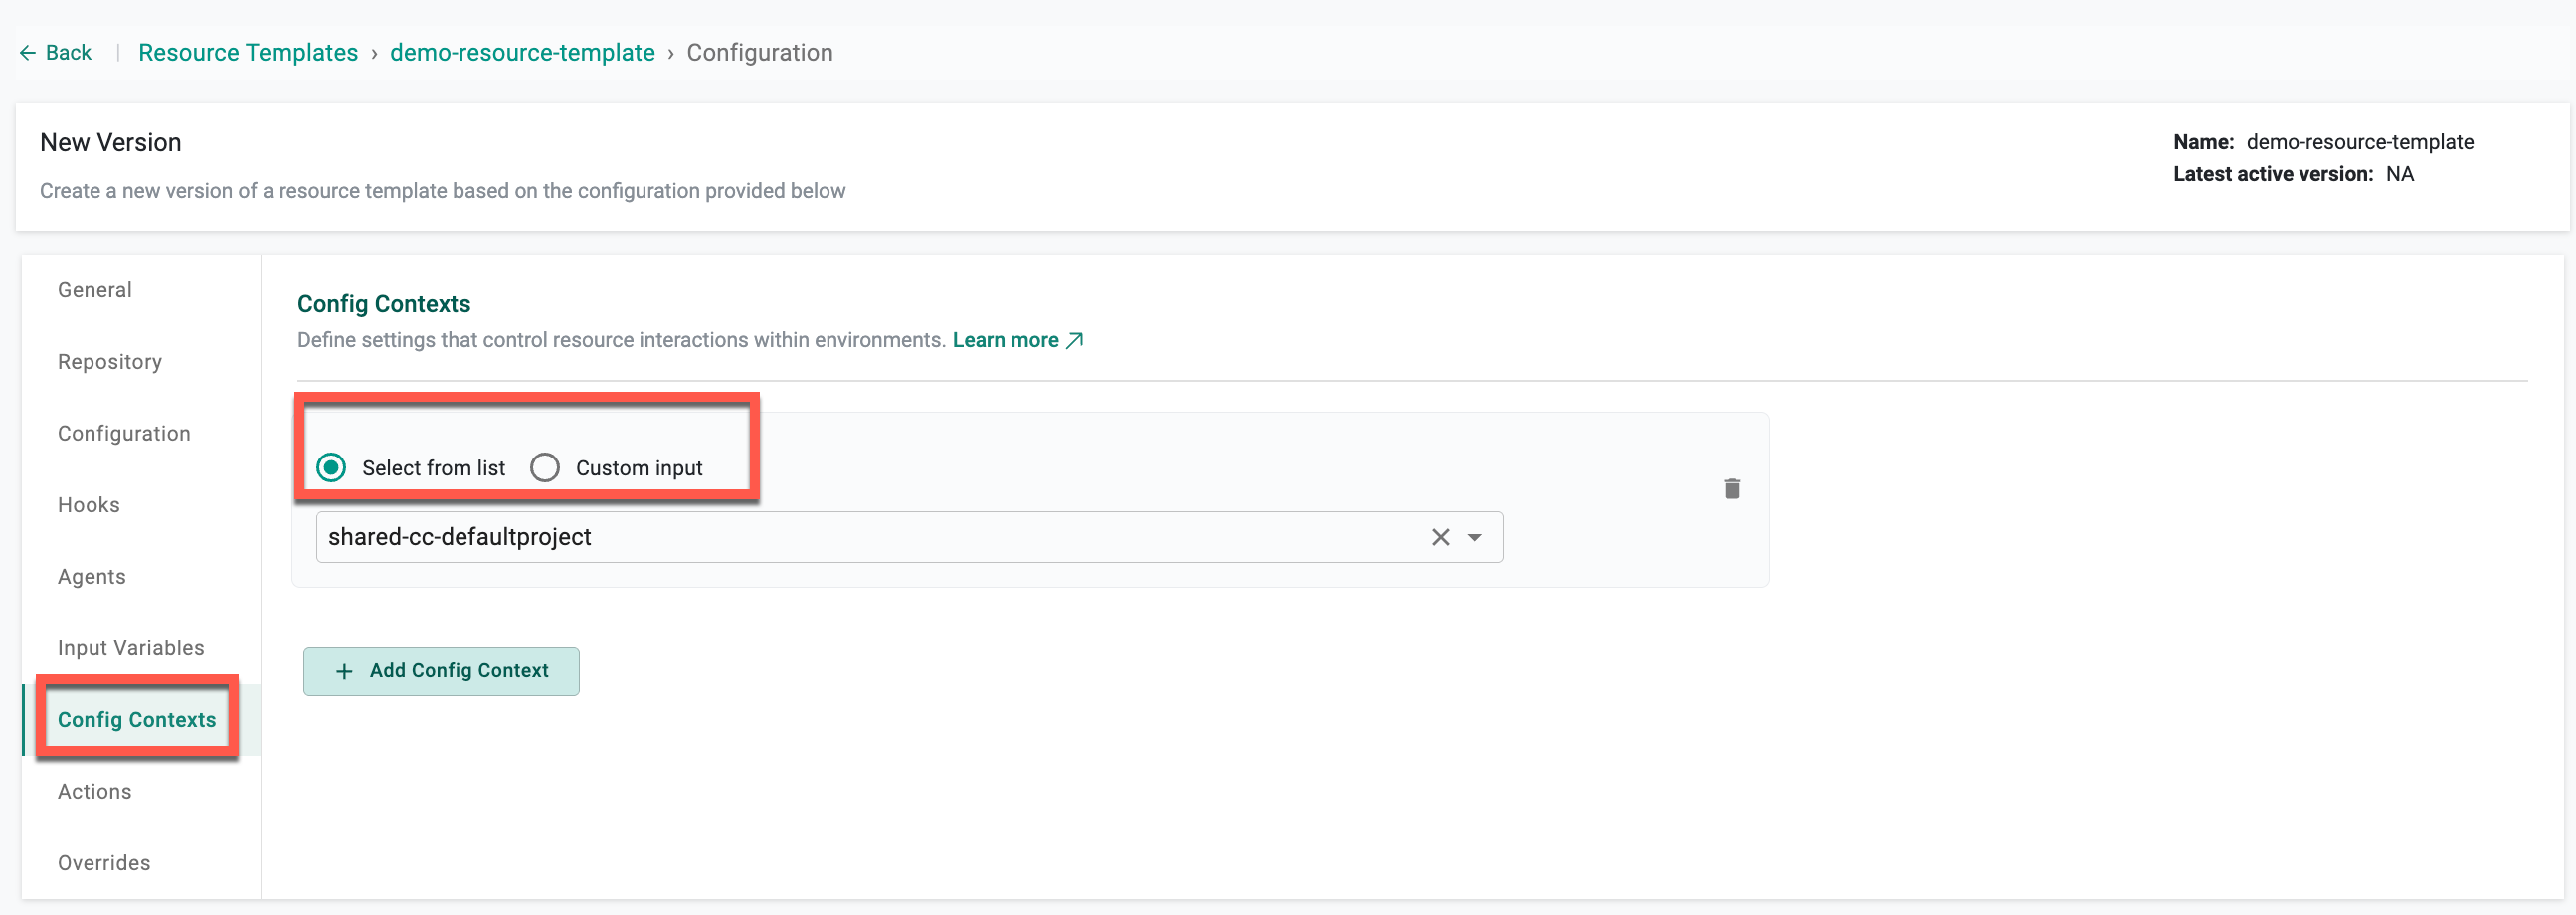
Contexts
| Option | Description |
|---|---|
| Select from list | Select an existing config context from the dropdown. This option is used when a single, fixed config context applies to all projects that use the template. |
| Custom input | Provide a config context name using static text, expressions, or a combination of both (for example, app-#{project.name}-cc). This option allows each project to use its own config context while sharing the same resource and environment templates. |
Upon furnishing the essential details, choose either Save as Active Version or Save as Draft Version
For details on using Custom input with expressions and project-specific config contexts, see Config Contexts using Custom Input.
Actions
Click + Actions to add the required actions to this resource template.
🔗 Refer this page to know more about the Actions.
Admins can configure actions such as scaling node pools or modifying virtual machine settings directly within the Resource Template. These actions streamline essential tasks, support input validation, and enable auditing for efficient and accountable environment management.
| Setting | Description |
|---|---|
| Name | Name of the action |
| Description | A brief description of the action |
| Type | Select the action type: Deploy for provisioning resources or Workflows for automating task sequences |
| Context | Select the required context that includes the actions |
Upon furnishing the essential details, choose either Save as Active Version or Save as Draft Version

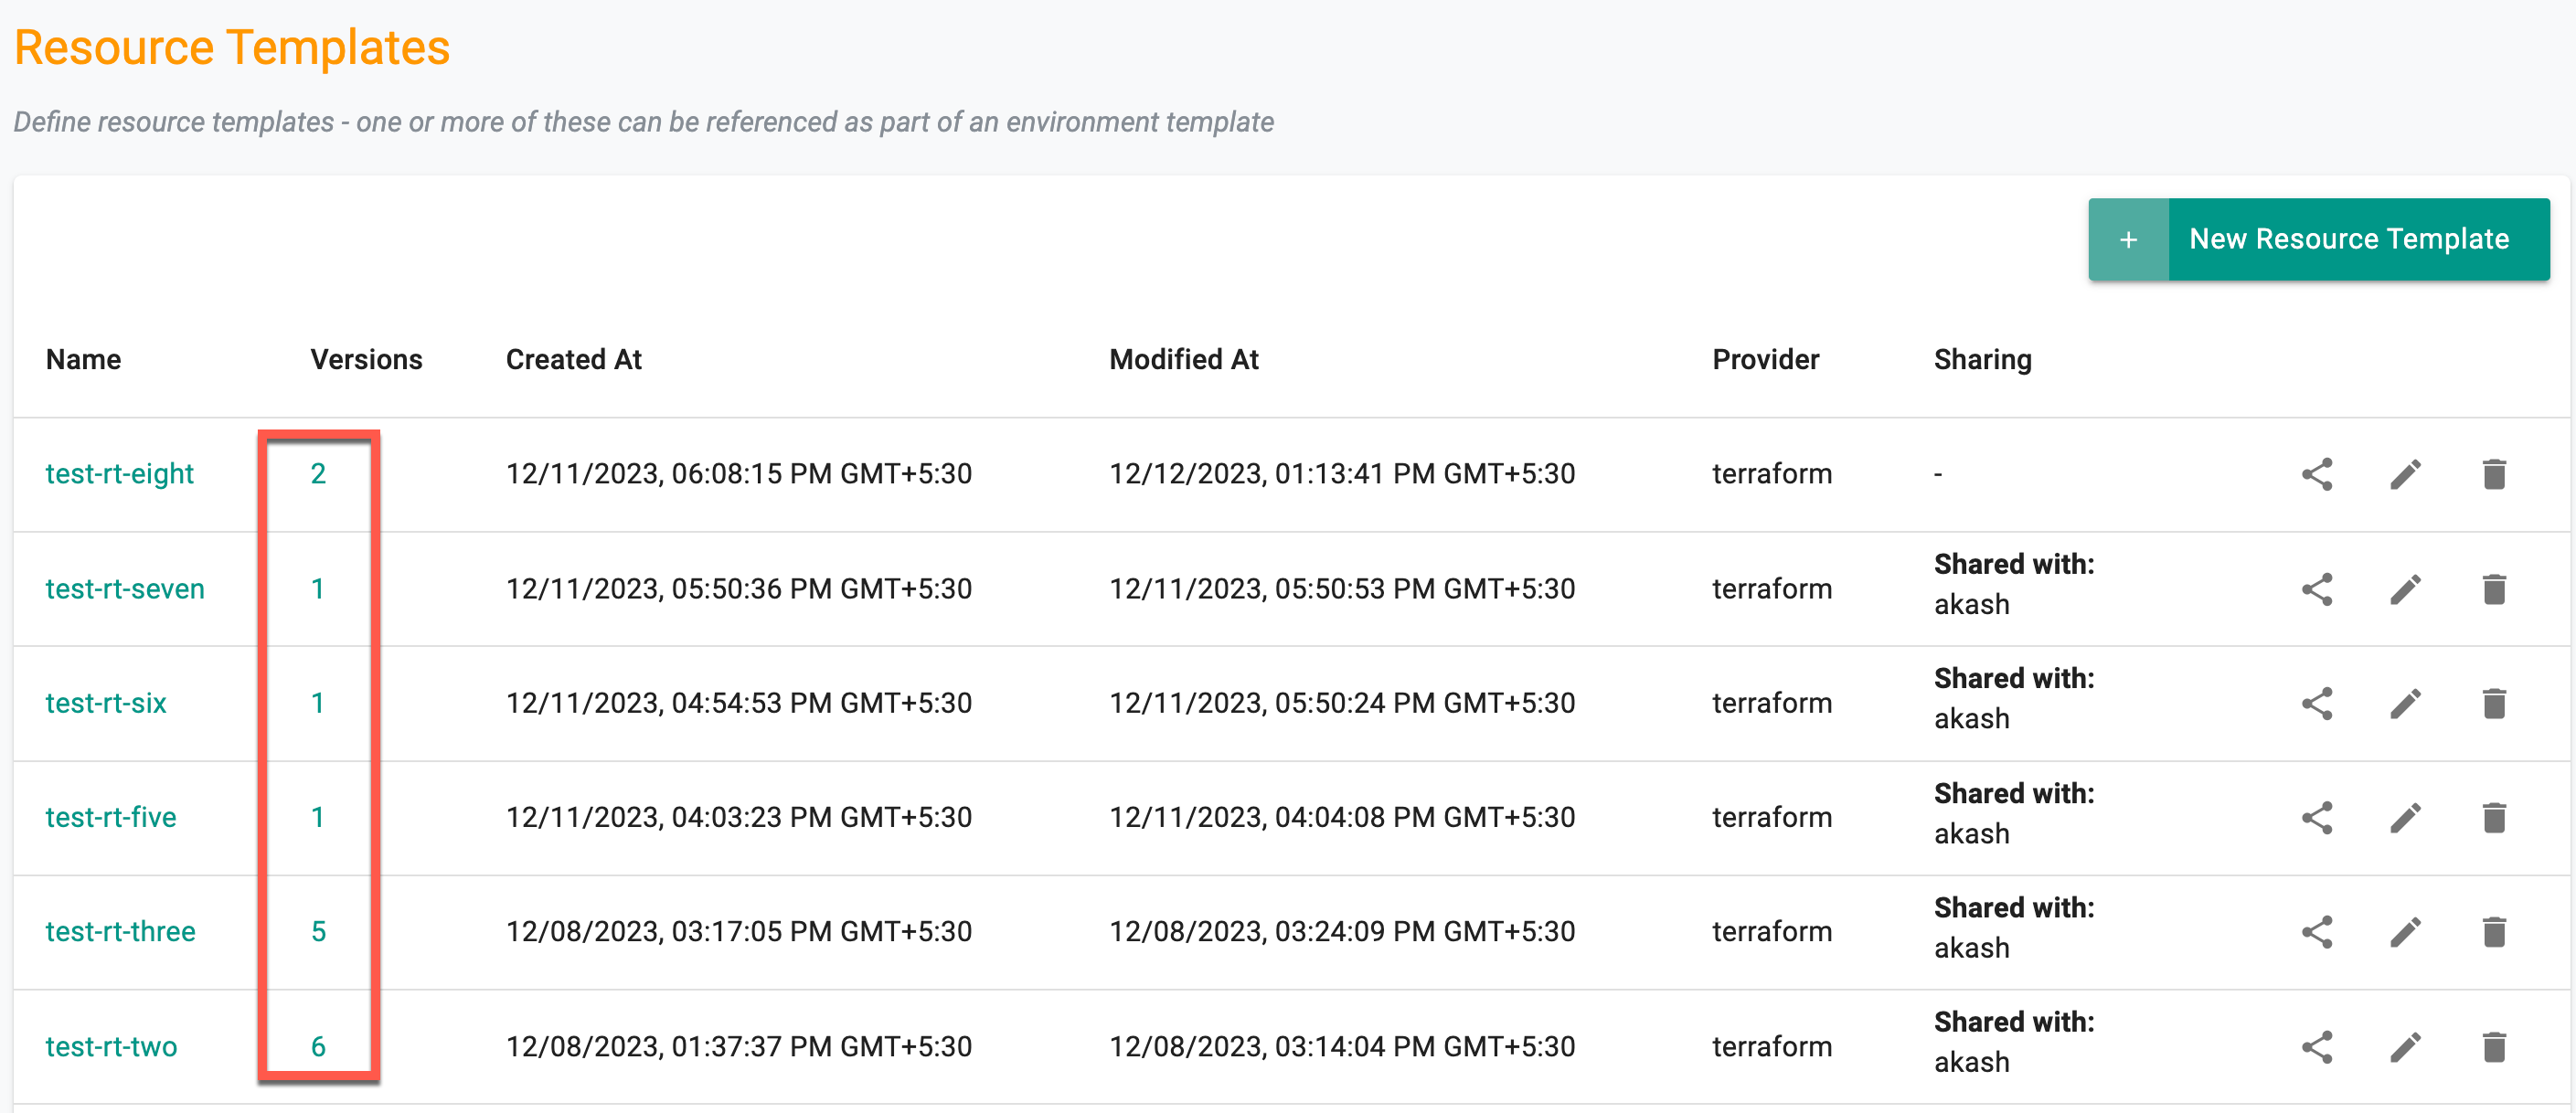
Version Management
Upon saving the configurations, users have the ability to review the list of resource templates with versions. To delve into specific version details, click on the corresponding version number.
There are three (3) distinct states for resource template versions:
- Draft
- Active
- Disabled
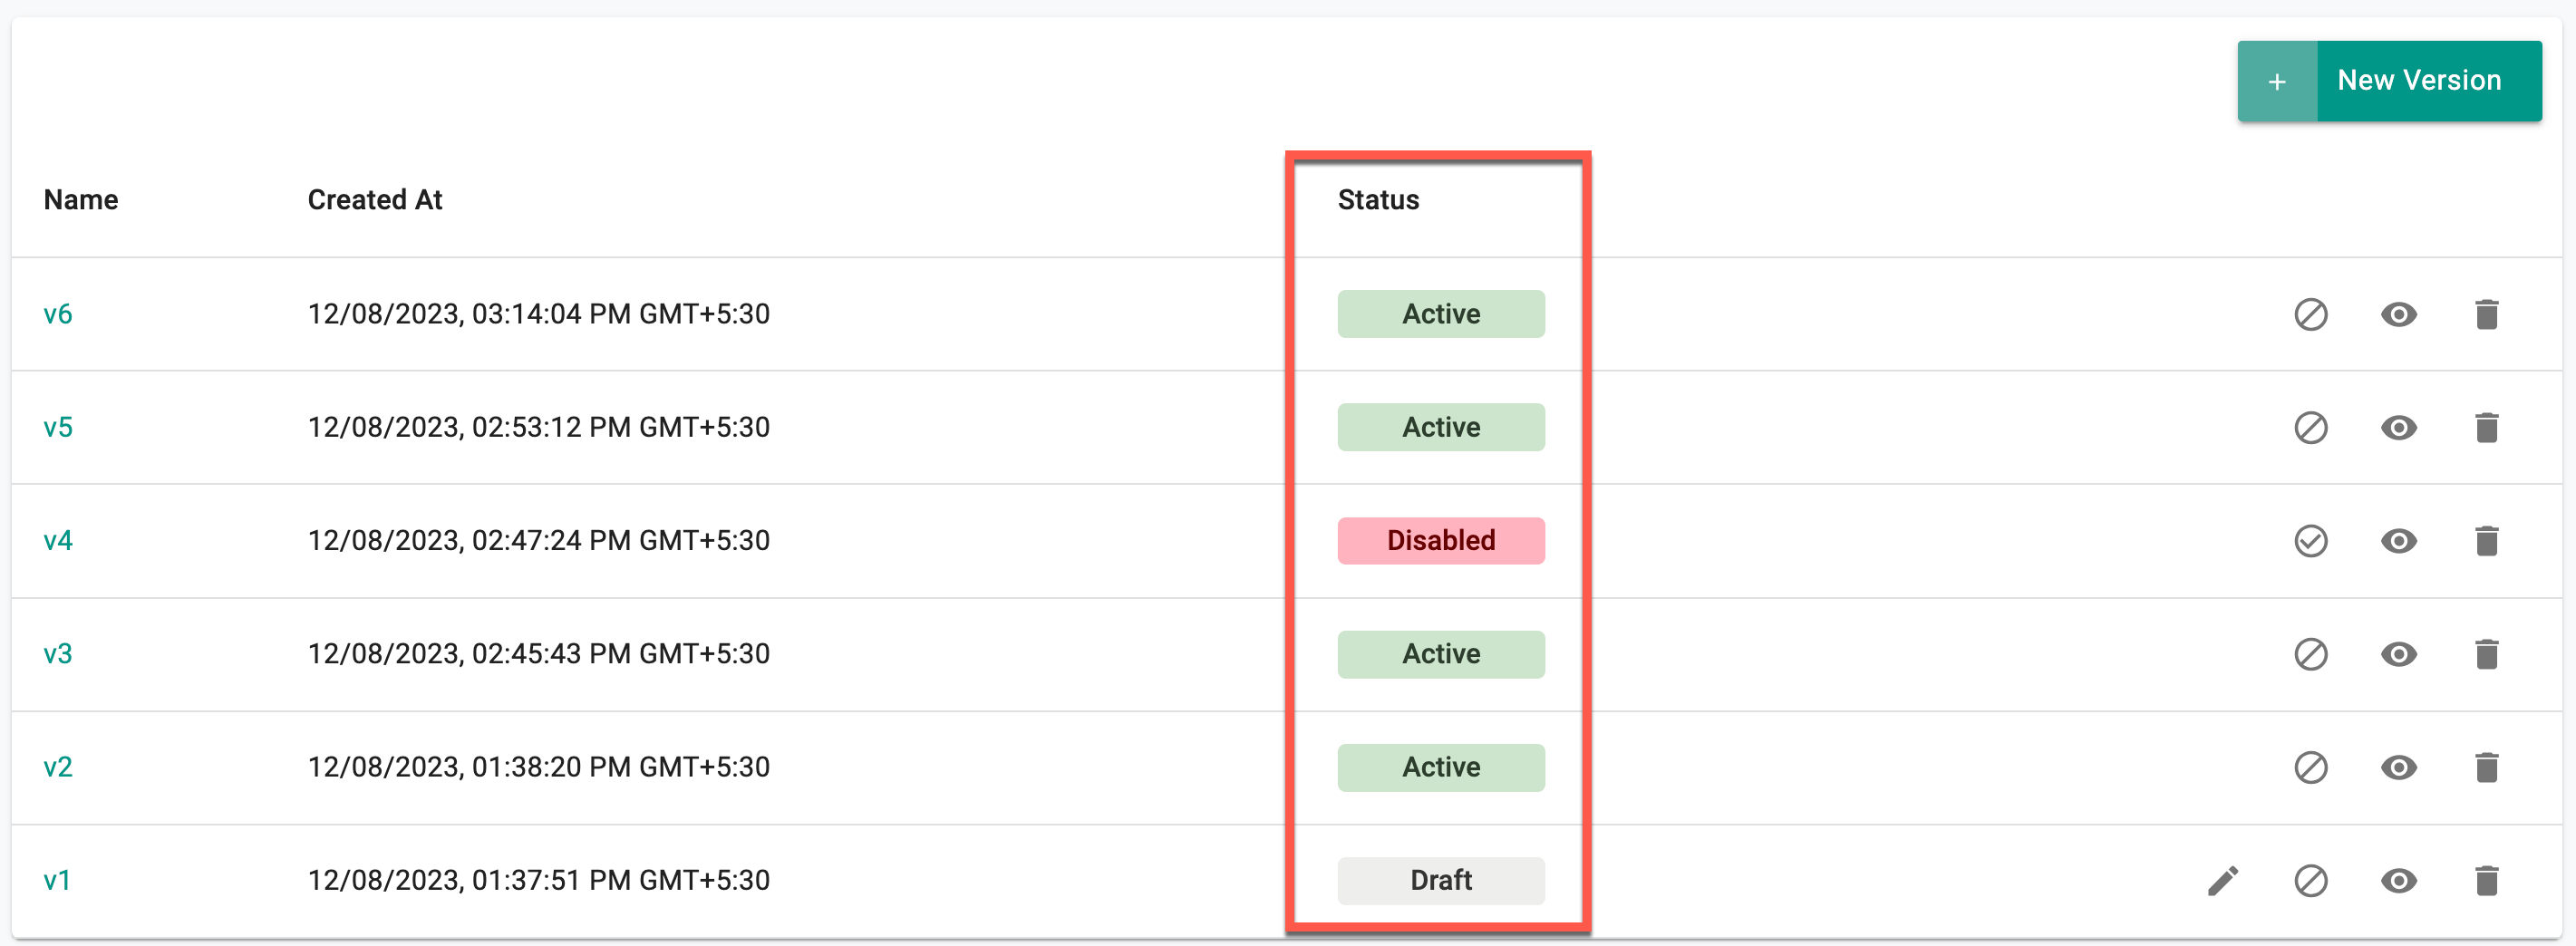
Users can create a draft version of resource templates and make multiple edits to it during the testing/validation phase. Once it is verified that the template is working as expected, users can transition the status from Draft to Active. However, it's important to note that no further edits can be made to the template in the active status. A new version has to be created for any edits to an Active version. Draft versions are project scoped which means that these versions are not shared with downstream projects (when the template is shared).
If a version of a template needs to be made unavailable for security related reasons or compliance, users can disable it by clicking on the Disable icon. Disabling effectively restricts further use of this version, meaning it can no longer be referenced in any new environments that are created. However, existing environments already using this version will remain unaffected.
Draft Status
In the draft status, the following rules apply:
- Inaccessible from shared projects
- Usable within the same project
- Editable multiple times
- Can be marked as active (accessible from shared projects)
- Can be marked as disabled and restored to an active state by enabling
Active Status
For versions in the active status:
- Cannot be reverted back to draft from any other state
- Accessible from shared projects
- No further changes allowed
- Can be marked as disabled and restored to an active state by enabling
Disabled Status
Versions in the disabled status adhere to the following rules:
- Cannot be used in the future; no impact on existing projects
- Can be restored to an active state by enabling
Important
- Use the delete icon to remove a version if it is not currently in use. Versions cannot be deleted if they are in use
- Resource Template versions can be managed through different interfaces, including UI, Terraform, and GitOps Sync
![]()