Part 4: Workload
What Will You Do
In this part of the self-paced exercise, you will deploy a "test workload" to your OPA Gatekeeper cluster that will be used to test the OPA Gatekeeper policy.
Step 1: Deploy Workload
Important
An "App Developer" would like clear and obvious instructions on what they need to do to make sure their workloads are compliant with organizational policy.
In this step, you will create a namespace and deploy a workload in that namespace.
Create Namespace
- Navigate to the Namespaces page
- Create a New Namespace, provide a name (e.g. opa-demo) and select type as Wizard
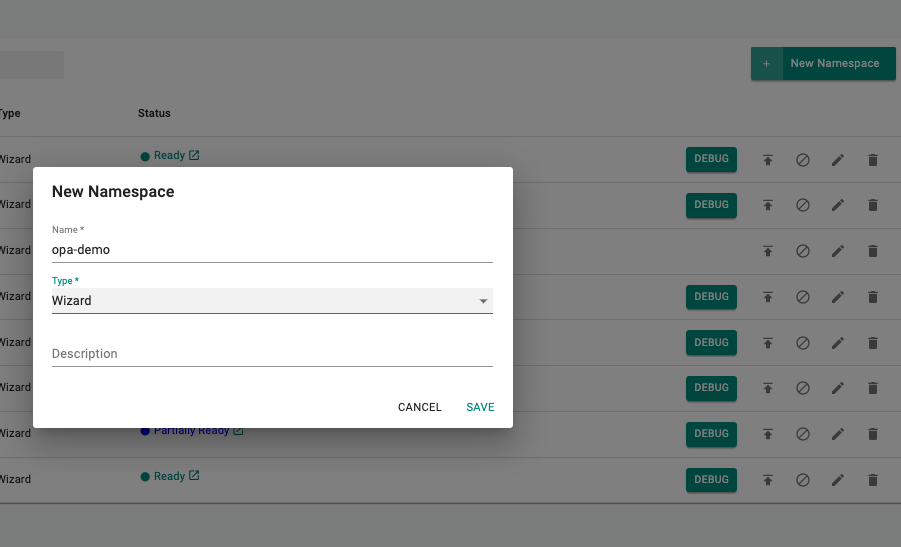
- In the placement section, select the cluster that you want to deploy the namespace to
- Click Save & Go to Publish
- Publish the namespace
Deploy the workload
- Under Applications, select the Workloads section
- Create a new Workload, specify the name (e.g. opa-gs-workload) and Package type as K8s yaml
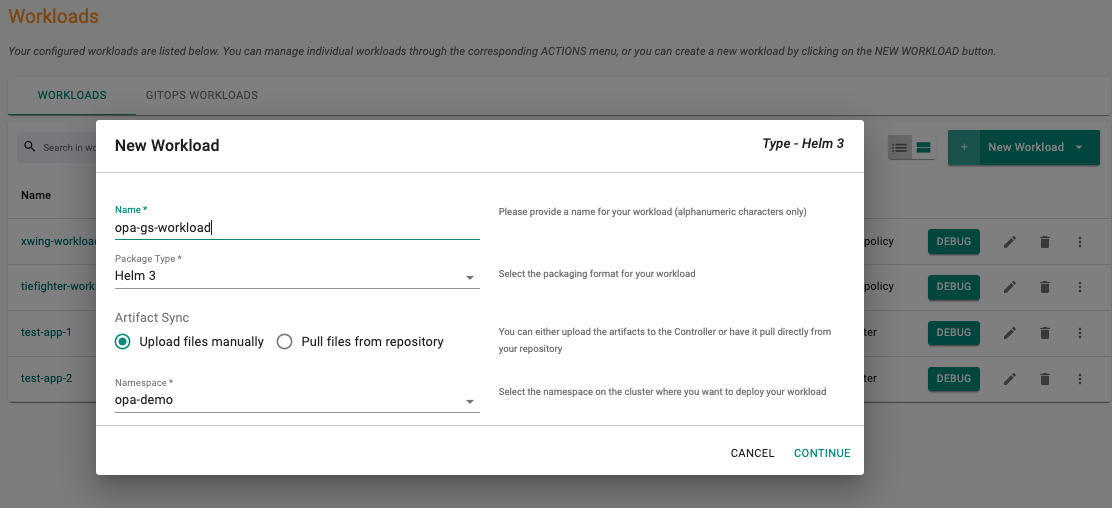
- Select Upload files manually as the Artifact Sync option
- Select the namespace (e.g. opa-demo) from the dropdown menu
- Select Continue
- Upload the yaml file below
apiVersion: v1
kind: Pod
metadata:
  name: opa-gs-nginx
spec:
  containers:
  - name: opa-gs-nginx
    image: nginx
    resources:
      limits:
        cpu: "800m"
      requests:
        cpu: "500m"
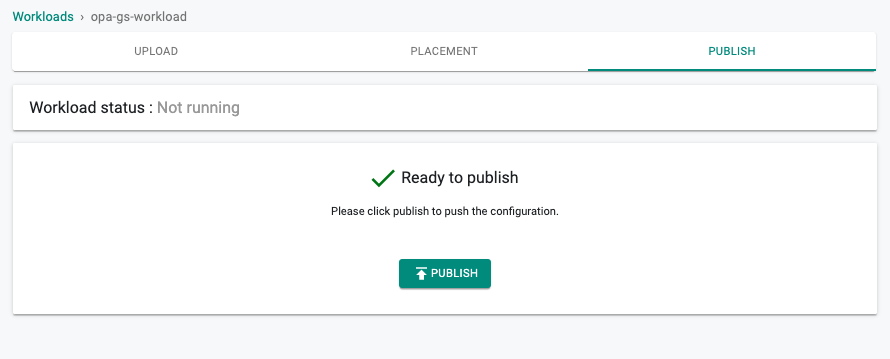
- Click Save and Go to Placement
- Select the cluster that you want to deploy the workload to (e.g. opa-gs-cluster), Click Save and Go to Publish
- Click Publish
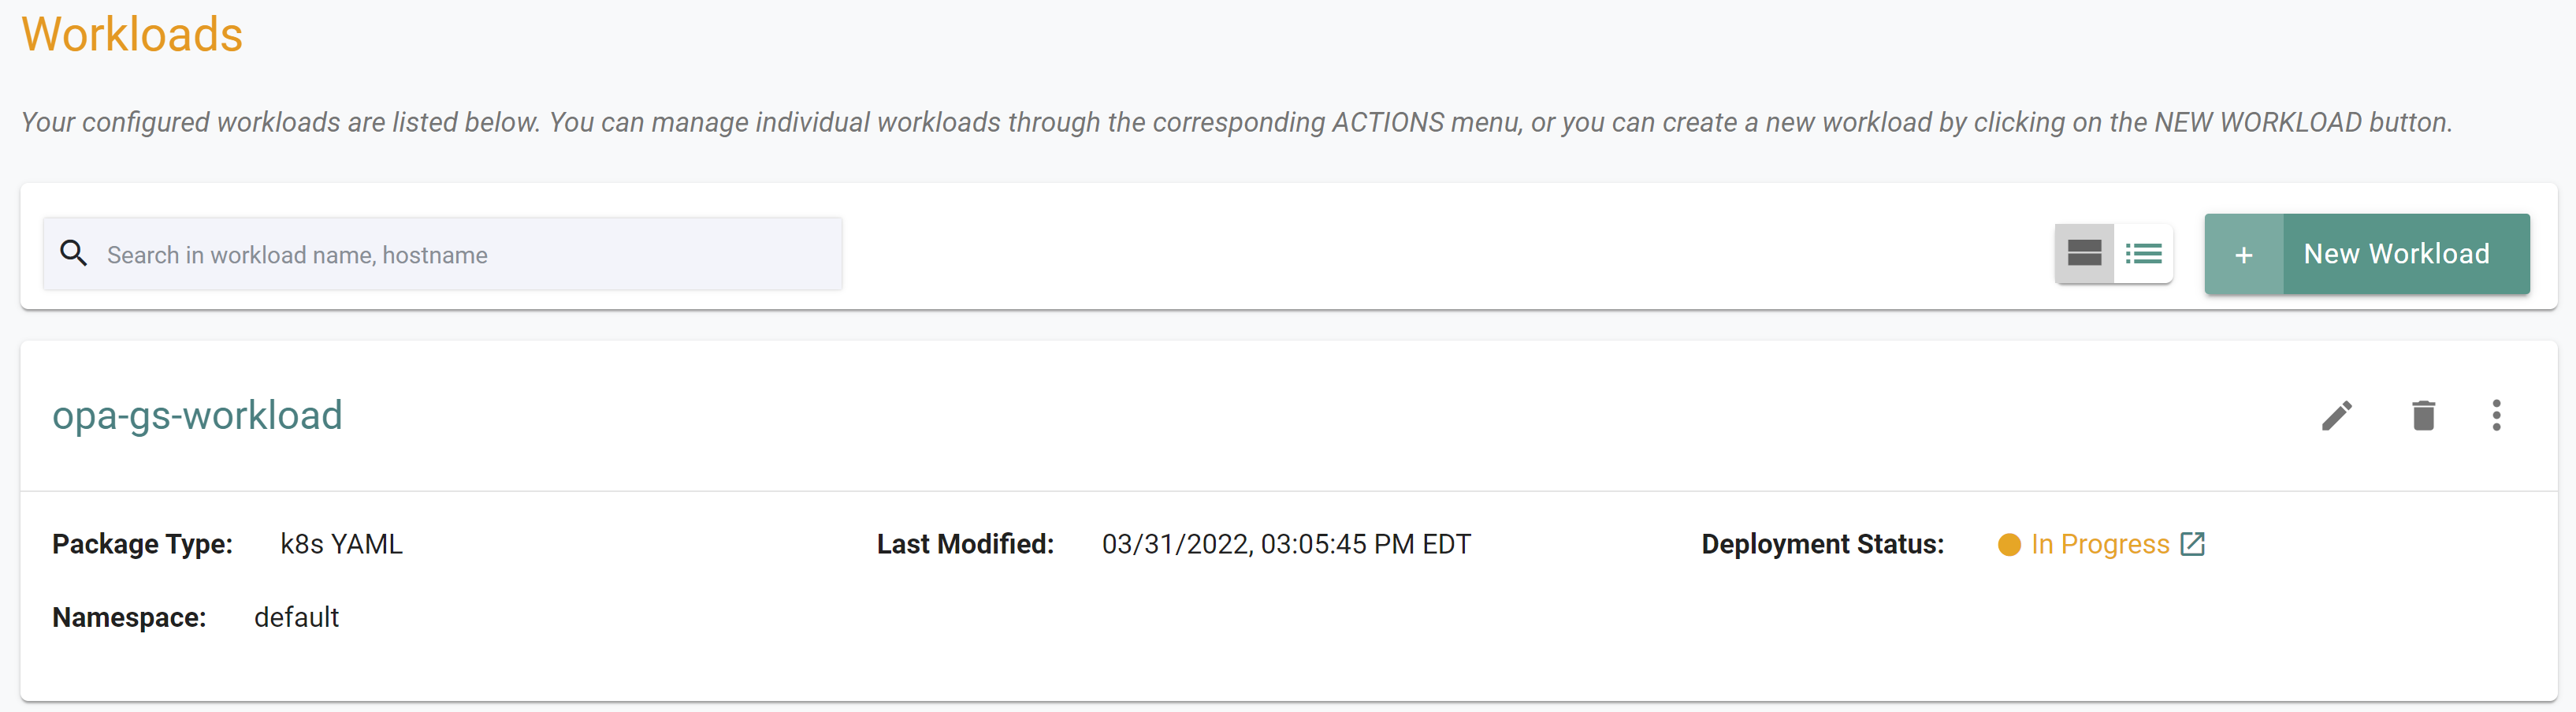
You should see something like the following showing the workload deployment status as "In Progress"
After a few minutes, you will see something like the following showing the workload deployment status as "Published Failed"

- Click to expand the error message
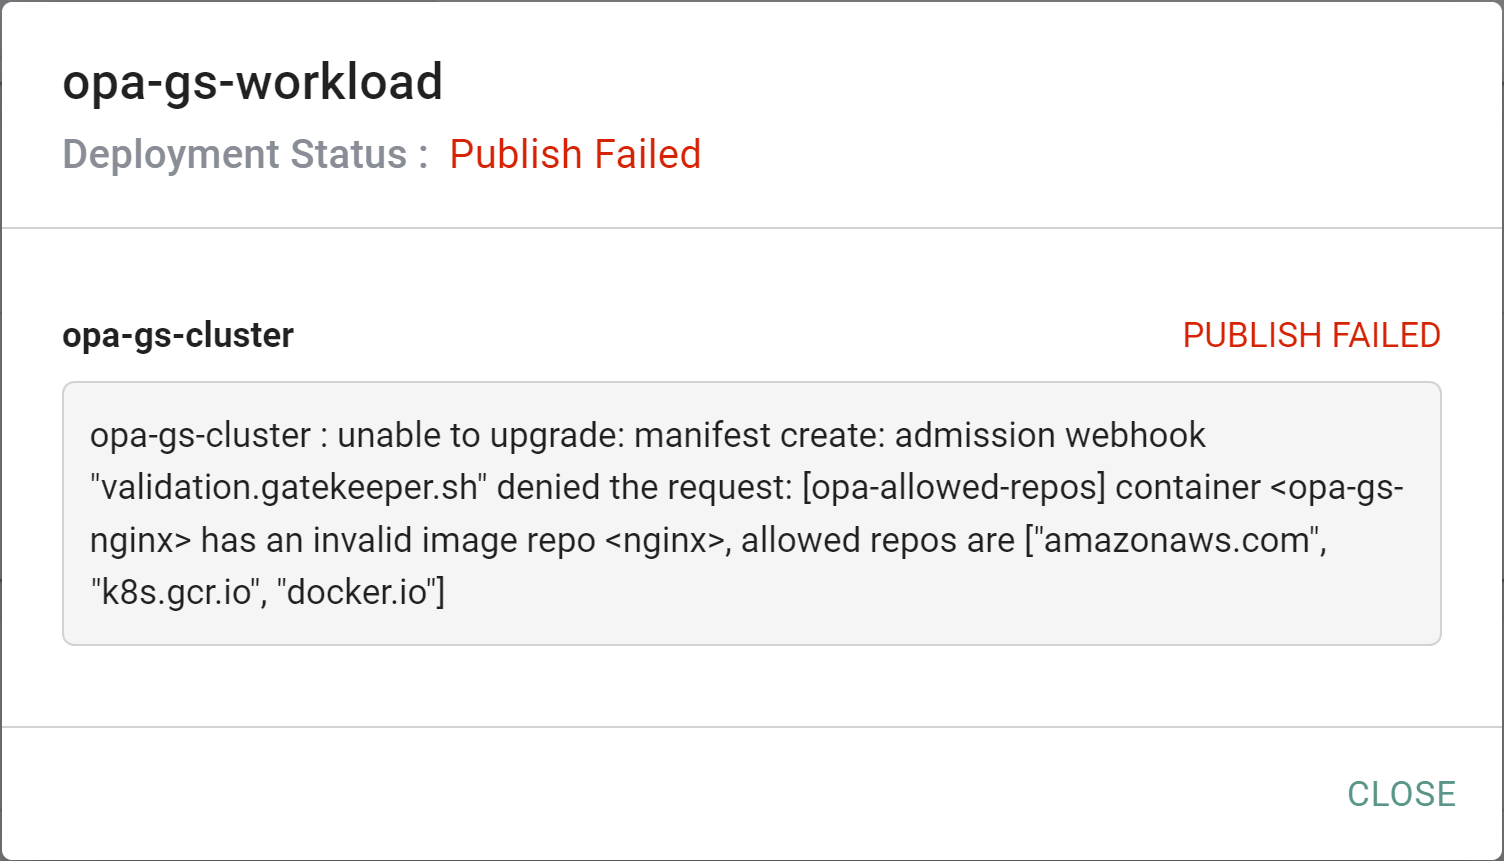
The error message shows that the OPA Gatekeeper constraint denied the request to create the pod as the image is not from a valid repo.
- Click to edit the workload
- Click to edit the uploaded YAML file
- Edit the image path to reference a supported repository
image: docker.io/nginx
The file should look like the following once updated
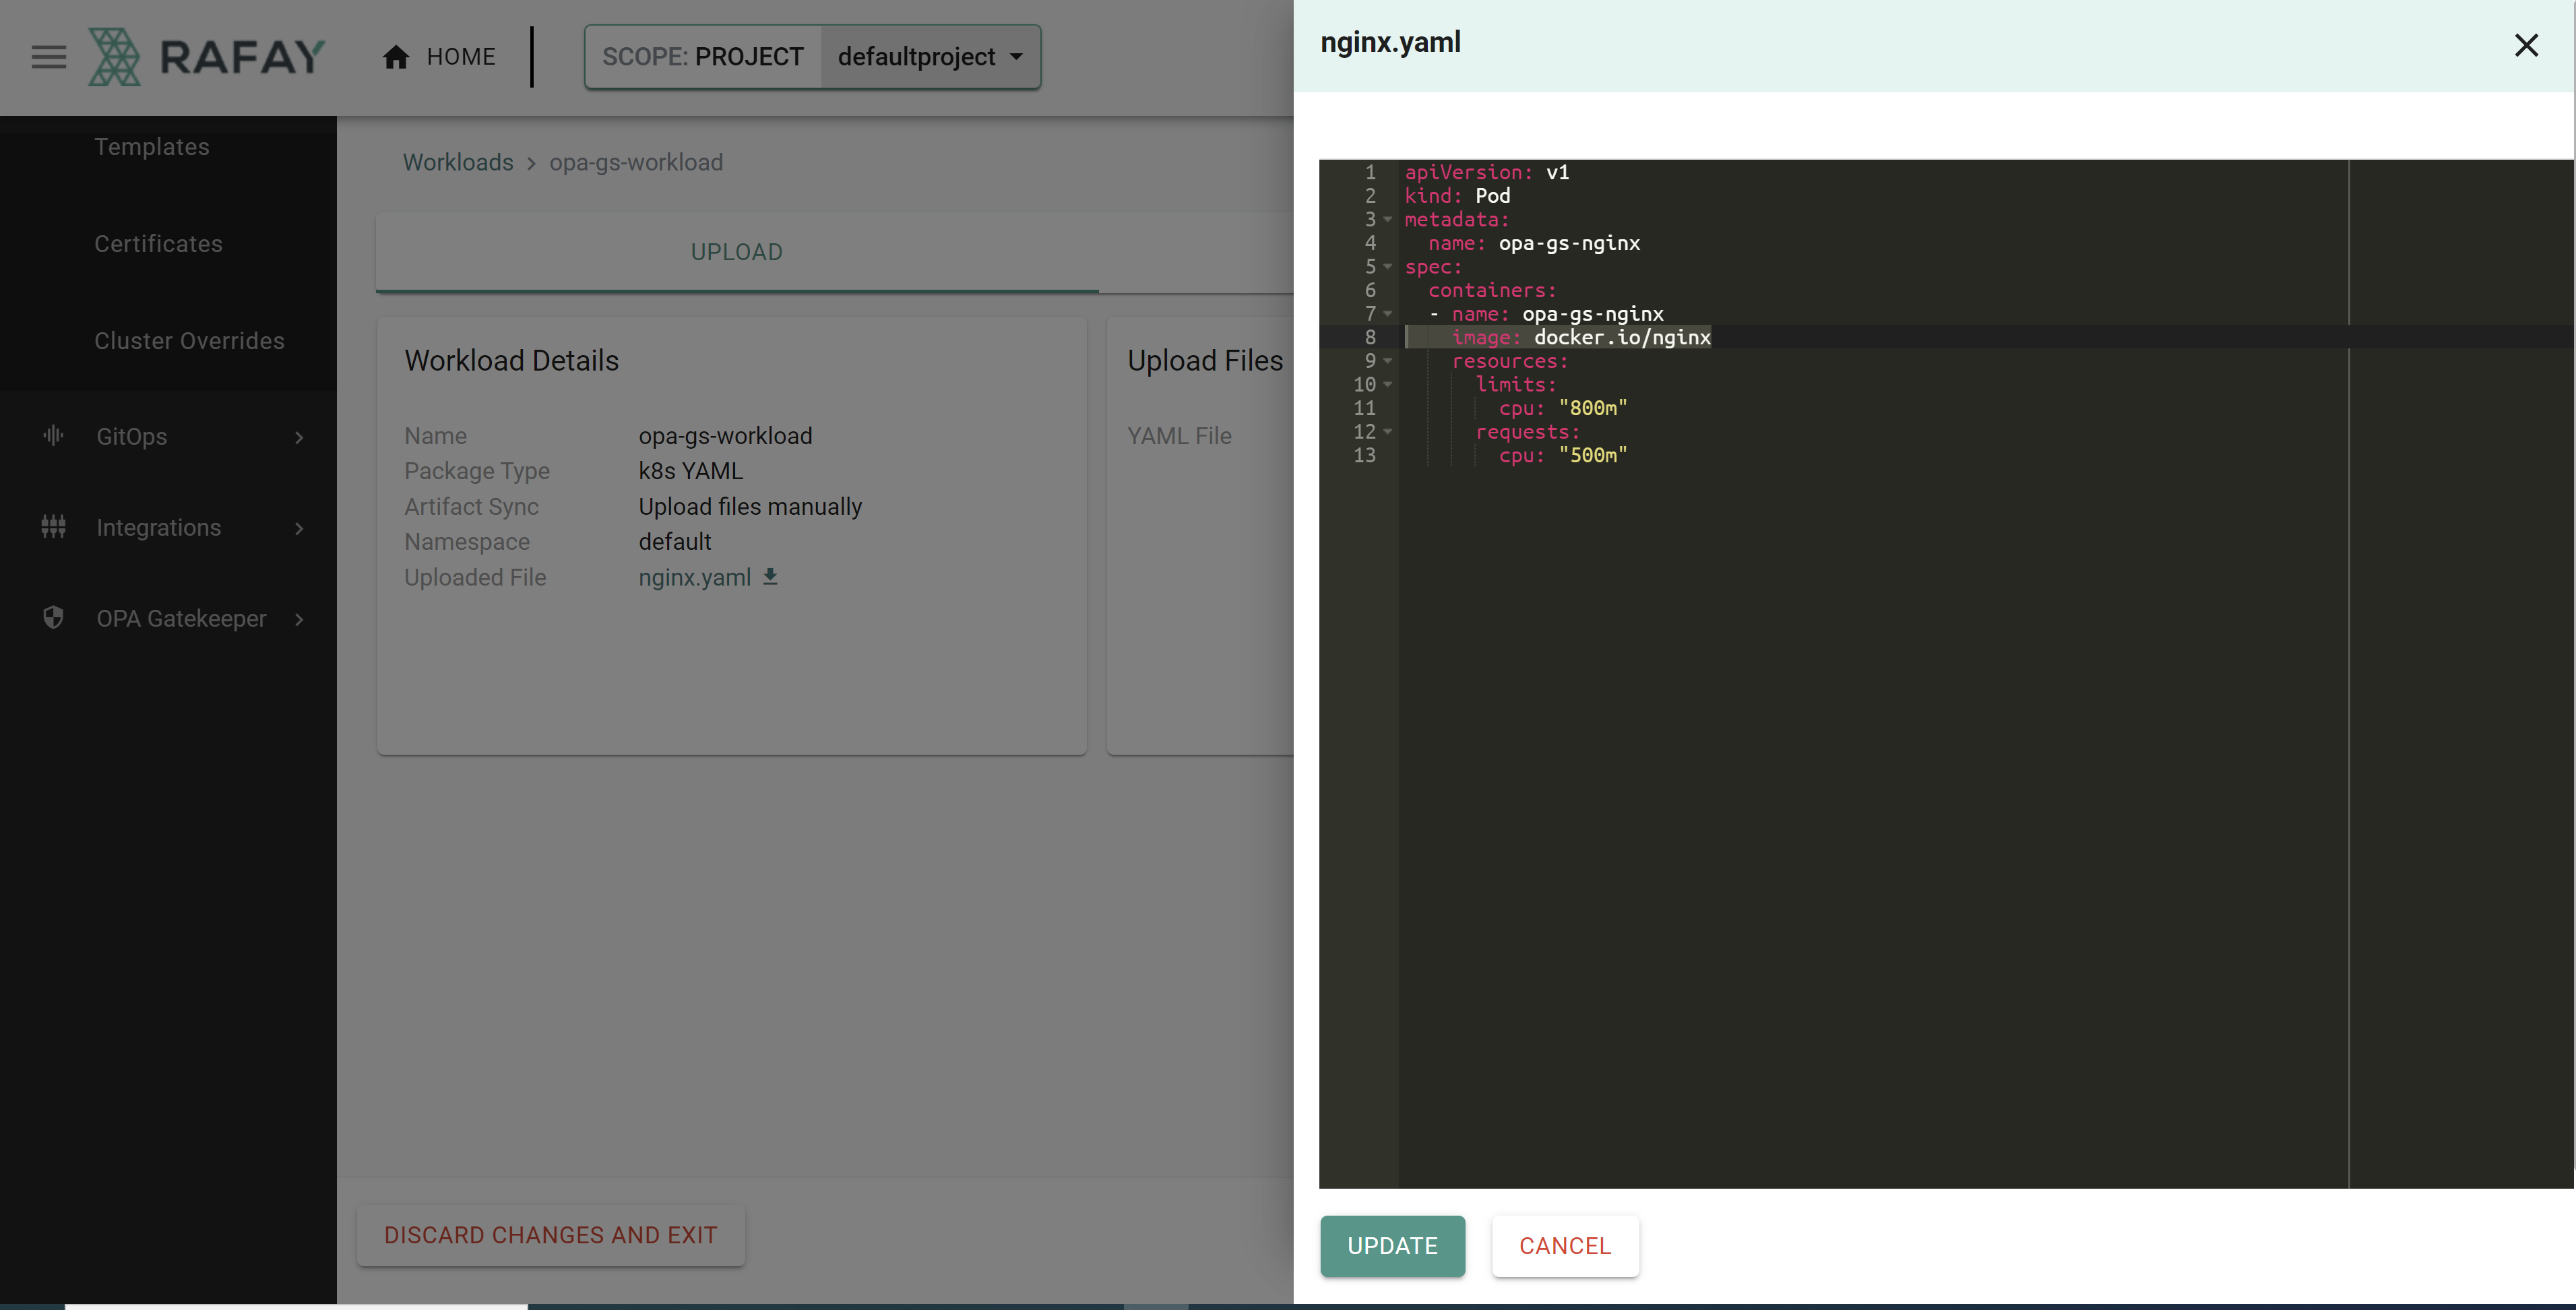
- Click "UPDATE" to update the file
- Click "SAVE AND GO TO PLACEMENT"
- Click "SAVE AND GO TO PUBLISH"
- Click "PUBLISH"
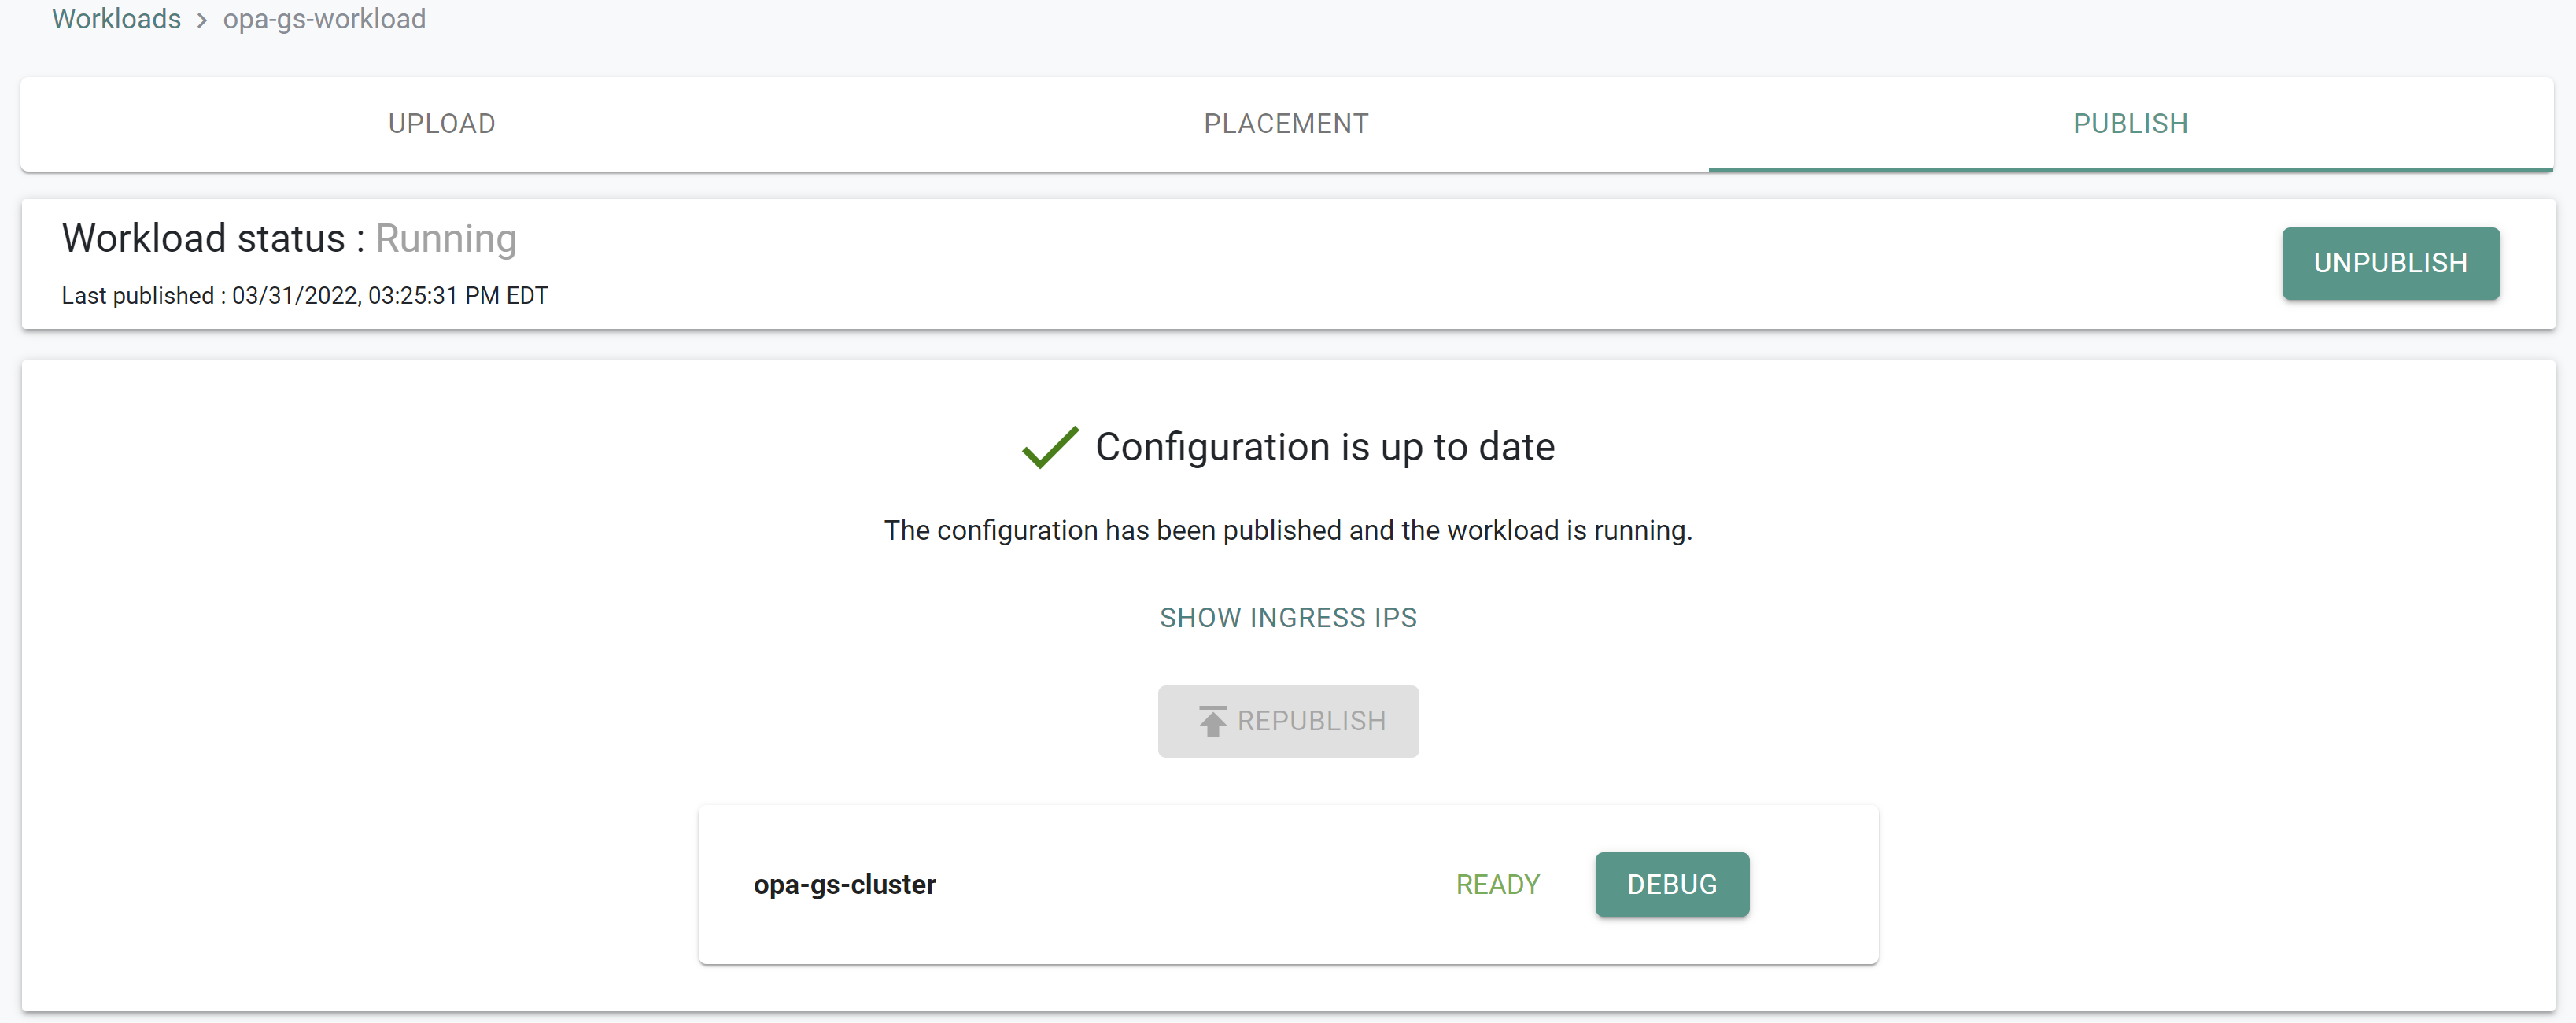
After a few minutes, you will see something like the following showing the workload status as "Running"
- Navigate to Infrastructure -> Clusters
- Click on "KUBECTL" in the cluster card
- Type the command below
kubectl get pods -n default
You should see a result like the following showing the nginx pod running.
NAME           READY   STATUS    RESTARTS   AGE
opa-gs-nginx   1/1     Running   0          5m37s
Step 2: Review Policy Violations
Important
A "Security Admin" would like to be able to centrally "specify and enforce" policies organization wide. In addition, they would like "centralized visibility" into policy violations across the organization.
In this step, you will review the OPA Gatekeeper policy violations.
- Navigate to OPA Gatekeeper -> Policy Violations
- Click on "VIEW DETAILS" for the cluster where the policy was applied
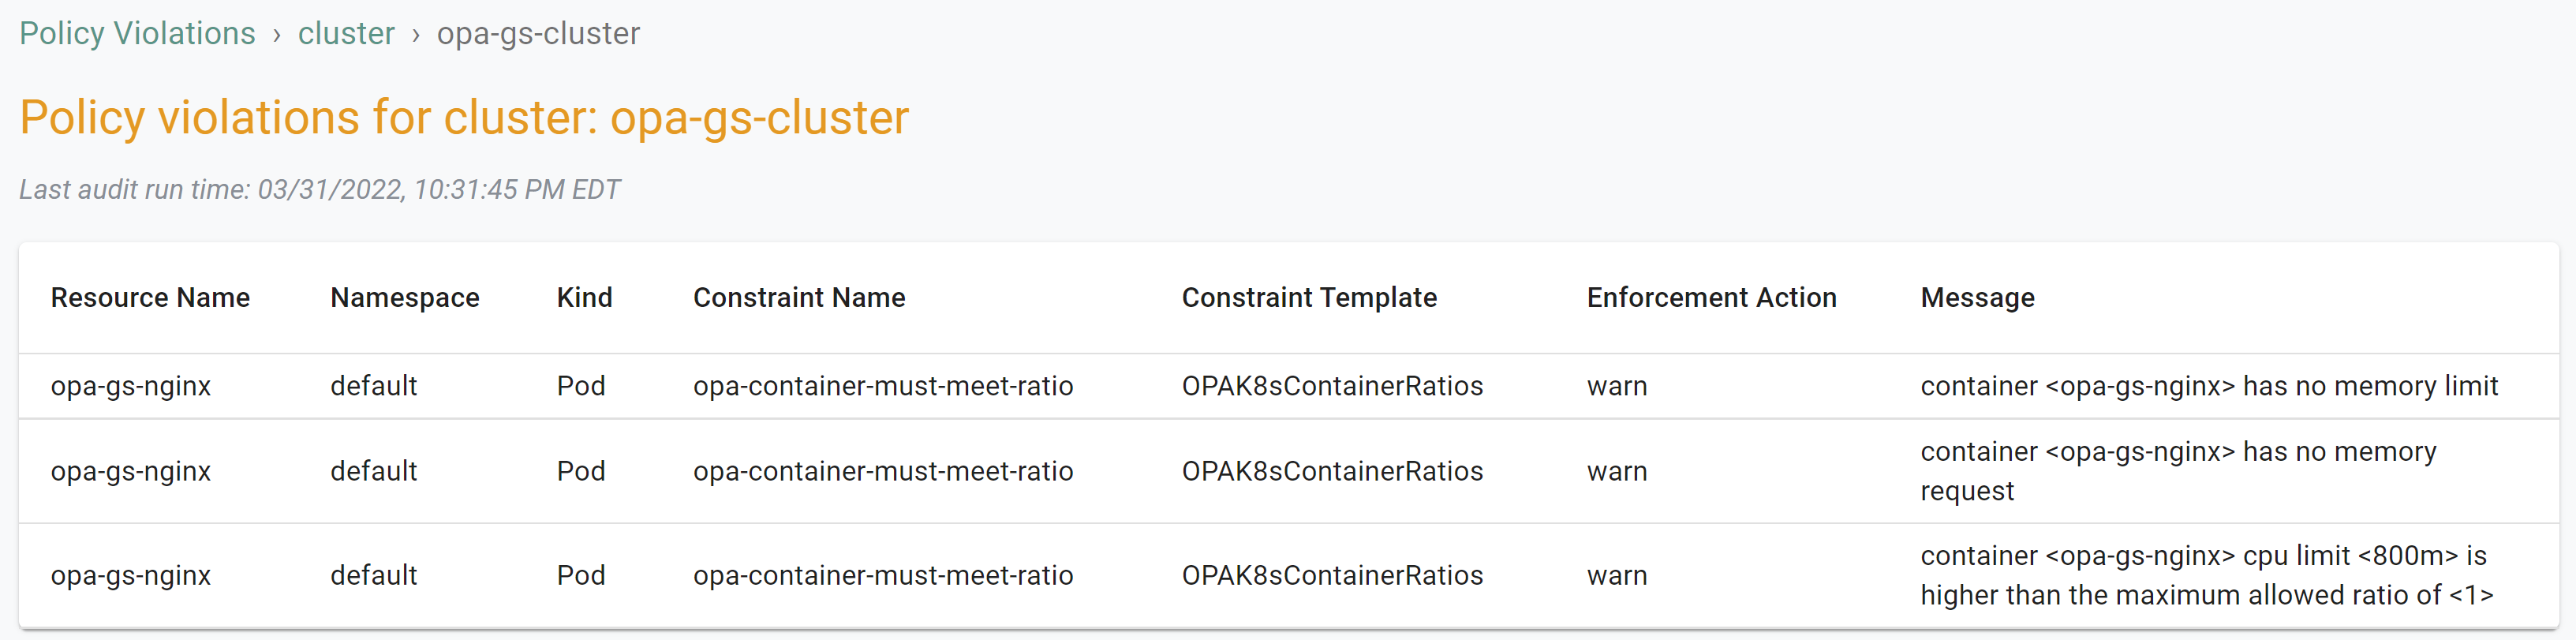
You should see a result like the following showing "warn" enforcement actions for the container ratio constraint
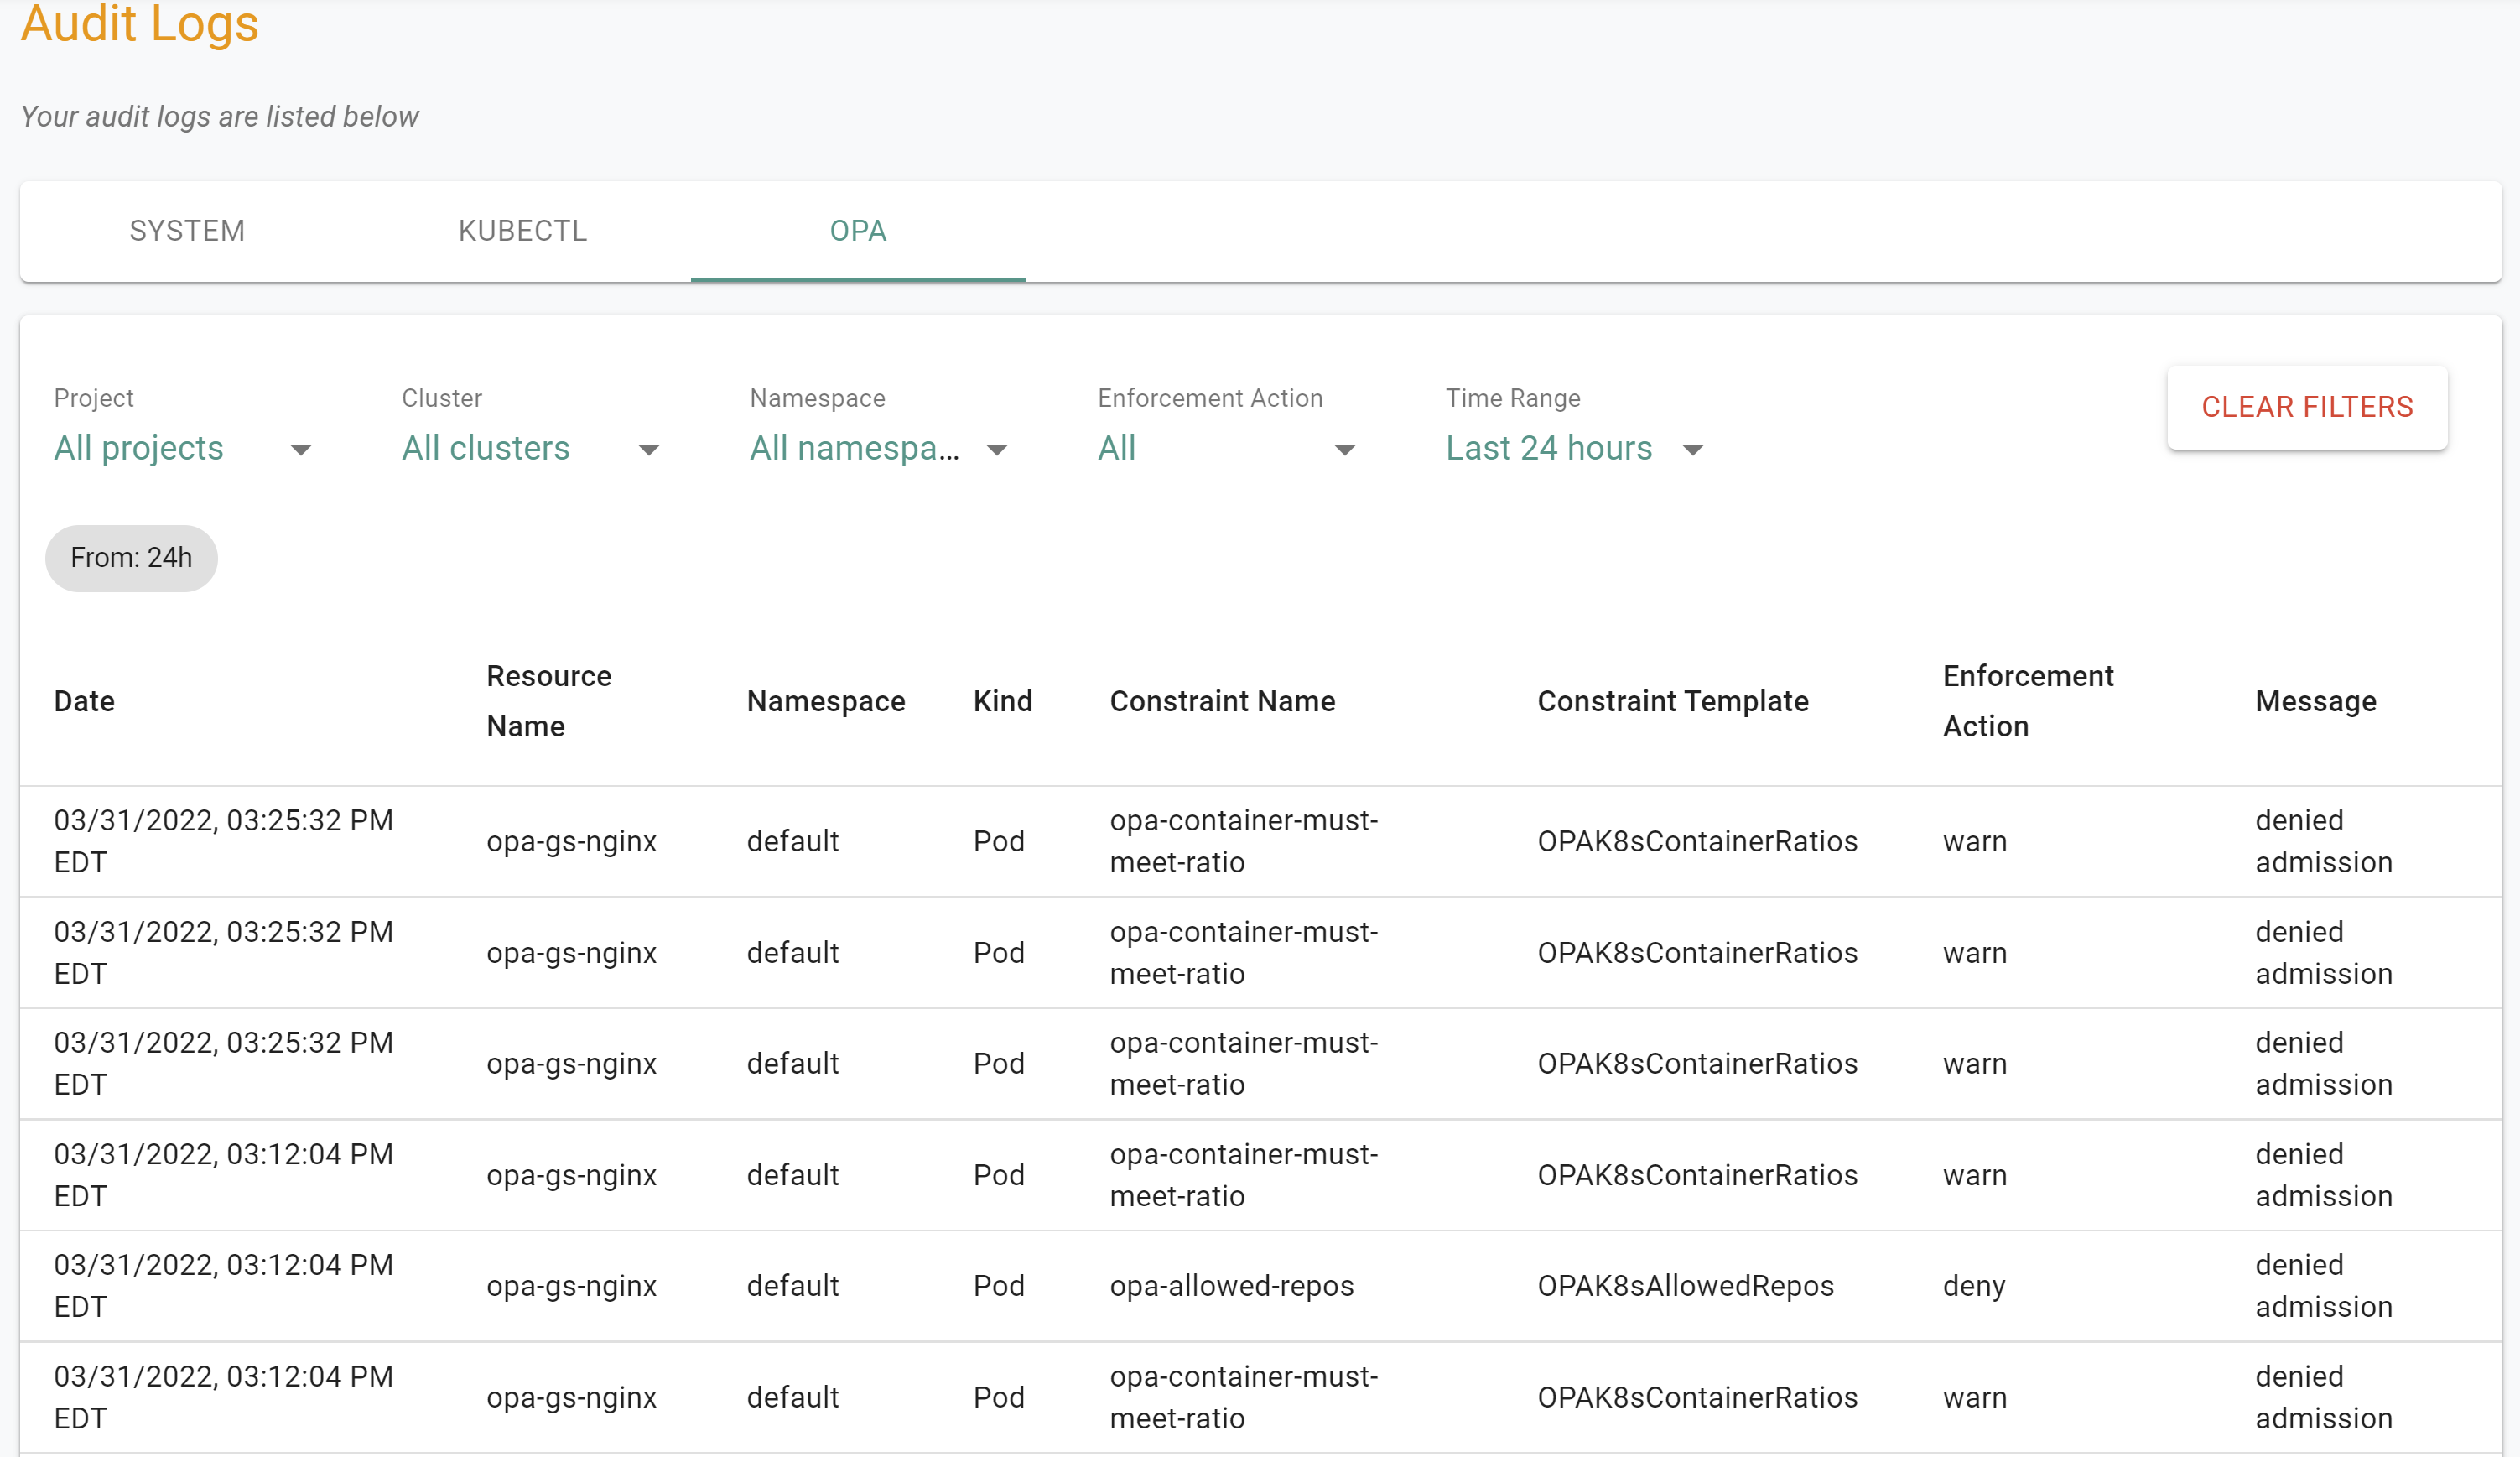
Step 3: Review Audit Logs
In this step, you will review the OPA Gatekeeper audit logs.
- Navigate to System -> Audit Logs -> OPA
You should see a result like the following showing both the "warn" and "deny" enforcement actions that were triggered when the workload was published both times.
Recap
Congratulations! At this point, you have successfully deployed a workload onto the OPA Gatekeeper cluster from an approved repository and reviewed the policy violations and audit logs to understand current violations and enforcement action history.
Step 1: Deploy Workload
Important
An "App Developer" would like clear and obvious instructions on what they need to do to make sure their workloads are compliant with organizational policy.
In this step, you will create a workload on the cluster using the "workload.yaml" file which contains the declarative specification for our test workload.
The following items may need to be updated if alternate names were used.
- project: "defaultproject"
- clusters: "opa-gs-cluster"
name: opa-gs-workload
namespace: default
project: defaultproject
type: NativeYaml
clusters: opa-gs-cluster
payload: nginx.yaml
- Open Terminal (on macOS/Linux) or Command Prompt (Windows) and navigate to the folder where you forked the Git repository
- Navigate to the folder "
/getstarted/opa_gatekeeper/workload" - Type the command below to create the workload
rctl create workload workload.yaml
If there were no errors, you should see a message like below
Workload created successfully
Now, let us publish the newly created workload to the cluster. The workload can be deployed to multiple clusters as per the configured "placement policy". In this case, you are deploying to a single cluster with the name "opa-gs-cluster".
rctl publish workload opa-gs-workload
In the web console, click on Applications -> Workloads. You should see something like the following showing the workload deployment status as "In Progress"
After a few minutes, you will see something like the following showing the workload deployment status as "Published Failed"
- Click to expand the error message
The error message shows that the OPA Gatekeeper constraint denied the request to create the pod as the image is not from a valid repo.
- Click to edit the workload
- Click to edit the uploaded YAML file
- Edit the image path to reference a supported repository
image: docker.io/nginx
The file should look like the following once updated
- Click "UPDATE" to update the file
- Click "SAVE AND GO TO PLACEMENT"
- Click "SAVE AND GO TO PUBLISH"
- Click "PUBLISH"
After a few minutes, you will see something like the following showing the workload status as "Running"
- Navigate to Infrastructure -> Clusters
- Click on "KUBECTL" in the cluster card
- Type the command below
kubectl get pods -n default
You should see a result like the following showing the nginx pod running.
NAME           READY   STATUS    RESTARTS   AGE
opa-gs-nginx   1/1     Running   0          5m37s
Step 2: Review Policy Violations
Important
A "Security Admin" would like to be able to centrally "specify and enforce" policies organization wide. In addition, they would like "centralized visibility" into policy violations across the organization.
In this step, you will review the OPA Gatekeeper policy violations.
- Navigate to OPA Gatekeeper -> Policy Violations
- Click on "VIEW DETAILS" for the cluster where the policy was applied
You should see a result like the following showing "warn" enforcement actions for the container ratio constraint
Step 3: Review Audit Logs
In this step, you will review the OPA Gatekeeper audit logs.
- Navigate to System -> Audit Logs -> OPA
You should see a result like the following showing both the "warn" and "deny" enforcement actions that were triggered when the workload was published both times.
Recap
Congratulations! At this point, you have successfully deployed a workload onto the OPA Gatekeeper cluster from an approved repository and reviewed the policy violations and audit logs to understand current violations and enforcement action history.