Part 2: Create Resources
This is Part 2 of a multi-part, self-paced quick start exercise.
What Will You Do
In part 2, you will setup the backup/restore resources in order to perform backup and restore operations. You will:
- Create backup Cloud Credential
- Create backup locations for control plane and persistent volumes
- Create data agents
- Create backup and restore policies
Step 1: Create Backup Cloud Credential
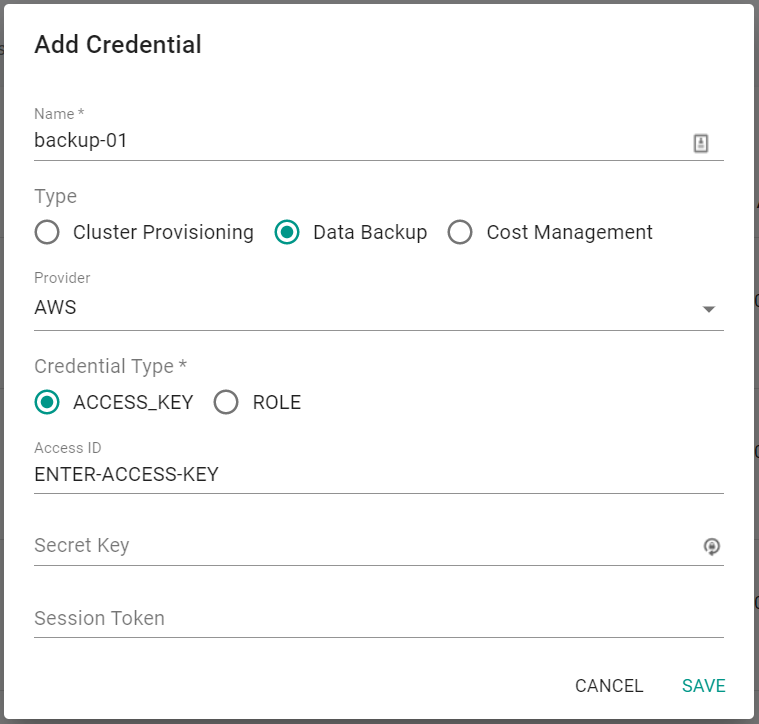
In this step, you will create a cloud credential for the clusters that will perform backup and restore operations. You will need to generate an access key and secret within AWS in order to create the credential.
- Ensure you are logged into the console
- In your project, navigate to Infrastructure -> Cloud Credentials
- Click on New Credential
- Provide a name for the Credential
- Select Data Backup for Type
- Select AWS for Provider
- Select ACCESS_KEY for Credential Type
- Enter the Access Key created in AWS
- Enter the secret created in AWS
- Click Save
Alternatively, you can create the cloud credential using RCTL and build this into an automation pipeline. The following command could be used ensuring the credential name access key and secret key are updated first.
rctl create credential aws sample-cred --cred-type data-backup --access-key <access-key> --secret-key <secret-key>
Step 2: Create Backup Locations
In this step, we will create two backup locations which will store the control plane backup data and persistent volume data respectively. We will use an Amazon S3 bucket to store the data.
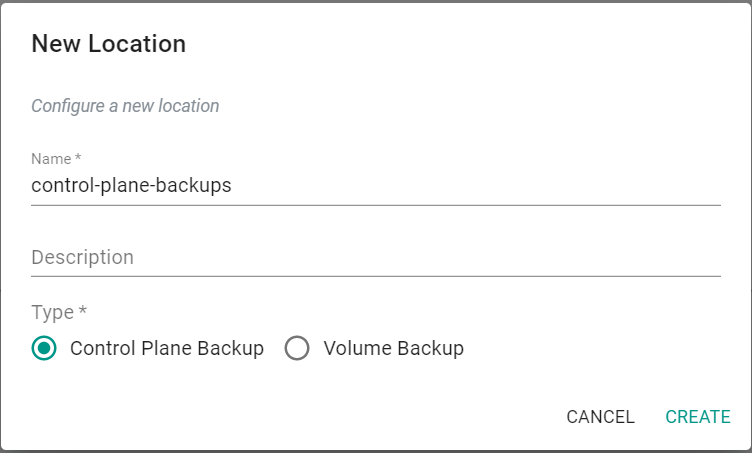
First, we will create the backup location for the Control Plane backups.
- In your project, navigate to Backup/Restore -> Locations
- Click on New Location
- Provide a name for the Location
- Select Control Plane Backup for Type
- Click Create
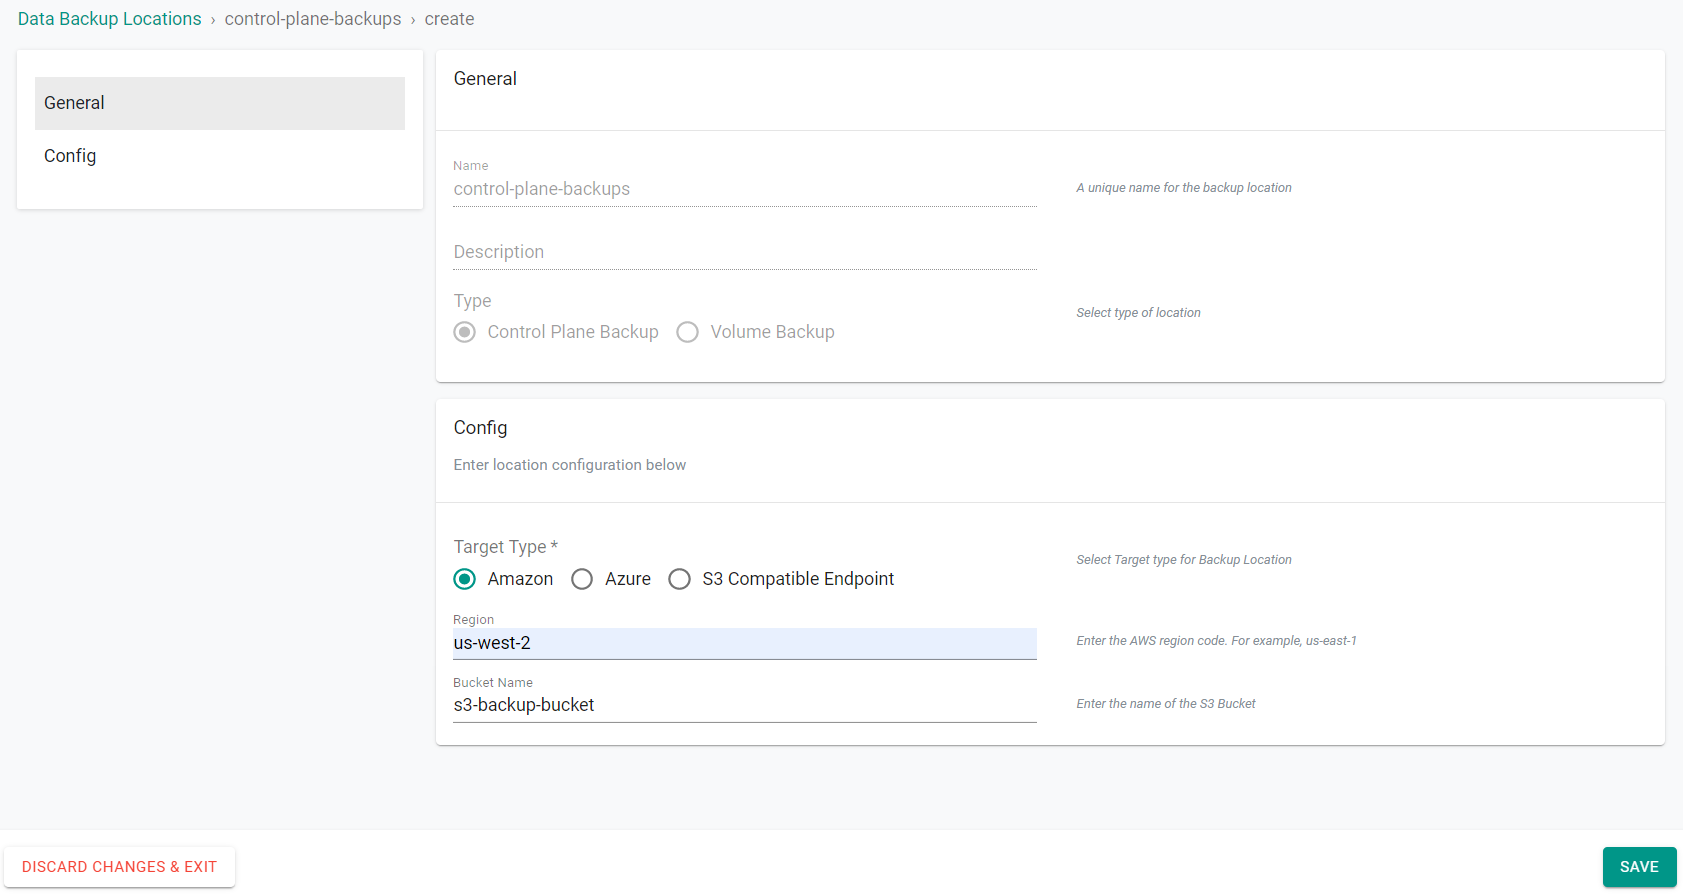
- Select Amazon for the Target Type
- Enter the AWS region where the bucket is located
- Enter the S3 bucket name
- Click Save
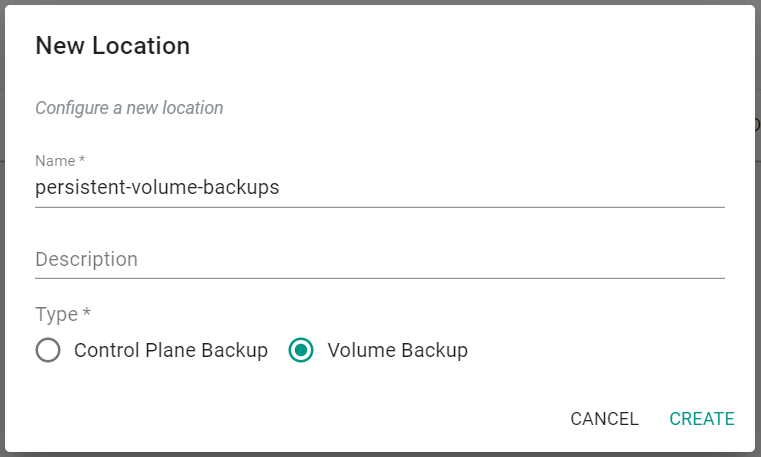
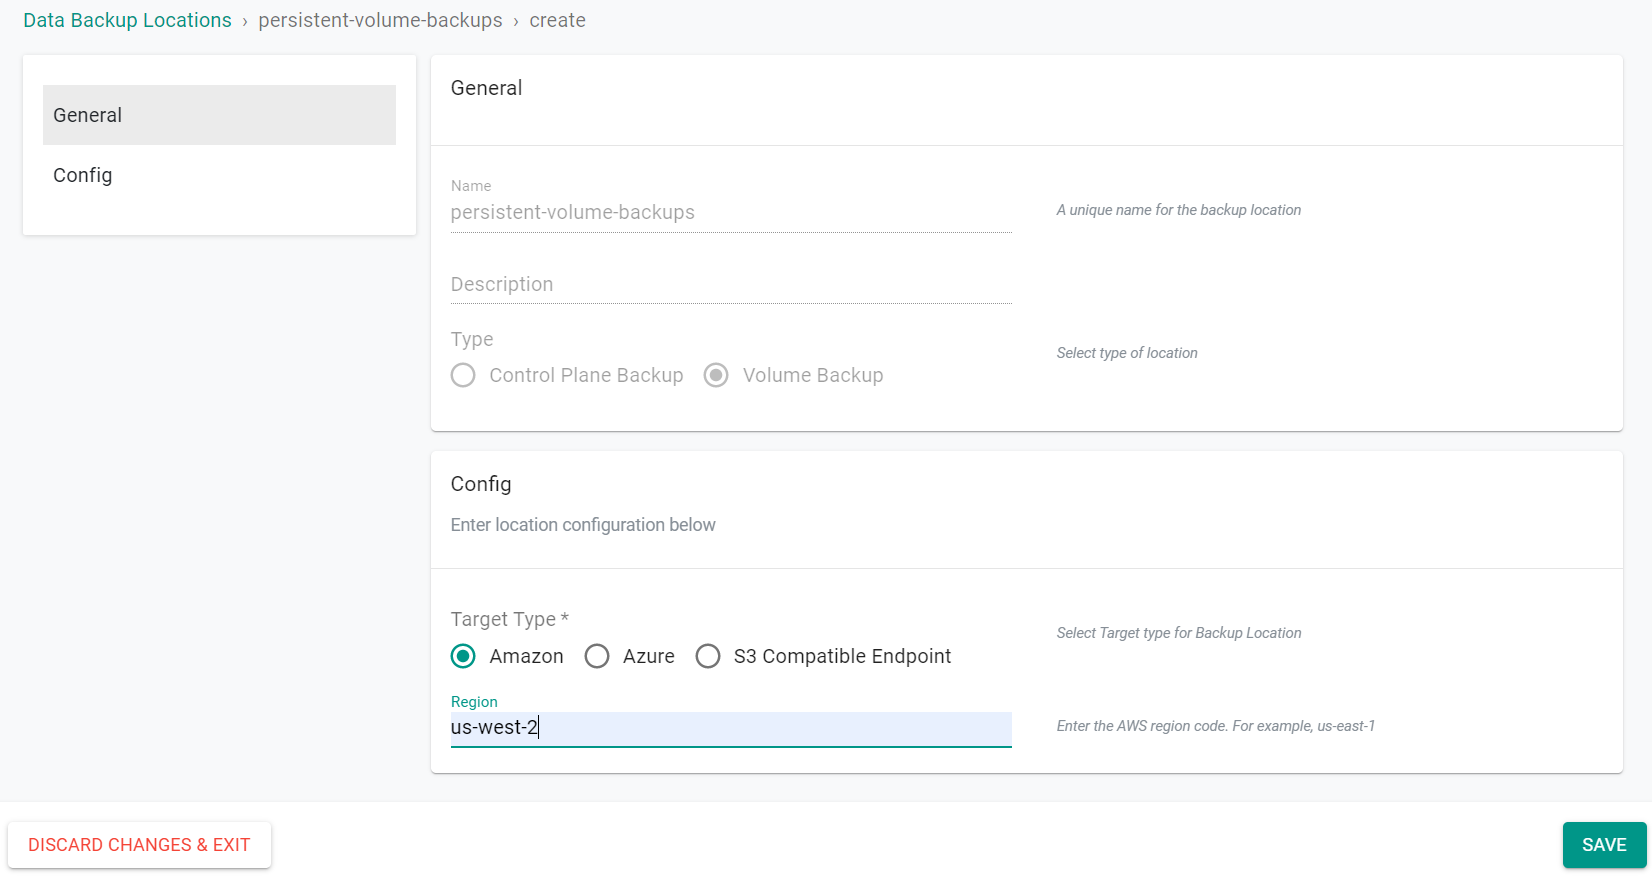
- Navigate to Backup/Restore -> Locations
- Click on New Location
- Provide a name for the Location
- Select Volume Backup for Type
- Click Create
- Select Amazon for the Target Type
- Enter the AWS region where the bucket is located
- Click Save
Alternatively, you can create the backup locations using RCTL and build this into an automation pipeline. The following commands could be used ensuring the location name, bucket region and bucket name are updated first.
rctl create dp-location <name> --backup-type controlplanebackup --target-type amazon --region <region> --bucket-name <bucketname>
rctl create dp-location <name> --backup-type volumebackup --target-type amazon --region <region> --bucket-name <bucketname>
Step 3: Create Data Agents
In this step, we will create a data agent on each cluster where a backup or restore operation will occur. The agent on each cluster will be used to perform the backup/restore operations.
Perform the following steps for each cluster where backup or restore operations will be peformed.
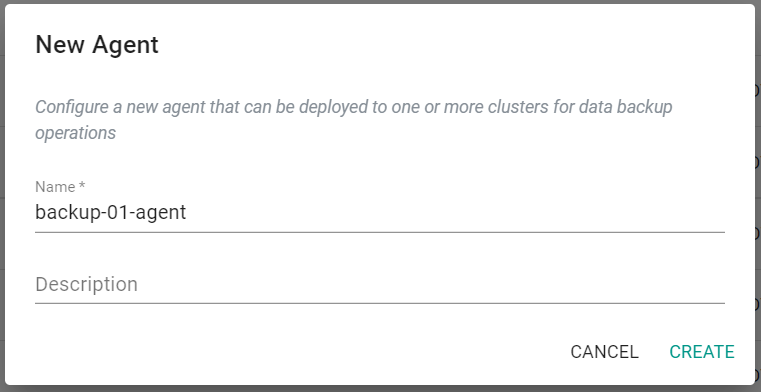
- In your project, navigate to Backup/Restore -> Data Agents
- Click on New Agent
- Provide a name for the Data Agent
- Click Create
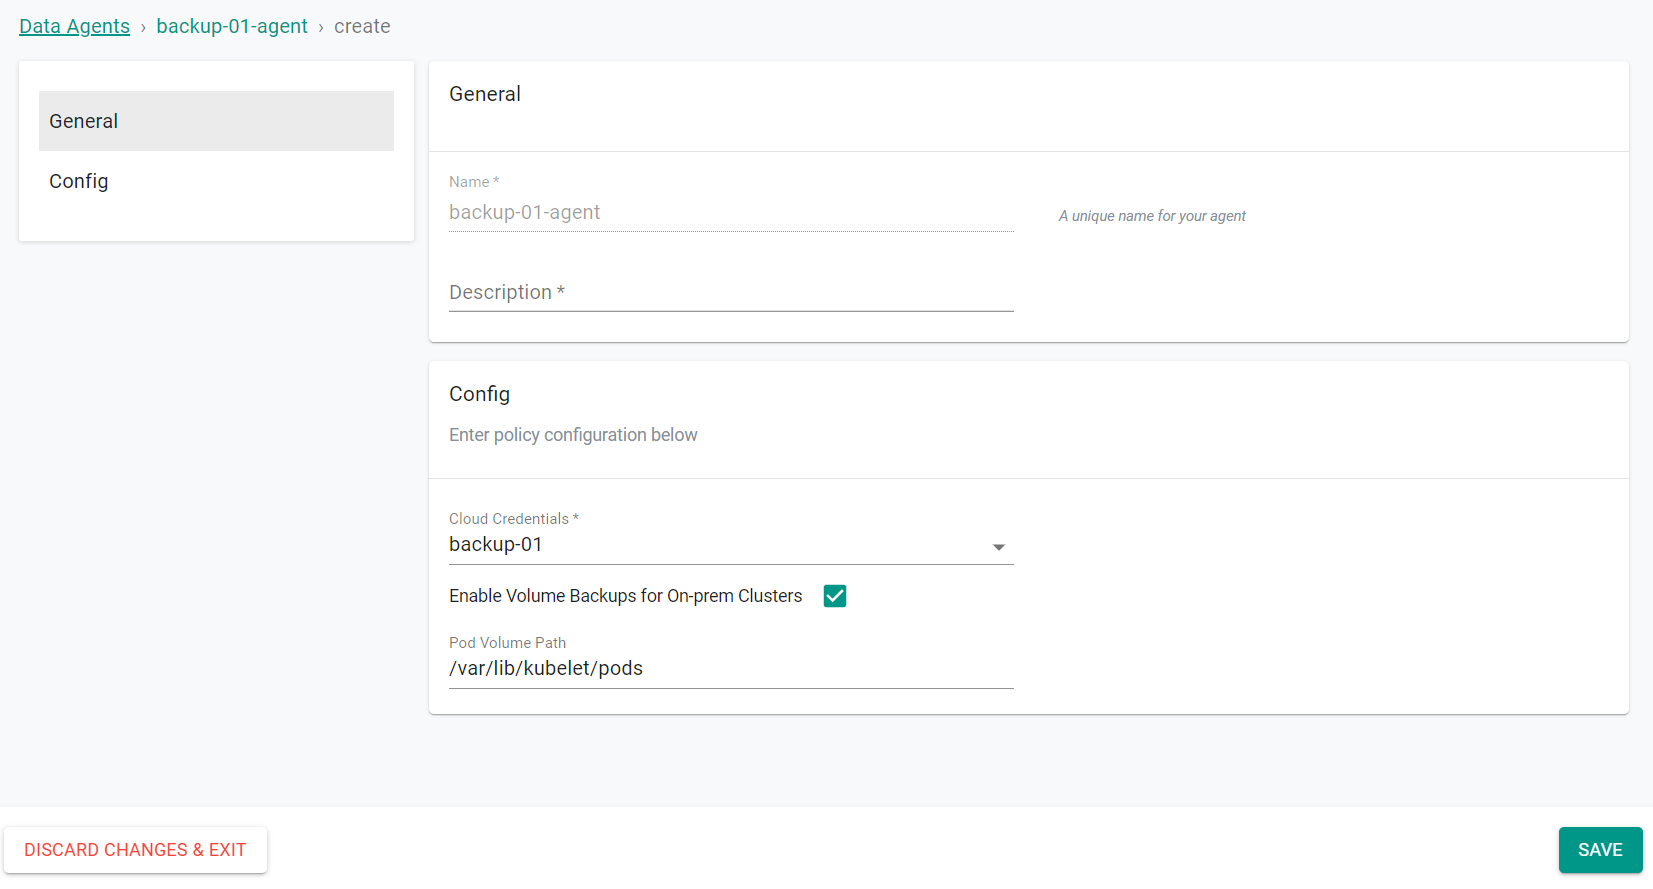
- Select the cloud credential of the cluster where the data agent will be deployed
- Select Enable Volume Backups for On-Prem Clusters
- Update the Pod Volume Path if different than the default value
- Click Save
We must now deploy the agent to a cluster.
- Click Deploy to Clusters
- Select the cluster
- Click Deploy
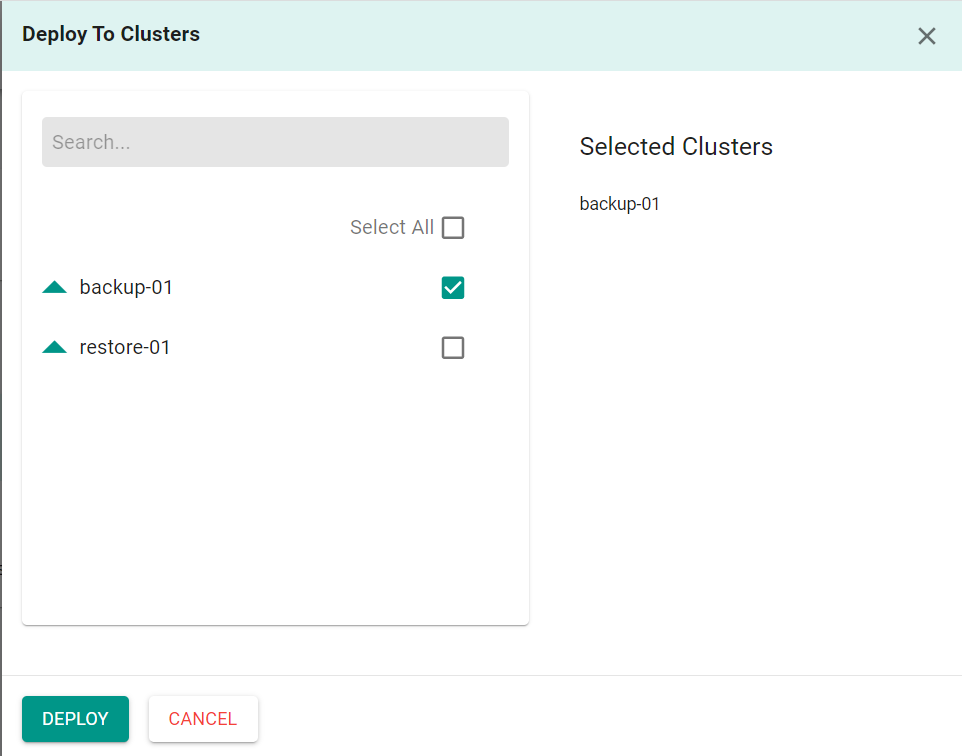
- Perform the previous steps again for the second cluster
Alternatively, you can create and deploy the data agents using RCTL and build this into an automation pipeline. The following commands could be used ensuring the data agent name, cloud credential name and cluster name are updated first.
rctl create dp-agent <name> --cloud-credentials <cloudcredentials>
rctl deploy dp-agent <agent-name> --cluster-name <cluster-name>
Step 4: Create Backup and Restore Policies
In this step, you will create both a backup and a restore policy.
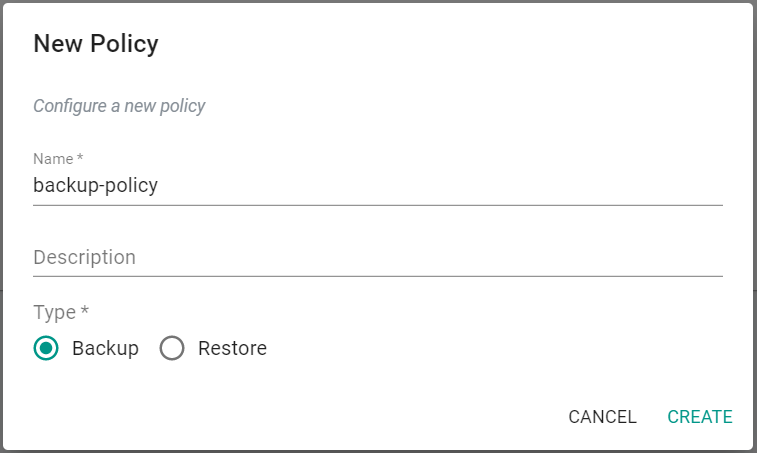
First, you will create a backup policy.
- In your project, navigate to Backup/Restore -> Policies
- Click on New Policy
- Provide a name for the backup policy
- Select "Backup for Type
- Click Create
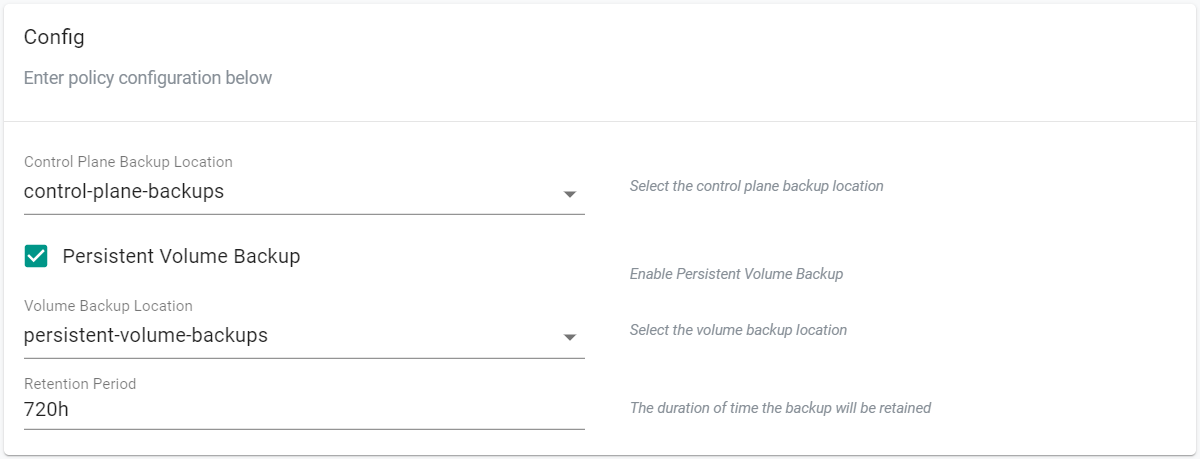
- Under the Config section, select the control plane backup location that was previously created
- Select Persistent Volume Backups to enable it
- Select the volume backup location that was previously created
- Click Save
Alternatively, you can create the backup policy using RCTL and build this into an automation pipeline. The following command could be used ensuring the policy name, control plane location and volume location are updated first.
rctl create dp-policy <name> --type backup --location <location> --snapshot-location <snapshot-location> --retention-period 720h
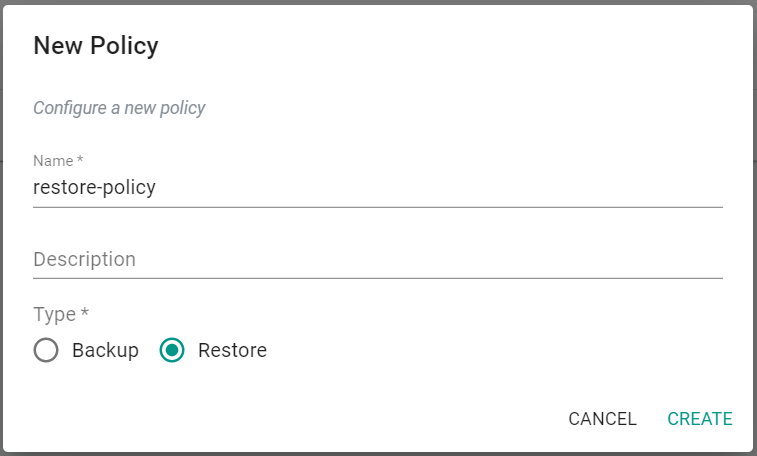
Now, you will create a restore policy.
- Navigate to Backup/Restore -> Policies
- Click on New Policy
- Provide a name for the restore policy
- Select Restore for Type
- Click Create
- Under the Config section, select Resore PVs
- Click Save

Alternatively, you can create the restore policy using RCTL and build this into an automation pipeline. The following command could be used ensuring the policy name is updated first.
rctl create dp-policy <name> --type restore --restore-pvs
Recap
In this part, you have created the needed backup and restore resources in order to be able to initiate backup and restore jobs on your two clusters.