Canary
What Will You Do
In this section, you will setup the required resources to use progressive rollouts. You will create a custom add-on for Argo Rollouts and deploy it to your cluster through a blueprint. Argo Rollouts will be used to manage the deployment strategy for the progressive rollouts of the workloads. You will then setup a GitOps pipeline that will deploy and update a workload from a Git repository upon commit. A webhook from the Git repo commit will be used to trigger the pipeline.
graph LR;
 client([client])-->ingress[Ingress];
 ingress-->|routing rule|service[Service];
    subgraph cluster[Kubernetes Cluster]
        ingress;
        service--95%-->pod1[Existing App];
        service-.5%.->pod2[Canary App];
    end

 classDef plain fill:#ddd,stroke:#fff,stroke-width:4px,color:#000;
 classDef k8s fill:#326ce5,stroke:#fff,stroke-width:4px,color:#fff;
 classDef red fill:#FF0000,stroke:#fff,stroke-width:4px,color:#fff;
 classDef cluster fill:#fff,stroke:#bbb,stroke-width:2px,color:#326ce5;
 class ingress,service,pod1 k8s;
 class pod2 red;
 class client plain;
 class cluster cluster;
Step 1: Create Namespace
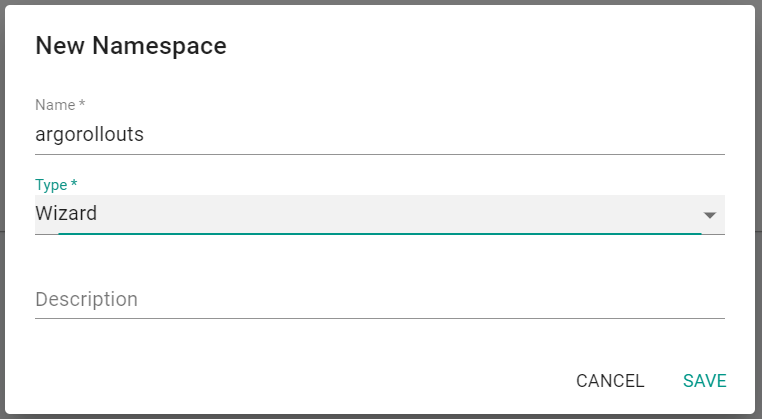
You will now create a managed namespace from the controller for the Argo Rollout resources.
- Ensure you are logged into the console
- In your project, navigate to Infrastructure -> Namespaces
- Click on New Namespace
- Enter argorollouts for the name
- Select Wizard for Type
- Click Save
- Click "Save & Go To Placement"
- Select your cluster for placement
- Click "Save & Go To Publish"
- Click "Publish"
- Click "Exit"
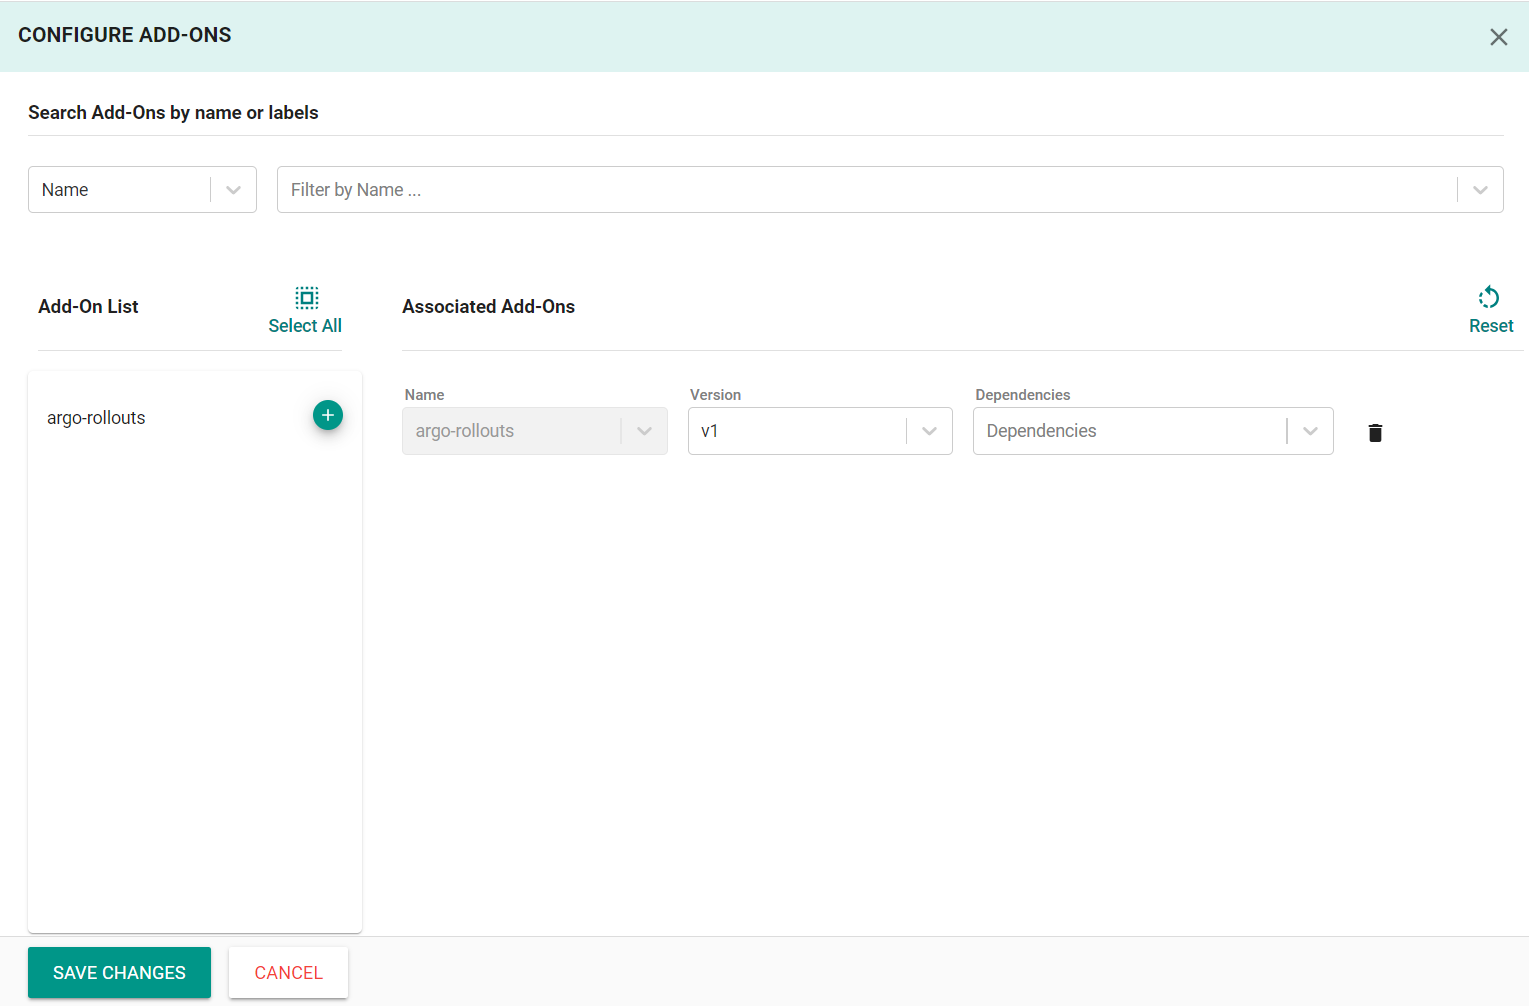
Step 2: Create Addon
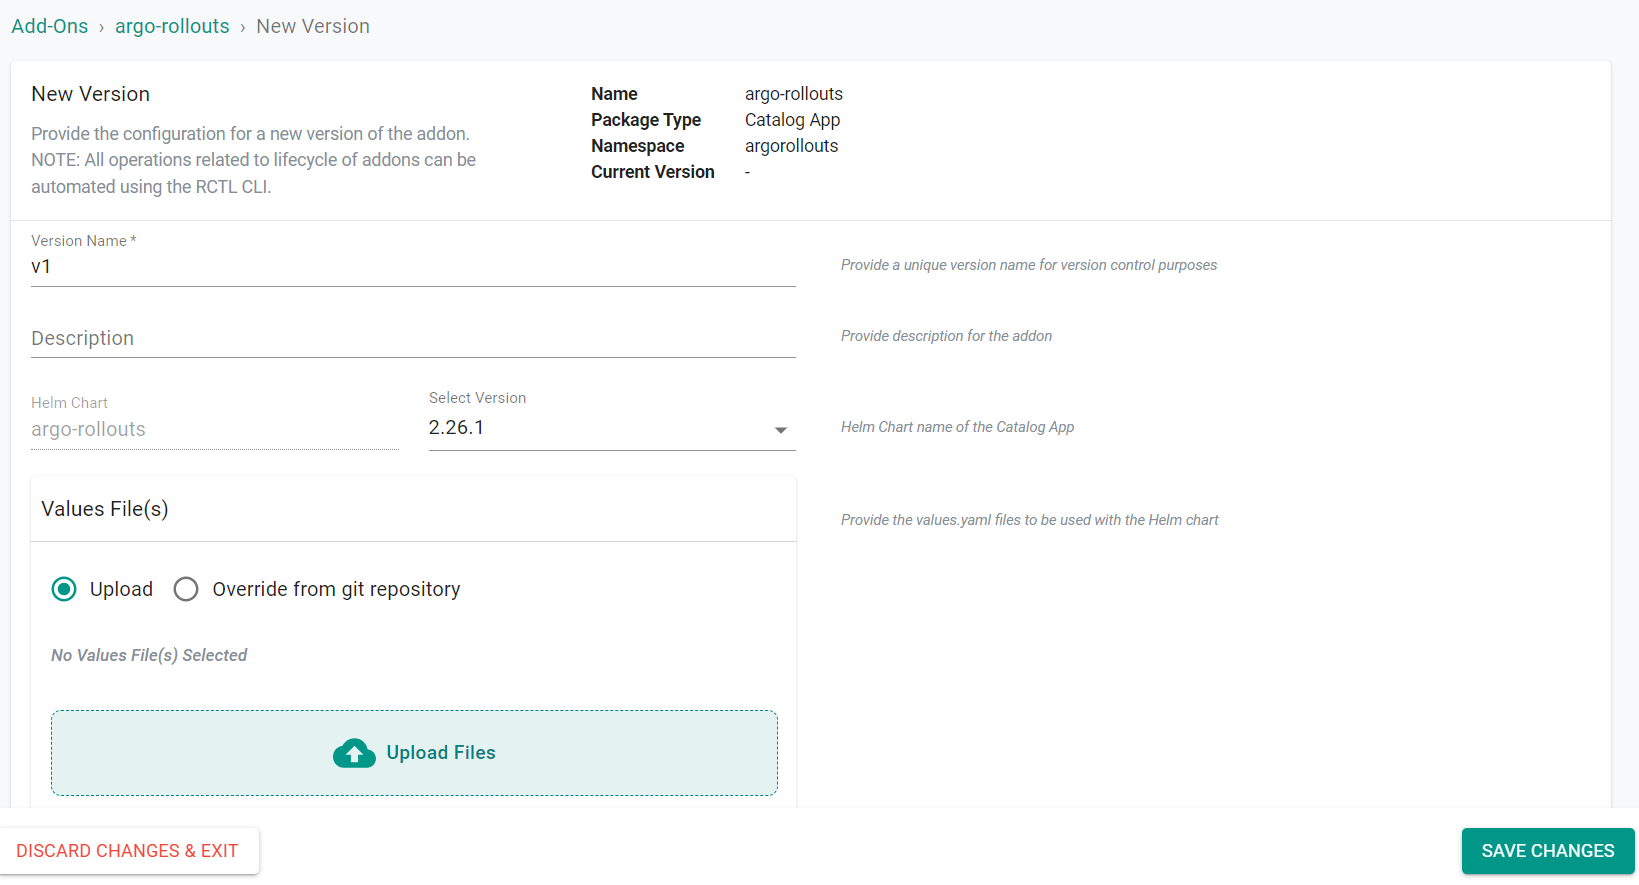
In this step, you will create a custom cluster add-on from the Catalog. The add-on will then be used in a custom cluster blueprint.
- In your project, navigate to Catalog in the left side tree
- Search for "argo-rollouts"
- Click on argo-rollouts
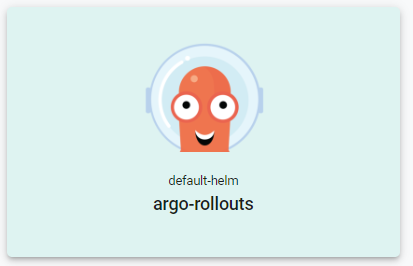
- Click Create Add-On
- Enter argo-rollouts for the name of the add-on
- Select the previously created namespace
- Click Create

- Enter v1 for the version name
- Click Save Changes
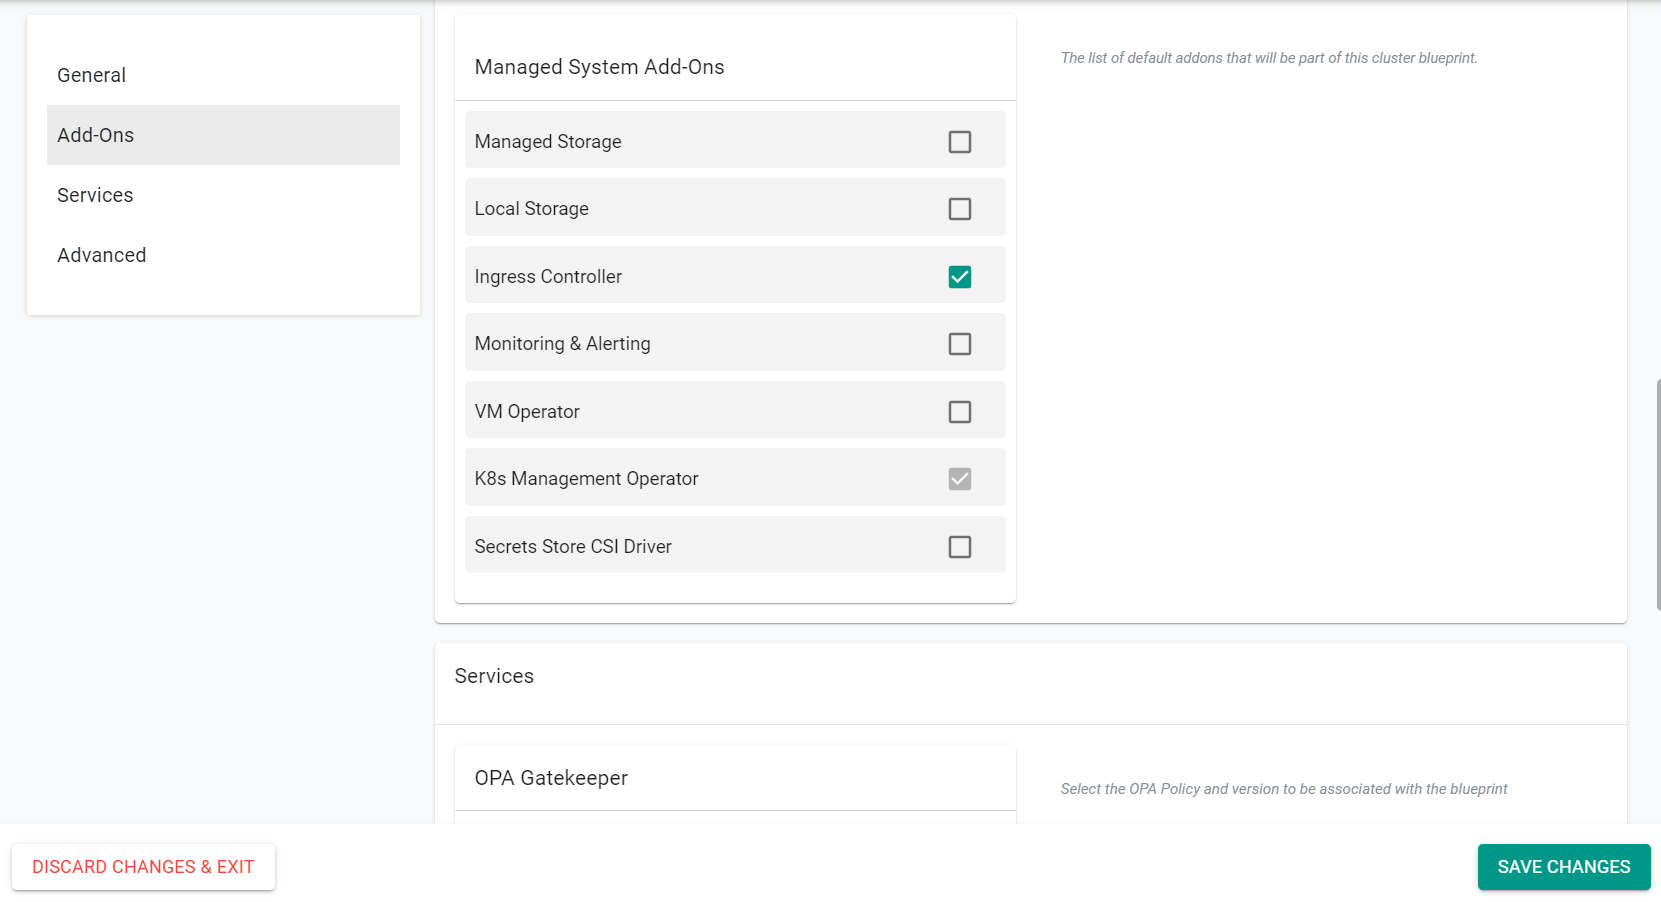
Step 3: Create Blueprint
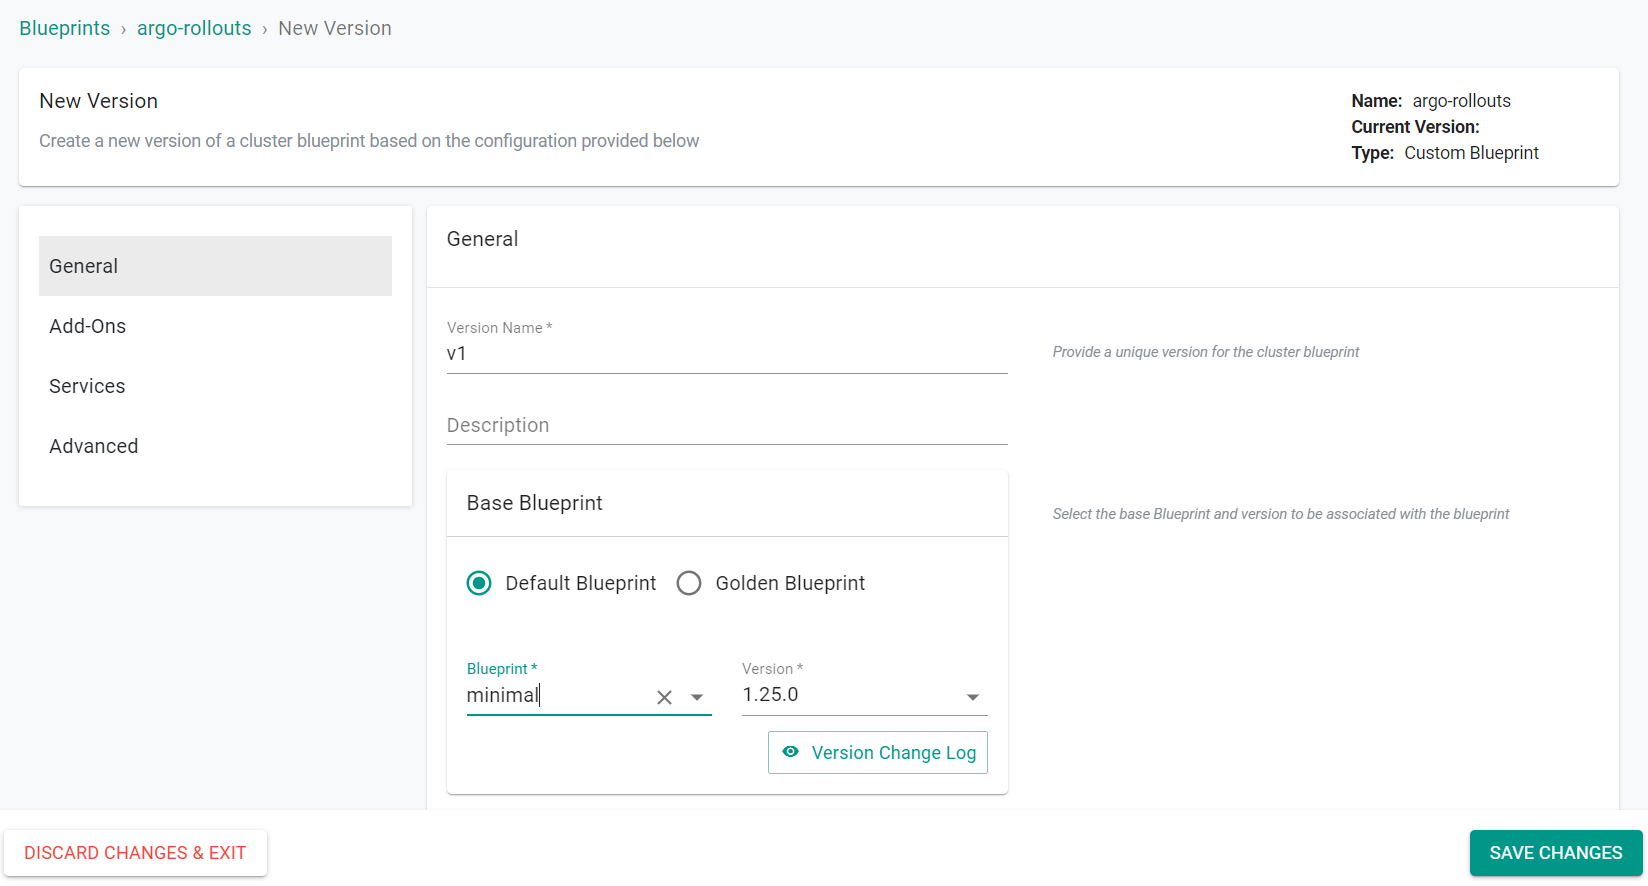
In this step, you will create a custom cluster blueprint which contains the previously created addon.
- In your project, navigate to Infrastructure -> Blueprints in the left side tree
- Click New Blueprint
- Enter argo-rollouts for the name of the blueprint
- Click Save

- Enter v1 for the version name
- Select minimal for the base blueprint
- Click Configure Add-Ons
- Click the + symbol to add the argo-rollouts add-on to the blueprint
- Click Save Changes
- Select Ingress Controller under managed system add-ons
- Click Save Changes
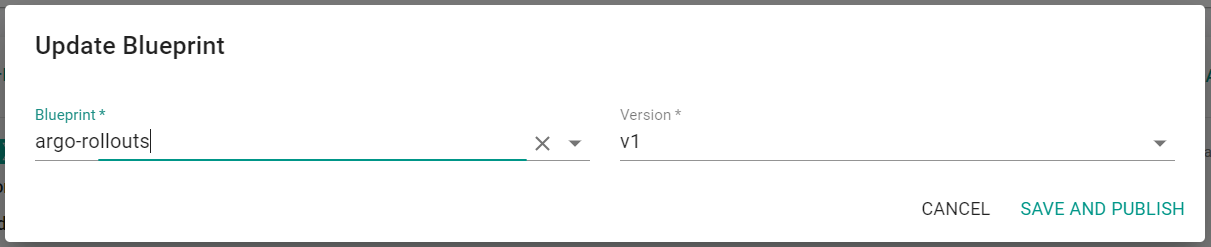
Step 4: Apply Bluprint
In this step, you will apply the previously created blueprint to the cluster. Applying the blueprint will install Argo Rollouts and the managed system ingress controller.
- In your project, navigate to Infrastructure -> Clusters in the left side tree
- Click the gear icon on your cluster
- Select Update Blueprint
- Select argo-rollouts for the blueprint and v1 for the version
- Click Save and Publish
The blueprint will begin being applied to the cluster
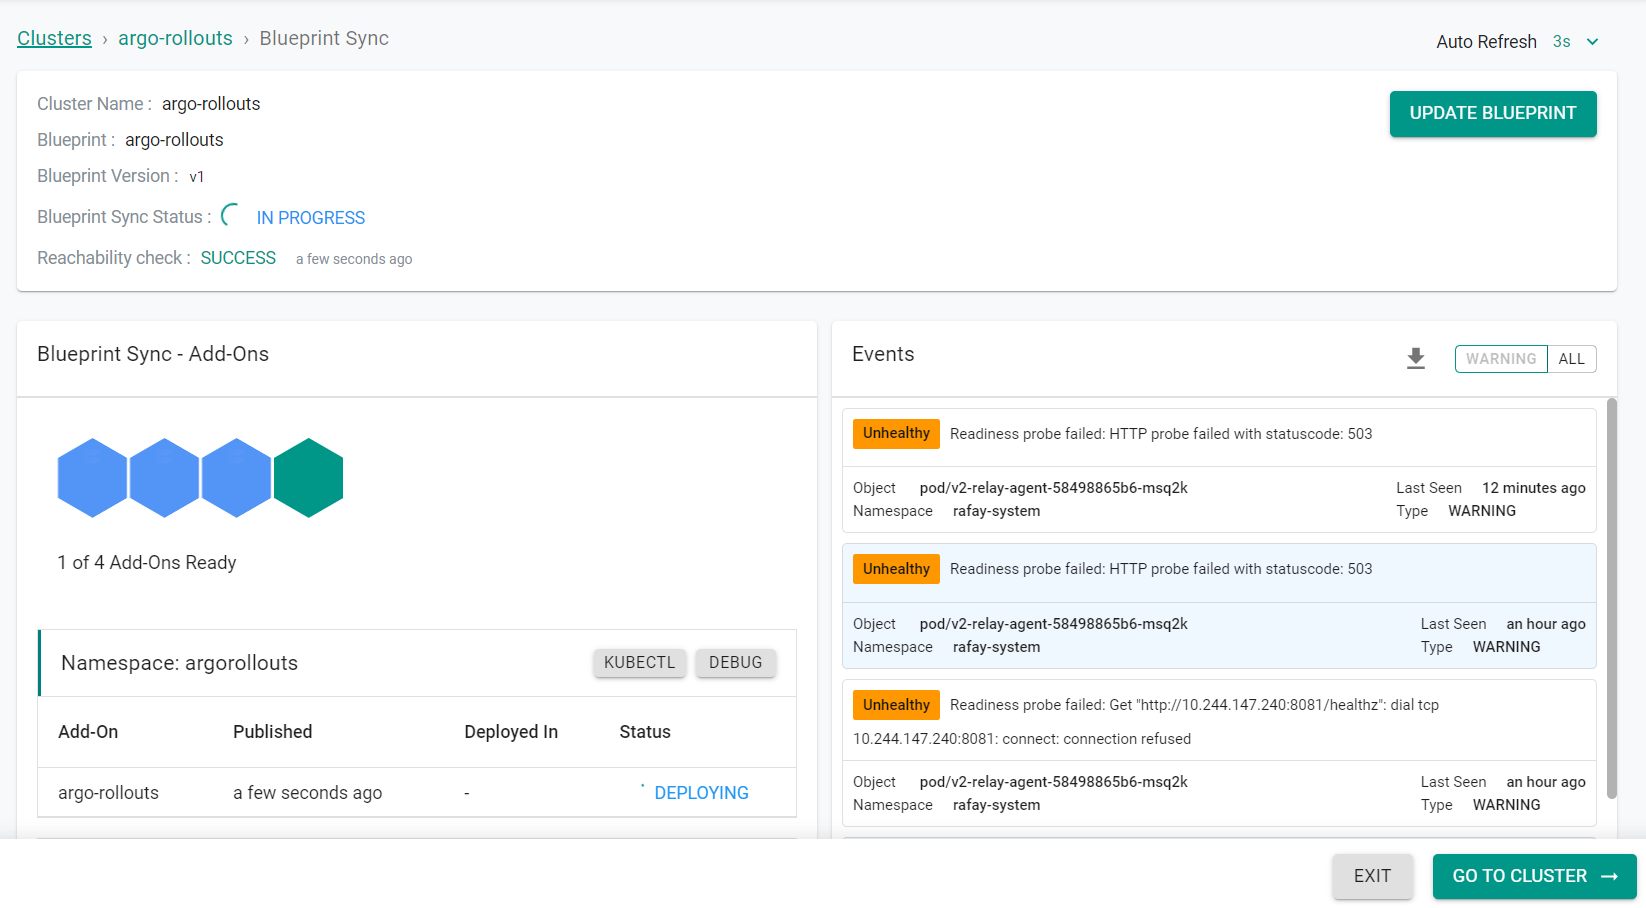
Afer a short period of time, the blueprint will be applied to the cluster.
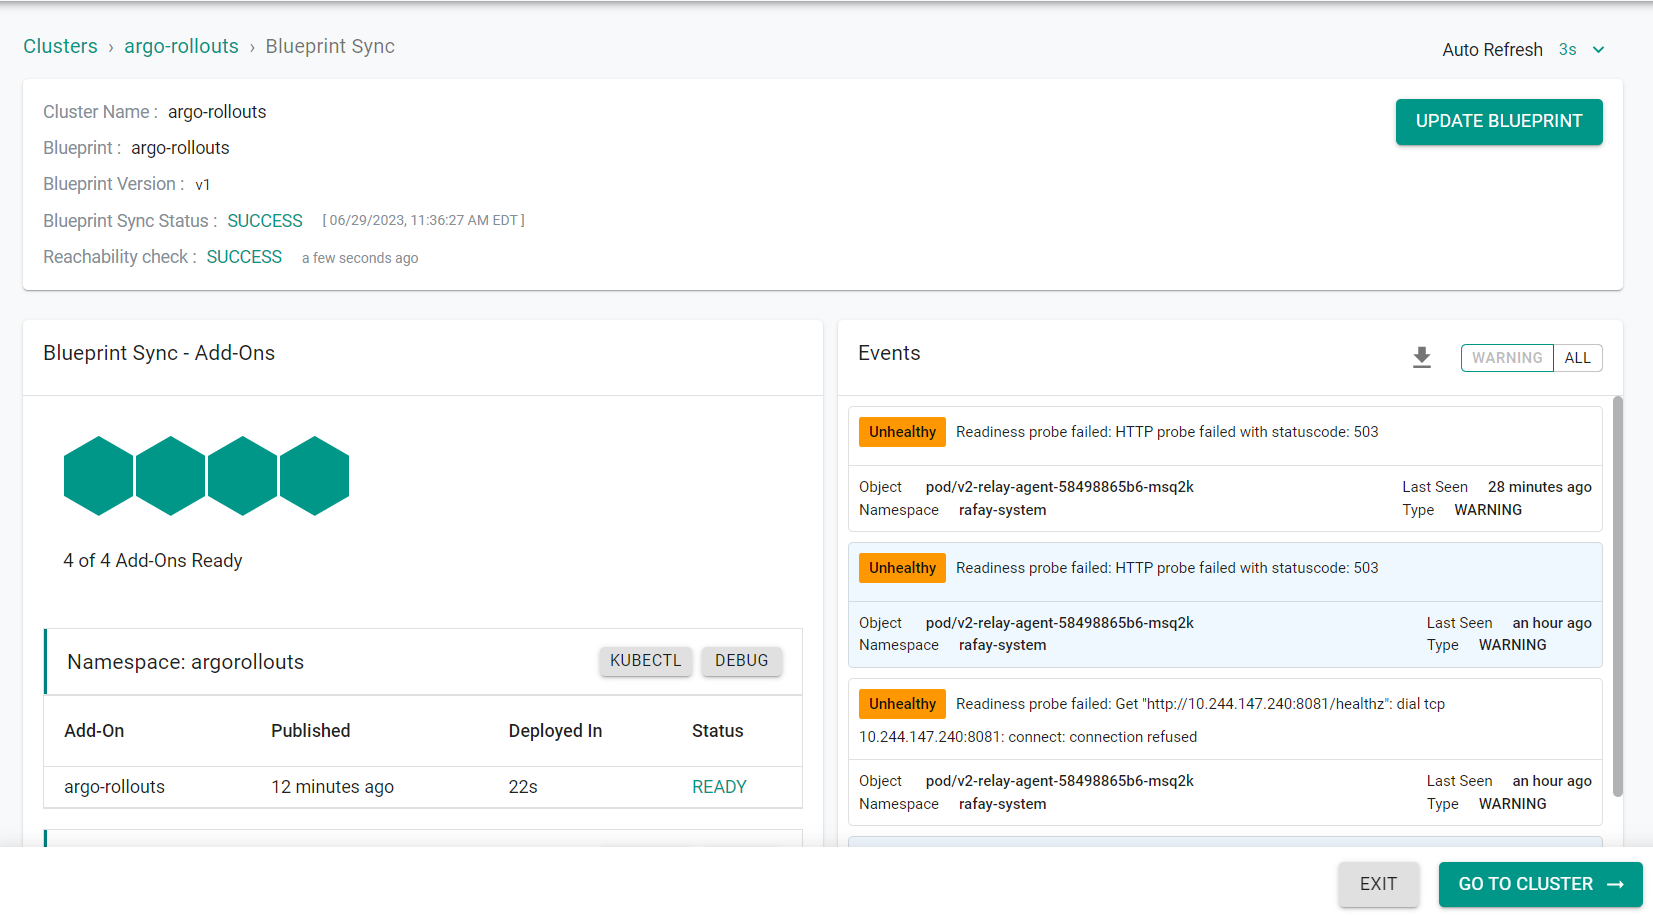
- Click Exit
Step 5: Fork Git Repo
In this step, you will fork a git repository to your account. The forked repo will contain declarative specs for the workload resources used in this guide. A GitOps pipeline will be created later in this guide which will be triggered by commits to this repository.
- Ensure you are logged into your GitHub.com account
- Navigate to the public Git repository
- Click to fork the repository
- Select your account name to fork repo to
- Once complete, you should see a copy of the repository in your Git system (e.g. GitHub).
Step 6: Add Repository
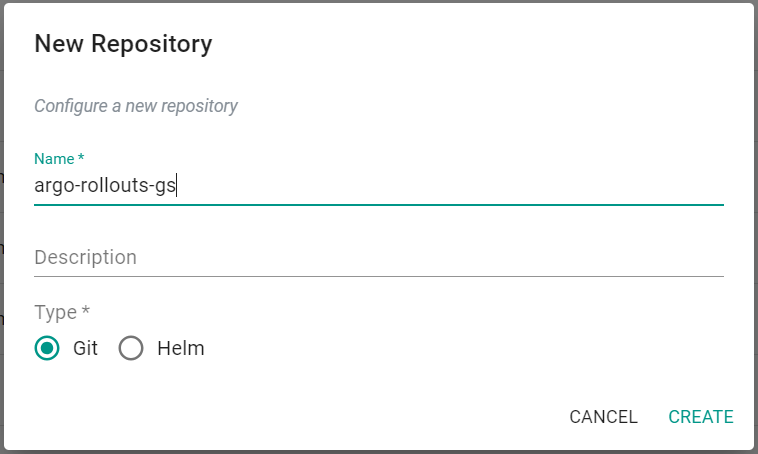
In this step, you will add the forked repository to the controller so that the controller can deploy resources from the repo.
- In your project, navigate to Integrations -> Repositories
- Click New Repository
- Enter argo-rollouts-gs for the repo name
- Select Git for Type
- Click Create
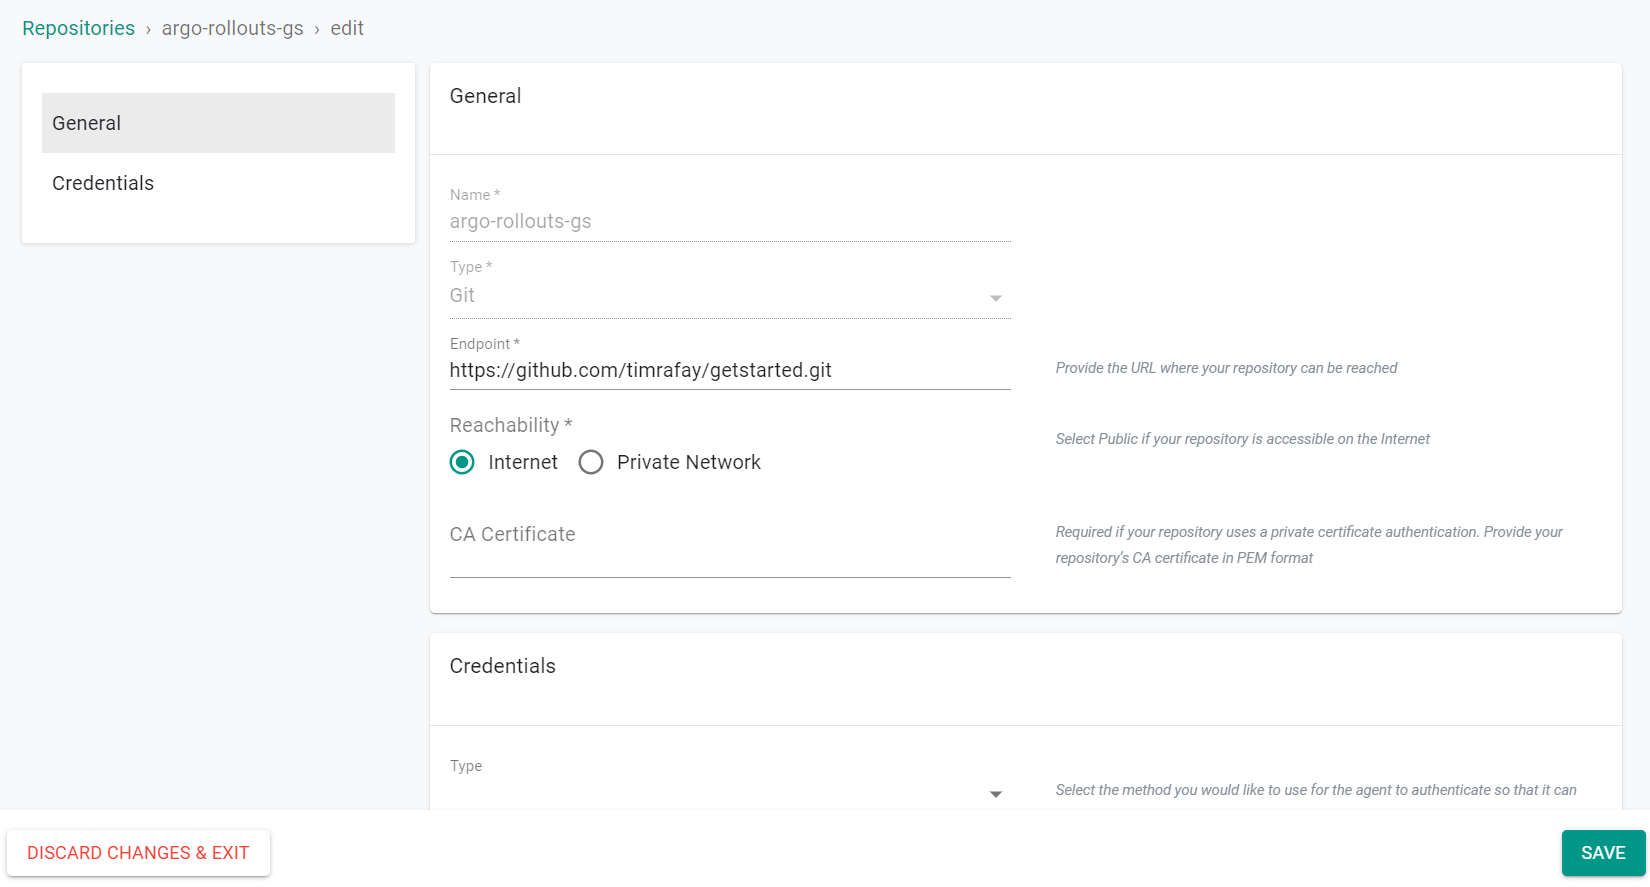
- Enter the Git repo's Endpoint URL
- Click Save
Step 7: Create Workload
You will now create a test workload which will contain multiple resources. The workload will be used to demonstrate progressive rollout strategies.
- In your project, navigate to Applications -> Workloads
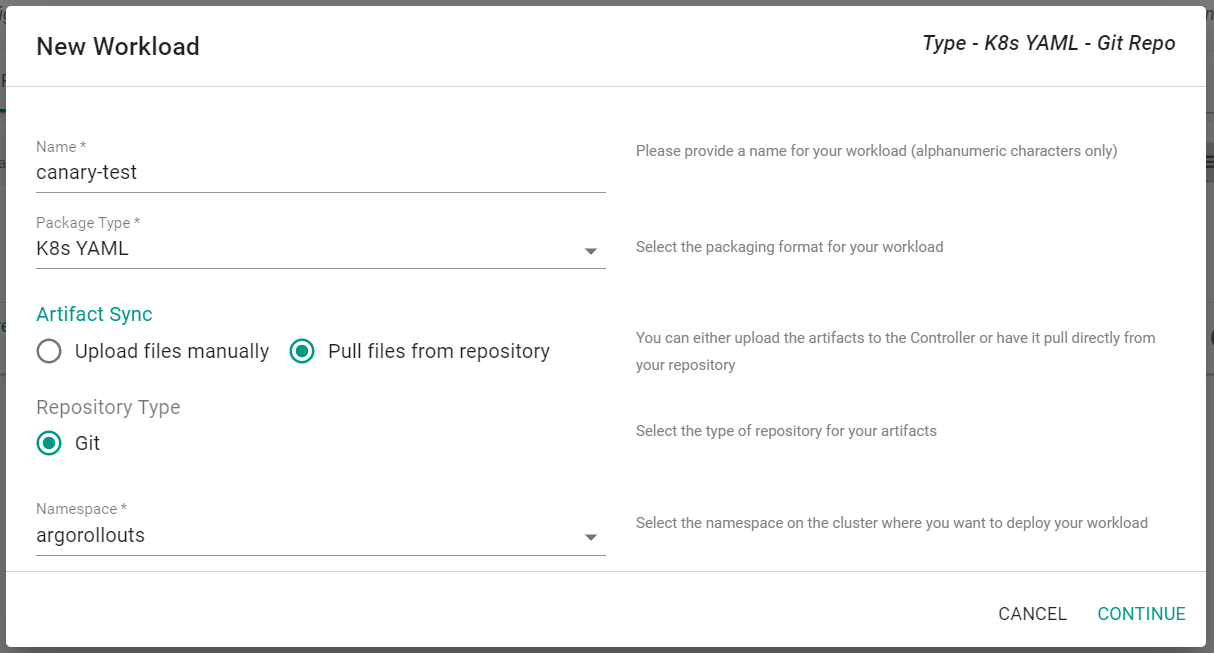
- Click New Workload -> Create New Workload
- Enter canary-test for the workload name
- Select K8s YAML for the package type
- Select Pull files from repository
- Select the previously created argorollouts namespace
- Click Continue
- Select argo-rollouts-gs for the repository
- Enter the repo branch for the revision. By default it is master
- Enter /progressive-rollouts/canary.yaml for the YAML file path
- Click Save & Go To Placement

- Select the cluster where the resources will be deployed
- Click Save & Go To Publish
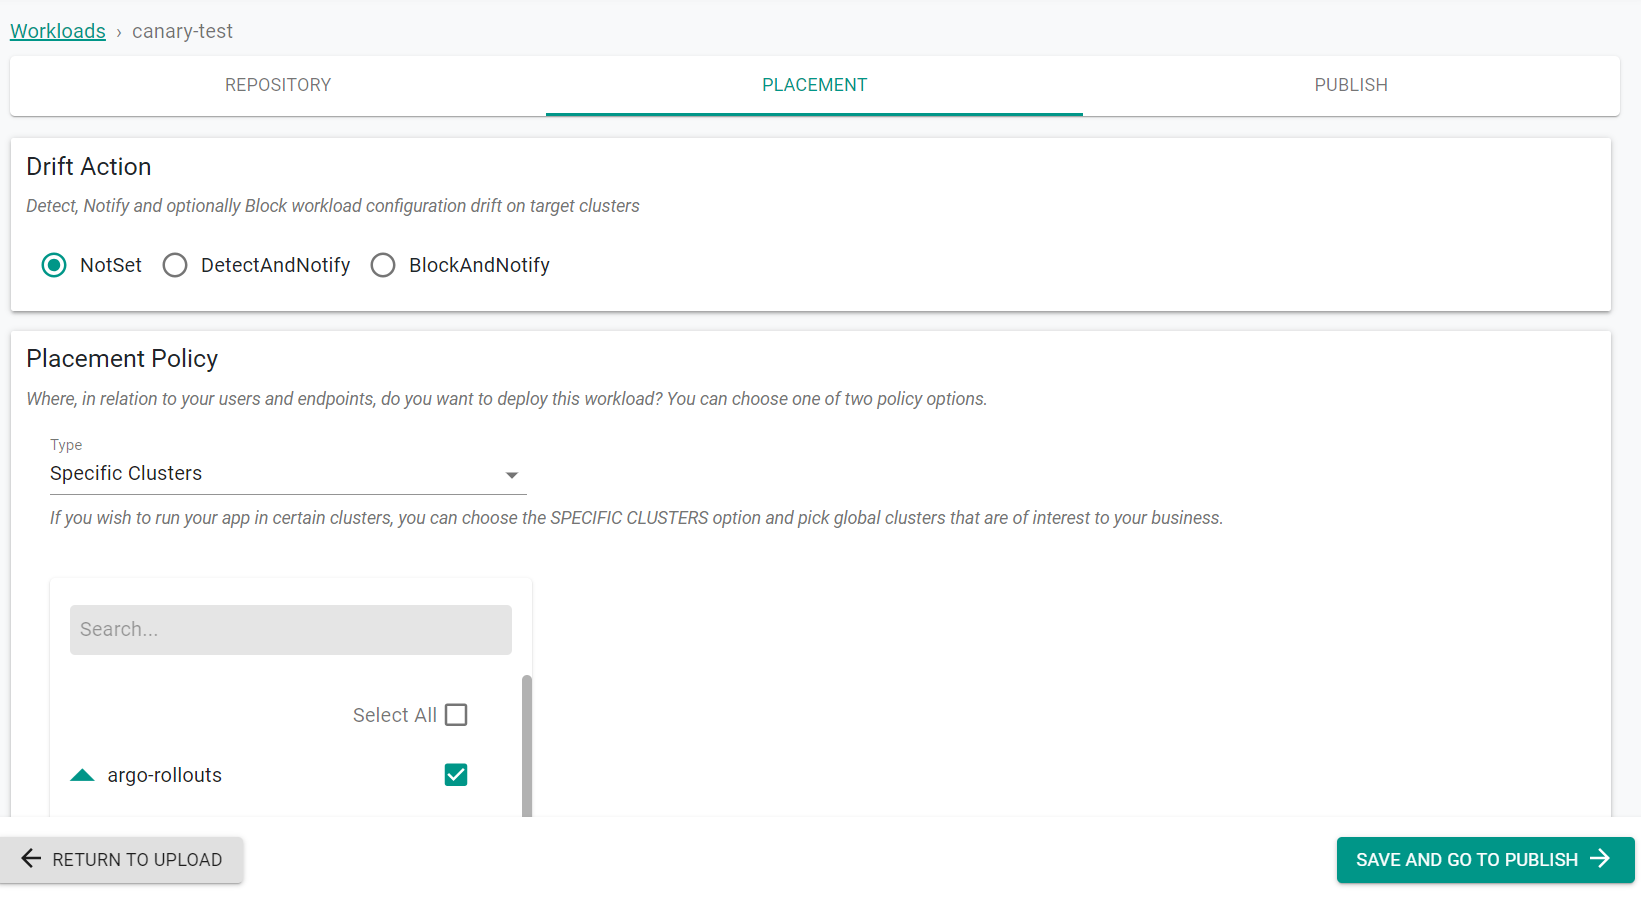
- Click Publish
This will deploy the workload on the cluster selected.
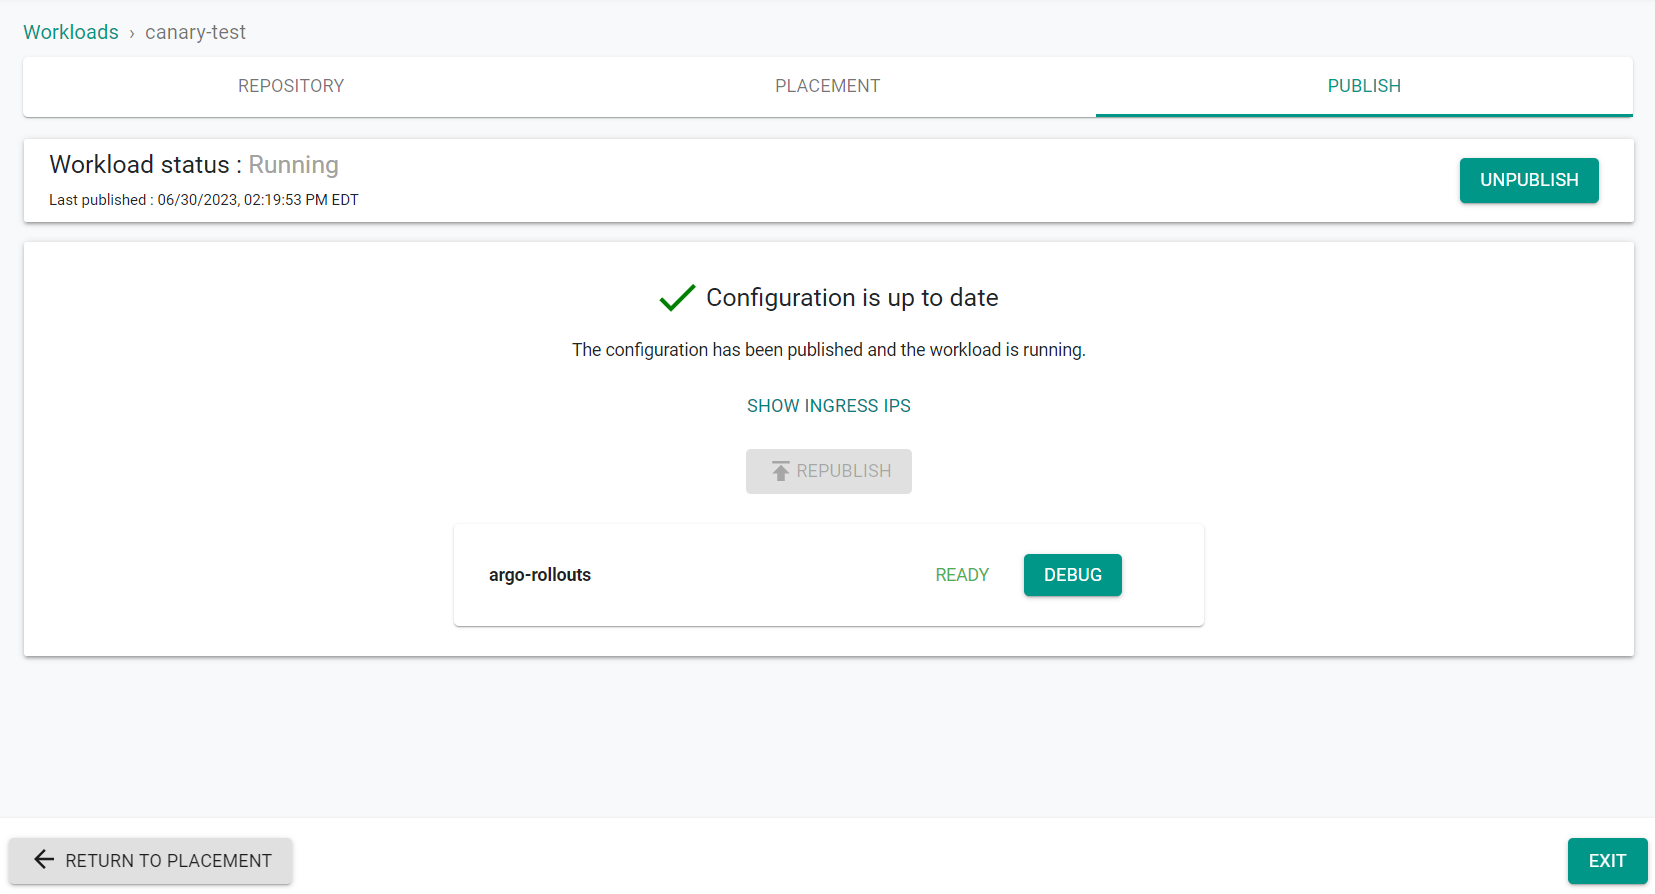
- Click Exit
Step 8: Create Pipeline
The GitOps pipeline will be used to deploy/update workloads from the Git repository each time and update is made and committed to the repo.
- In your project, navigate to GitOps -> Pipelines
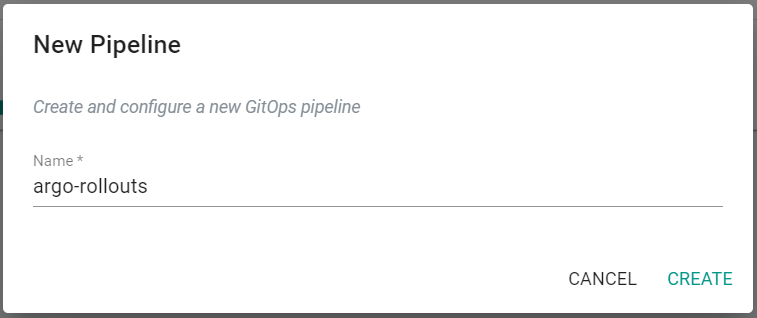
- Click New Pipeline
- Enter argo-rollouts for the name
- Click Create
Add Stage
A pipeline can have multiple stages, with completely different actions to model your desired workflows. In this exercise, we will test with a simple, single stage pipeline.
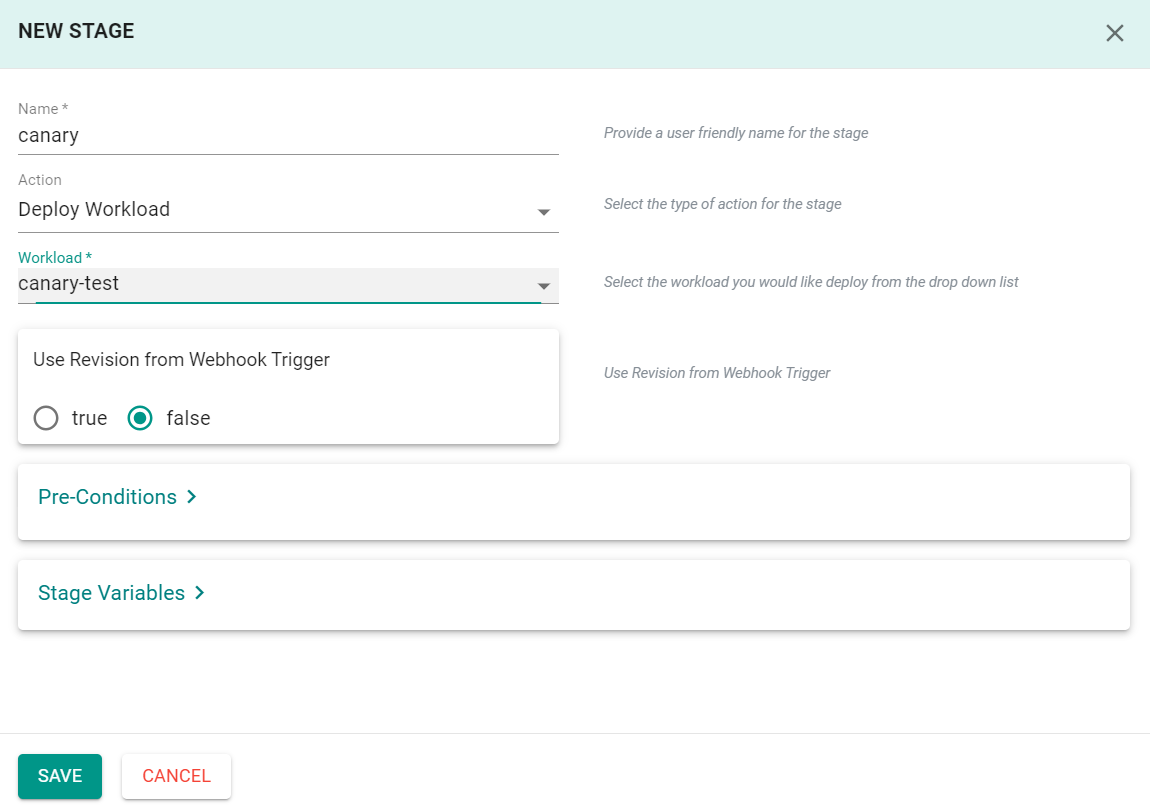
- Under the "Stages" tab, Click Add New Stage
- Enter canary for the name
- Select Deploy Workload for the action
- Select canary-test for the workload
- Click Save
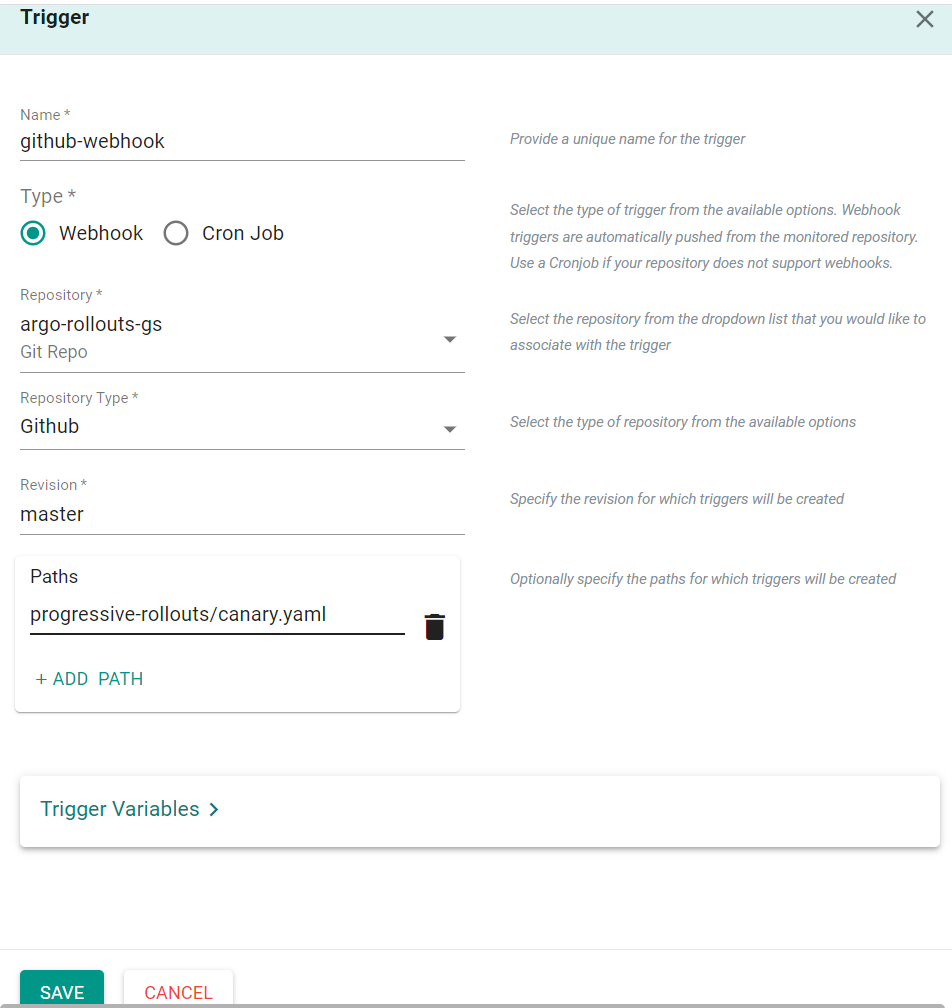
Add Trigger
A pipeline can be executed based on an "external trigger". For example, changes to the manifests in your Git repository. In this exercise, we will configure a trigger that will receive a webhook notification when specific files in your Git repository are modified.
- Click on the Triggers tab in the pipeline
- Click Add New Trigger
- Enter github-webhook for the name
- Select Webhook for type
- Select argo-rollouts-gs for the repository
- Select Github for repository type
- Enter master for revision
- Click Add Path
- Enter progressive-rollouts/canary.yaml
- Click Save
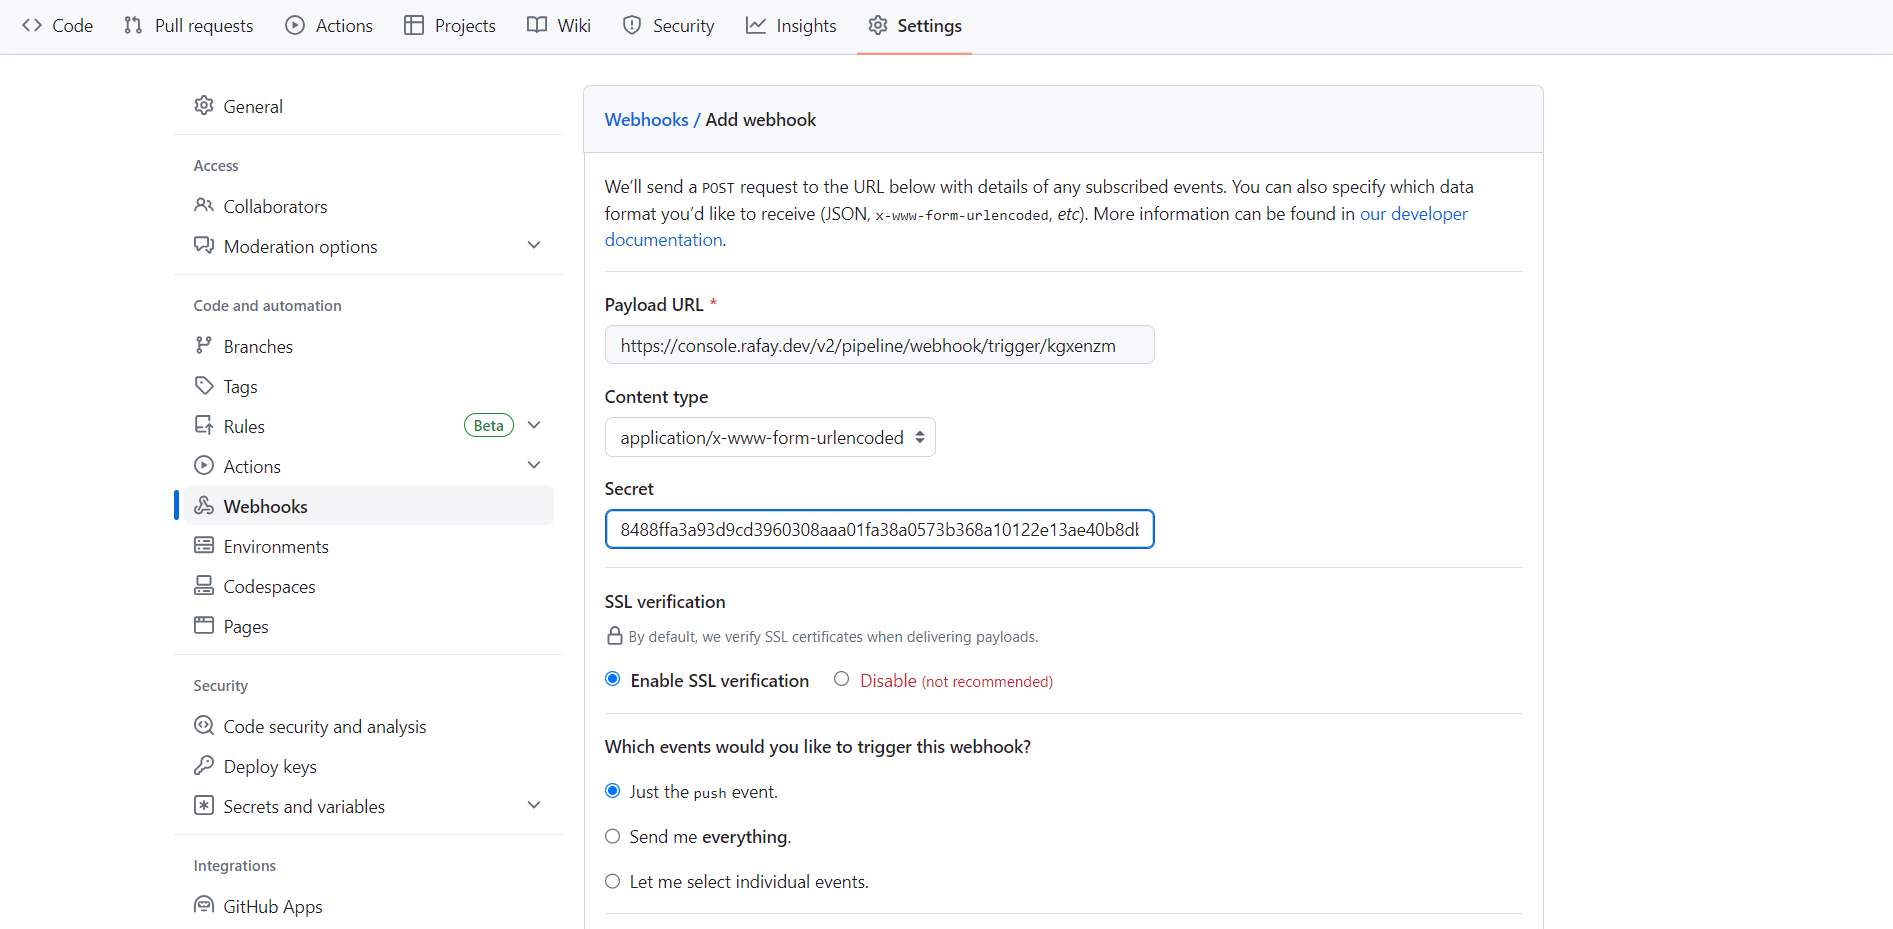
You will now be presented with the webhook configuration details that you need to copy/paste to your GitHub repository. Once you complete this step, the GitOps pipeline will be configured to receive webhook notifications whenever the repository is updated in Git.
Setup GitHub Webhook
- Navigate to your GitHub repository -> Settings -> Webhooks
- Click Add webhook
- Copy and Paste the "Payload URL" and "Secret" from the previous step
- Click Add webhook
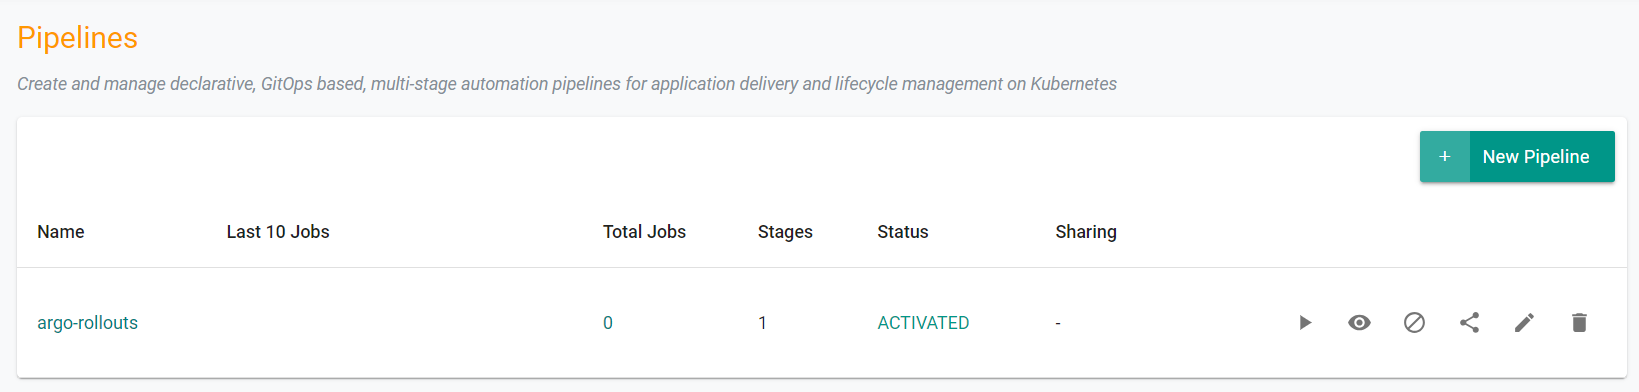
Activate Pipeline
By default, newly created pipelines start life in a deactivated state.
- In your project, navigate to GitOps -> Pipelines
- Click the Activate Pipeline button
- Click Yes to confirm activation
Step 9: Upgrade Workload
In this step, we will update the workload manifest in Git and see that the updates are applied to the application by the GitOps pipeline using the progressive rollout strategy.
First, you will access the application of the previously deployed workload.
- Run the following command from a cluster node to connect to the workloads webserver.
for n in {1..1000}; do curl 127.0.0.1; sleep 1; done
You should see output similar to the following showing the version of the workload being served by the webserver application.
Version-1.0.0
Version-1.0.0
Version-1.0.0
Version-1.0.0
Version-1.0.0
Version-1.0.0
Version-1.0.0
Version-1.0.0
Version-1.0.0
Version-1.0.0
Version-1.0.0
Now, you will update the workload manifest in the repository and see that the workload is updated using a canary approach. The canary rollout is currently configured in the manifest to update 40% of the workload. This can be customized to your rollout needs.
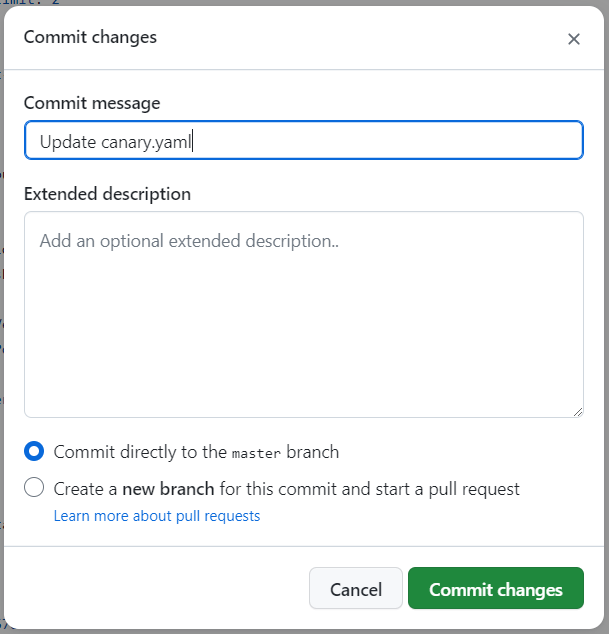
- In your Github repository, navigate to /progressive-rollouts/canary.yaml
- Update line number 30 with - "-text=Version-1.0.1"
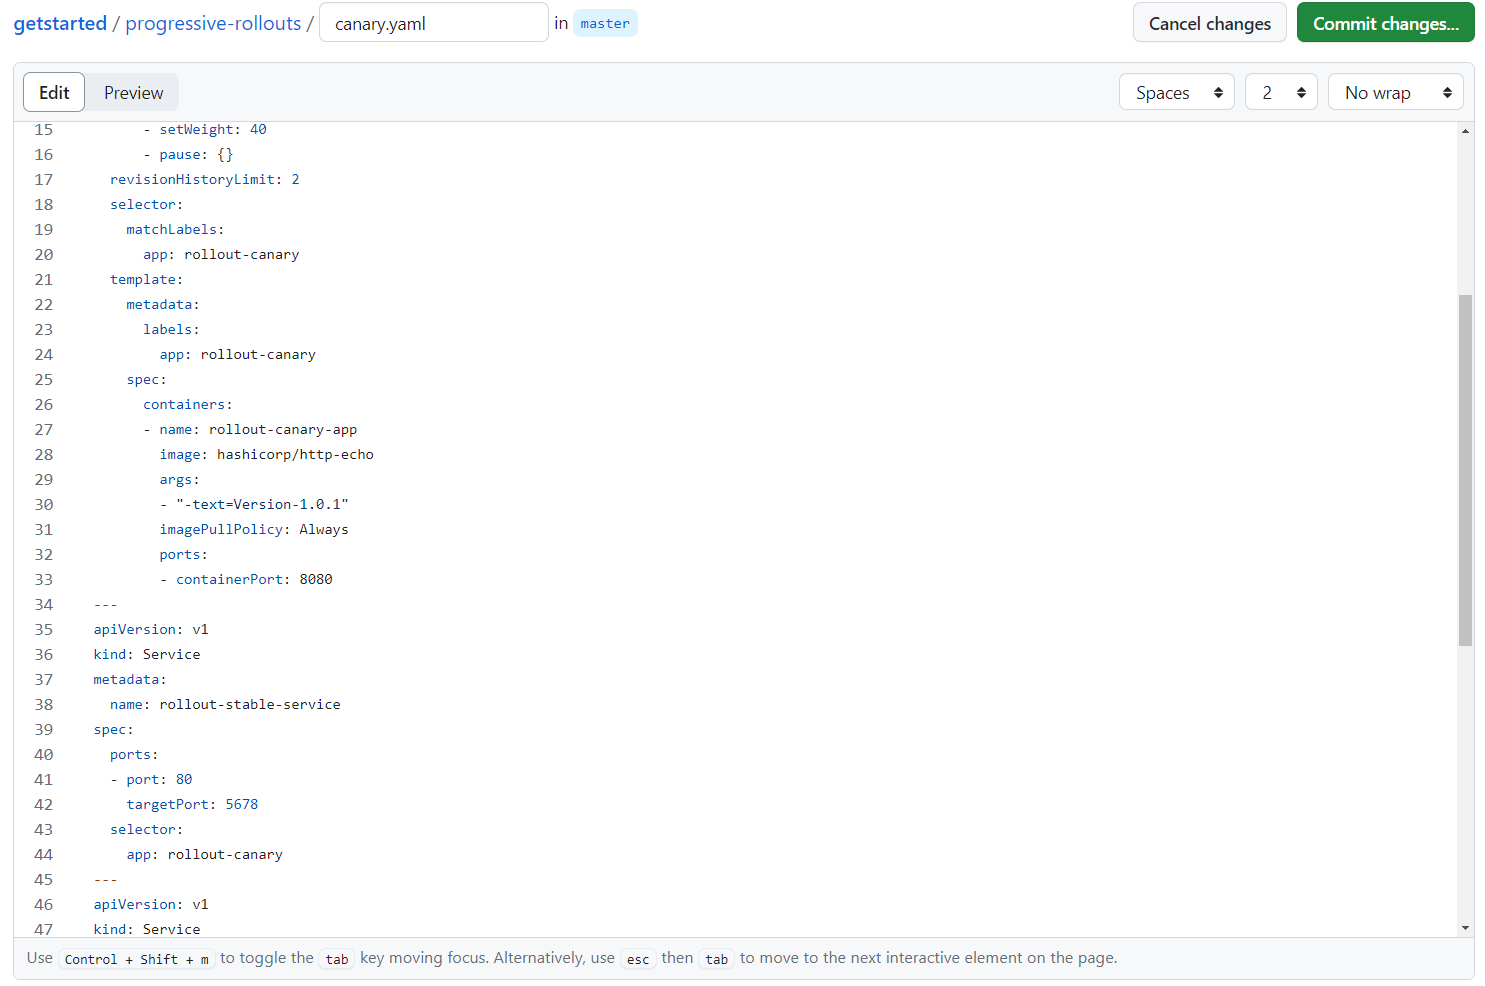
- Click Commit changes...
- Click Commit changes
After a few seconds, you should see the output of the previously executed "for loop" command display the updated version number. This shows that the progressive rollout updated a portion of the images with the new version of the application.
Version-1.0.0
Version-1.0.0
Version-1.0.0
Version-1.0.0
Version-1.0.0
Version-1.0.0
Version-1.0.0
Version-1.0.1
Version-1.0.1
Version-1.0.1
Version-1.0.0
Version-1.0.0
Version-1.0.0
Version-1.0.0
Version-1.0.1
Version-1.0.0
Version-1.0.0
Version-1.0.0
Recap
At this point, you have succesfully setup a GitOps pipeline to enable progressive rollouts using Argo Rollouts.