Install
What Will You Do
In this exercise,
- You will create a Network Policy addon and use it in a custom cluster blueprint, the Network Policy will allow all traffic within the namespace it is applied as well as to/from another namespace . It will deny all traffic to/from any other namespace
- You will then apply this cluster blueprint to a managed cluster
- For this exercise we will use two namespaces called namespace-a and namespace-b
Important
This tutorial describes the steps to create and use a custom cluster blueprint using the Web Console. The entire workflow can also be fully automated and embedded into an automation pipeline.
Assumptions
- You have already provisioned an upstream Kubernetes cluster (bare metal or VM based)
Step 1: Create NetworkPolicy Yaml
- Create the file npolicy-namespace-a.yaml and copy the contents below. This policy uses a namespaceSelector to allow traffic to/from other namespaces that have the matching labels. Additional rules such as ports, protocols, and IPBlocks can be added to further secure your pods.
---
kind: Namespace
apiVersion: v1
metadata:
  name: namespace-a
  labels:
    ns-policy: namespace-a
---
kind: NetworkPolicy
apiVersion: networking.k8s.io/v1
metadata:
  name: np-allow-ns-a-b
spec:
  podSelector:
    matchLabels: {}
  ingress:
  - from:
    - namespaceSelector:
        matchLabels:
          ns-policy: namespace-b
    - namespaceSelector:
        matchLabels:
          ns-policy: namespace-a
  egress:
  - to:
    - namespaceSelector:
        matchLabels:
          ns-policy: namespace-b
    - namespaceSelector:
        matchLabels:
          ns-policy: namespace-a
Step 2: Create Namespace Yaml
- Create the file ns-labels-b.yaml and copy the contents below. This will be applied to namespace-b and will set the labels needed to be used in the namespaceSelector defined above.
kind: Namespace
apiVersion: v1
metadata:
  name: namespace-b
  labels:
    ns-policy: namespace-b
Step 3: Create NetworkPolicy Addons
- Under Infrastructure, select "Namespaces" and create two new namespaces called namespace-a and namespace-b
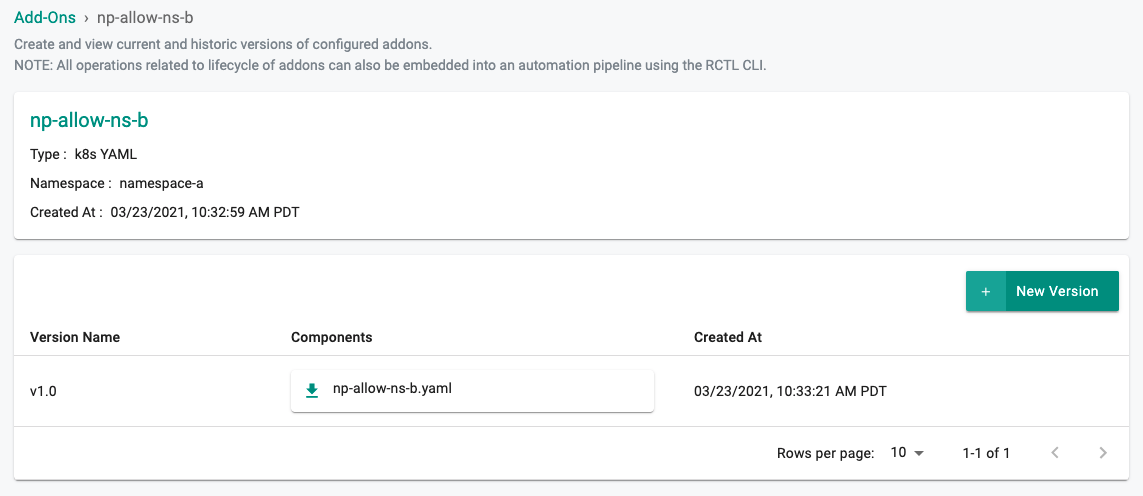
- Select "Addons" and "Create" a new Addon called np-allow-ns-b by selecting the "+ New Add-On" button
- Ensure that you select "k8s YAML" for type and select the namespace as namespace-a
- Provide the npolicy-namespace-a.yaml from the step 1 and select "CREATE"
- Click on "+ New Version"
- Enter "v1.0" for the Version Name and "UPLOAD" the k8s Yaml File downloaded in step 1
- Select "Save Changes"
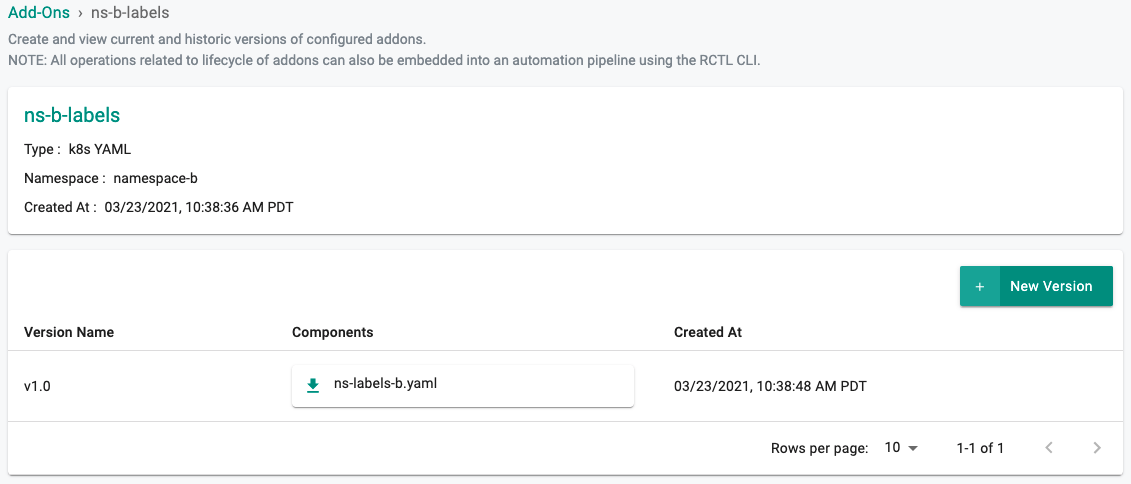
- Select "Addons" and "Create" a new Addon called ns-b-labels by selecting the "+ New Add-On" button
- Ensure that you select "k8s YAML" for type and select the namespace as namespace-b
- Provide the ns-labels-b.yaml from step 2 and select "CREATE"
- Click on "+ New Version"
- Enter "v1.0" for the Version Name and "UPLOAD" the k8s Yaml File created in step 2
- Select "Save Changes"
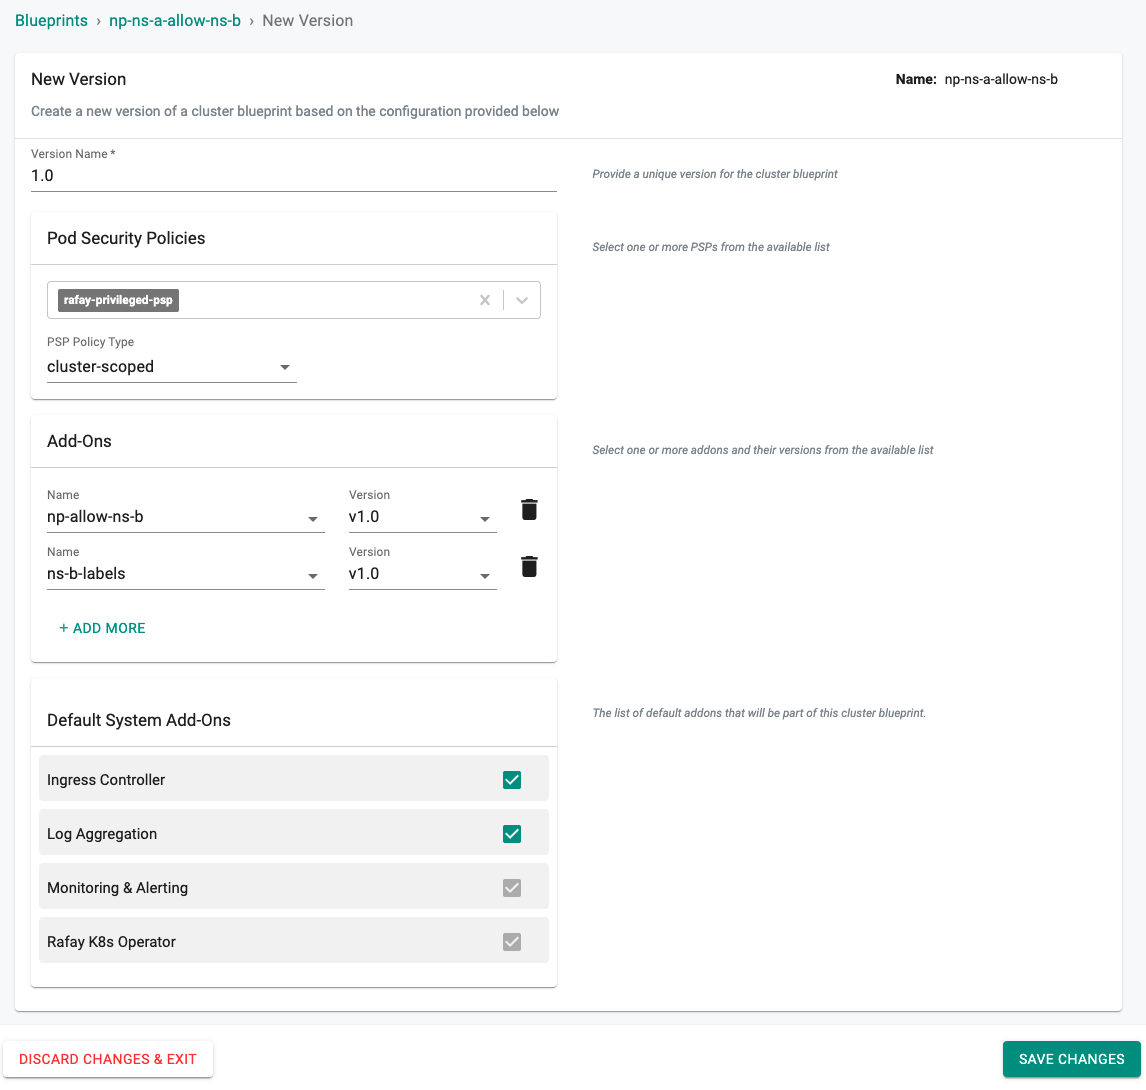
Step 4: Create Blueprint
Now, we are ready to assemble a custom cluster blueprint using the addons.
- Under Infrastructure, select "Blueprints"
- Create a new blueprint and give it a name such as np-ns-a-allow-ns-b
- Create a new version of the blueprint by selecting "+ New Version"
- Enter a version name such as "1.0" and add the np-allow-ns-b, and ns-b-labels addons.
Once the blueprint is created, ensure you publish it and optionally provide a version so that it can be tracked.

Step 5: Apply Blueprint
Now, we are ready to apply this custom blueprint to a cluster.
- Click on Options for the target Cluster in the Web Console
- Select "Update Blueprint" and select the np-ns-a-allow-ns-b blueprint and appropriate version we created from the list
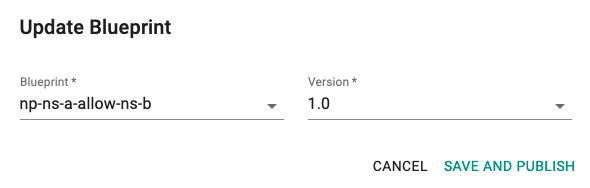
Click on "Save and Publish". This will start the deployment of the addons configured in the np-ns-a-allow-ns-b blueprint to the targeted cluster. The blueprint sync process can take a few minutes. Once complete, the cluster will display the current cluster blueprint details and whether the sync was successful or not. See illustrative example below.
Step 6: Verify Deployment
Users can optionally verify whether the correct resources have been created on the cluster.
- Click on the Kubectl button on the cluster to open a virtual terminal
- We will verify the network policy in the namespace-a namespace. We will also verify the appropriate labels have been set. You should see something like the example below.
kubectl get networkpolicies -n namespace-a

NAME            POD-SELECTOR   AGE
np-allow-ns-b   <none>         54s

kubectl get namespaces -l ns-policy=namespace-b
NAME          STATUS   AGE
namespace-b   Active   6d
Recap
Congratulations! You have successfully created a custom cluster blueprint defining a network policy and applied it to a cluster. You can now use this blueprint on as many clusters as you require.