MinIO
MinIO is a high performance, Kubernetes native "Object Storage" solution. This is well suited for machine learning, analytics and application data workloads. Amazon’s S3 API is the de-facto standard in the object storage world and MinIO provides full compatibility with the S3 API.
The image below provides an illustrative view into how MinIO can be leveraged by Kubernetes resident workloads.

What Will You Do
In this exercise,
- You will create a workload using MinIO's official Helm chart
- You will then deploy this MinIO workload to a managed cluster
Important
This tutorial describes the steps to create and use a workload using the Web Console. The entire workflow can also be fully automated and embedded into an automation pipeline.
Assumptions
- You have already provisioned or imported a Kubernetes cluster using the controller
- You have sufficient CPU, Memory and Storage in your cluster for MinIO
- You have Helm client installed locally to download the MinIO helm chart
Challenges
Although deploying a simple Helm chart can be trivial for a quick sniff test, there are a number of considerations that have to be factored in for a production grade deployment. Some of them are described below.
MinIO Ingress
The MinIO service deployed on the cluster needs to be exposed externally for it to be practical. In this recipe, we will use the managed nginx Ingress Controller in the default blueprint to expose the MinIO service externally.
Certificate Lifecycle
MinIO's Ingress needs to be secured using TLS. It is impractical to manually handle certificates and private keys. In this recipe, we will use a managed cert-manager addon in our cluster blueprint to manage the lifecycle of certificates for MinIO's Ingress.
Secrets Management
It is imperative to secure MinIO's "Access Key" and "Secrets" and not have users manually handle these secrets. In this recipe, we will also use the the controller's Integration with HashiCorp Vault to secure MinIO's access key and secrets.
Step 1: Download Helm chart
Use your helm client to download the latest release of MinIO helm chart file minio-x.y.z.tgz to your machine. In this recipe, we used MinIO v5.0.32.
- Add Minio's repo to your Helm CLI
helm repo add minio https://helm.min.io/
- Now, fetch the latest Helm chart from this repo.
helm fetch minio/minio
Step 2: Customize Values
In this step, we will be creating a custom "values.yaml" file with overrides for our MinIO deployment. Copy the following yaml document into the "minio-custom-values.yaml" file.
## Enable persistence using Persistent Volume Claims
#
persistence:
  #Specify the size for MinIO Storage
  size: 200Gi

## Configure resource requests and limits for your MinIO container
##
resources:
  requests:
    memory: 2Gi
    cpu: 500m
  limits:
    memory: 4Gi
    cpu: 1

## Enable and configure ingress to expose MinIO service externally
##
ingress:
  enabled: true
  annotations:
    # Add annotation to use built-in nginx ingress controller
    kubernetes.io/ingress.class: nginx
    # Add annotation to use cert-manager for generating and maintaining the cert for MinIO ingress
    cert-manager.io/cluster-issuer: "letsencrypt-http"
  path: /
  hosts:
    # Change the host to your domain
    - minio.infra.gorafay.net
  tls:
    - secretName: minio-ingress-tls
      hosts:
        - minio.infra.gorafay.net

## Change below settings if you would like to use K8S secrets for the MinIO's access and secret key
## Remove this if you are planning to use the Vault integration
##
existingSecret: ""
accessKey: "AKIAIOSFODNN7EXAMPLE"
secretKey: "wJalrXUtnFEMI/K7MDENG/bPxRfiCYEXAMPLEKEY"

## (Optionally) If you would like to use the vault integration to secure MinIO's access and secret key
#
securityContext:
  enabled: false
## Add pod annotations to use the vault intergation
podAnnotations:
  rafay.dev/secretstore: vault
  ## replace "infra" with your configured vault role
  vault.secretstore.rafay.dev/role: "infra"
environment:
  ## replace infra-apps/data/minio#data.apikey with the vault secret path to your MinIO access key
  MINIO_ACCESS_KEY: secretstore:vault:infra-apps/data/minio#data.apikey
  ## replace infra-apps/data/minio#data.apisecret with the vault secret path to your MinIO secret key
  MINIO_SECRET_KEY: secretstore:vault:infra-apps/data/minio#data.apisecret
Step 3: Create MinIO Workload
- Login into the Web Console and navigate to your Project as an Org Admin or Project Admin
- Under Infrastructure (or Applications if accessed with Project Admin role), select "Namespaces" and create a new namespace called "minio"
- Go to Applications > Workloads
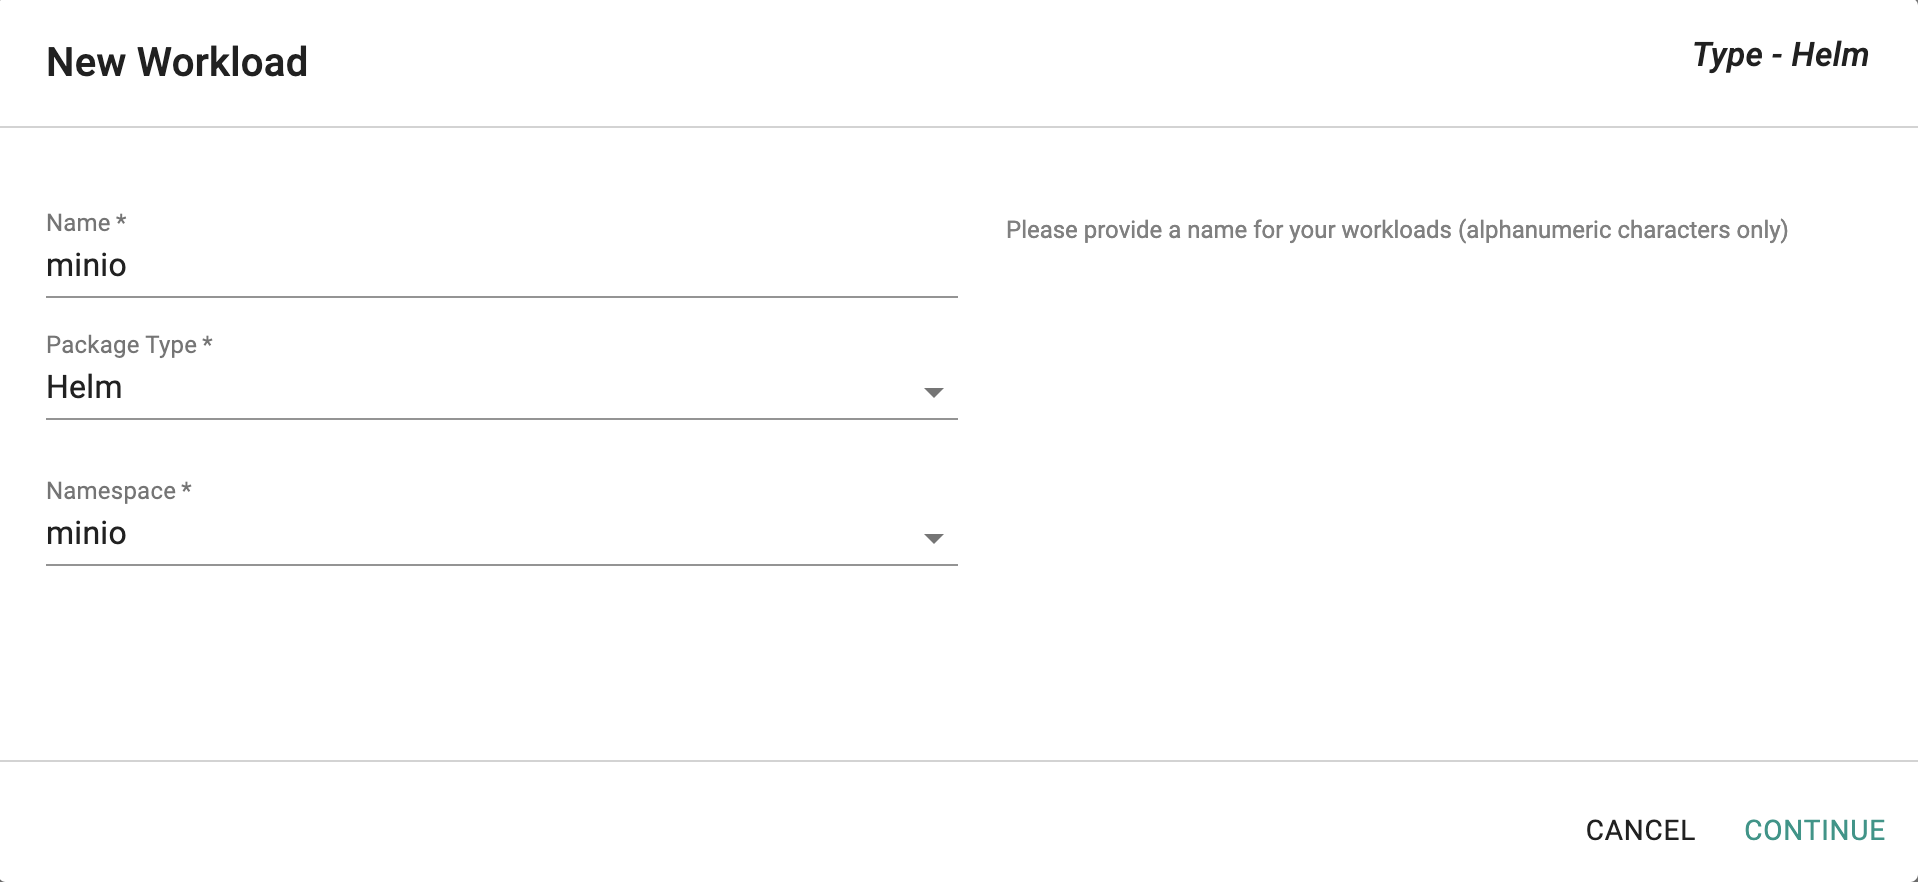
- Select "New Workload" to create a new workload called "minio"
- Ensure that you select "Helm" for Package Type and select the namespace as "minio"
- Click CONTINUE to next step
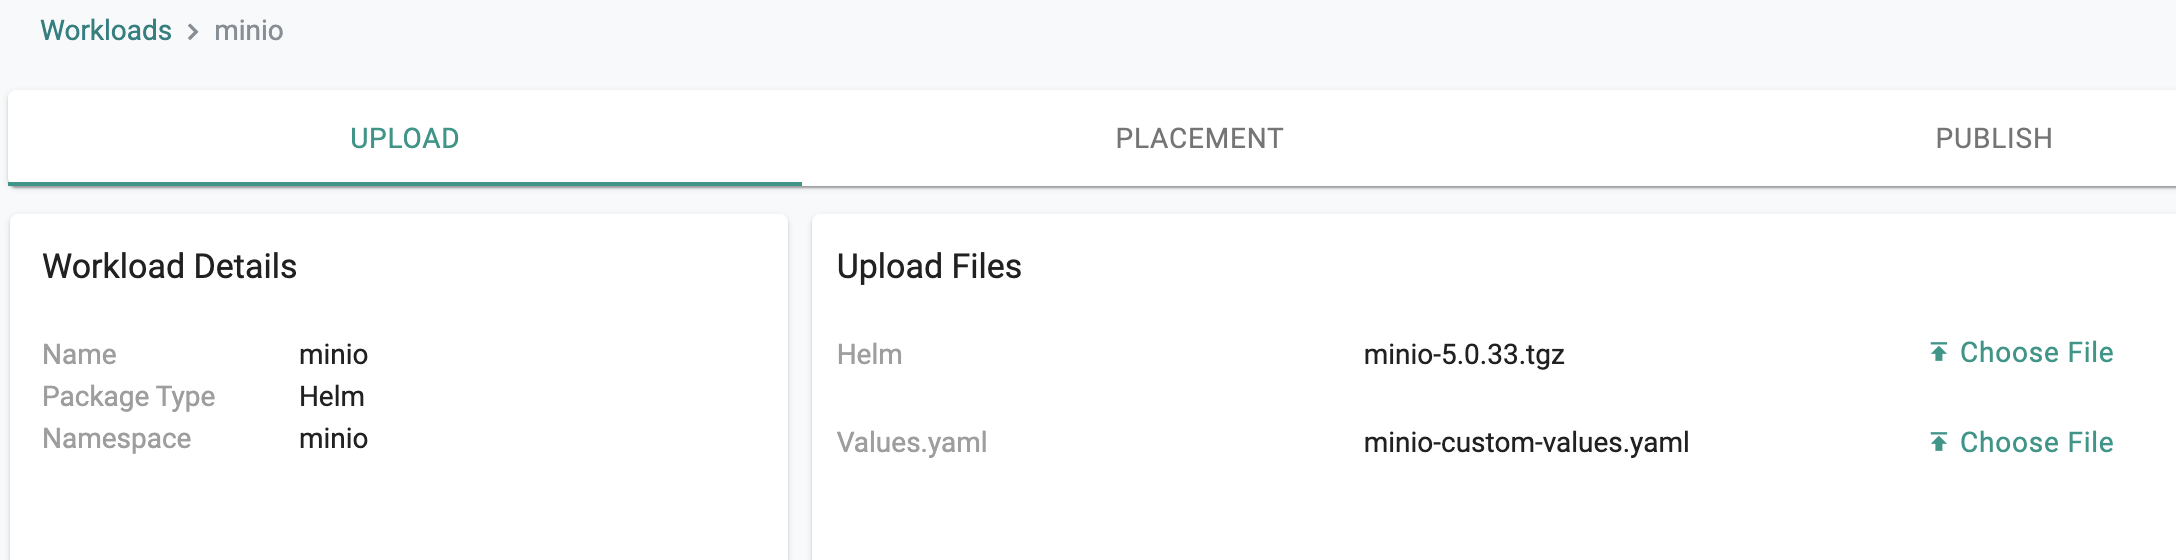
- Upload the MinIO helm chart minio-x.y.z.tgz to the Helm > Choose File
- Upload the minio-custom-values.yaml created file from the previous step to Values.yaml > Choose File
- Save and Go to Placement
- In the Placement step, select the cluster(s) that you would like to deploy MinIO
- Publish the MinIO workload to the selected cluster(s)
Step 4: Verify Deployment
You can optionally verify whether the correct resources have been created on the cluster.
- After publishing the MinIO workload, click on the Debug button
- Click on the Kubectl button to open a virtual terminal for kubectl proxy access right to the "minio" namespace context of the cluster
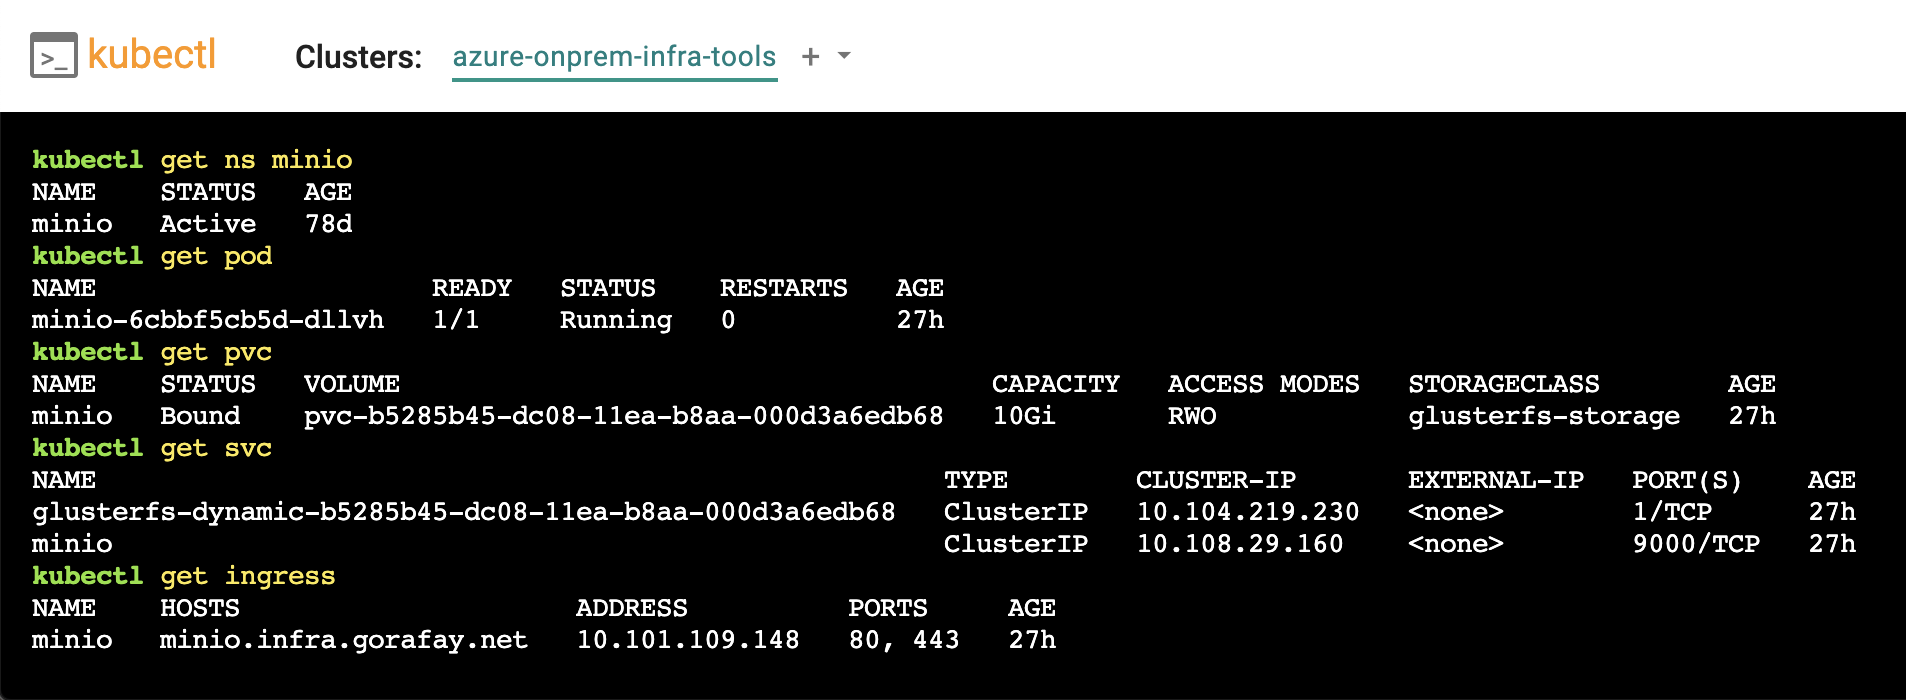
- First, we will verify if the minio namespace has been created
kubectl get ns minio
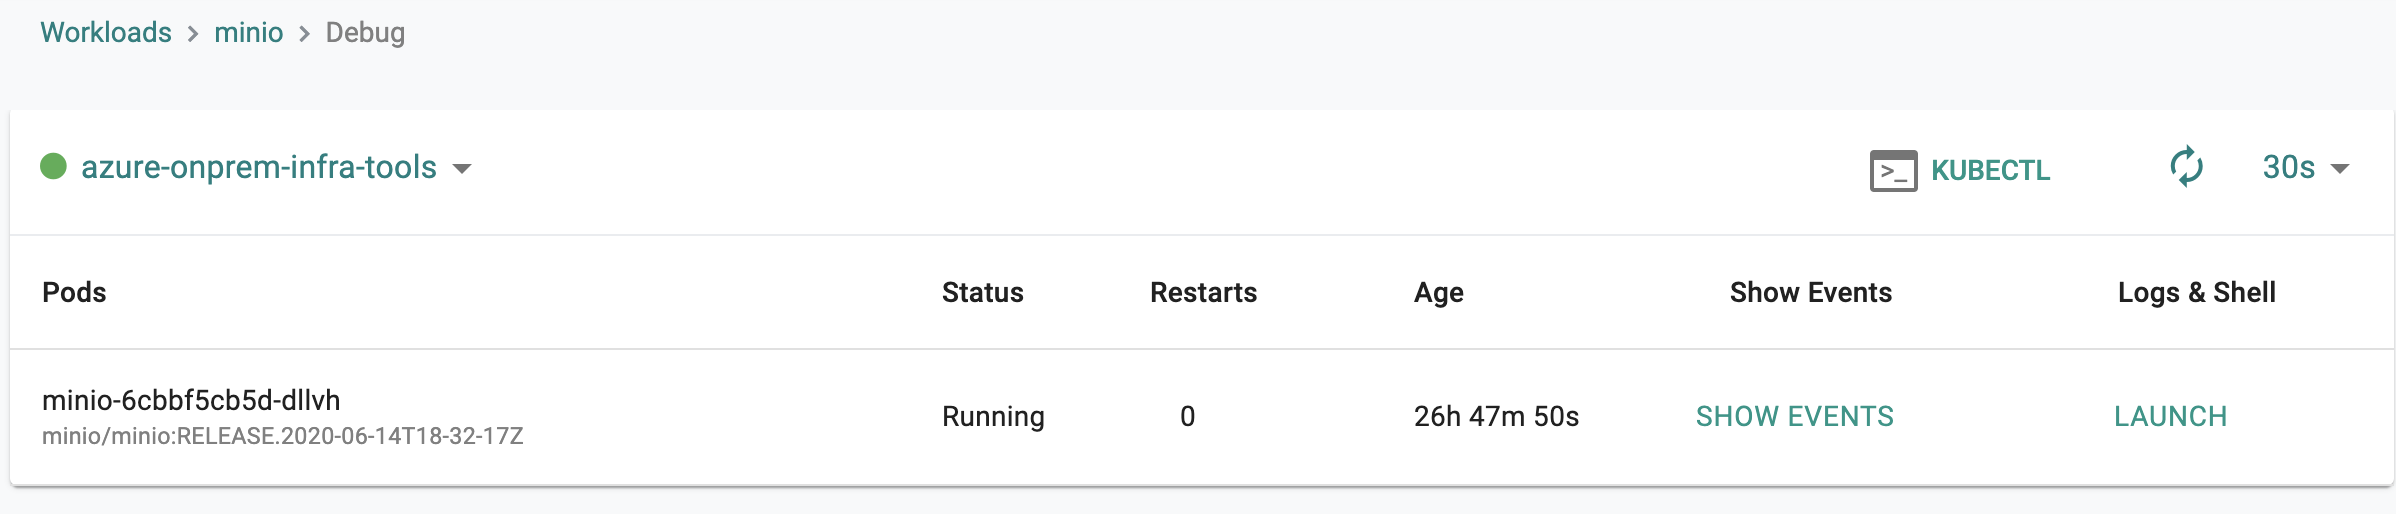
- Second, we will verify the MinIO pod status
kubectl get pod
- Then, we will verify the MinIO persistent volume claim status
kubectl get pvc
- Then, we will verify the MinIO service
kubectl get svc
- Then, we will verify the ingress for MinIO service
kubectl get ingress
Shown below is an example for what you should see on a cluster where MinIO has been deployed as a Helm type workload through the controller.
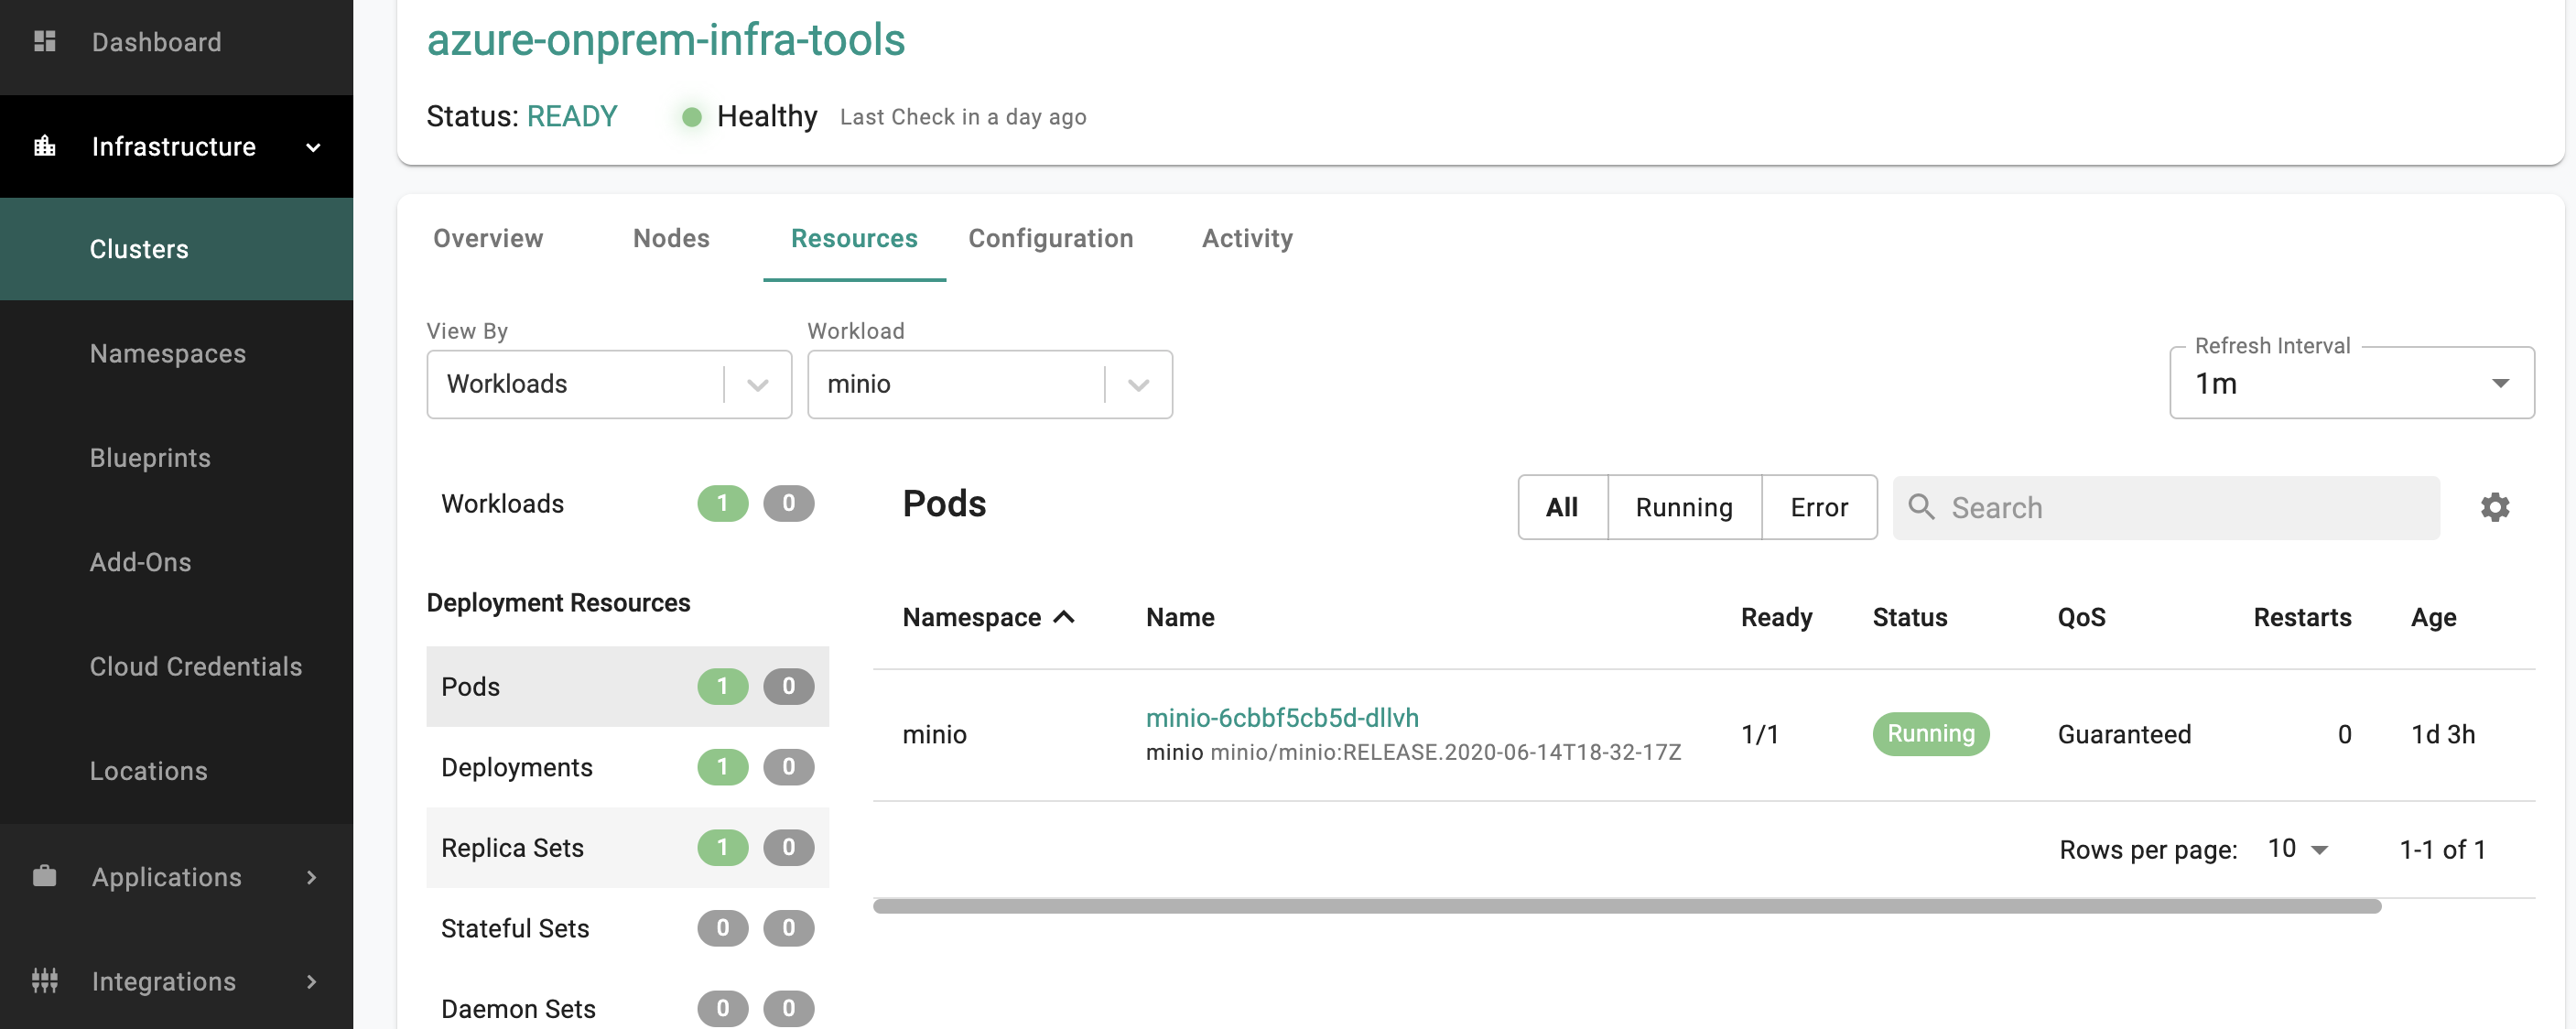
Alternatively, users with Infrastructure or Organization Admin roles in the Web Console you can view the status of all Kubernetes resources created by this MinIO workload by going to Infrastructure > Clusters > cluster_name > Resources and filter by Workloads "minio" as below:
- Finally, access the MinIO service via the ingress hostname and enter the MinIO's access and secret key configured in the custom-values.yaml file to login to MinIO.
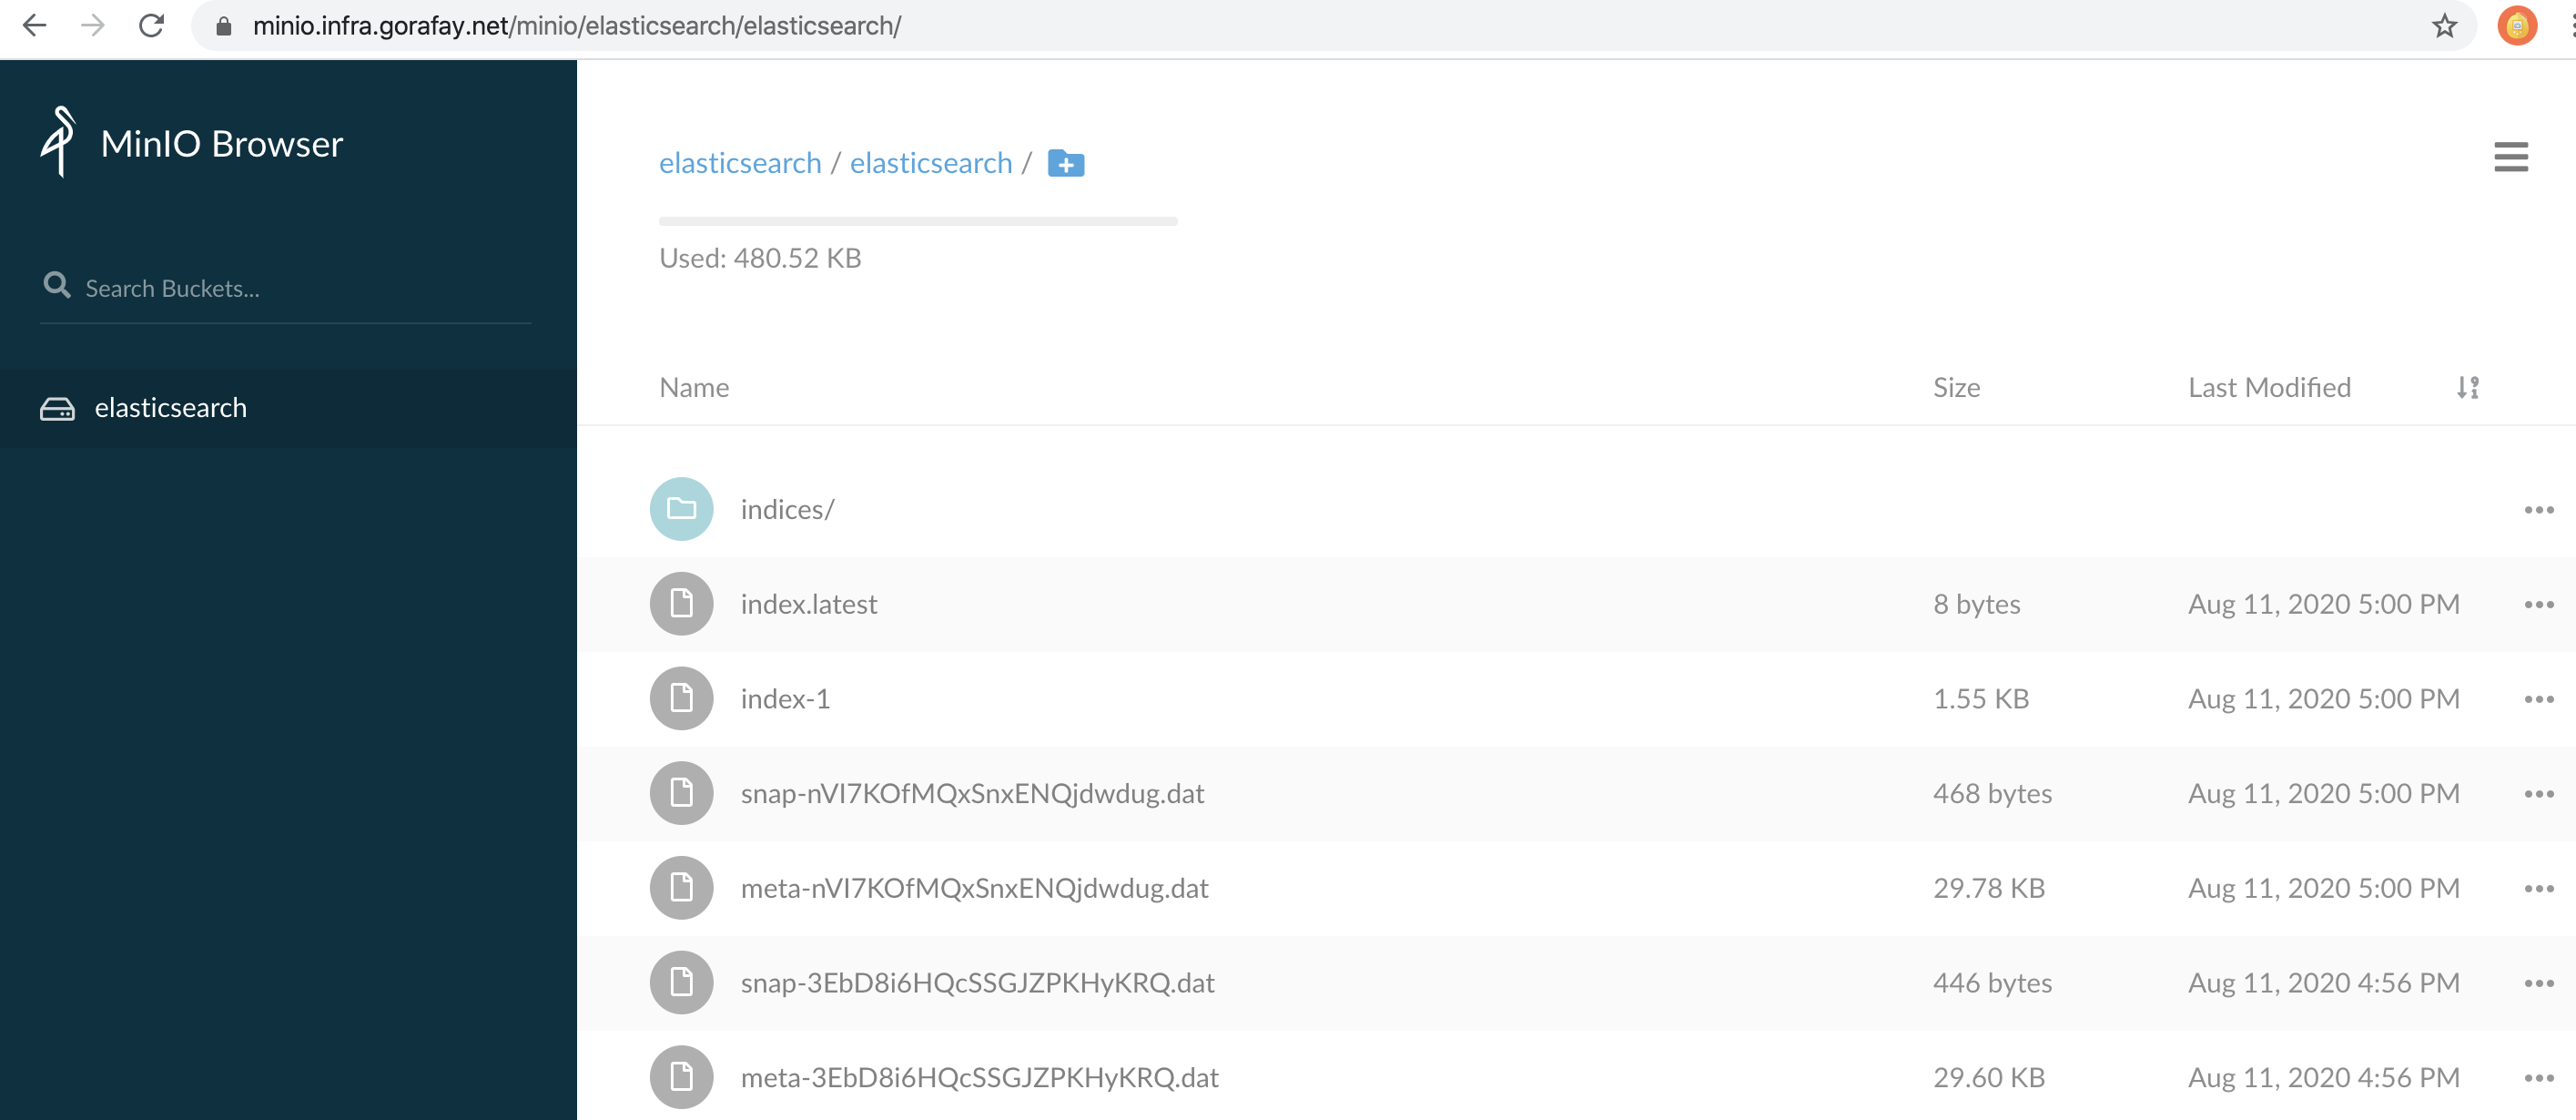
Recap
Congratulations! You have successfully deployed MinIO as a workload to a managed cluster. You can now start using MinIO as object storage for your applications. The example screenshot below is MinIO being used to store daily snapshots of ElasticSearch indices.