Part 3: Using Deployments
This is Part 3 of a multi-part, self-paced quick start exercise.
Note
This exercise requires MicroK8s. If you do not have these already installed and running, see "Prerequisites".
What Will You Do
In part 3, you will:
- Use Deployments to update your pods.
Estimated Time
Estimated time for this exercise is 10 minutes. Watch a video of the exercise below.
Using Deployments
A Deployment provides declarative updates for Pods and ReplicaSets. This exercise will focus on Deployments.
Deployment YAML file
Create a deployment using a YAML file, which is a configuration file. You could create a YAML file from the command line, but for this exercise, you can just use a text editor. Or you can download the deployment YAML file from from this public Git repository.
- Open the Terminal.
- Navigate to the Downloads folder.
cd ./Downloads - Use the following command to create an empty YAML file in your Downloads folder.
touch deployment.yaml - Use the nano text editor in the Terminal.
nano deployment.yaml - Copy and paste the configuration below into the text editor.
- Press Cmd + X, then type Y and press Return to save the deployment.yaml file.
- Open the command prompt.
- Navigate to the Downloads folder.
cd ./Downloads - Use the following command to create an empty YAML file in your Downloads folder.
copy NUL deployment.yaml - Open the deployment.yaml file with a text editor.
- Copy and paste the configuration below into the text editor.
- Save the deployment.yaml file.
- Open the Terminal.
- Navigate to the Downloads folder.
cd ./Downloads - Use the following command to create an empty YAML file in your Downloads folder.
touch deployment.yaml - Use the nano text editor in the Terminal.
nano deployment.yaml - Copy and paste the configuration below into the text editor.
- Press Cmd + X, then type Y and press Return to save the deployment.yaml file.
Add a Deployment
- In the Terminal or Command Prompt, list the resources in the current namespace. There may not be any resources listed.
microk8s kubectl get deployment -o wide - Use the deployment.yaml file to manage your pods.
microk8s kubectl create -f deployment.yaml - List resources in the current namespace. You now have a test-deployment using the python-http-server container.
microk8s kubectl get deployment -o wide - View a list of replicasets.
microk8s kubectl get replicaset -
View the list of pods. Copy the name of one of the pods. Make sure the test-deployment pods are ready.
microk8s kubectl get pods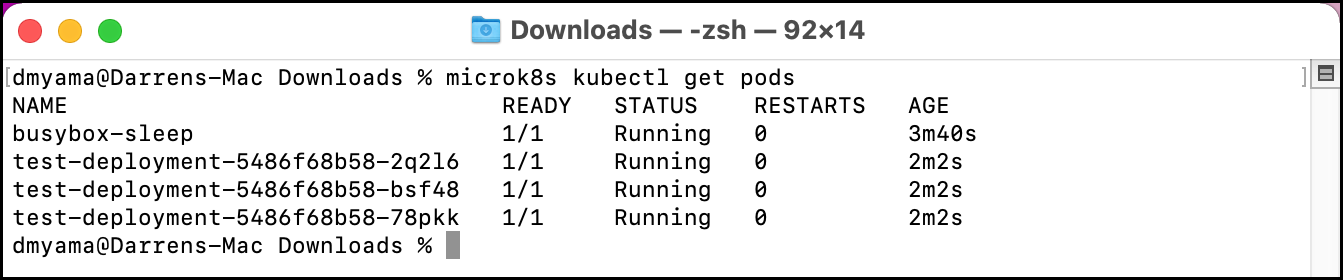
-
Access the pod. Replace pod-name with the name of the pod.
microk8s kubectl exec -it pod-name -- bash -
Run a curl command. You should see the response included in the YAML file, including the name for the pod.
curl http://localhost
-
Exit the pod.
exit
deployment.yaml
apiVersion: apps/v1
kind: Deployment
metadata:
  name: test-deployment
spec:
  replicas: 3
  selector:
    matchLabels:
      app: test-pod
  template:
    metadata:
      labels:
        app: test-pod
    spec:
      containers:
      - name: python-http-server
        image: python:2.7
        command: ["/bin/bash"]
        args: ["-c", "echo \" Hello from $(hostname)\" > index.html; python -m SimpleHTTPServer 80"]
        ports:
        - name: http
          containerPort: 80