Traefik

Traefik is a leading modern ingress controller, reverse proxy and load balancer that makes deploying microservices easy. Traefik integrates with your existing infrastructure components and configures itself automatically and dynamically.
Traefik is designed to be as simple as possible to operate, but capable of handling large, highly-complex deployments across a wide range of environments and protocols in public, private, and hybrid clouds. It also comes with a powerful set of middlewares that enhance its capabilities to include load balancing, API gateway, orchestrator ingress, as well as east-west service communication and more.
This recipe describes how customers can standardize the configuration, deployment and lifecycle management of Traefik as an ingress controller through a custom system add-on across their fleet of clusters.
What Will You Do
In this exercise,
- You will create a customized Traefik add-on using Traefik's official Helm chart
- You will use the add-on in a custom cluster blueprint
- You will then apply this cluster blueprint to a managed cluster
- You will then deploy a test workload to use the Traefik ingress controller
Assumptions
- You have an existing MKS cluster
- You have have DNS setup for your domain
- You have a TLS certificate for the domain
Step 1: Create Namespace
You will now create a managed namespace from the controller for the Traefik resources.
- Ensure you are logged into the console
- In your project, navigate to Infrastructure -> Namespaces
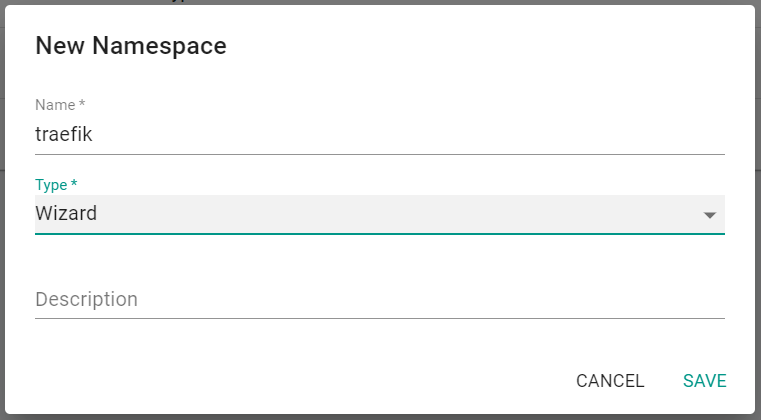
- Click on New Namespace
- Enter traefik for the name
- Select Wizard for Type
- Click Save
- Click Discard Changes & Exit
Step 2: Create TLS Secret Addon
In this step, you will create addon for a secret containing the TLS certificate for the wildcard domain to be used by ingress.
- Save the below YAML to a file named tls-secret.yaml
- Update the tls.crt and tls.key values with your certificate values. Be sure to base64 encode the values before entering into the file.
apiVersion: v1
data:
  tls.crt: <Certificate>
  tls.key: <Cert_Key>
kind: Secret
metadata:
  name: wildcard-tls
  namespace: traefik
type: kubernetes.io/tls
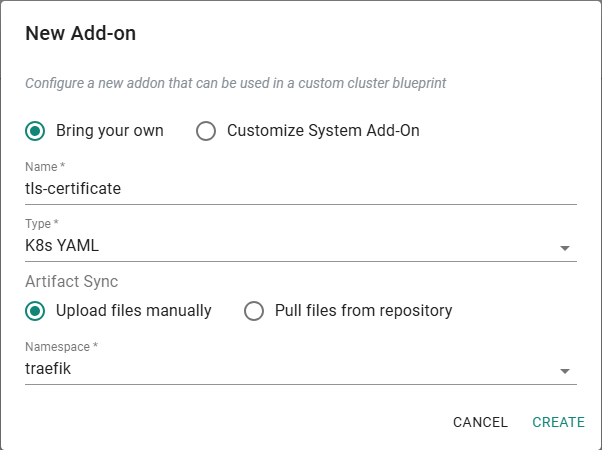
- In your project, navigate to Infrastructure ->Add-Ons
- Click Create Add-On -> Create New Add-On
- Enter tls-certificate for the name
- Select K8s YAML for the type
- Select the previously created traefik namespace
- Click Create
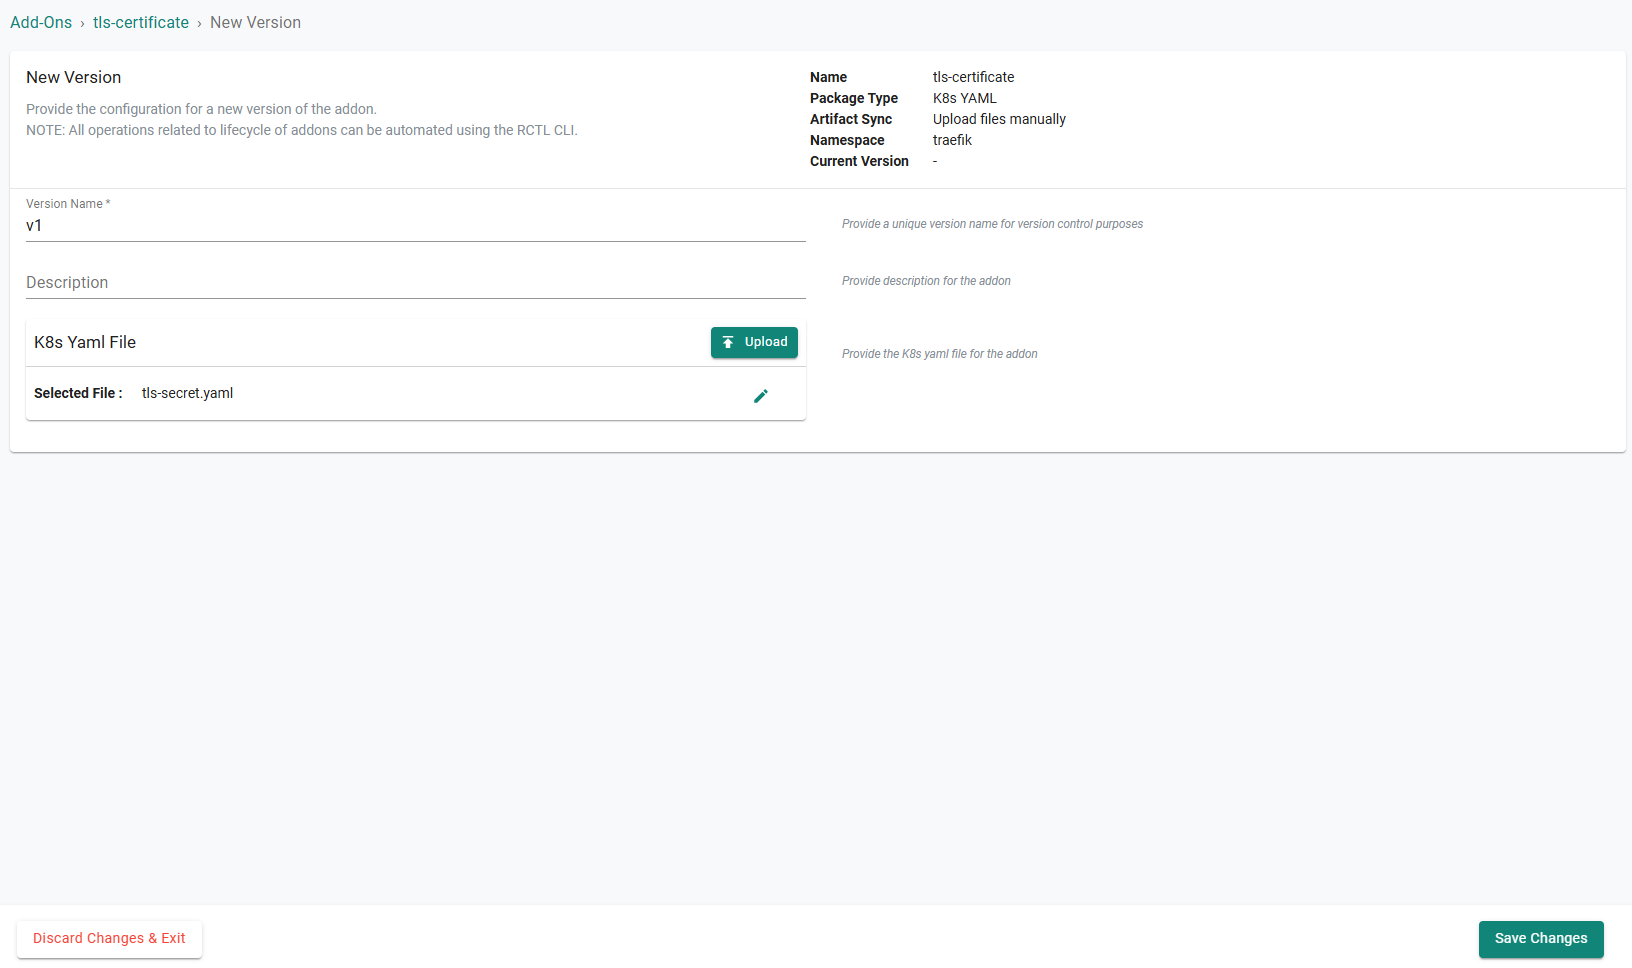
- Click New Version
- Enter v1 for the version name
- Click Upload under the K8s Yaml File section
- Select the previously saved tls-secret.yaml* file
- Click Save Changes
Step 3: Create Traefik Custom Values File
In this step, you will create a custom values file for the Traefik Helm chart. The values file will reference the addon secret from the previous step.
- Save the below YAML to a file named traefik-values.yaml
deployment:
  kind: DaemonSet
hostNetwork: true
ports:
  web:
    port: 80
  websecure:
    port: 443
# Customize updateStrategy of traefik pods
updateStrategy:
  type: RollingUpdate
  rollingUpdate:
    maxUnavailable: 1
    maxSurge: 0

service:
  type: ClusterIP

securityContext:
  capabilities:
    drop: [ALL]
    add: [NET_BIND_SERVICE]
  readOnlyRootFilesystem: true
  runAsGroup: 0
  runAsNonRoot: false
  runAsUser: 0

providers:
  kubernetesIngressNginx:
    enabled: true
tlsStore:
  default:
    defaultCertificate:
      # Name of the Kubernetes Secret that holds your default TLS certificate and key in the traefik controller namespace
      secretName: wildcard-tls
Step 4: Create Traefik Addon
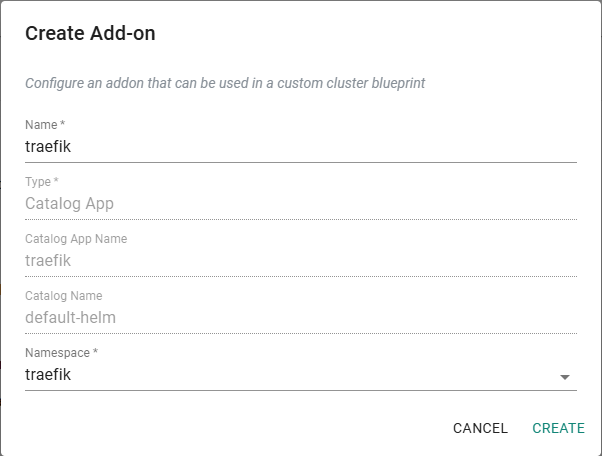
In this step, you will create a custom cluster add-on from the Catalog. The add-on will then be used in a custom cluster blueprint.
- In the Rafay console, navigate to App Catalog
- Search for "traefik"
- Click on traefik
- Click Create Add-On
- Enter traefik for the name
- Select the previously created namespace
- Click Create
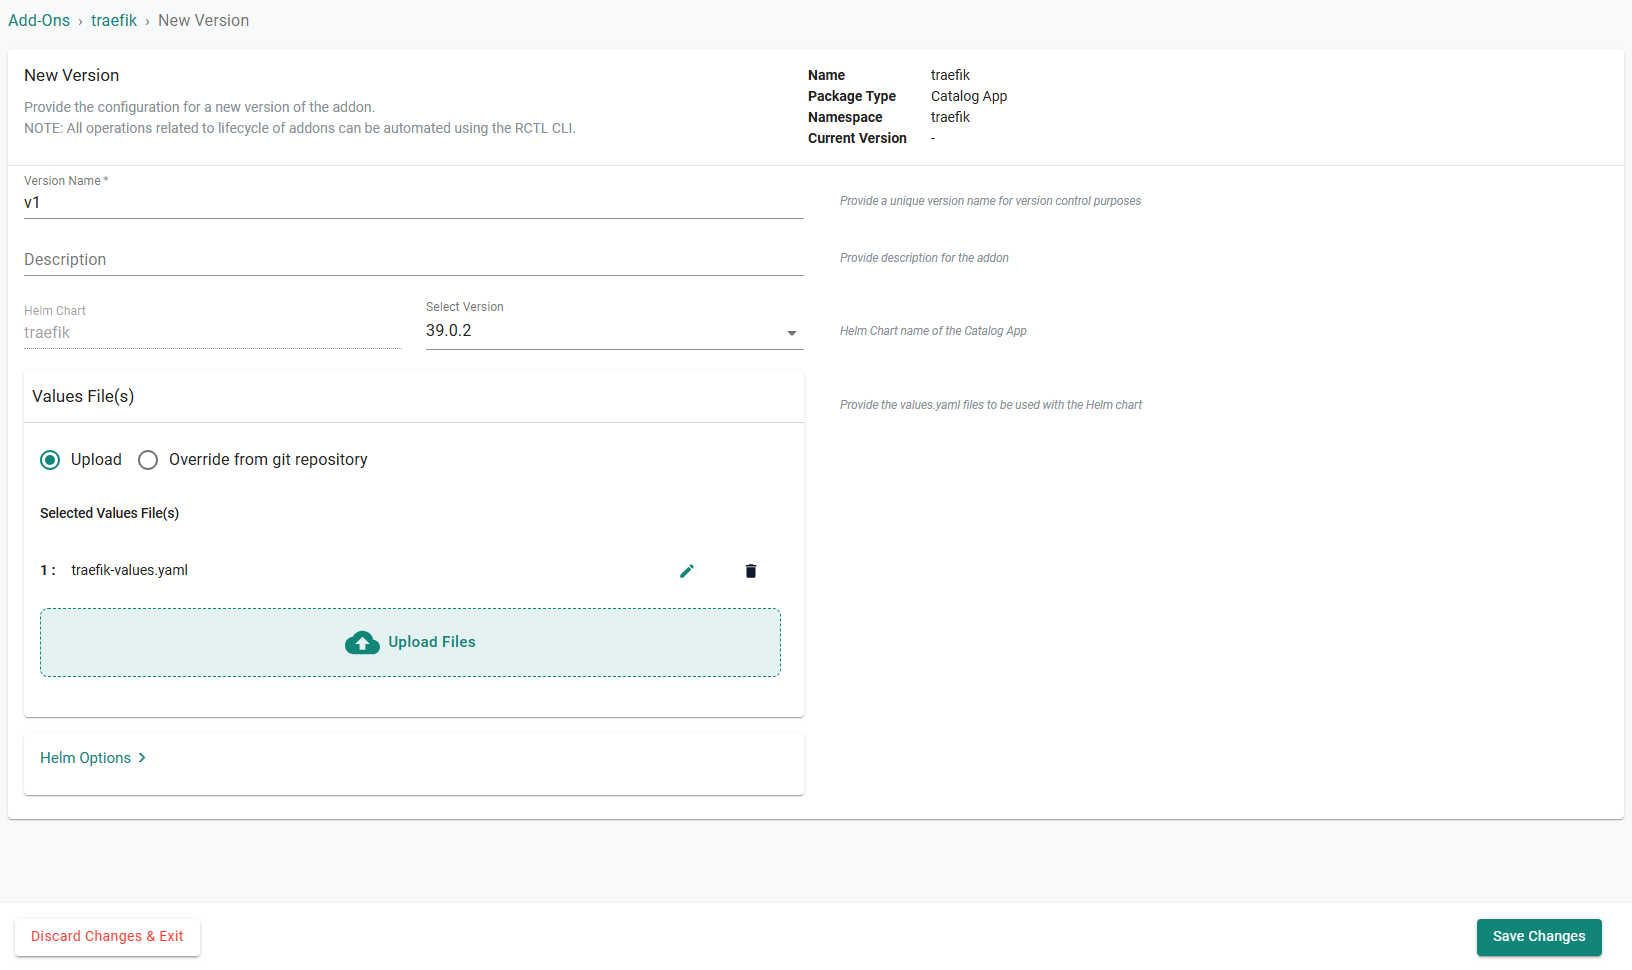
- Enter v1 for the version name
- Click Upload Files under the Values File(s) section
- Select the previously saved traefik-values.yaml file
- Click Save Changes
Step 5: Create Blueprint
In this step, you will create a custom cluster blueprint which contains the previously created addons.
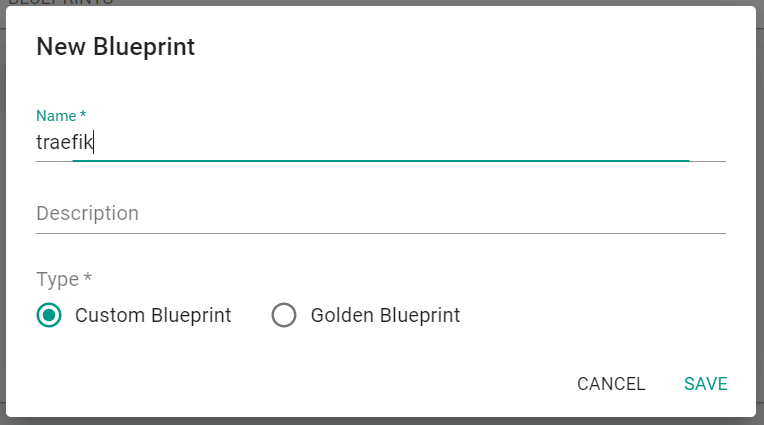
- In the Rafay console, navigate to Infrastructure -> Blueprints in the left side tree
- Click New Blueprint
- Enter traefik for the name of the blueprint
- Click Save
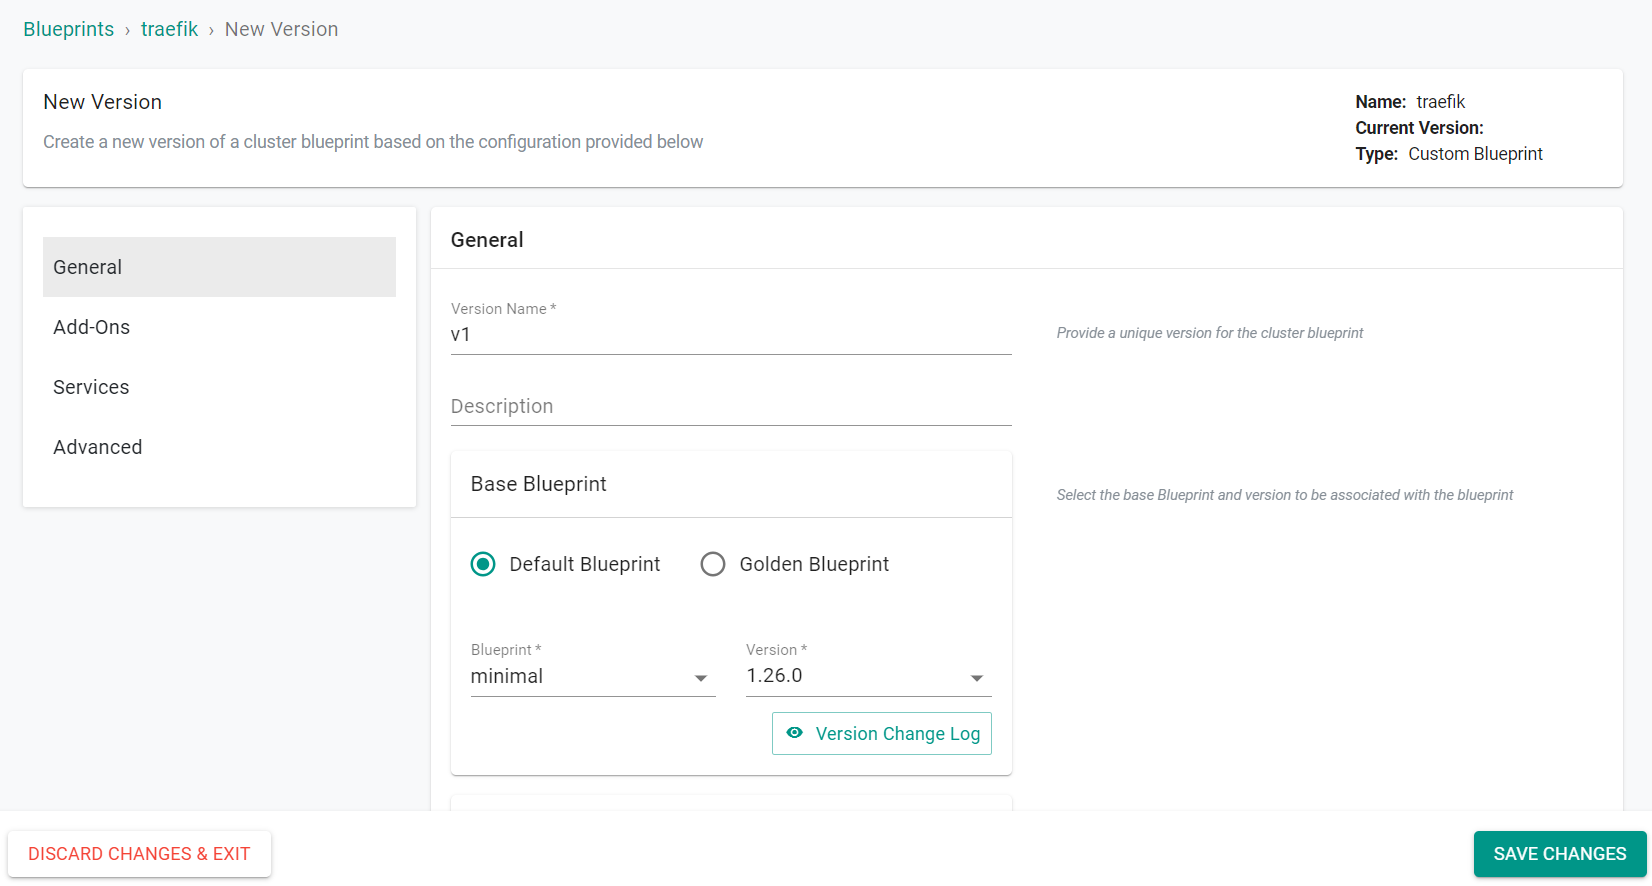
- Enter v1 for the version name
- Select minimal for the base blueprint
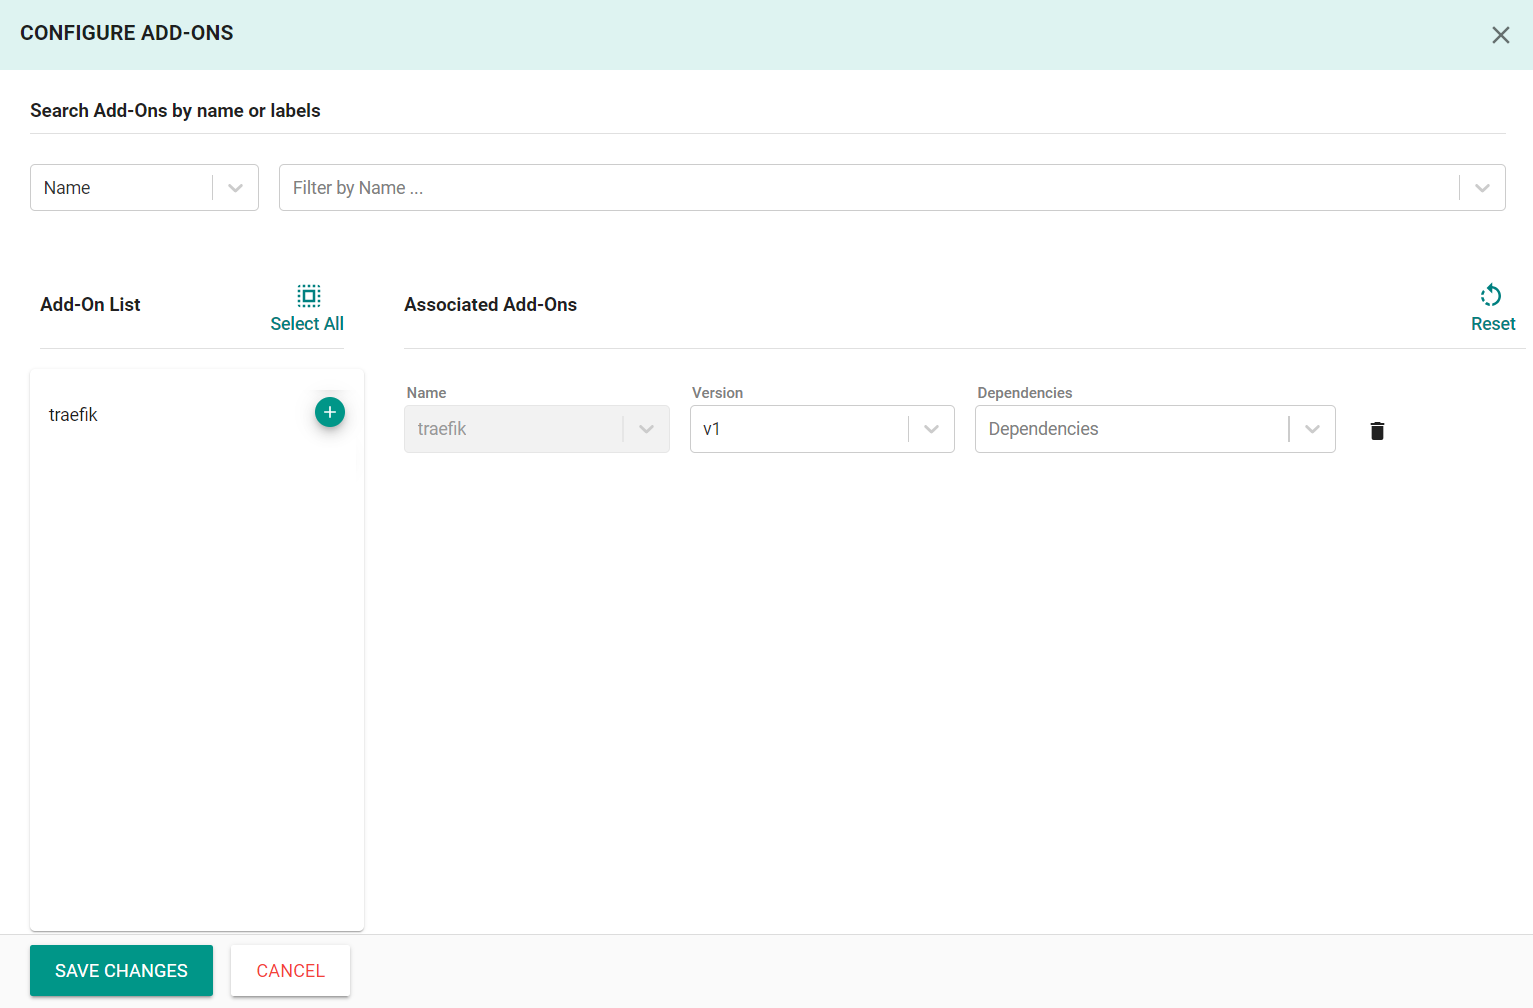
- Click Configure Add-Ons
- Click the + symbol to add the tls-certificate and traefik add-ons to the blueprint
- Set the tls-certificate addon as a dependency for the traefik addon
- Click Save Changes
- Unselect Ingress Controller from the Managed System Add-Ons secton
- Click Save Changes
Step 6: Apply Blueprint
In this step, you will apply the previously created blueprint to the cluster. Applying the blueprint will install the Traefik ingress controller and TLS secret.
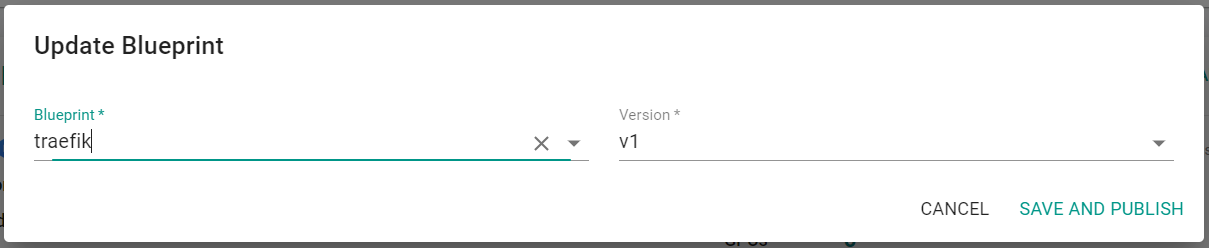
- In the Rafay console, navigate to Infrastructure -> Clusters in the left side tree
- Click the gear icon on your cluster
- Select Update Blueprint
- Select traefik for the blueprint and v1 for the version
- Click Save and Publish
After a short period of time, the blueprint will be applied to the cluster.
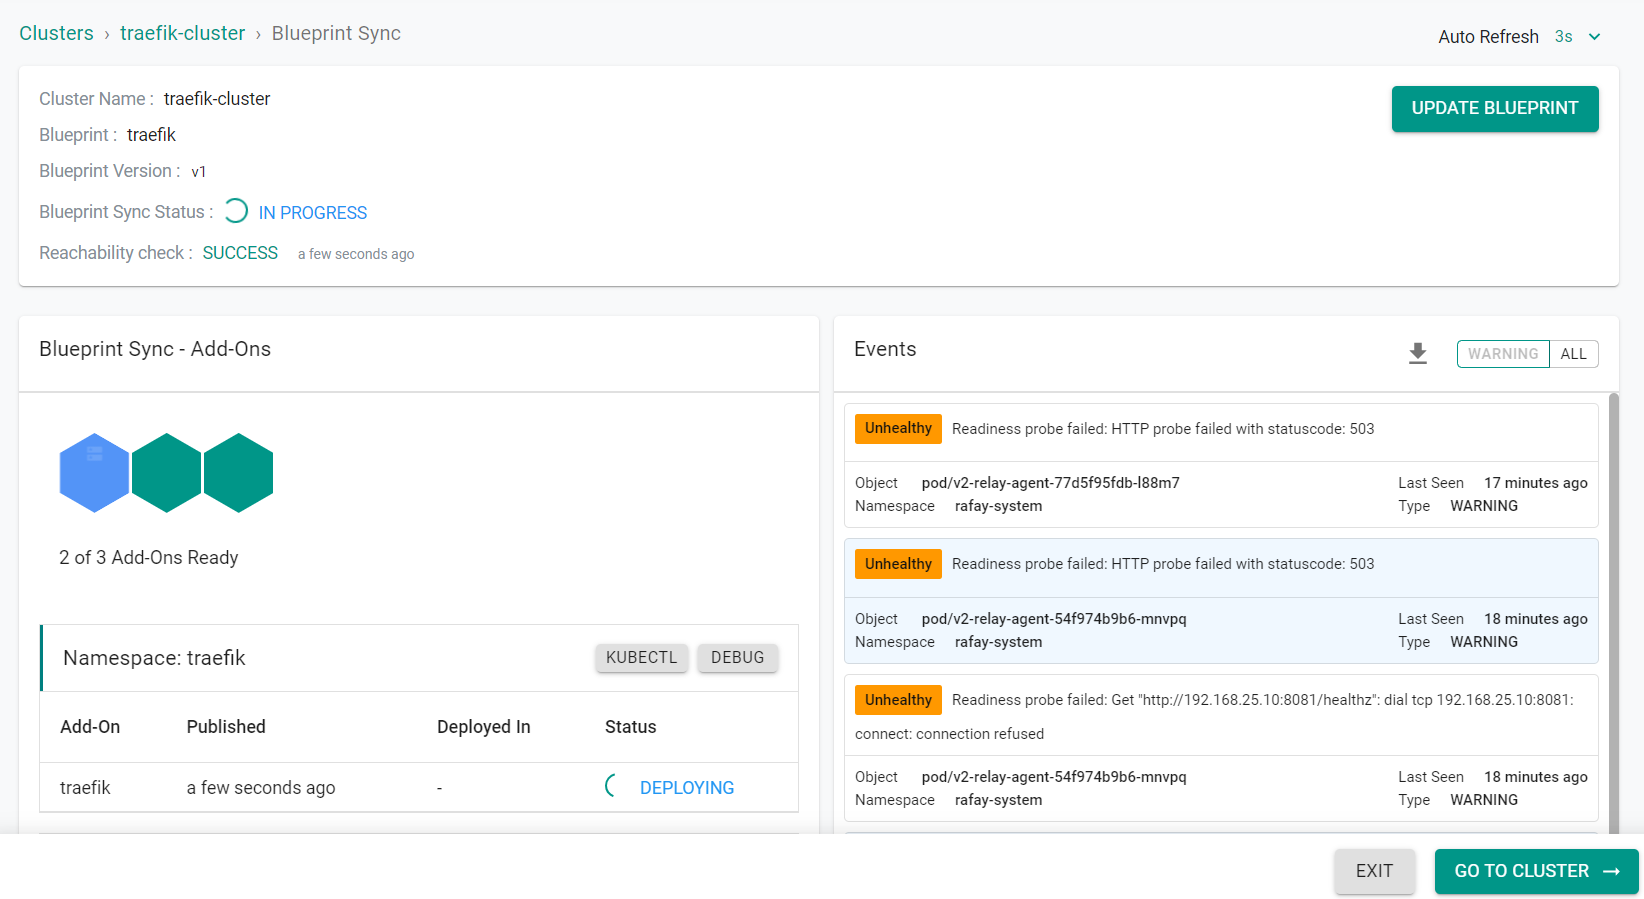
- Click Exit
Step 6: Deploy Workload Resources
In this step, you will deploy the resources needed for a test workload that will use the Traefik ingress controller.
- Save the following YAML to a file named traefik-workload.yaml. Be sure to update the HOSTNAME with a value to match your domain. For this example, we are using "whoami.paas.demo.gorafay.net"
apiVersion: apps/v1
kind: Deployment
metadata:
  name: whoami
  labels:
    app: whoami
spec:
  replicas: 1
  selector:
    matchLabels:
      app: whoami
  template:
    metadata:
      labels:
        app: whoami
    spec:
      containers:
        - name: whoami
          image: traefik/whoami
          ports:
            - name: web
              containerPort: 80
---
apiVersion: v1
kind: Service
metadata:
  name: whoami
spec:
  selector:
    app: whoami
  ports:
    - name: web
      port: 80
      targetPort: web
---
apiVersion: networking.k8s.io/v1
kind: Ingress
metadata:
  name: whoami-ingress
spec:
  ingressClassName: traefik
  rules:
    - host: <HOSTNAME>
      http:
        paths:
          - path: /
            pathType: Prefix
            backend:
              service:
                name: whoami
                port:
                  name: web
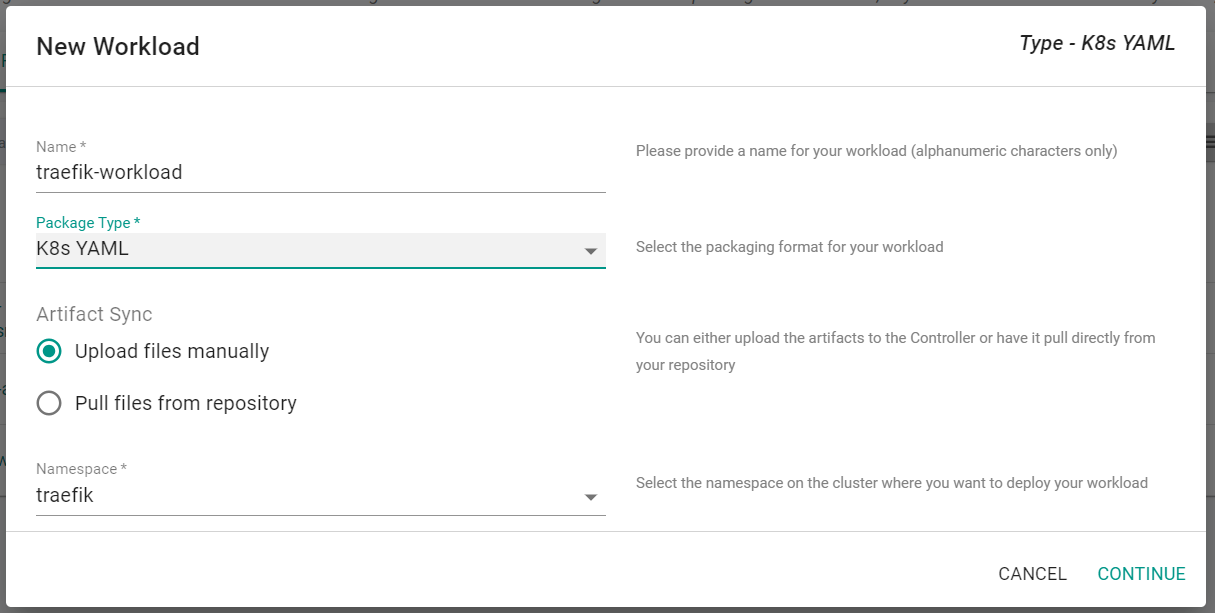
- In the Rafay console, navigate to Applications -> Workloads in the left side tree
- Click New Workload -> Create New Workload
- Enter traefik-workload for the name
- Select K8s YAML for the package type
- Select Upload files manually
- Select traefik for the namespace
- Click Continue
- Click Choose File
- Select the previously saved traefik-workload.yaml file
- Click Save and Go To Placement
- Select the cluster to deploy the workload to
- Click Save and Go To Publish
- Click Publish to deploy the workload
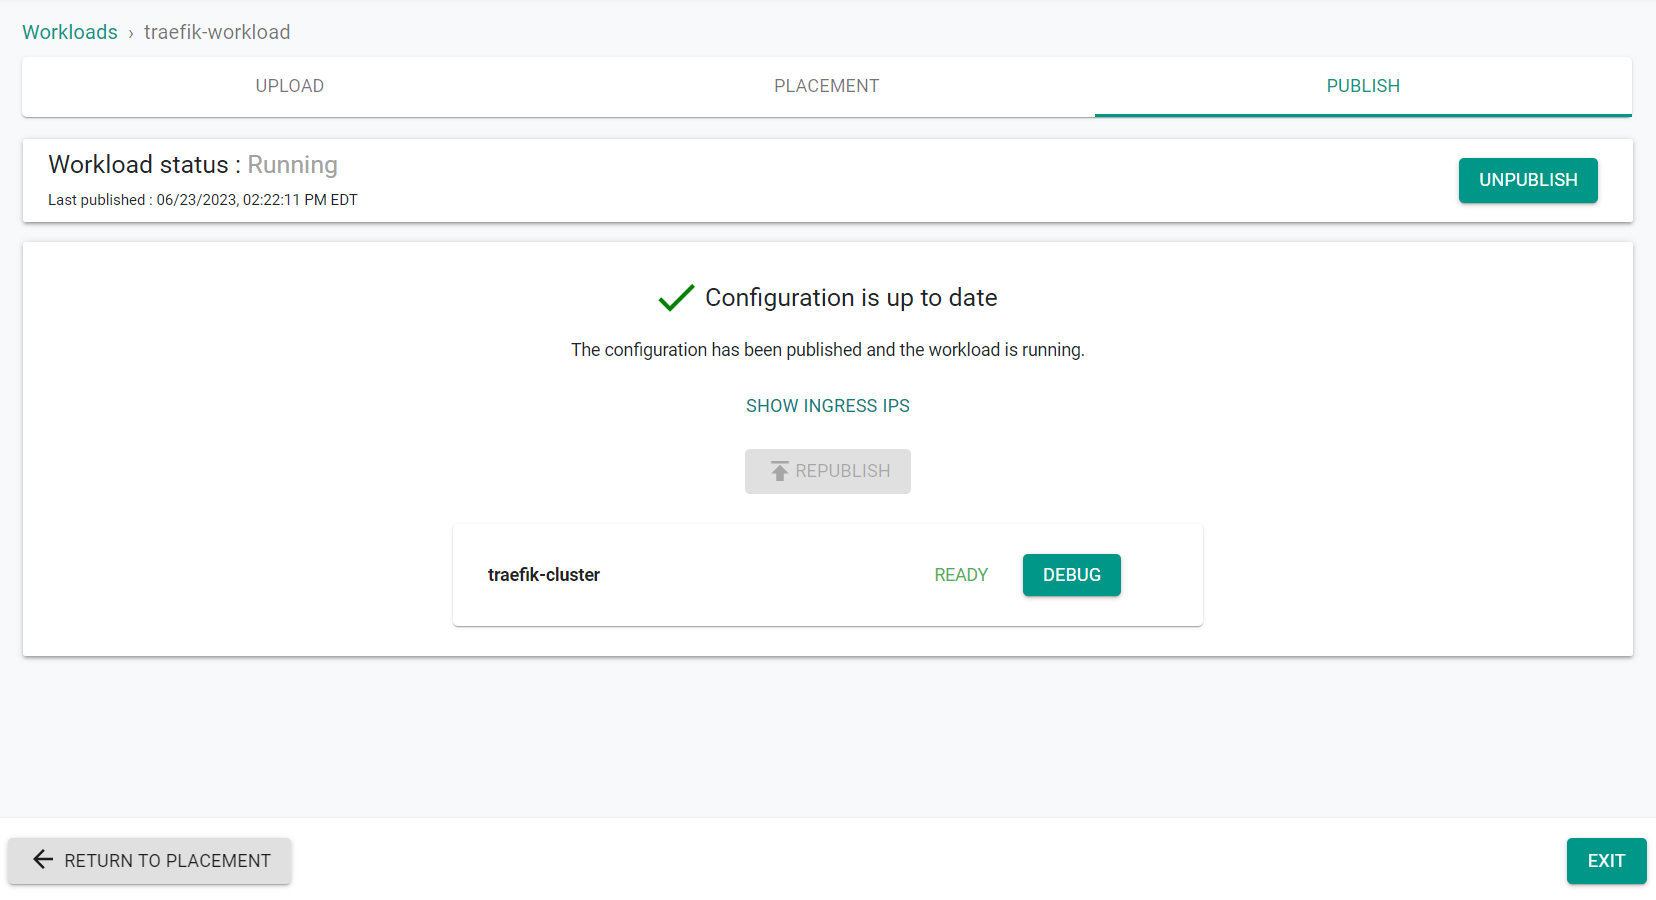
- Click Exit
Step 7: Verify Workload
In this step, you will verify that the previously deployed workload is running and can be accessed through the Traefik ingress.
- Enter the previously entered Hostname (e.g. whoami.paas.demo.gorafay.net) into a web browser to access the test workload through the Traefik ingress.
You will see something similar to the following screenshot showing access to the test workload, whoami.

Recap
Congratulations! You have successfully created a custom cluster blueprint with the Traefik ingress controller as a custom add-on. You can now use this blueprint on as many clusters as you require.