Part 4: Using PVC
This is Part 4 of a multi-part, self-paced quick start exercise.
Note
This exercise requires MicroK8s and uses alias kubectl='microk8s kubectl'. If you do not have these already installed and running, see "Prerequisites".
What Will You Do
In part 4, you will:
- Deploy a WordPress site and a MySQL database using a PersistentVolumeClaim (PVC), a Service, and a Deployment in two YAML files (one for WordPress and one for MySQL).
- Use a web browser to Access the WordPress site using the internal IP address and NodePort.
Estimated Time
Estimated time for this exercise is 15 minutes. Watch a video of this exercise.
Using PersistentVolumeClaims
A PersistentVolumeClaim (PVC) is a request for storage, which mounts the persistent volume into a pod for use. In a previous exercise, you created the PersistentVolume (PV) first, then added the PersistentVolumeClaim (PVC). In this exercise, you will add a PVC and the PV will be automatically created.
PVC YAML file
Create two PVC YAML files to configure a WordPress site and a MySQL database. You could create these YAML files from the command line, use a text editor, or download the PVC YAML files from the Git repository.
For this exercise, the YAML file will contain multiple Kubernetes objects: a Service, a Deployment, and a PersistentVolumeClaim. This is possible by separating each object with three dashes (---) in the YAML file. See the examples below.
- Open the Terminal.
- Navigate to the Downloads folder.
cd ./Downloads - Use the following command to create two empty YAML files in your Downloads folder.
touch mysql-pvc.yaml wp-pvc.yaml - Use the nano text editor in the Terminal.
nano mysql-pvc.yaml - Copy and paste the configuration below into the text editor.
- Press Cmd + X, then type Y and press Return to save the mysql-pvc.yaml file.
- Repeat steps 4 through 6 to create the wp-pvc.yaml file.
- Open the command prompt.
- Navigate to the Downloads folder.
cd ./Downloads - Use the following command to create an empty YAML file in your Downloads folder.
copy NUL mysql-pvc.yaml - Open the mysql-pvc.yaml file with a text editor. For example, use Notepad++ to edit the YAML file.
- Copy and paste the configuration below into the text editor.
- Save the mysql-pvc.yaml file.
- Repeat steps 3 through 6 to create the wp-pvc.yaml file.
- Open the Terminal.
- Navigate to the Downloads folder.
cd ./Downloads - Use the following command to create two empty YAML files in your Downloads folder.
touch mysql-pvc.yaml wp-pvc.yaml - Use the nano text editor in the Terminal.
nano mysql-pvc.yaml - Copy and paste the configuration below into the text editor.
- Press Cmd + X, then type Y and press Return to save the mysql-pvc.yaml file.
- Repeat steps 4 through 6 to create the wp-pvc.yaml file.
Add a PVC
Note: This PVC exercise requires completing the Secrets exercise first. The secret.yaml file contains the password for the MySQL database.
- In the Terminal or Command Prompt, make sure you are in the default namespace.
kubectl config set-context --current --namespace=default - Enable DNS, Ingress, and Storage in MicroK8s. These MicroK8s add-ons are required to deploy the containers and access the WordPress site using a web browser. It may take a few minutes for the add-ons to become available.
microk8s enable dns ingress storage -
List the StorageClasses. The
microk8s-hostpathshould be listed.kubectl get storageclass
-
Add MySQL to your environment using a YAML file.
kubectl create -f mysql-pvc.yaml - Add WordPress to your environment using a YAML file.
kubectl create -f wp-pvc.yaml - Get the Internal IP address for the cluster. Example: 192.168.64.2.
kubectl get nodes -o wide -
Get the Services to find the port for the WordPress node. This information is in the YAML file, but it is good to know how to find it from the command line.
kubectl get services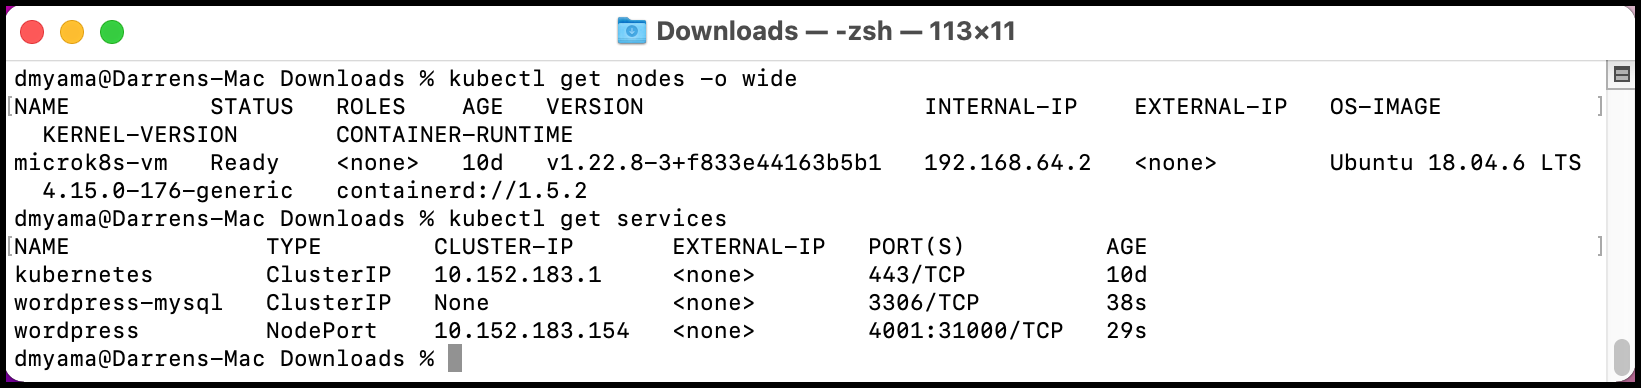
-
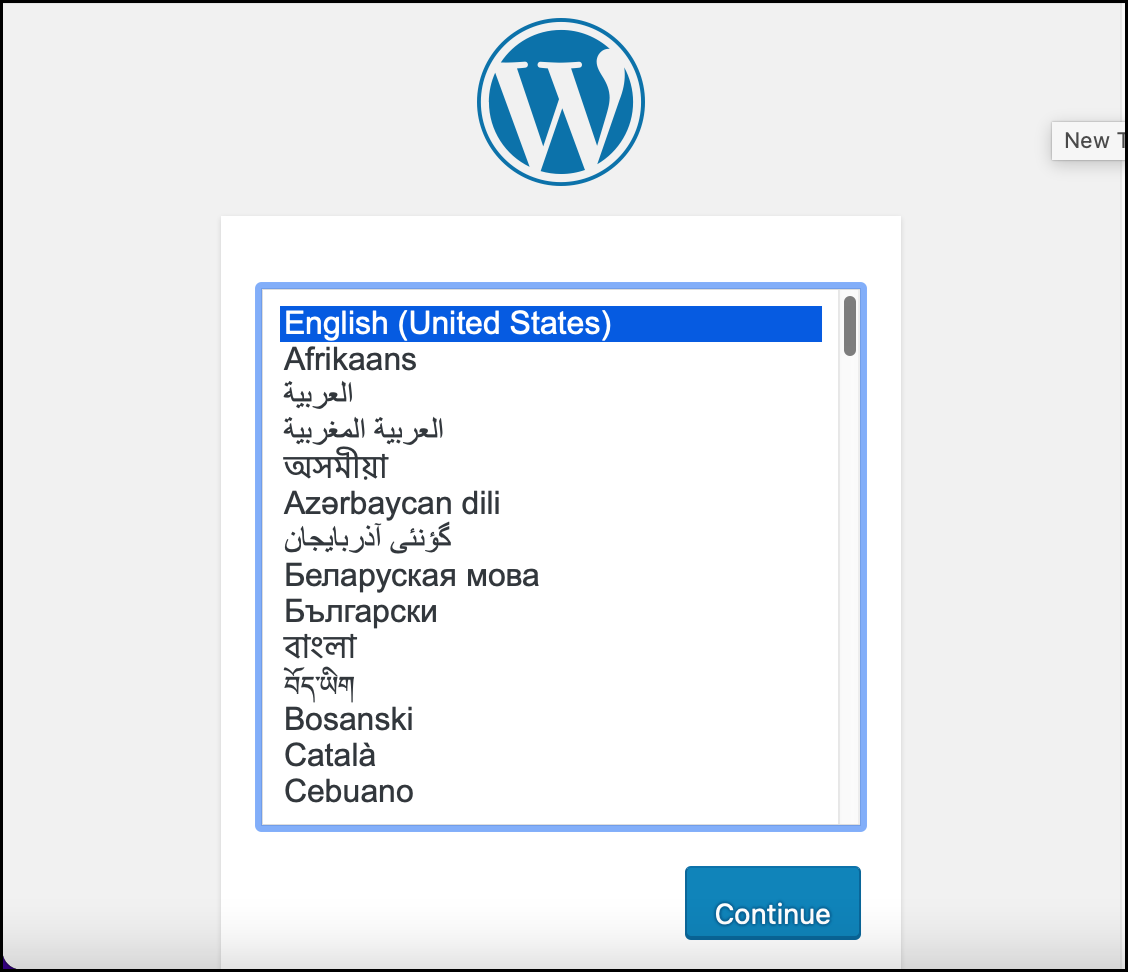
Open a web browser, use the IP address and NodePort to view the WordPress website. Example: http://192.168.64.2:31000.
mysql-pvc.yaml
This YAML file example contains a Service, a Deployment, and a PersistentVolumeClaim for single instance MySQL database.
- The Service has WordPress communicate with the MySQL database over port 3306.
-
The PersistentVolumeClaim allows read-write by a single node (ReadWriteOnce) and allocates 20Gi of storage.
-
When a PVC is created, a PersistentVolume (PV) is dynamically provisioned based on the storage class configuration.
-
The Deployment uses the MySQL 5.6 image.
-
The MySQL container mounts the PersistentVolume at /var/lib/mysql.
- The MYSQL_ROOT_PASSWORD environment variable sets the database password from the Secret file from a previous exercise.
apiVersion: v1
kind: Service
metadata:
  name: wordpress-mysql
  labels:
    app: wordpress
spec:
  ports:
    - port: 3306
  selector:
    app: wordpress
    tier: mysql
  clusterIP: None
---
apiVersion: v1
kind: PersistentVolumeClaim
metadata:
  name: mysql-pv-claim
  labels:
    app: wordpress
spec:
  accessModes:
    - ReadWriteOnce
  resources:
    requests:
      storage: 20Gi
---
apiVersion: apps/v1
kind: Deployment
metadata:
  name: wordpress-mysql
  labels:
    app: wordpress
spec:
  selector:
    matchLabels:
      app: wordpress
      tier: mysql
  strategy:
    type: Recreate
  template:
    metadata:
      labels:
        app: wordpress
        tier: mysql
    spec:
      containers:
      - image: mysql:5.6
        name: mysql
        env:
        - name: MYSQL_ROOT_PASSWORD
          valueFrom:
            secretKeyRef:
              name: mysql-pass
              key: password
        ports:
        - containerPort: 3306
          name: mysql
        volumeMounts:
        - name: mysql-persistent-storage
          mountPath: /var/lib/mysql
      volumes:
      - name: mysql-persistent-storage
        persistentVolumeClaim:
          claimName: mysql-pv-claim
wp-pvc.yaml
This YAML file example contains a Service, a Deployment, and a PersistentVolumeClaim for the WordPress site.
- The Service allows communicating with WordPress using port 31000.
-
The PersistentVolumeClaim allows read-write by a single node (ReadWriteOnce) and allocates 20Gi of storage.
- When a PVC is created, a PersistentVolume (PV) is dynamically provisioned based on the storage class configuration.
-
The Deployment uses the WordPress image, that includes Apache.
-
The WordPress container mounts the PersistentVolume at /var/www/html for website data files.
- The WORDPRESS_DB_HOST environment variable sets the name of the MySQL Service, and WordPress will access the database by Service.
- The WORDPRESS_DB_PASSWORD environment variable sets the database password from the Secret file from a previous exercise.
apiVersion: v1
kind: Service
metadata:
  name: wordpress
  labels:
    app: wordpress
spec:
  ports:
    - port: 4001
      targetPort: 80
      nodePort: 31000
  selector:
    app: wordpress
    tier: frontend
  type: NodePort
---
apiVersion: v1
kind: PersistentVolumeClaim
metadata:
  name: wp-pv-claim
  labels:
    app: wordpress
spec:
  accessModes:
    - ReadWriteOnce
  resources:
    requests:
      storage: 20Gi
---
apiVersion: apps/v1
kind: Deployment
metadata:
  name: wordpress
  labels:
    app: wordpress
spec:
  selector:
    matchLabels:
      app: wordpress
      tier: frontend
  strategy:
    type: Recreate
  template:
    metadata:
      labels:
        app: wordpress
        tier: frontend
    spec:
      containers:
      - image: wordpress:4.8-apache
        name: wordpress
        env:
        - name: WORDPRESS_DB_HOST
          value: wordpress-mysql
        - name: WORDPRESS_DB_PASSWORD
          valueFrom:
            secretKeyRef:
              name: mysql-pass
              key: password
        ports:
        - containerPort: 80
          name: wordpress
        volumeMounts:
        - name: wordpress-persistent-storage
          mountPath: /var/www/html
      volumes:
      - name: wordpress-persistent-storage
        persistentVolumeClaim:
          claimName: wp-pv-claim
Recap
Congratulations! At this point, you have successfully used ConfigMaps, Secrets, PersistentVolumes, and PersistentVolumeClaims. You are ready to progress to the next part.