Part 5: Using Ingress
This is Part 5 of a multi-part, self-paced quick start exercise.
Note
This exercise requires MicroK8s. If you do not have these already installed and running, see "Prerequisites".
What Will You Do
In part 5, you will:
- Use Ingress to access an application from outside the cluster.
Estimated Time
Estimated time for this exercise is 20 minutes. Watch a video of the exercise below.
Using Ingress
Ingress exposes HTTP and HTTPS routes from outside the cluster to services within the cluster. Traffic routing is controlled by rules defined on the Ingress resource.
Ingress YAML file
Create an ingress service using a YAML file, which is a configuration file. You could create a YAML file from the command line, but for this exercise, you can just use a text editor. Or you can download the ingress YAML file from this public Git repository.
- Open the Terminal.
- Enable Ingress in MicroK8s. When Ingress is enabled, MicroK8s adds an Ingress namespace.
microk8s enable ingress - Verify that the NGINX Ingress controller is running.
microk8s kubectl get pods -n ingress - Navigate to the Downloads folder.
cd ./Downloads - Use the following command to create an empty YAML file in your Downloads folder.
touch ingress.yaml - Use the nano text editor in the Terminal.
nano ingress.yaml - Copy and paste the configuration below into the text editor.
- Press Cmd + X, then type Y and press Return to save the ingress.yaml file.
- Open the command prompt.
- Enable Ingress in MicroK8s. When Ingress is enabled, MicroK8s adds an Ingress namespace.
microk8s enable ingress - Verify that the NGINX Ingress controller is running.
microk8s kubectl get pods -n ingress - Navigate to the Downloads folder.
cd ./Downloads - Use the following command to create an empty YAML file in your Downloads folder.
copy NUL ingress.yaml - Open the ingress.yaml file with a text editor. For example, use Notepad++ to edit the YAML file.
- Copy and paste the configuration below into the text editor.
- Save the ingress.yaml file.
- Open the Terminal.
- Enable Ingress in MicroK8s. When Ingress is enabled, MicroK8s adds an Ingress namespace.
microk8s enable ingress - Verify that the NGINX Ingress controller is running.
microk8s kubectl get pods -n ingress - Navigate to the Downloads folder.
cd ./Downloads - Use the following command to create an empty YAML file in your Downloads folder.
touch ingress.yaml - Use the nano text editor in the Terminal.
nano ingress.yaml - Copy and paste the configuration below into the text editor.
- Press Ctrl + X, then type Y and press Enter to save the ingress.yaml file.
Add an Ingress service
- In the Terminal or Command Prompt, add the ingress service to your environment using a YAML file.
microk8s kubectl create -f ingress.yaml - List the ingress services. You will need the NodePort port number. Example: 30007.
microk8s kubectl get ingress -
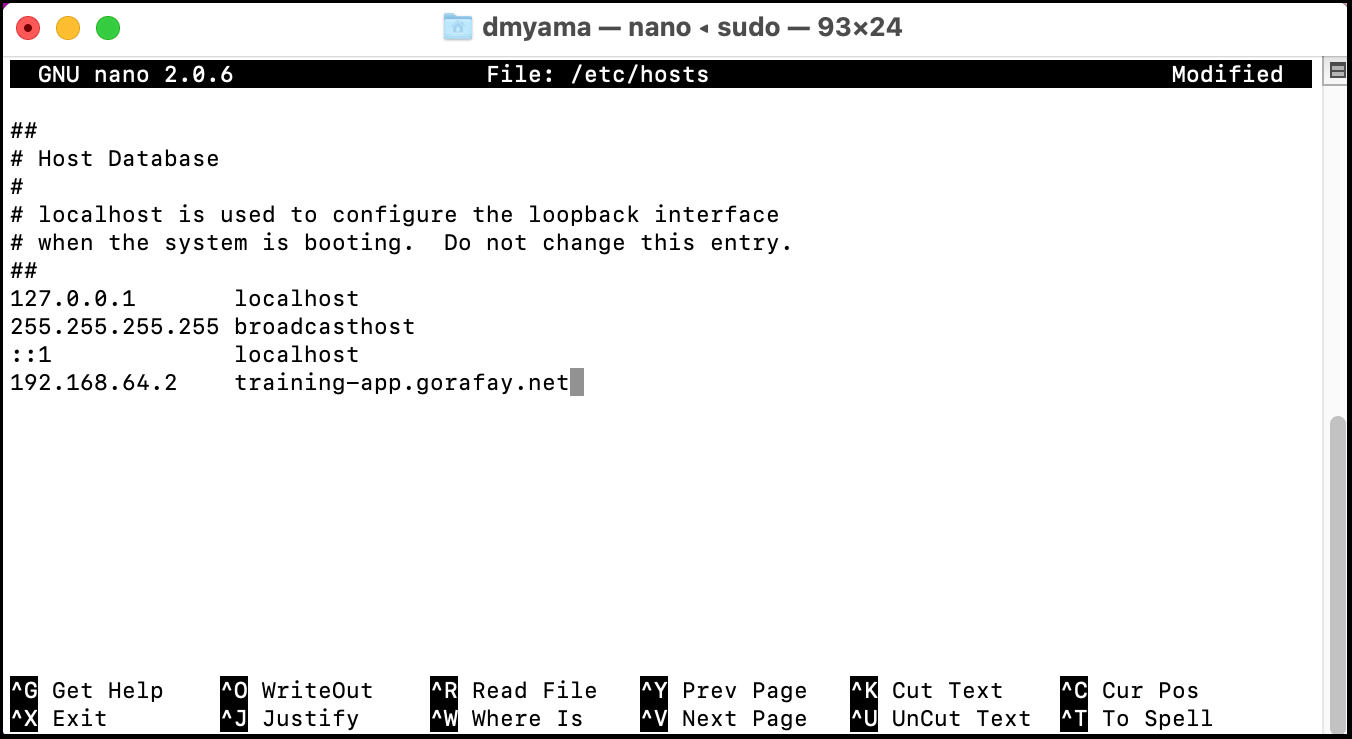
Add the IP address and the hostname to the hosts file. This imitates a domain name system (DNS).
- For macOS and Linux:
sudo nano /etc/hosts - For Windows:
- Open Notepad as a administrator.
- Open the hosts file. Path: C:\Windows\System32\drivers\etc
- For macOS and Linux:
-
Test that the service is available using the hostname and the NodePort. A message should display and include the pod name; this is from the Deployment YAML file ("Hello from...").
curl http://training-app.gorafay.net:30007
ingress.yaml
apiVersion: networking.k8s.io/v1
kind: Ingress
metadata:
  name: example-ingress
  annotations:
    kubernetes.io/ingress.class: "nginx"
spec:
  rules:
  - host: training-app.gorafay.net
    http:
      paths:
      - path: /
        pathType: Prefix
        backend:
          service:
            name: test-service
            port:
              number: 4000
Recap
Congratulations! At this point, you have successfully used Namespaces, Pods, Deployments, Services, and Ingress. You are ready to progress to the next part.