Overview
Overview
Velero is a popular tool to backup and restores the Kubernetes cluster resources and persistent volumes. Velero can be used for:
- Disaster recovery
- Data Migration
- Data Protection
Velero utilizes CRDs to backup and restore the cluster resources. Velero uses S3 API-compatible object storage as its backup location providing users with a plethora of storage options that provide s3 compatible APIs.
What Will You Do
In this exercise,
- You will create a cluster blueprint with a "velero" addon
- You will then apply this cluster blueprint to a managed cluster
Important
This tutorial describes the steps to create and use a velero based blueprint using the Web Console. The entire workflow can also be fully automated and embedded into an automation pipeline.
Assumptions
- You have already provisioned or imported a Kubernetes cluster using the controller
- You either have access to a s3 compatible storage endpoint (e.g. AWS S3/Cloud or MinIO/On-prem) and sufficient storage to backup the cluster resources.
- You have Helm client installed locally to download the Velero helm chart
Challenges
Although deploying a simple Helm chart can be trivial for a quick sniff test, there are a number of considerations that have to be factored in for a production grade deployment. Some of them are described below.
Secrets Management
It is imperative to secure the s3 endpoint access keys used by Velero. It is a very poor security practice to have admins manually handle these secrets. In this recipe, we will also use the controller's Integration with HashiCorp Vault to secure these access keys.
Step 1: Download Helm Chart
Use your helm client to download the latest release of Velero helm chart file velero-x.y.z.tgz to your machine. In this recipe, we use Velero v2.12.15.
- Add Velero's repo to your Helm CLI
helm repo add vmware-tanzu https://vmware-tanzu.github.io/helm-charts
- Now, fetch the latest Helm chart from this repo.
helm fetch vmware-tanzu/velero
Step 2: Customize Values
In this step, we will be creating a custom "values.yaml" file with overrides for our Velero deployment.
- Select from one of the options below depending on your preference for storage and access credential type.
- Follow the instructions and create a custom "values.yaml" file
| Provider | Type |
|---|---|
| AWS S3 | IAM Role |
| AWS S3 | IAM Credentials - Vault |
| MinIO | Credentials - Vault |
Step 3: Create Addon
- Login into the Web Console and navigate to your Project as an Org Admin or Infrastructure Admin
- Under Infrastructure, select "Namespaces" and create a new namespace called "velero"
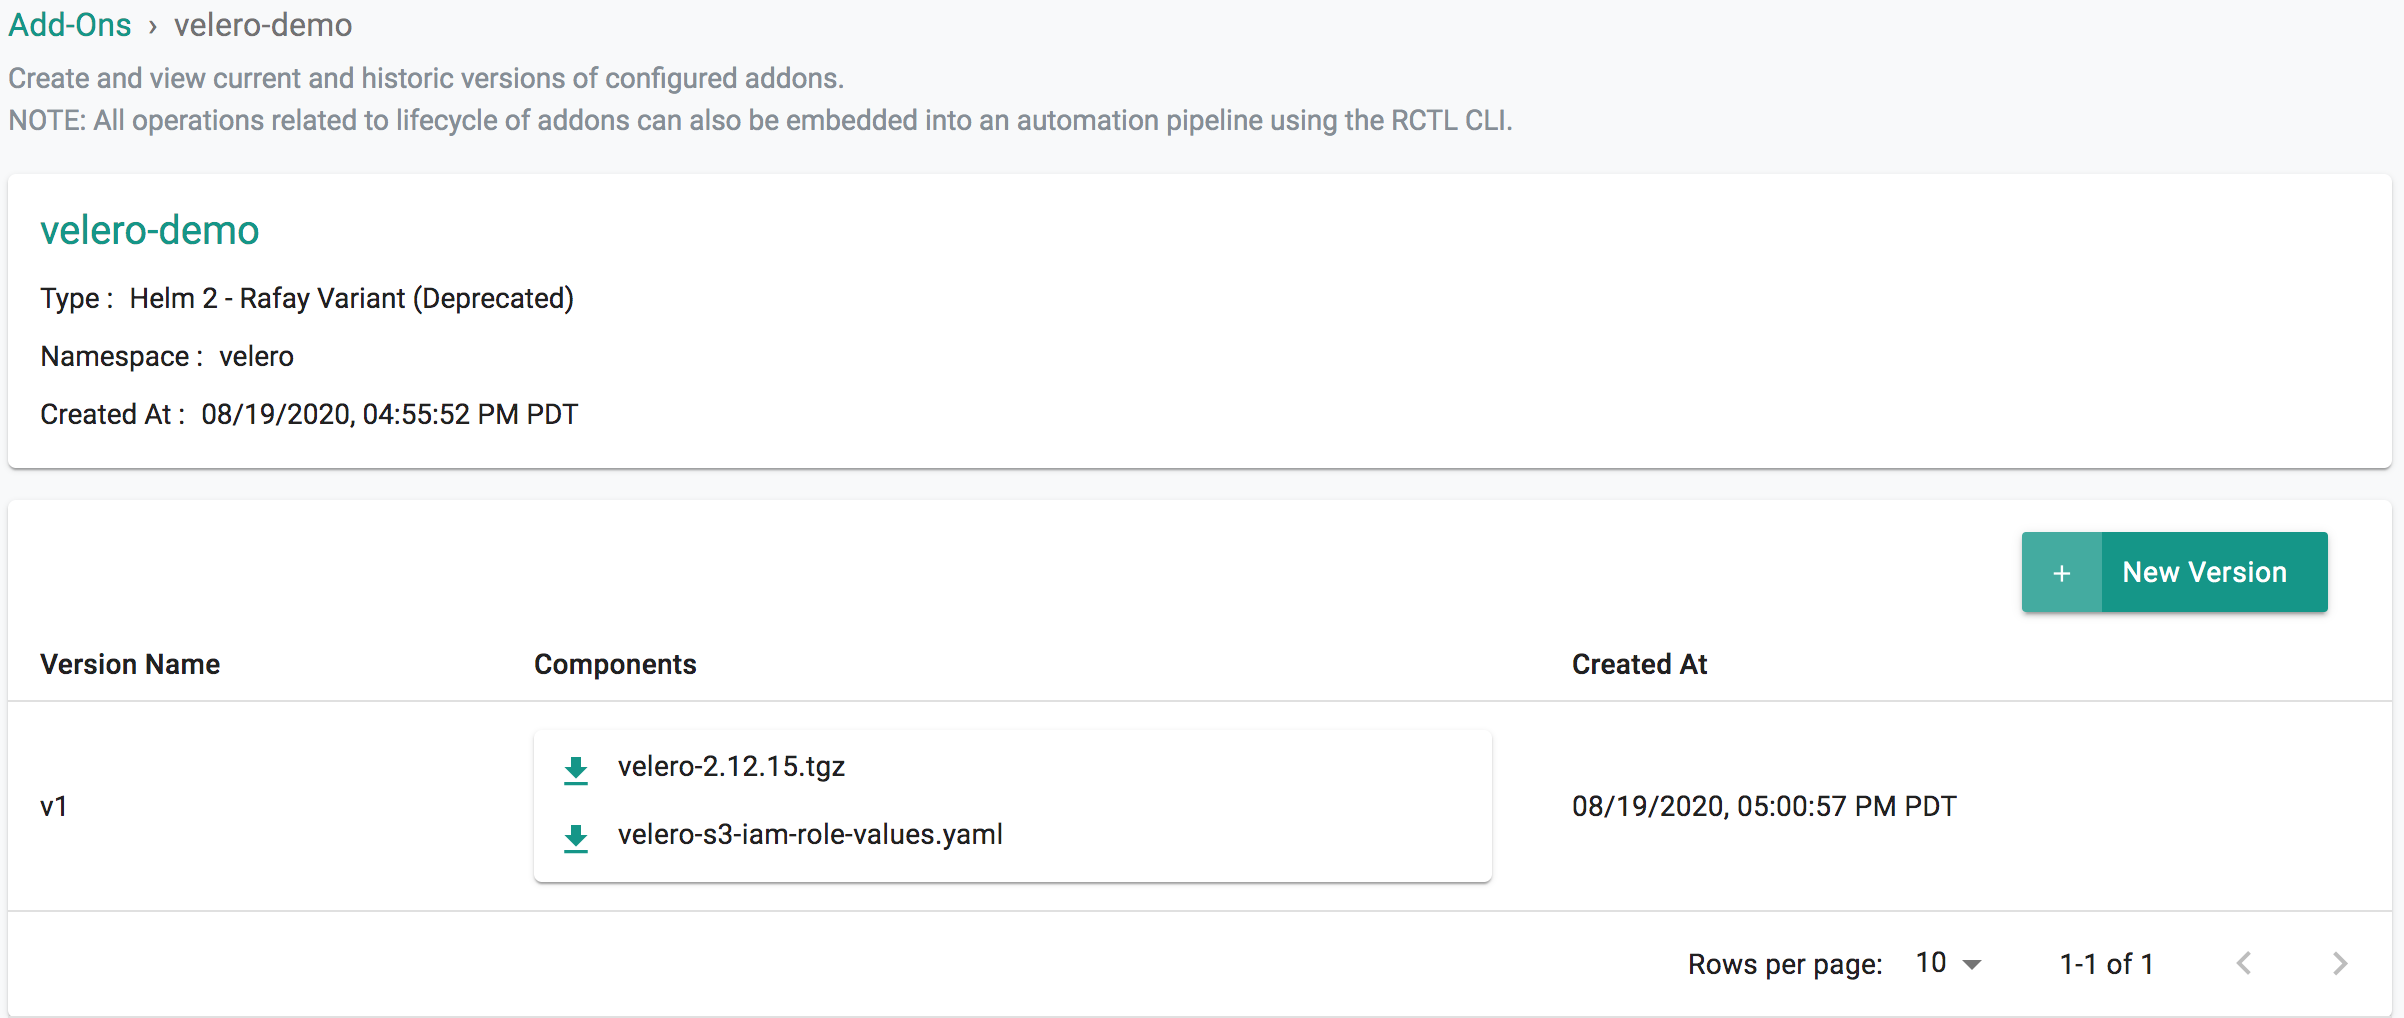
- Select "Addons" and "Create" a new Addon called "velero"
- Ensure that you select "Helm 2" or "Helm 3" for type and select the namespace as "velero"
- Click CREATE to next step
- Select "New Version" and give it a name called "v2.12.15"
- Upload the Helm chart "velero-2.12.15.tgz". From the previous step, upload the "velero-custom-values.yaml" file.
- Click "SAVE CHANGES"
Step 4: Create Blueprint
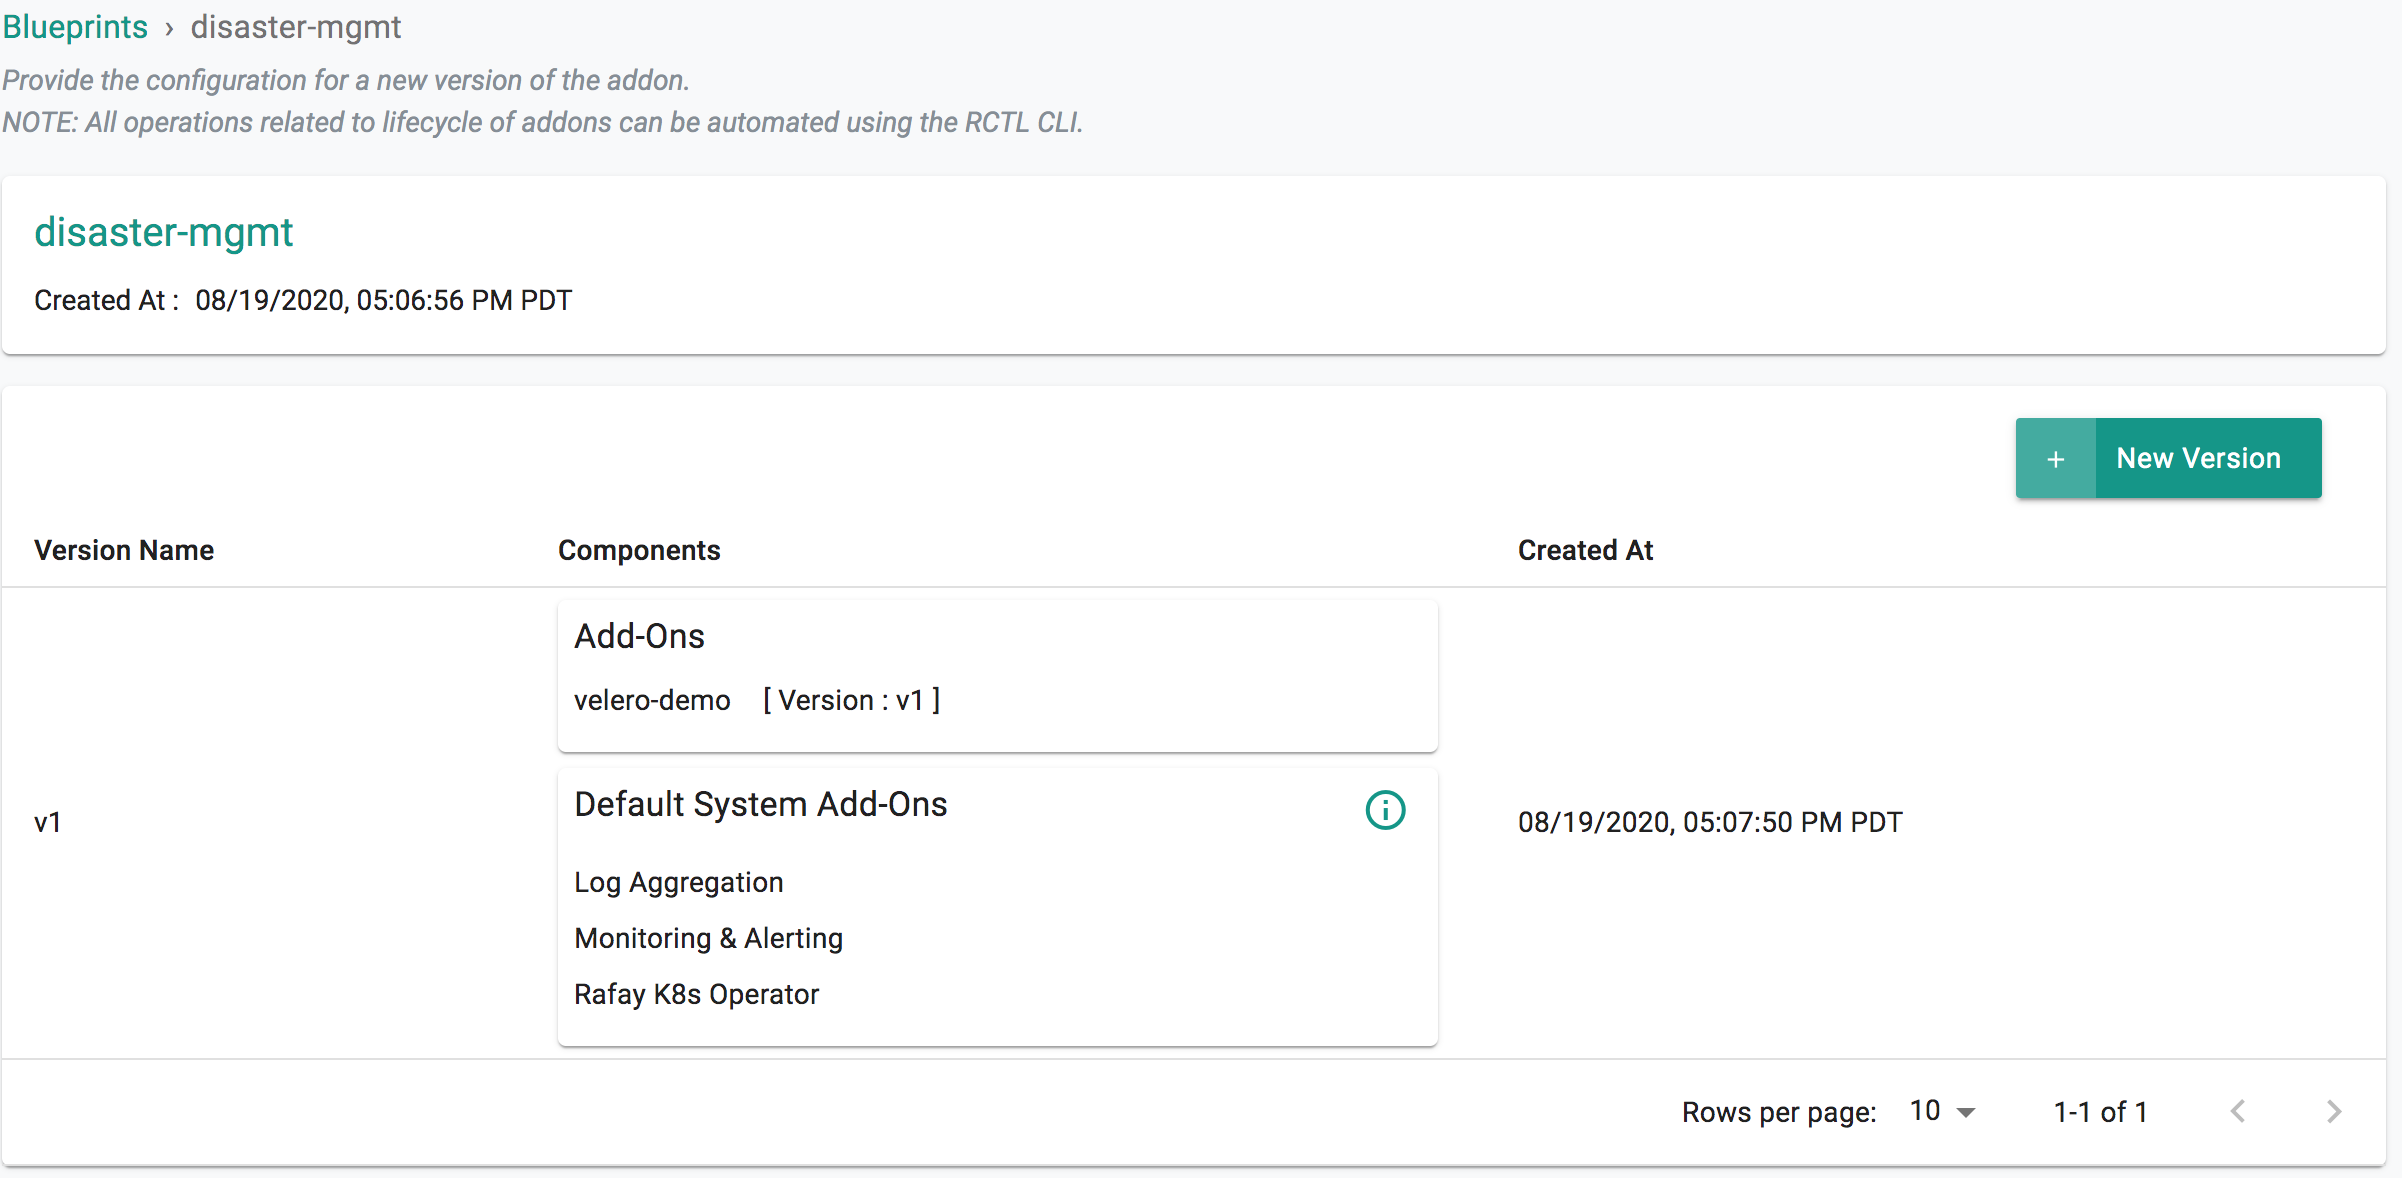
Now, we are ready to assemble a custom cluster blueprint using this addon.
- Under Infrastructure, select "Blueprints"
- Create a new blueprint and give it a name such as "disaster-mgmt"
- Click SAVE
- Select "New Version" and give it a version name. Ex: v1
- Under Add-Ons, select "ADD MORE" and chose the "velero" addon created in Step 3
Step 7: Apply Blueprint
Now, we are ready to apply this blueprint to a cluster.
- Click on Options for the target Cluster in the Web Console
- Select "Update Blueprint" and select the "disaster-mgmt" blueprint from the dropdown and for the version select "v1" from the dropdown
- Click on "Save and Publish".
This will start the deployment of the addons configured in the "disaster-mgmt" blueprint to the targeted cluster. The blueprint sync process can take a few minutes. Once complete, the cluster will display the current cluster blueprint details and whether the sync was successful or not.
Step 8: Verify Deployment
Users can optionally verify whether the correct resources have been created on the cluster.
- Click on the Kubectl button on the cluster to open a virtual terminal
First, we will verify if the velero namespace has been created
kubectl get ns velero
Next, we will verify if the pods are healthy in the "velero" namespace
kubectl get po -n velero
Velero creates a number of Custom Resources-CRDs on the cluster. You can view them by issuing the following command in KubeCTL.
kubectl get crd |grep velero

backups.velero.io                      2020-08-19T22:07:42Z
backupstoragelocations.velero.io       2020-08-19T22:07:50Z
deletebackuprequests.velero.io         2020-08-19T22:08:03Z
downloadrequests.velero.io             2020-08-19T22:07:57Z
podvolumebackups.velero.io             2020-08-19T22:08:00Z
podvolumerestores.velero.io            2020-08-19T22:07:55Z
resticrepositories.velero.io           2020-08-19T22:07:47Z
restores.velero.io                     2020-08-19T22:07:52Z
schedules.velero.io                    2020-08-19T22:07:39Z
serverstatusrequests.velero.io         2020-08-19T22:07:44Z
volumesnapshotlocations.velero.io      2020-08-19T22:07:36Z
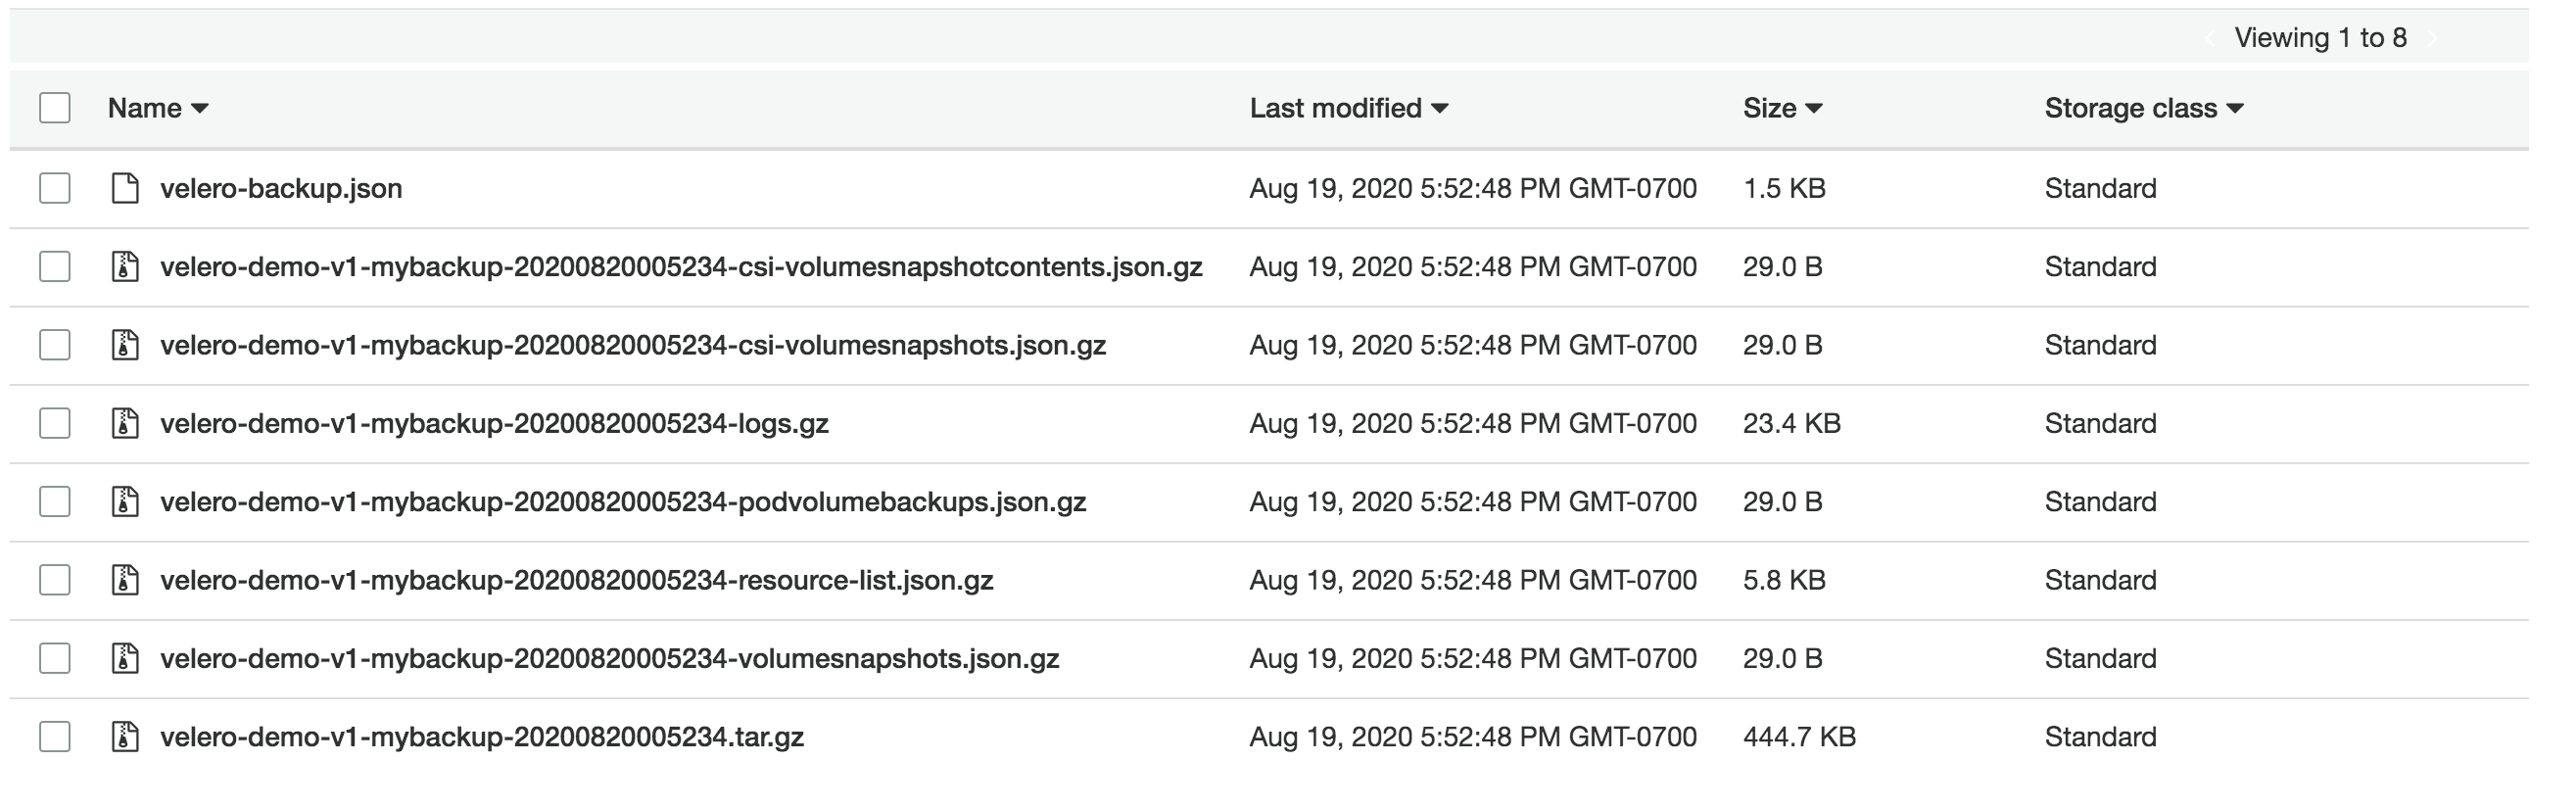
Since we also created a schedule in the custom values.yaml to create hourly backups of the entire cluster resources, we can verify if the backup process is started.
To view the schedules configured.
kubectl get schedule -n velero

NAME                      AGE
velero-demo-v1-mybackup   3m2s
To view the backups configured.
kubectl get backup -n velero

NAME                                     AGE
velero-demo-v1-mybackup-20200820005234   2m
To check the status of the backup.
kubectl describe backup velero-demo-v1-mybackup-20200820005234 -n velero

Name:         velero-demo-v1-mybackup-20200820005234
Namespace:    velero
Labels:       app.kubernetes.io/instance=velero-demo-v1
              app.kubernetes.io/managed-by=Tiller
              app.kubernetes.io/name=velero
              helm.sh/chart=velero-2.12.15
              rep-organization=5m18rky
              rep-partner=rx28oml
              rep-project=z24wnmy
              rep-workload=velero-demo
              velero.io/schedule-name=velero-demo-v1-mybackup
              velero.io/storage-location=aws
Annotations:  velero.io/source-cluster-k8s-gitversion: v1.16.13-eks-2ba888
              velero.io/source-cluster-k8s-major-version: 1
              velero.io/source-cluster-k8s-minor-version: 16+
API Version:  velero.io/v1
Kind:         Backup
Metadata:
  Creation Timestamp:  2020-08-20T00:52:36Z
  Generation:          9
  Resource Version:    6013
  Self Link:           /apis/velero.io/v1/namespaces/velero/backups/velero-demo-v1-mybackup-20200820005234
  UID:                 177b6194-9110-4592-a7a8-bae1a80afb26
Spec:
  Hooks:
  Storage Location:  aws
  Ttl:               240h0m0s
  Volume Snapshot Locations:
    aws
Status:
  Completion Timestamp:  2020-08-20T00:52:46Z
  Expiration:            2020-08-30T00:52:36Z
  Format Version:        1.1.0
  Phase:                 Completed
  Progress:
    Items Backed Up:  753
    Total Items:      753
  Start Timestamp:    2020-08-20T00:52:36Z
  Version:            1
Events:               <none>
Shown below is an example of velero backup snapshots in AWS S3.
Recap
Congratulations! You have successfully created a custom cluster blueprint with the "velero" addon and applied to a cluster.