Provision
These instructions guide you through provisioning a managed upstream Kubernetes cluster using the prepackaged OVA image in your vSphere environment.
Step 1: Create Cluster
Configure and create a cluster object in the Controller in the Web Console. This will generate cluster activation secrets for this cluster. You will use this to bring up a VM on vSphere. Optionally, you can inject this into the Cloud Init template.
As an Org Admin or Infrastructure Admin for a Project.
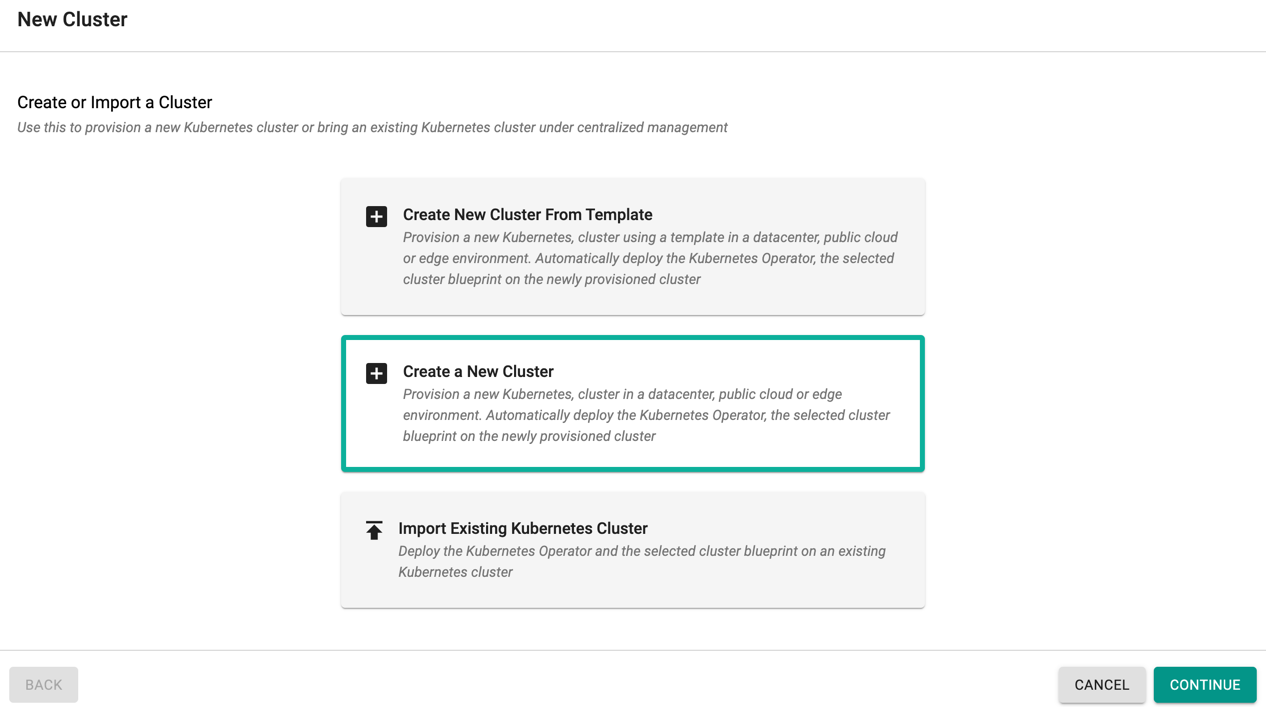
- Log in to the Web Console, select a project, then go to Infrastructure > Clusters.
- Click New Cluster.
- Select Create a New Cluster option.
- Click Continue to go to the next configuration page.
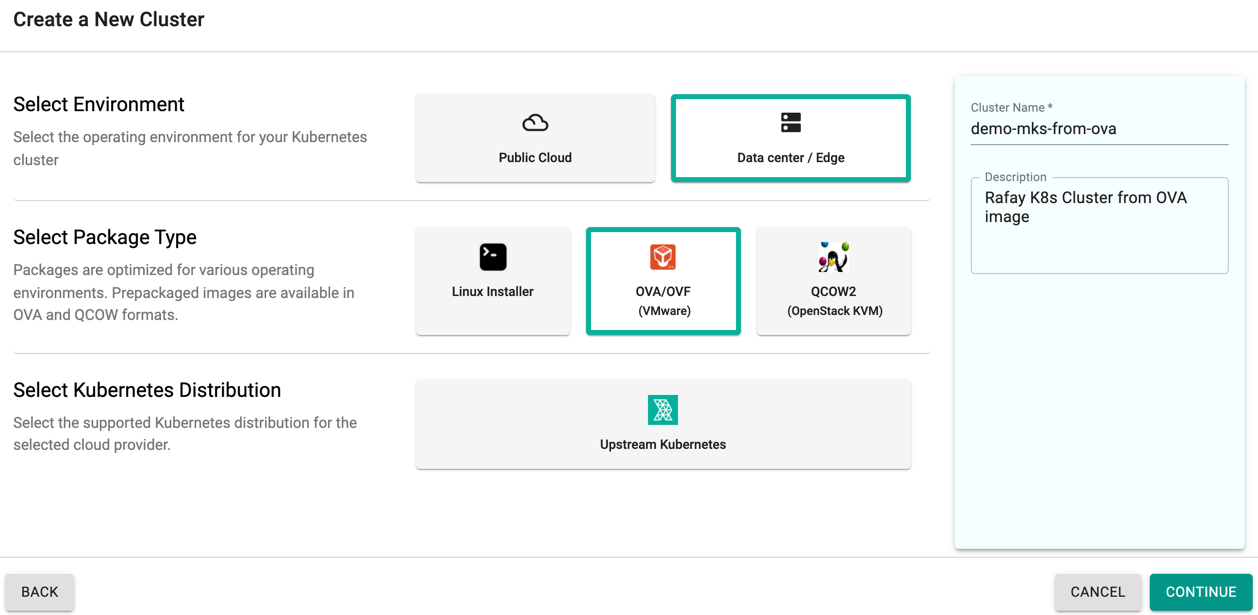
- Select Data center/Edge for Environment.
- Select OVA/OVF for Package type.
- Select Upstream Kubernetes for the distribution.
- Provide a name for your cluster (the use of underscore is not allowed in the name).
Important
The maximum character size supported for a MKS cluster name is 63 characters.
- Optionally, provide a description for the cluster.
- Click Continue to go to the next configuration page.
-
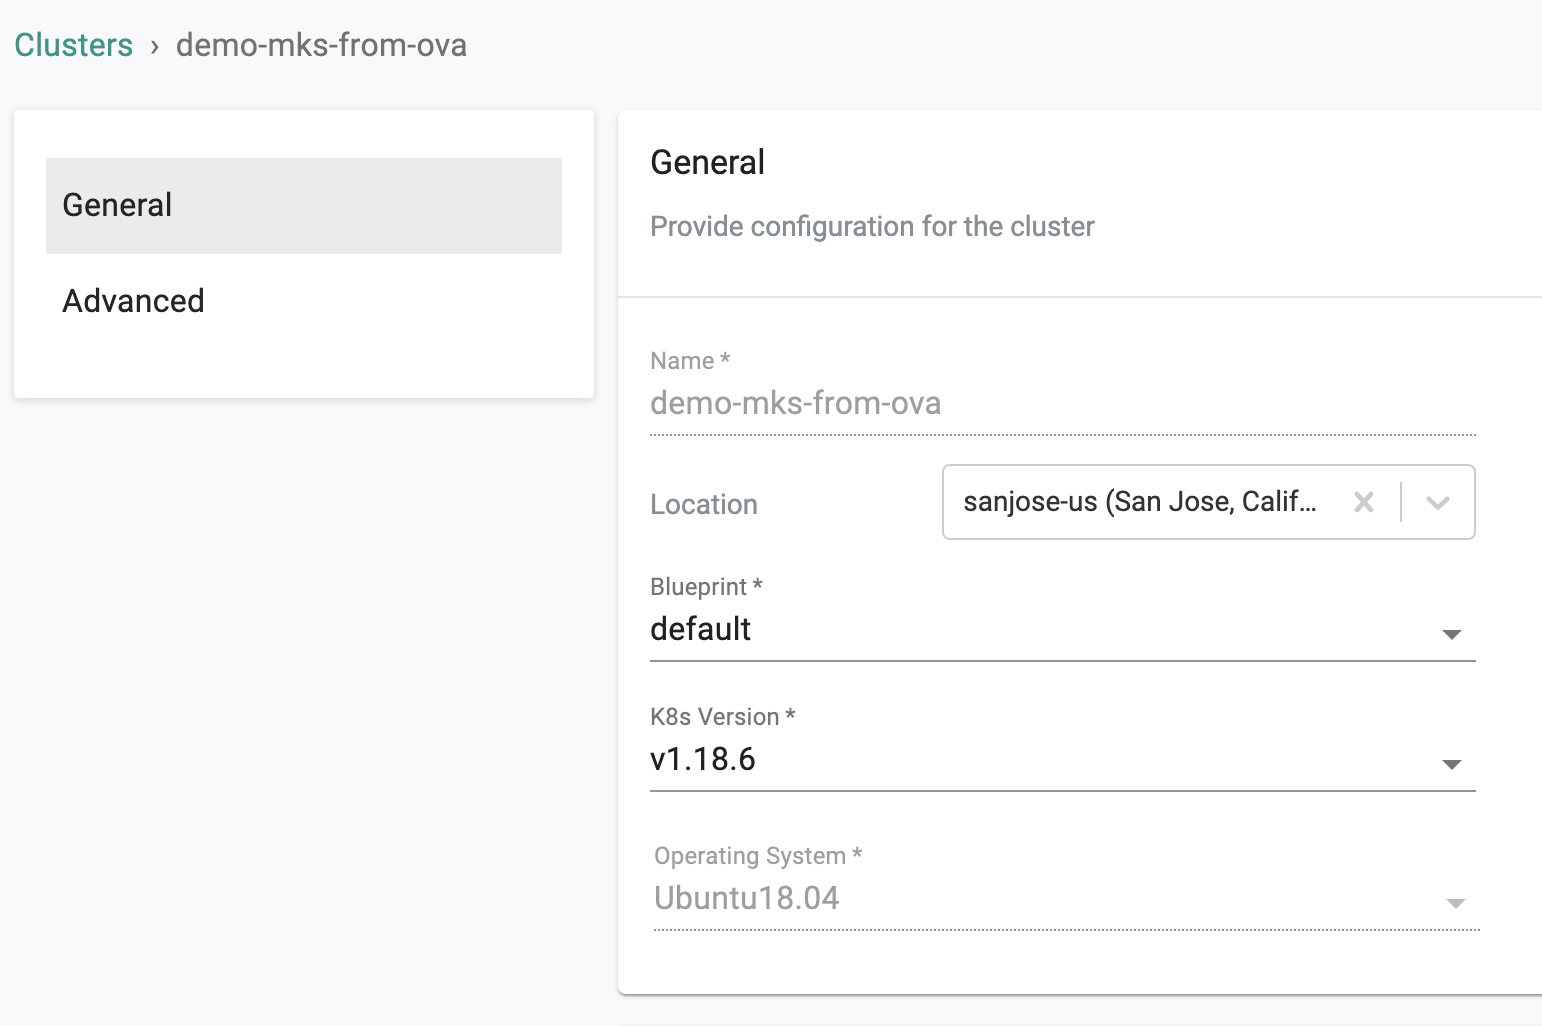
Under General settings:
- Select a location from the Location drop down. A location is used for location-based policies.
- Select the cluster blueprint from the Blueprint drop down.
- Select the Kubernetes version from the K8s Version drop down.
-
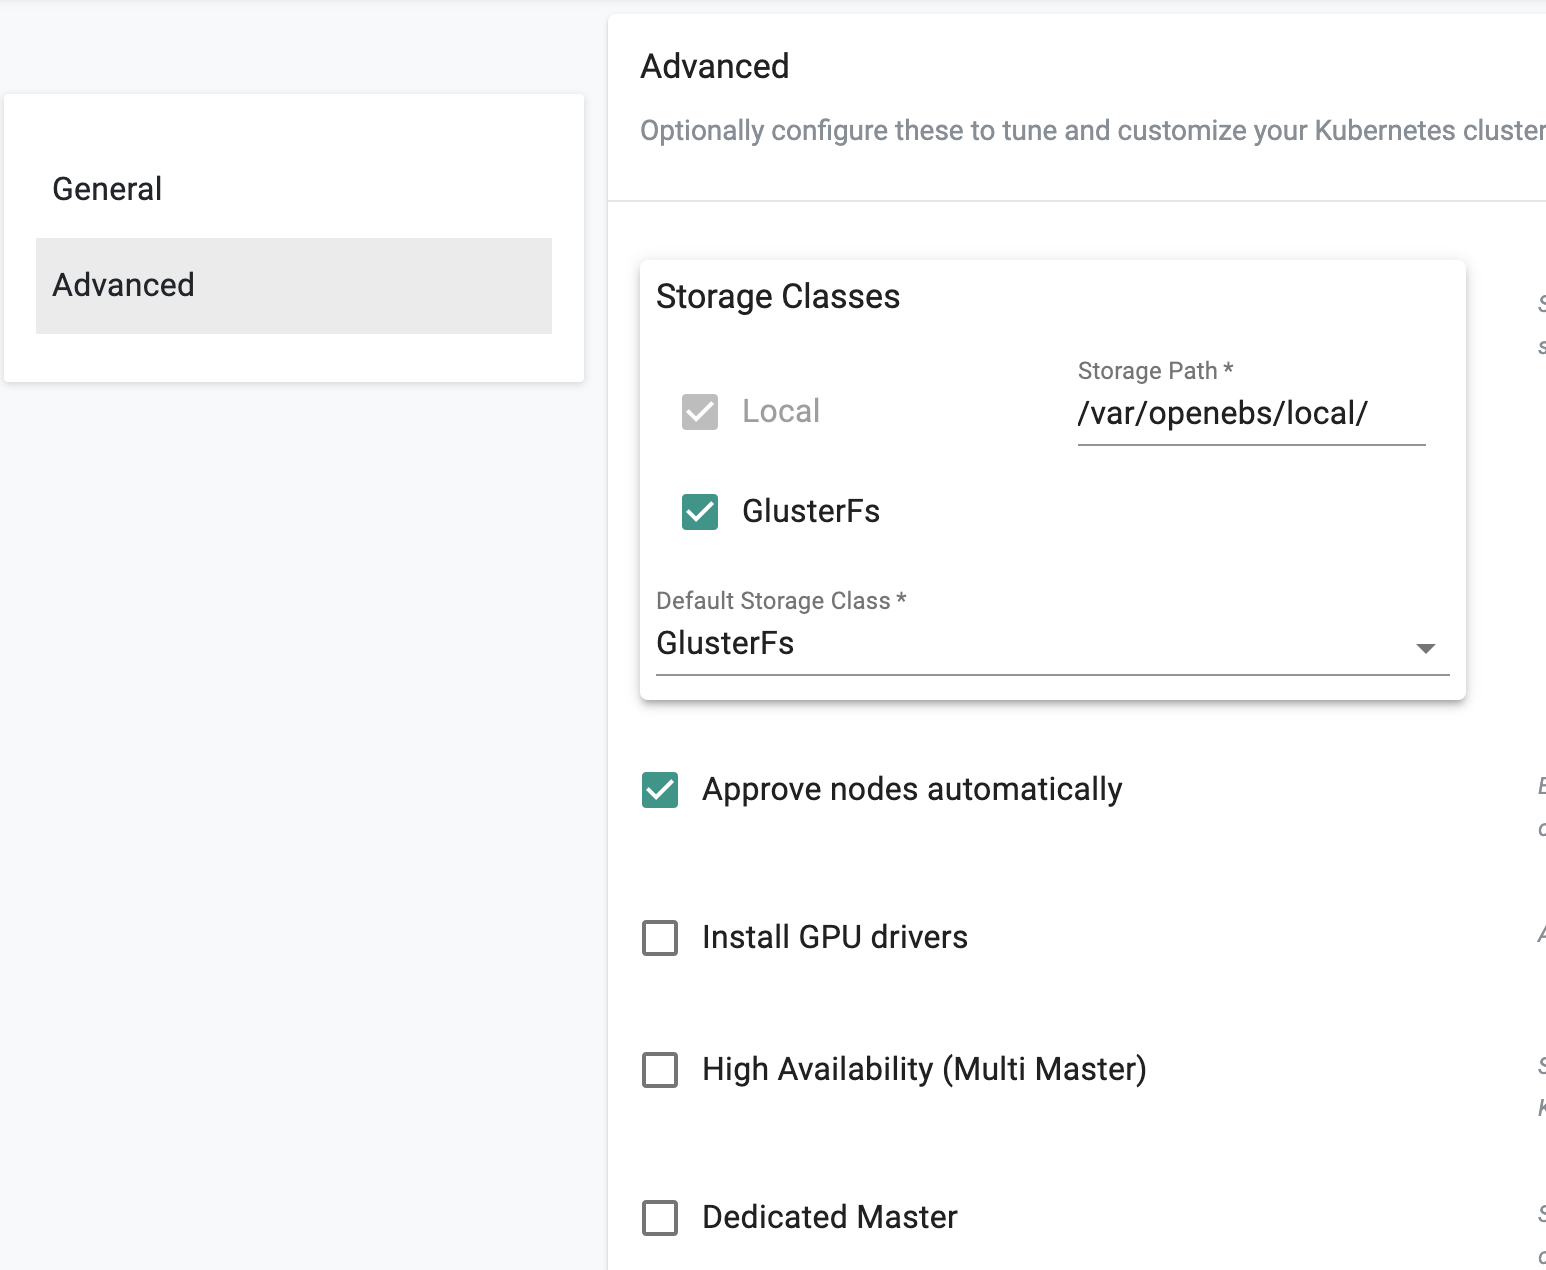
Under Advanced settings:
- Select GlusterFS for StorageClass. If this option is selected, make sure to attach a raw unformatted volume to your VM.
- Select to enable Approve nodes automatically option to automatically approve nodes during provisioning. If this is deselected, you must manually approve the nodes before the nodes can join the cluster.
- Select to enable High Availability (Multi Master) to provision a multi-master cluster.
- Select to enable Dedicated Master for a dedicated master model for the cluster. Workload pods will not be scheduled on dedicated masters.
- Click Continue to create the cluster.
Note
Selecting node auto approval will help avoid a manual approval step in the provisioning process. It is highly recommended for controlled environments where automation is critical. Example: controlled, factory type assembly environments.
K8s Version
A default K8s version is packaged in the provided OVA image. If a different Kubernetes version is selected, it will be automatically downloaded by the Controller and used for provisioning. This will require additional time for provisioning and will require downloading the K8s version over the Internet.
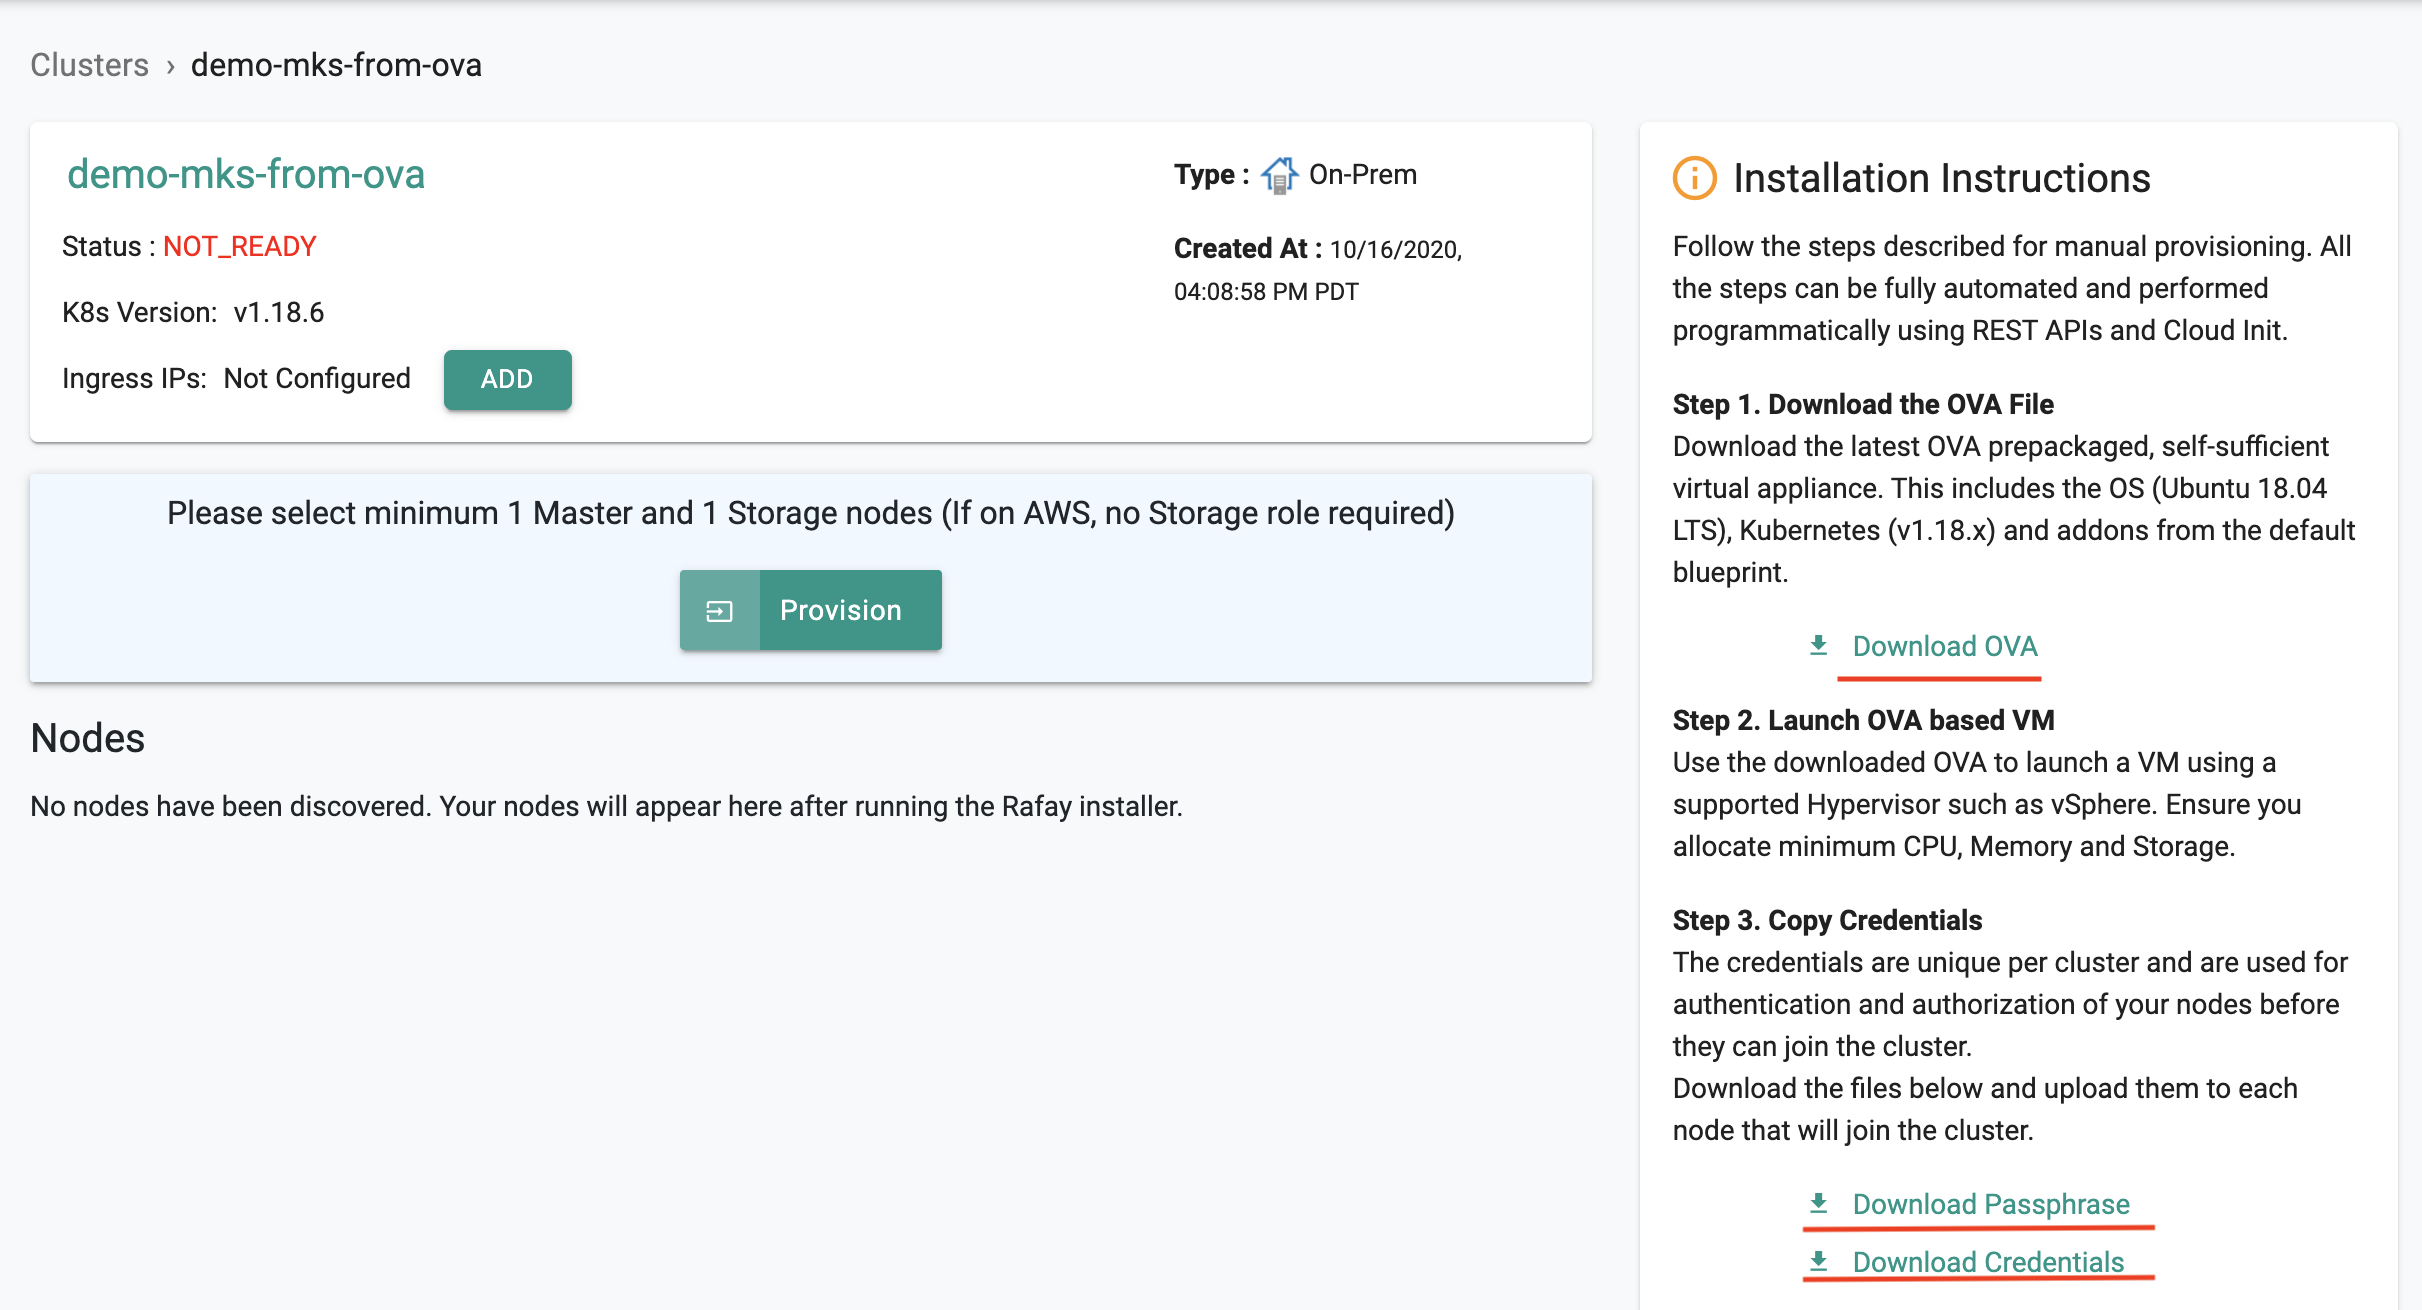
Step 2: Download OVA and Credentials
Download the OVA file and the credentials (credentials and passphrase files) from the installation instructions. The files are unique to this cluster.
- rafay-clusterimage-"version".ova
- "clustername"-credentials.pem
- "clustername"-passphrase.txt
Important
The credential files are unique to this cluster and cannot be reused with other clusters.
Step 3: Launch VM
- Use VMware vSphere to launch the VM. For an illustrative example, see VMware vSphere Example
- Power on the VM. If you are not using DHCP, configure networking (like IP address and gateway) for the VM.
-
Log in to the VM with
rafay_adminfor the username andAdmin$321for the password.By default, the VM launched via OVA image has SSH enabled.
-
Once the VM has been launched successfully, copy the files downloaded from Step 2 above to the VM. For an example of creating these files using SSH, see SSH Example.
-
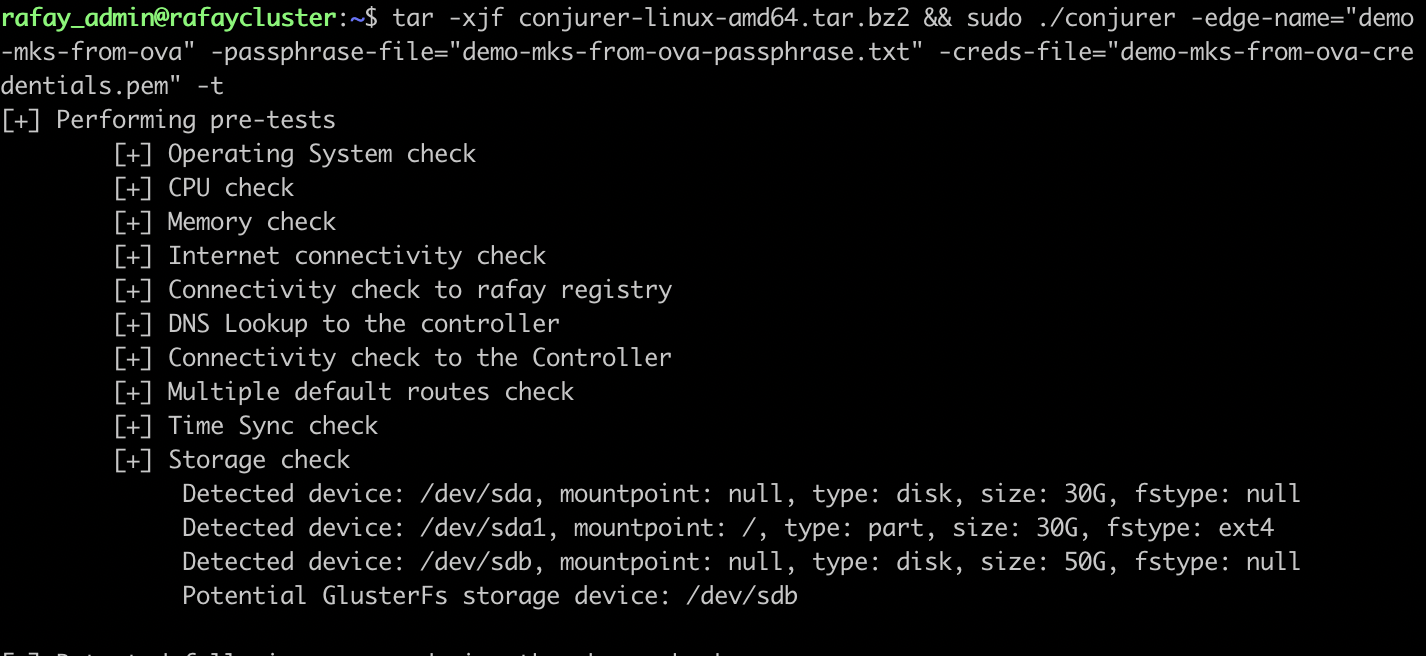
Run the installation pre-flight check using the command from the Step 4 of the Web Console node installation instructions to make sure there is no error (you can ignore the errors indicated the previous installed docker and Kubernetes versions).
Note
The filenames for the Passphrase and Credentials files must match in the command. You can change the names in the command to match the names of your files.
- Run the installation script using the command from the Step 5 of the Web Console node installation instructions.
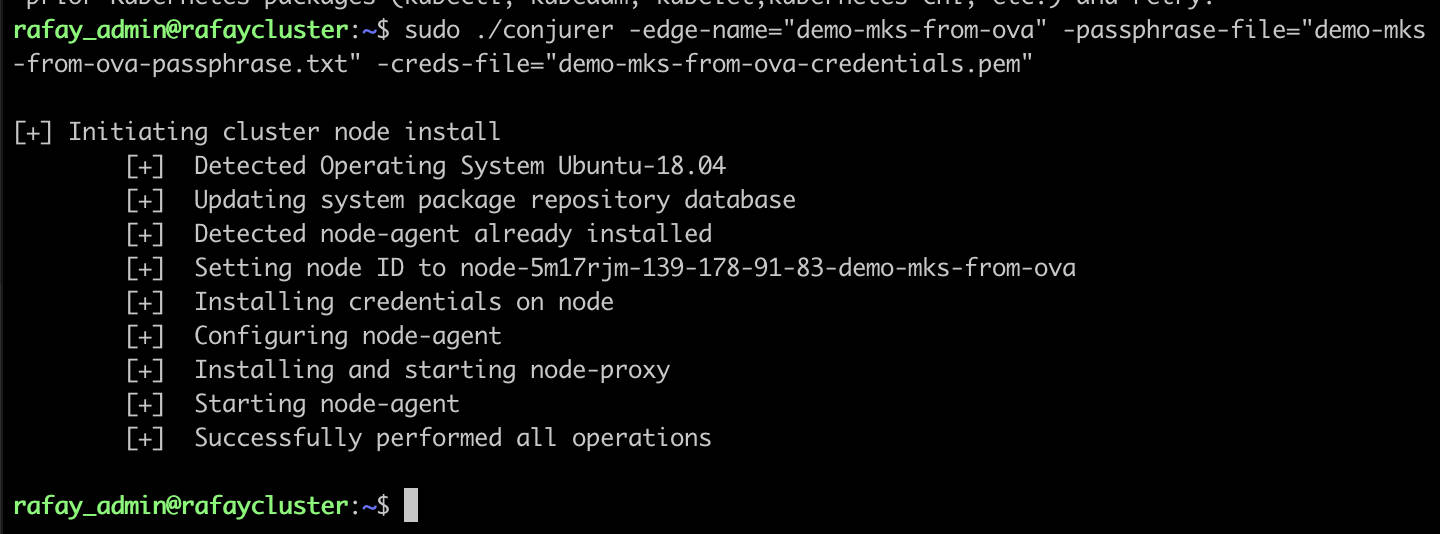
- Once the installation script has run successfully with the activation secrets, the node will automatically attempt to connect and register with the Controller.
Step 4: Configure Cluster
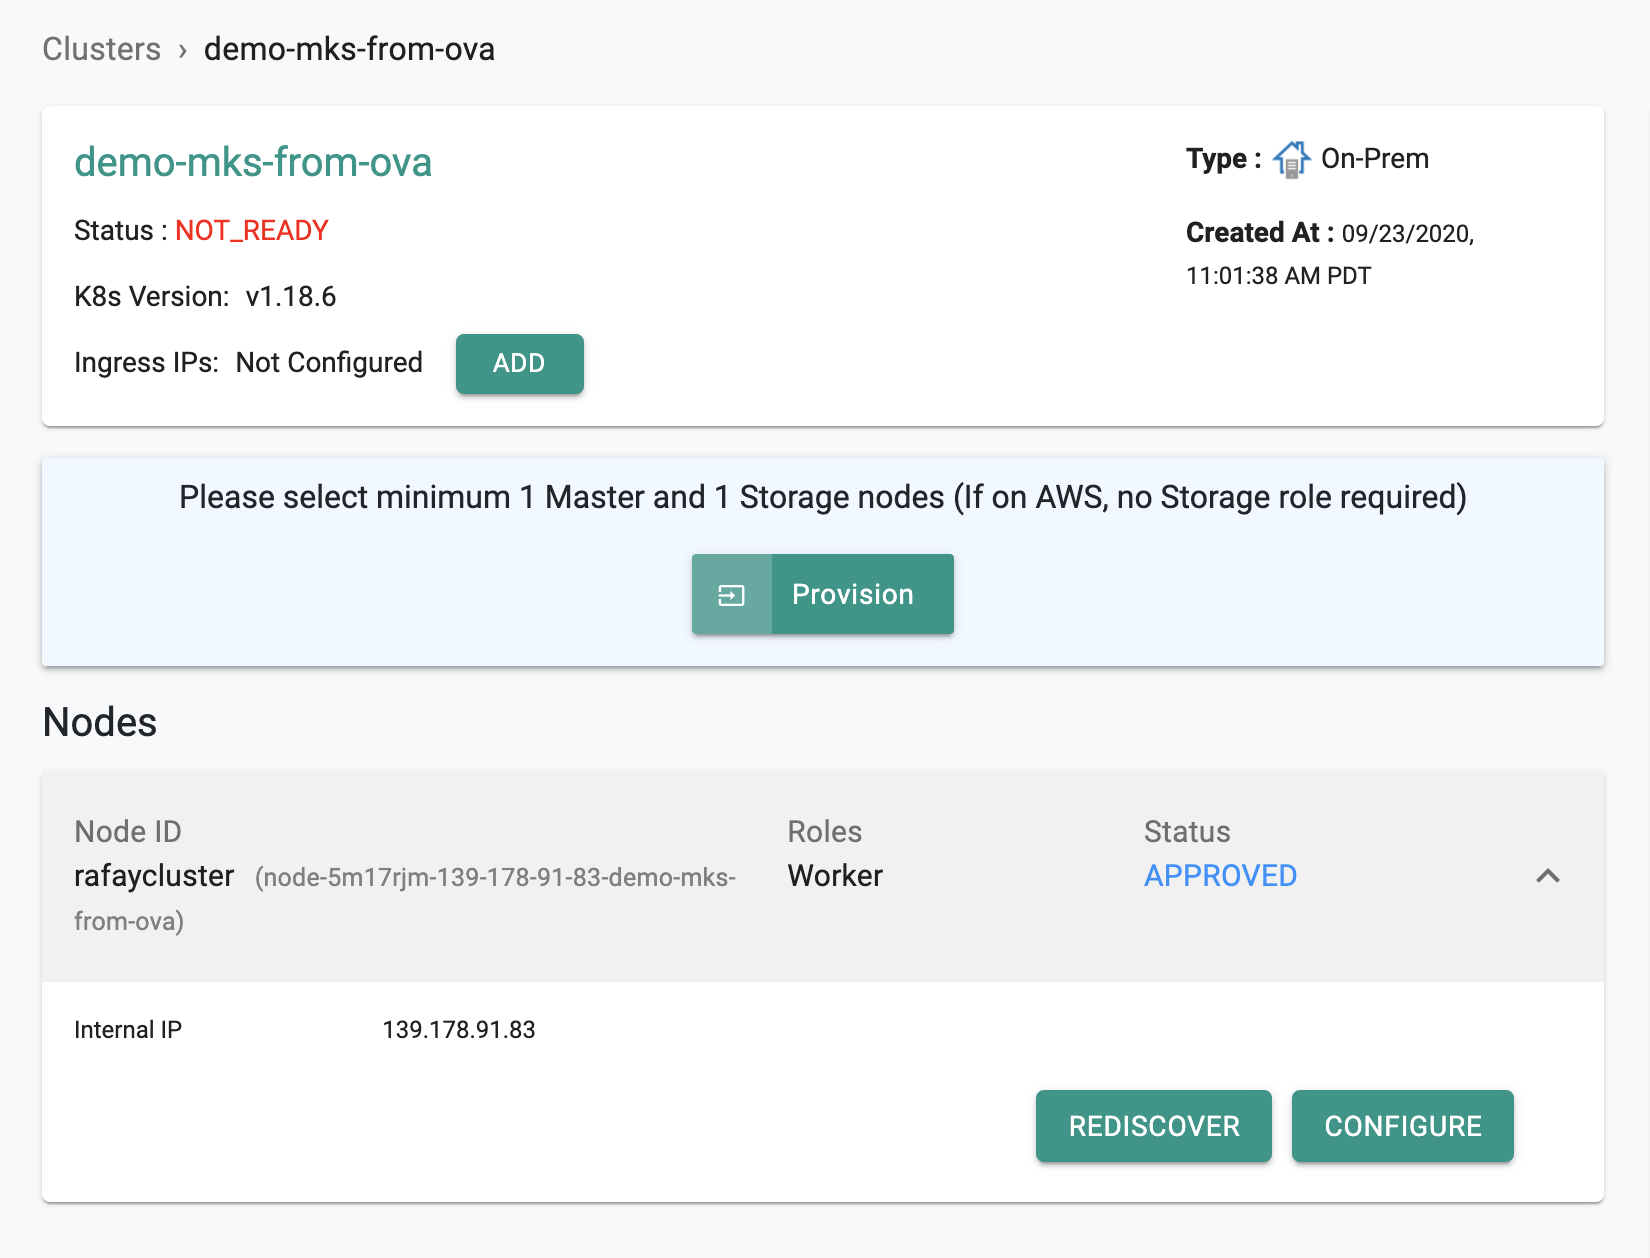
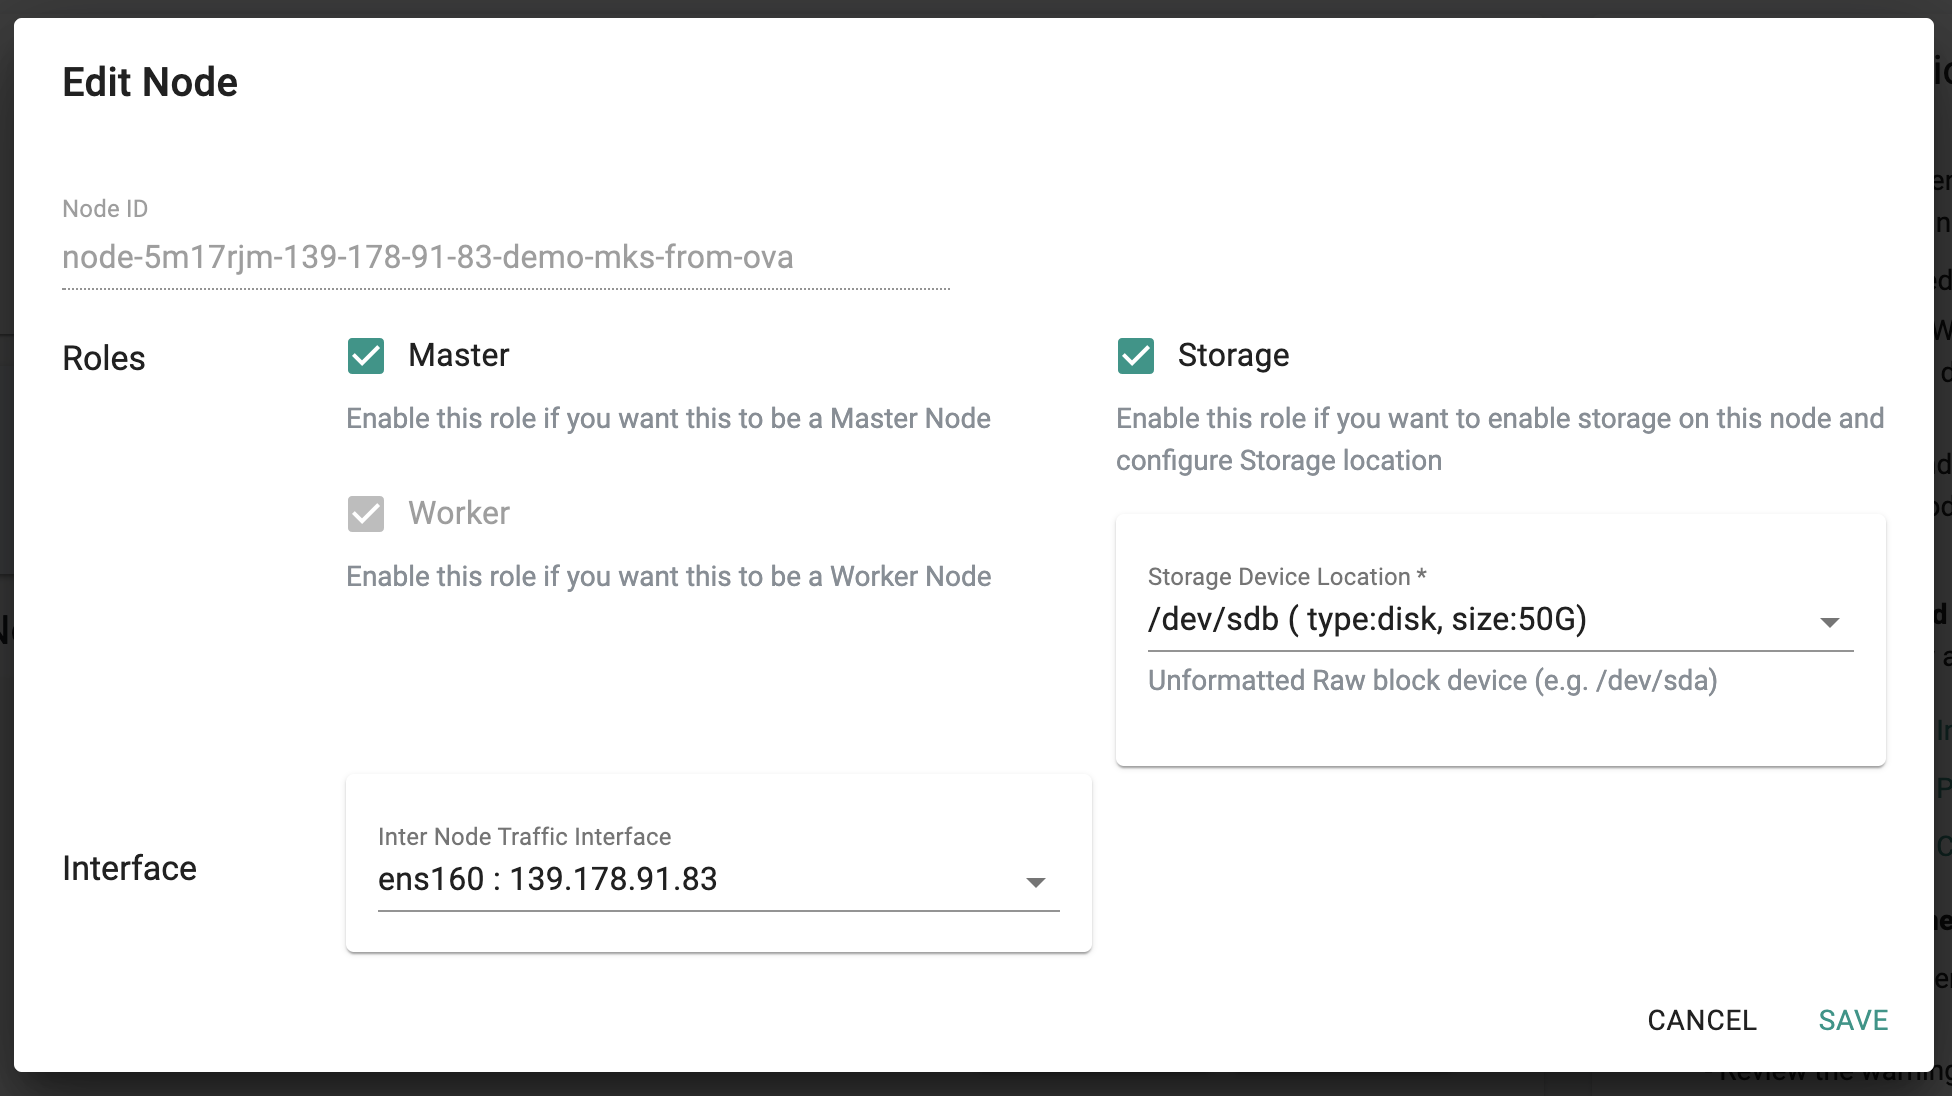
In the Web Console, you will see that the node has been discovered and approved. Click on Configure and follow the wizard.
Master Role
Enable Master role. This will configure the node to act as a Kubernetes master.
Storage
The Controller auto-detects and displays the available volumes. Select the correct volume from the dropdown (currently “/dev/sdb” with a capacity of 50GB).
Interface
The controller auto-detects and displays the available interfaces. Select the correct interface from the dropdown.
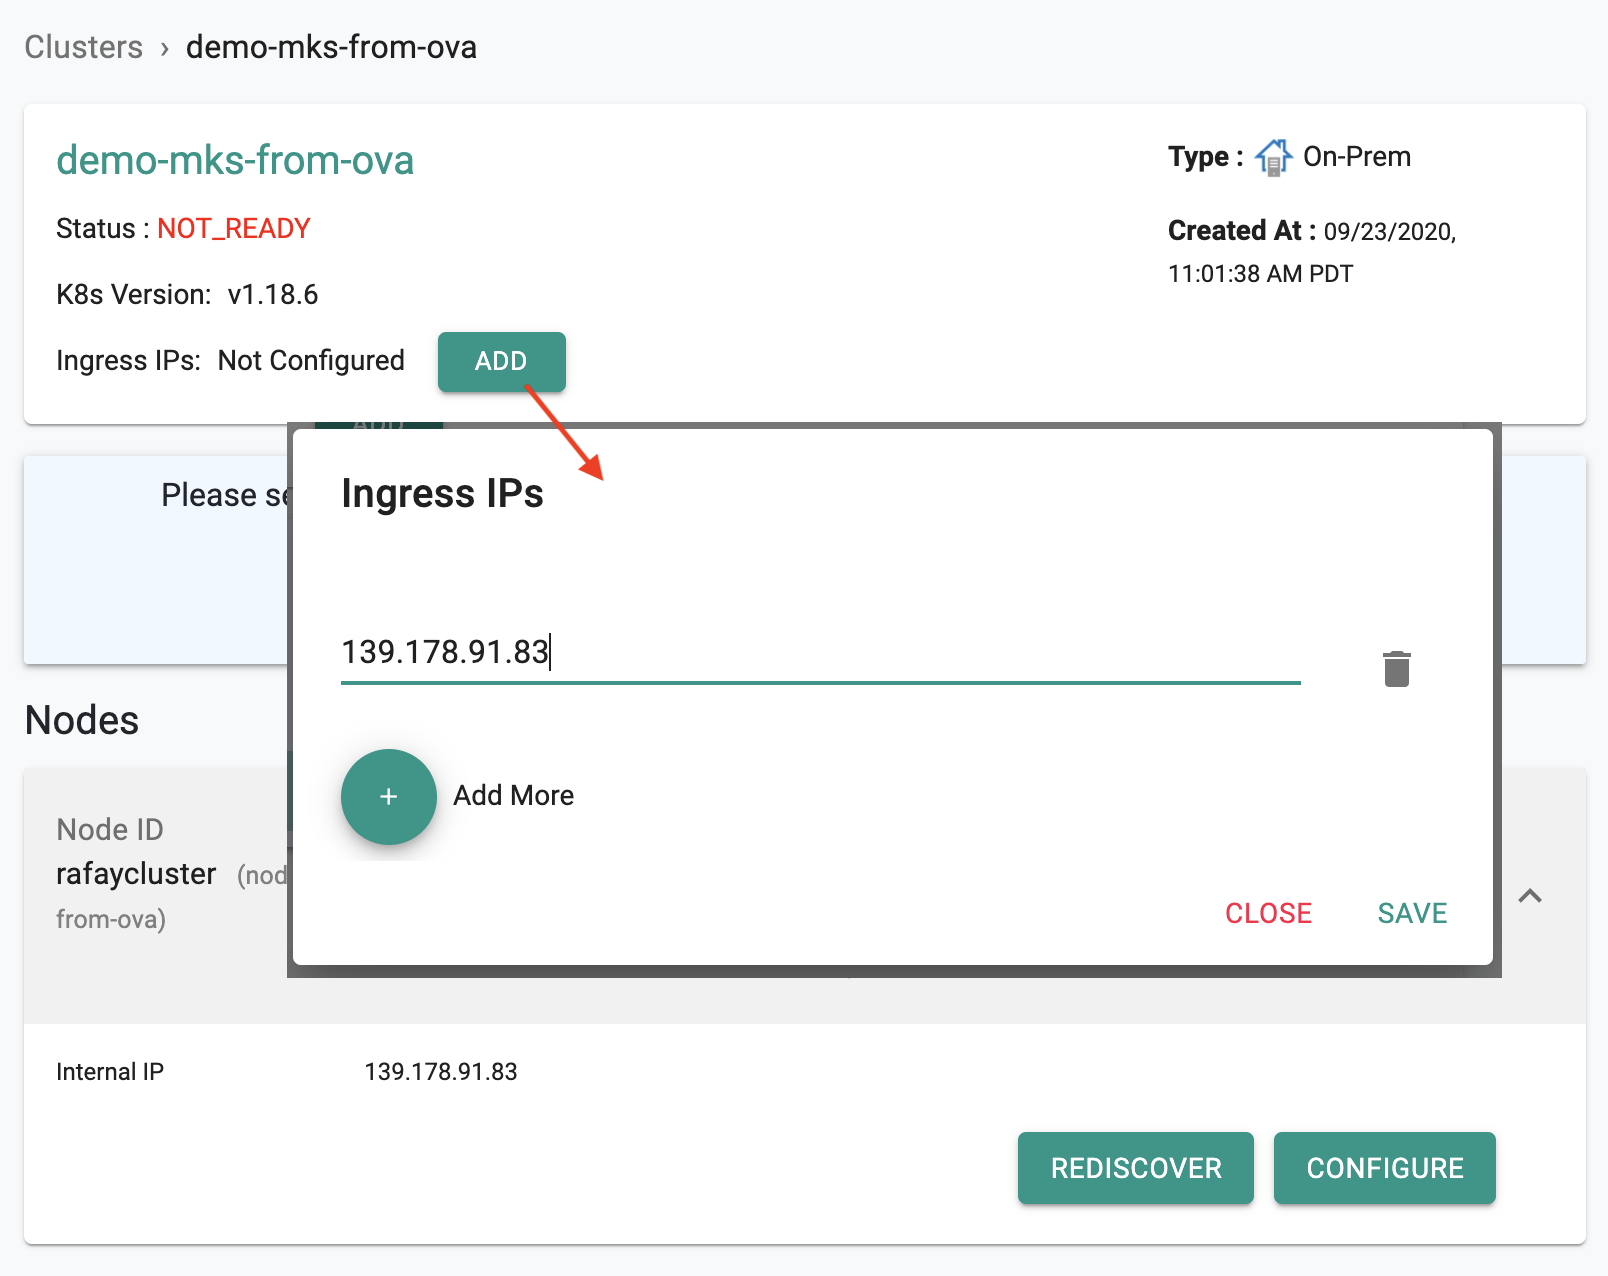
Ingress IP
In this step, we will configure the IP of the cluster node where you expect to receive incoming traffic. Applications (workloads) deployed on the managed cluster can be accessed on this IP.
- Look up the IP addresses assigned to the VM and copy/paste this here. This information is also available directly in the interface dropdown.
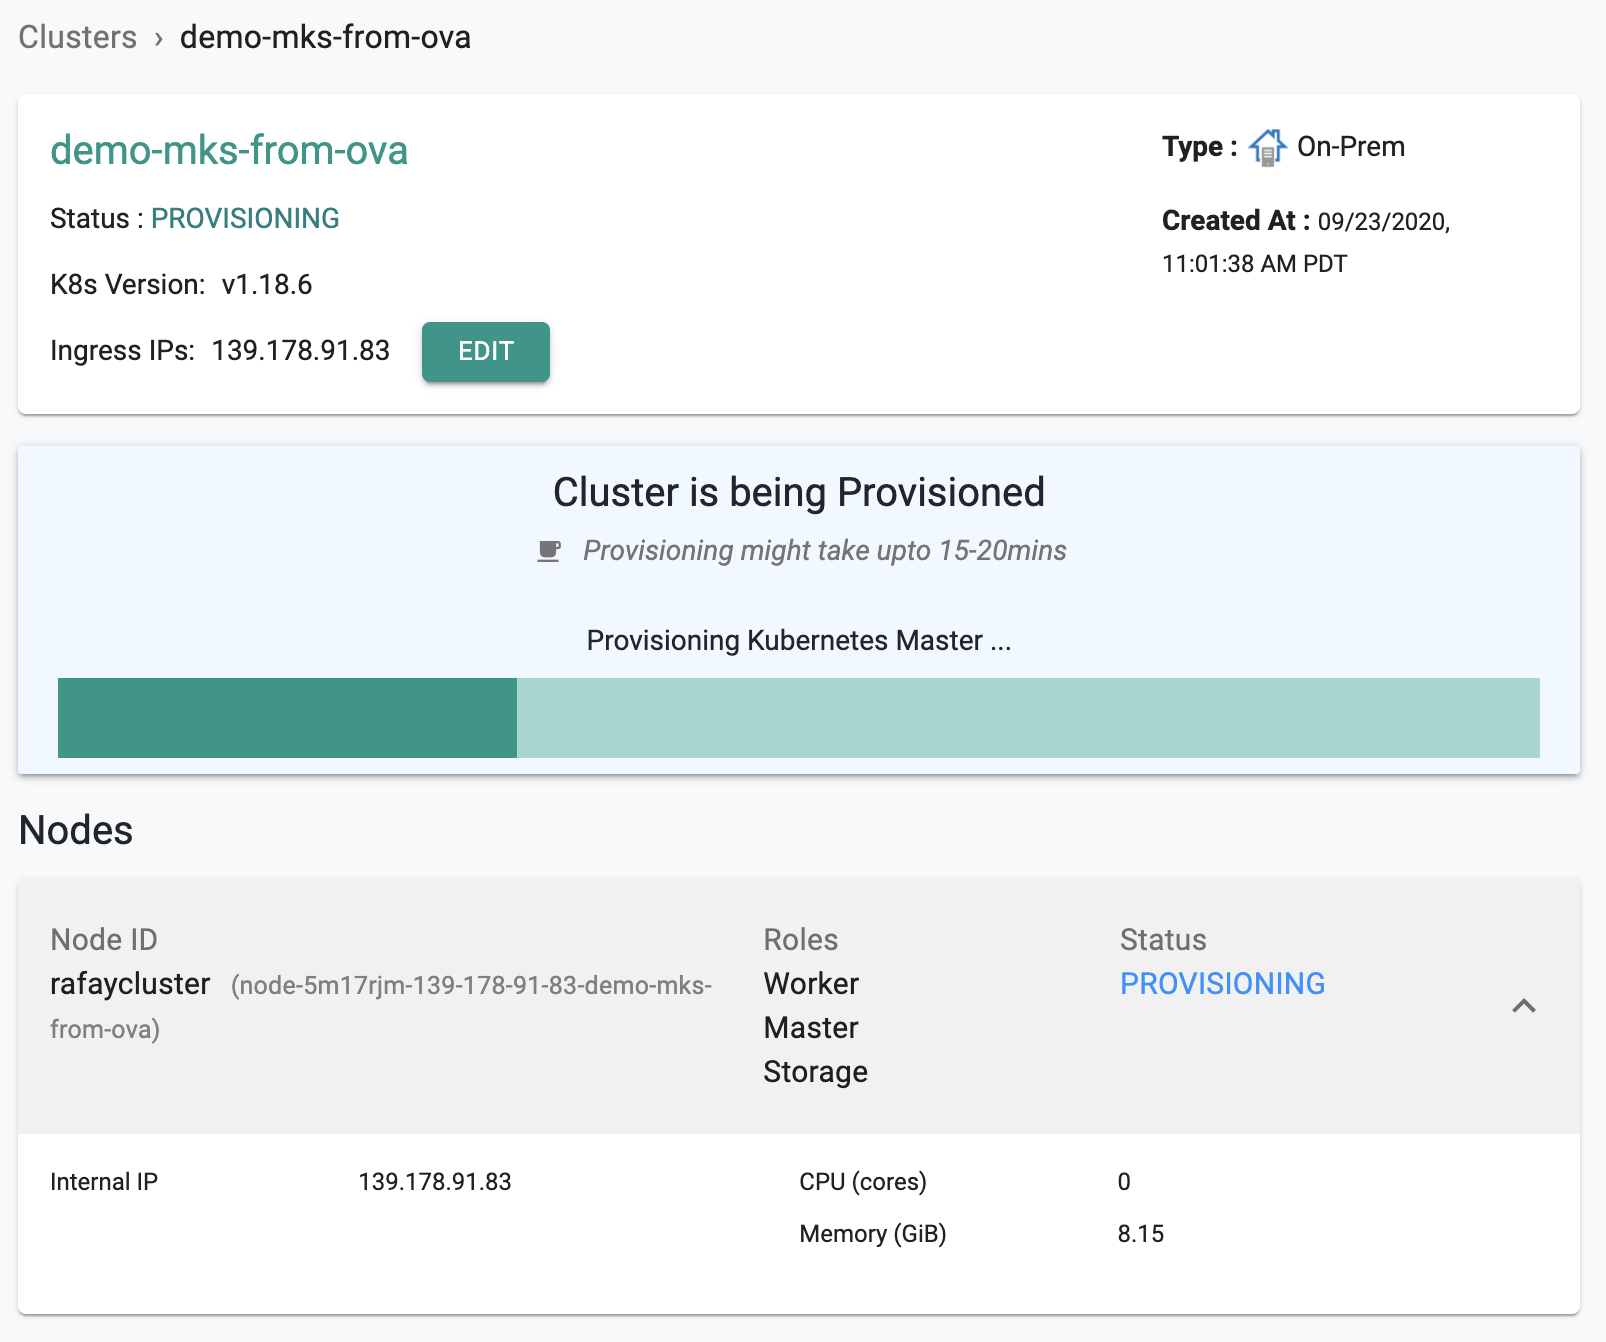
Step 5: Provision Cluster
Once configured, Click on “Provision” to provision the cluster and wait for the process to complete.
Important
If you selected a multi master, HA cluster configuration, you will have to configure at least three nodes before you will be allowed to provision the cluster.
Depending on the resources provided to the VM, the provisioning process can take ~5 minutes to complete. Progress and status updates will be displayed to the user during this process as the software components are configured in the VM.
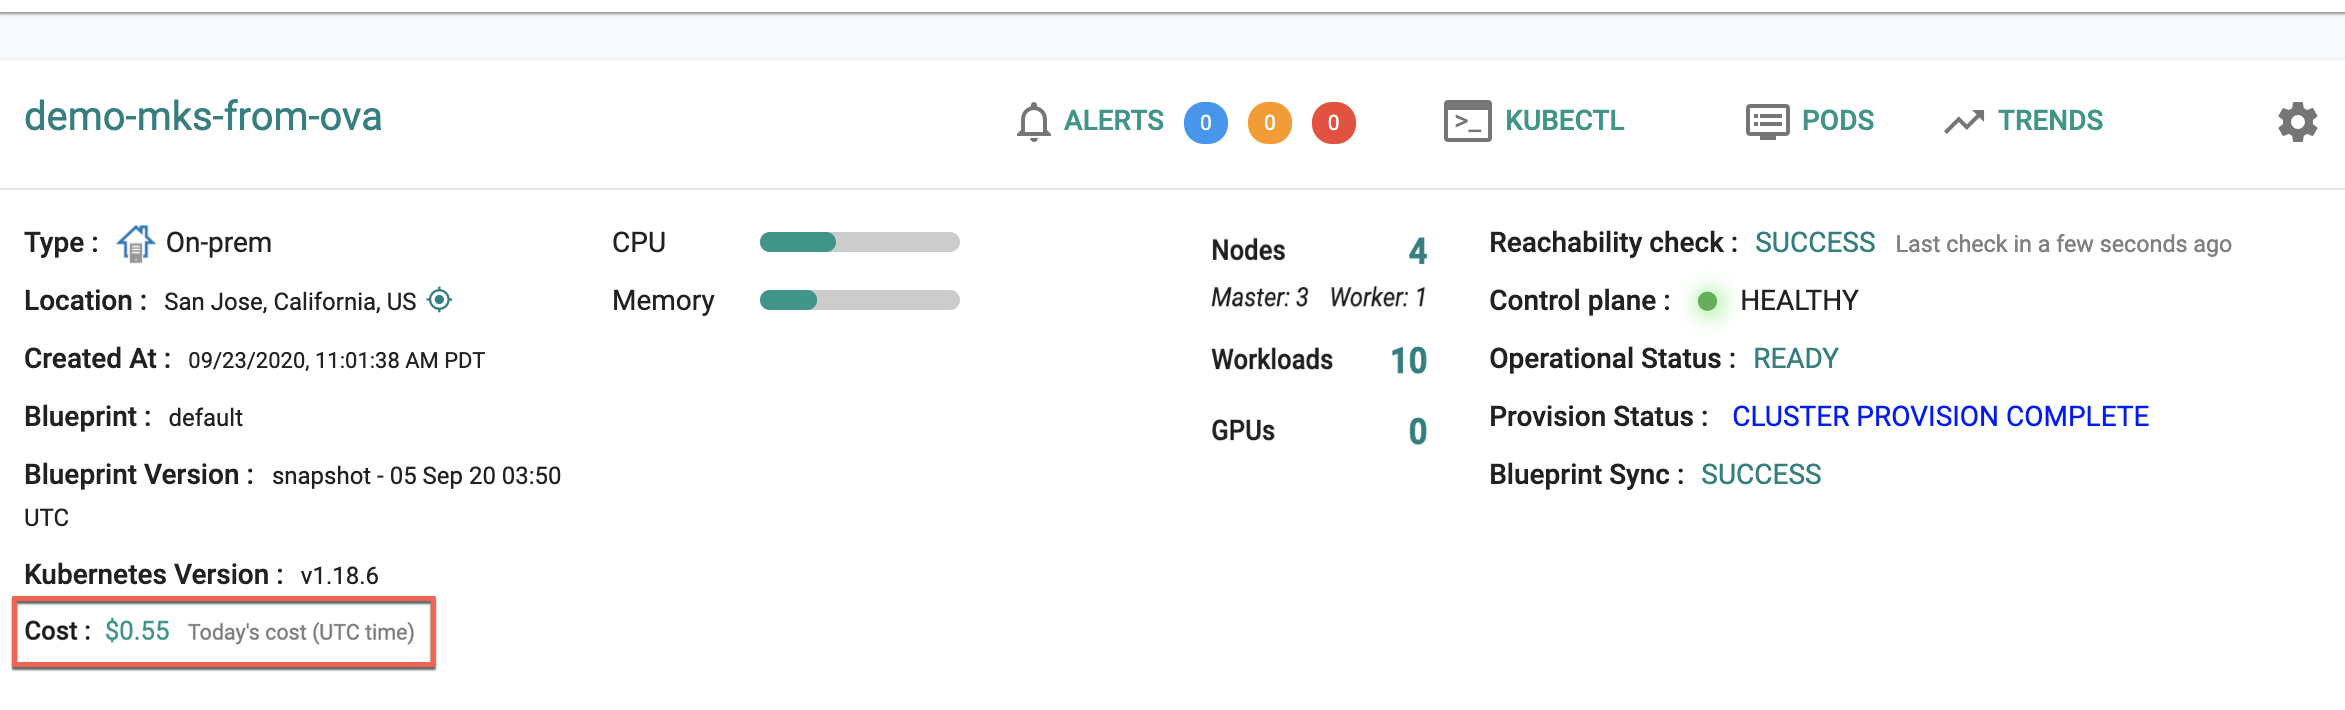
Step 6: Validate Provisioning
Once the cluster is provisioned, verify the following:
Control Plane
This should show as Green and report status as HEALTHY. This means that the k8s cluster operating in vSphere is in a healthy state.
Reachability Check
This should report status as SUCCESS. In addition, the “Last Check in Time” should be within a minute. This means that a heartbeat has been established between the Kubernetes cluster on vSphere and the Controller.
To view the cost details of this cluster, click on the available cost link. This will navigate you to the Cost Explorer page, where you can access detailed cost information for this specific cluster.
An illustrative screenshot of a “successfully” provisioned cluster in the Web Console is shown below.