ADFS
Follow the steps documented below to integrate your Org and ADFS (Active Directory Federation Services) for Single Sign On (SSO).
Important
Only users with "Organization Admin" privileges can configure SSO in the Web Console.
Step 1: Create IdP
- Login into the Web Console as an Organization Admin
- Click on System and Identity Providers
- Click on New Identity Provider
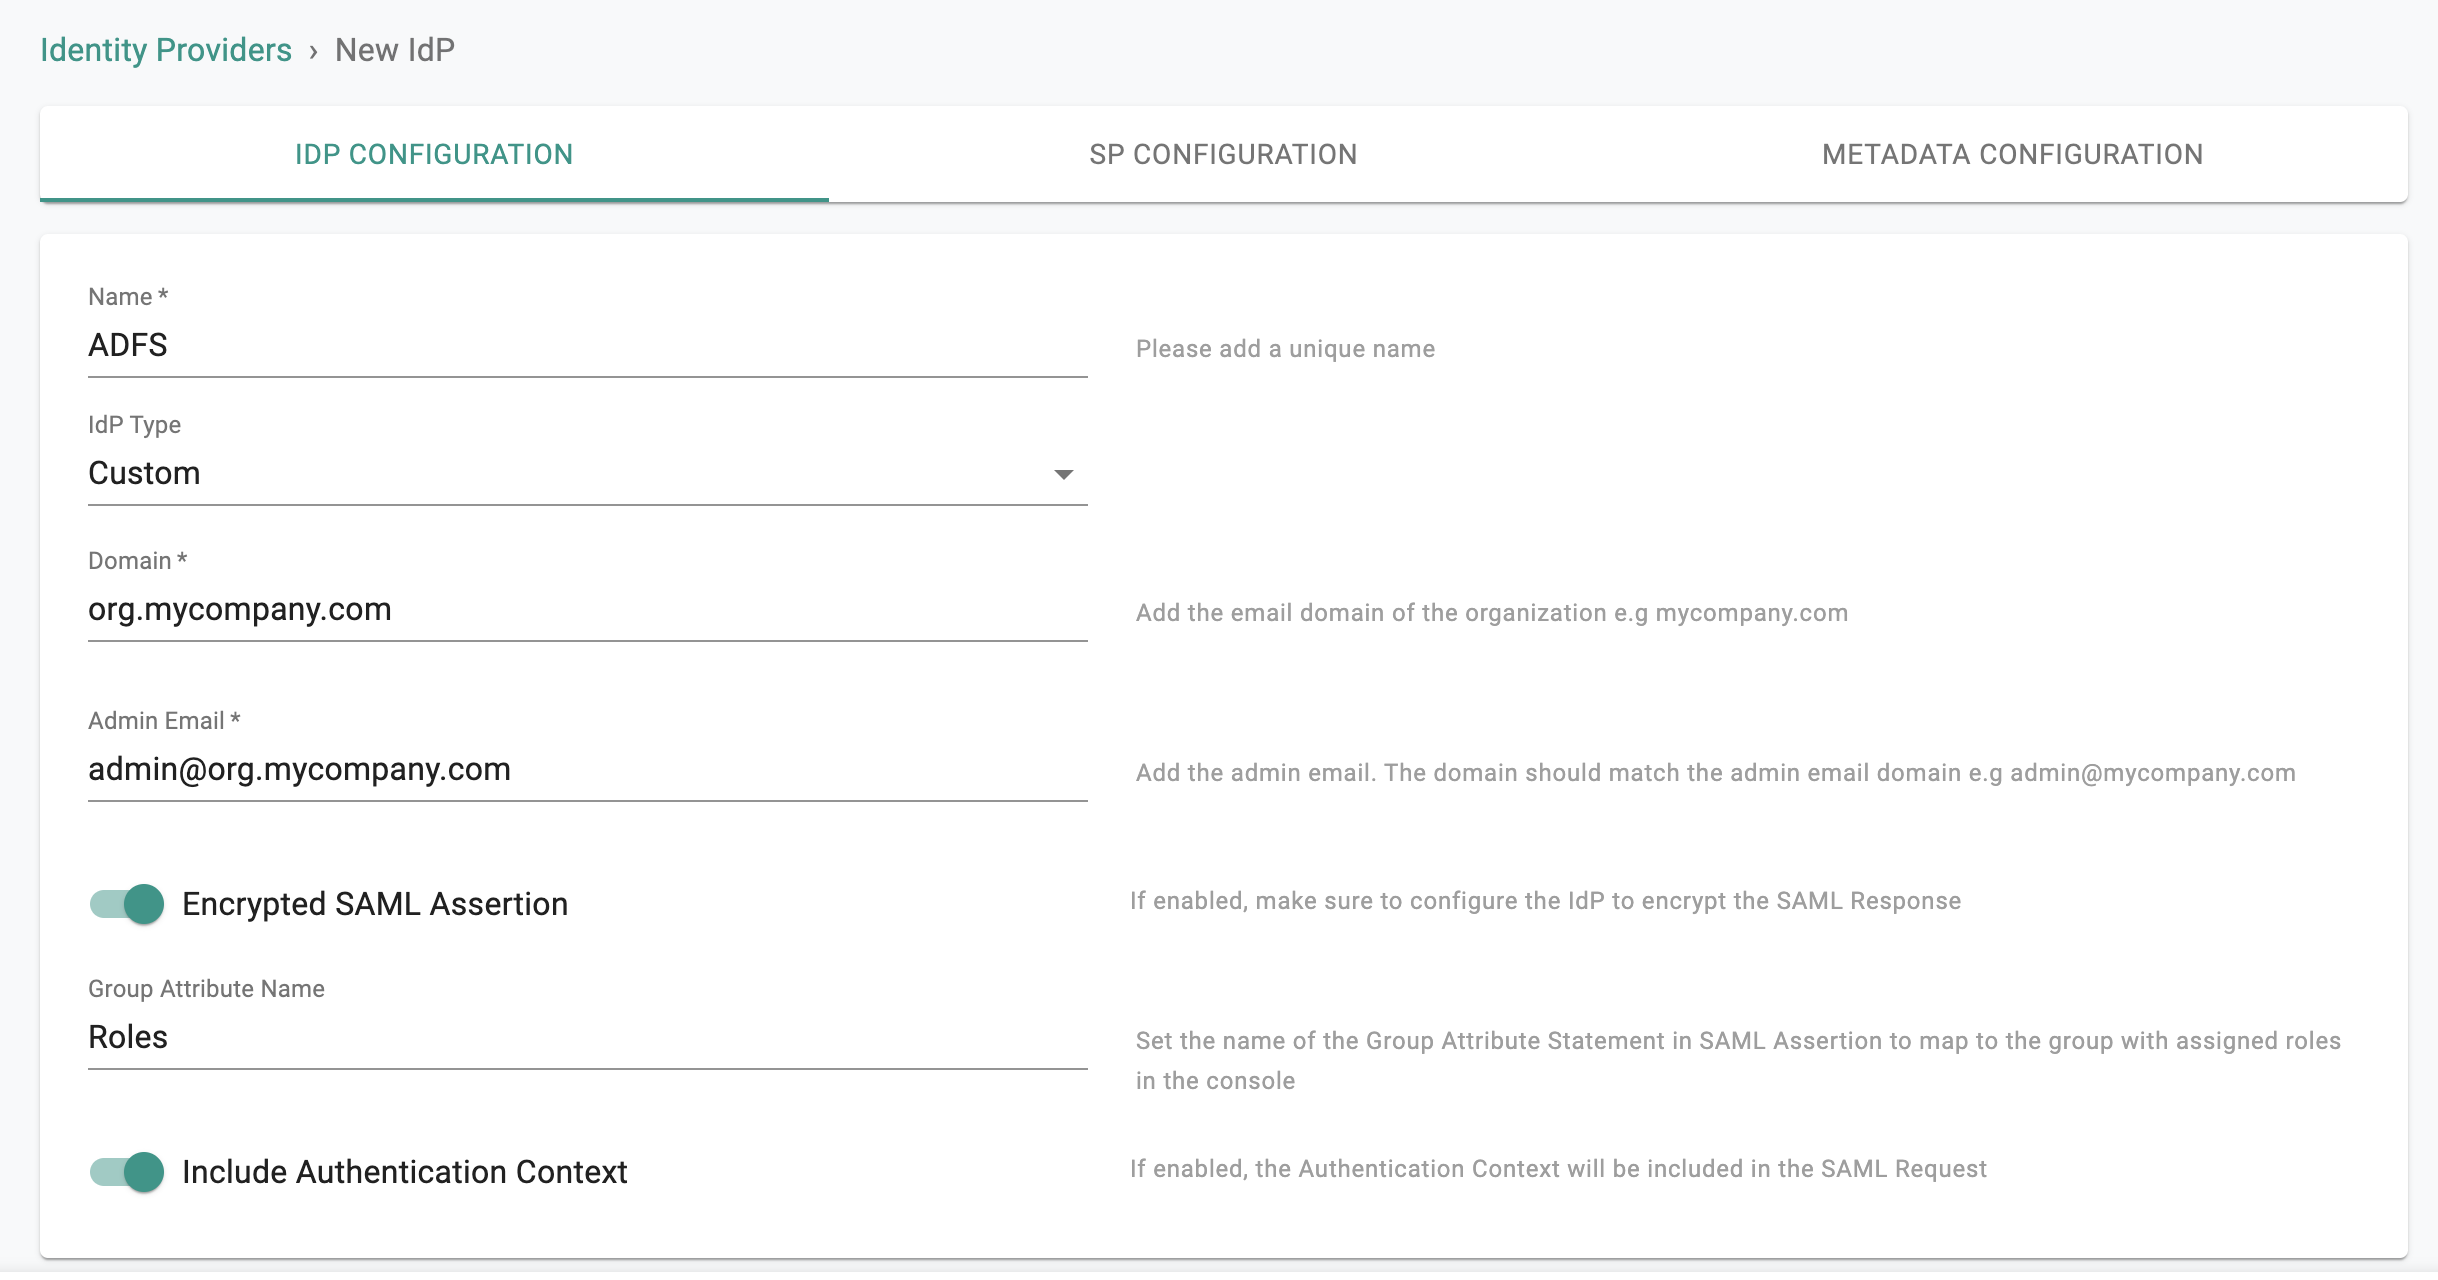
- Provide a name, select Custom from the IdP Type drop down
- Enter the Domain for which you would like to enable SSO
Important
Within an org, the domain of an IdP cannot be used for another IdP. A domain existing in an org can be used in multiple orgs (for one IdP in each org)
- Enter the valid Admin Email of the domain above to use for validating the ownership of the domain
- Optionally, toggle Encryption if you wish to send/receive encrypted SAML assertions
- Provide a name for the Group Attribute Name
- Optionally, toggle Include Authentication Context if you wish to send/receive auth context information in assertion
- Click on Save & Continue
Important
Encrypting SAML assertions is optional because privacy is already provided at the transport layer using HTTPS. Encrypted assertions provide an additional layer of security on top ensuring that only the SP (Org) can decrypt the SAML assertion.
Step 2: View SP Details
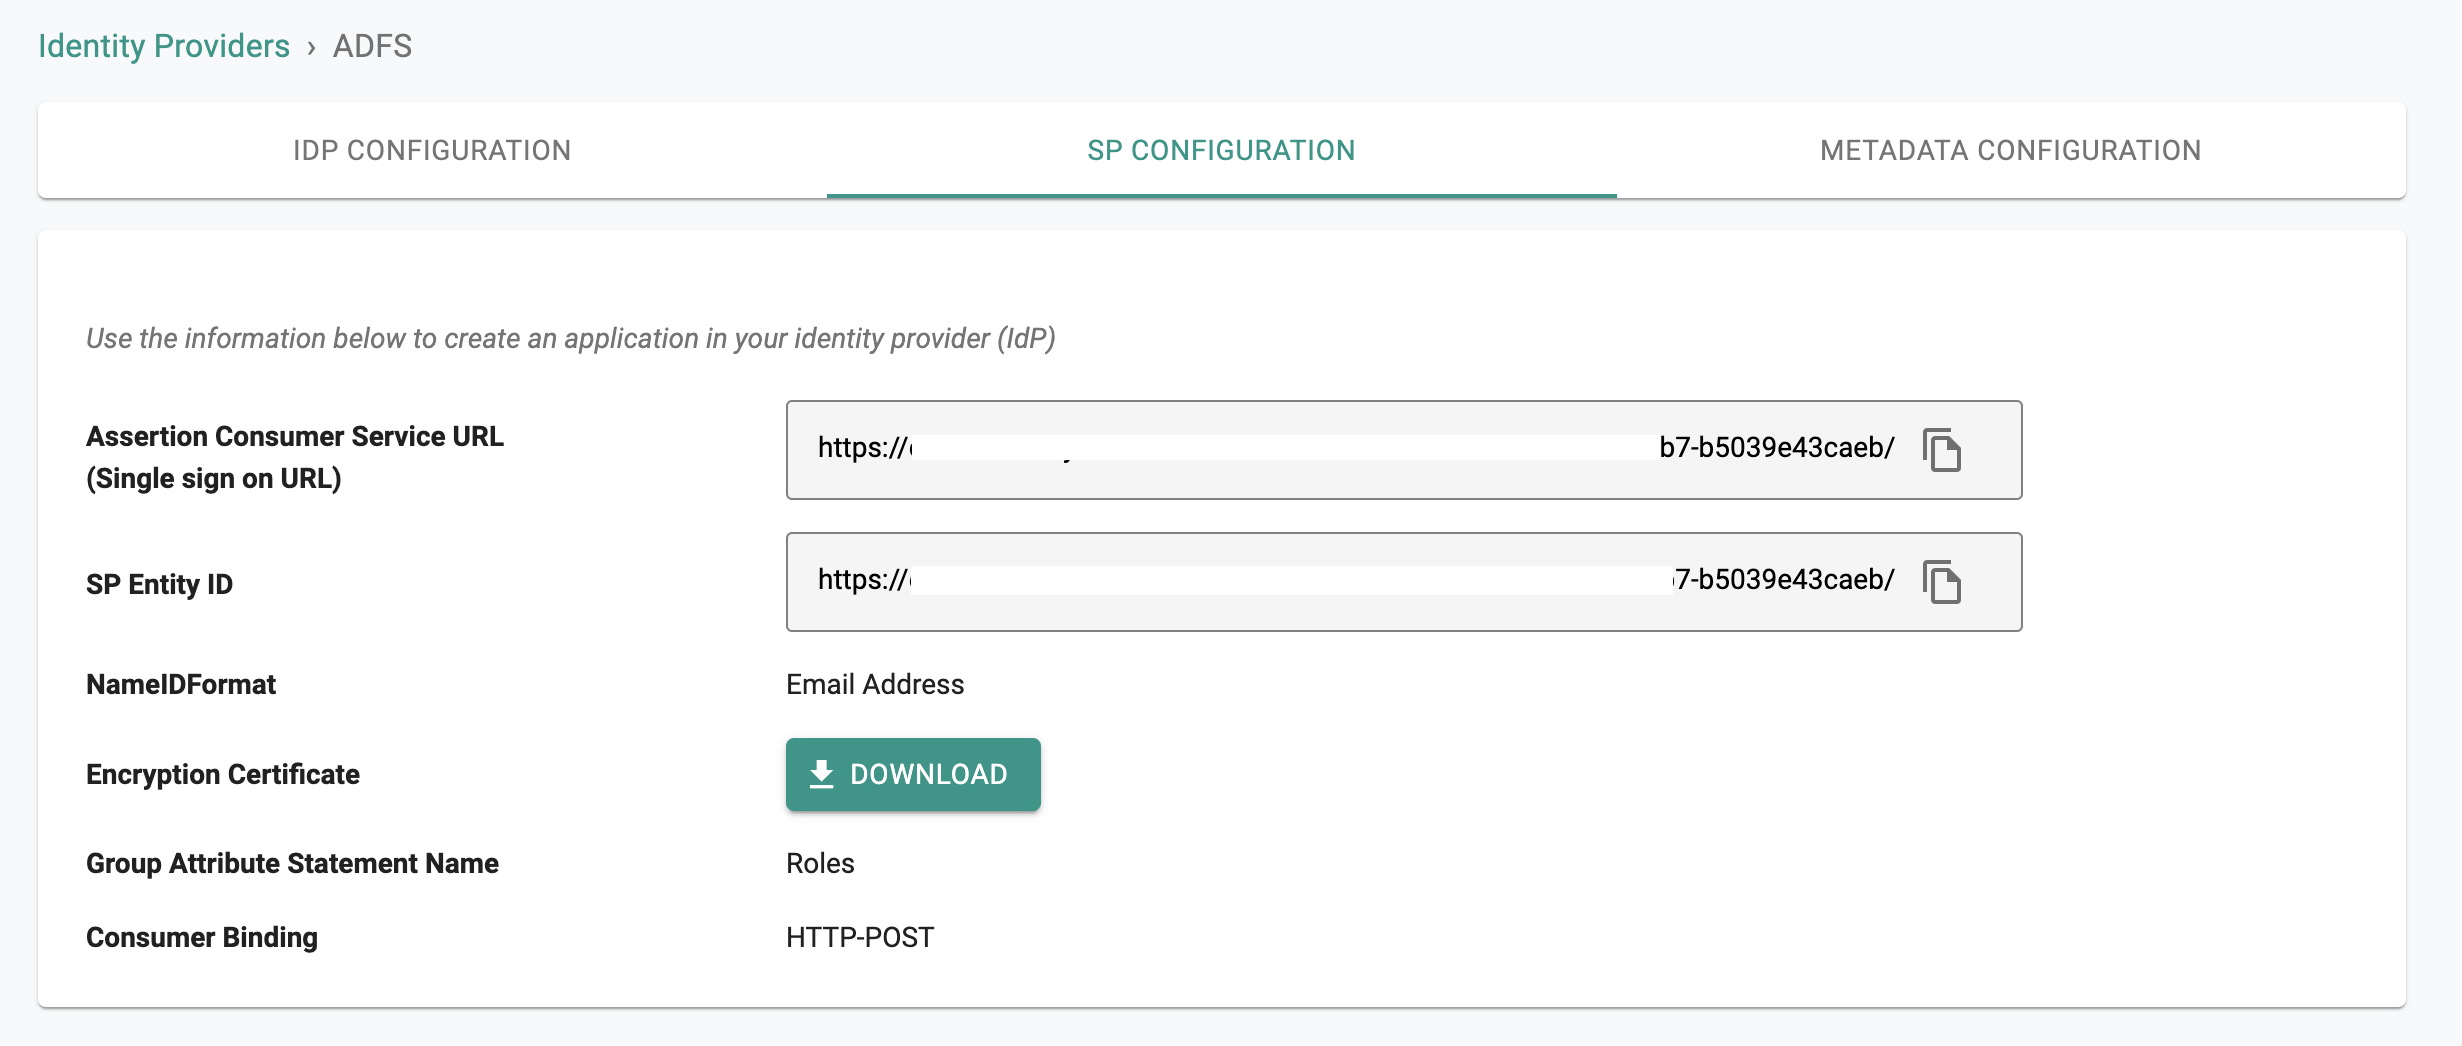
The IdP configuration wizard will display critical information that you need to copy/paste into your ADFS Relying Party Trust configuration. Provide the following information to your ADFS administrator.
- Assertion Consumer Service (ACS) URL
- SP Entity ID
- Name ID Format
- Download the Encryption Certificate (if encryption enabled)
- Group Attribute Statement Name
- Consumer Binding
- Click on Save & Continue
Step 3: Specify IdP Metadata
- Download the ADFS IdP Metadata file from your ADFS metadata URL https://
/FederationMetadata/2007-06/FederationMetadata.xml - In the Metadata configuration page, choose IdP Metadata File option.
- Use Upload button to upload the ADFS IdP Metadata file downloaded above
- Click on Save & Exit to finish the IdP configuration
- Once this process is complete, you can view details about the IdP configuration on the Identity Provider page.
- You can also edit and update the configuration if required.
Step 4: Verify Domain for IdP Integration
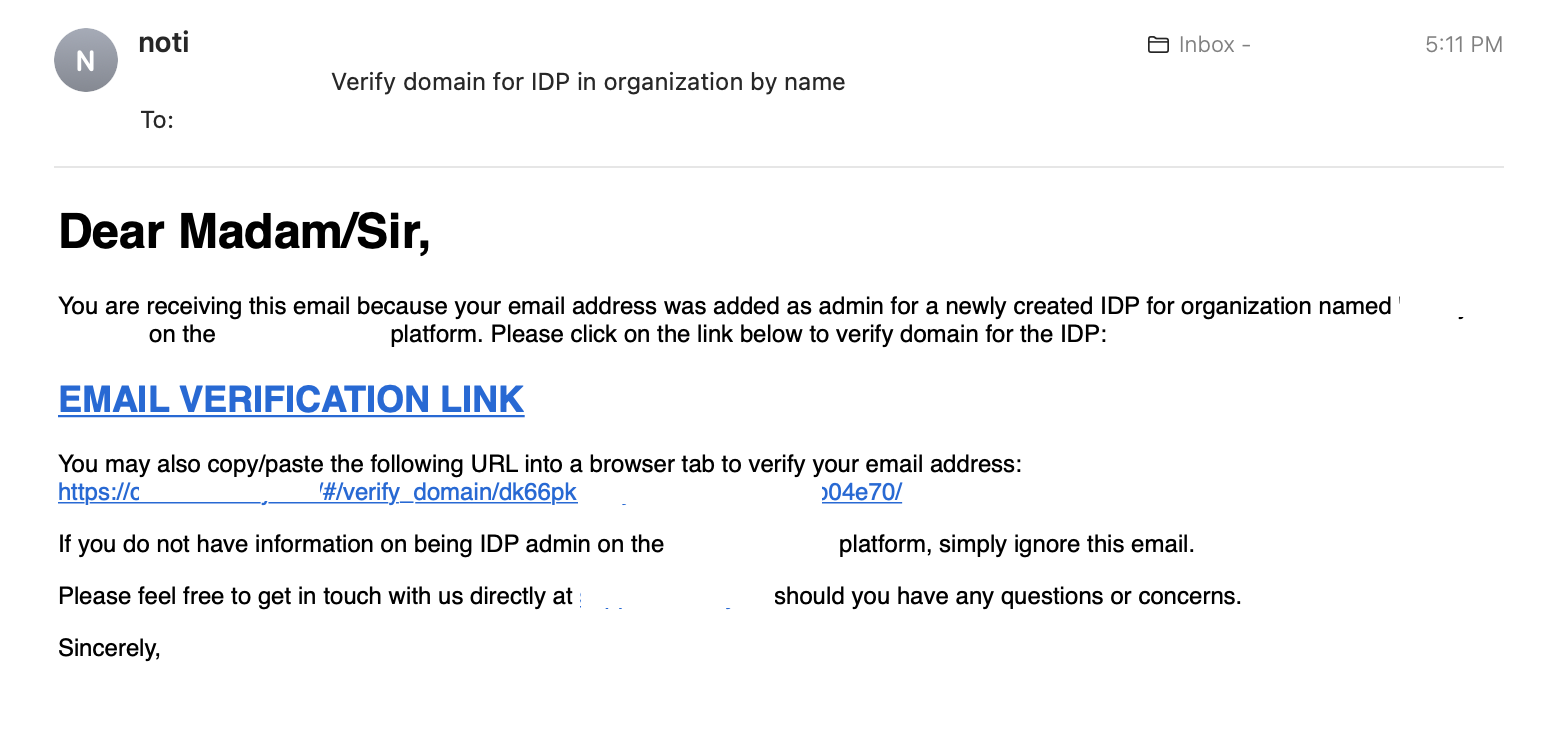
- The owner of the admin email to validate the IdP domain in Step 1 should receive an email from the platform where subject contains Verify domain for IDP in organization by name
- Click on the EMAIL VERIFICATION LINK provided in the email to verify the domain
- Once the domain is verified, you can confirm on the Identity Provider page the status of your ADFS IdP
Step 5: Create Relying Party Trust in ADFS
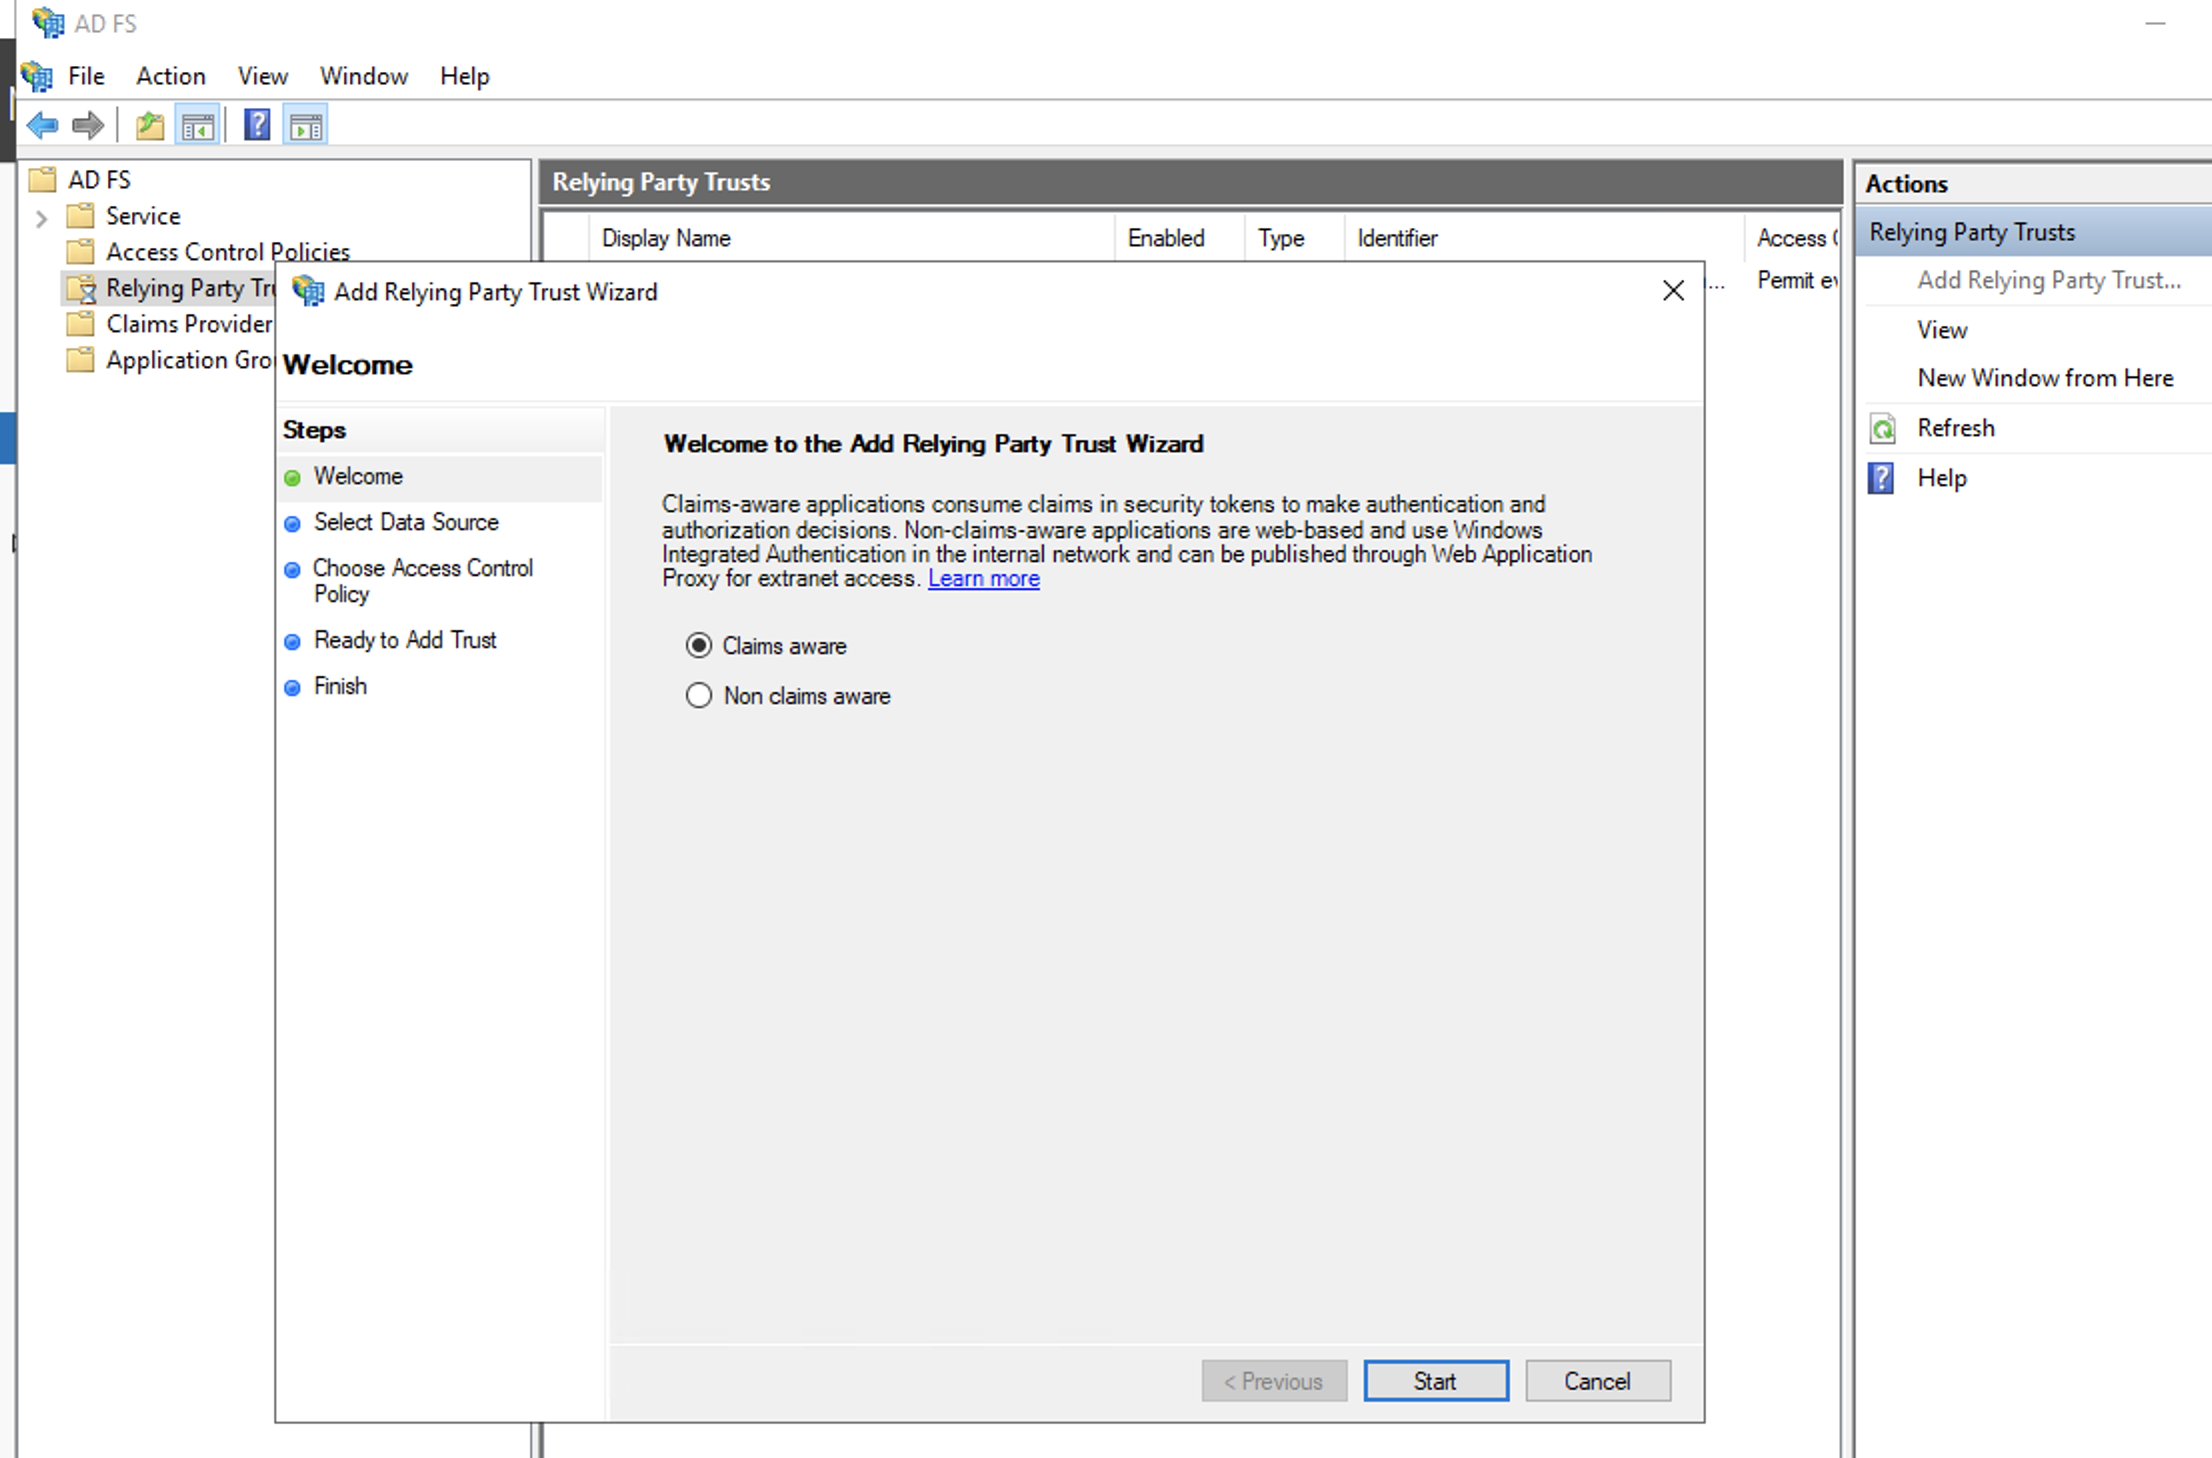
- Open AD FS Management tool as an Administrator
- Select Relying Party Trusts and click Actions > Add Relying Party Trust
- In Add Relying Party Trust Wizard windows, select Claim aware and click Start
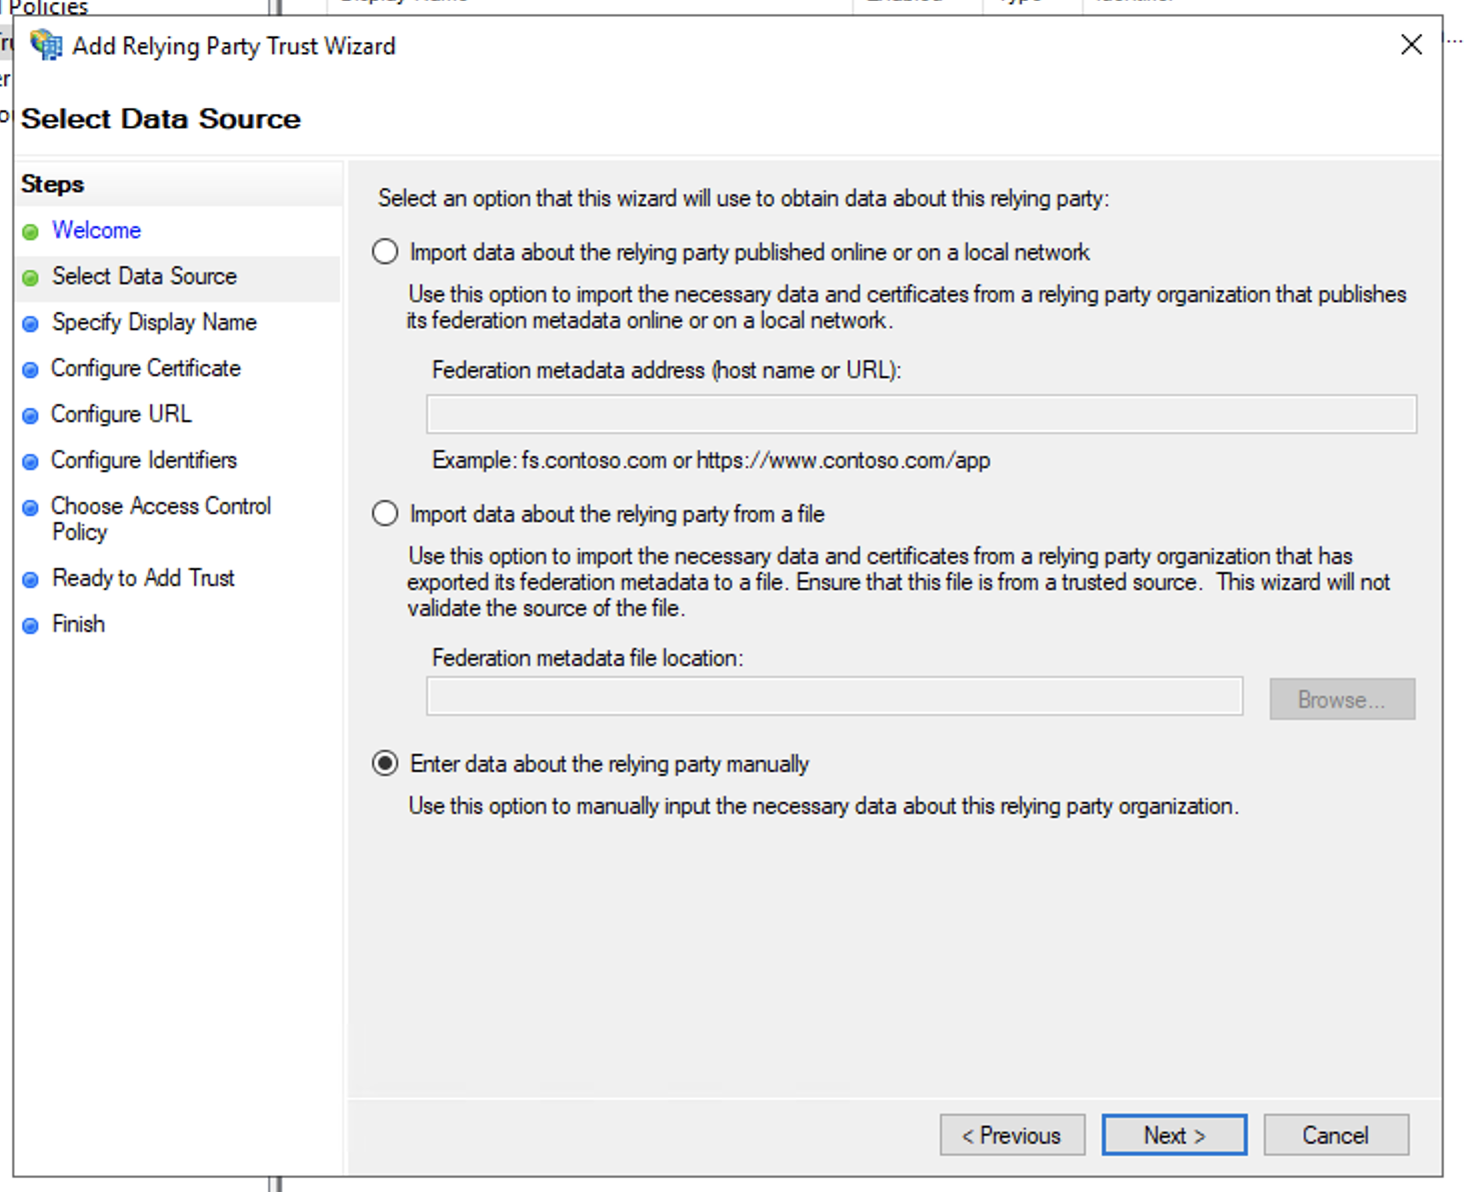
- In Select Data Source windows, select Enter data about the relying party manually and click Next
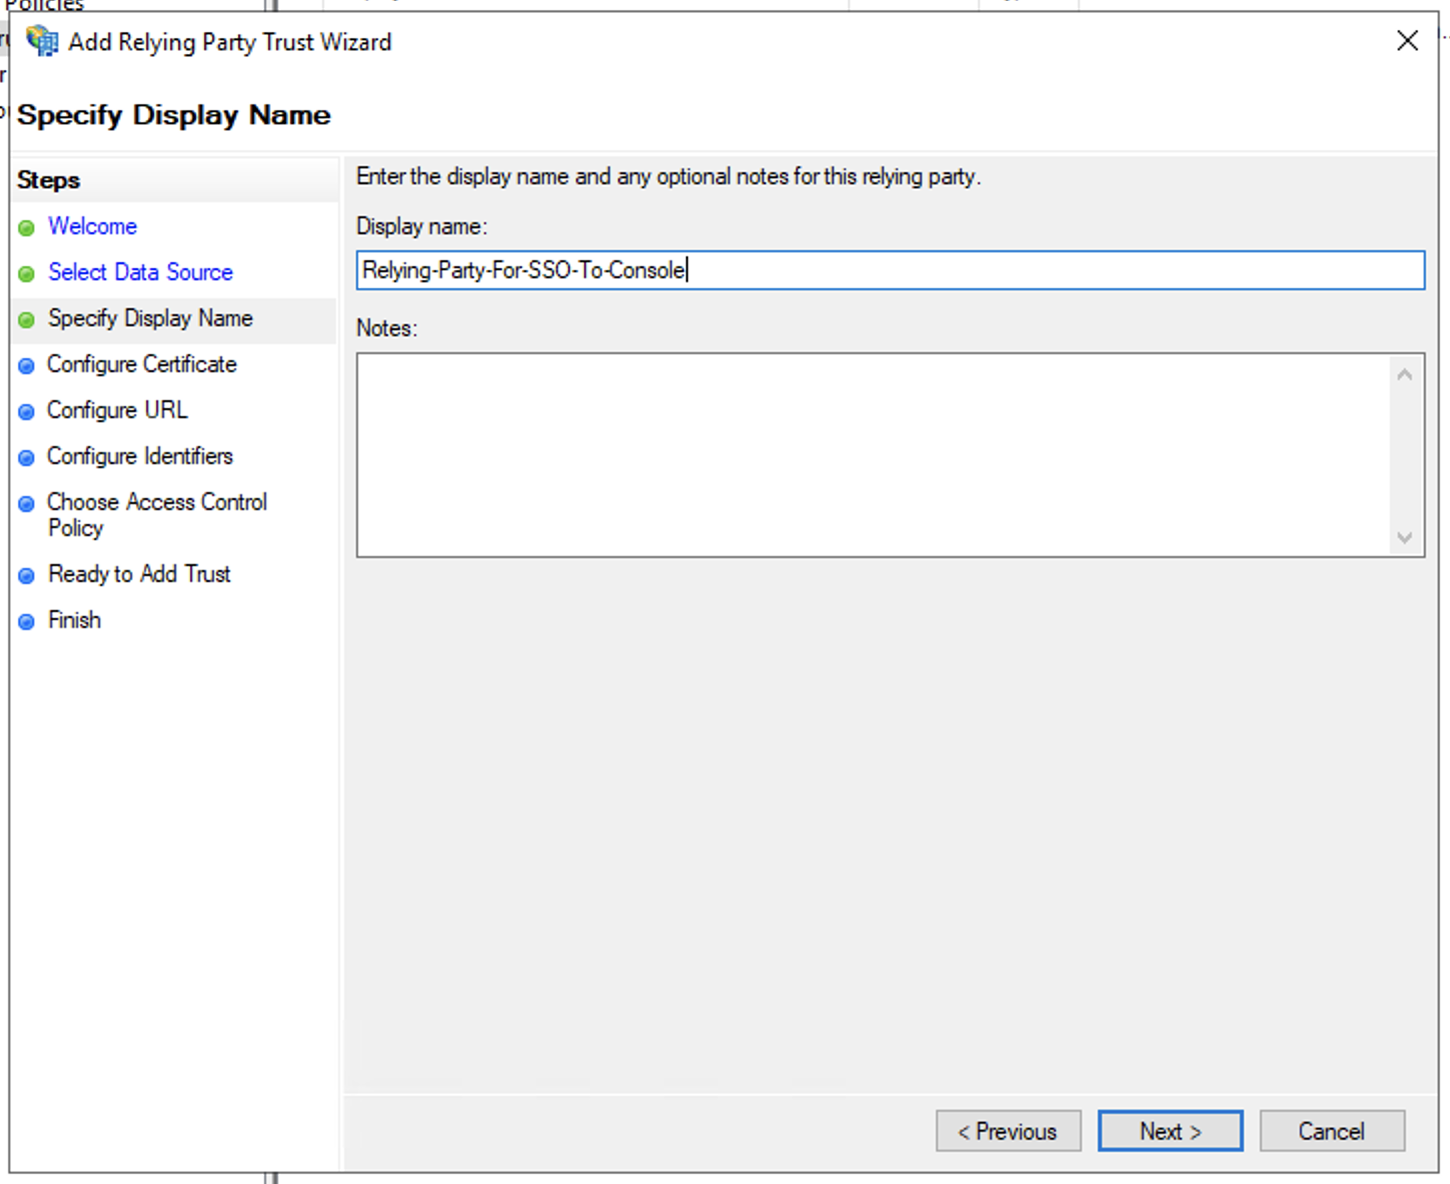
- In Specify Display Name windows, enter the Display name and click Next
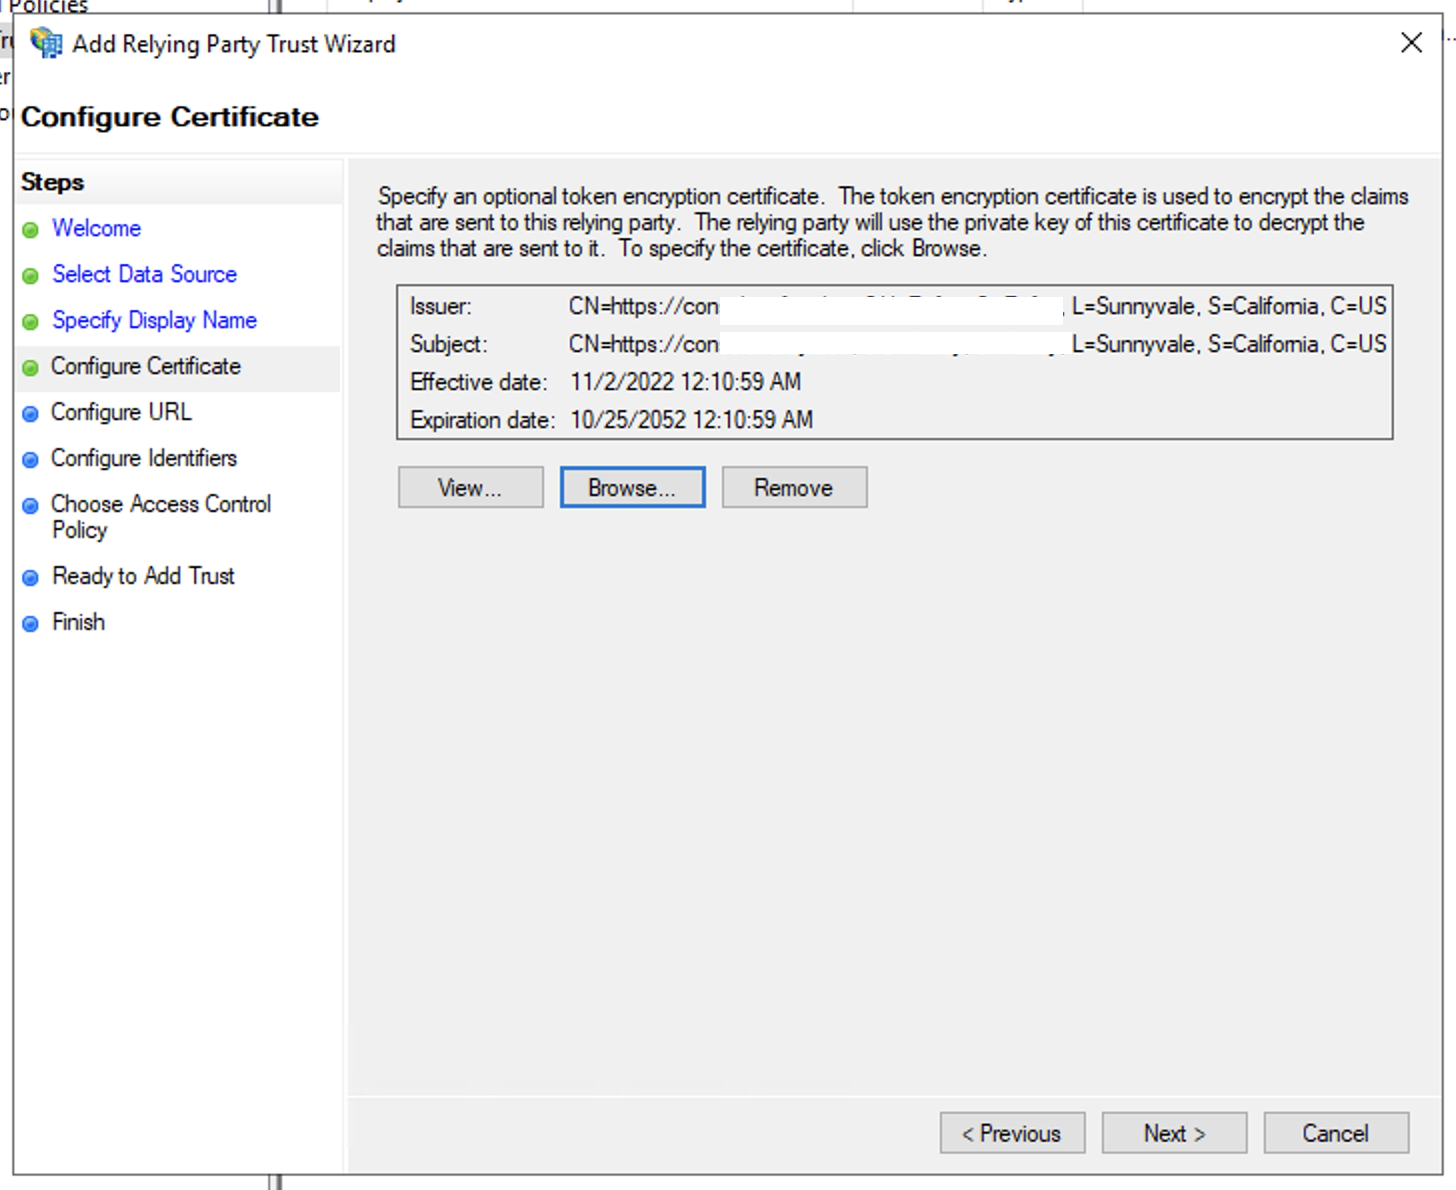
- (Optional) In Configure Certifcate windows, click Browse and select the Encryption Certificate (if encryption enabled) downloaded in Step 2 then click Next
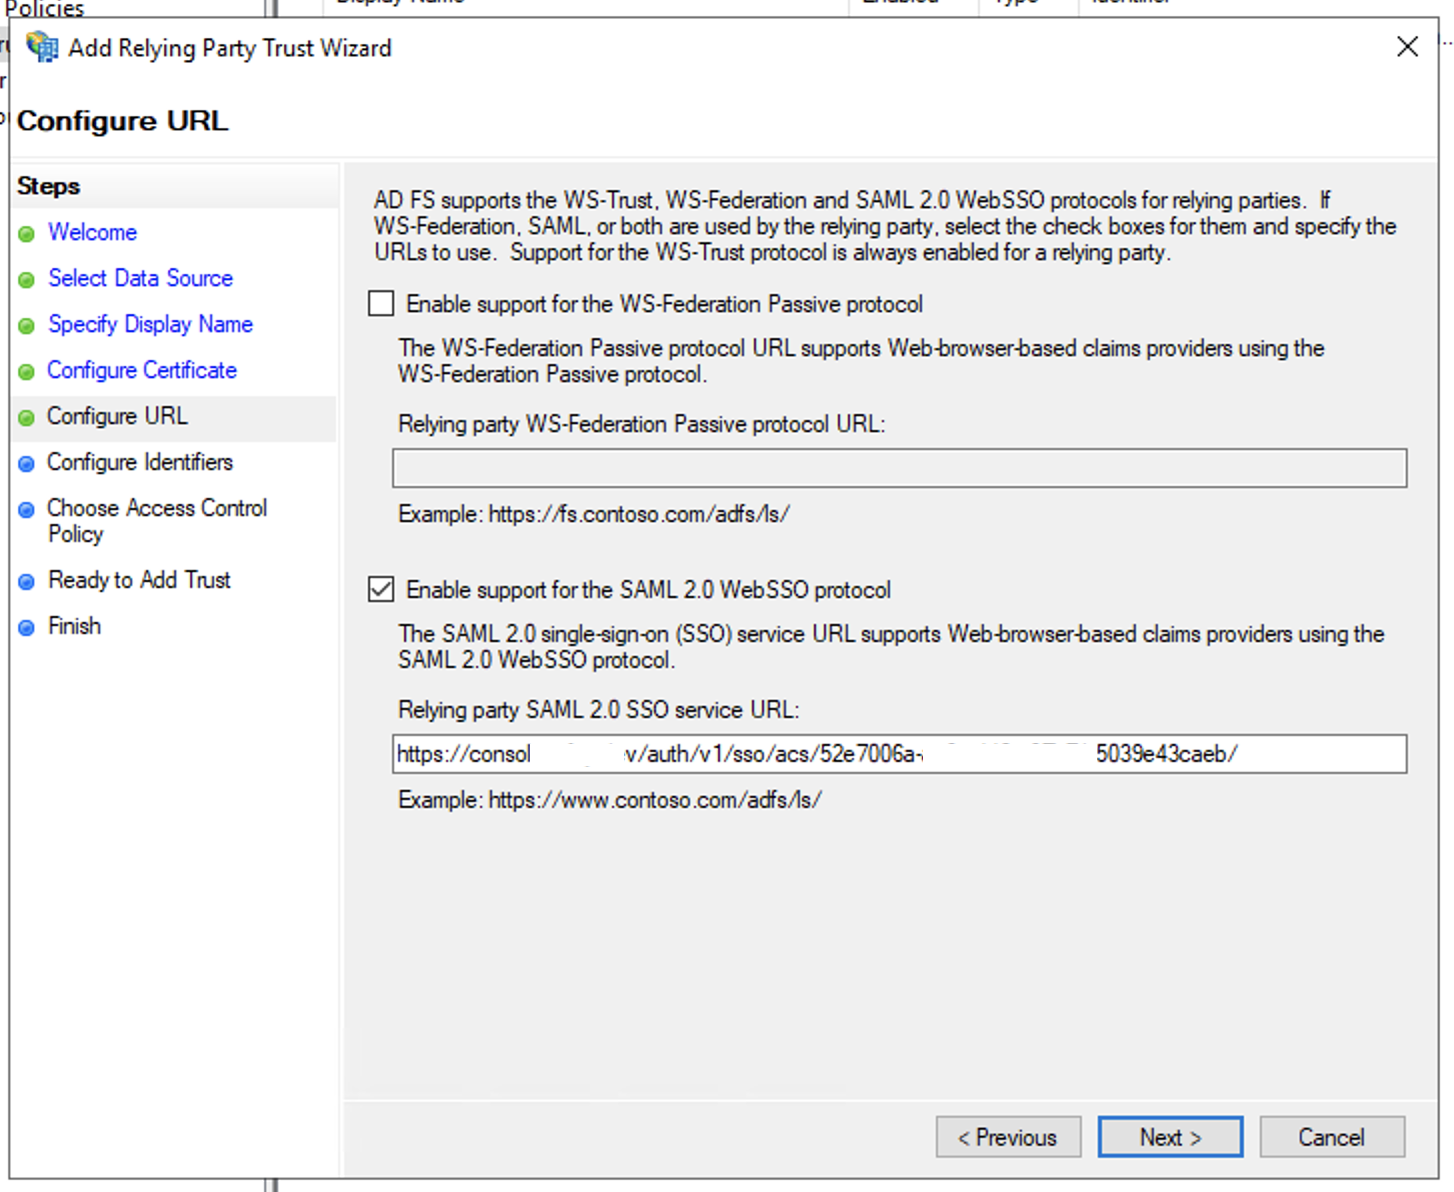
- In Configure URL windows, select Enable support for the SAML 2.0 WebSSO protocol and enter the Assertion Consumer Service (ACS) URL from the SP configuration in Step 2 to the Relying party SAML 2.0 SSO service URL text field and click Next
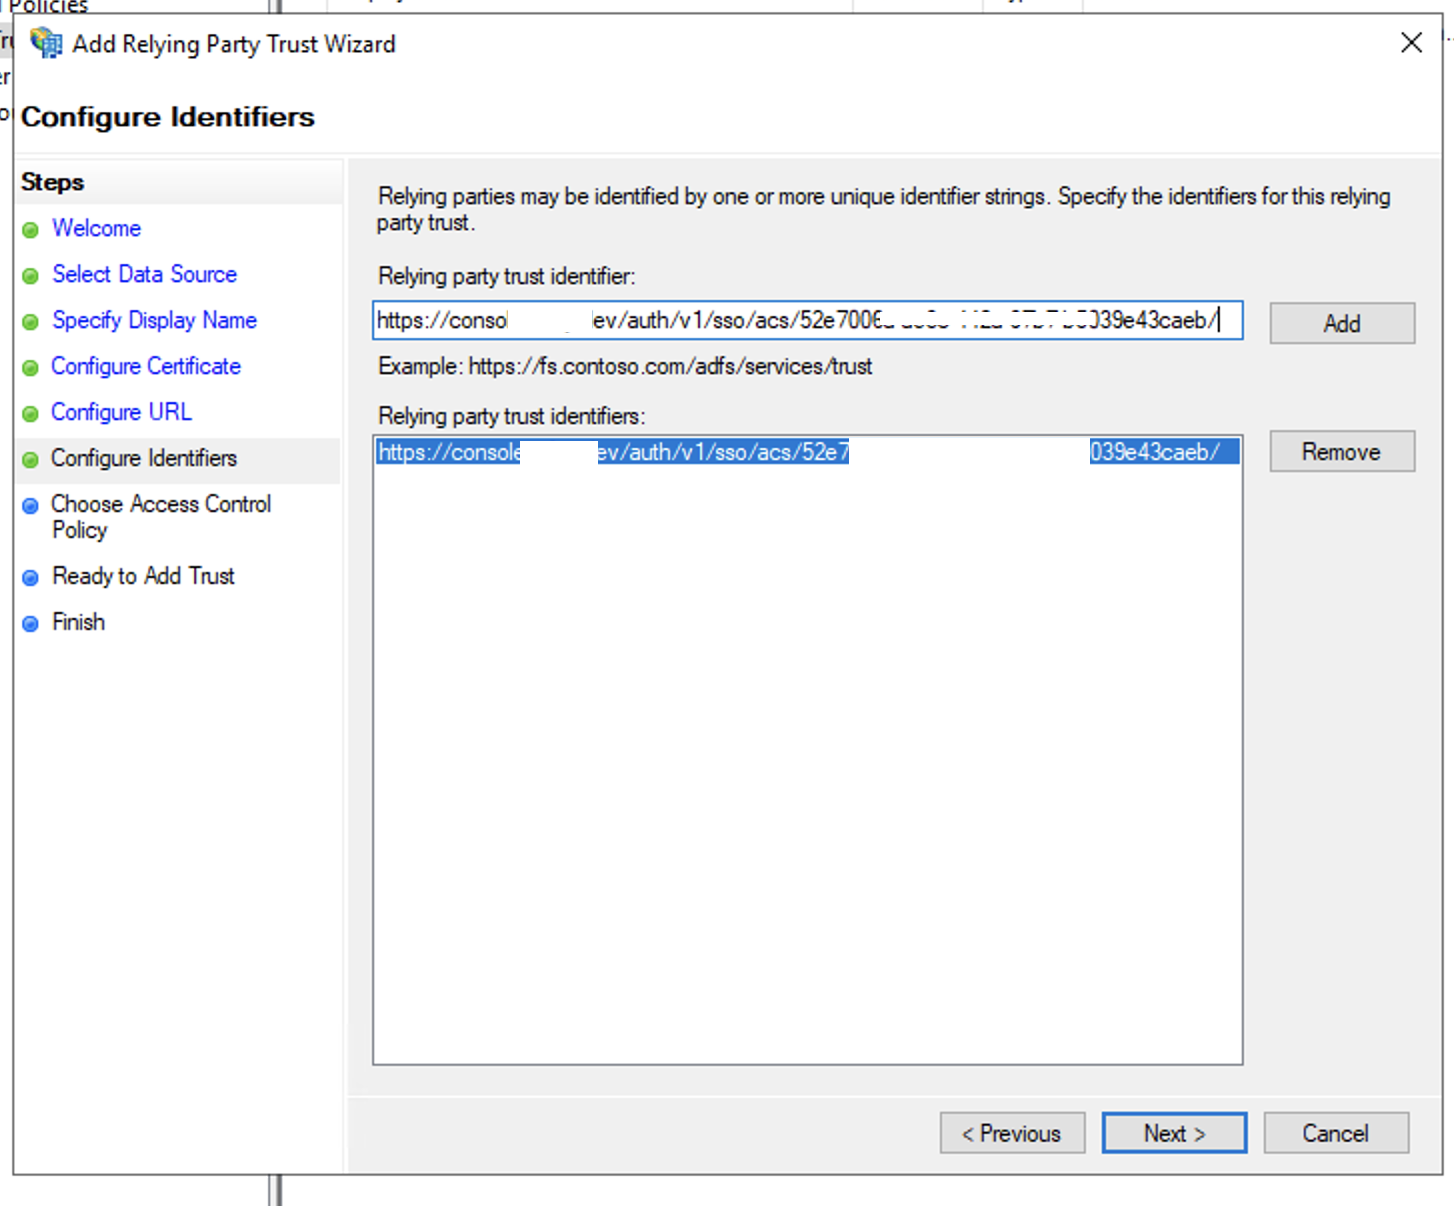
- In Configure Identifiers windows, enter the SP Entity ID from the SP configuration in Step 2 to the Relying party trust identifier text field, click Add and click Next
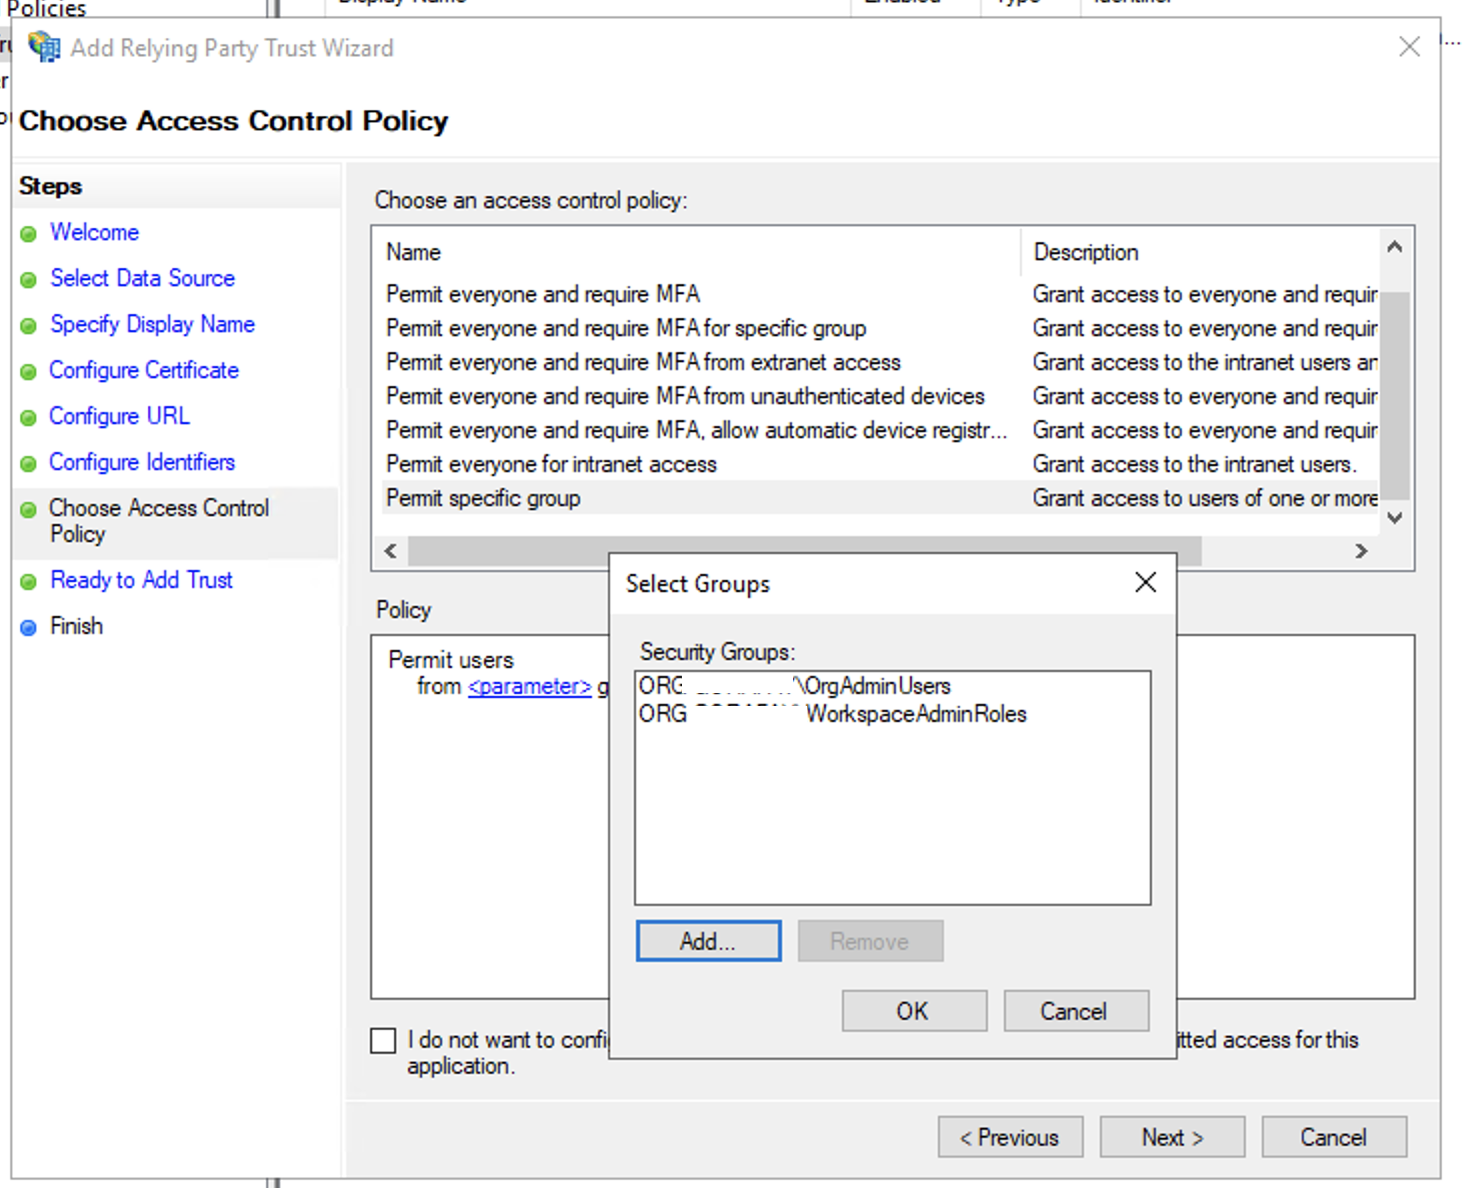
- In Choose Access Control Policy windows, select your desired access control policy for the relying party for example Permit everyone or Permit specific group and add the AD Groups to acess to this relying party trust, then click Next
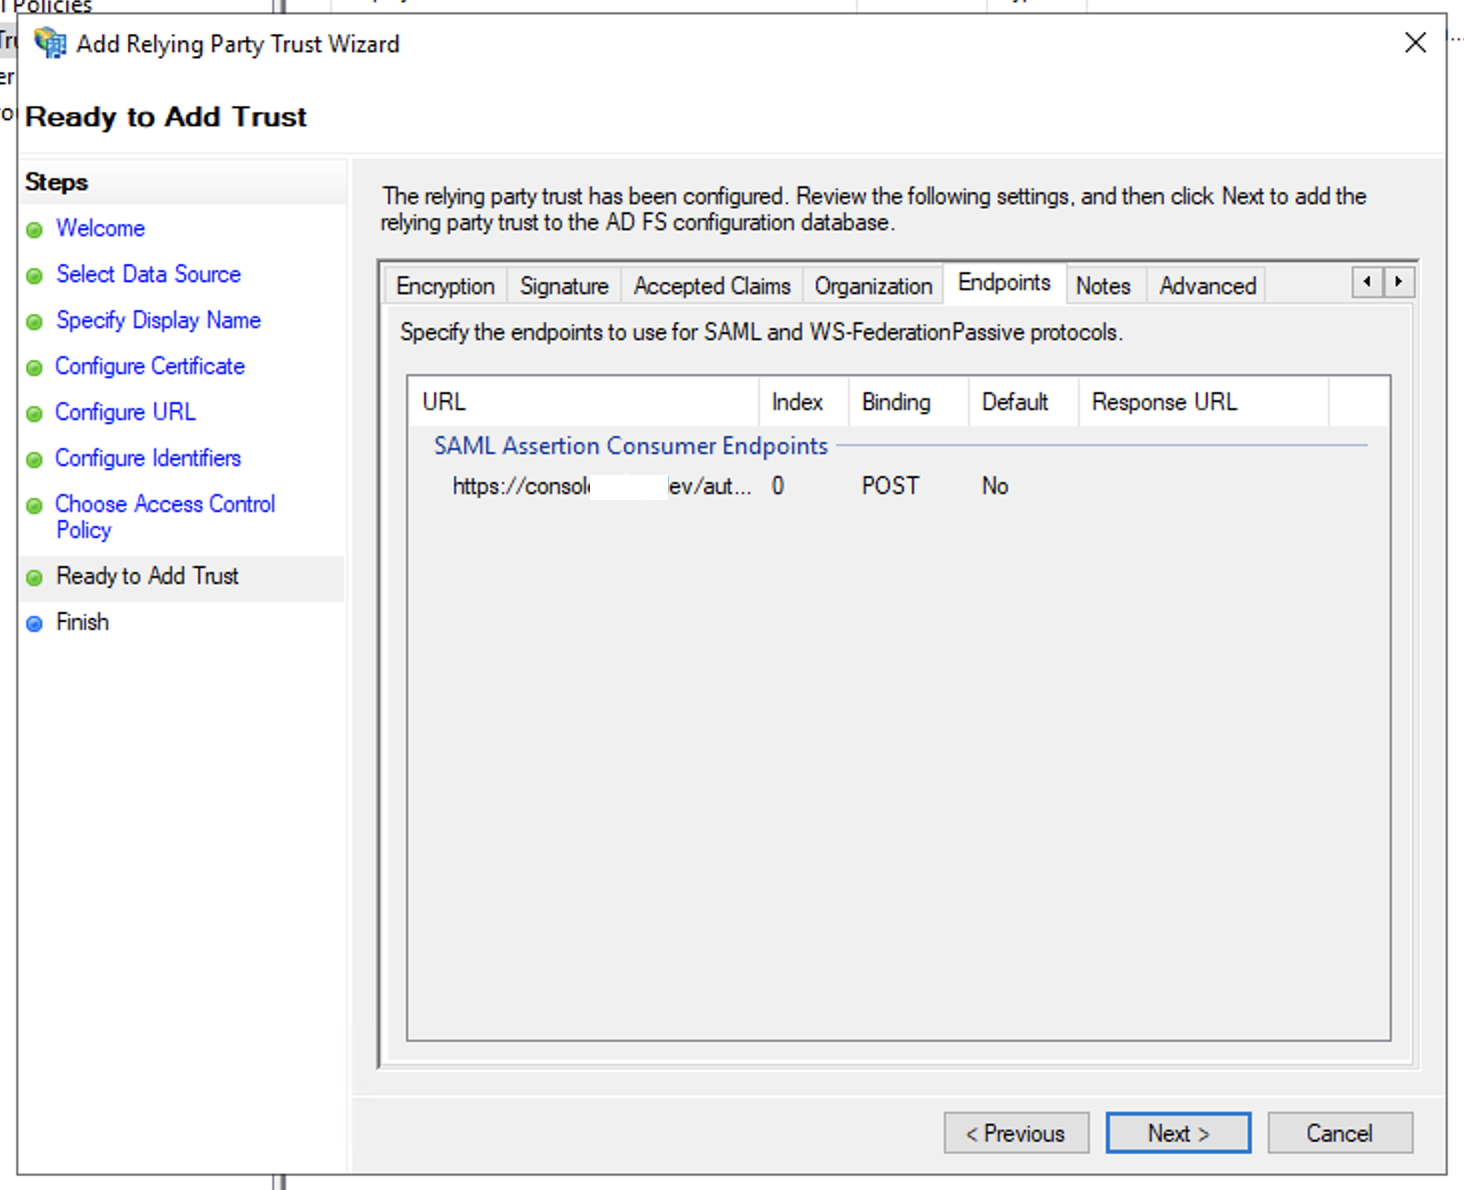
- In Ready To Add Trust windows, verify the relying trust information and click Next
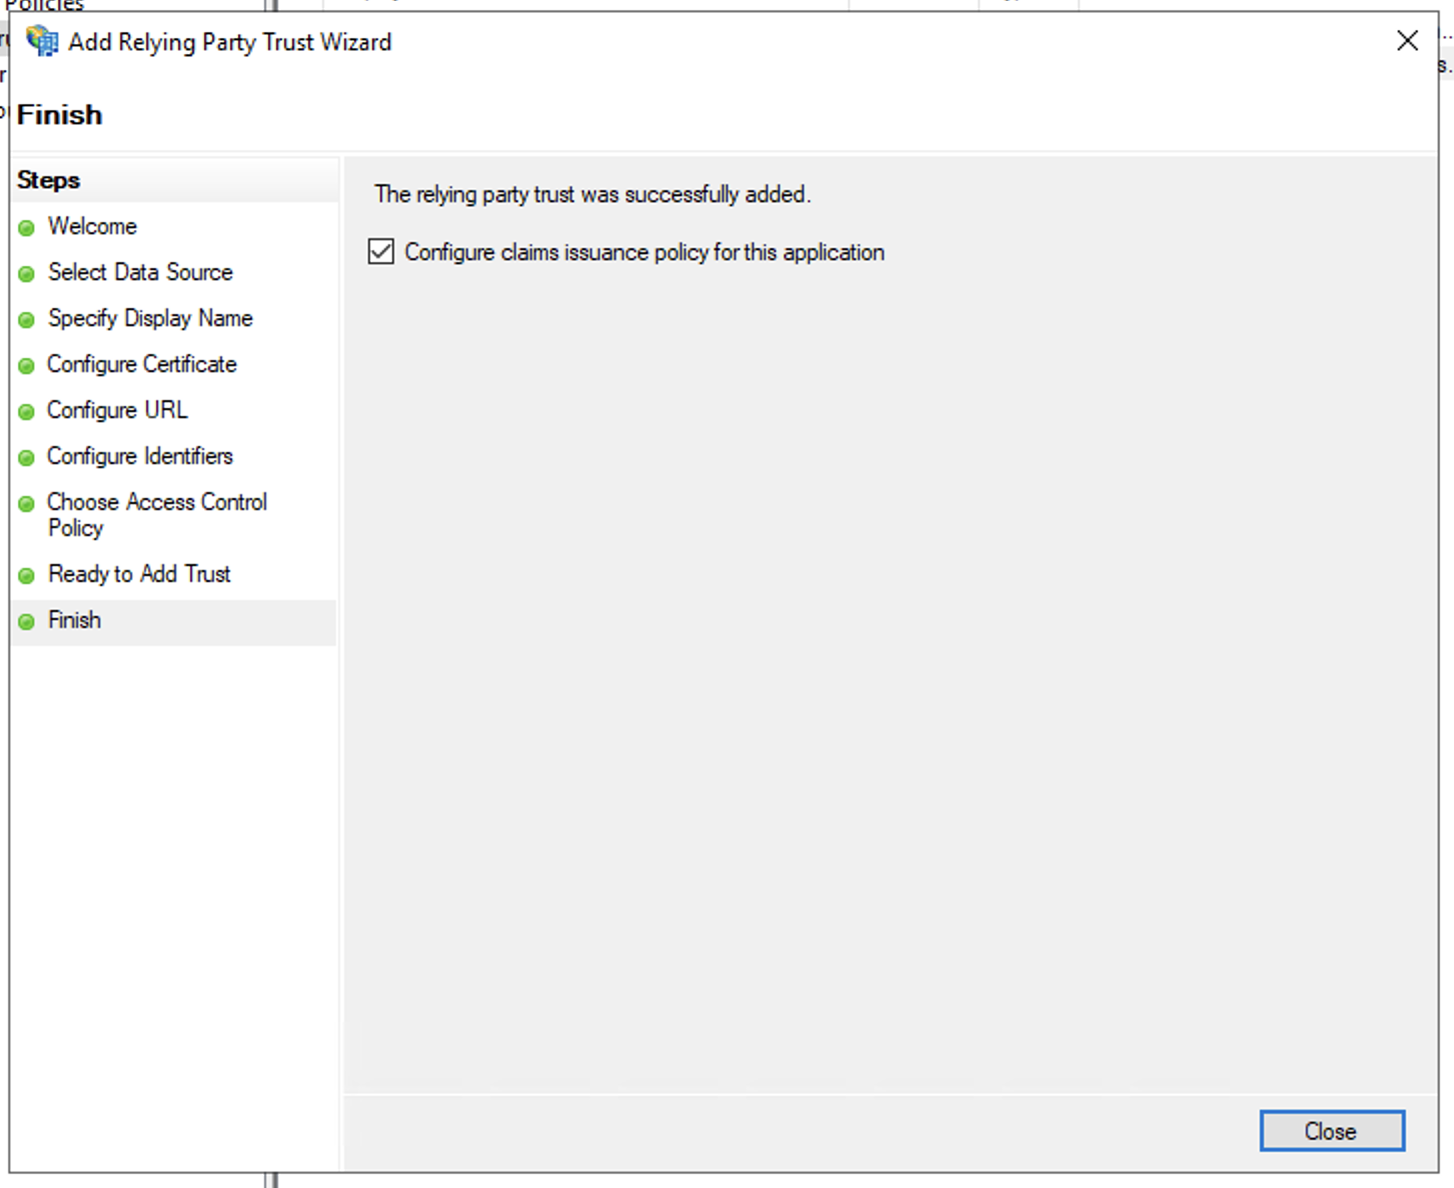
- In Finish windows, select Configure claims issuance policy for this application and click Close
Step 6: Add Claims For Relying Party Trust
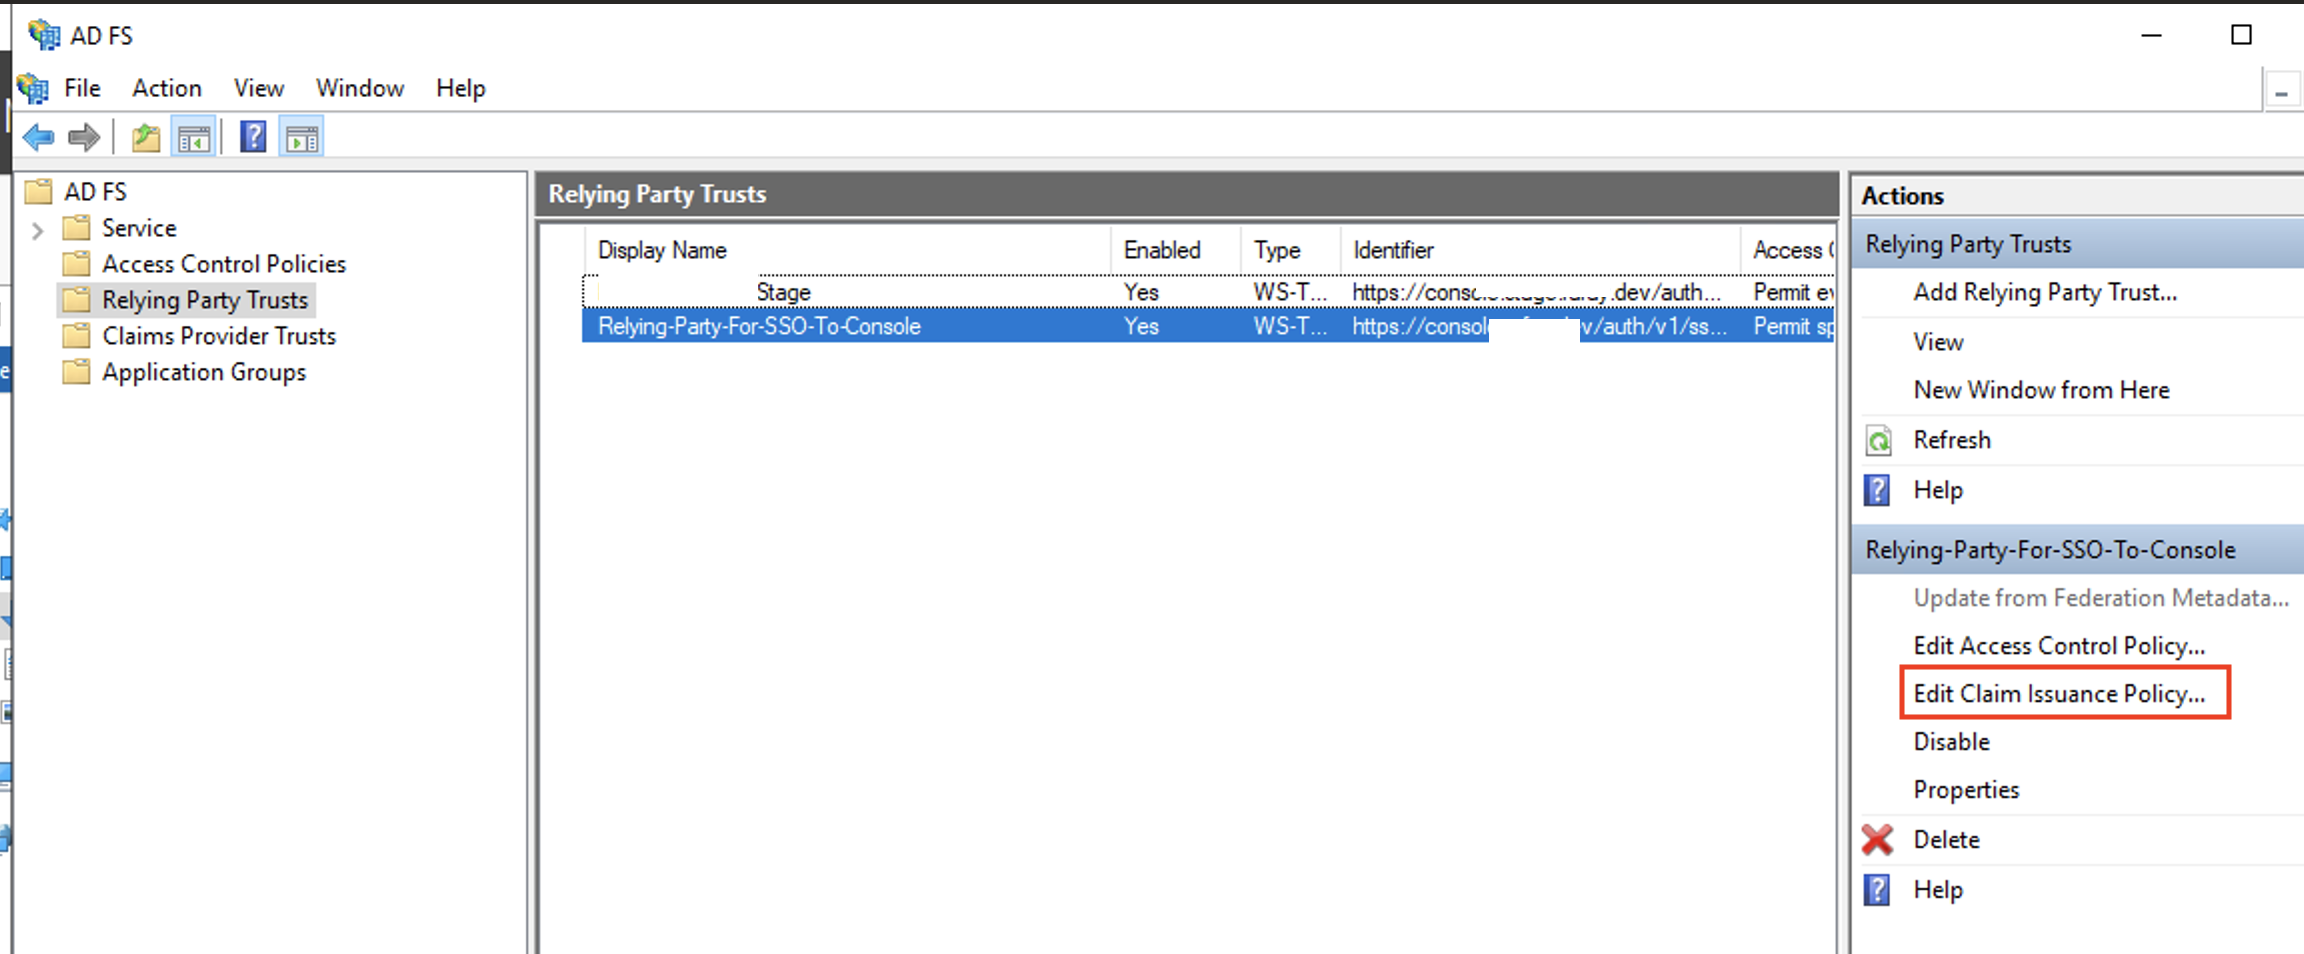
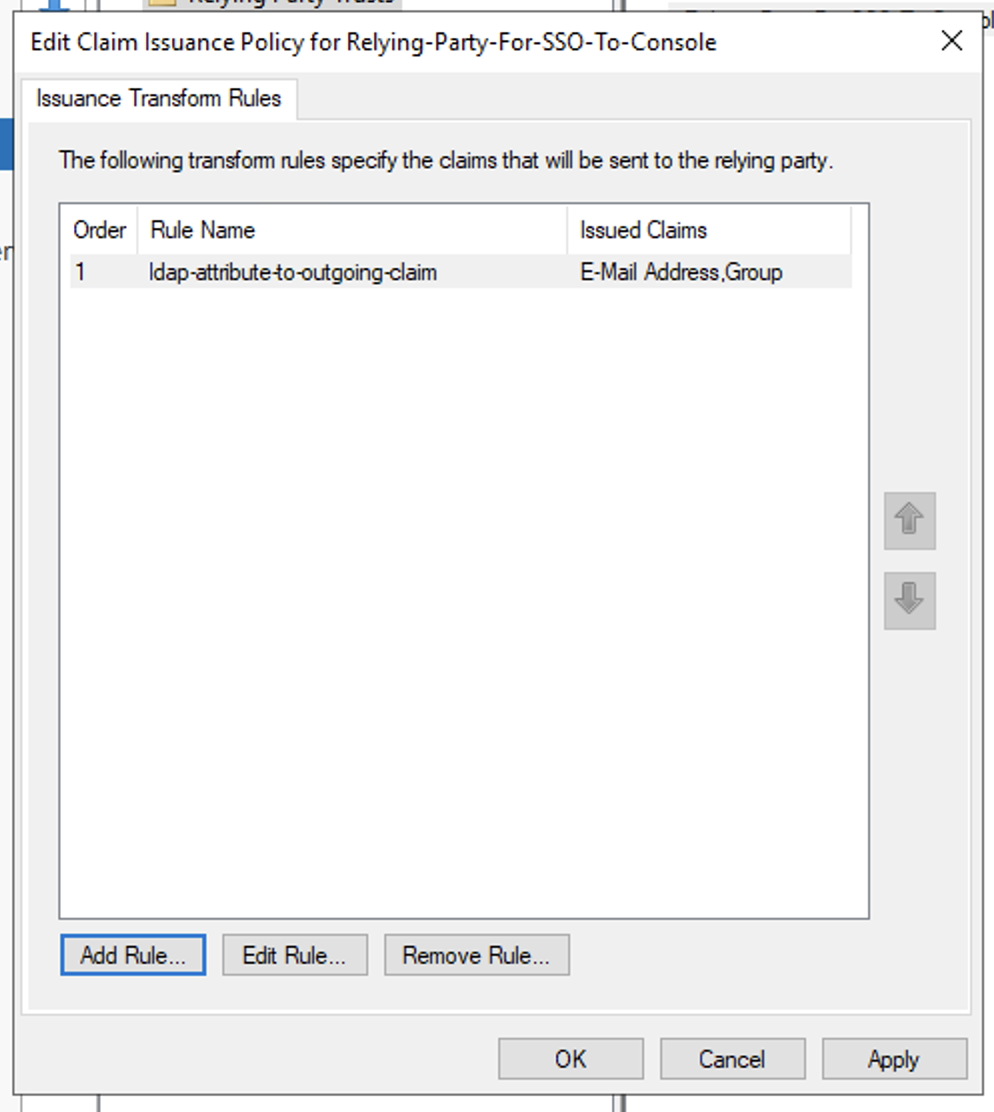
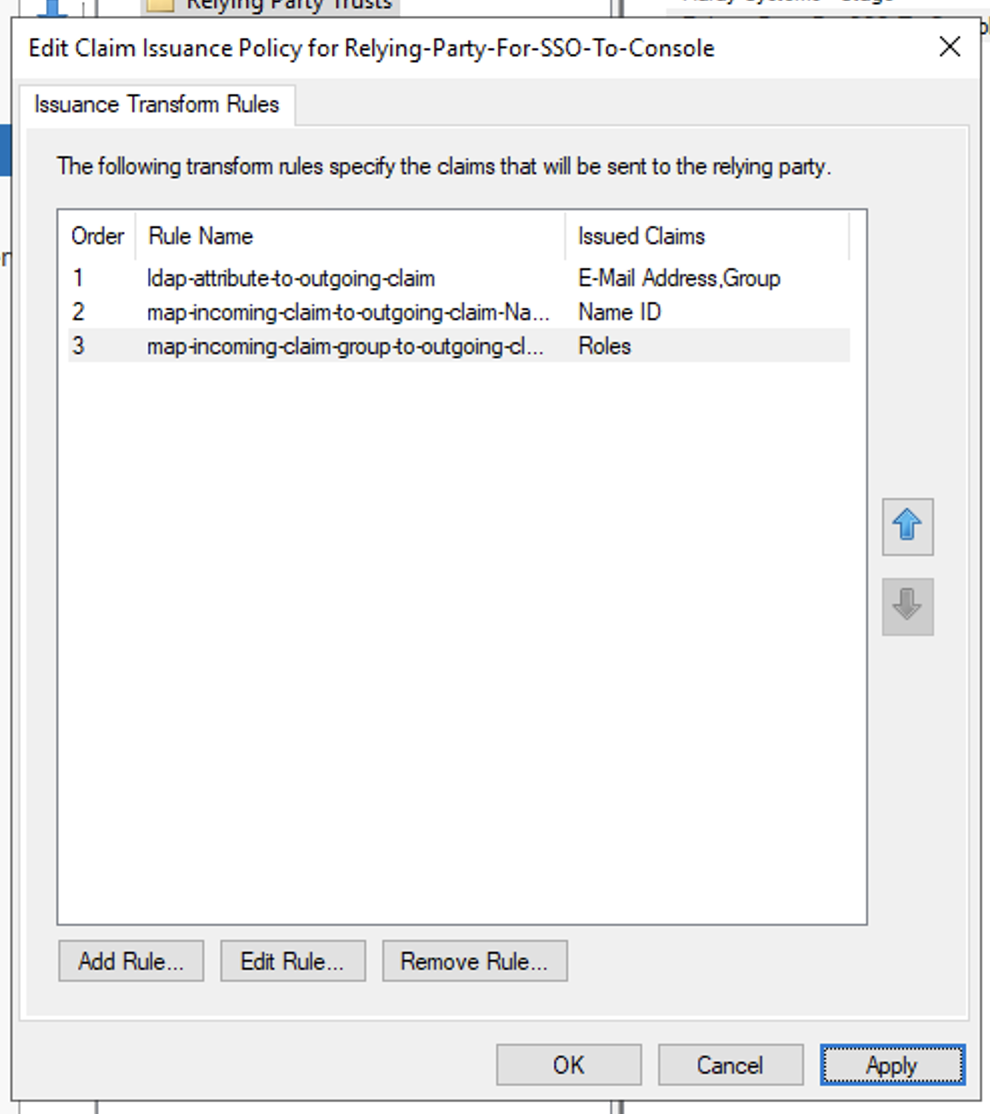
- Select the newly created replying party trust and click Actions > Edit Claim Issuance Policy to configure claims
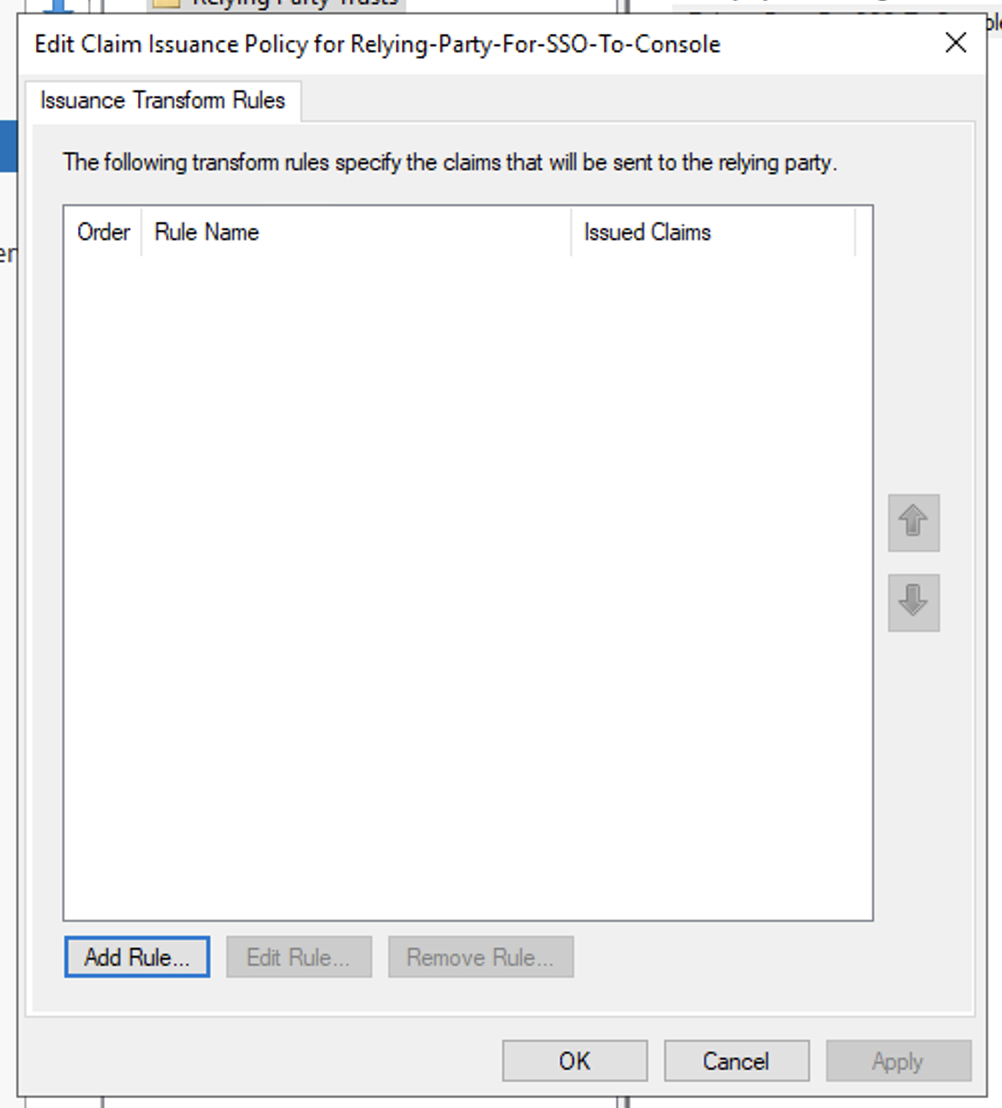
- In Issuance Transform Rules windows, click Add Rule to add the LDAP attribute claim rule
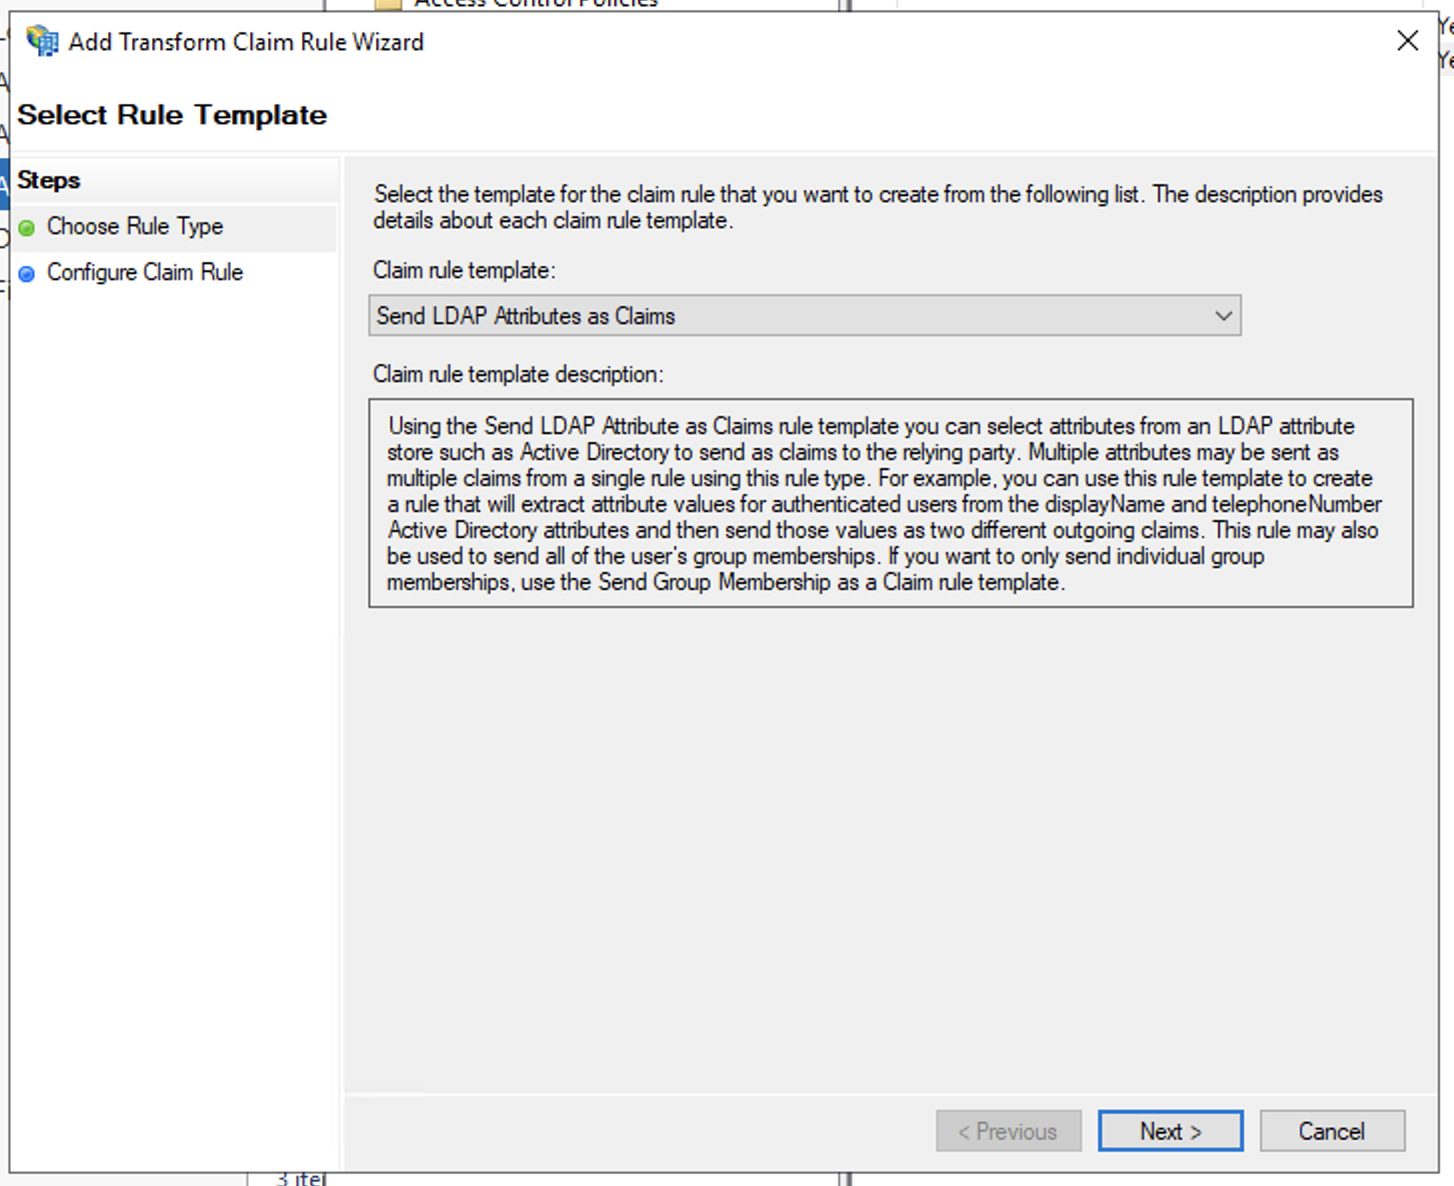
- In Add Transform Claim Rule Wizard > Choose Rule Type windows, select Send LDAP Attributes as Claims in the Claim rule template and click Next
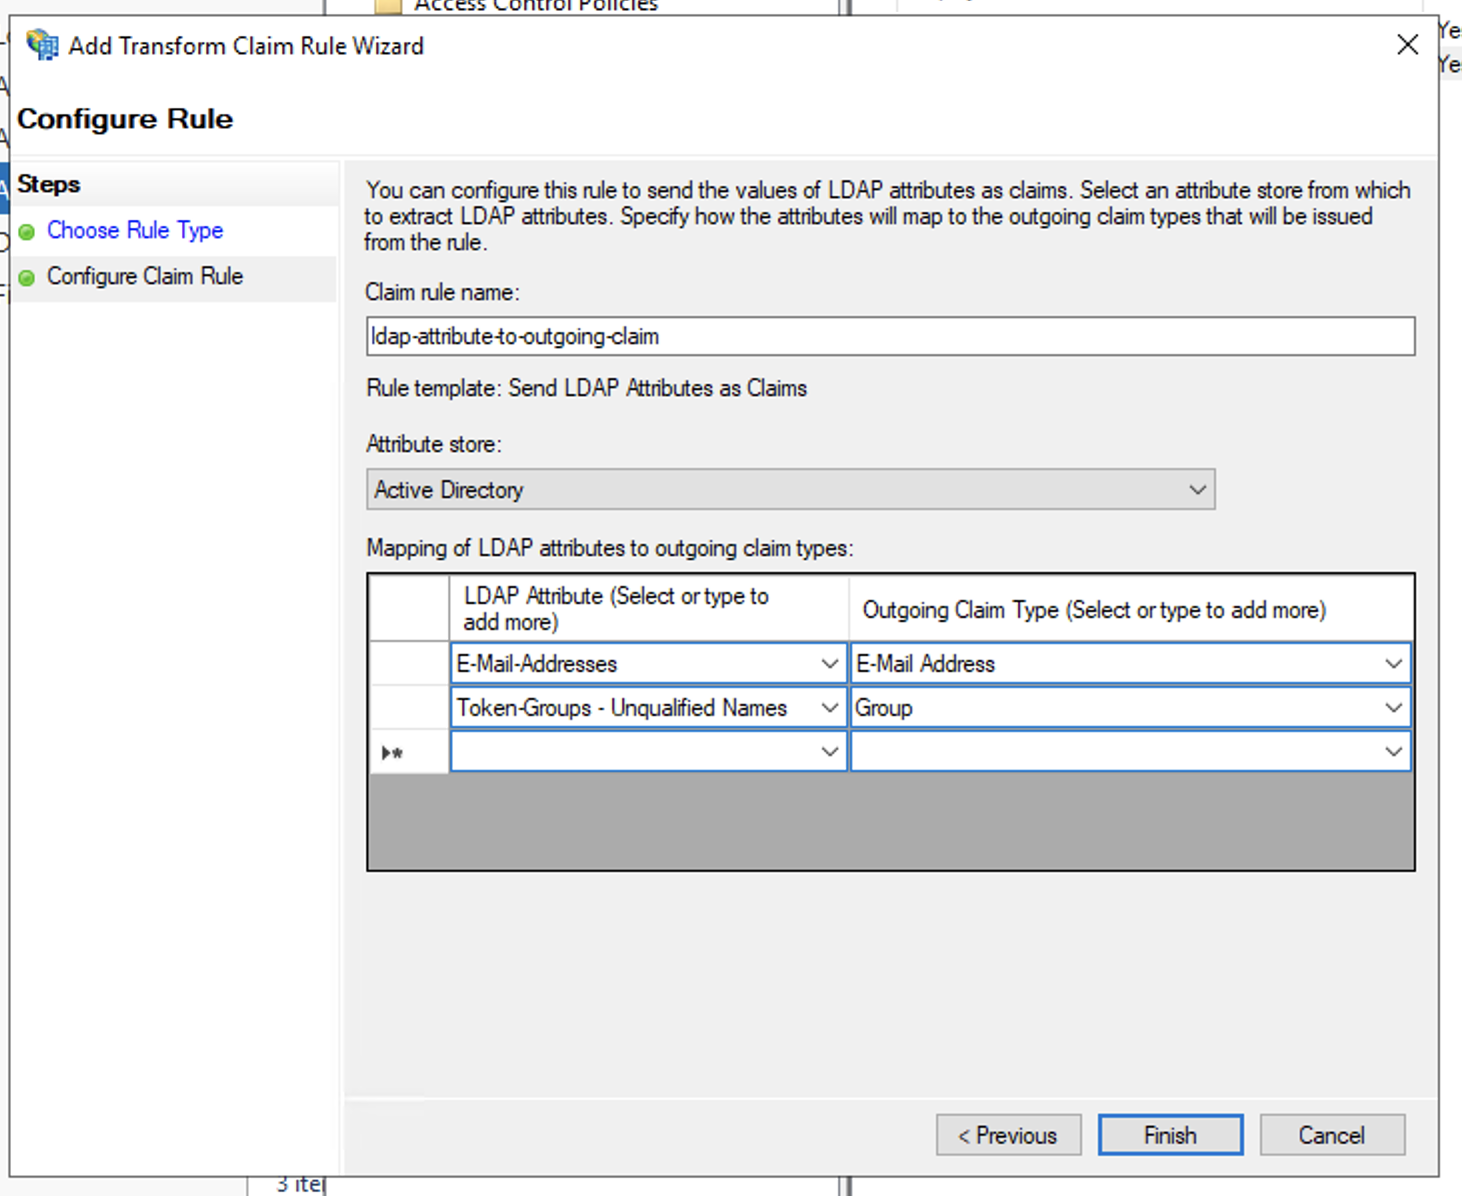
- In Configure Claim Rule windows:
- Enter Claim rule name,
- Select Active Directory for Attribute store
- Select LDAP Attribute E-Mail-Addresses (or User-Principal-Name if email is not configured for the user) to map as Outgoing Claim Type E-Mail Address
- Select LDAP Attribute Token-Groups - Unqualified Names to map as Outgoing Claim Type Group
- Then click Finish to create the LDAP attribute claim rule
- In Issuance Transform Rules windows, click Add Rule to add the transform an incoming claim rule for NameID
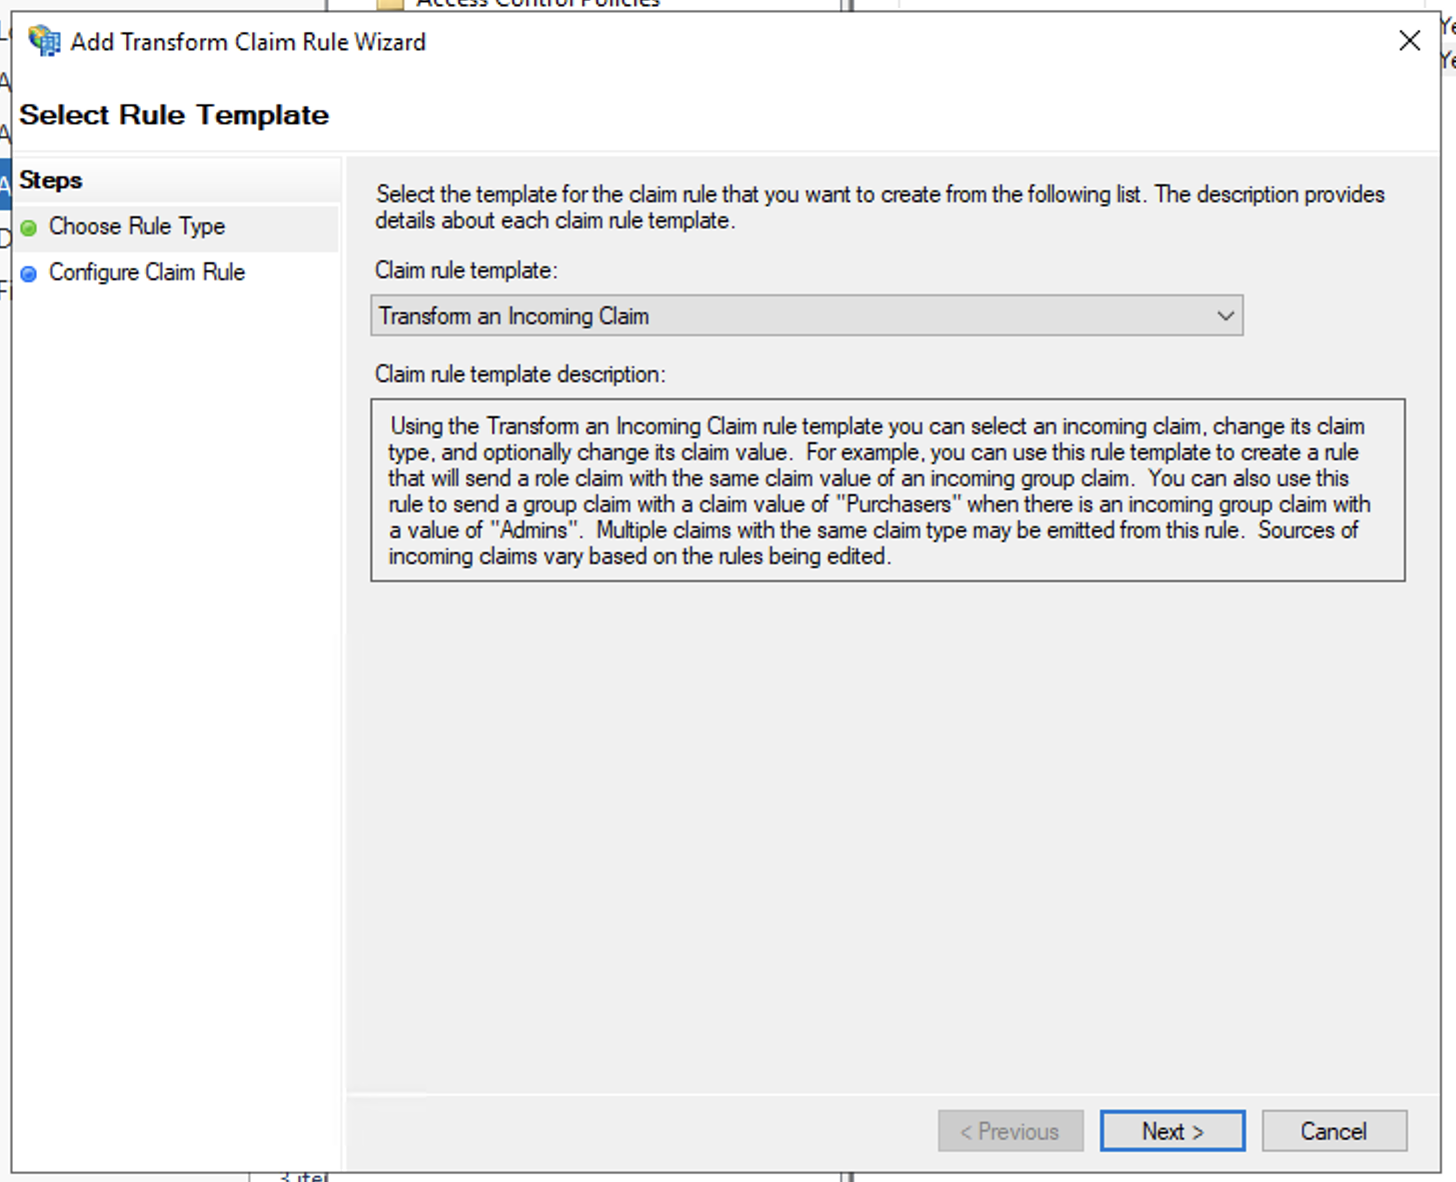
- In Add Transform Claim Rule Wizard > Choose Rule Type windows, select Transform an Incoming Claim in the Claim rule template and click Next
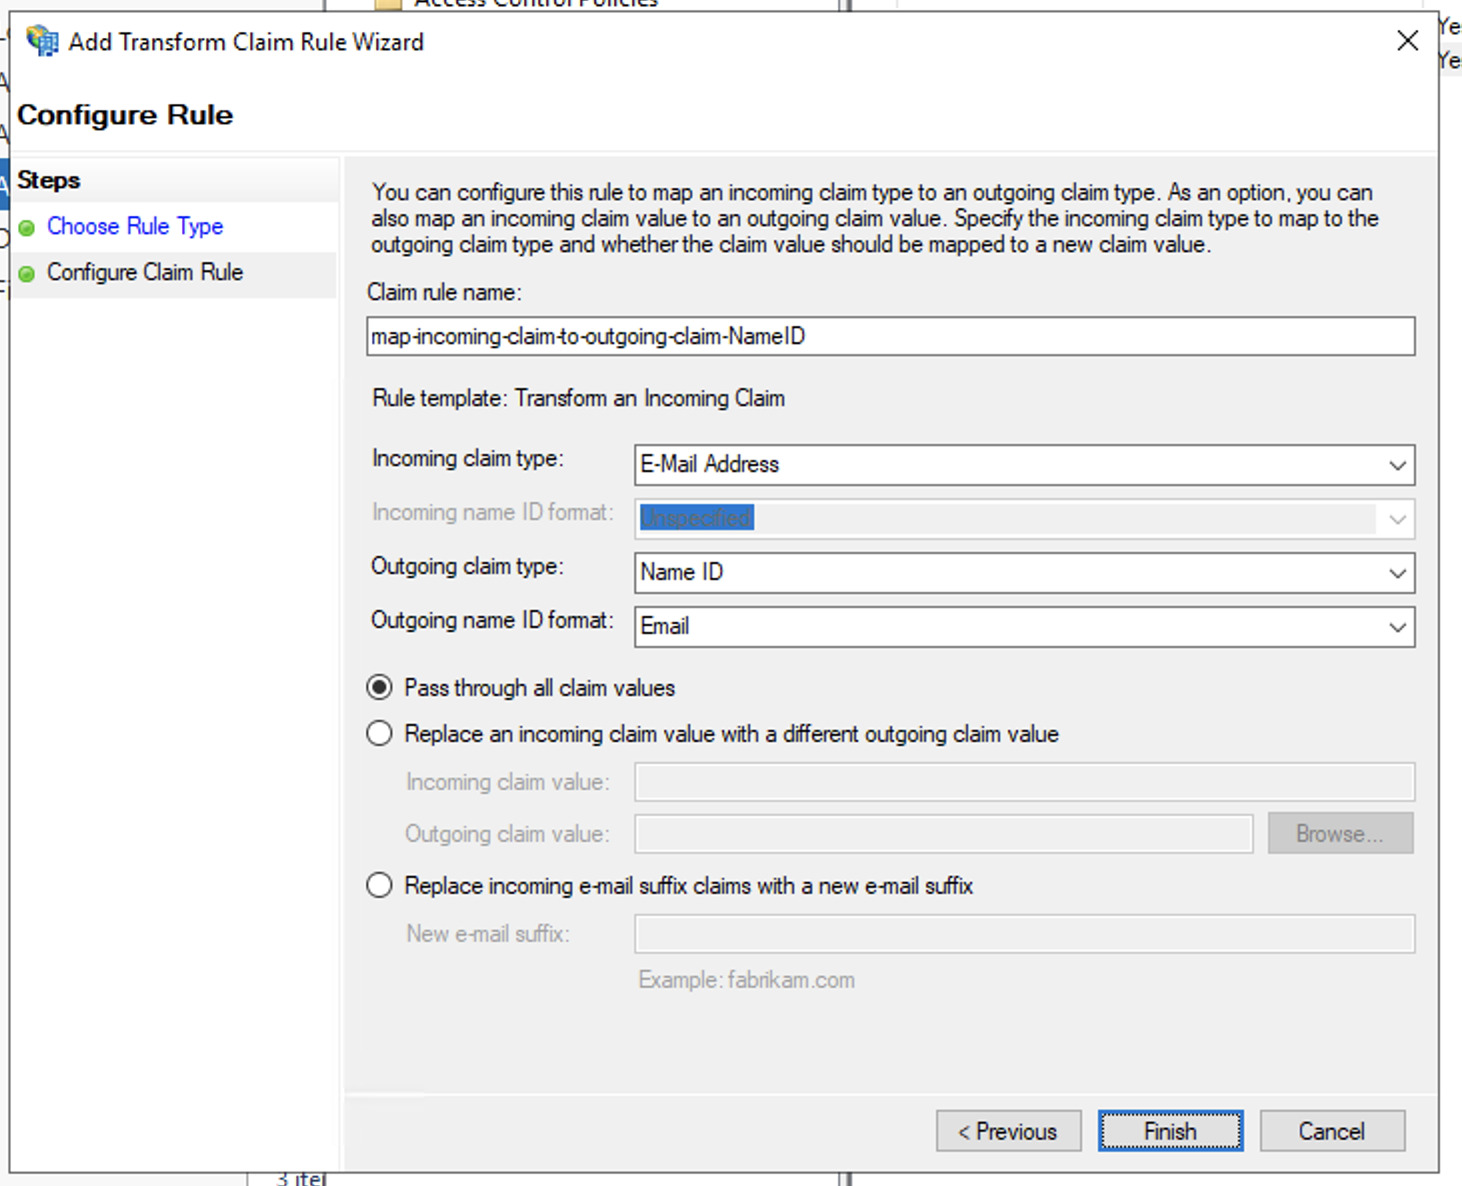
- In Configure Claim Rule windows:
- Enter Claim rule name,
- Select E-Mail Address for Incoming claim type
- Select Name ID for Outgoing claim type
- Select Email for Outgoing name ID format
- Select Pass through all claim values
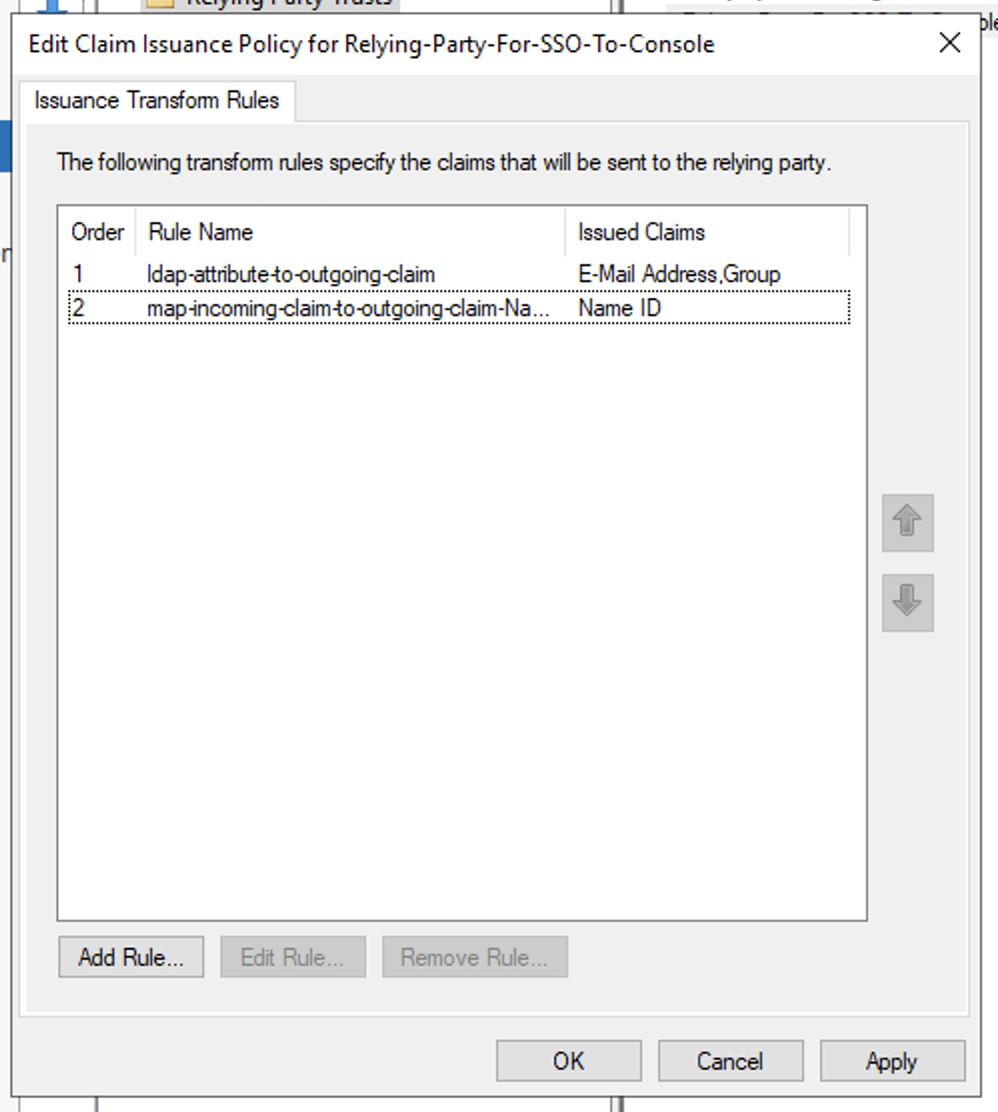
- Then click Finish to create the transform an incoming claim rule for NameID
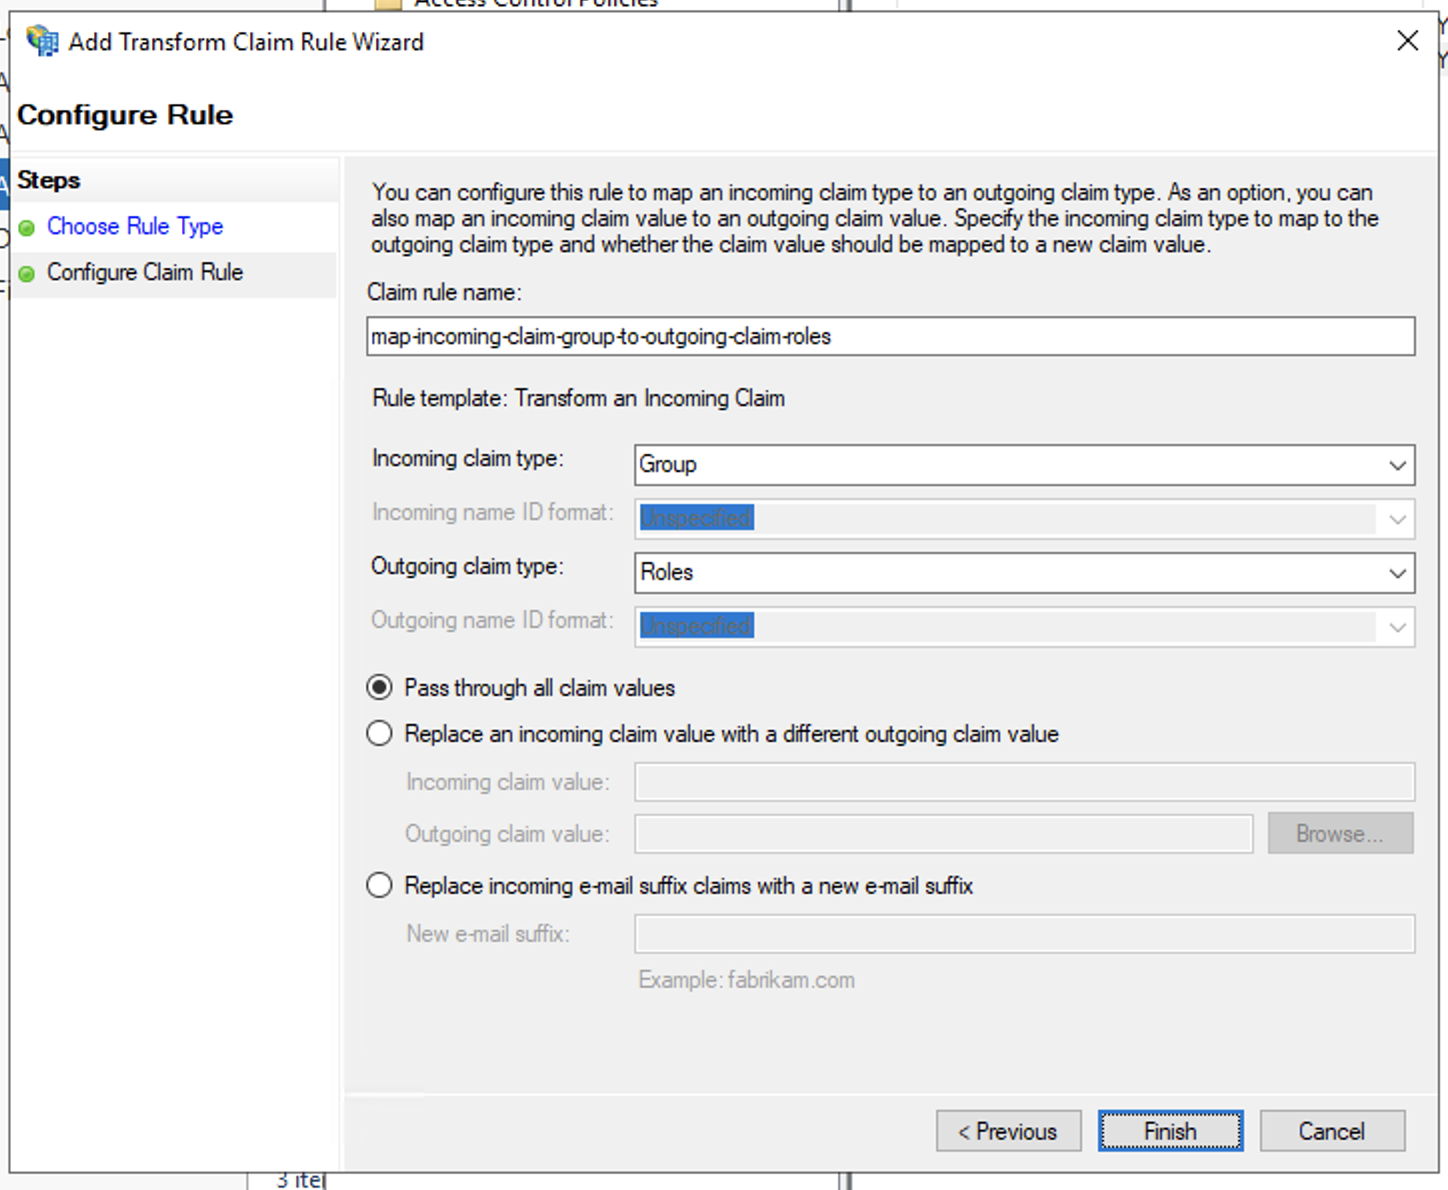
- In Issuance Transform Rules windows, click Add Rule to add the transform an incoming claim rule for Group Attribute
- In Add Transform Claim Rule Wizard > Choose Rule Type windows, select Transform an Incoming Claim in the Claim rule template and click Next
- In Configure Claim Rule windows:
- Enter Claim rule name,
- Select Group for Incoming claim type
- Enter the value of Group Attribute Statement Name from Step 2 for Outgoing claim type
- Select Pass through all claim values
- Then click Finish to create the transform an incoming claim rule for Group Attribute
- Then click Apply and OK to finish configuring the Claim Issuance Policy for the relying party trust
Step 7: Groups Configuration In Web Console
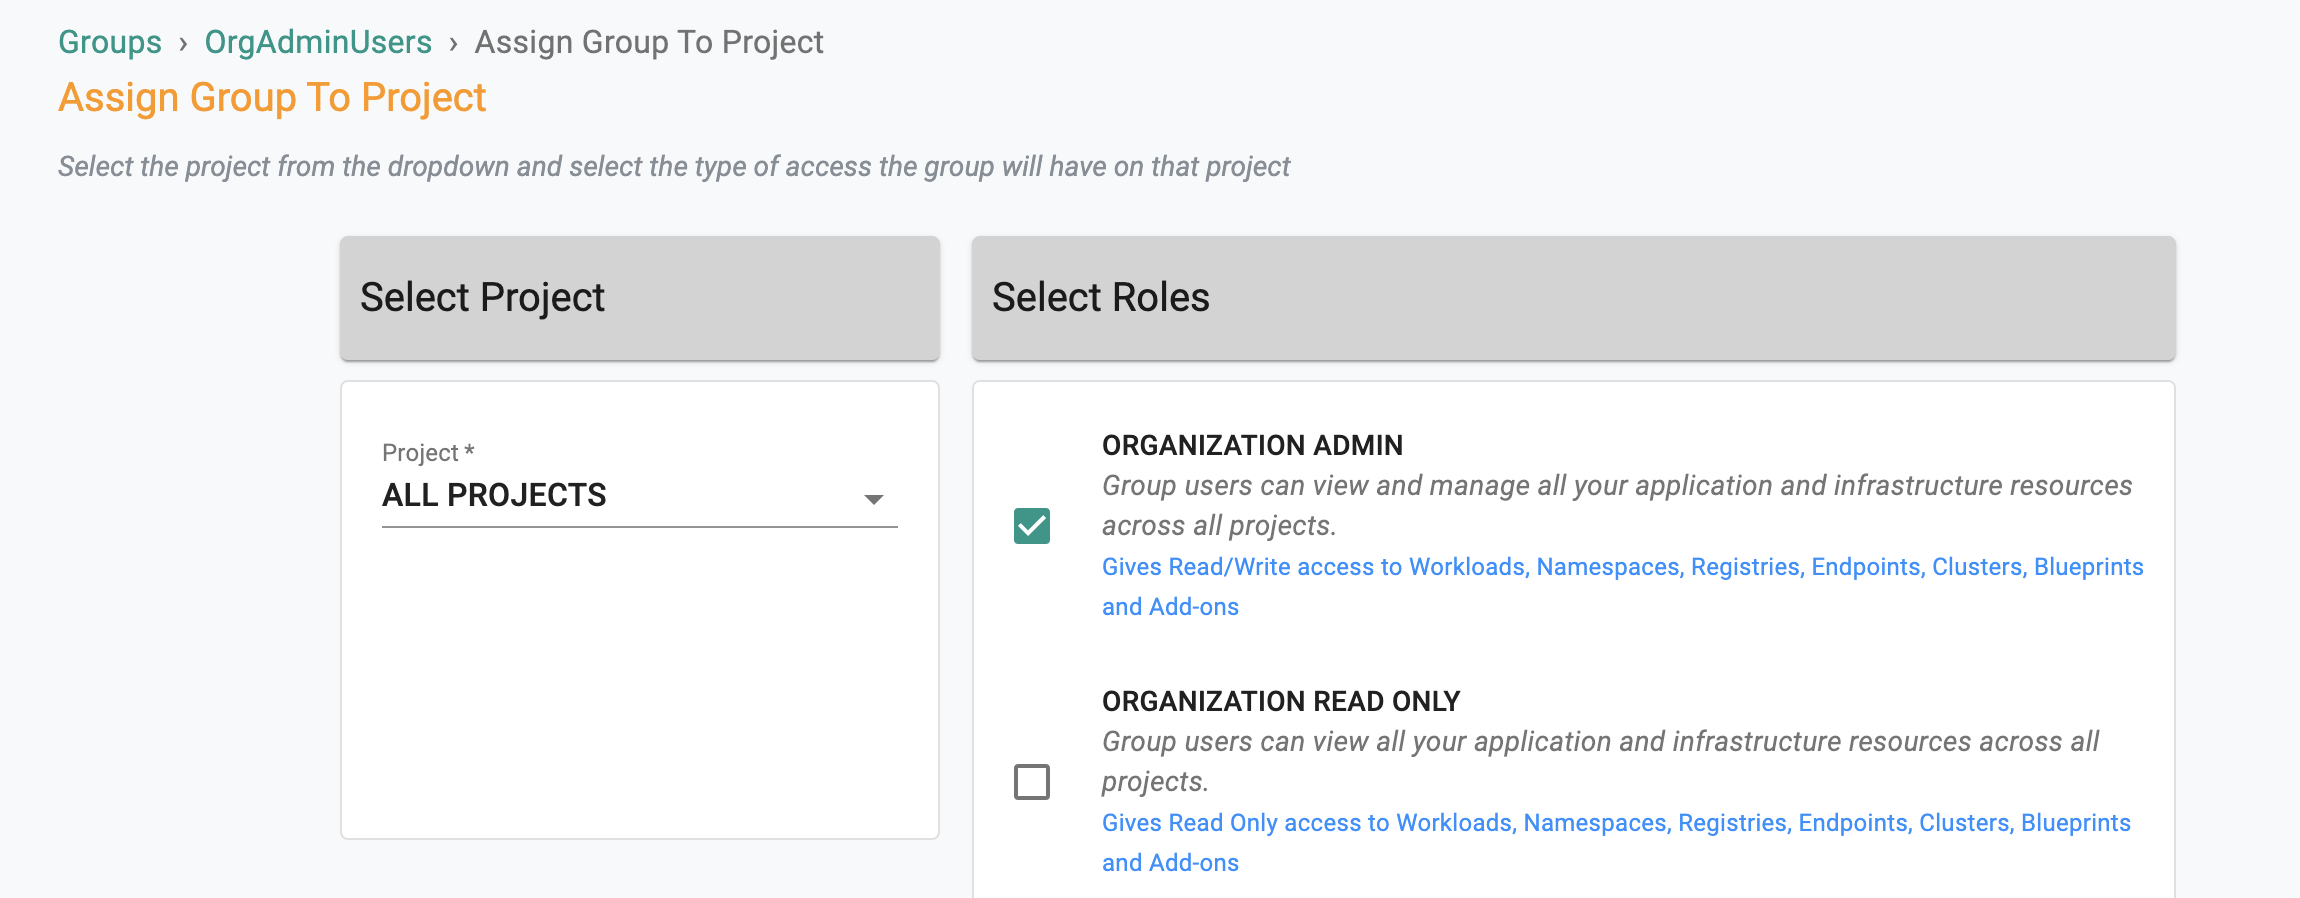
Identical named groups with the Active Directory group names need to be created in your Org. Ensure that these groups are mapped to the appropriate Projects with the correct privileges. In the example below, the Group "OrgAdminUsers" is configured as an "Organization Admin" with access to all Projects.
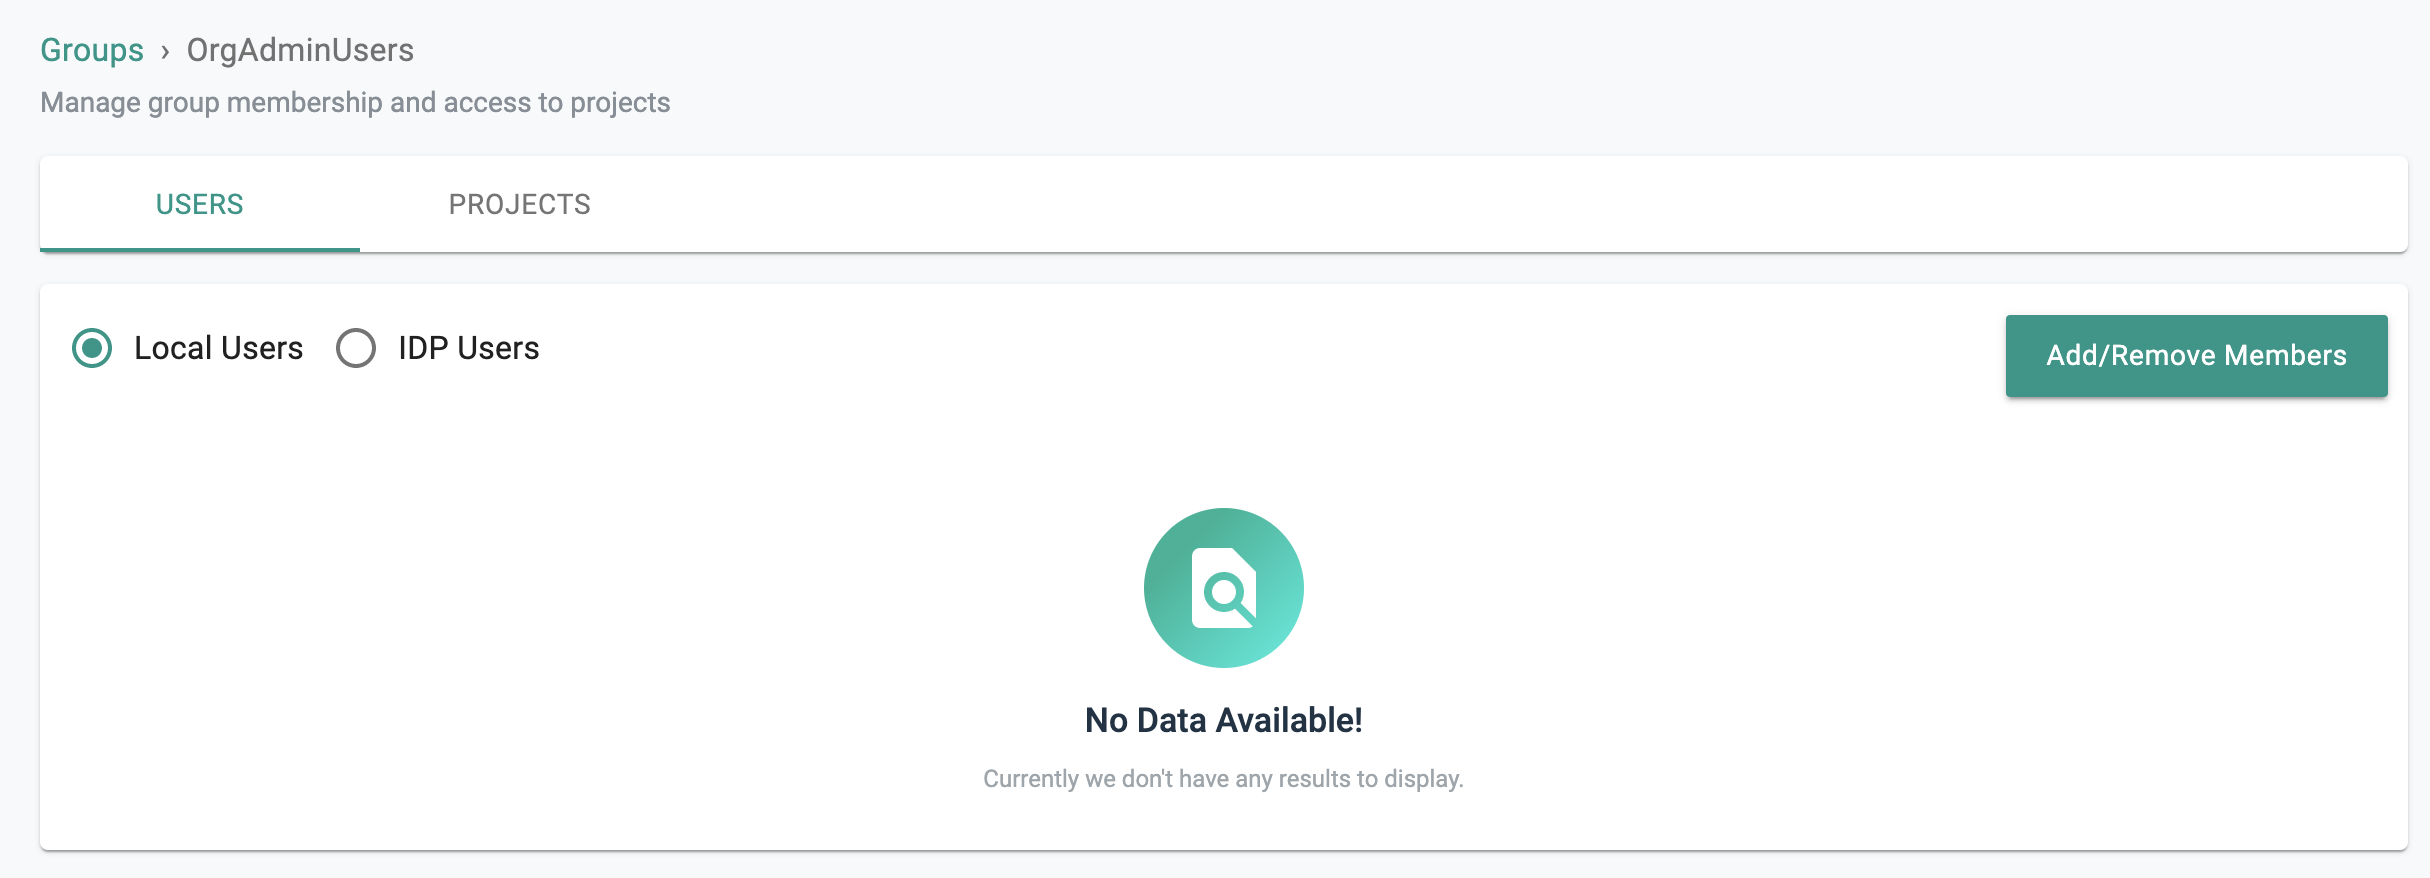
It is important to emphasize that because of SSO via ADFS, user lifecycle management can be completely offloaded to the IdP. In the example below, note that there is no Local Users managed in the "OrgAdminUsers" group but there are IDP Users because they are all managed in ADFS.
- No Local Users in the "OrgAdminUsers"
- IDP Users in the "OrgAdminUsers"
Recap
Congratulations! You have successfully enabled SSO using ADFS. You should be able to login to the Web Console using your ADFS credentials.
