Azure Integration
Cost Management needs access to the Microsoft Azure Billing Rate Card API to access accurate pricing data for your Kubernetes resources.
Users must perform the below steps and complete a few setups to create a Cost profile in the controller
Step 1: Custom Azure Role Creation
- Create an Azure role definition. Below is an example file, in which the user must replace YOUR_SUBSCRIPTION_ID with the Subscription ID where your Kubernetes Clusters are running:
{
    "Name": "CostmanagementRole",
    "IsCustom": true,
    "Description": "Rate Card query role",
    "Actions": [
        "Microsoft.Compute/virtualMachines/vmSizes/read",
        "Microsoft.Resources/subscriptions/locations/read",
        "Microsoft.Resources/providers/read",
        "Microsoft.ContainerService/containerServices/read",
        "Microsoft.Commerce/RateCard/read"
    ],
    "AssignableScopes": [
        "/subscriptions/YOUR_SUBSCRIPTION_ID"
    ]
}
-
Save this file with a preferred name, for example, myazurerole.json
-
Run the below command to register that role with Azure
az role definition create --verbose --role-definition @myazurerole.json
Step 2: Create an Azure Service Principal
- Run the below command to create an Azure Service Principal
az ad sp create-for-rbac --name "<display_name>" --role "CostmanagementRole" --scope "/subscriptions/YOUR_SUBSCRIPTION_ID" --output json
Step 3: Azure Service Principal details to Cost Management
Supplying through Cloud Credentials
Create a cloud credentials of type Cost Management and provider Azure. Enter all the parameters
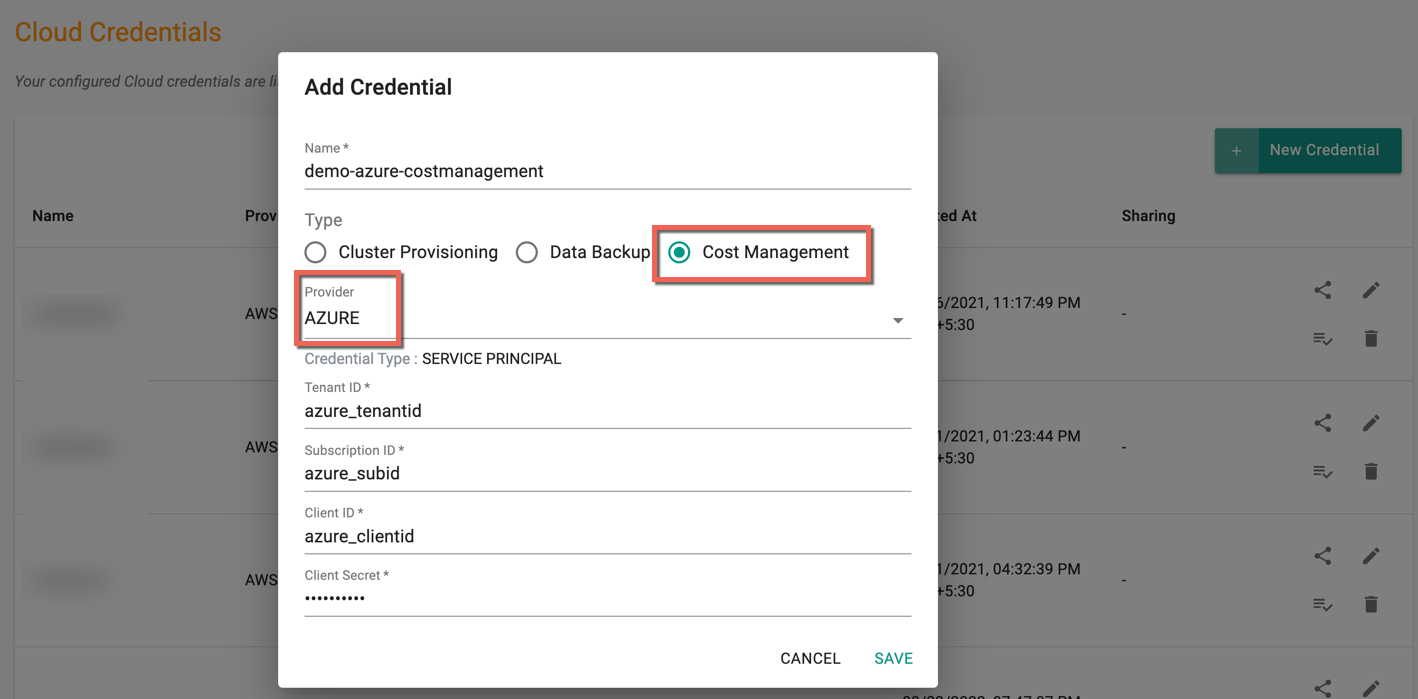
If selecting 'Cluster Provisioning Credentials', update the Cost Management role to include the Enterprise Application used for Cluster Provisioning, and skip Step 2 and Step 3
Refer Cloud credentials for more details
Step 4: Cost Profile
Create a custom role, enable Custom Pricing and provide Cloud credentials
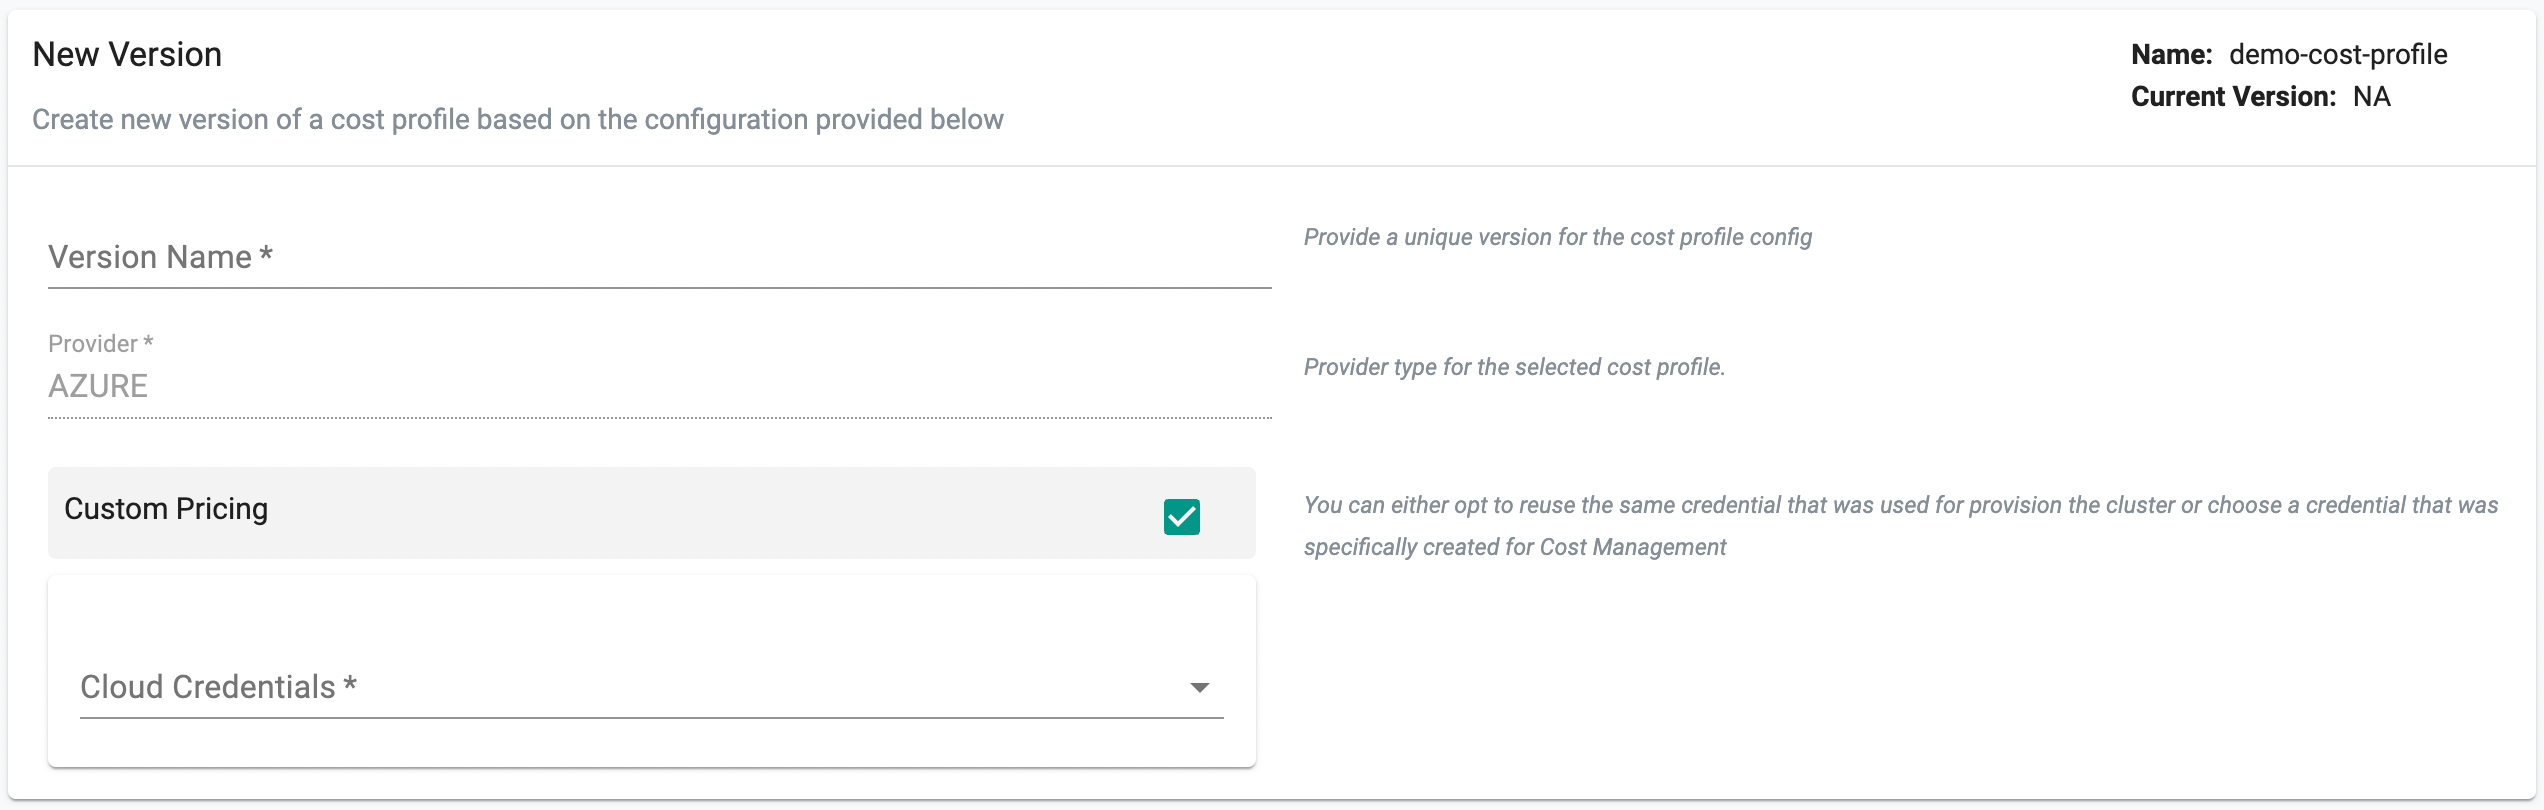
This Custom Cost Profile can be applied to clusters via blueprints.