Part 2: Using DaemonSets
This is Part 2 of a multi-part, self-paced quick start exercise.
Note
This exercise requires MicroK8s and uses alias kubectl='microk8s kubectl'. If you do not have these already installed and running, see "Prerequisites".
What Will You Do
In part 2, you will:
- Create two virtual machines to use as Worker Nodes.
- Create a Cluster using the microk8s-vm and one Worker Node.
- Use a DaemonSet on the Cluster.
- Add a second Worker Node to the Cluster to see that a Pod is added to the new Node.
Estimated Time
Estimated time for this exercise is 20 minutes. Watch a video of this exercise below.
Using DaemonSets
A DaemonSet ensures that some or all Nodes in a Cluster run a copy of a Pod. As Nodes are added to the Cluster, the DaemonSet can add Pods to them. As Nodes are removed from the Cluster, those Pods are garbage collected.
DaemonSets differ from Deployments because a DaemonSet will add Pods regardless of restrictions, like insufficient resource requirements. This is useful to ensure that critical Pods are added, like Pods used for logging or monitoring.
DaemonSets also differ from Deployments because a DaemonSet will add one Pod on each Node, while a Deployment will add the designated number of Pods on any of the Nodes in the Cluster, based on resource availability.
Create two Multipass virtual machines
To test a DaemonSet, this exercise will require two Multipass virtual machines. You will create the first one and add it as a Worker Node to the Master Node, the microk8s-vm virtual machine. You will then apply the DaemonSet. Later in this exercise, you will create a second virtual machine and add it as a Worker Node to test that the DaemonSet adds the Pod to the new Worker Node.
Note: For Linux-based host operating systems, make sure Multipass is installed. MicroK8s for Linux does not install Multipass.
- In the Terminal or Command Prompt, create a virtual machine using Multipass. Replace vm-name with the name of the virtual machine. Example: worker-1.
multipass launch --name vm-name - Use the shell command to access the microk8s-vm virtual machine.
multipass shell microk8s-vm -
Use the add-node command to create an add-node token. Copy the token and paste it into a text file for later use. Example: microk8s join 192.168.64.2:25000/7c127b9ec0928873a6f2cca8c23456a/rxa3bedbbbdc. Note: Create an add-node token for each MicroK8s virtual machine.
sudo microk8s add-node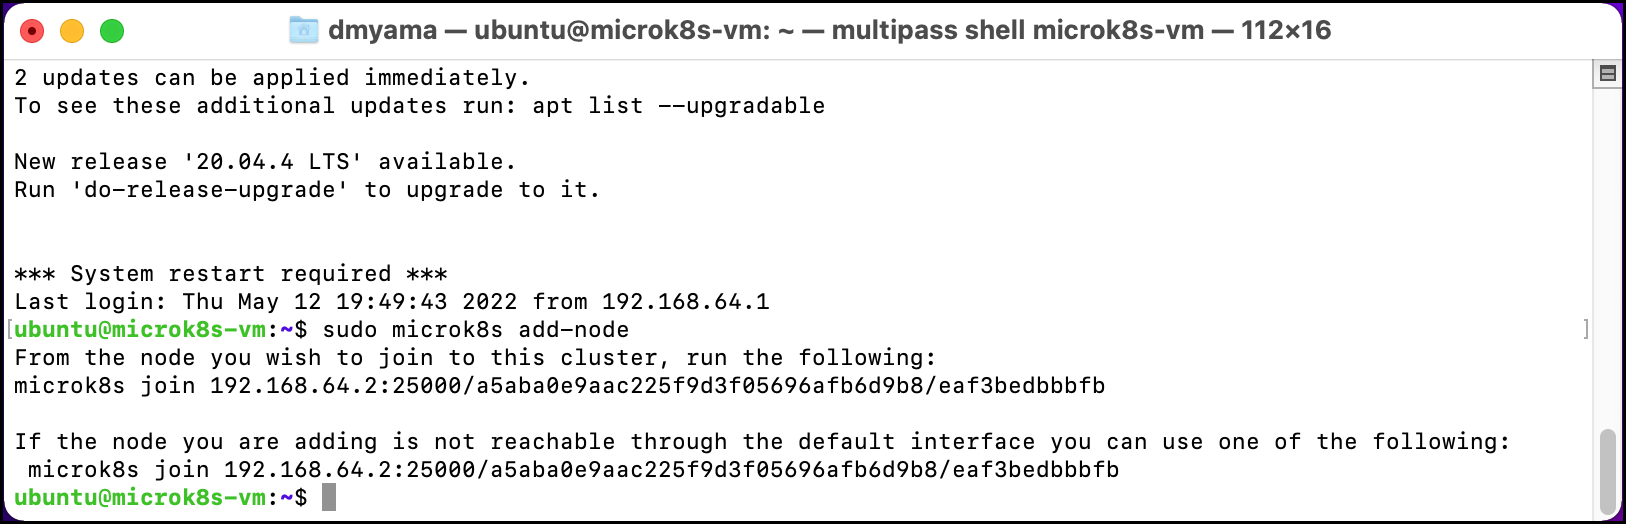
-
Exit the microk8s-vm virtual machine.
exit - Check that the node is running. The microk8s-vm should be the only node.
kubectl get nodes -o wide - Use the shell command to access the first virtual machine you created. Replace vm-name with the name of the virtual machine. Example: worker-1. To see a list of available virtual machines, use the
multipass listcommand.multipass shell vm-name - Install MicroK8s on the new virtual machine. For this exercise, you do not need to add the user to the MicroK8s group.
sudo snap install microk8s --classic --channel=1.23/stable -
After the MicroK8s installation is complete, use
sudoand the add-node token to add the virtual machine as a worker node. Adding the virtual machine as a worker node may take a few minutes.sudo microk8s join 192.168.64.2:25000/7c127b9ec0928873a6f2cca8c23456a/rxa3bedbbbdc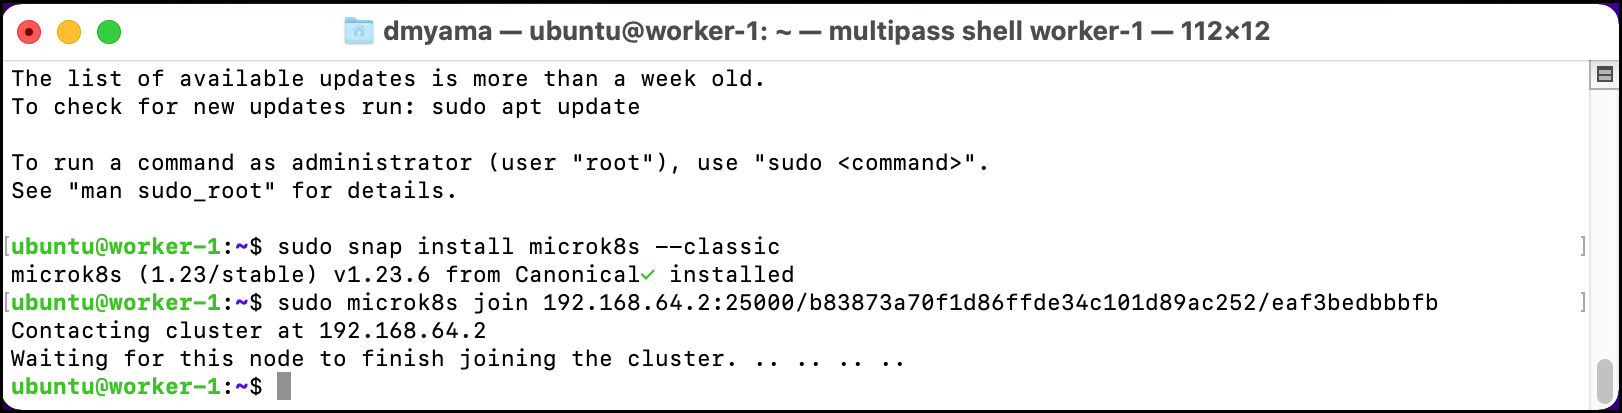
-
Exit the virtual machine.
exit -
Check that the nodes are running. There should be two nodes, the microk8s-vm virtual machine and the other virtual machine that you created.
kubectl get nodes -o wide
Create a DaemonSet from a YAML file
Create a DaemonSet YAML file with the example below. You could create the YAML file from the command line, use a text editor, or download the DaemonSet YAML file from the Git repository.
- Open the Terminal.
- Navigate to the Downloads folder.
cd ./Downloads - Use the following command to create an empty YAML file in your Documents folder.
touch daemonset.yaml- Or you can download the namespace YAML file from a Git repository and go to step 7.
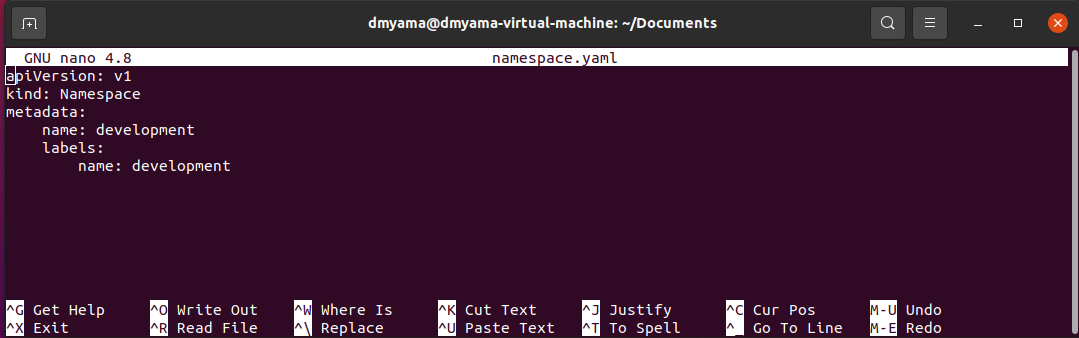
- Use the nano text editor in the Terminal.
nano daemonset.yaml - Copy and paste the configuration below into the text editor.
- Press Cmd + X, then type Y and press Return to save the namespace.yaml file.
- Add the DaemonSet to your environment using a YAML file.
kubectl apply -f daemonset.yaml - List the daemonsets to see the status.
kubectl get daemonsets - List the pods to see the status and the pod names. There should be two test-daemonset pods.
kubectl get pods -o wide
- Open the command prompt.
- Navigate to the Documents folder.
cd ./Documents - Use the following command to create an empty YAML file in your Documents folder.
copy NUL daemonset.yaml- Or you can download the namespace YAML file from a Git repository and go to step 7.
- Open the namespace.yaml file with a text editor. For example, use Notepad++ to edit the YAML file.
- Copy and paste the configuration below into the text editor.
- Save the namespace.yaml file.
- Add the DaemonSet to your environment using a YAML file.
kubectl apply -f daemonset.yaml - List the daemonsets to see the status.
kubectl get daemonsets - List the pods to see the status and the pod names. There should be two test-daemonset pods.
kubectl get pods -o wide
- Open the Terminal.
- Navigate to the Documents folder.
cd ./Documents - Use the following command to create an empty YAML file in your Documents folder.
touch daemonset.yaml- Or you can download the namespace YAML file from a Git repository and go to step 7.
- Use the nano text editor in the Terminal.
nano daemonset.yaml - Copy and paste the configuration below into the text editor.
- Press Ctrl + X, then type Y and press Enter to save the namespace.yaml file.
- Add the DaemonSet to your environment using a YAML file.
kubectl apply -f daemonset.yaml - List the daemonsets to see the status.
kubectl get daemonsets - List the pods to see the status and the pod names. There should be two test-daemonset pods.
kubectl get pods -o wide
Add a second worker node to a cluster
Create a second virtual machine and add it as a Worker Node to the Master Node. The DaemonSet will automatically add the Pod to the new Worker Node.
- In the Terminal or Command Prompt, create a second virtual machine using Multipass. Replace vm-name with the name of the virtual machine. Example: worker-2. Note: A message might appear asking to send usage data to Multipass; follow the instructions to accept or decline.
multipass launch --name vm-name - Use the shell command to access the microk8s-vm virtual machine. You need to create a second add-node token.
multipass shell microk8s-vm - Use the add-node command to create an add-node token. Copy the token and paste it into a text file for later use. Example: microk8s join 192.168.64.2:25000/7c127b9ec0928873a6f2cca8c789012b/rxa3bedbbbdc. Note: Create an add-node token for each MicroK8s virtual machine.
sudo microk8s add-node - Exit the microk8s-vm virtual machine.
exit - Use the shell command to access the second virtual machine you created. Replace vm-name with the name of the virtual machine. Example: worker-2. To see a list of available virtual machines, use the
multipass listcommand.multipass shell vm-name - Install MicroK8s on the new virtual machine. For this exercise, you do not need to add the user to the MicroK8s group.
sudo snap install microk8s --classic --channel=1.23/stable - After the MicroK8s installation is complete, use
sudoand the add-node token to add the virtual machine as a worker node. Adding the virtual amchine as a worker node may take a few minutes.sudo microk8s join 192.168.64.2:25000/7c127b9ec0928873a6f2cca8c789012b/rxa3bedbbbdc - Exit the virtual machine.
exit - Check that the pod is running on each node. There should be three pods running, one on the microk8s-vm and the others on the virtual machines you created. The daemonset added the pod to the second worker node. The microk8s-vm and the first worker node should have the same Age. The Age of the second worker node is more recent.
kubectl get pods -o wide
daemonset.yaml
apiVersion: apps/v1
kind: DaemonSet
metadata:
  name: test-daemonset
spec:
  selector:
    matchLabels:
      name: test-daemonset
  template:
    metadata:
      labels:
        name: test-daemonset
    spec:
      tolerations:
      # this toleration is to have the daemonset runnable on master nodes
      # remove it if your masters can't run pods
      - key: node-role.kubernetes.io/master
        effect: NoSchedule
      containers:
      - name: python-http-server
        image: python:2.7
        command: ["/bin/bash"]
        args: ["-c", "echo \" Hello from $(hostname)\" > index.html; python -m SimpleHTTPServer 80"]
        ports:
        - name: http
          containerPort: 80
        resources:
          limits:
            memory: 200Mi
          requests:
            cpu: 100m
            memory: 200Mi
      terminationGracePeriodSeconds: 30