Part 1: Create
This is Part 1 of a multi-part exercise that will focus on creating and sharing a blueprint across projects within an organization.
What Will You Do
In part 1, you will:
- Create a new project in your organization
- Create a cluster blueprint
- Share the blueprint across projects
- Apply the blueprint to a cluster
Step 1: Create Project
In this step, we will create a new project which will serve as a logically isolated "operating environment" (sub tenant). To learn more, see Project.
Note
Creating a project requires "Org Admin" privileges.
We will create a project named "central". This project will be used to house the source blueprint we will create in an upcoming step. Then we will share this blueprint with another project.
Select a method from the tabs below.
- Create a new project called "central"

- Switch context to the "central" project by clicking on the project in the web console
You can create a project using RCTL. See CLI Setup to install the RCTL CLI.
- Create a
project.yamlfile. The project name is "central" in the following example.
apiVersion: system.k8smgmt.io/v3
kind: Project
metadata:
  description: getstarted_project
  name: central
spec:
  default: false
-
Run
./rctl apply -f project.yamlto create the project. -
Run
./rctl config set project centralto set the project. -
Run
./rctl config showto see the current RCTL configuration. Make surecentralappears for project.
While it is possible to create a project using Terraform, a key benefit of using Terraform is creating multiple things at once.
Go to Step 2 to create a project and a blueprint.
Step 2: Create Blueprint
In this step, we will create a custom blueprint based off the "minimal" blueprint.
Select a method from the tabs below.
- Navigate to the previously created "central" project in your Org
- Select Infrastructure -> Blueprints
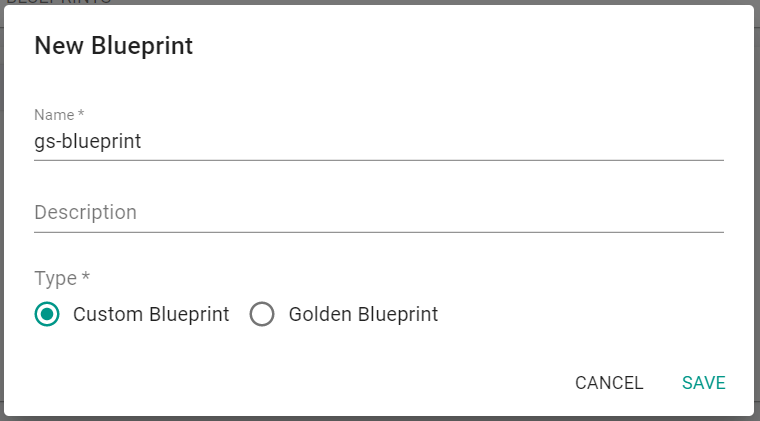
- Click "New Blueprint"
- Enter a name for the blueprint
- Select "Custom Blueprint" for the Type
- Click "Save"
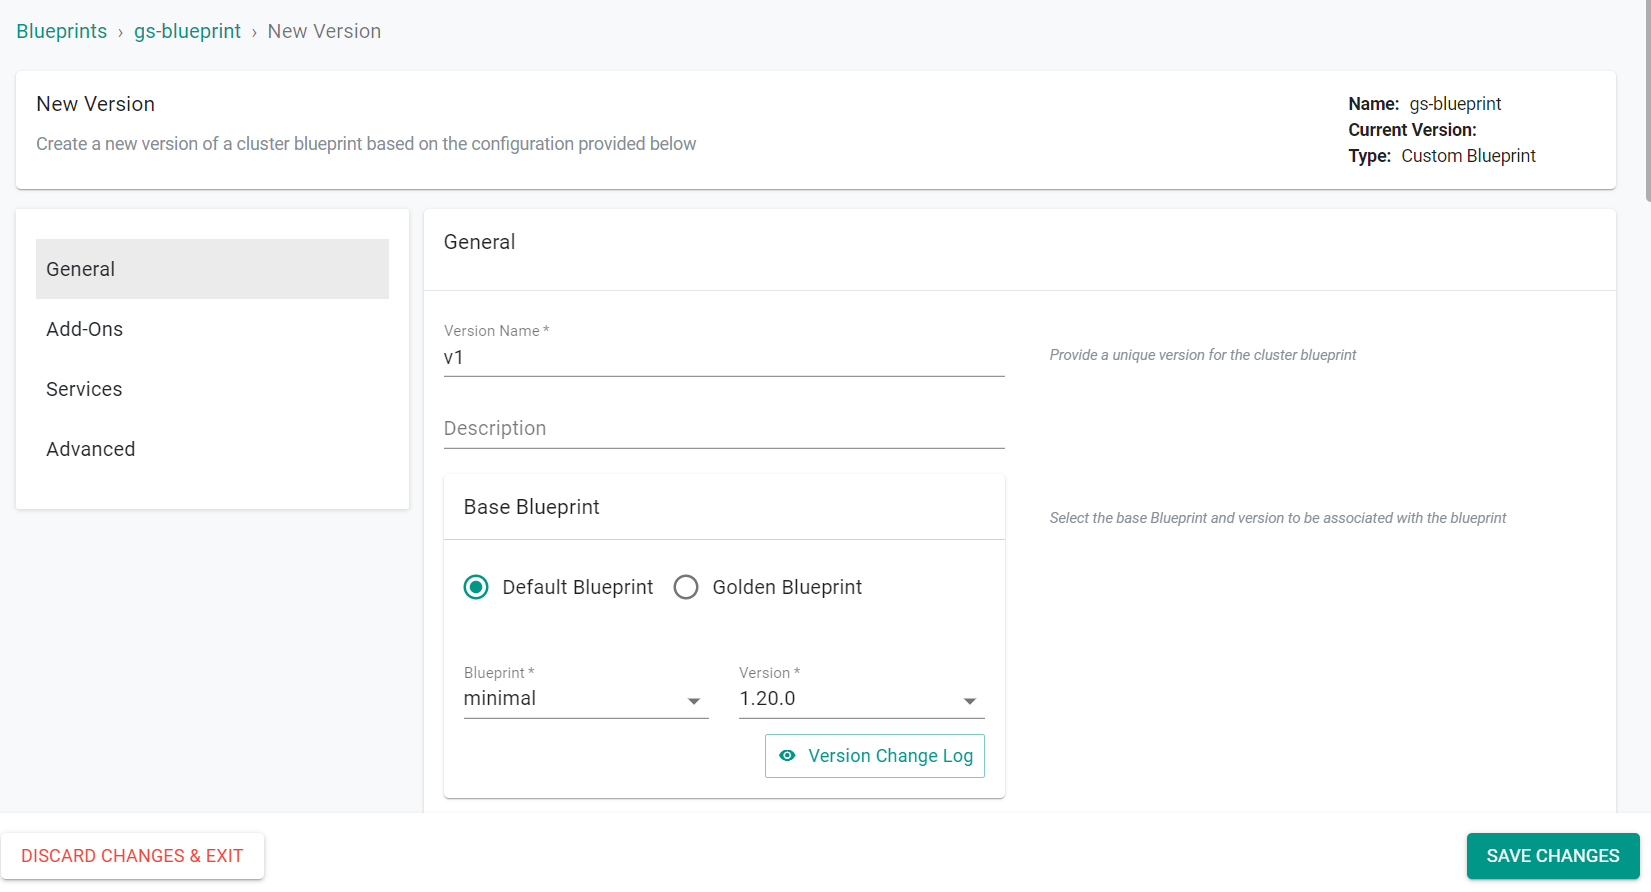
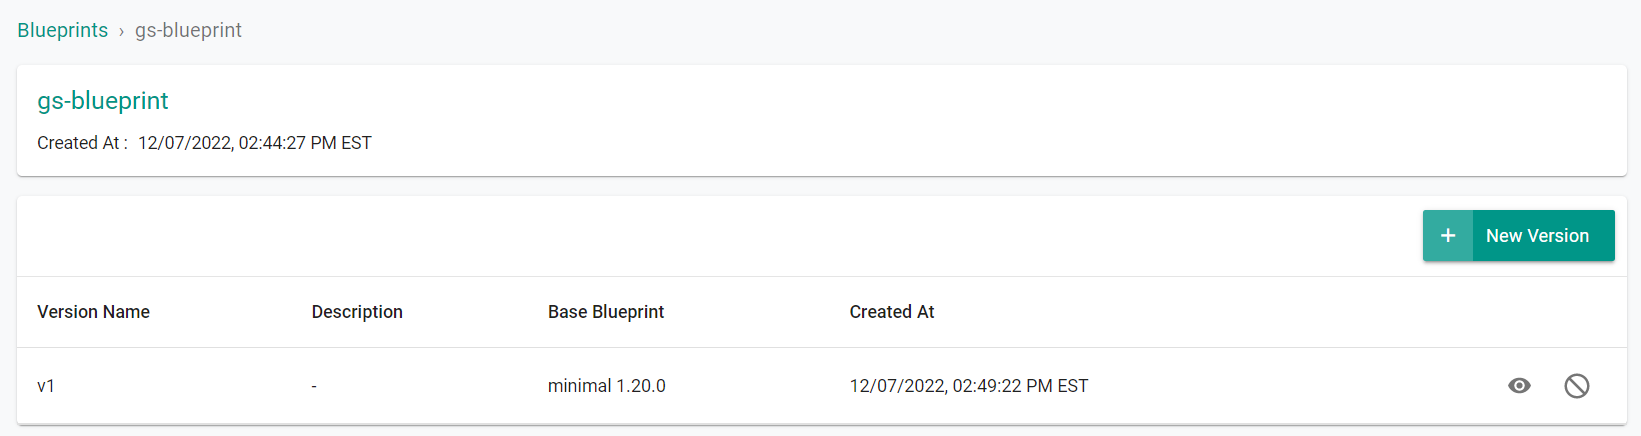
Next, create a blueprint version for this custom blueprint.
- Enter the "Version Name"
- Select the minimal blueprint as the base blueprint
- Click "Save Changes"
You can create a blueprint using RCTL.
- Create a
blueprint.yamlfile. Use the following example.
apiVersion: infra.k8smgmt.io/v3
kind: Blueprint
metadata:
  name: test-blueprint
  project: central
-
Run
./rctl apply -f blueprint.yaml --v3to create the blueprint. -
Run
./rctl get blueprints --v3to see a list of blueprints in the project.
You can create a project and a blueprint using Terraform. See Install Terraform to install Terraform.
- Download the Getting Started package and extract it.
- Edit the
config.jsonfile. You can use a text editor. The path to the config file: /getstarted/terraform/blueprints/artifacts/credentials. - Add your console API key, API secret, and Project ID to the
config.jsonfile. - Open the Terminal and navigate to the blueprints folder in the getstarted package. The path: /getstarted/terraform/blueprints.
- Run
terraform initto initialize the directory containing the Terraform configuration files, preparing the directory for use with Terraform. - Run
terraform validateto validate the configuration files in the directory, without accessing any remote services. - Run
terraform applyto create the project and blueprint. Enteryeswhen prompted.
Step 3: Share Blueprint
In this step, we will share the previously created custom blueprint with the project where your cluster is located.
A shared blueprint cannot be deleted. Disable sharing first, then delete the blueprint.
Select a method from the tabs below.
- Navigate to the previously created "central" project in your Org
- Select Infrastructure -> Blueprints
- Click the "Manage Sharing" icon near the previously created blueprint
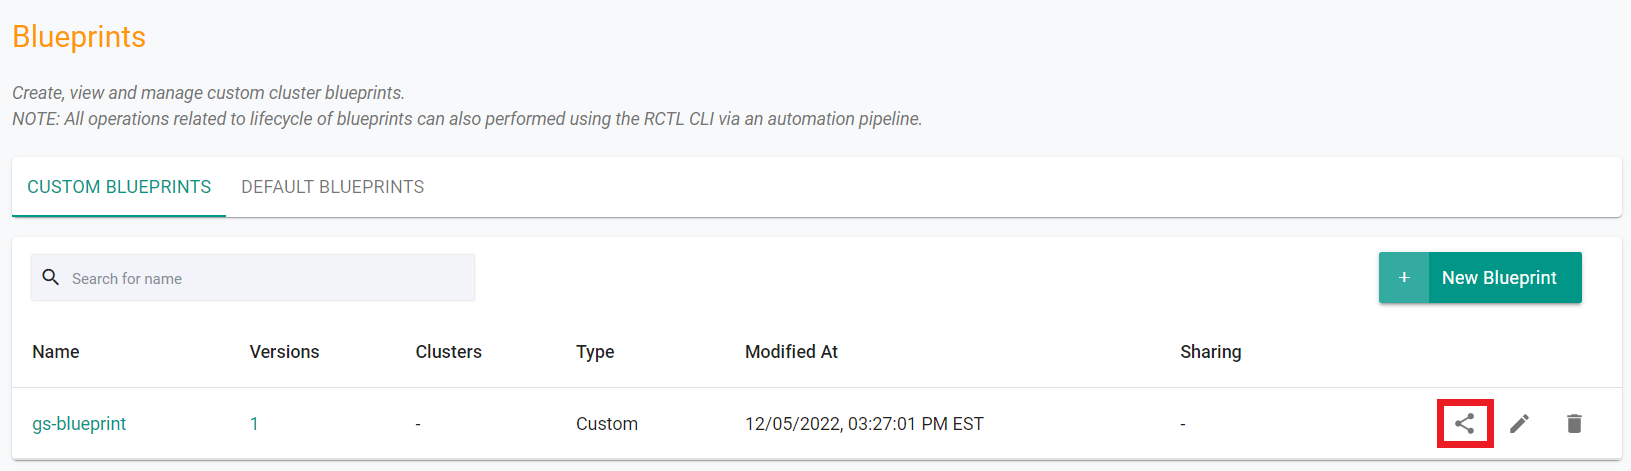
- Select "Specific Projects"
- Select the project where your cluster is located
- Click "Save"
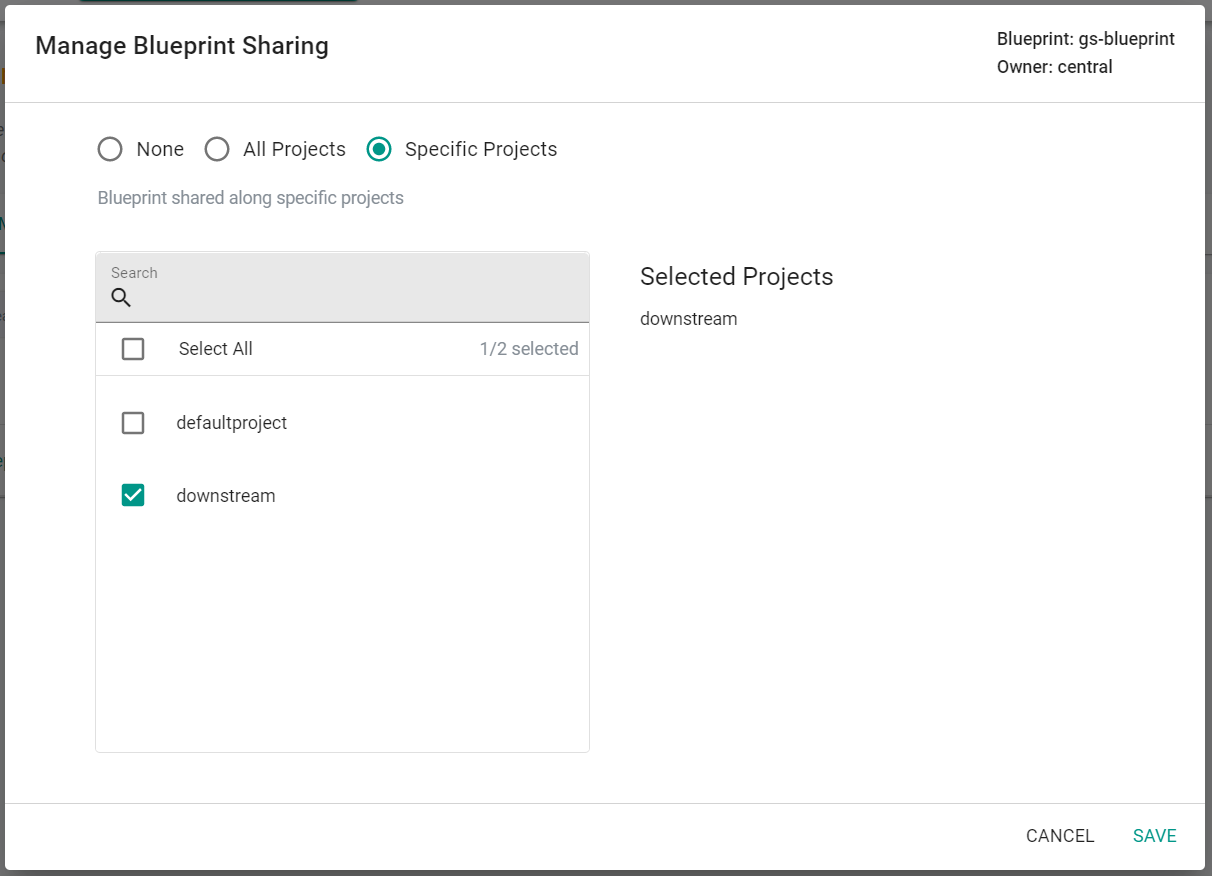
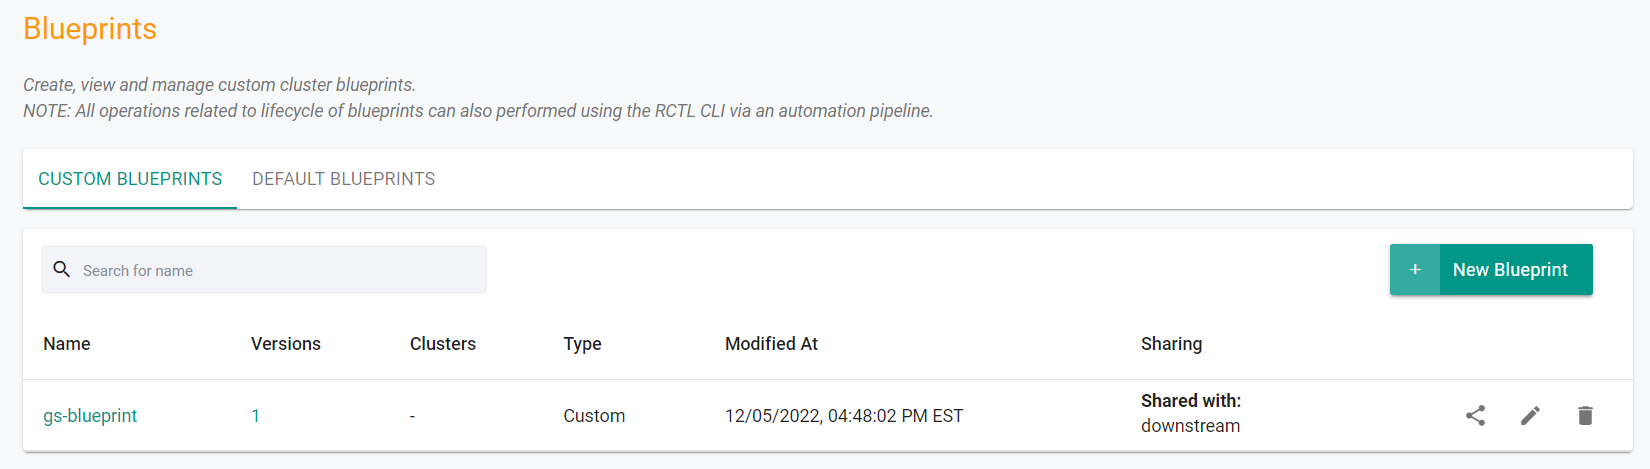
You will now see the blueprint is shared across projects.
You can share a blueprint using RCTL. Enable sharing and include the project names to share the blueprint with.
- Update the
blueprint.yamlfile to match the example below.
apiVersion: infra.k8smgmt.io/v3
kind: Blueprint
metadata:
  name: v1
  project: central
spec:
  base:
    name: default
    version: 1.21.0
  defaultAddons:
    enableIngress: true
    enableMonitoring: true
  sharing:
    enabled: true
    projects:
    - name: testproject
  type: custom
  version: "1"
-
Run
./rctl apply -f blueprint.yaml --v3to update the blueprint. -
Run
./rctl get blueprints --v3to see a list of blueprints in the project.
You can share the blueprint using Terraform. Enable sharing and include the project names to share the blueprint with.
- Edit the
main.tffile in the blueprints folder. The path to the file: /getstarted/terraform/blueprints/modules/blueprints. - For
sharing.enabled, change the setting totrue. - For
sharing.projects.name, change the setting to a project with a cluster. - Save the changes to the
main.tffile. - Open the Terminal and navigate to the blueprints folder in the getstarted package. The path: /getstarted/terraform/blueprints.
- Run
terraform applyto update the blueprint. Enteryeswhen prompted.
Step 4: Apply Blueprint
In this step, we will apply the blueprint to the existing cluster in the downstream project.
Select a method from the tabs below.
- Navigate to the project in your Org where the cluster is located.
- Select Infrastructure -> Clusters
- Click the gear icon on the cluster card
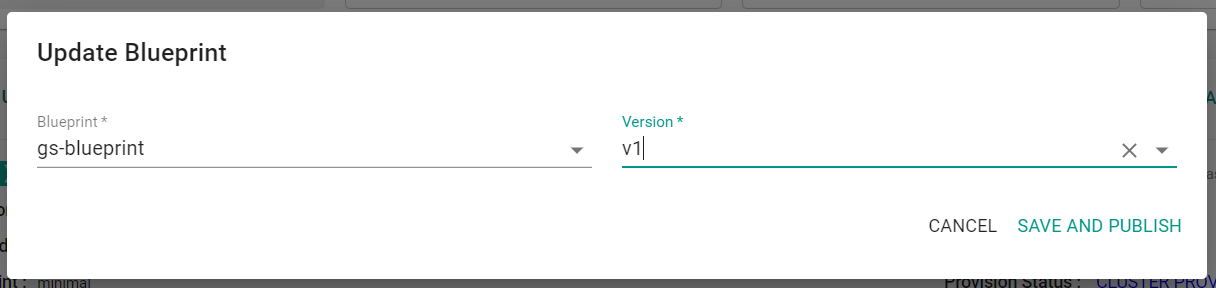
- Select "Update Blueprint"
- Select the previously created and shared blueprint
- Select the blueprint version
- Click "Save and Publish"
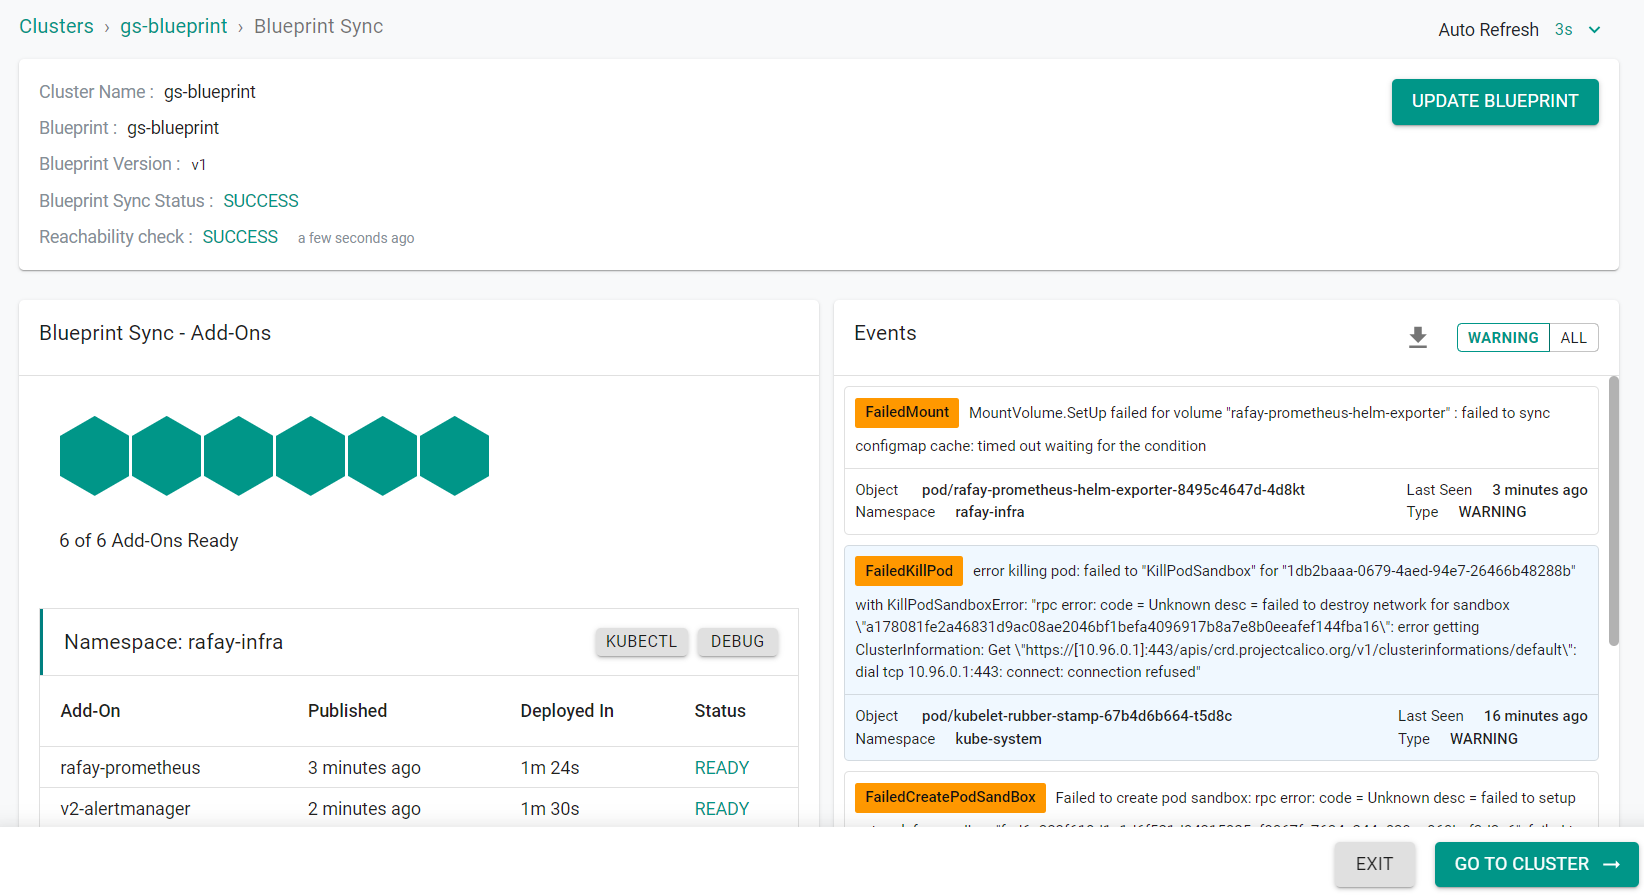
The blueprint will begin to be applied to the cluster.
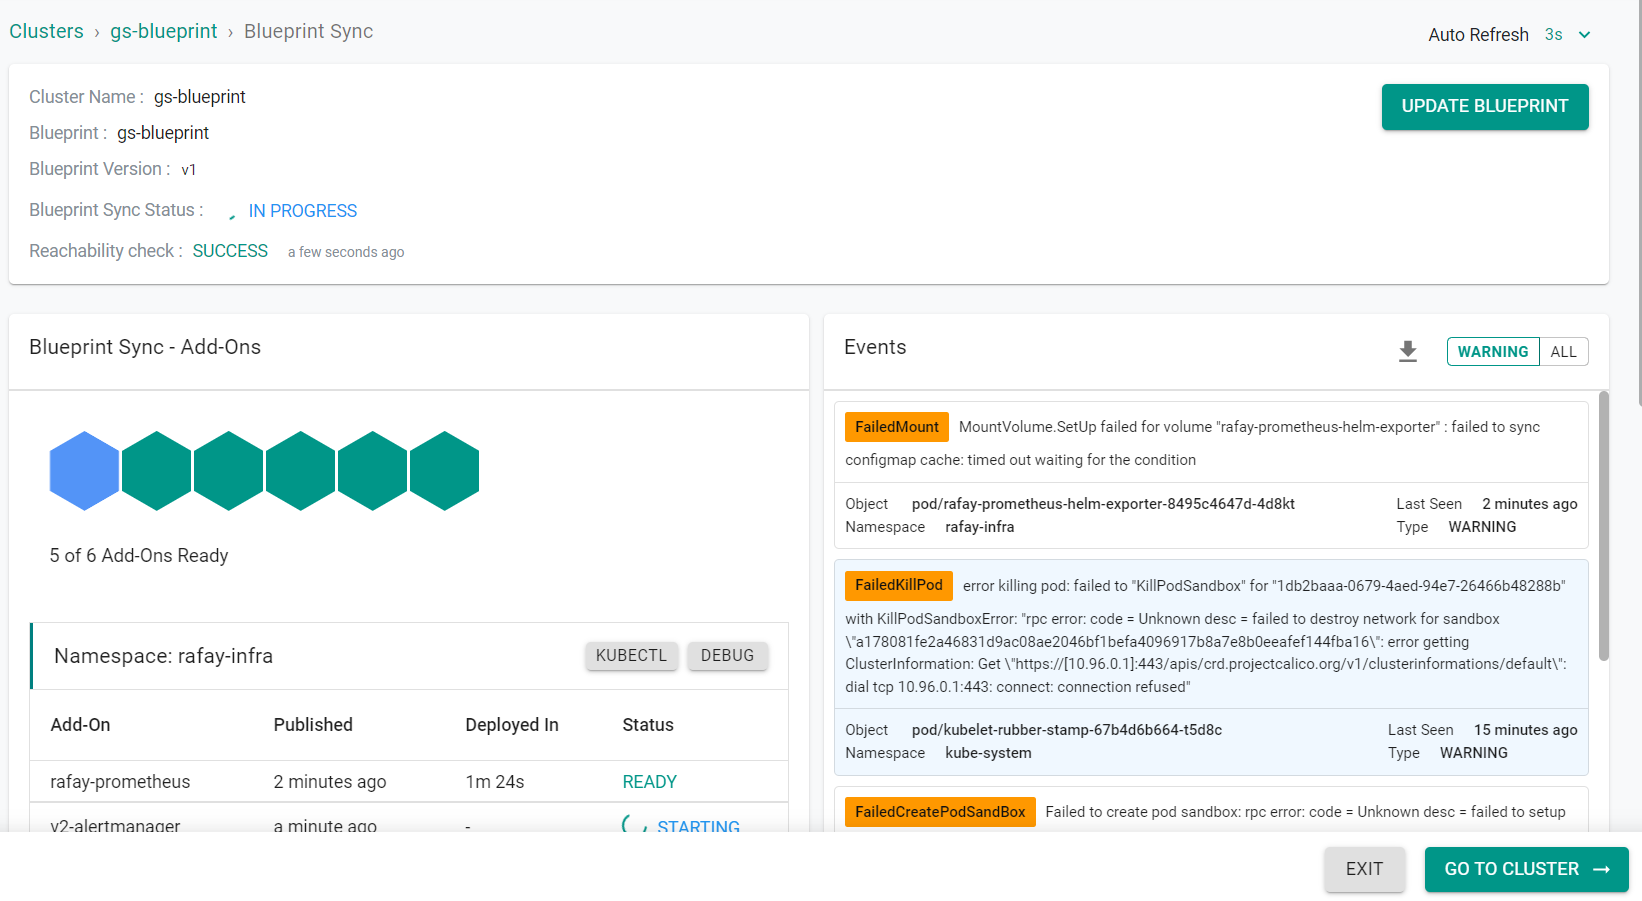
The blueprint is now applied to the cluster.
When using RCTL, apply a blueprint using the update cluster command.
- Run
./rctl config set project <project_name>. Changeto the name of the project with the cluster to apply the blueprint to. - Run
./rctl update cluster <cluster_name> -b test-blueprint. Changeto the name of the cluster to apply the blueprint to.
When using Terraform, apply a blueprint by updating the Terraform TFVARS file for the cluster. This exercise uses an existing cluster. See Amazon EKS Cluster Lifecycle or Azure AKS Cluster Lifecycle for exercises on creating a cluster.
- Edit the
terraform.tfvarsfile for the cluster. - Change the
blueprint_nameandblueprint_versionto match the shared blueprint. - Save the TFVARS file.
- In the Terminal, navigate to the folder containing the Terraform files for the cluster.
- Run
terraform applyto apply the changes to the cluster. The shared blueprint is applied to the cluster.
Recap
Congratulations! At this point, you have successfully created, shared and applied a custom cluster blueprint across projects.