Part 1: Setup
What Will You Do
In this section, you will perform a one-time configuration of a GitOps pipeline to enable System Sync to communicate with a Git repository.
- Create a Gitops Agent
- Create a Git repository
- Create a GitOps pipeline to enable System Sync
Once this part is complete, in subsequent parts, you will test System Sync to sync bidrectionally, from System to Git and then from Git to System.
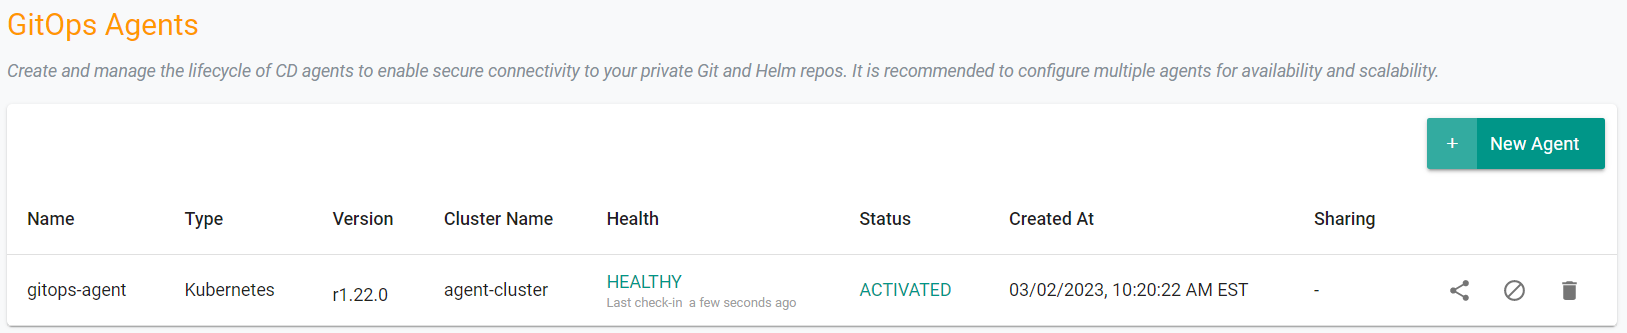
Step 1: Create GitOps Agent
We must first create a GitOps Agent that will allow the pipeline to access your Git repository. The agent will run on your existing cluster.
- Ensure you are logged into the console
- In your project, navigate to GitOps -> GitOps Agents
- Click on "New Agent"
- Provide a name for the Agent
- Select the cluster where the agent will be deployed
- Click "Create"
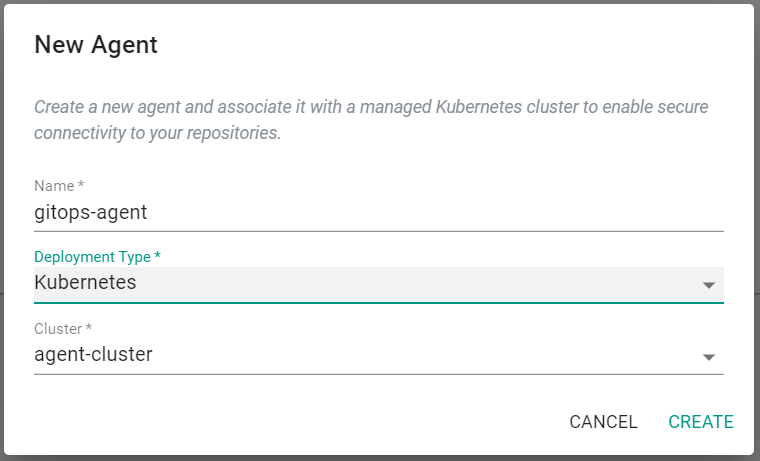
This will create an agent on the cluster specified. The agent will be used to communicate with the Git repository. It will take a few minutes for the agent to be deployed and become healthy.
Step 2: Create Repository
Next, we will create a repositoy in GitHub. This repository will be used by System Sync to store the configuration files of the resources within the organization.
- Ensure you are logged into your GitHub.com account
- Navigate here to create a new repository
- Enter a repository name
- Change the repository to "Private"
- Click "Create Repository"
This will create a new private repository in your Git system (e.g. GitHub). An example shown below.
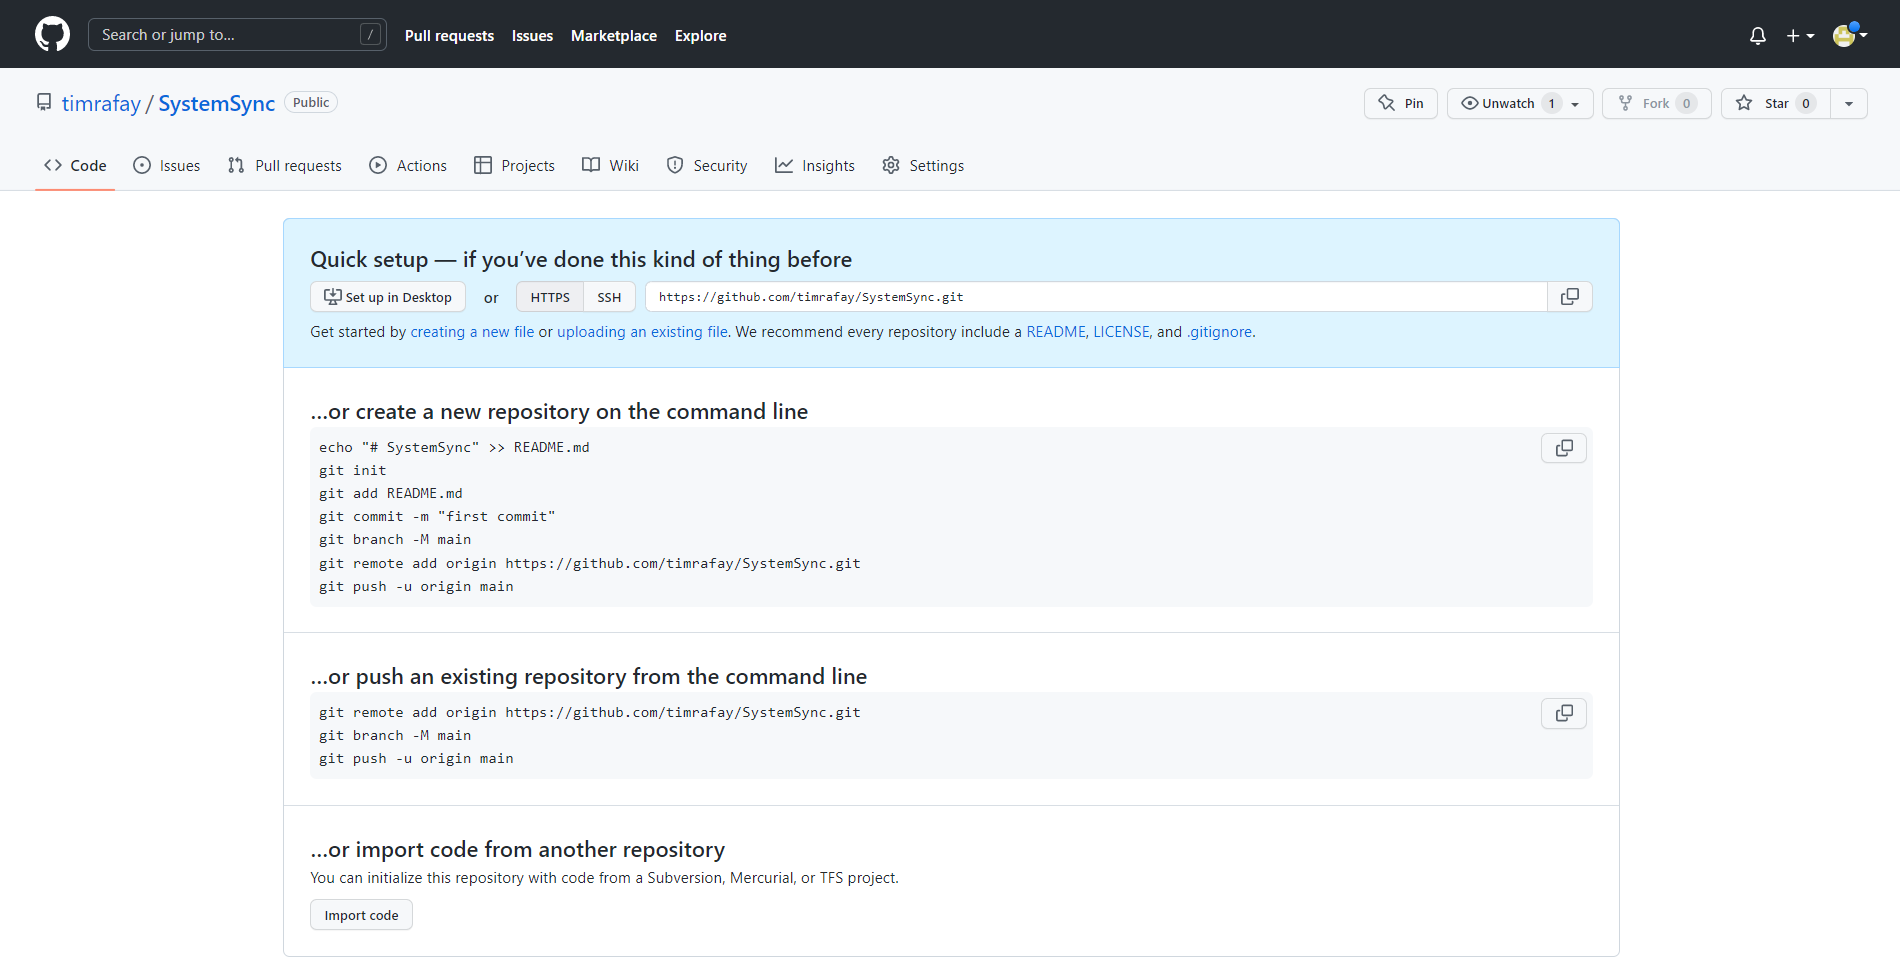
- Create a single readme file in the repository to initiliaze it
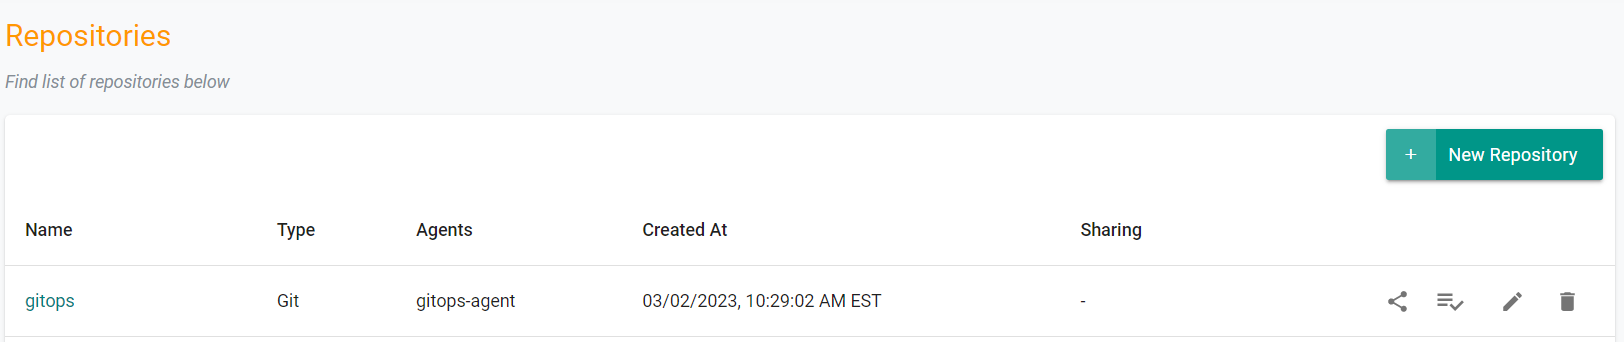
Step 3: Add Repository
- In your project, navigate to Integrations -> Repositories
- Click "New Repository"
- Enter a name for the repository
- Select "Git" for Type
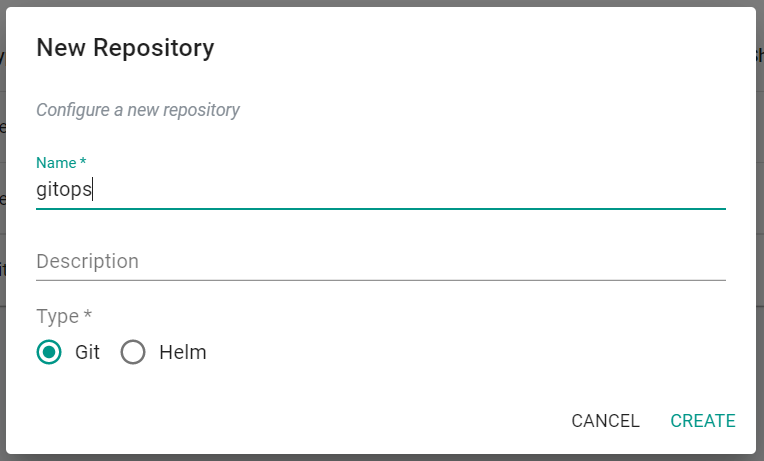
- Click "Create"
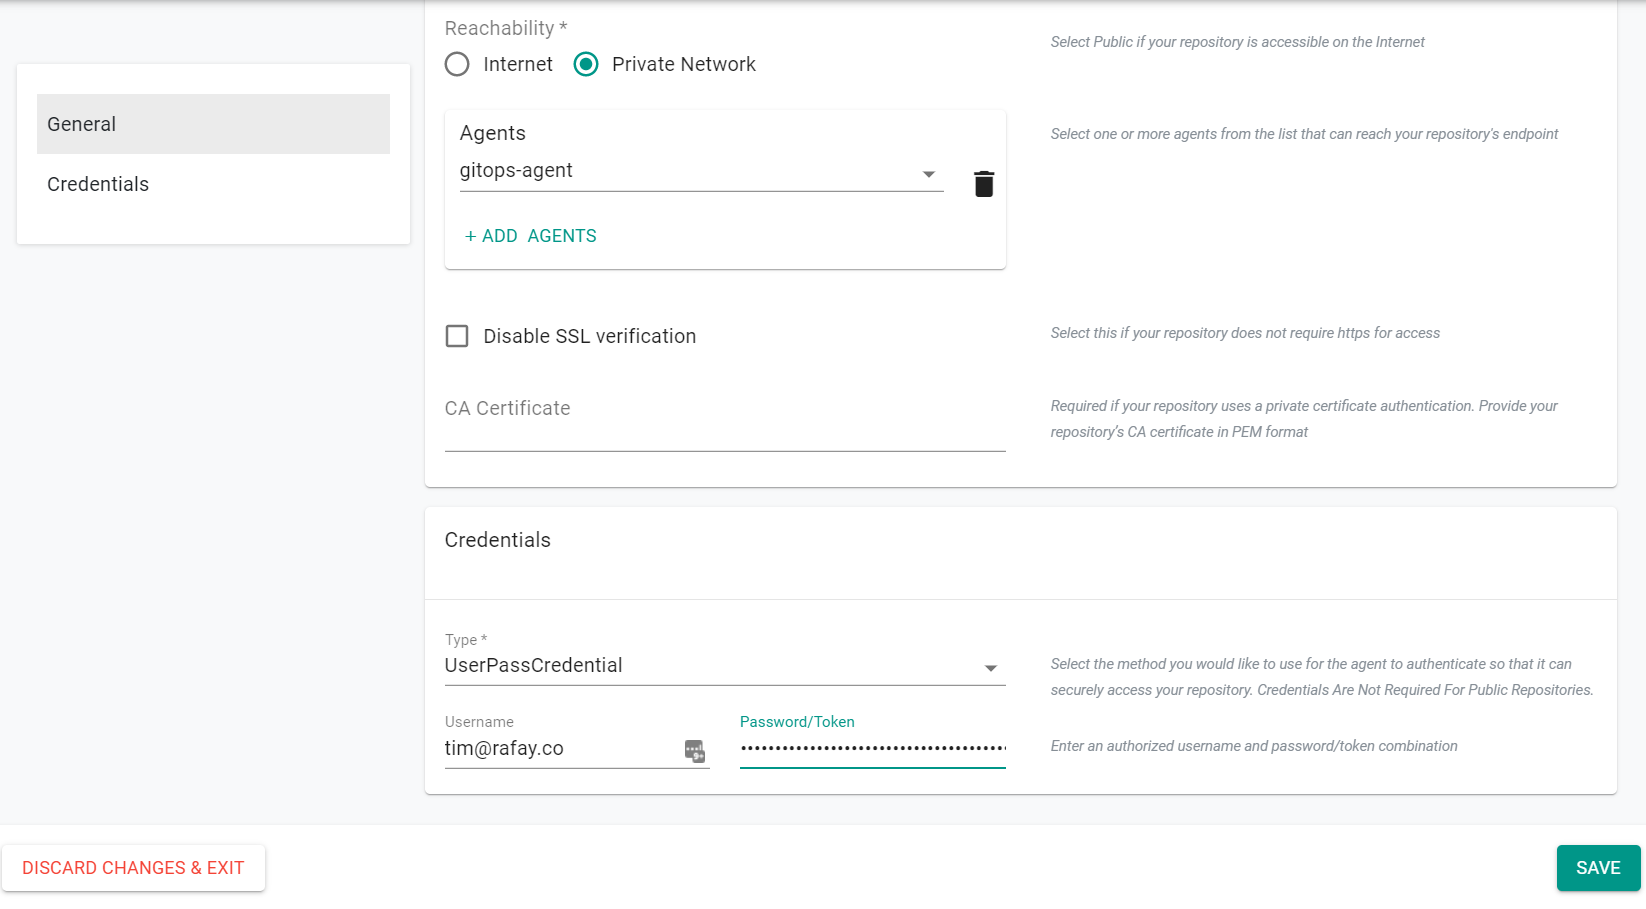
- Provide the Git repo's Endpoint URL
- Select "Private Network" for Reachability
- Select the agent that was previously created

- Under the Credentials section, select "UserPassCredential" for Type
- Enter your Github username
- Navigate to your GitHub Developer Settings to create a Personal Access Token for your Git repository
- Click "Generate new token" -> "Generate new token (classic)"
- Select the "repo" scope
- Click "Generate token"
- Copy the token that is presented on the screen
- Paste the token in the "Password/Token" field of the create repository page in the console
- Click "Save"
Note
It does not matter if your GitHub repo is public or private. If public, you do not need to provide access credentials.
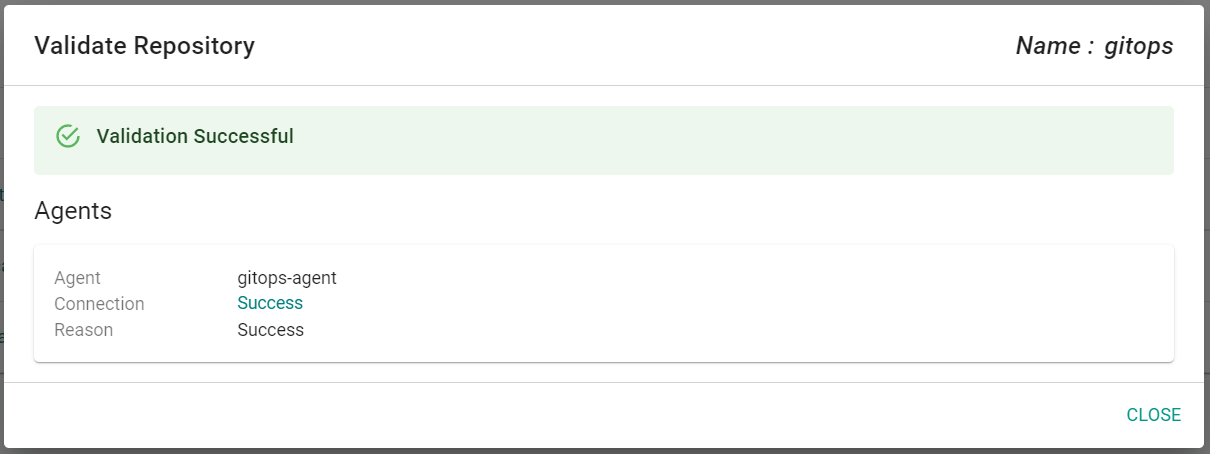
- Under Integrations -> Repositories, click on the validate button for your repository
- If you see a validation successful message, the controller is able to access the repository
Step 4: Create Pipeline
The GitOps pipeline will ensure that the resources in the system are "always kept reconciled" with the desired specifications in the Git repository. It will also ensure the Git repository is reconciled with the sytem if a change is made directly on the system.
We will now create a GitOps Pipeline.
- In your project, navigate to GitOps -> Pipelines
- Click "New pipeline"
- Enter a friendly name
- Click "Create"
Add Stage
A pipeline can have multiple stages, with completely different actions to model your desired workflows. In this exercise, we will test with a simple, single stage pipeline.
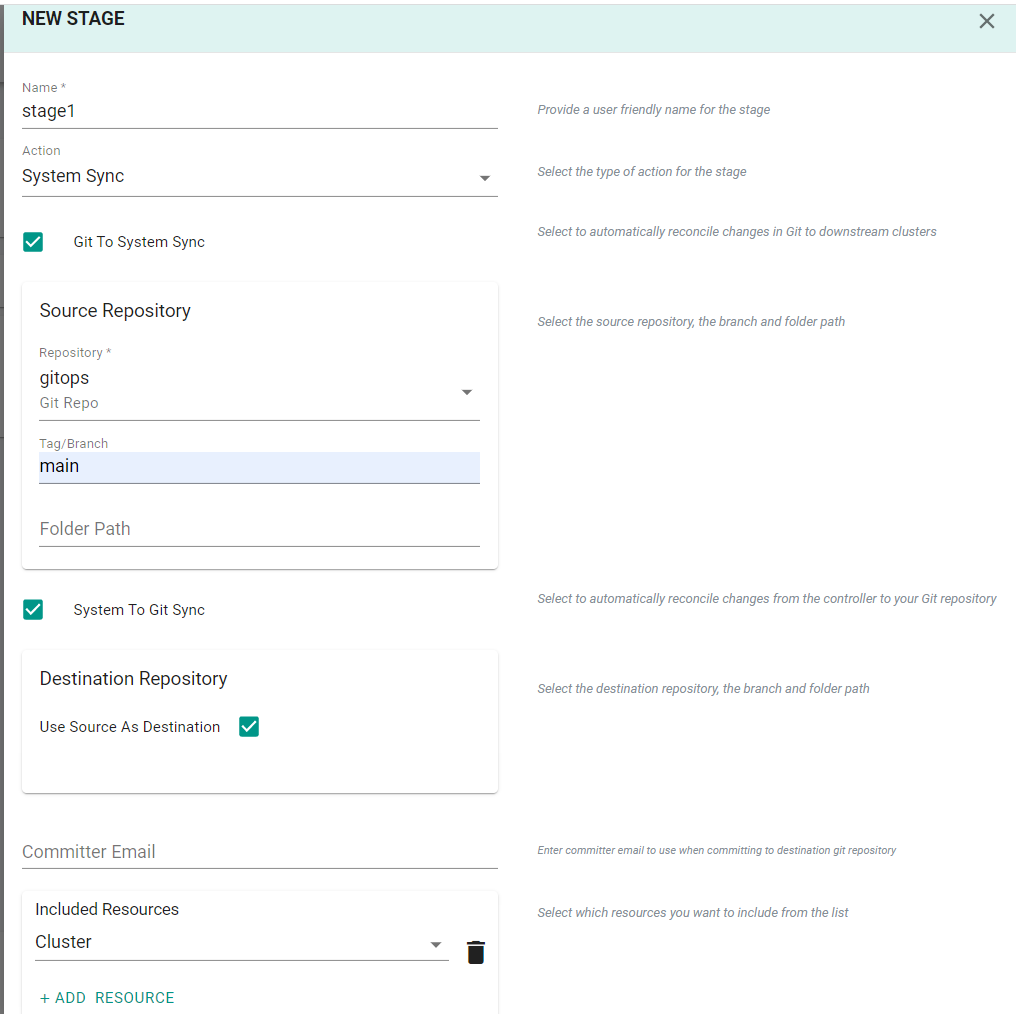
- Under Stages, Click "Add New Stage"
- Provide a name for the stage
- For Action, select "System Sync"
- Select "Git to System Sync"
- Select the previously created repository
- Enter "main" for the branch
- Select "System to Git Sync"
- Select "Use Source As Destination"
- Under "Included Resources", click "Add Resource"
- Select "Cluster"
- Click "Save"
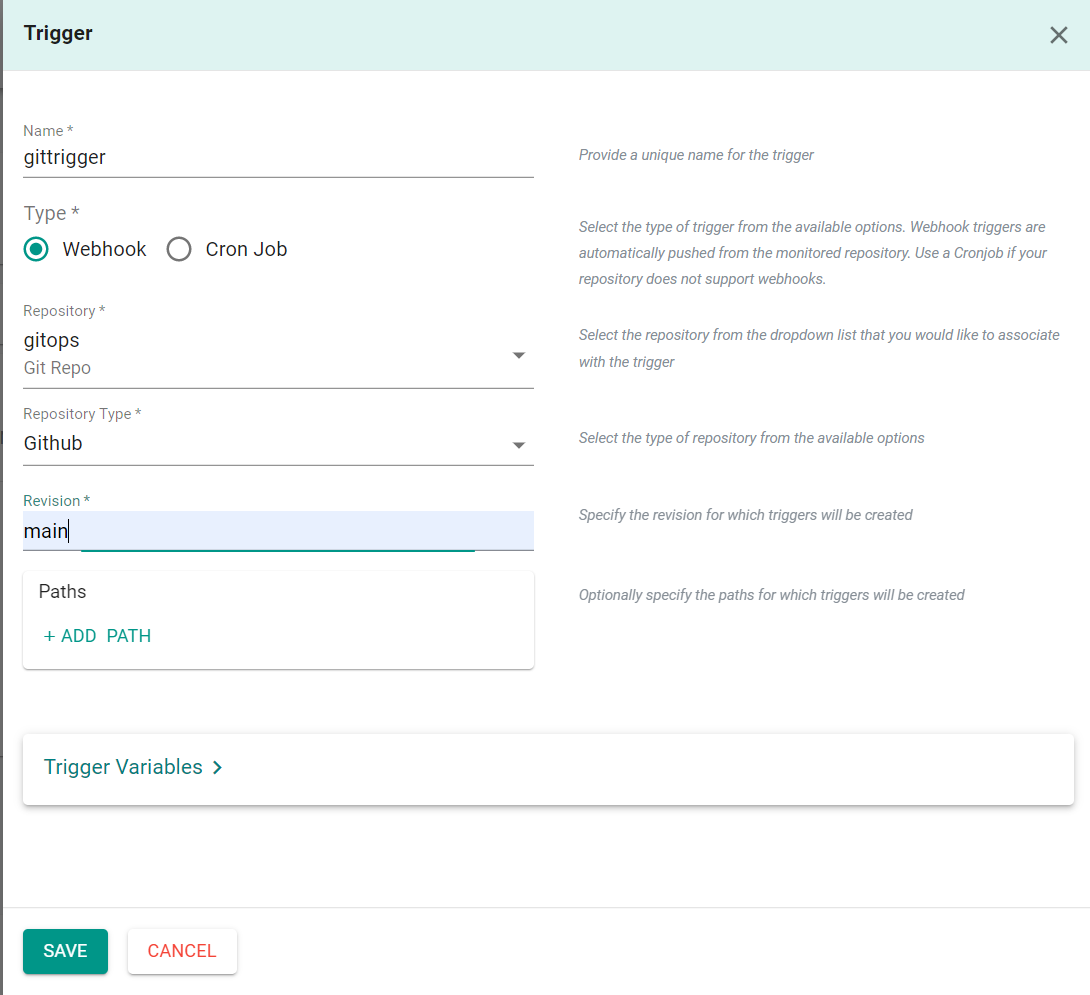
Add Trigger
A pipeline can be executed based on an "external trigger". For example, changes to the manifests in your Git repository. In this exercise, we will configure a trigger that will receive a webhook notification when specific files in your Git repository are modified.
- Click on the "Triggers" tab in the pipeline
- Click "Add New Trigger"
- Provide a name for the trigger
- Select "Webhook" for type
- Select the repository that we created previously
- Select "Github" for Repository Type
- Enter "main" for revision
- Click "Save"
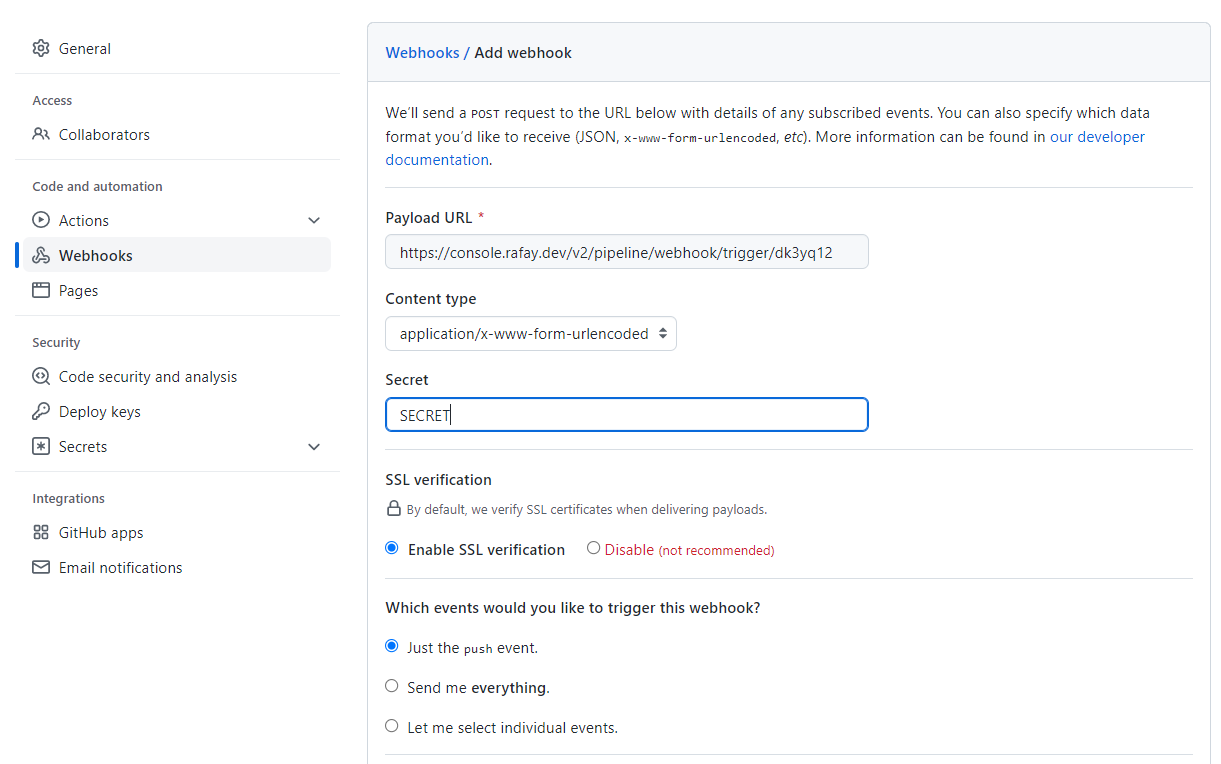
You will now be presented with the webhook configuration details that you need to copy/paste to your GitHub repository. Once you complete this step, the GitOps pipeline will be configured to receive webhook notifications whenever the repository is updated in Git.
Setup GitHub Webhook
- Navigate to your GitHub repository -> Settings -> Webhooks
- Click "Add webhook"
- Copy and Paste the "Payload URL" and "Secret" from the previous step
- Click "Add webhook"
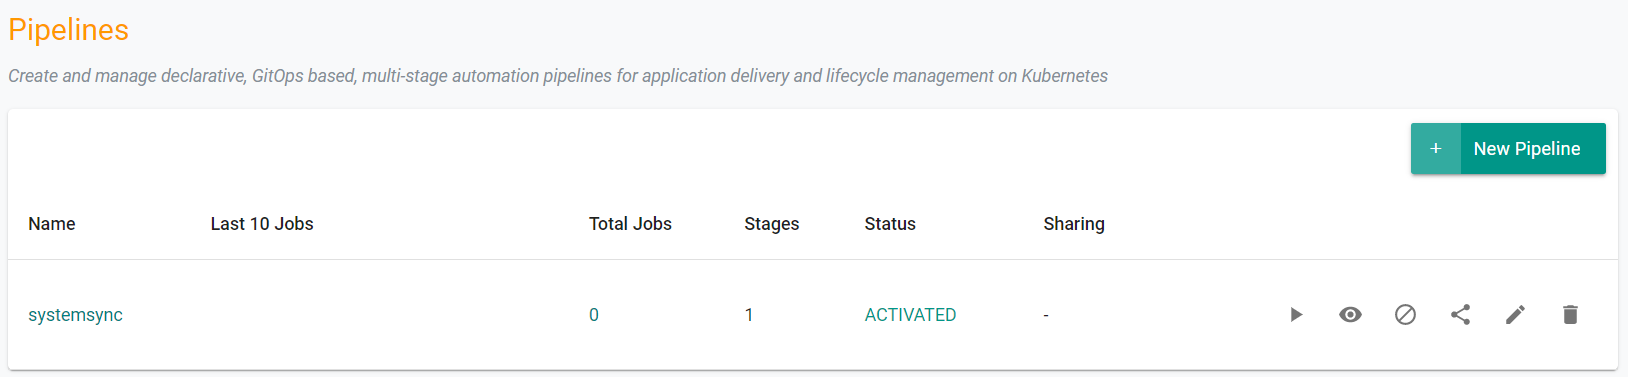
Activate Pipeline
By default, newly created pipelines start life in a deactivated state.
- In your project, navigate to GitOps -> Pipelines
- Click the "Activate Pipeline" button
- Click "Yes" to confirm activation
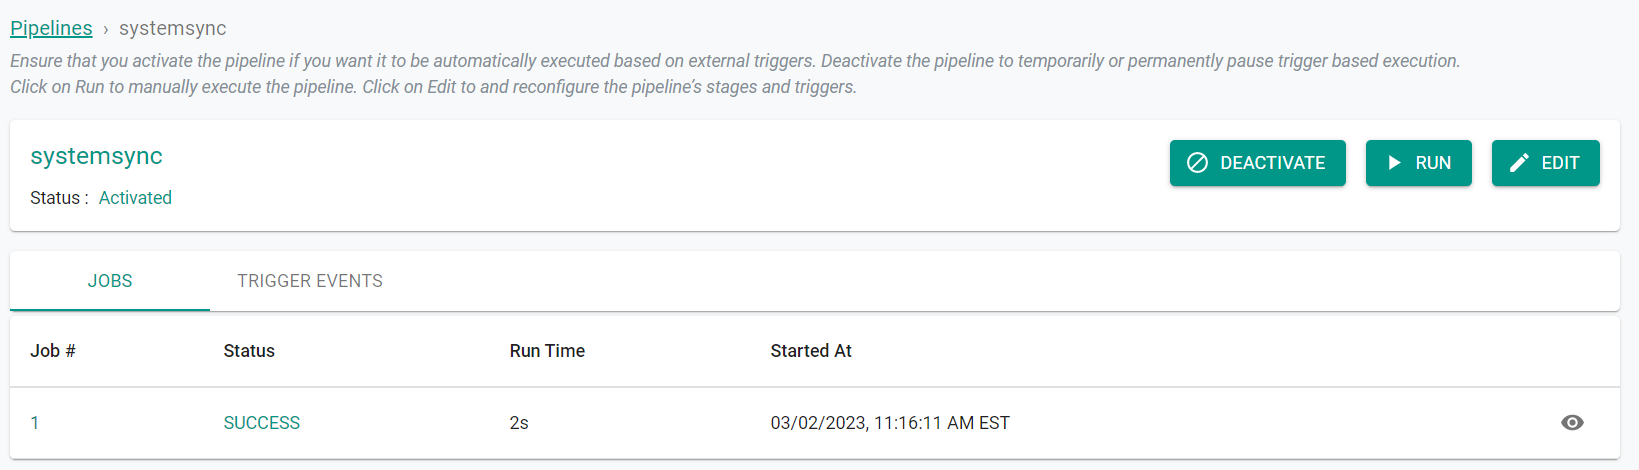
Step 5: Initial Sync
We will manually run the pipeline in order to sync the existing system resources to the GitHub repository. Note, only the resources that were included in the pipeline stage will be synced. In this case, only cluster resources will be synced.
- In your project, navigate to GitOps -> Pipelines
- Click on the previously created pipeline
- Click "Run"
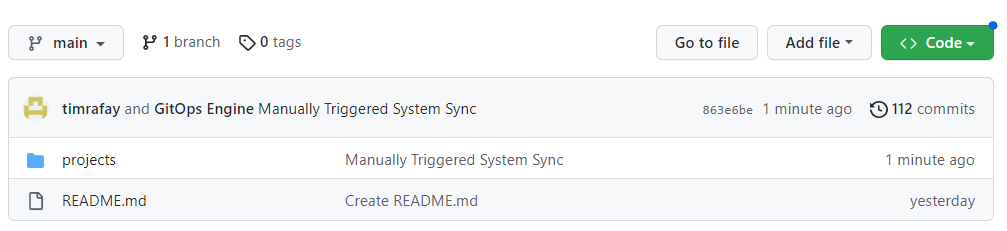
- Navigate to your GitHub Repository
We can see that a project folder has been created in the Git repository by the pipeline.
Recap
In this part, you successfully configured a GitOps pipeline to enable System Sync between the system and your Git repository. You are now ready to move to subsequent parts of the exercise to start testing System Sync with AKS clusters.