Part 9: Backup/Restore
This is Part 9 of a multi-part, self paced exercise.
What Will You Do
In this part, you will create a backup policy and use it to perform a backup of your cluster on Amazon S3. This part assumes that you have access to an account on Amazon AWS and have the ability to manage IAM policies.
Estimated Time
Estimated time burden for this part is 15 minutes.
Step 1: Cloud Credentials
In order to perform a backup of your cluster to your Amazon S3 bucket, you need to configure credentials that the backup agent on your cluster will use to write to the configured S3 bucket.
In the project where your cluster resides,
- Navigate to Infrastructure -> Cloud Credentials
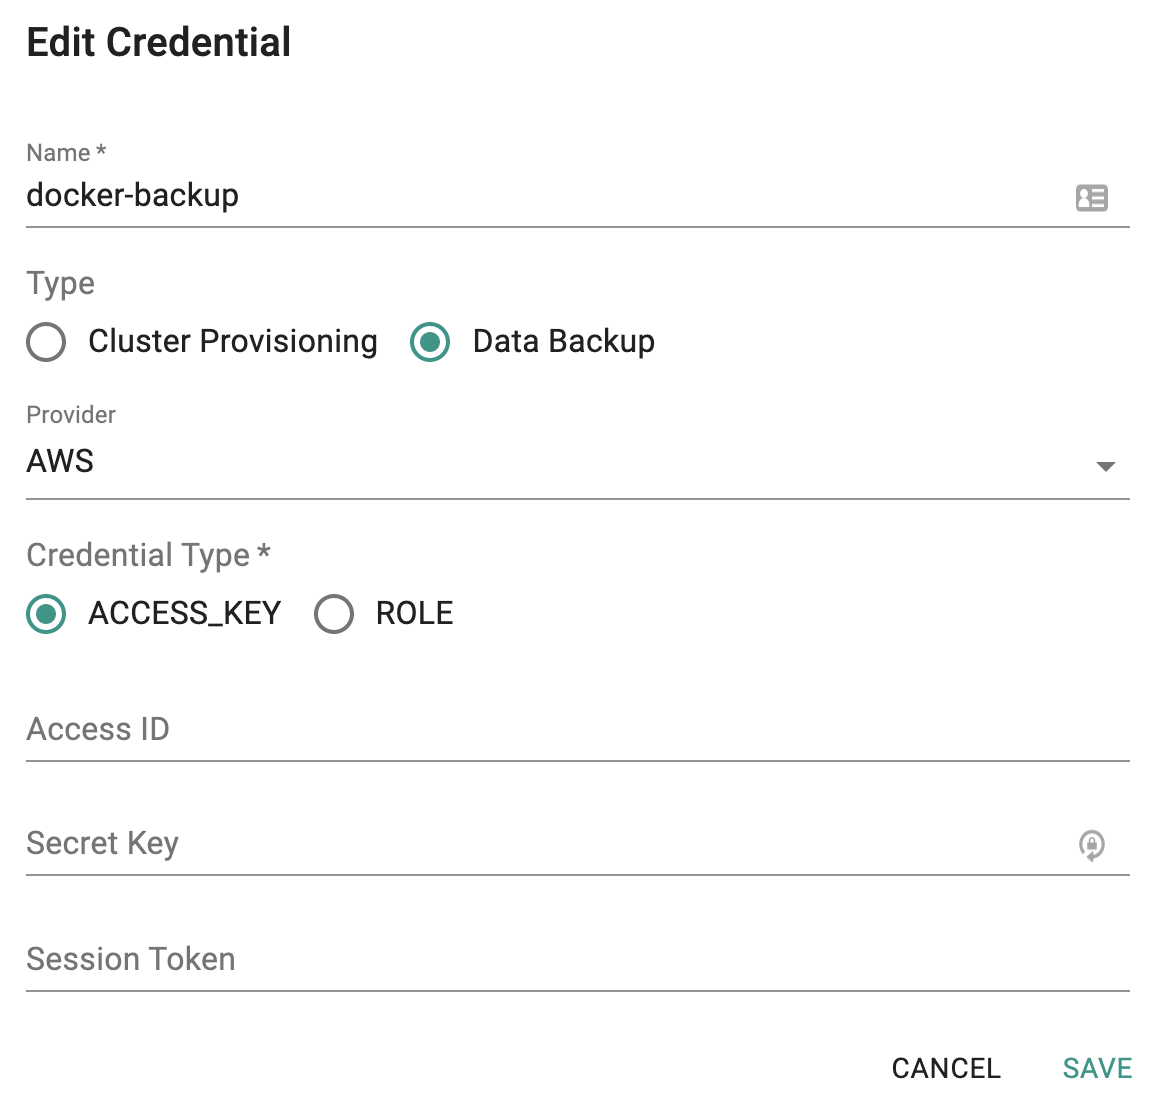
- Click on New Credential
- Provide a name and select "backup" for type
- Select "AWS" for provider
- Select "Access Key" for credential type (we cannot use an IAM Role because your cluster is not operating in AWS Infrastructure)
- Provide the access key and secret
To verify whether the credentials you provided are valid
- Navigate to Cloud Credentials
- Click on validate
If you see a message that says "Valid Credentials", proceed to the next step.
Step 2: Backup Location
In this step, you will configure a backup location where your cluster backups will be stored. In a given project, you can have as many backup locations as required.
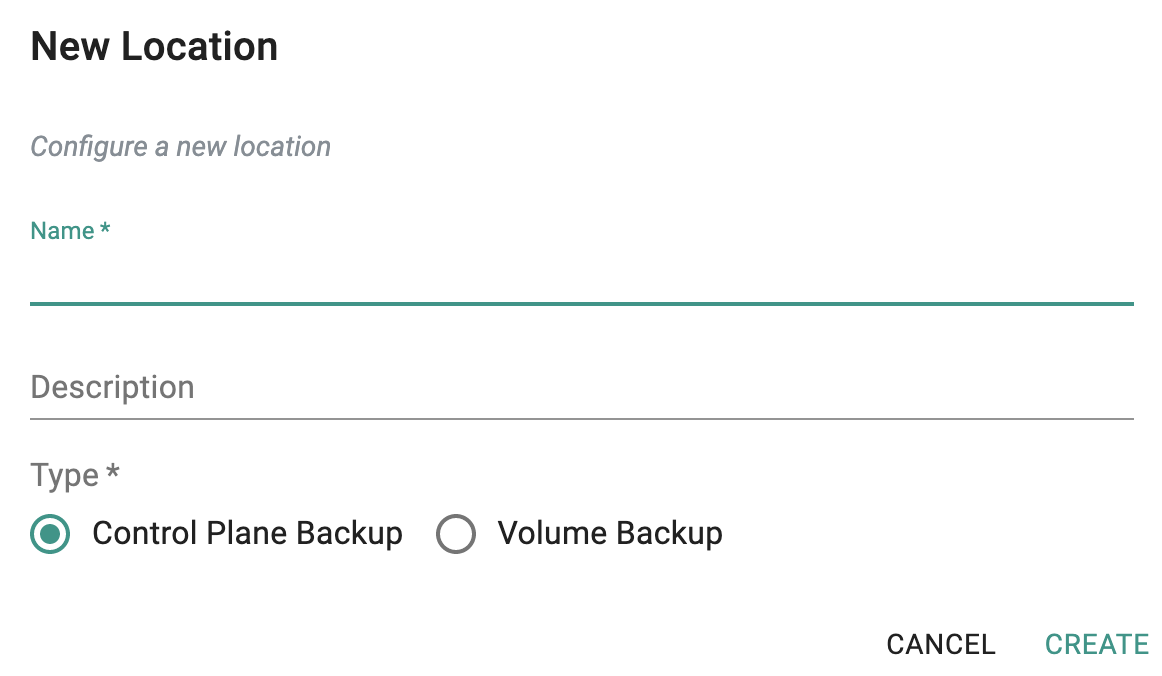
- Navigate to Backup/Restore -> Locations and click on "New Location"
- Provide a name and select "Control Plane Backup"
Important
It is possible to have completely different backup locations for the cluster's control plane and storage volumes to provide separation of duties and achieve compliance.
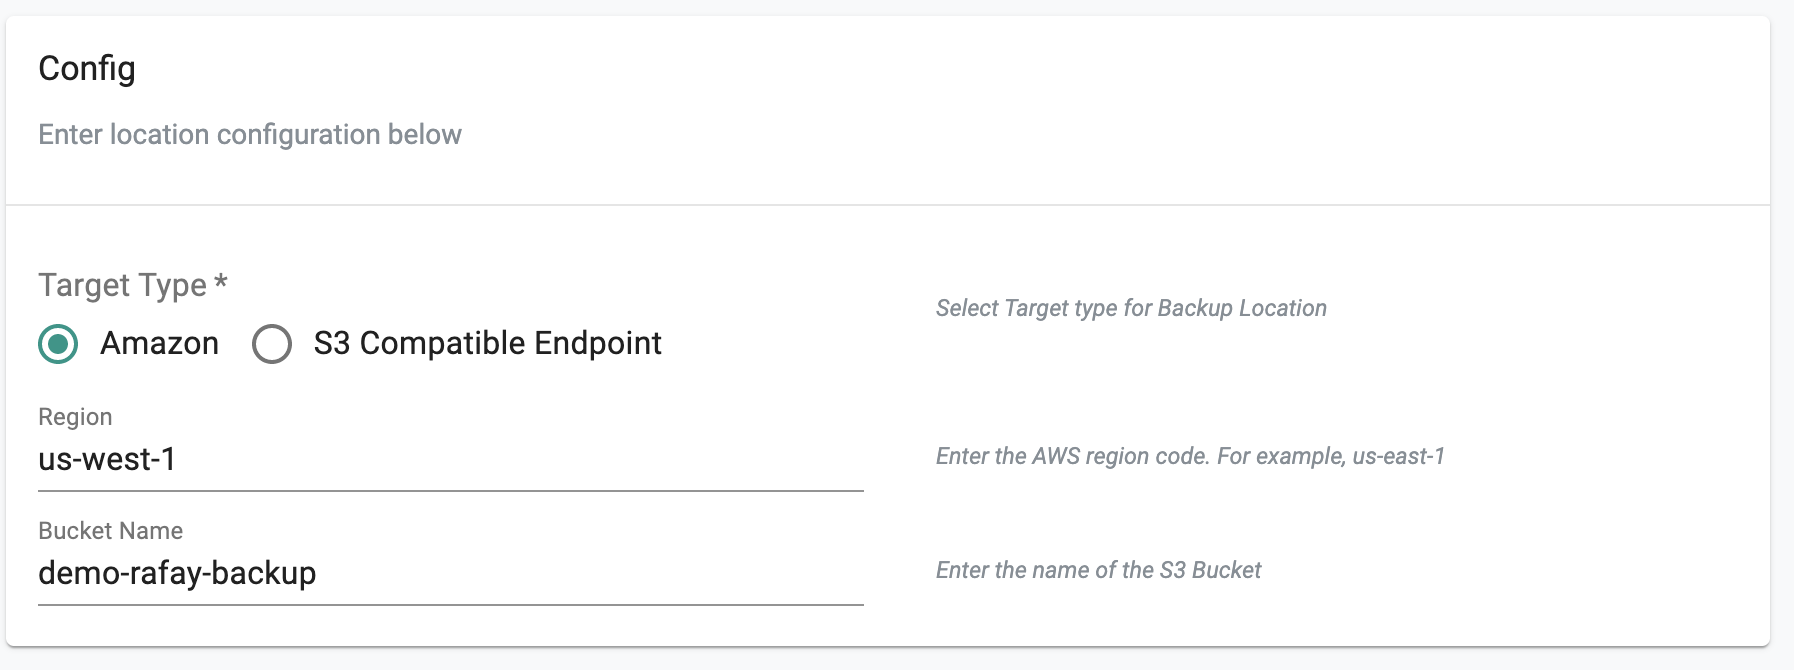
- You will now be prompted to provide additional configuration
- Enter the "AWS region" for your S3 bucket, enter the name of the "s3 bucket" and Save.
Step 3: Data Agent
At this point, we are ready to create a "data backup agent" and deploy it to our cluster.
Important
You can deploy the "same" backup agent to as many clusters in the project making it well suited for enterprise wide standardization and fleet workflows.
- Navigate to Backup/Restore -> Data Agent and click on "New Agent"
- Provide a "Name" and Save
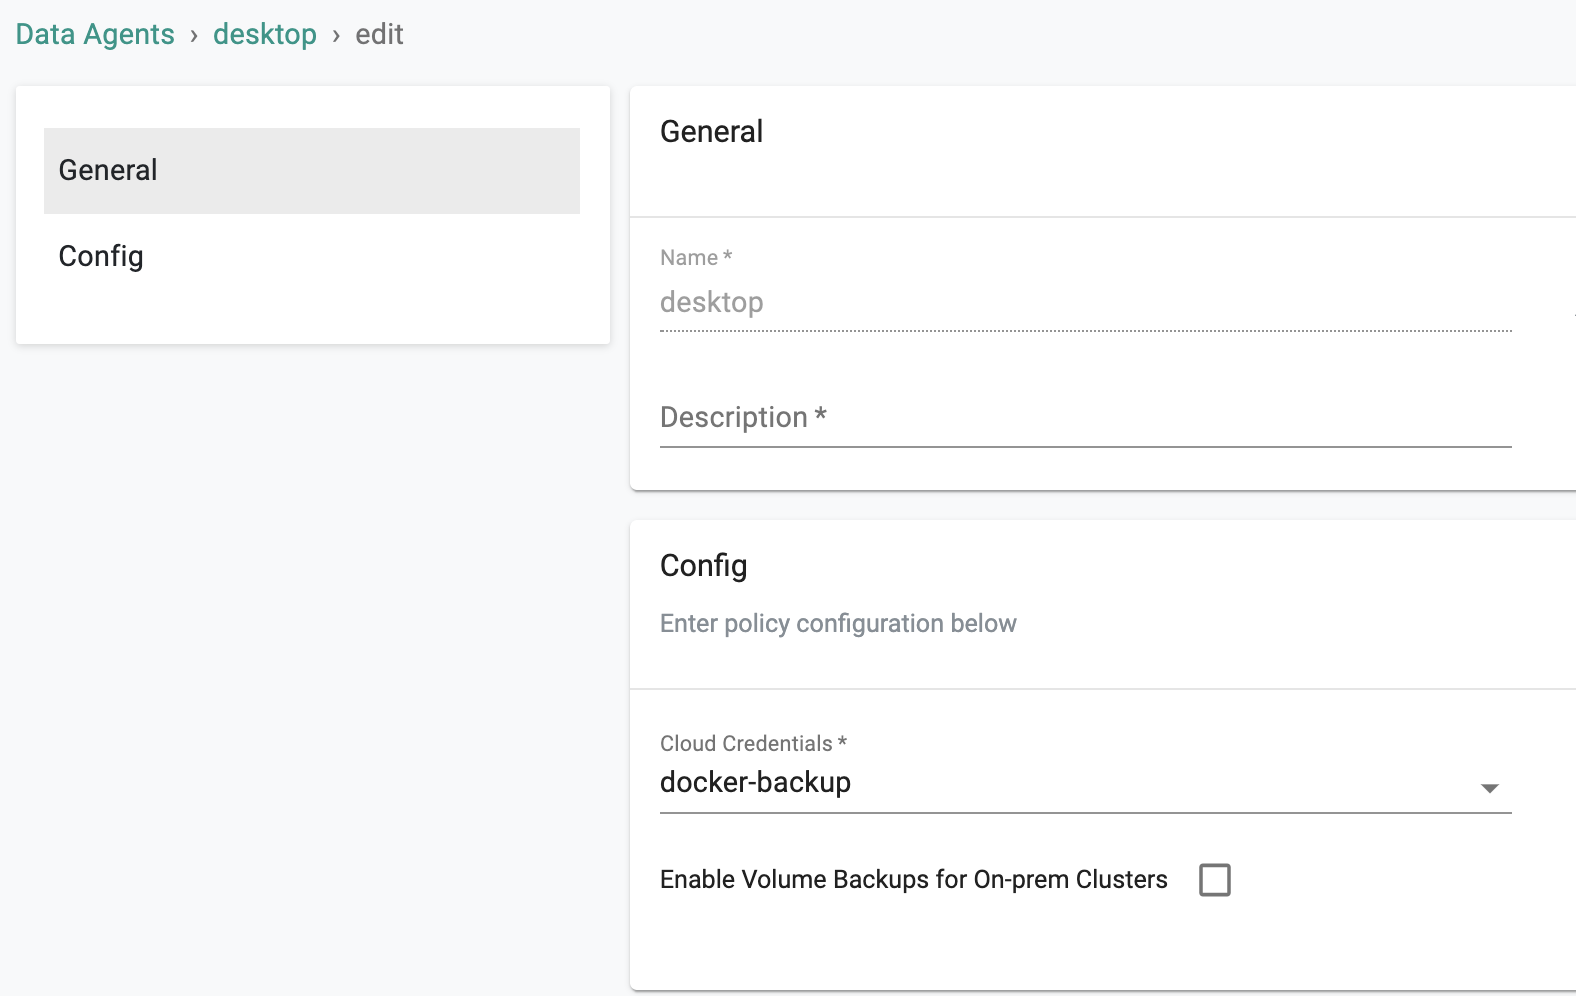
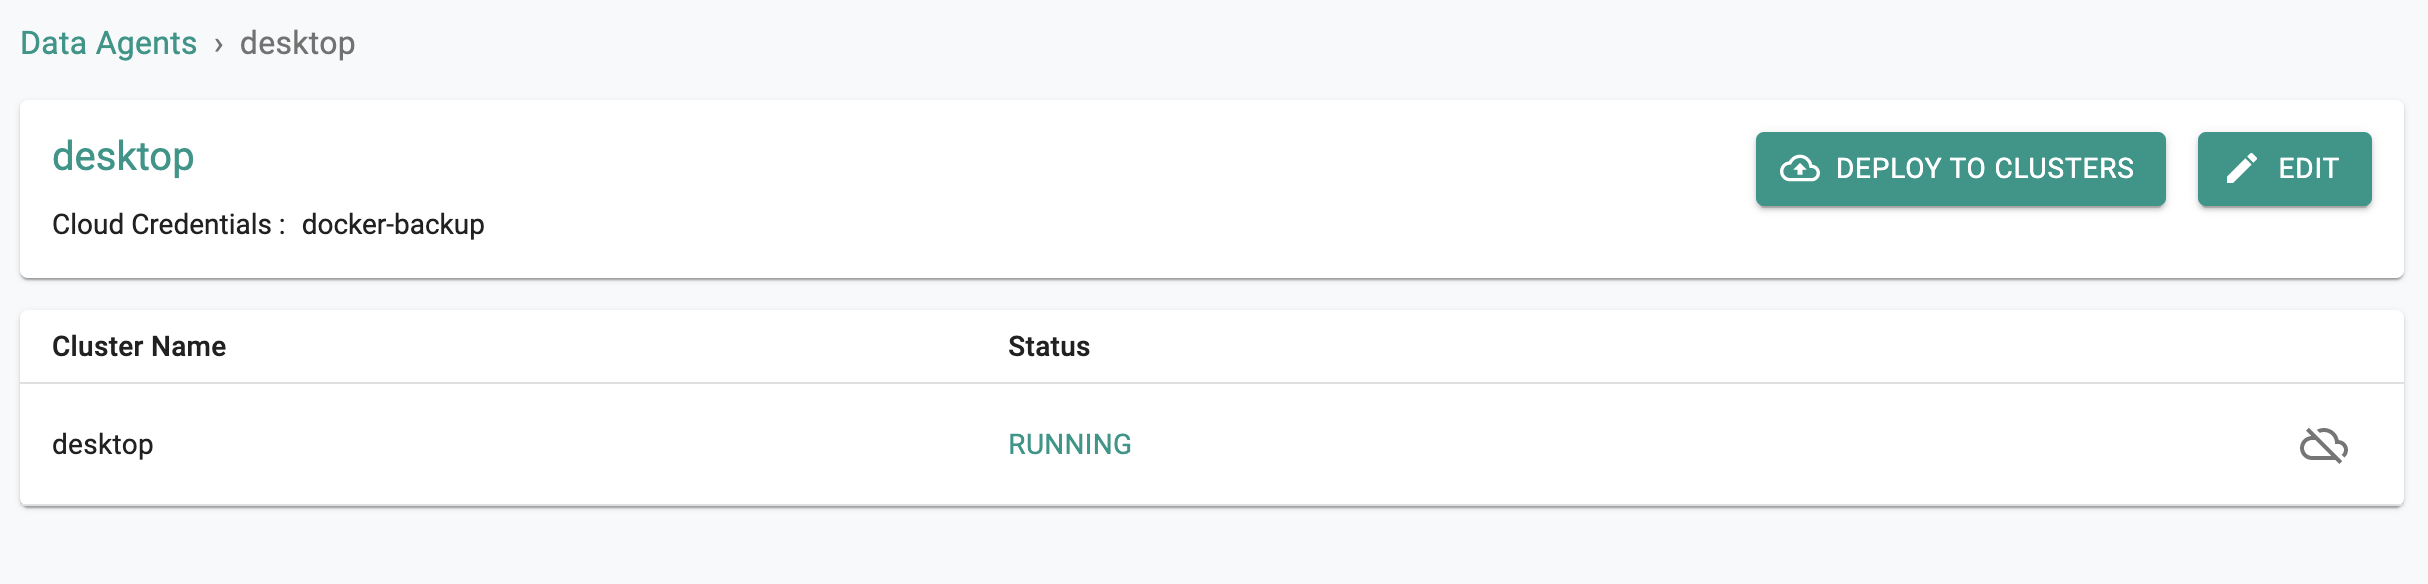
Now, we need to configure the backup agent with the location we created in the previous step.
- Select the "cloud credentials" you would like to use for this agent from the dropdown and Save
- Select "Deploy to Clusters" and select your cluster
A job will be created that will automatically deploy the "Velero Project's" components to your cluster with the required configuration. This process can take a few minutes to download the required container images and make everything operational.
Optionally, you can use kubectl to see what the backup agent looks like on your cluster by using the command shown below.
kubectl get po -n rafay-system

NAME                                             READY   STATUS    RESTARTS   AGE
controller-manager-868759489b-f6xpg              1/1     Running   15         21h
edge-client-75d456497-78tqp                      1/1     Running   1          21h
rafay-connector-6c6c4f67cf-m5c6n                 1/1     Running   25         21h
relay-agent-7bb69f58c4-5chgc                     1/1     Running   1          21h
velero-dk6wpm1-desktop-55f57589ff-x6nf8          1/1     Running   0          10h
Step 4: Backup Policy
At this point, you have configured and deployed a "data backup agent" on your cluster to backup to a "specific location". However, the agent does not know
- What needs to be backed up?
- How frequently do backups have to be performed?
- What locations to be used for the control plane and persistent volumes?
- How long to retain the backups?
We will create a backup policy that will capture these rules.
Important
You can have as many backup policies as you need in a given project
- Navigate to Backup/Restore -> Policies and click on "New Policy"
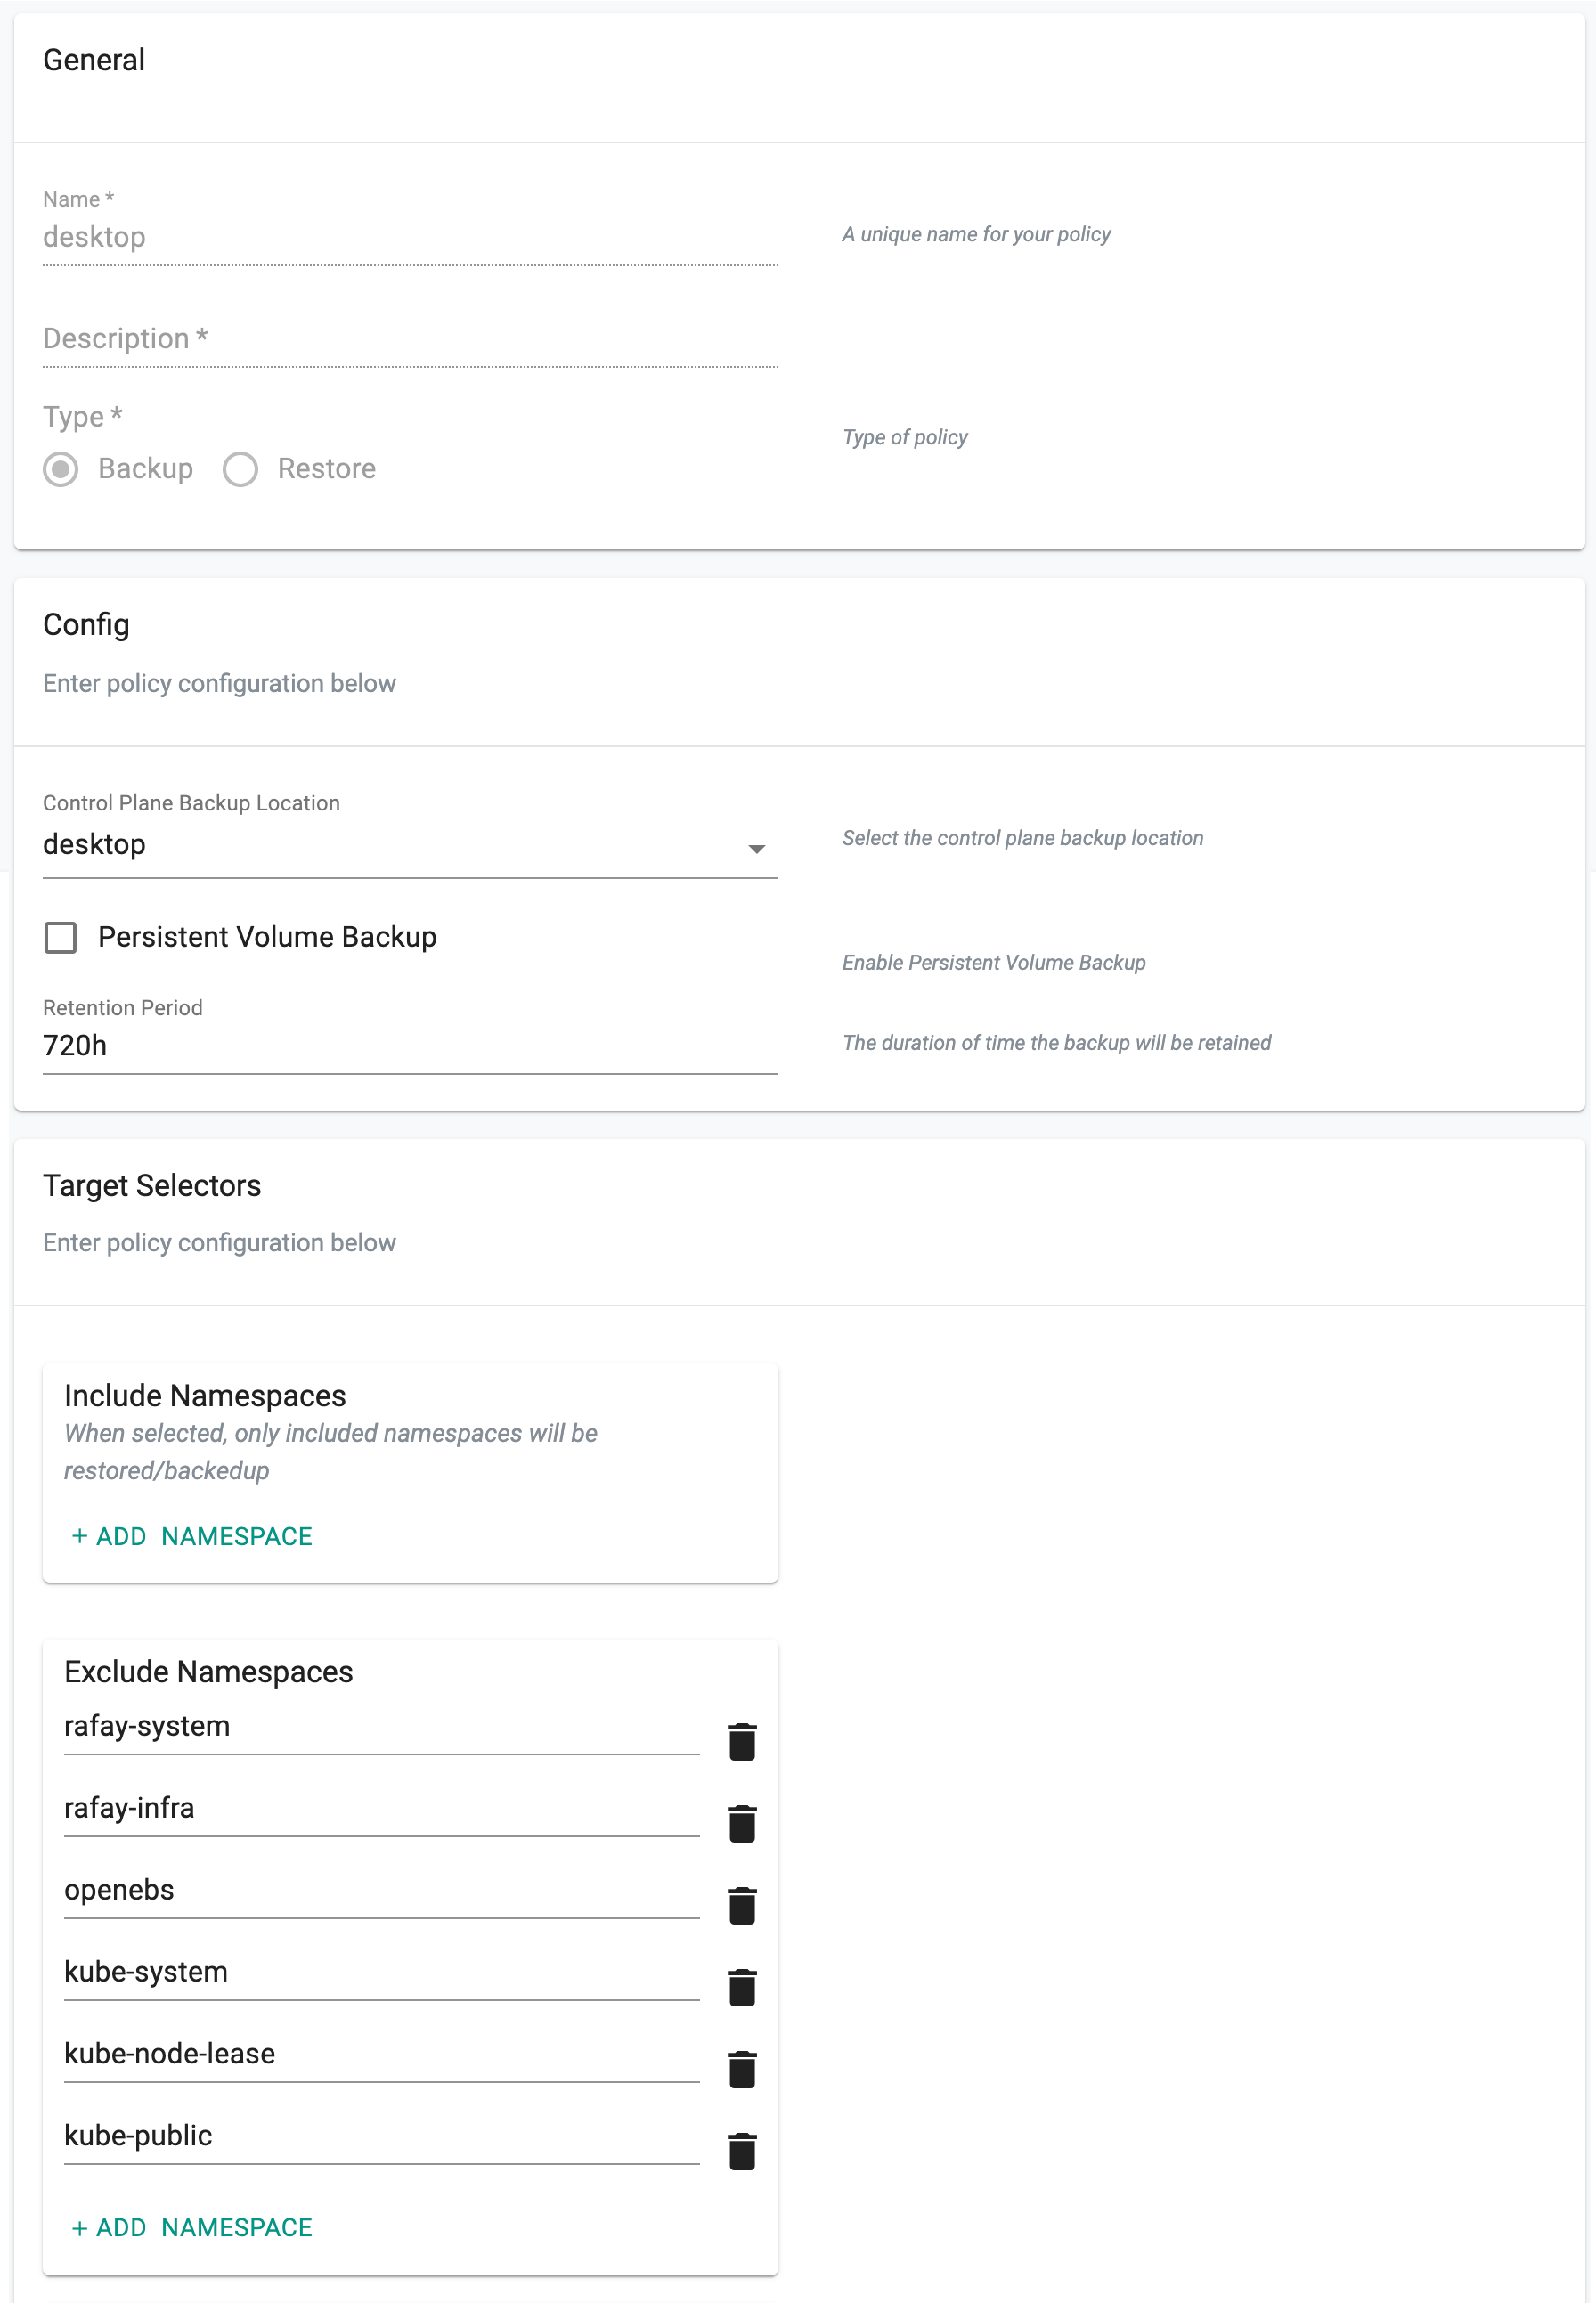
- Provide a "Name", select "Backup" for type and Save
In the "Config" section
- Select the location you created in the previous step for "control plane" backup
- For now, accept the defaults for inclusion/exclusion and Save
Step 5: Backup Job
Now, we are ready to actually perform a backup of our cluster. We will create a "Backup Job" where you will associate a "specific backup policy" with "your cluster". This will provide the backup agent on the cluster with the intelligence it requires to perform backups or restores.
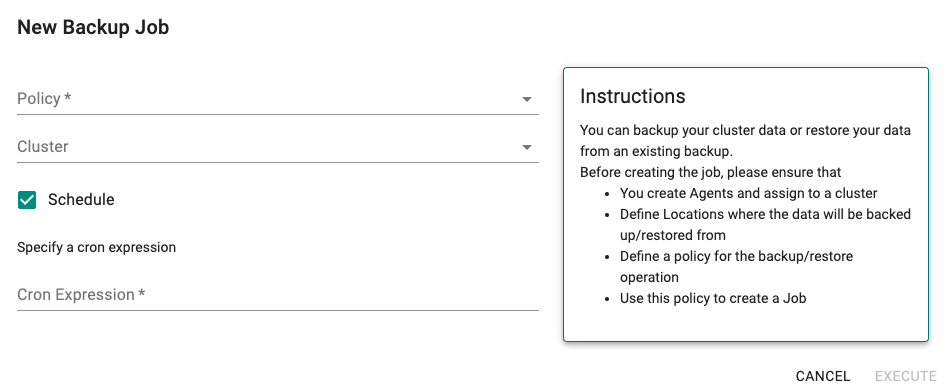
- Navigate to Backup/Restore -> Jobs and create a "New Backup Job"
- Select the "backup policy" you created in the previous step in the dropdown
- Select your cluster to associate the backup policy with.
- Optionally, by selecting the "Schedule" option, you can configure a "cron schedule" to perform backups on a periodic basis allowing organizations to implement a robust, continuous backup strategy.
- Click on Execute
At this point, the job will be submitted to the remote cluster. It can take a few seconds for the job to be displayed on the "job history" list. Once the job is complete, clicking on the job's name will provide you with additional detail about the backup itself.
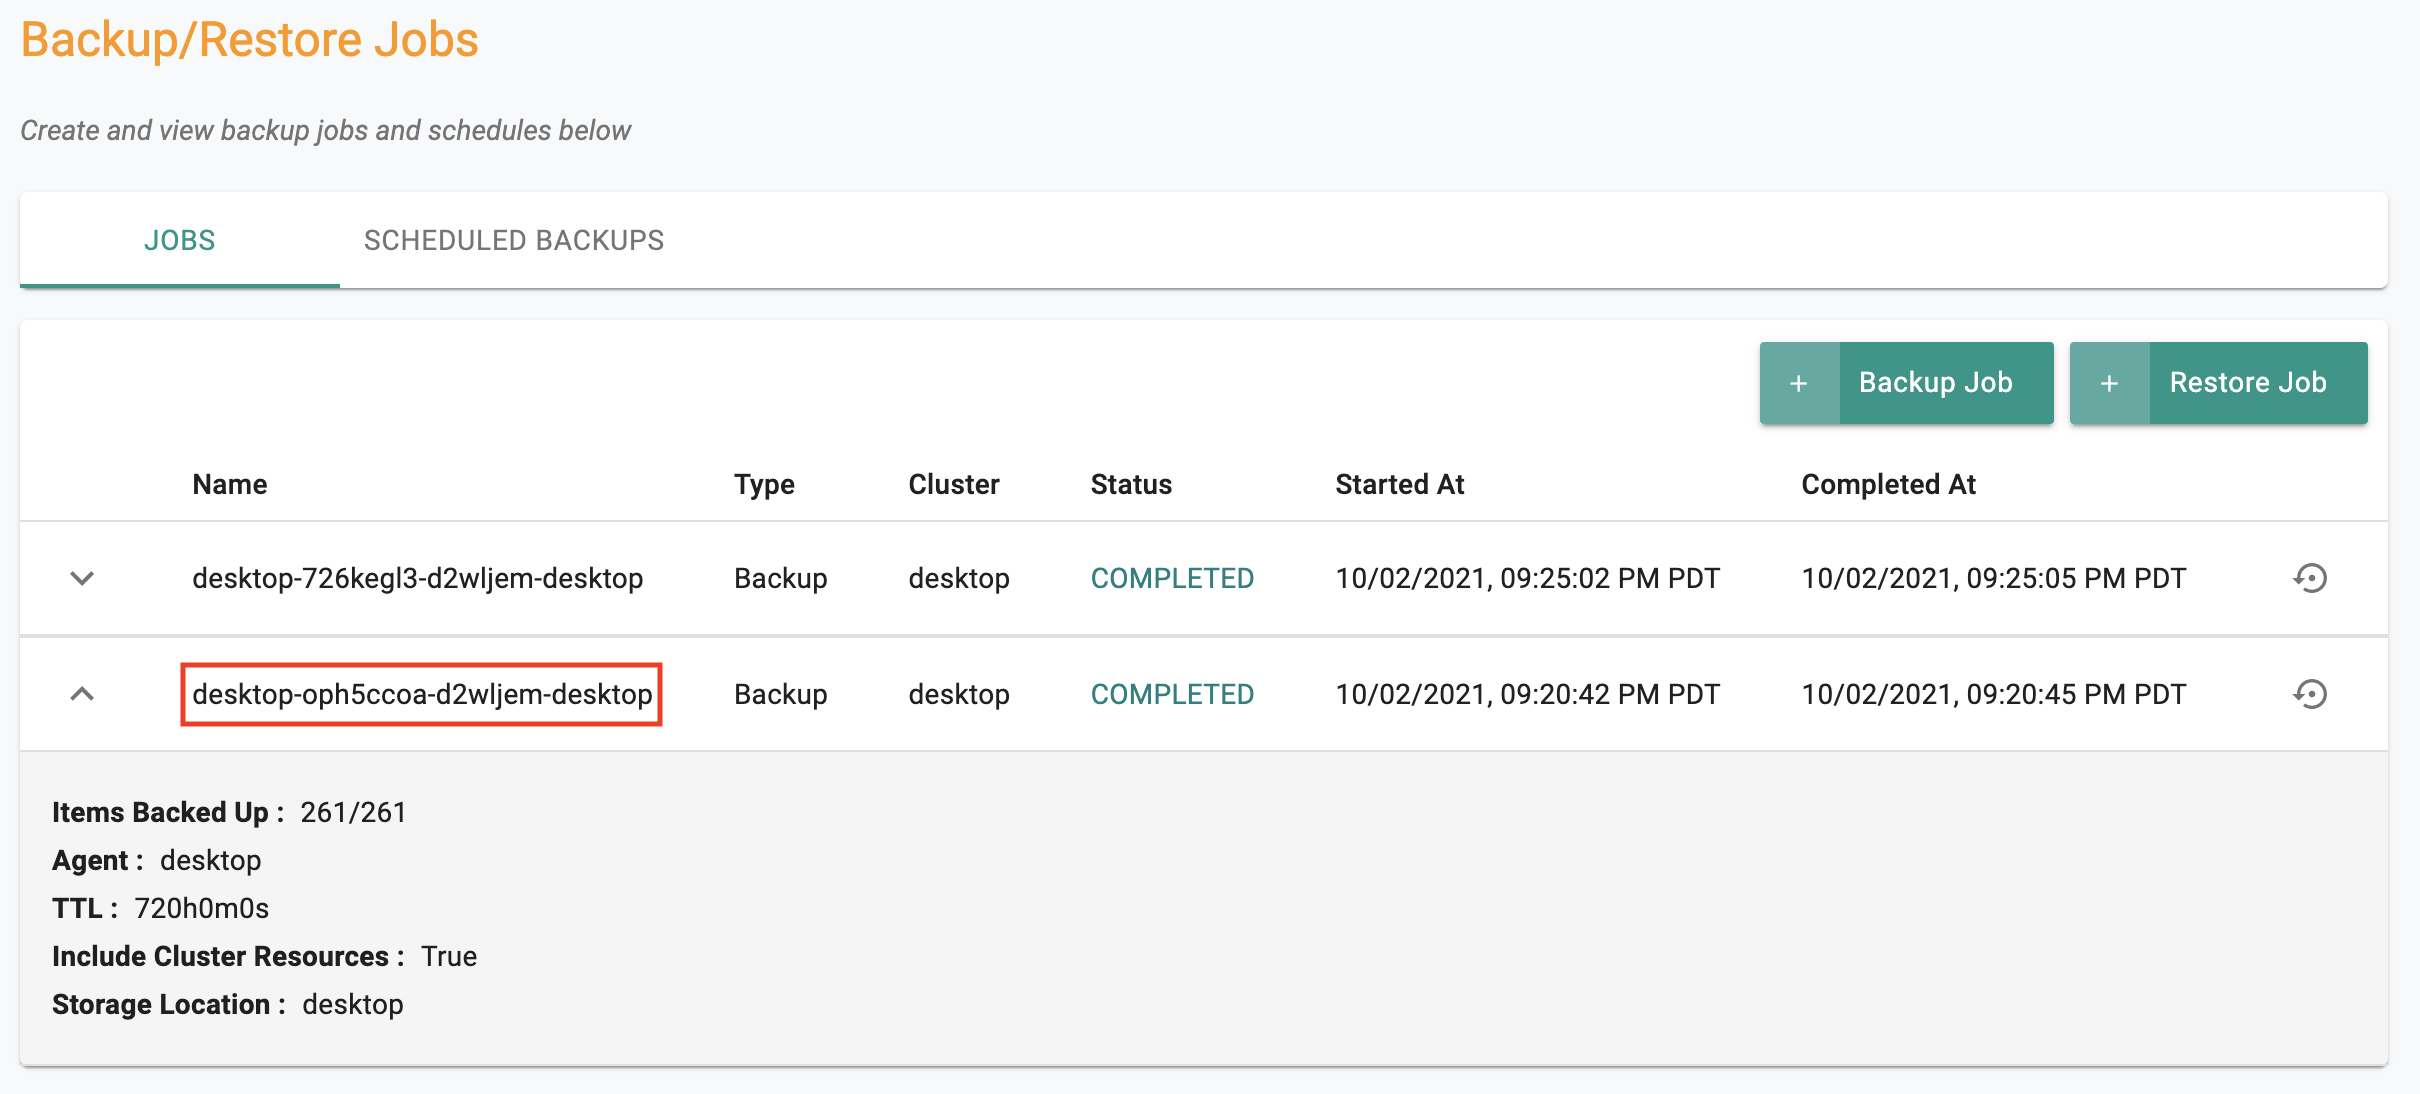
The name of the job is identical to the name of the "object" in the configured S3 bucket. Let us navigate to AWS to see what this looks like
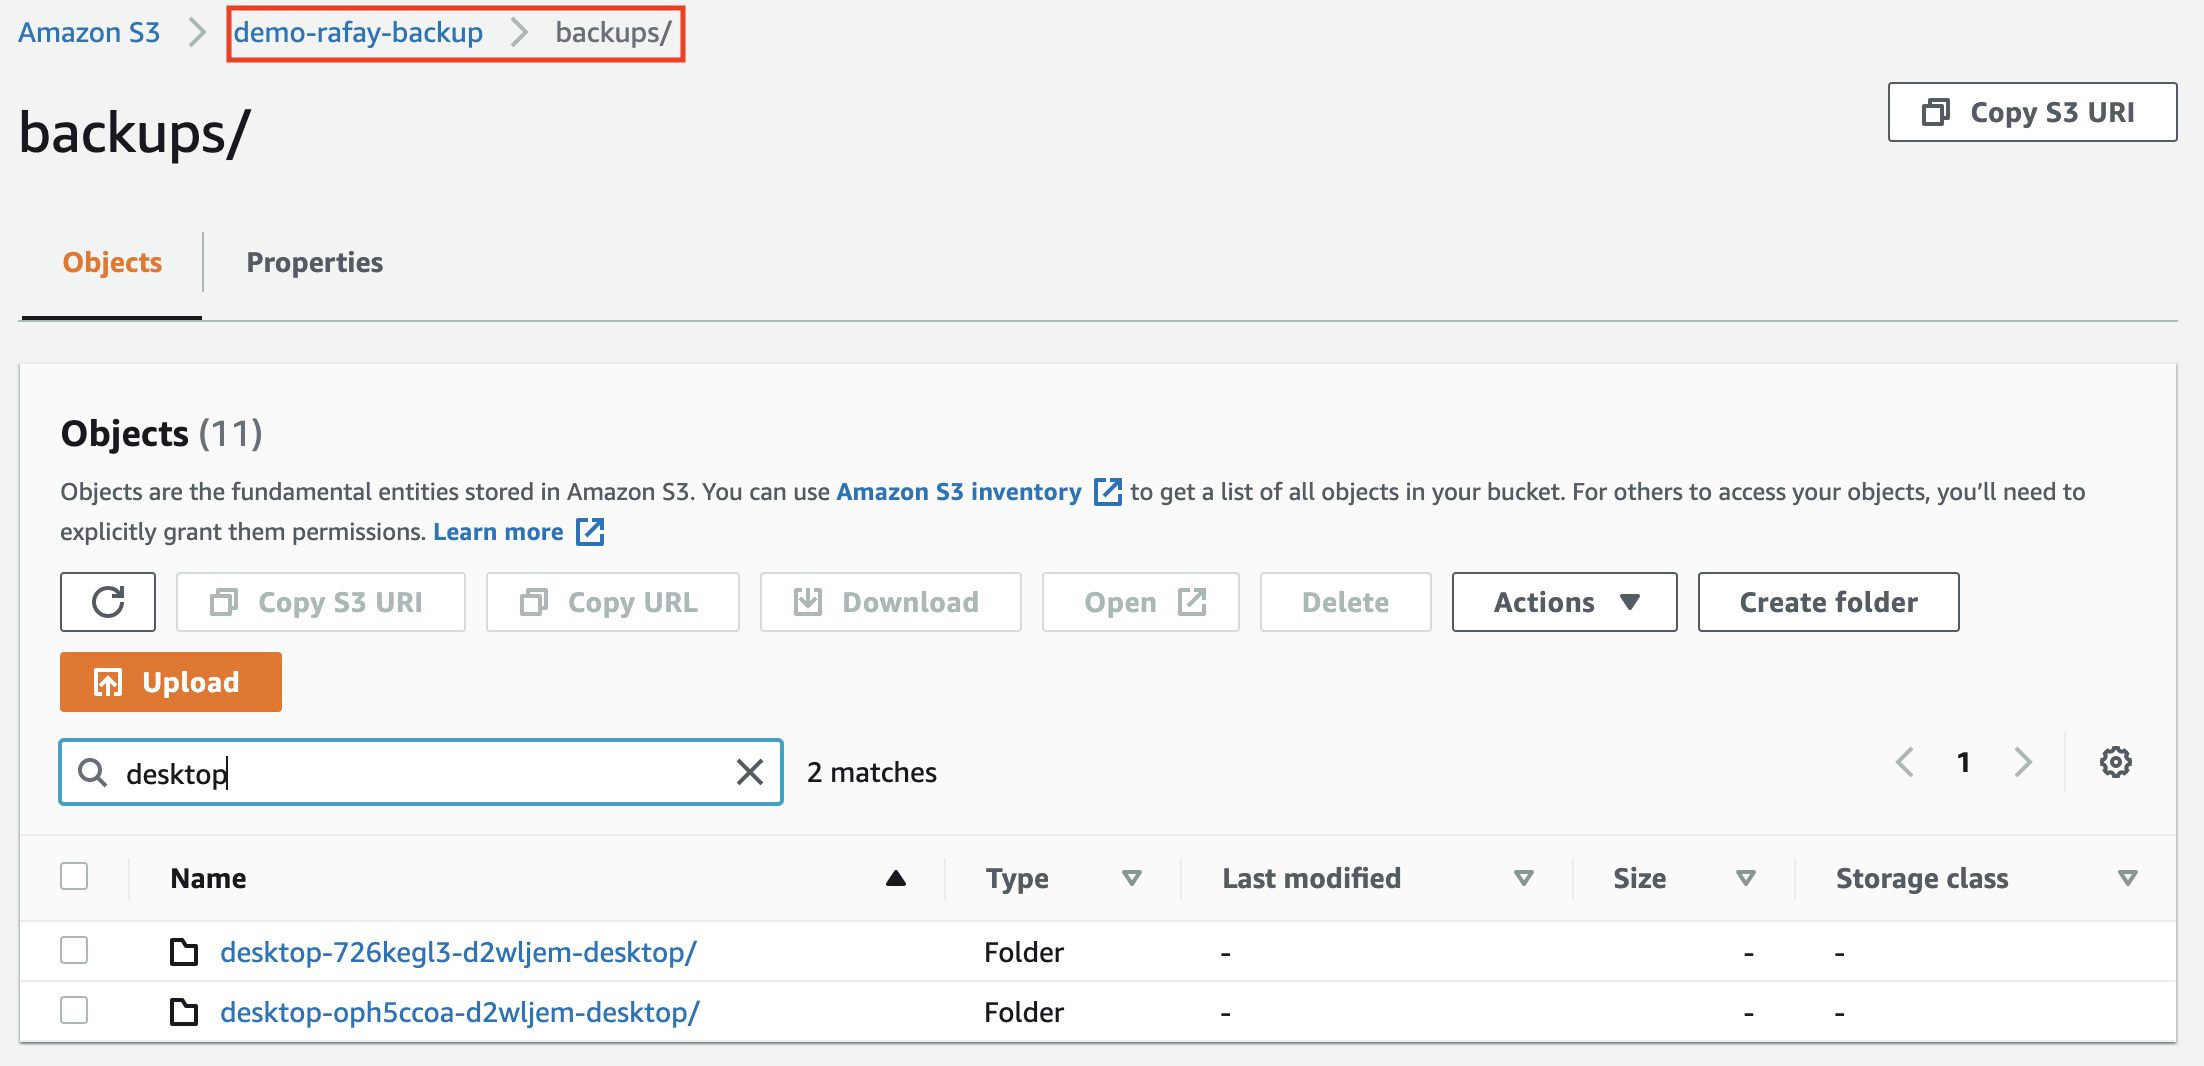
- Navigate to the AWS Console and login
- Select your S3 bucket and click on "backups"
- Search for your "policy name" to view the objects
- Optionally, click into an object to view the actual backup files. You will notice that all the content is 100% compatible with the Velero project.
Recap
Congratulations! At this point, you have successfully created a backup policy and performed a backup of your cluster on Amazon S3.