Custom Blueprint
Customers can create and manage "Custom Cluster Blueprints" by adding "addons" to the default cluster blueprints. It is important to emphasize that this "builds on" and "extends" the "Default Cluster Blueprints" and does not replace it.
Important
You can manage the lifecycle of custom blueprints using the Web Console, or RCTL CLI or REST APIs. It is strongly recommended to automate this by integrating RCTL with your existing CI system-based automation pipeline.
The below matrix presents a breakdown of actions like creation, updating, and deletion of custom blueprint(s) across multiple deployment methods: Interactive UI, Declarative RCTL commands, API-driven automation, and Terraform.
| Action | UI | CLI | API | Terraform |
|---|---|---|---|---|
| Create | Yes | Yes | Yes | Yes |
| Edit/Update | Yes | Yes | Yes | Yes |
| Delete | Yes | Yes | Yes | Yes |
Scoping
Other than the default cluster blueprints, which is common across all projects, all custom blueprints are scoped to a Project. This isolation boundary guarantees that there is no accidental spillover or leakage. If required, blueprints can be shared with selected or all projects.
Inheritance
Custom blueprints can inherit from a default blueprint or golden blueprint.
Default Blueprint
The Default Blueprints available out of the box are the following:
- default-aks (specific to AKS)
- default-gke (specific to GKE)
- default
- default-openshift (specific to OpenShift)
- default-upstream (specific to upstream)
- minimal.
The default blueprint carries core services such as Prometheus, log aggregation and more needed to run enterprise Kubernetes workloads while the minimal blueprint contains the bare-bones necessary components to get a cluster up and running and is better for either dev/test situations, or if you want to completely use your own custom services and add-ons.
Each Default Blueprint has different group of system add-ons with multiple versions. Users can pick any of these Default Blueprint and customize to create a new Blueprint version
Golden Blueprint
A custom blueprint can also inherit from a golden blueprint. This is extremely useful when an admin wants to set a specific set of rules that need to be enforced across a fleet of clusters i.e. a golden path but then for certain cluster types or a smaller group of clusters, needs to potentially enable other services, add more policies, etc. This is also useful to enforce compliance and security as configurations in a golden blueprint cannot be overridden or deleted by the custom blueprint.
Important
Any installation profile, service, and policies specified in a golden blueprint cannot be overridden or deleted in the custom blueprint.
For more information on Golden Blueprints, refer here.
RBAC
Users manage the lifecycle of cluster blueprints with an "infrastructure administrator" role in the Org.
Step 1: Create or Update Custom Blueprint
As an Admin in the Web Console,
Creating A Blueprint
- Navigate to the Project and click on Blueprints under Infrastructure
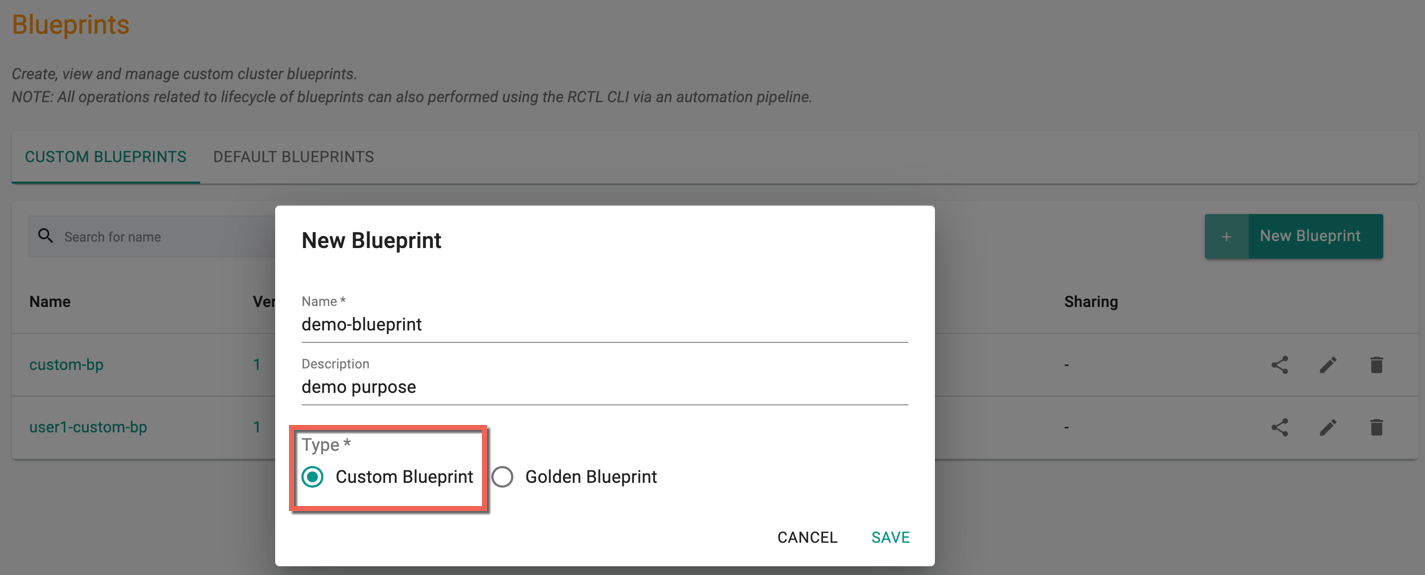
- Click on New blueprint
- Provide a name and description
- Select the Type Custom Blueprint, which is selected by default and click Save
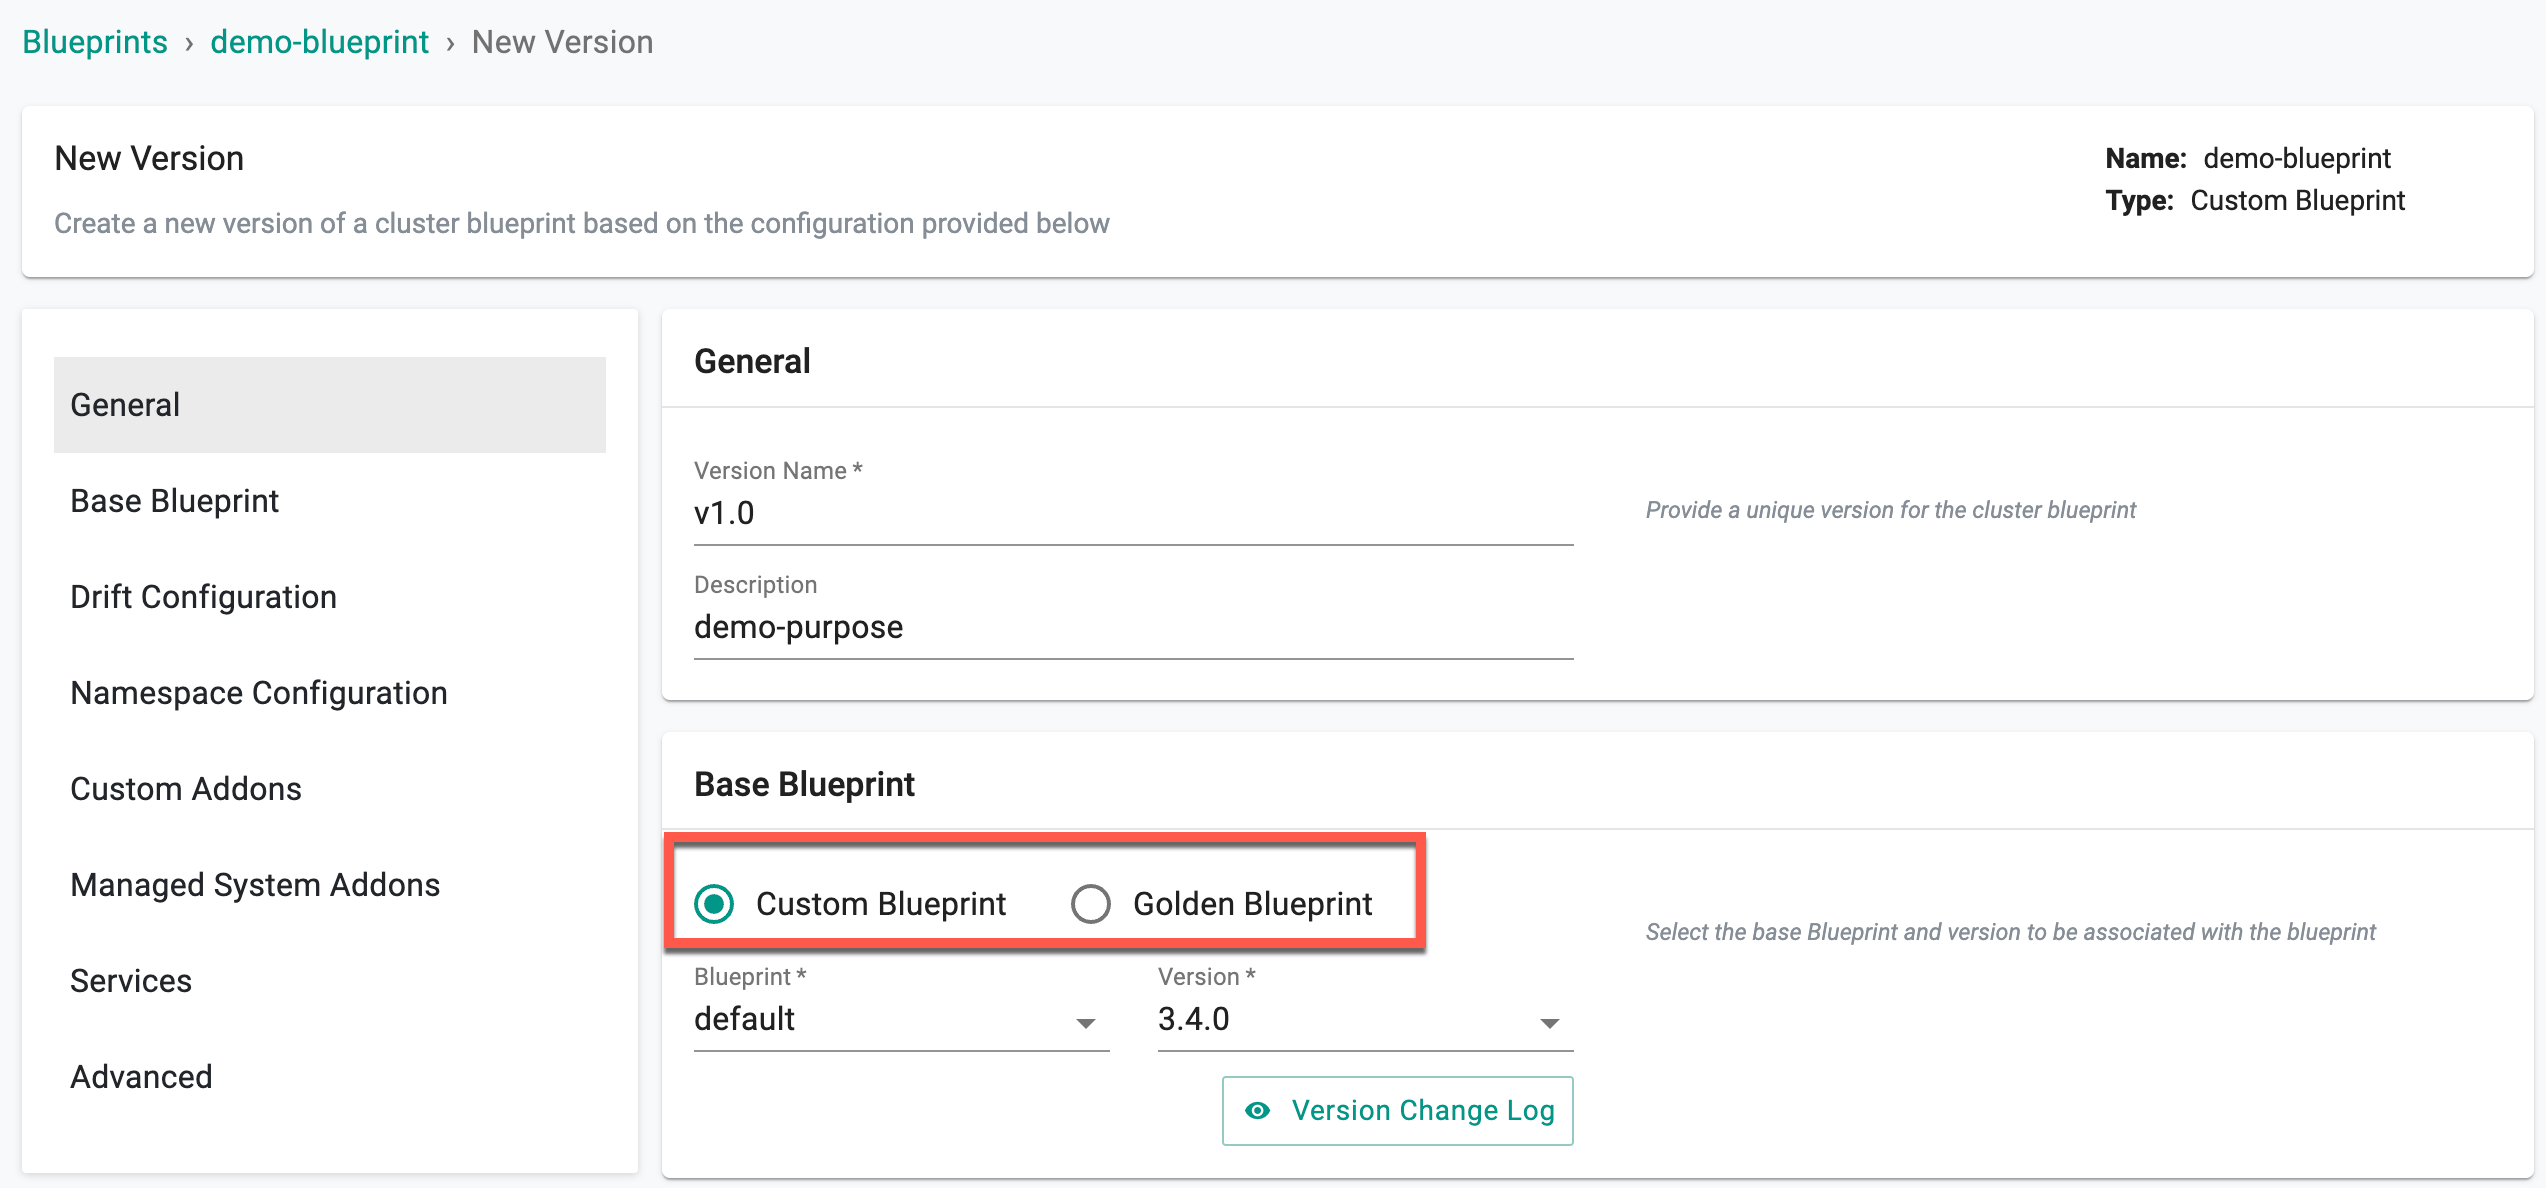
- Click on New Version and use the wizard to provide details
- Provide a version number/name
- Select a Base Blueprint, either Default Blueprint (or) Golden Blueprint. See above for when you should use the default blueprint or golden blueprint.
Updating A Blueprint
- Navigate to the Project and click on Blueprints under Infrastructure
- Click on your blueprint
- Click on New Version and use the wizard to provide details
- Provide a version number/name
Step 2: Enabling Key Services, Add-Ons, and Configurations
- Next, let's see the optional functionality that can be enabled in terms of add-ons and services. If you do not want to enable any of this, you can click save changes.
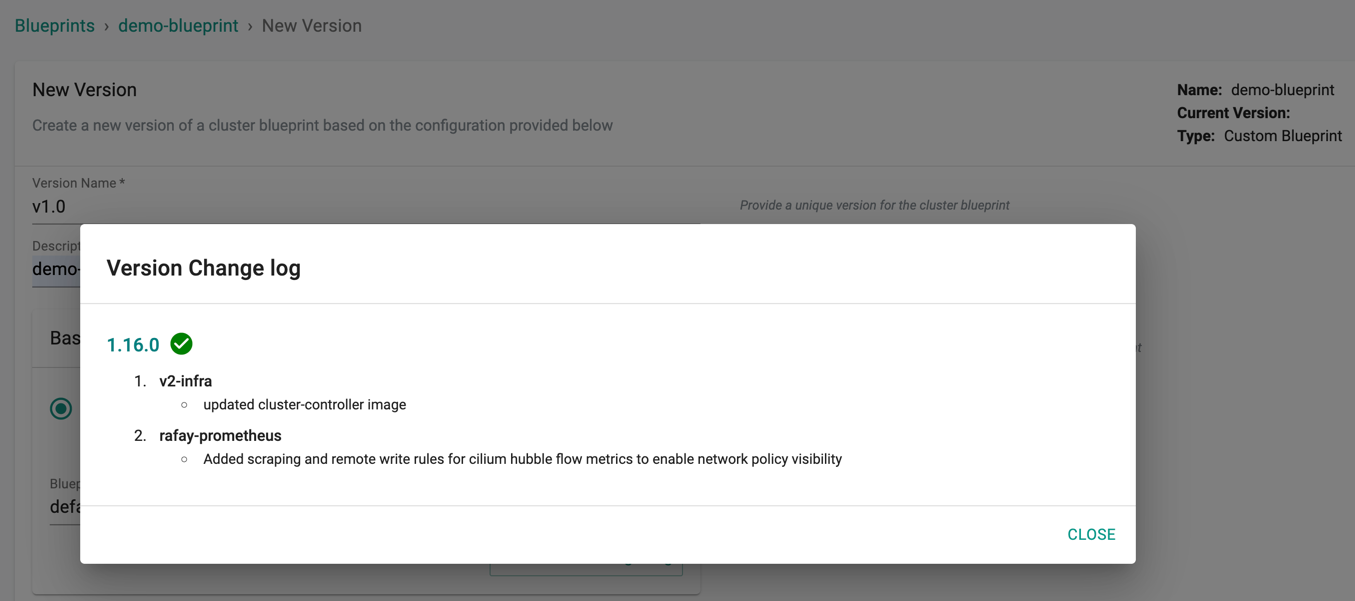
To view the Blueprint version changes (logs) performed on base blueprint, click Version Change Log. This shows the list of add-ons associated with each version
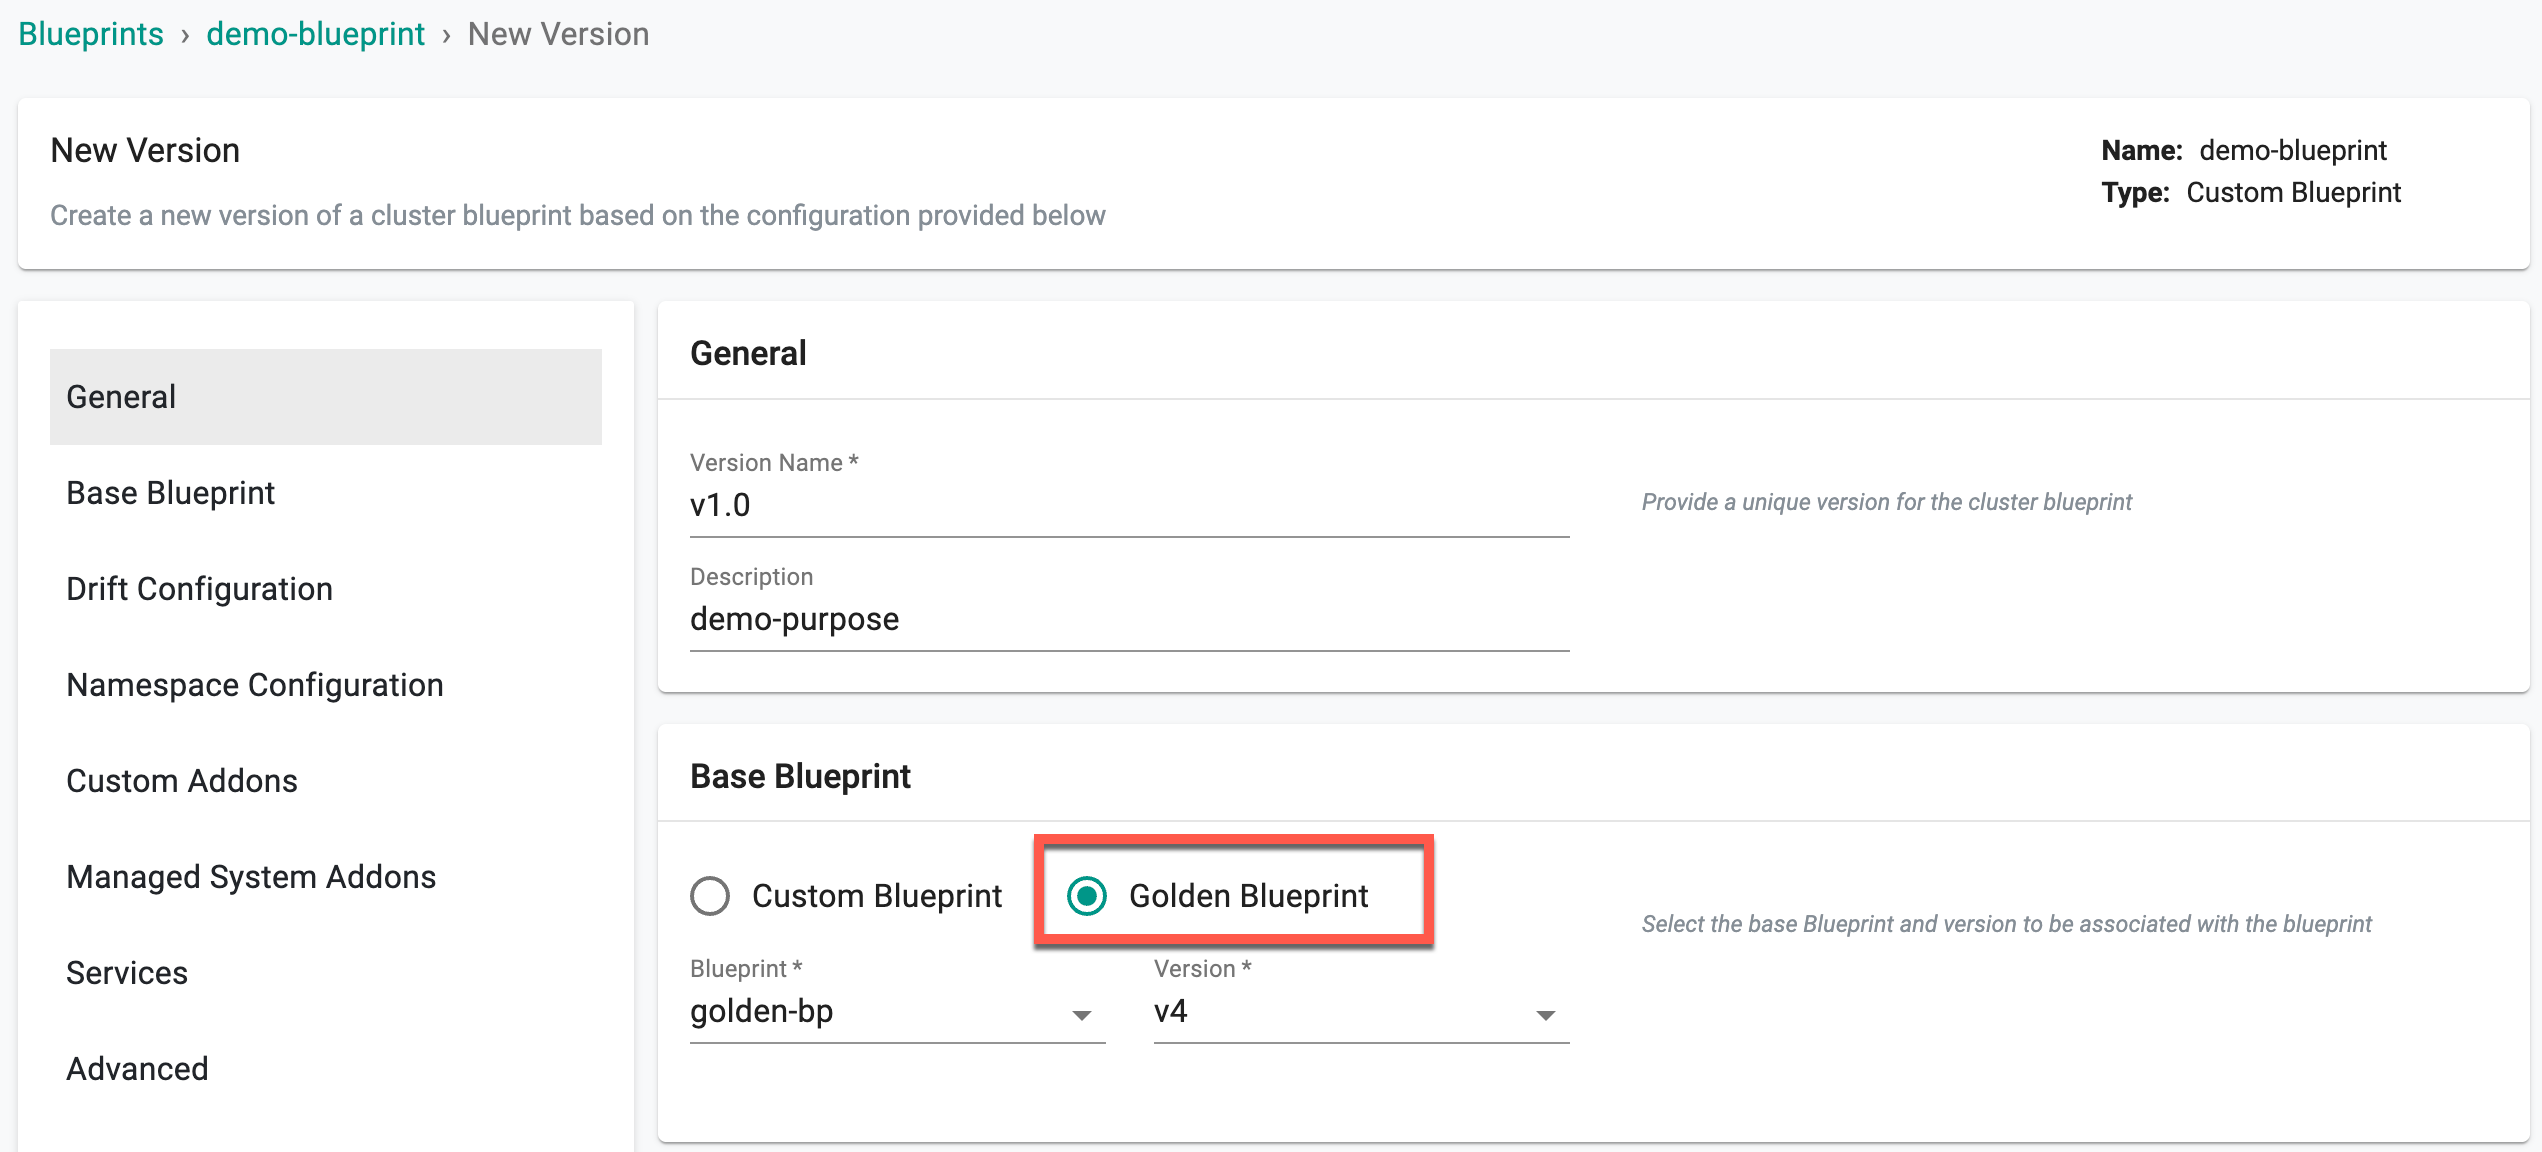
Golden Blueprint
To use Golden Blueprint as the base, select the Golden Blueprint option. Choose one of the existing golden blueprint and its version from the drop-down
When a user chooses a golden blueprint as a base during custom blueprint creation, - modifying the namespace sync option is not allowed - editing the OPA Gatekeeper and network configuration are not allowed, if these configurations are already set up in the selected golden blueprint. However, users can add additional OPA and network policies - the addons applied in the Golden BP cannot be included in the custom BP
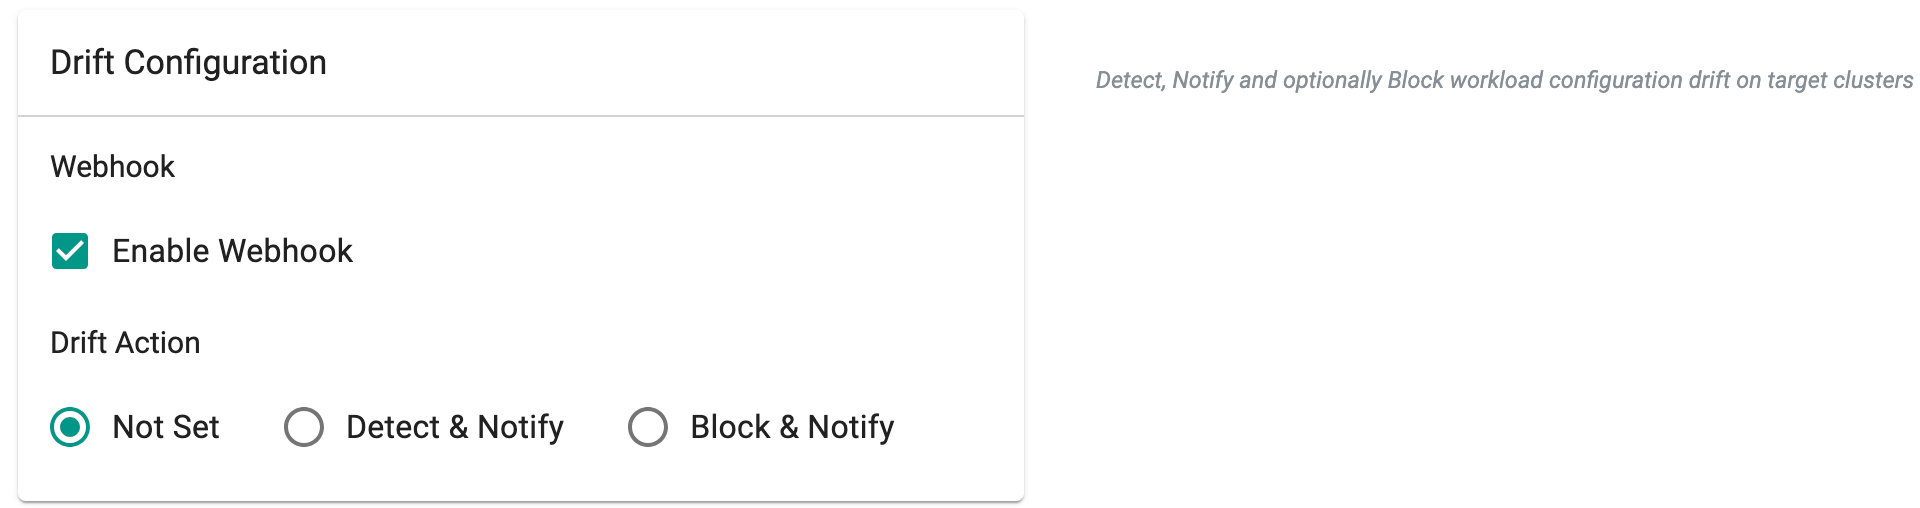
Enabling Drift Detection (Optional)
Optionally,
- Enable Webhook and select a drift action
Blueprint sync operations determine the status of the web-hook, considering settings at the blueprint, project, or organization levels. The order of assessment for the enable/disable configuration of the drift web-hook follows the pattern outlined in the table provided below.
| Organization | Project | Blueprint | Expected Behaviour |
|---|---|---|---|
| Enabled | Enabled | Enabled | Drift web-hook enabled on all clusters in the org |
| Enabled | Disabled | Enabled/Disabled | Drift web-hook disabled on all clusters in the project, but enabled on all clusters in different projects under the same org |
| Disabled | Enabled/Disabled | Enabled/Disabled | Drift web-hook disabled on all clusters in the org |
Important
In alignment with the end of support for PSPs in Kubernetes, turnkey support for PSPs has been deprecated. New Blueprints will no longer support the use of PSP. Existing PSP configurations configured through Blueprints will be maintained but cannot be updated. PSP addons are therefore marked as ready instantly on any Blueprint updates
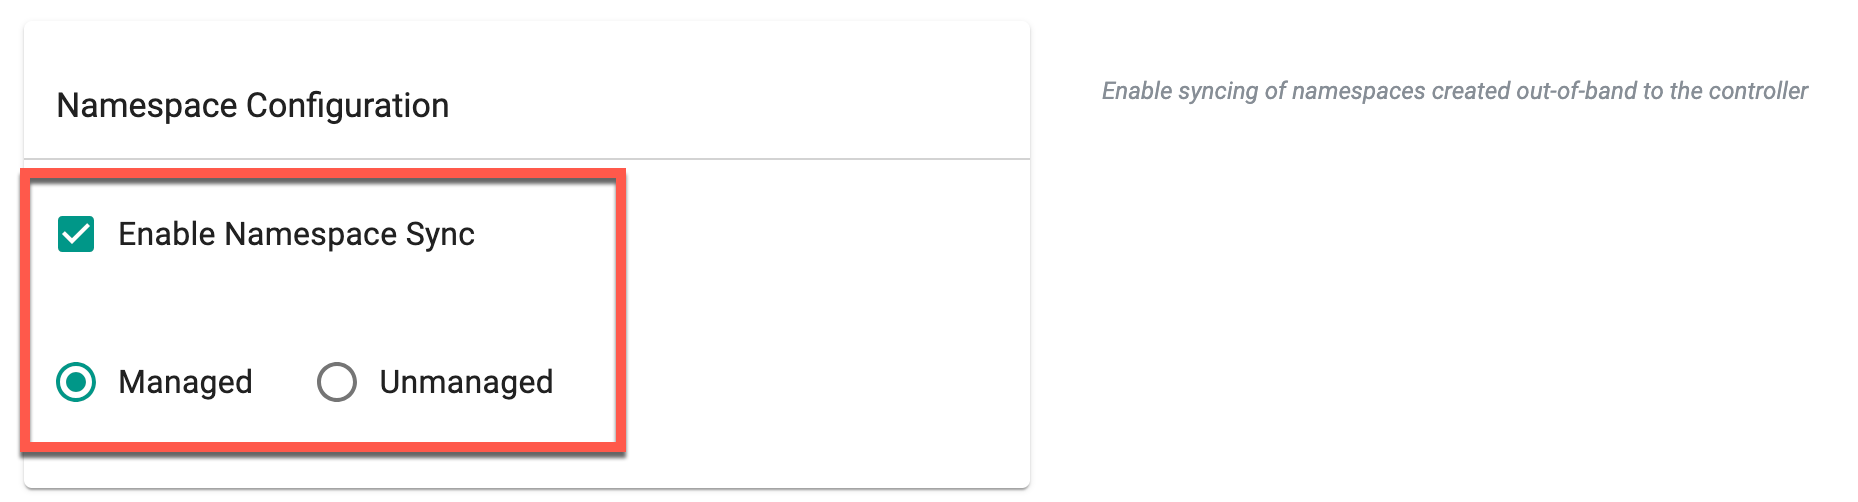
Enabling Namespace Syncing (Optional)
- Optionally, enable Namespace sync under Namespace configuration. Once enabled, you can choose between Managed or Unmanaged options. Managed is set as the default option upon selection. Choose Unmanaged to sync the namespace in unmanaged mode and deploy it to the cluster by selecting this blueprint during cluster provisioning. This will synchronize all namespaces in unmanaged mode to the controllers. If a golden blueprint is used as the base blueprint in a custom blueprint, the namespace configuration set in the golden blueprint takes precedence
Important
Though the "Enable Namespace Sync" option is enabled, namespaces added to the exclusion list will not be synchronized. Refer Namespace sync exclusion for more information
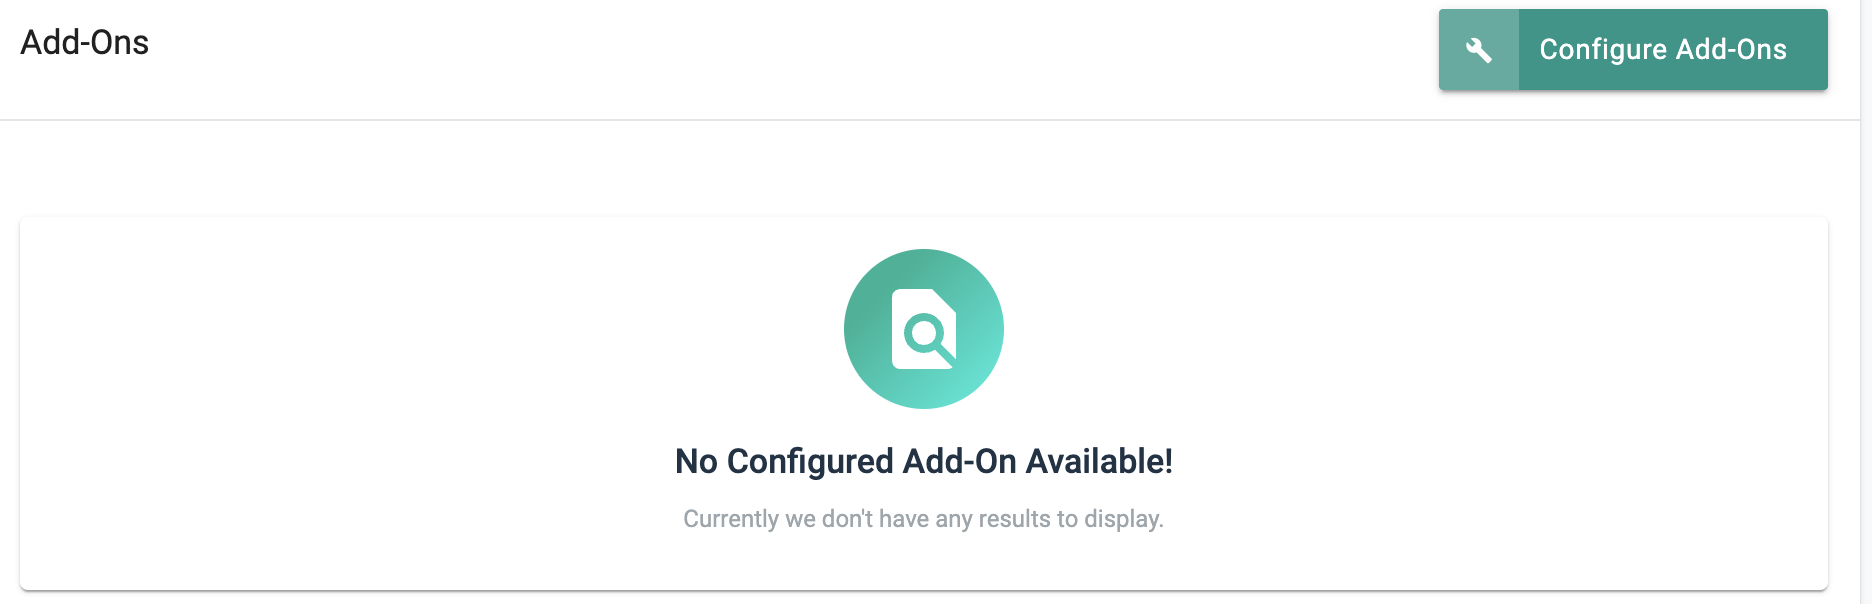
Adding customized add-ons (Optional)
Next you can select which custom software add-ons you want to have as part of your blueprint allowing you to bring your own software or customizations as necessary. Refer to the custom add-on documentation for more info on how to create a custom add-on.
In order to use these custom add-ons in a blueprint:
- Click Configure Add-Ons.
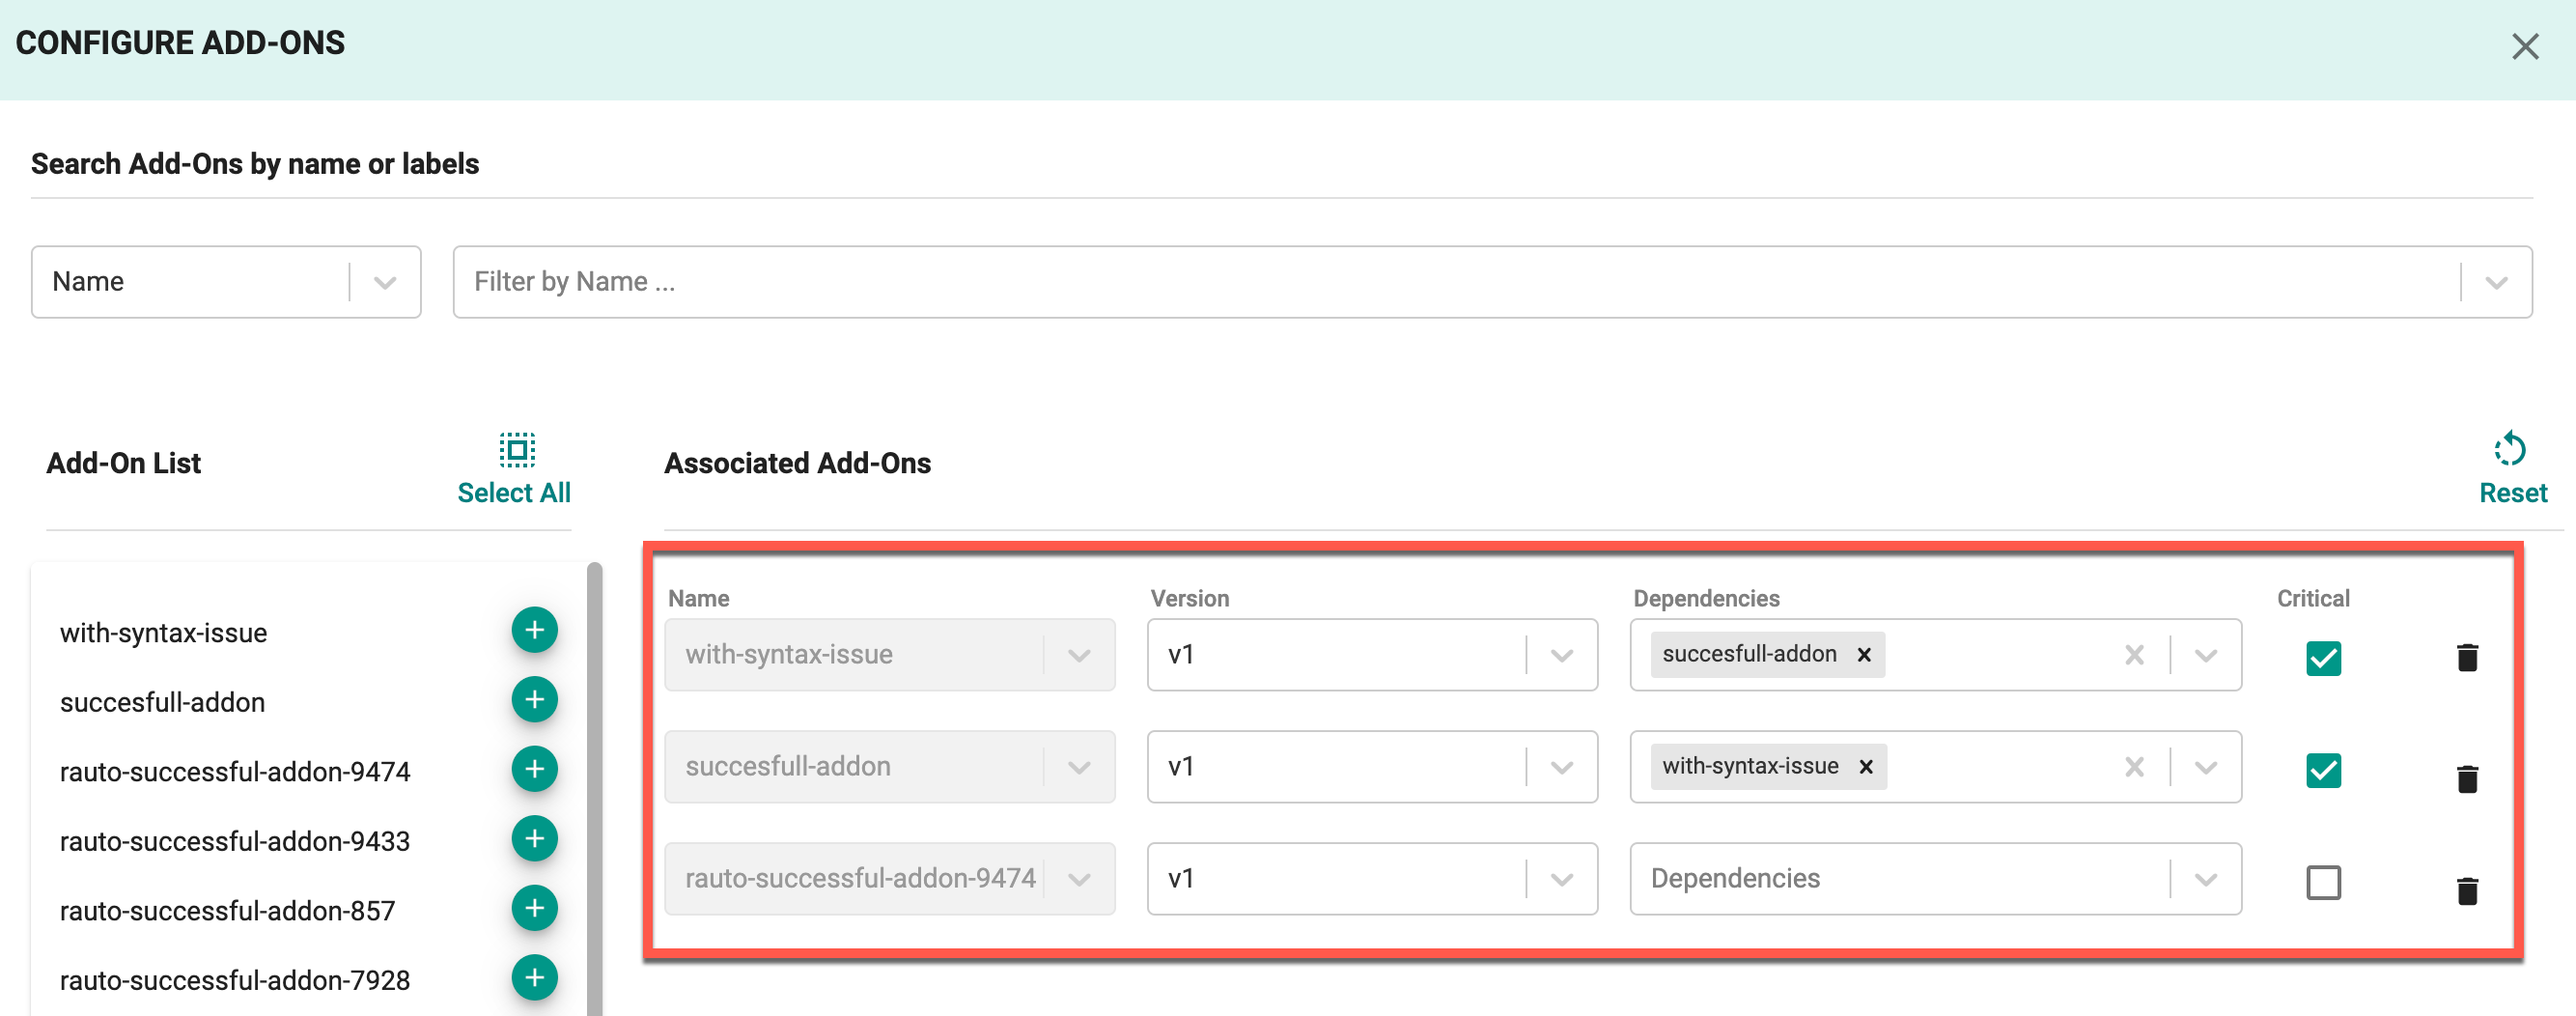
- Next search for the add-ons you want to use. You can search by name or search by label to reference a group of add-ons with the given label. Refer to to the custom add-on documentation for more info on how to create and use add on labels.
-
Next, you can select all from the search results or use the plus button to add the individual add-on. A few key things to note on this step:
1) When the add-on is selected, if not in the list already the latest version will be selected.
2) When you select all, add-ons which do not have a version/are not fully initialized will not be added to the list.
3) If the add-on is already in the blueprint, the next time you update, it will still have the given version you selected.
-
If you need to change a version or specify a dependency on another add-on for any given particular add-on, you can do so by going to the individual add-on and making your modification.
- Enable the Critical option for the required add-ons. This ensures that the deployment of these add-ons is mandatory, prioritizing them during cluster provisioning. For more details on add-on criticality, refer to this page.
- Click the reset button to reset the list of add-ons selected if you want to start over.
- Click SAVE CHANGES to save your changes.
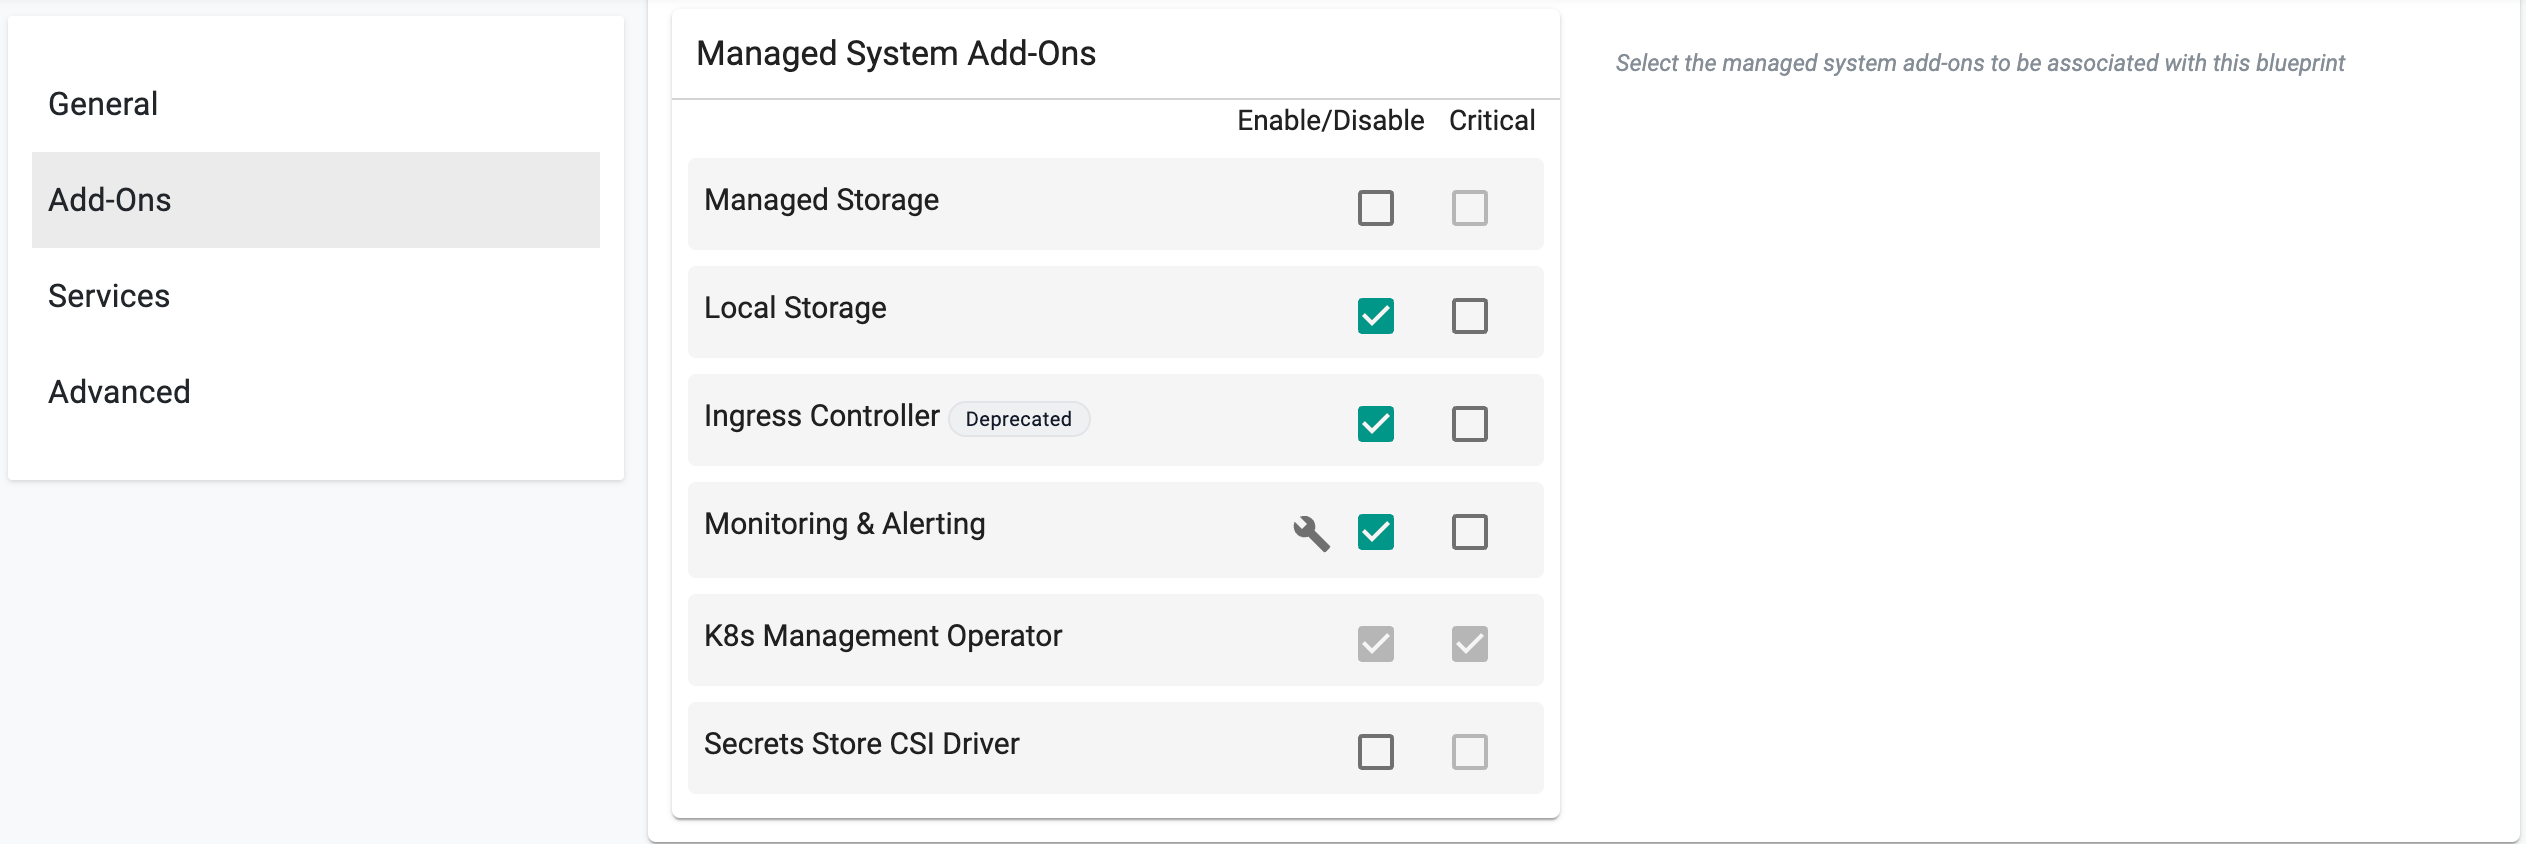
Enabling Managed System Add-Ons (Optional)
- Enable/disable managed system addons from the existing list (i.e. Ingress Controller).
- Enable the Critical option for the required add-ons. This ensures that the deployment of these add-ons is mandatory, prioritizing them during cluster provisioning. For more details on add-on criticality, refer to this page.
Enabling Managed Services (Optional)
Optionally Rafay managed services can be enabled including:
- Policy Management powered by OPA Gatekeeper: This enables OPA Gatekeeper on any cluster the blueprint is deployed to. Select policies from the list to enforce on the required cluster
- Network Policy powered by Cilium: You can select cluster-wide policies to enforce by default as well as specifying a custom installation profile in case you want to change certain Cilium installation parameters
- Cost Management: Toggling the enable button here enables cost management to enforce chargeback rules and get visibility into overall cost metrics and usage on a given cluster
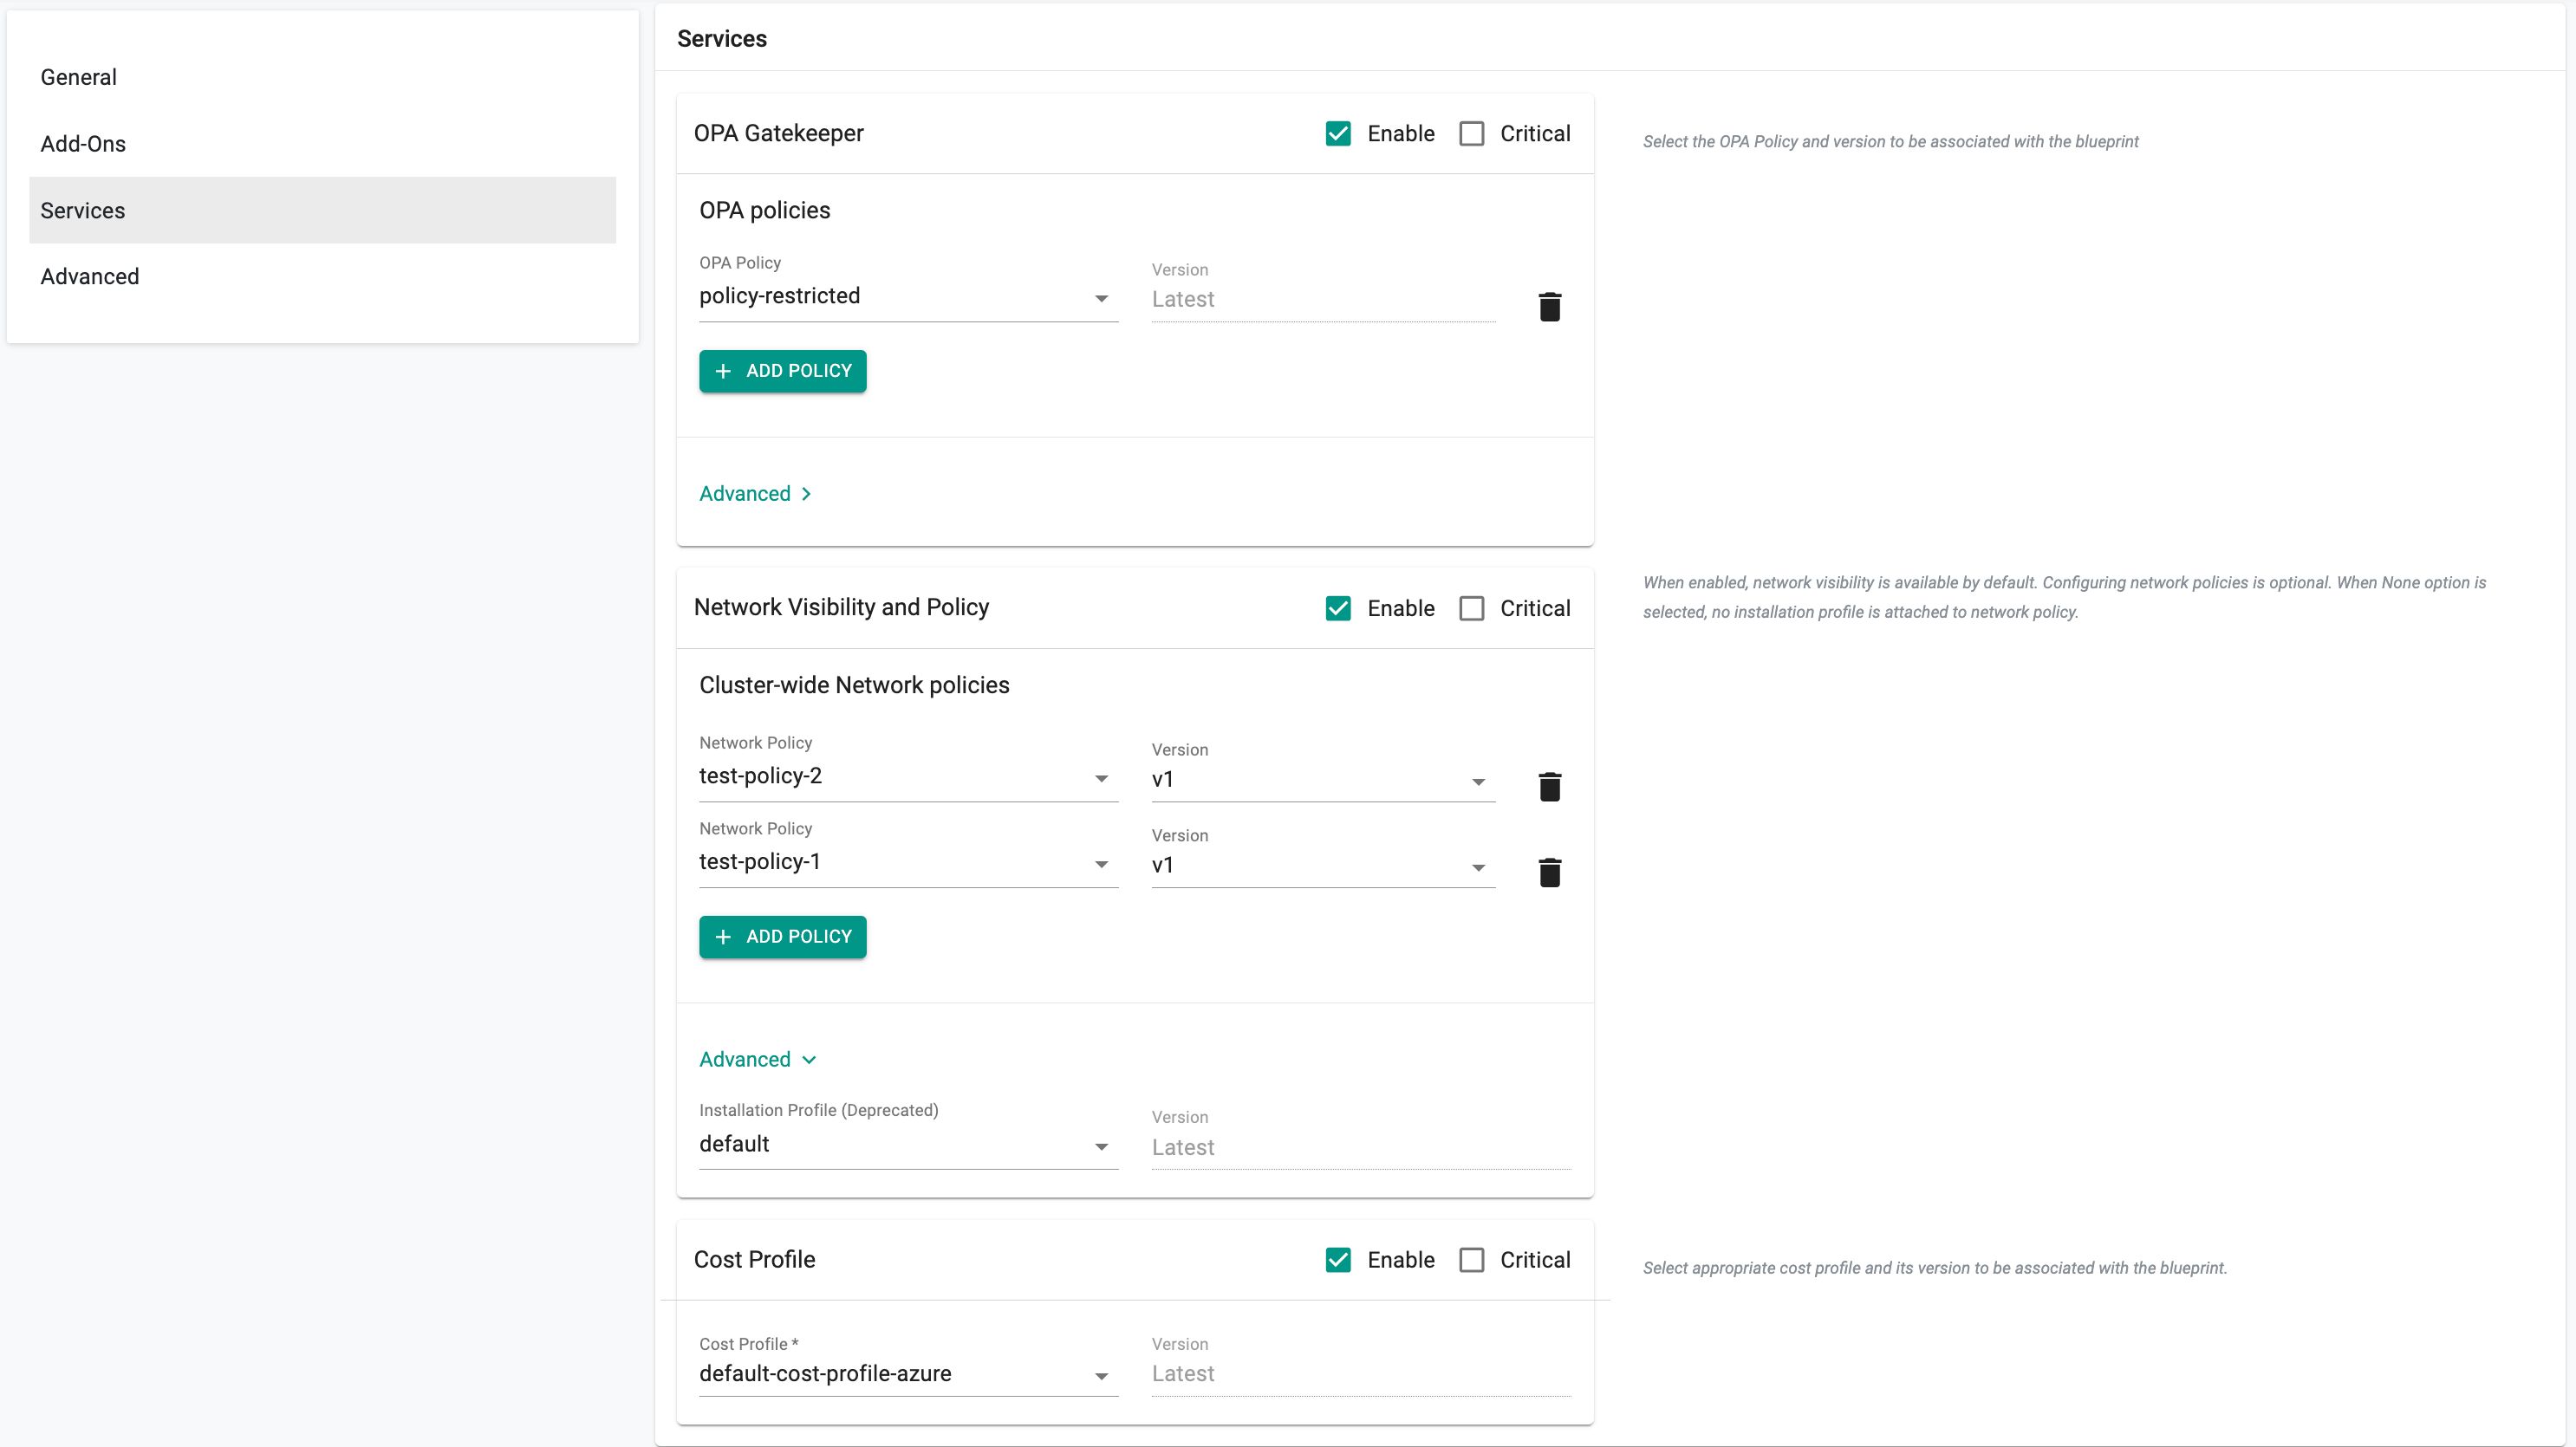
If necessary, enable Critical option to make these service(s) mandatory for cluster deployment. Refer to Critical Add-Ons for more information.
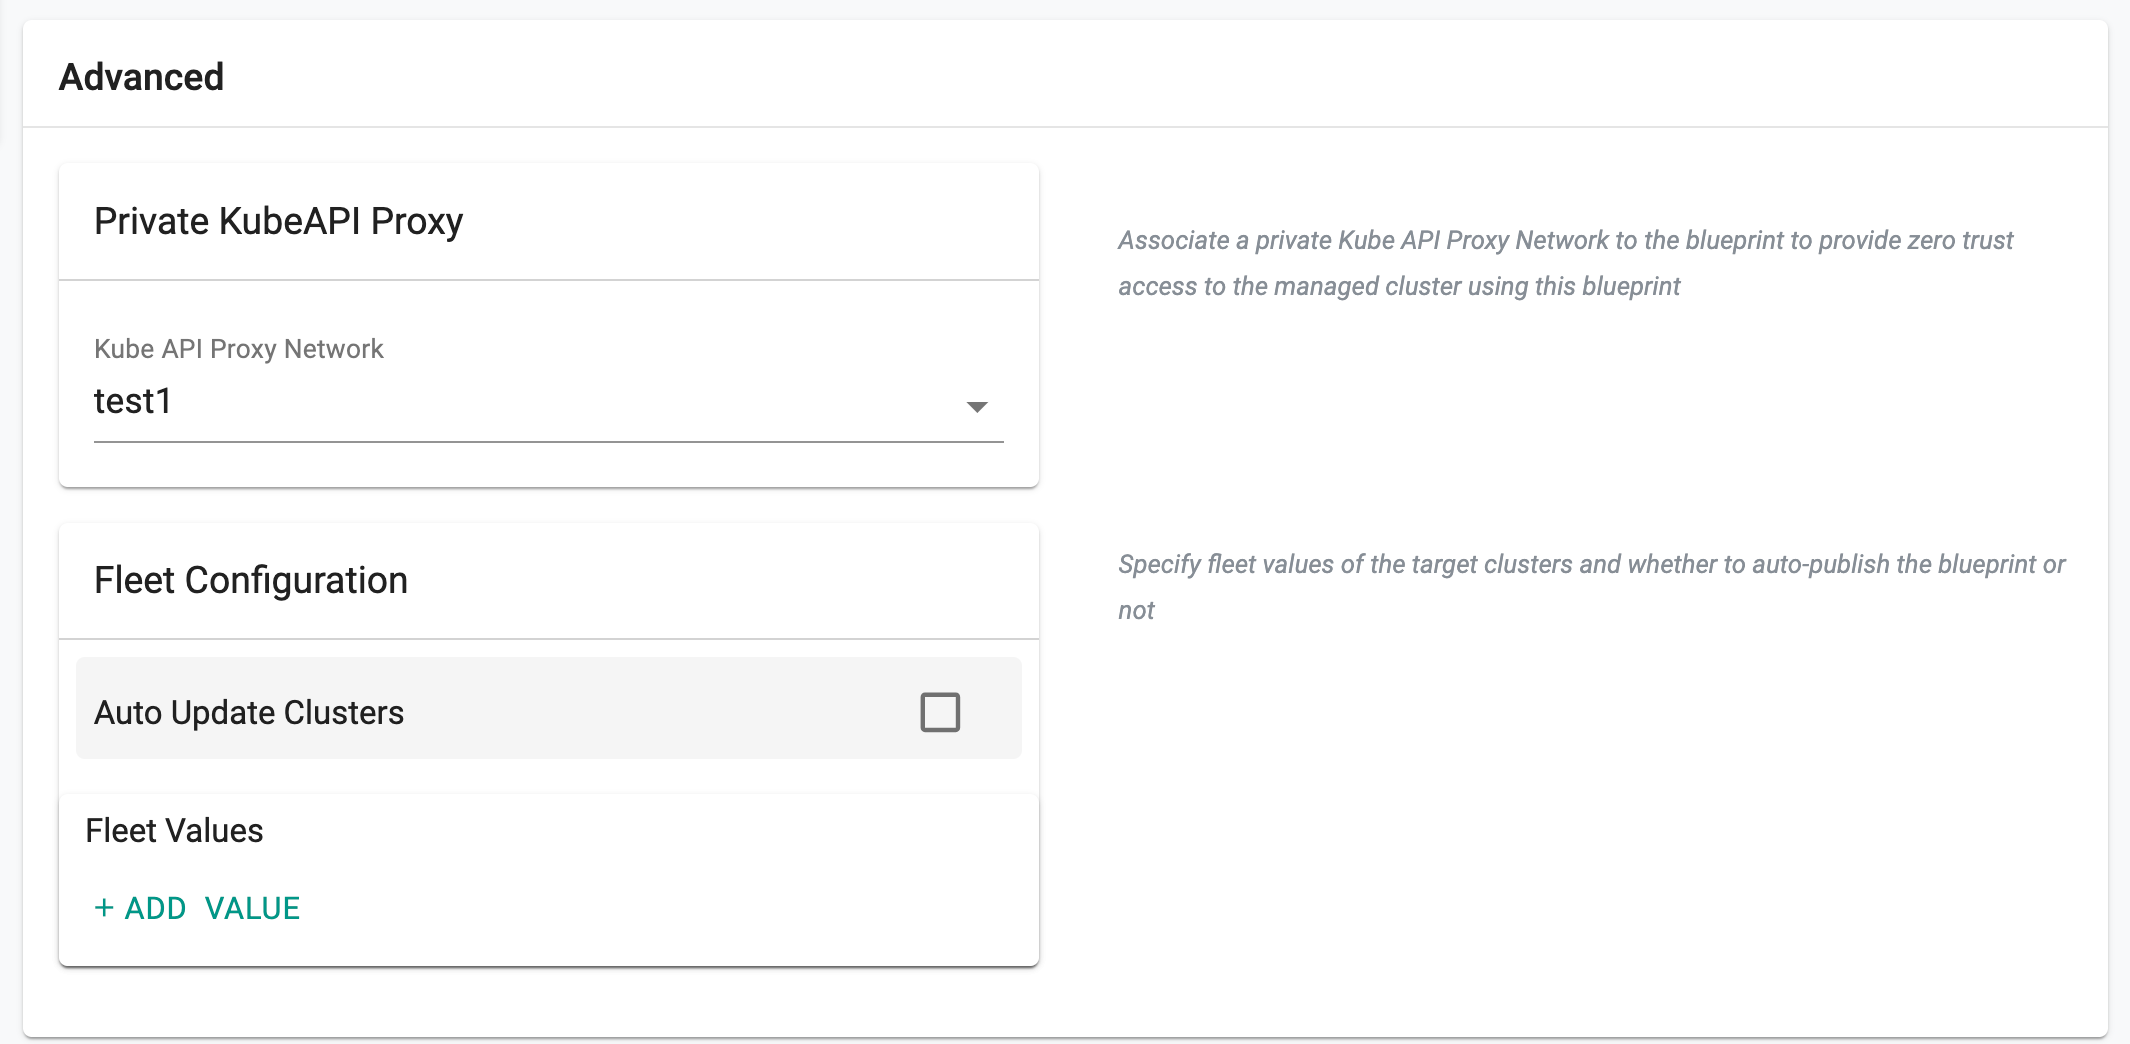
Advanced
- Add the required Fleet Values.
- Enable Auto Update Clusters if any changes to the blueprint should automatically be applied to the selected fleet(s) of cluster(s).
Important
With base blueprint versions 2.7 or later, Rafay's ingress class name has been revised to default-rafay-nginx instead of simply nginx to mitigate potential naming conflicts. This adjustment ensures the uniqueness of the custom ingress, thereby averting clashes. Additionally, this name update resolves various ingress-related issues encountered during Blueprint (BP) synchronization.
Step 3: Save Configuration
- Click Save As and choose either Save as a Draft or Save as an Active Version
- Click Save
Important
Custom Blueprints cannot override configurations specified in the Golden blueprint
🚨 Version Management for **Blueprints
Version management for Blueprints is supported through RCTL, API, and Terraform, enabling efficient lifecycle management and controlled updates.
To understand draft versioning, state management, and best practices, refer to the Version Management documentation
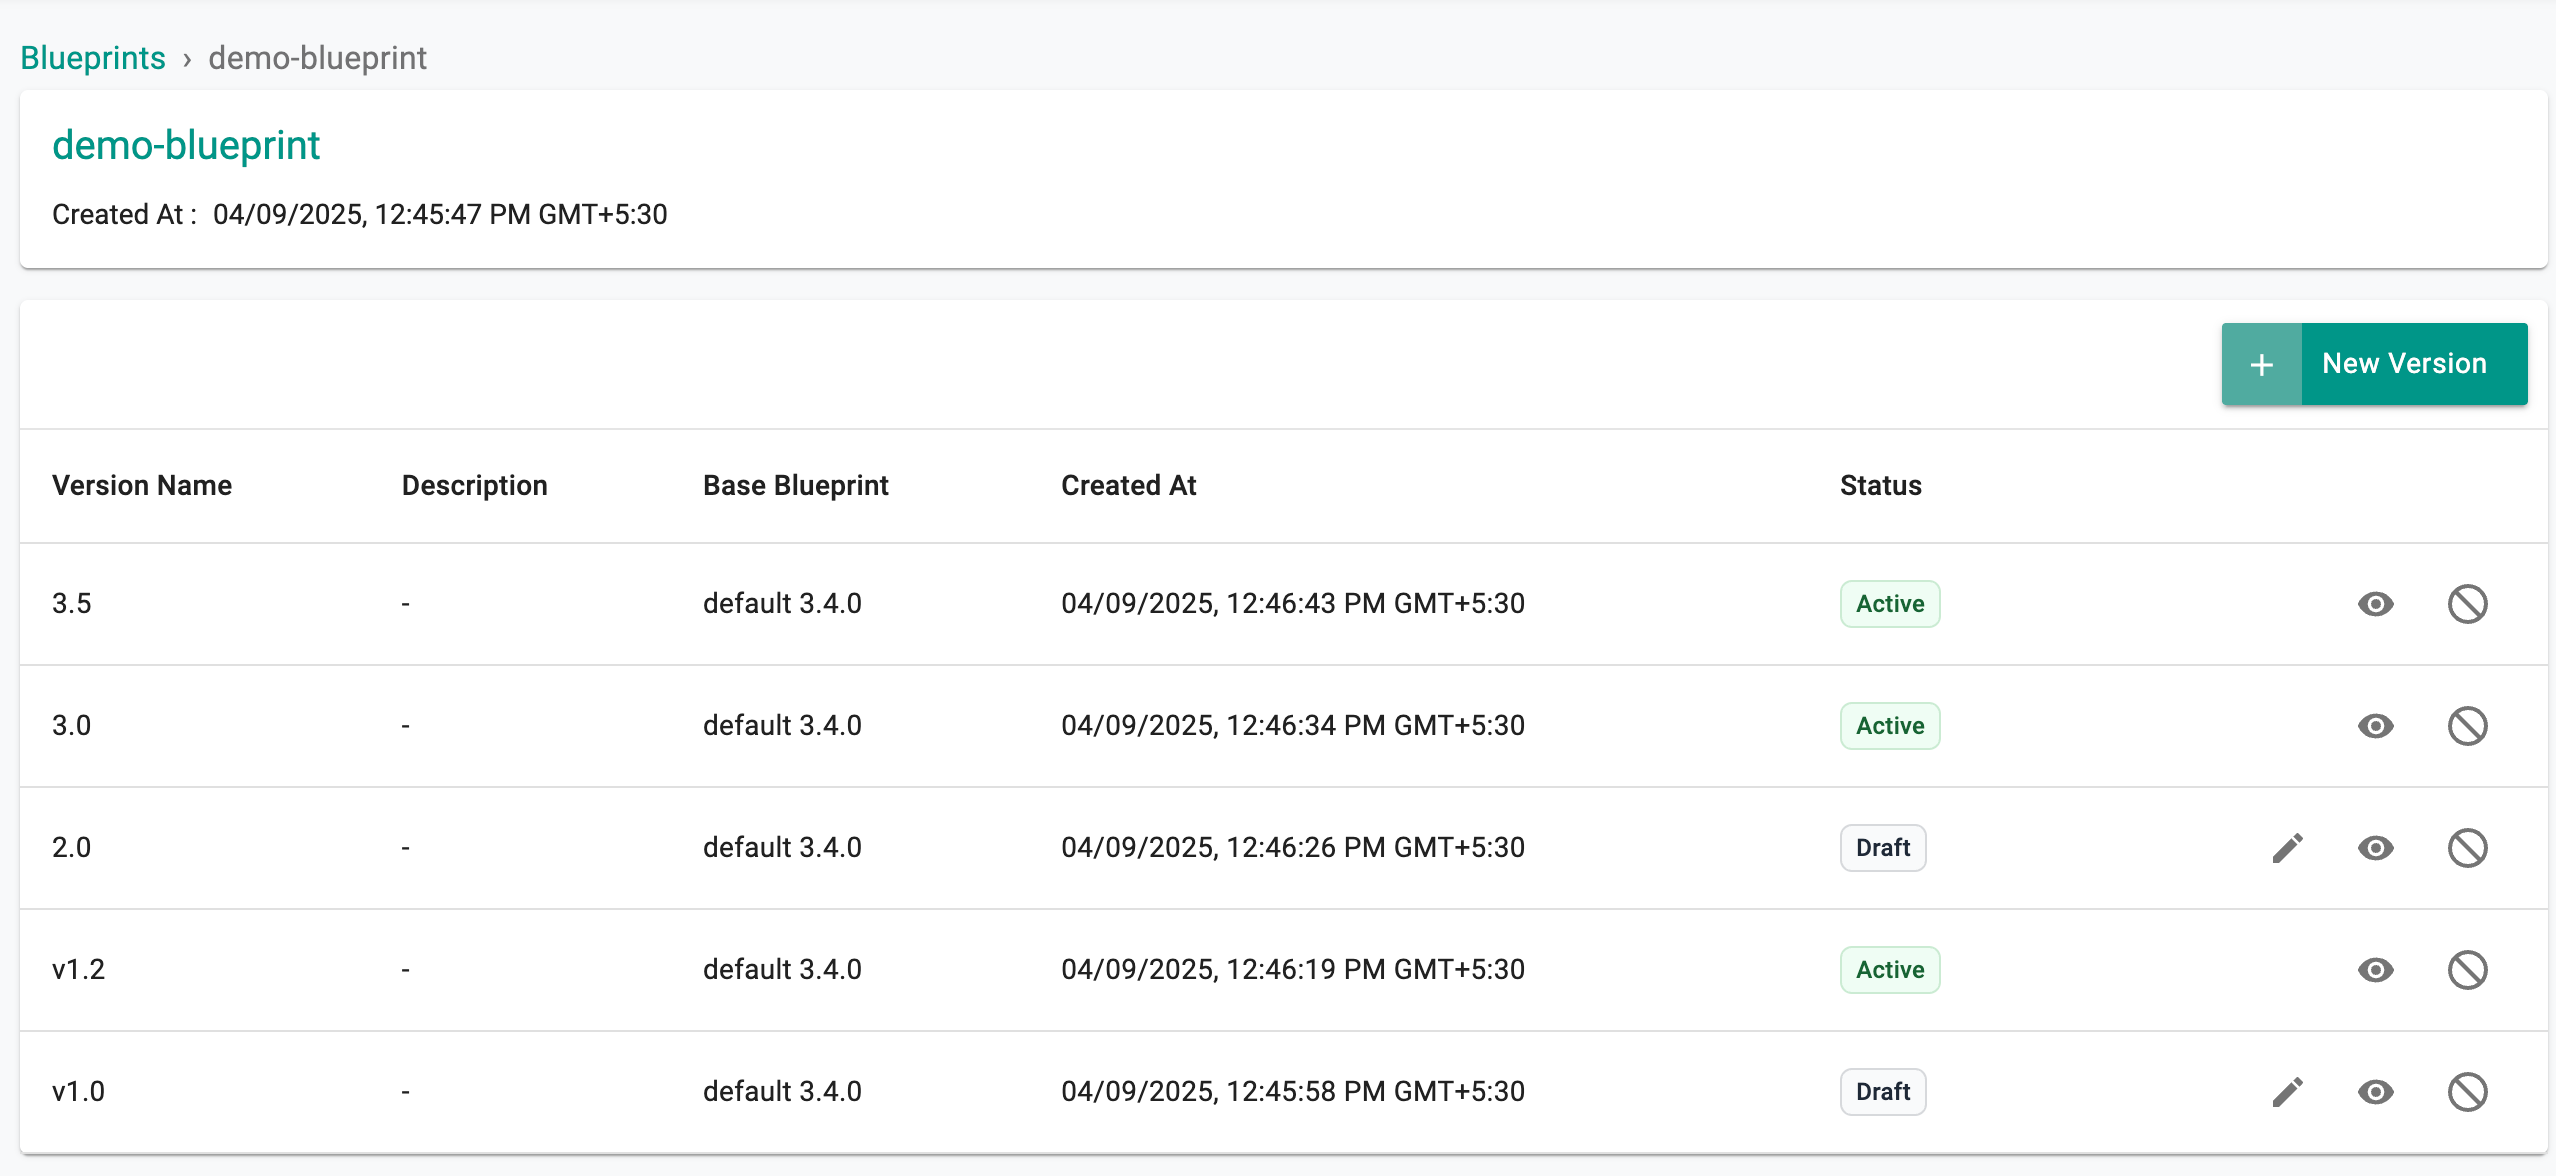
View Versions
The entire history of blueprint versions is maintained on the Controller. Admins can view details about the versions of cluster blueprints.
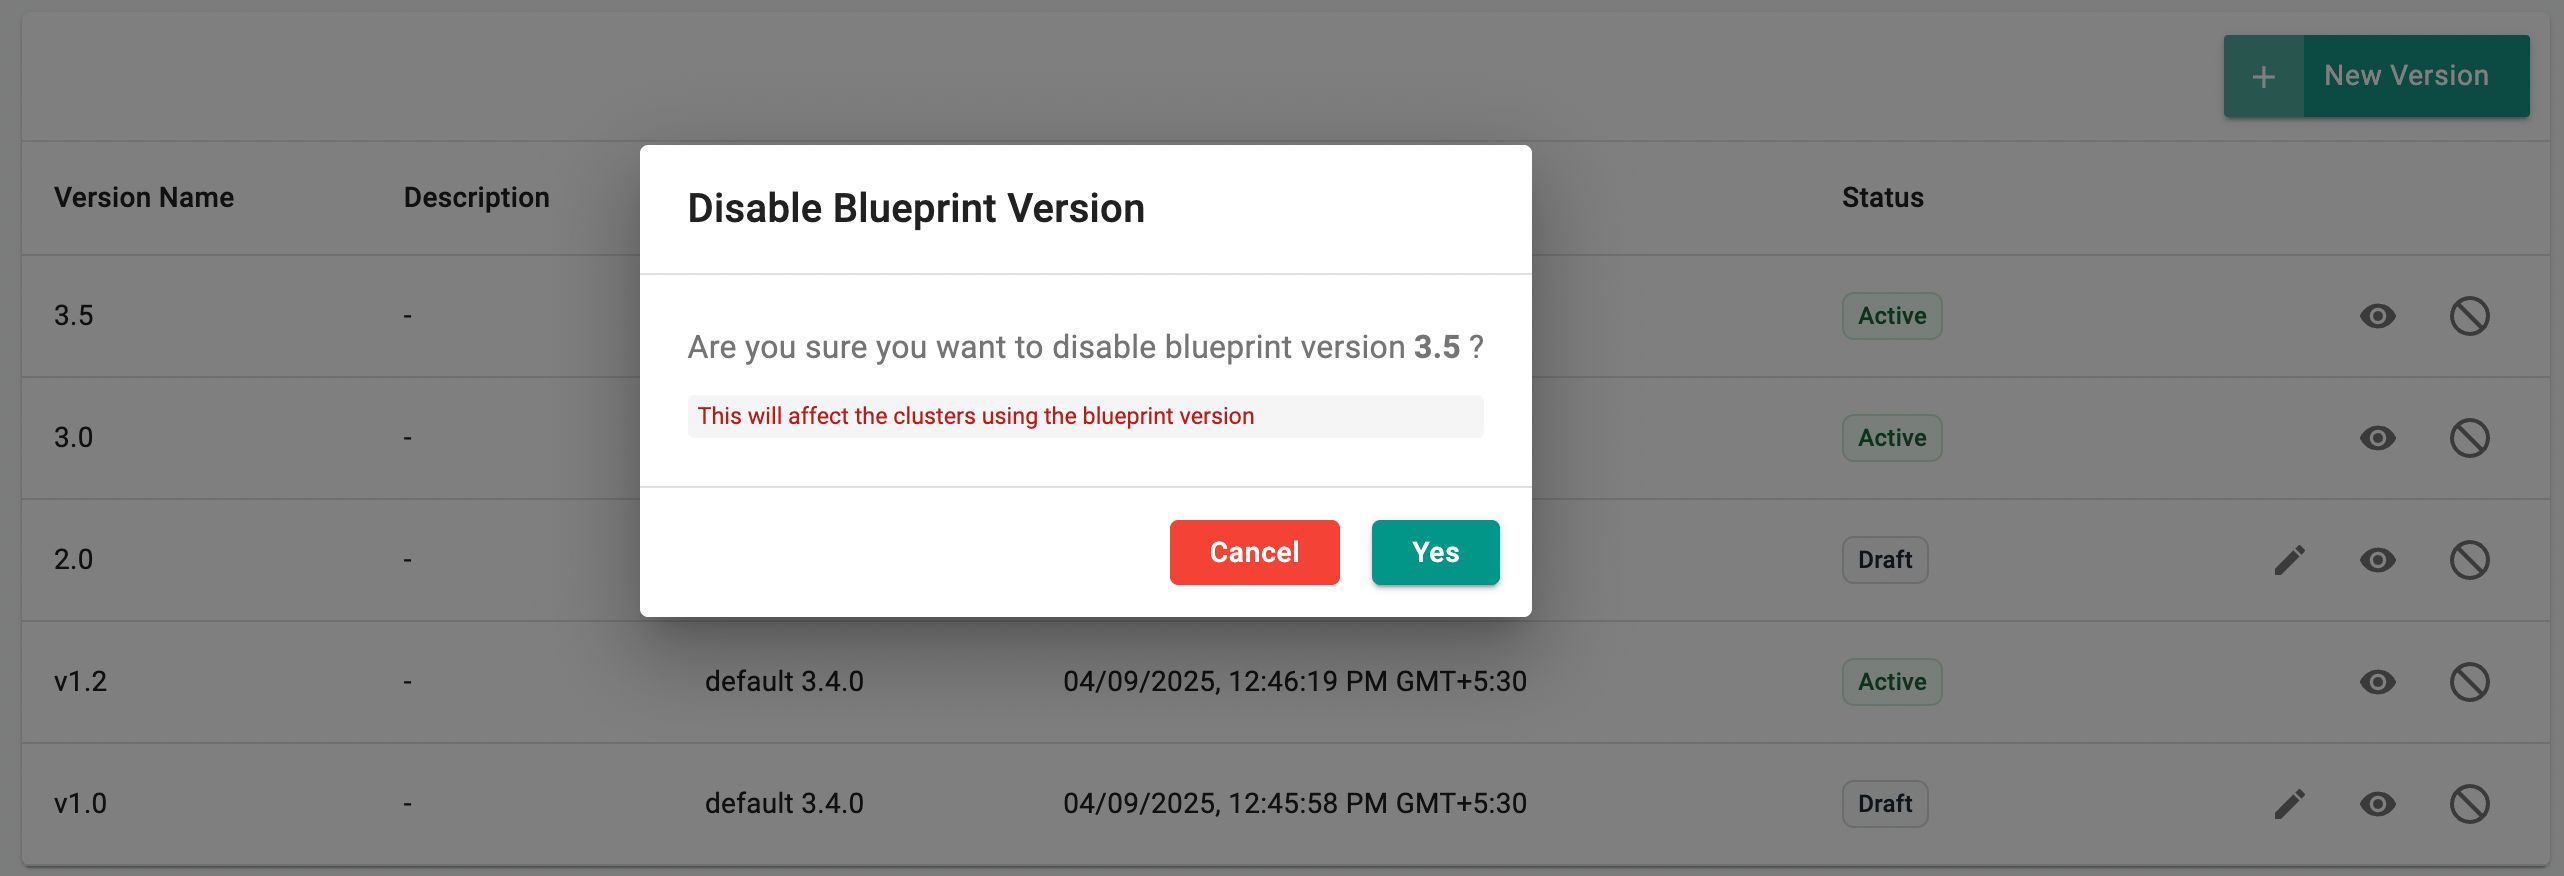
Use the Enable/Disable icon to control whether a blueprint version is available for selection during cluster provisioning. This option helps to disallow the users from using blueprint versions that might contain vulnerable/deprecated Add-On versions.
Disabling affects the clusters using this specific blueprint version. Click Yes to proceed
Once a version is disabled, the cluster deployed with that specific BP version is highlighted in red with an Update button. Use this button to update with the required blueprint and version

BP Version with Fleet Values
The history of blueprint versions with fleet values is maintained on the controller.
Publish to Fleet
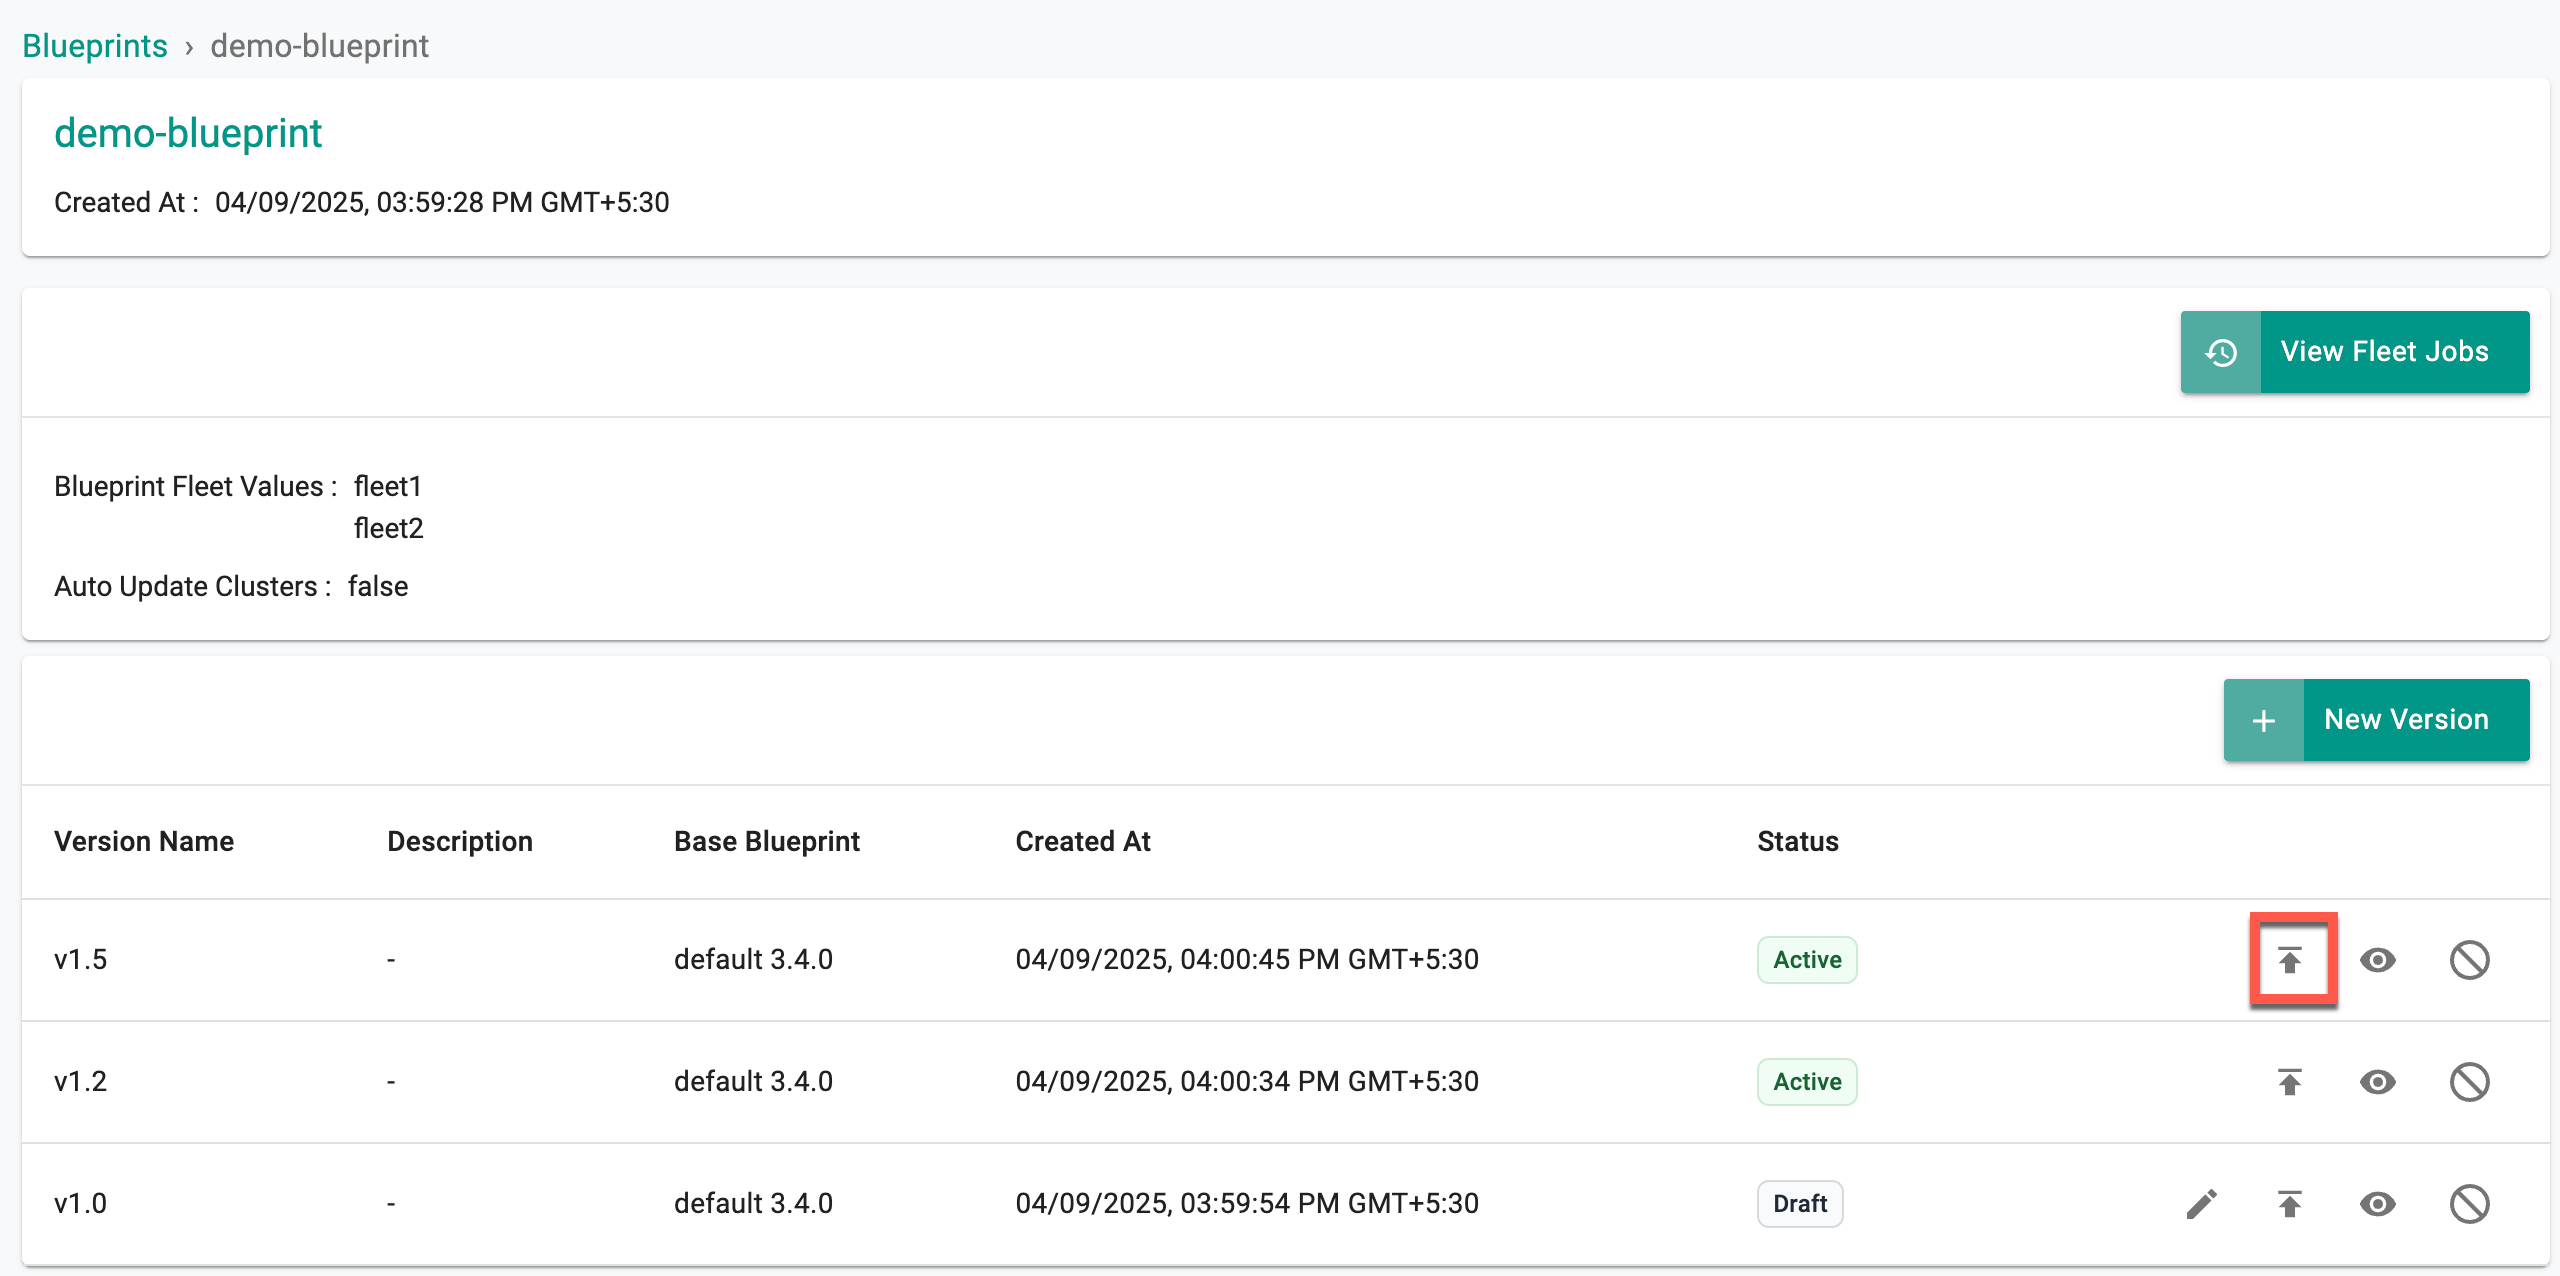
Blueprints with Fleet values show a publish icon.
- Click the publish icon to manually publish the selected blueprint version to the fleet(s). Once a blueprint version is published to a fleet, a job is initiated.
Important
If the Auto Update Clusters is enabled while creating a blueprint New Version, the new version is automatically published to the fleet(s). Users must manually publish the blueprint version to fleets if the Auto Update Clusters option is disabled
- Click View Fleet Jobs to view the status of the job. The below example shows blueprint version 5 is successfully published to the fleets and in Ready status
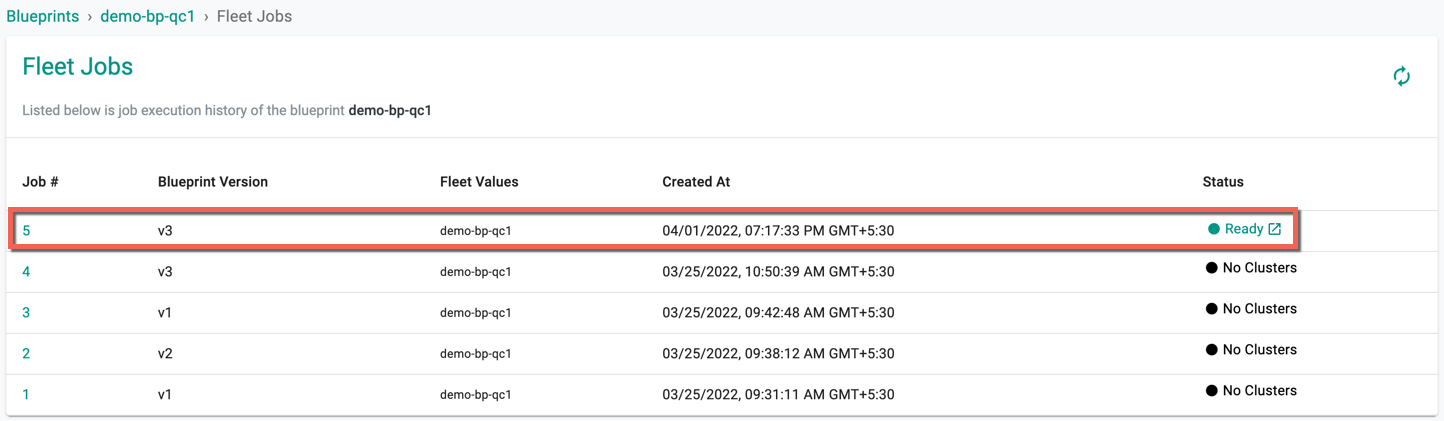
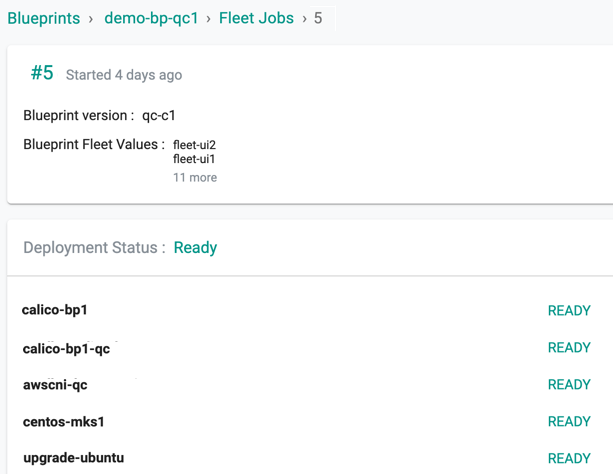
- Click the job id to view the list of clusters under this fleet
Important
Users cannot publish the disabled blueprint versions to the fleets
Deployment Status
Once the blueprint version is published to the fleets, the job status varies based on the blueprint sync
| Status | Description |
|---|---|
| No Cluster | No clusters available in the fleet(s) |
| Ready | Blueprint publish is success on all fleet(s) of clusters |
| Partially Ready | Blueprint published on a few clusters |
| In Progress | Blueprint publishing on the fleet(s) in progress |
| Failed | Blueprint publish failed on all fleets |
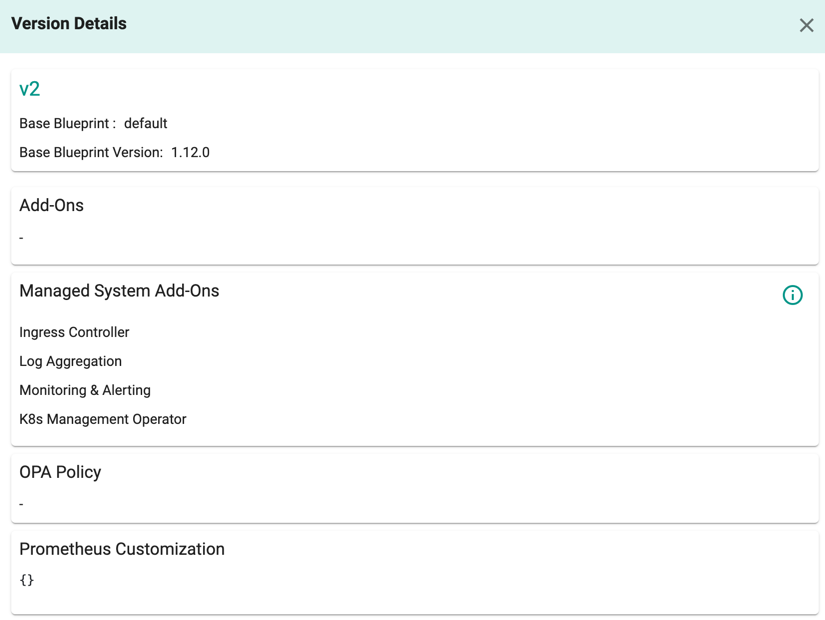
View
Click the eye icon to view the blueprint version details
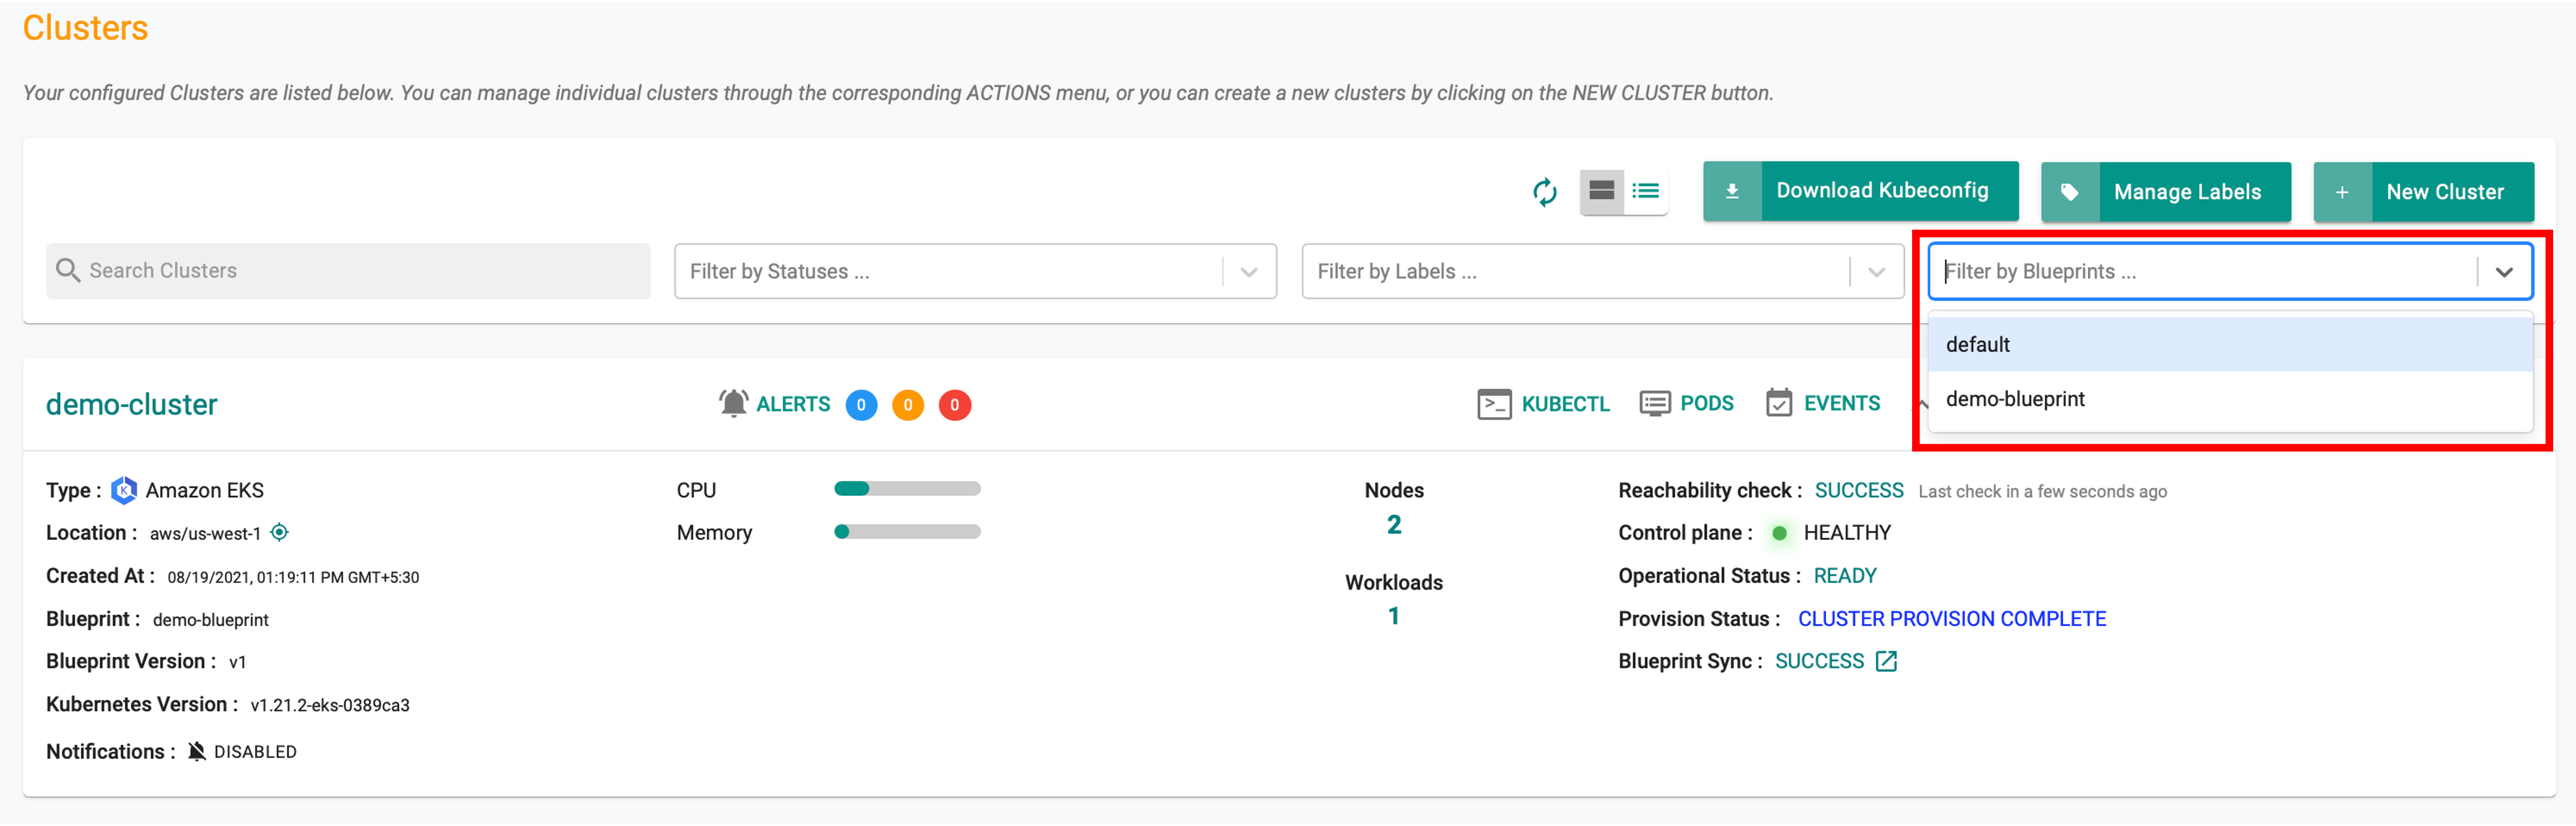
Filter Clusters by Blueprint
Infrastructure admins can "filter" clusters by blueprint name using the Web Console to manage a fleet of clusters efficiently. An illustrative example is shown below.
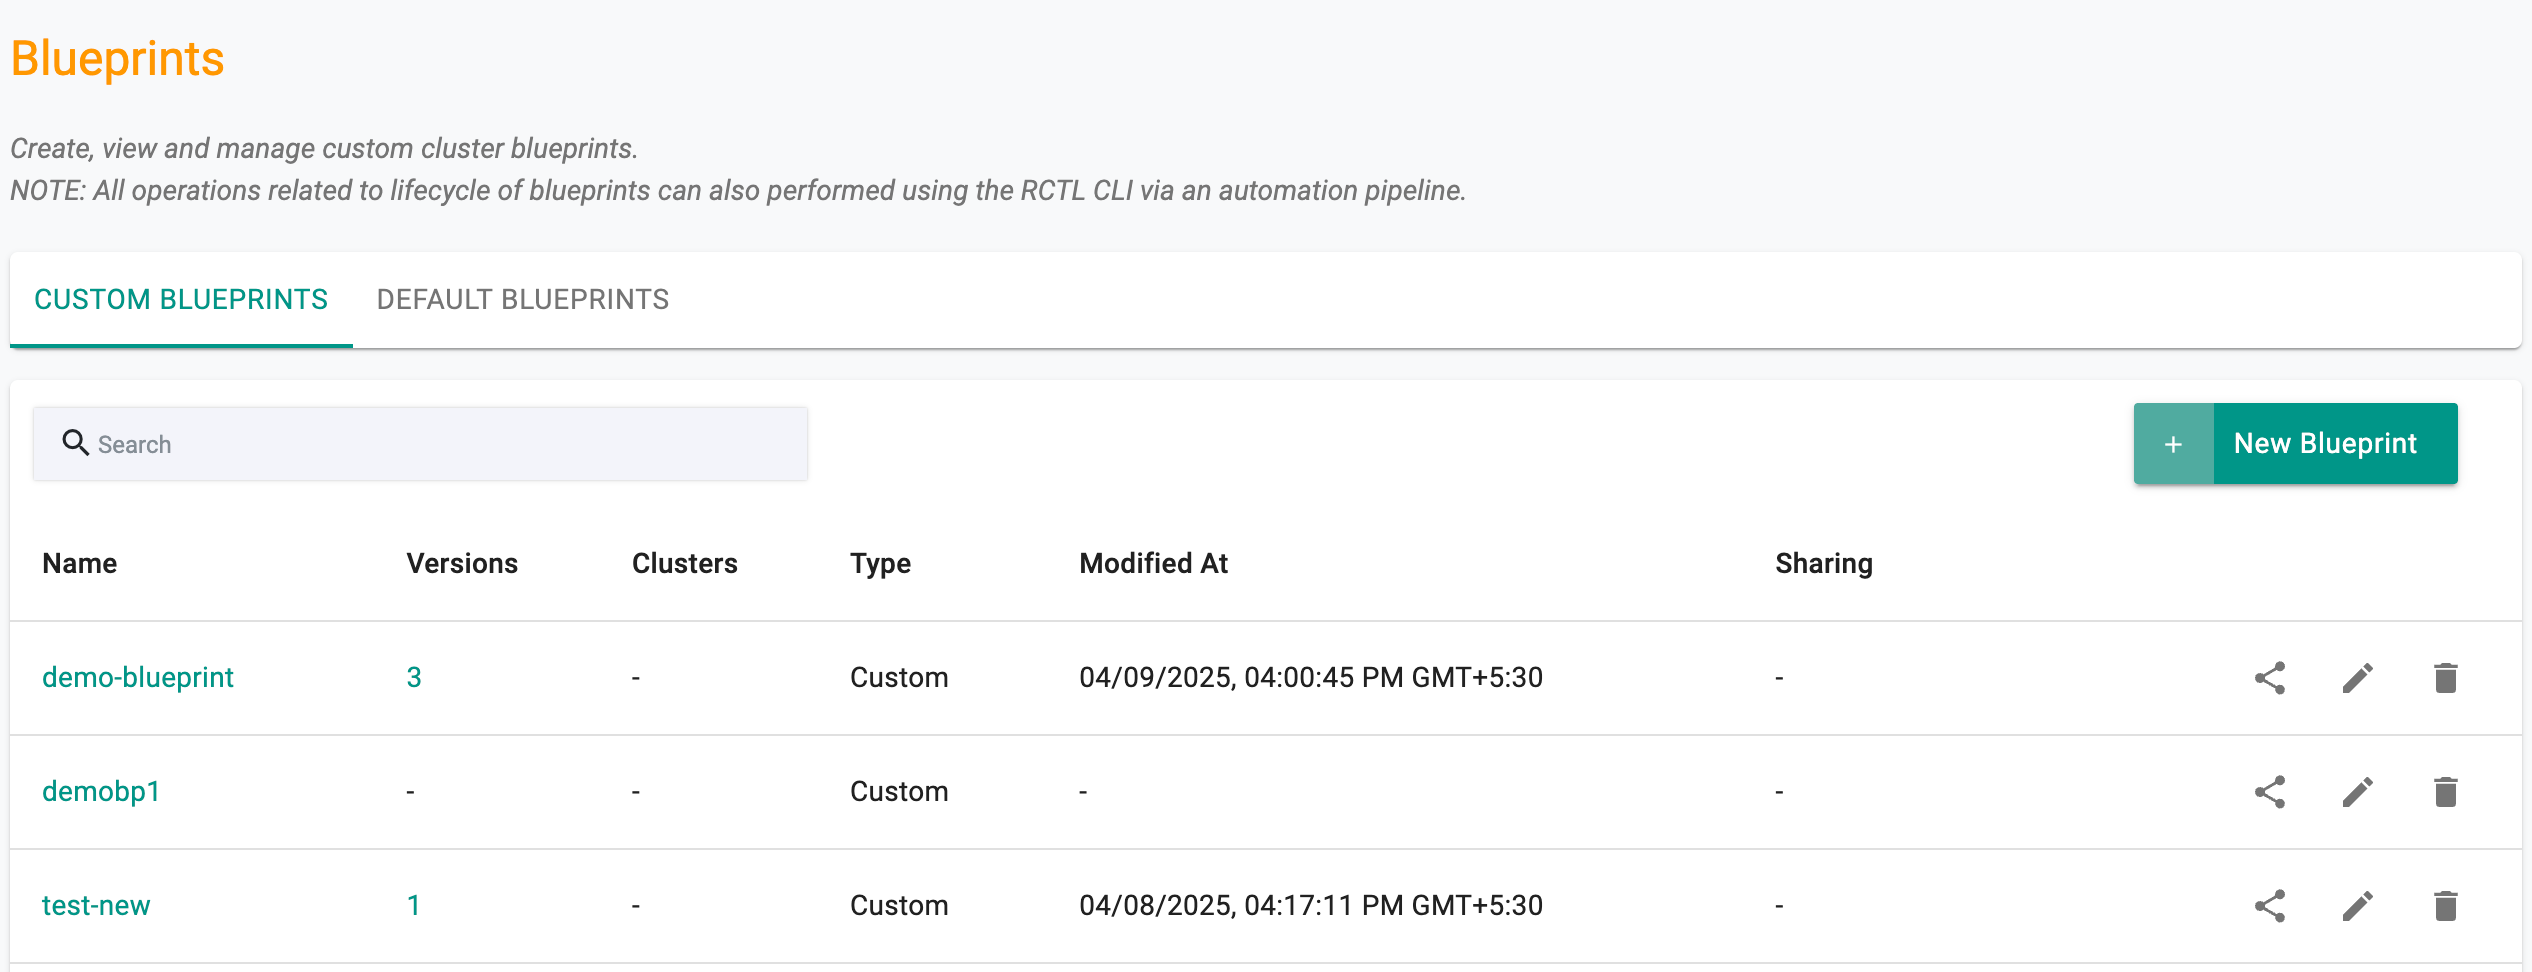
View All Cluster Blueprints
Admins can view all custom cluster blueprints.
- Navigate to the Project
- Click on Blueprints under Infrastructure
This will display both the "default blueprints" and any cluster blueprints that have been created. An illustrative example is shown below.
Actions
Users can share, edit, or delete custom blueprint(s) from the Blueprints list page if they are not inherited from another project. This can be accomplished using the respective icons, as depicted below.

Share Blueprints
Various consequences arise when a blueprint is shared across projects, contingent on the drift action enablement at the Organization, Project, and Blueprint levels. The following matrix illustrates the process of sharing blueprints, taking into account the drift action enablement:
| Parent Project | Blueprint | Child Project | Expected Behaviour |
|---|---|---|---|
| Enabled | Enabled | Enabled | Drift web-hook will be enabled on all clusters in parent and child projects |
| Enabled | Enabled | Disabled | The drift web-hook will be enabled on all clusters in parent projects and disabled on all clusters in the child projects |
| Enabled | Disabled | Enabled | The drift web-hook will be disabled in both parent project and child project |
| Enabled | Disabled | Disabled | The drift web-hook will be disabled in parent project and disabled in child project |
| Disabled | Enabled | Enabled | The drift web-hook will be disabled in parent project and enabled in child project |
| Disabled | Enabled | Disabled | The drift web-hook will be disabled in both parent project and child project |
| Disabled | Disabled | Enabled | The drift web-hook will be disabled in both parent project and child project |
| Disabled | Disabled | Disabled | The drift web-hook will be disabled in both parent and child project |
Apply Custom Blueprint
Once a custom cluster blueprint has been created and published, it can be used during the initial provisioning of clusters or applied to existing clusters.
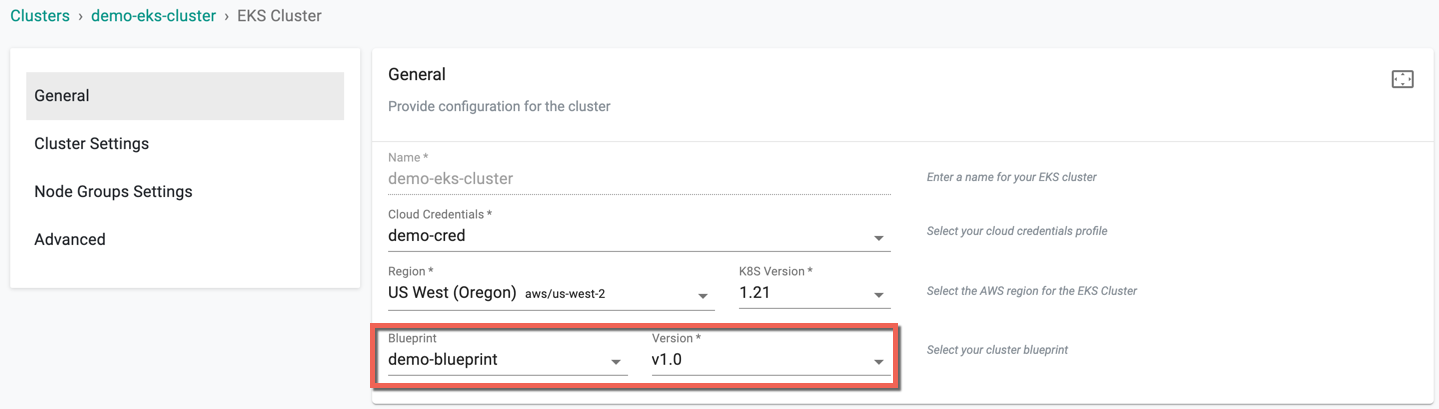
New Clusters
While creating a new cluster, select the "custom blueprint" from the dropdown. An illustrative example is shown below.
Existing Clusters
- Click on options (gear icon on the far right) for an existing cluster
- Select "Update Blueprint" from the options
- Select the "blueprint" and "version" from the dropdown
- Click on Save and Publish
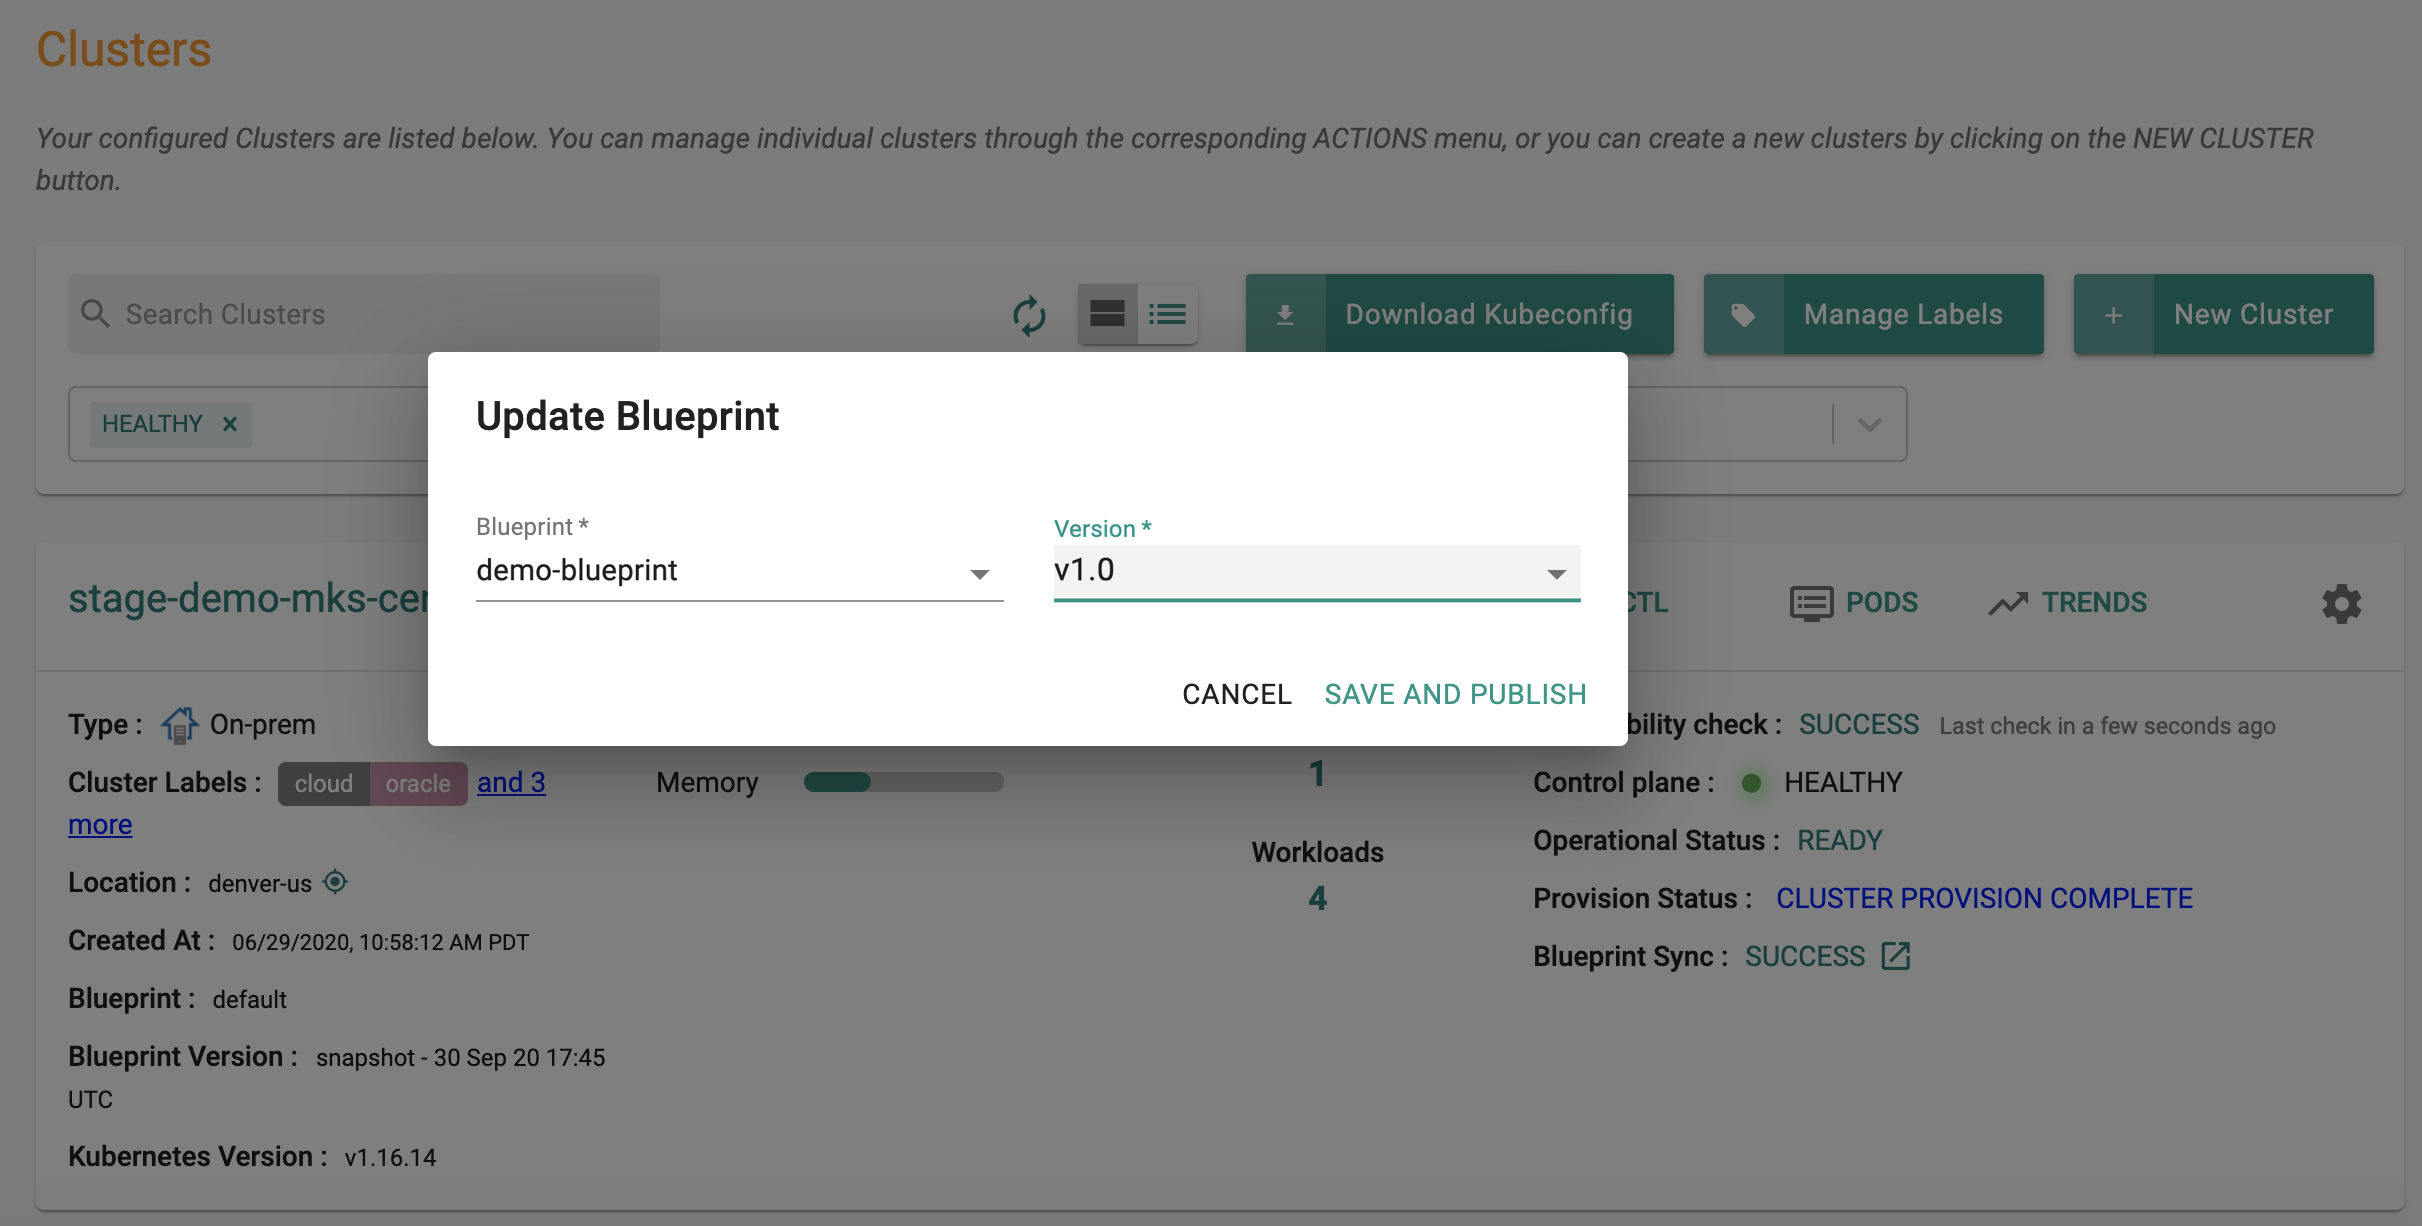
This will update the cluster blueprint on the target cluster. Once all the required resources are operational on the cluster, the blueprint update/sync will be complete.
Important
If the selected blueprint version has VM Operator enabled, minimum one node with label k8smgmt.io/vm-operator must be available in the selected cluster. This information is presented to the user when selecting the VM Operator is enabled in the blueprint version.
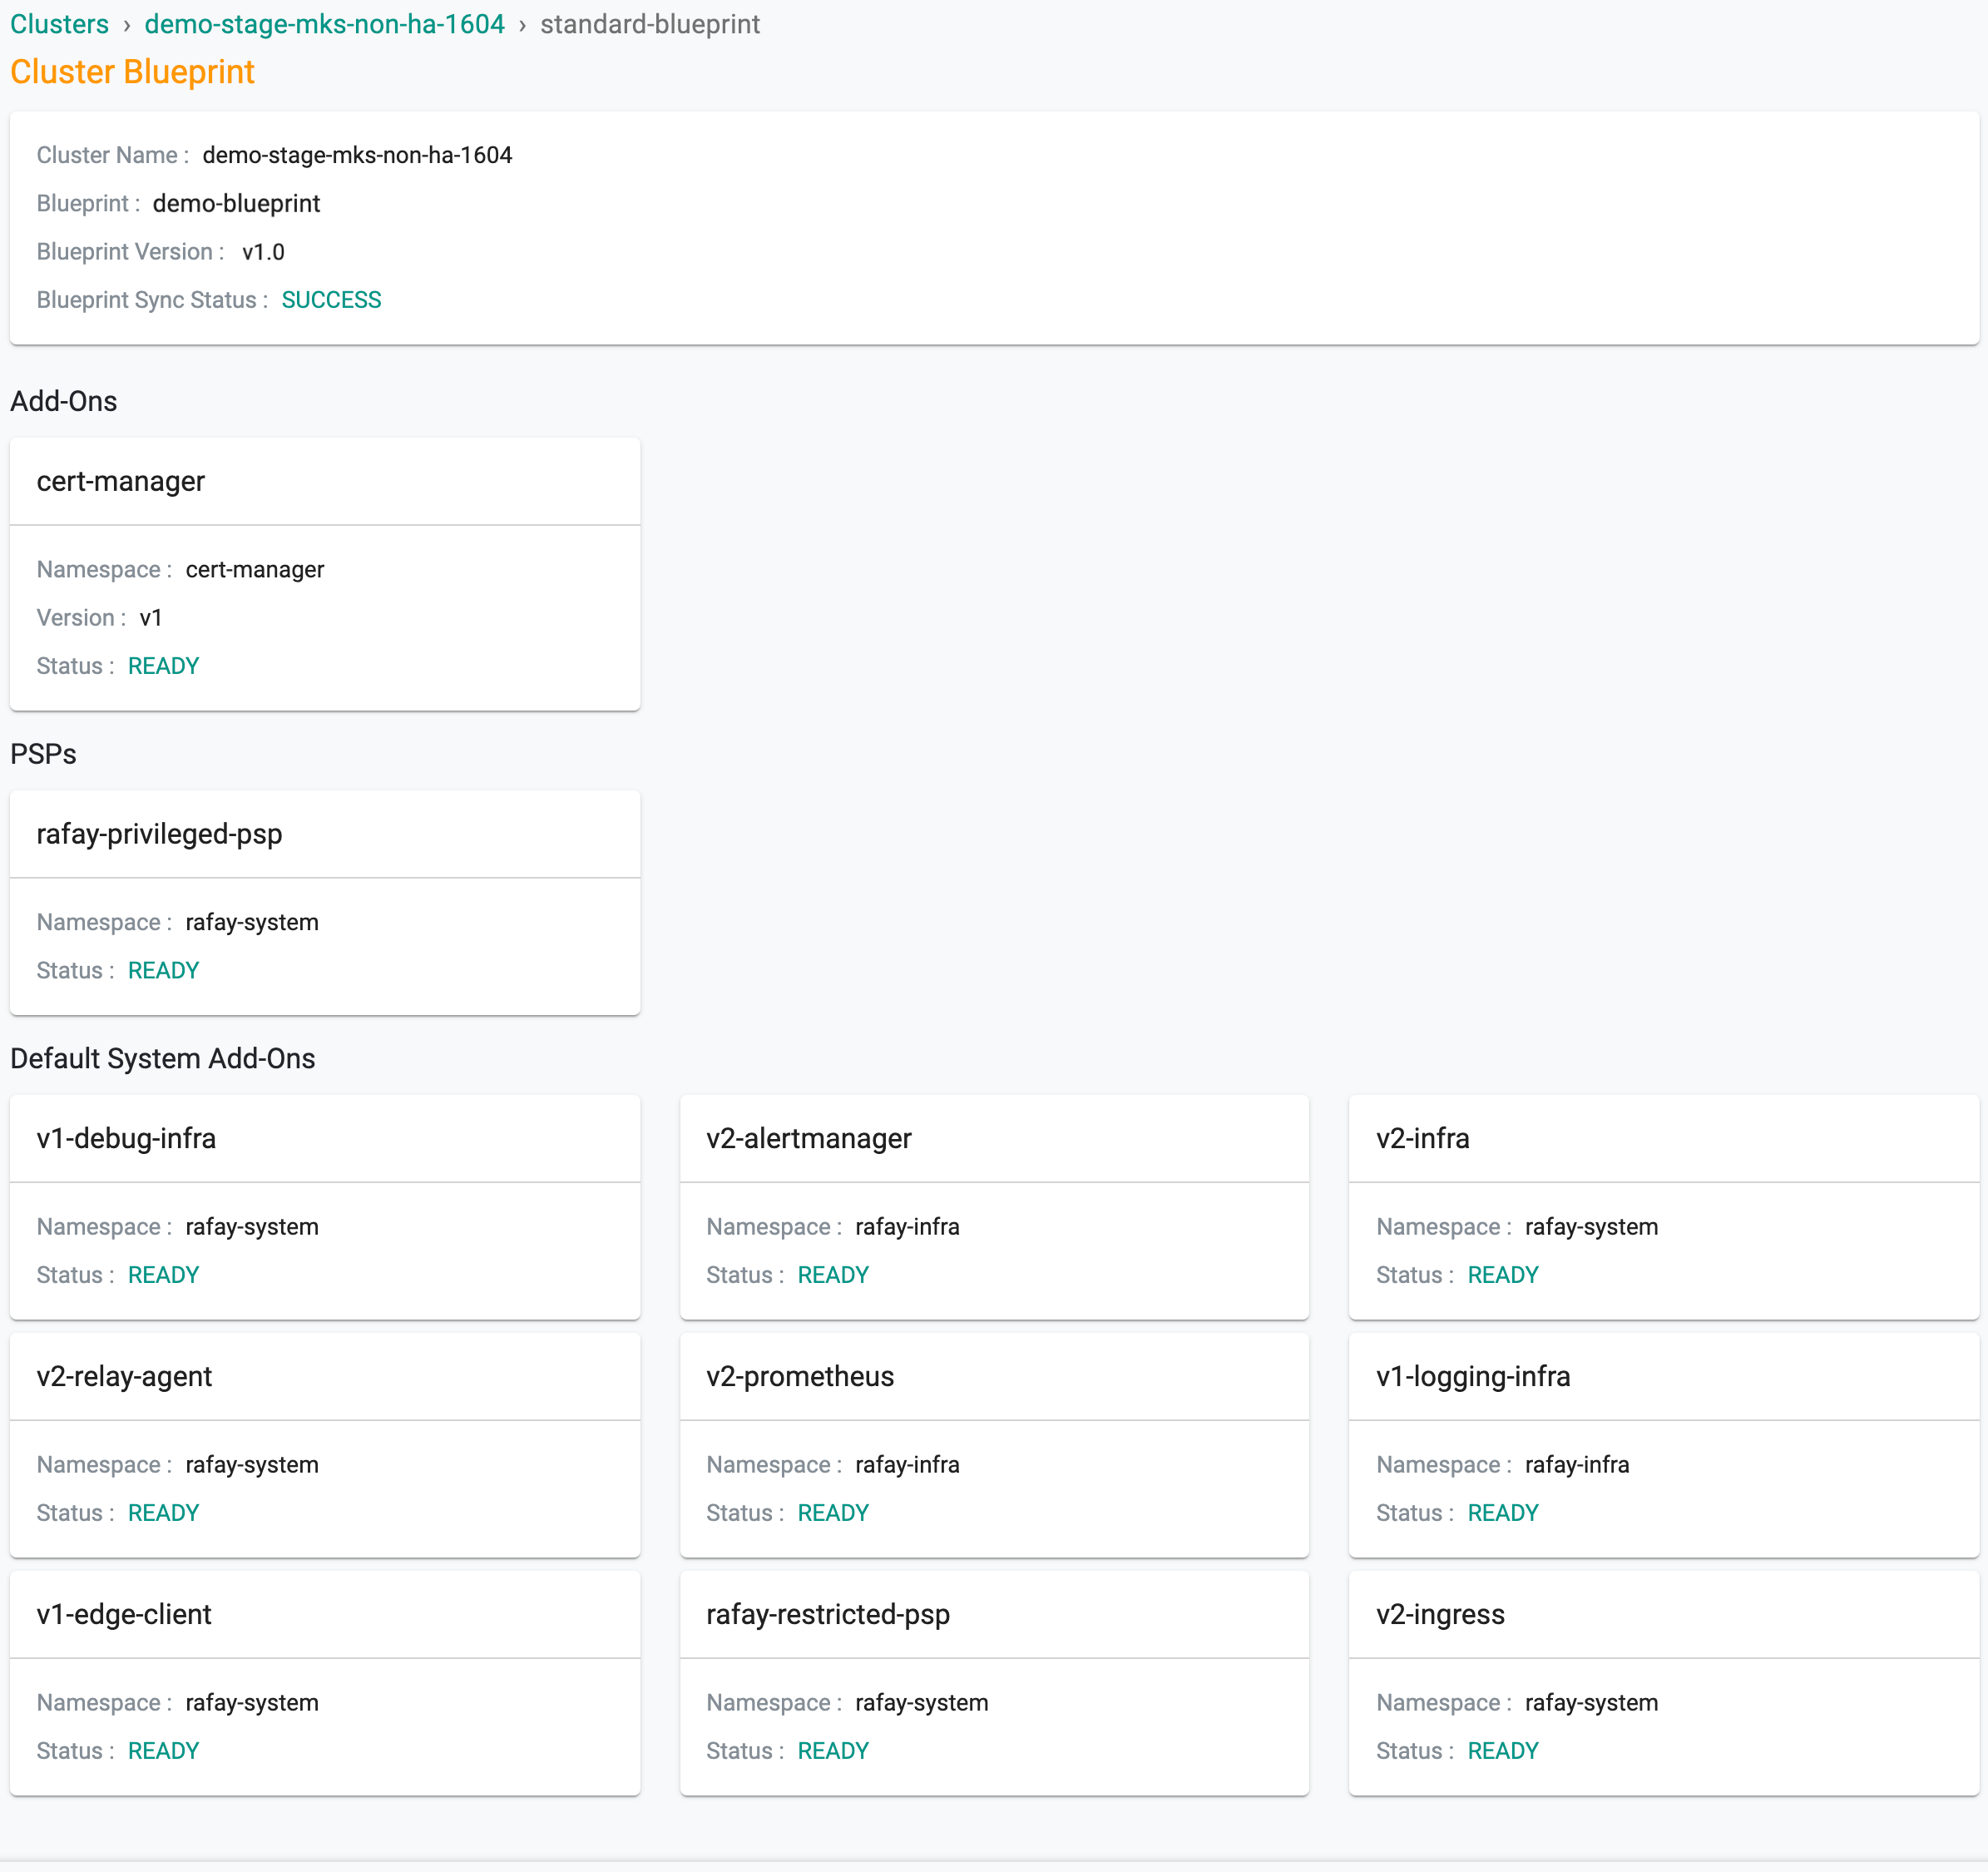
Status and Debug
In addition to using the Zero Trust KubeCTL channel for debugging and diagnostics, admins can also use the built-in status details if issues are encountered during a blueprint sync process with a cluster.
In the Blueprint Sync Status field on the cluster, click on the Status link. This will provide detailed status by component in the blueprint.
An illustrative example is shown below.
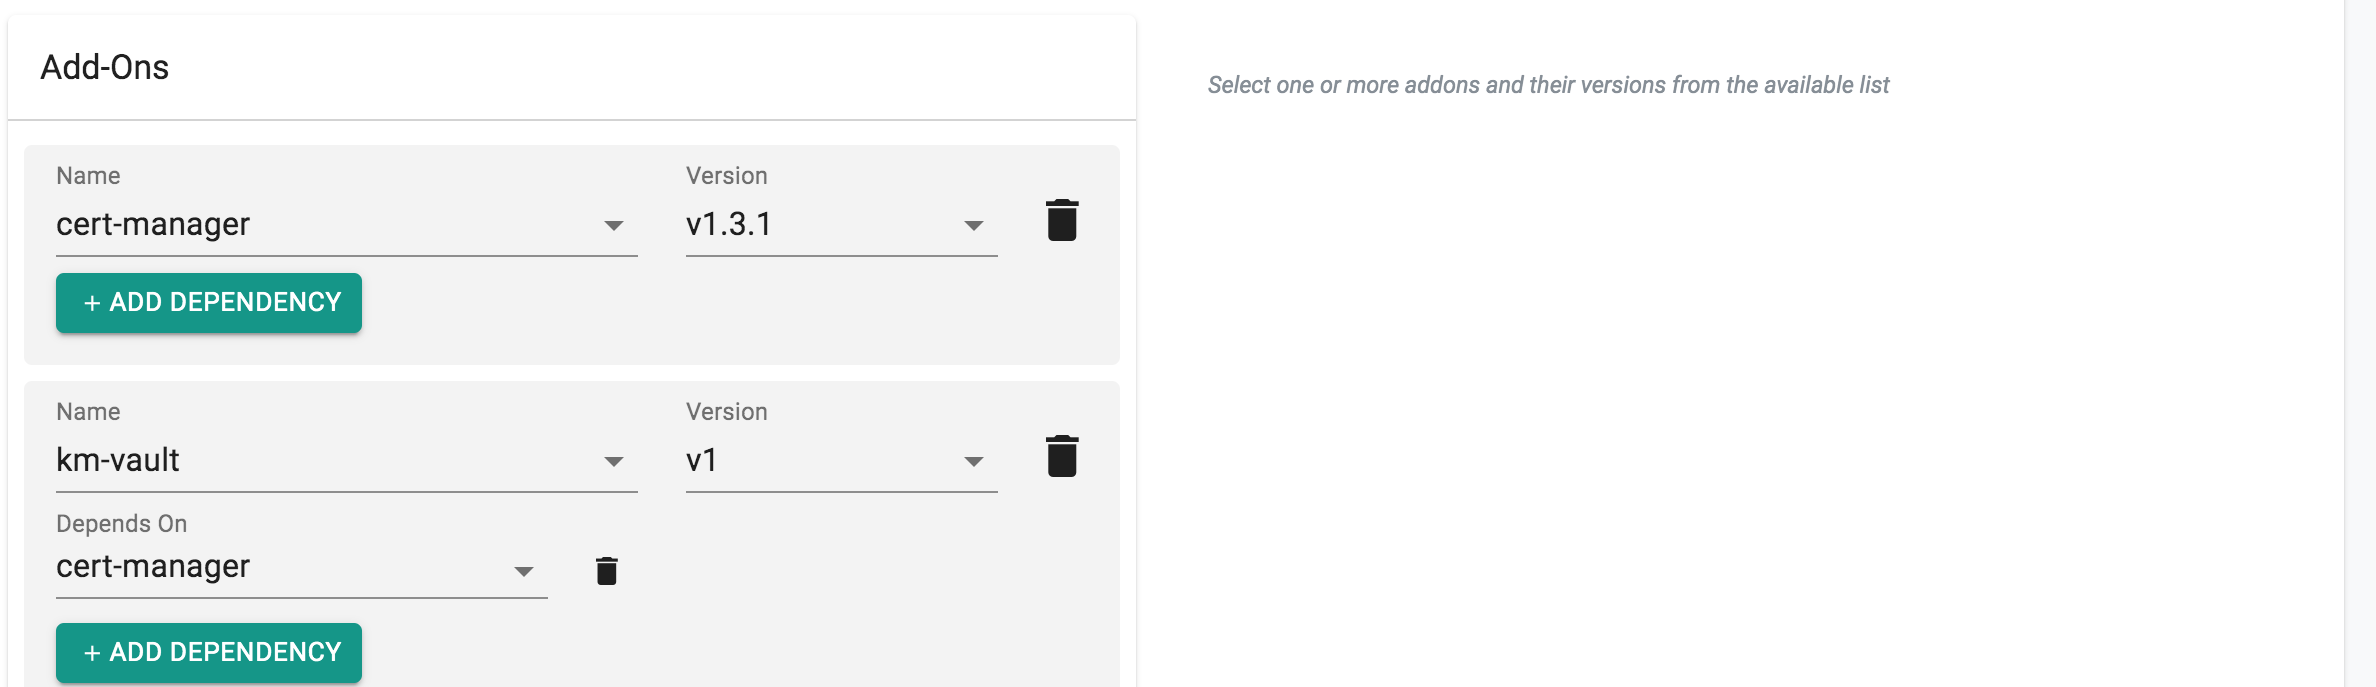
Dependency
In some scenarios, there are requirements that certain components (add-ons) need to be installed first before installing the rest of the components (add-ons).
To achieve this, define this dependency when creating the blueprint version. In the below example, install cert-manager before installing vault because vault uses cert-manager to create the certificate for Ingress.
- Navigate to the Project
- Click on Blueprints under Infrastructure
- Click on New blueprint
- Provide a name and description
- Click Create
- Click on New Version and use the wizard to provide details
- Provide a version number/name
- Under add-ons, select cert-manager and its version.
- Select "ADD MORE" and then select Vault add-on from the dropdown and its version
- Select "ADD DEPENDENCY" under Vault add-on and select "cert-manager"
- Click "Save Changes"
Note
If an add-on is dependent on multiple add-ons, all these add-ons can be added as dependencies