Overview
In this self-paced exercise, you will install KubeVirt on an existing cluster in order to run virtual machines along side of containerized applications.
About KubeVirt
KubeVirt is a Cloud Native Computing Foundation (CNCF) project. It leverages the fact that the kernel-based virtual machine (KVM) hypervisor is itself a Linux process that can be containerized. KubeVirt enables KVM-based virtual machine workloads to be managed as pods in Kubernetes. KubeVirt allows you to bring your VMs into a modern Kubernetes-based cloud native environment instead of forcing you to perform an expensive and time consuming refactoring initiative.
- KubeVirt brings K8s-style APIs and manifests to drive both the provisioning and management of virtual machines (VMs) using simple resources.
- KubeVirt provides standard VM operations (VM life cycle, power operations, clone, snapshot, etc.).
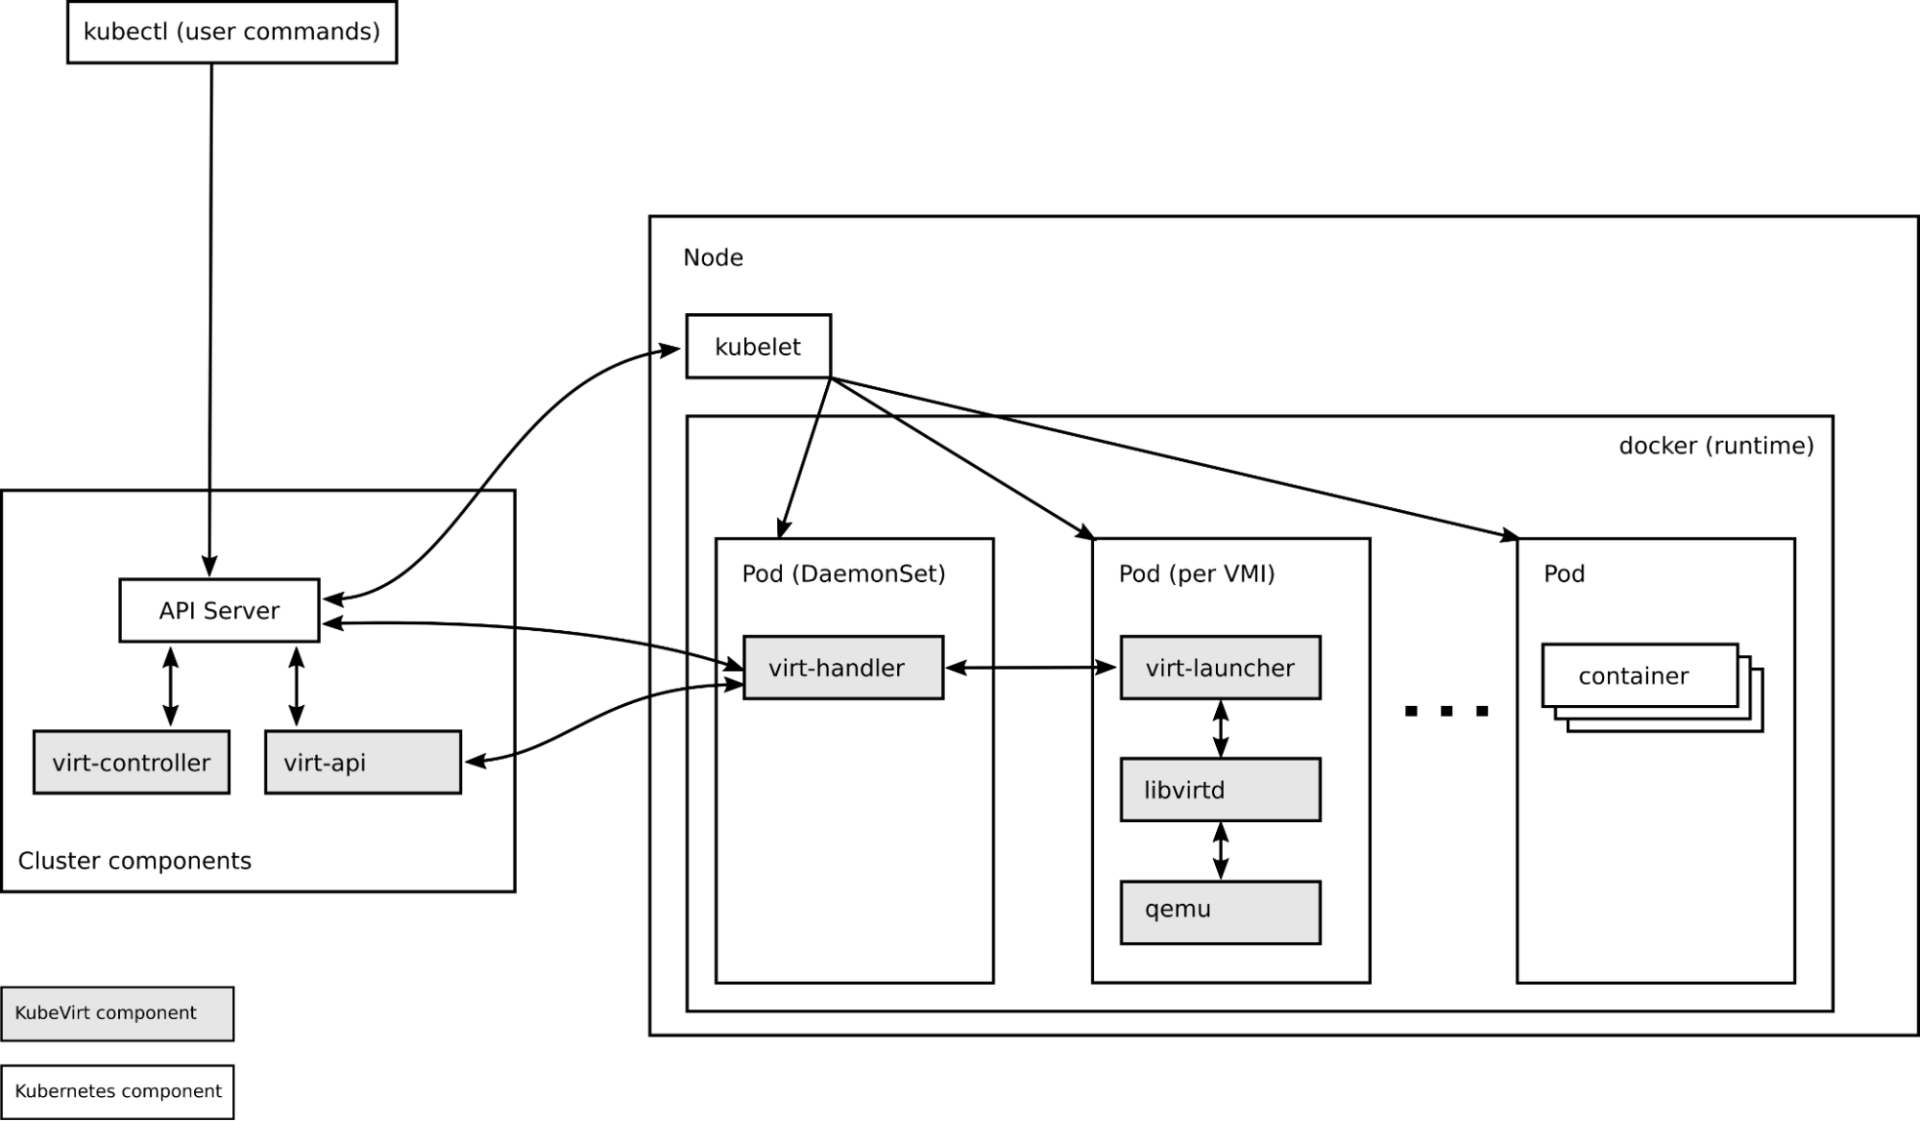
In the image below, you can see that users interact with the virtualization API. This in turn interacts with the Kubernetes API server to schedule the requested virtual machine instances (VMIs). KubeVirt is focused on providing just the virtualization capability offloading other capabilities such as scheduling, networking and storage to Kubernetes (since it excels at it).
Why KubeVirt?
Since the VMs are operated as pods in Kubernetes, users can expect the following benefits:
- Ability to leverage the world class declarative approach available in Kubernetes.
- Standardization by leveraging the same Kubernetes network plugins to enable communication between VMs and other pods or services in the cluster.
- Leverage Kubernetes’s world class capabilities for high availability and scheduling.
- Leverage the Kubernetes ecosystem such as role-based access control (RBAC), monitoring and logging solutions
Important
KubeVirt can be used on Kubernetes clusters with virtualized nodes. But, the use of nested virtualization can have a performance impact.
What Will You Do by Part
| Part | What will you do? |
|---|---|
| 1 | Setup and Configuration |
| 2 | Create a Cluster Blueprint with KubeVirt |
| 3 | Deploy a Virtual Machine Workload to the cluster |
Watch a video showcasing highlights of this exercise.
graph LR;
 user([User])
 rafay[Rafay <br> Platform]

 subgraph cluster[Kubernetes Cluster]
 direction TB
 container[Containerized <br> Apps];
 vm[Virtual <br> Machines]
 end

 user -->rafay-..->vm;
 rafay-..->container;

 classDef plain fill:#ddd,stroke:#fff,stroke-width:4px,color:#000;
 classDef k8s fill:#326ce5,stroke:#fff,stroke-width:4px,color:#fff;
 classDef teal fill:#008080,stroke:#fff,stroke-width:4px,color:#fff;
 classDef cluster fill:#fff,stroke:#bbb,stroke-width:2px,color:#326ce5;
 class container,vm k8s;
 class user plain;
 class rafay teal;
 class cluster cluster;
Assumptions
- You have an existing cluster in your Rafay Org.
- You have a Git client on your laptop.