Create Blueprint
To deploy NGINX Ingress Controller on the managed Kubernetes cluster using a cluster blueprint, perform the following steps:
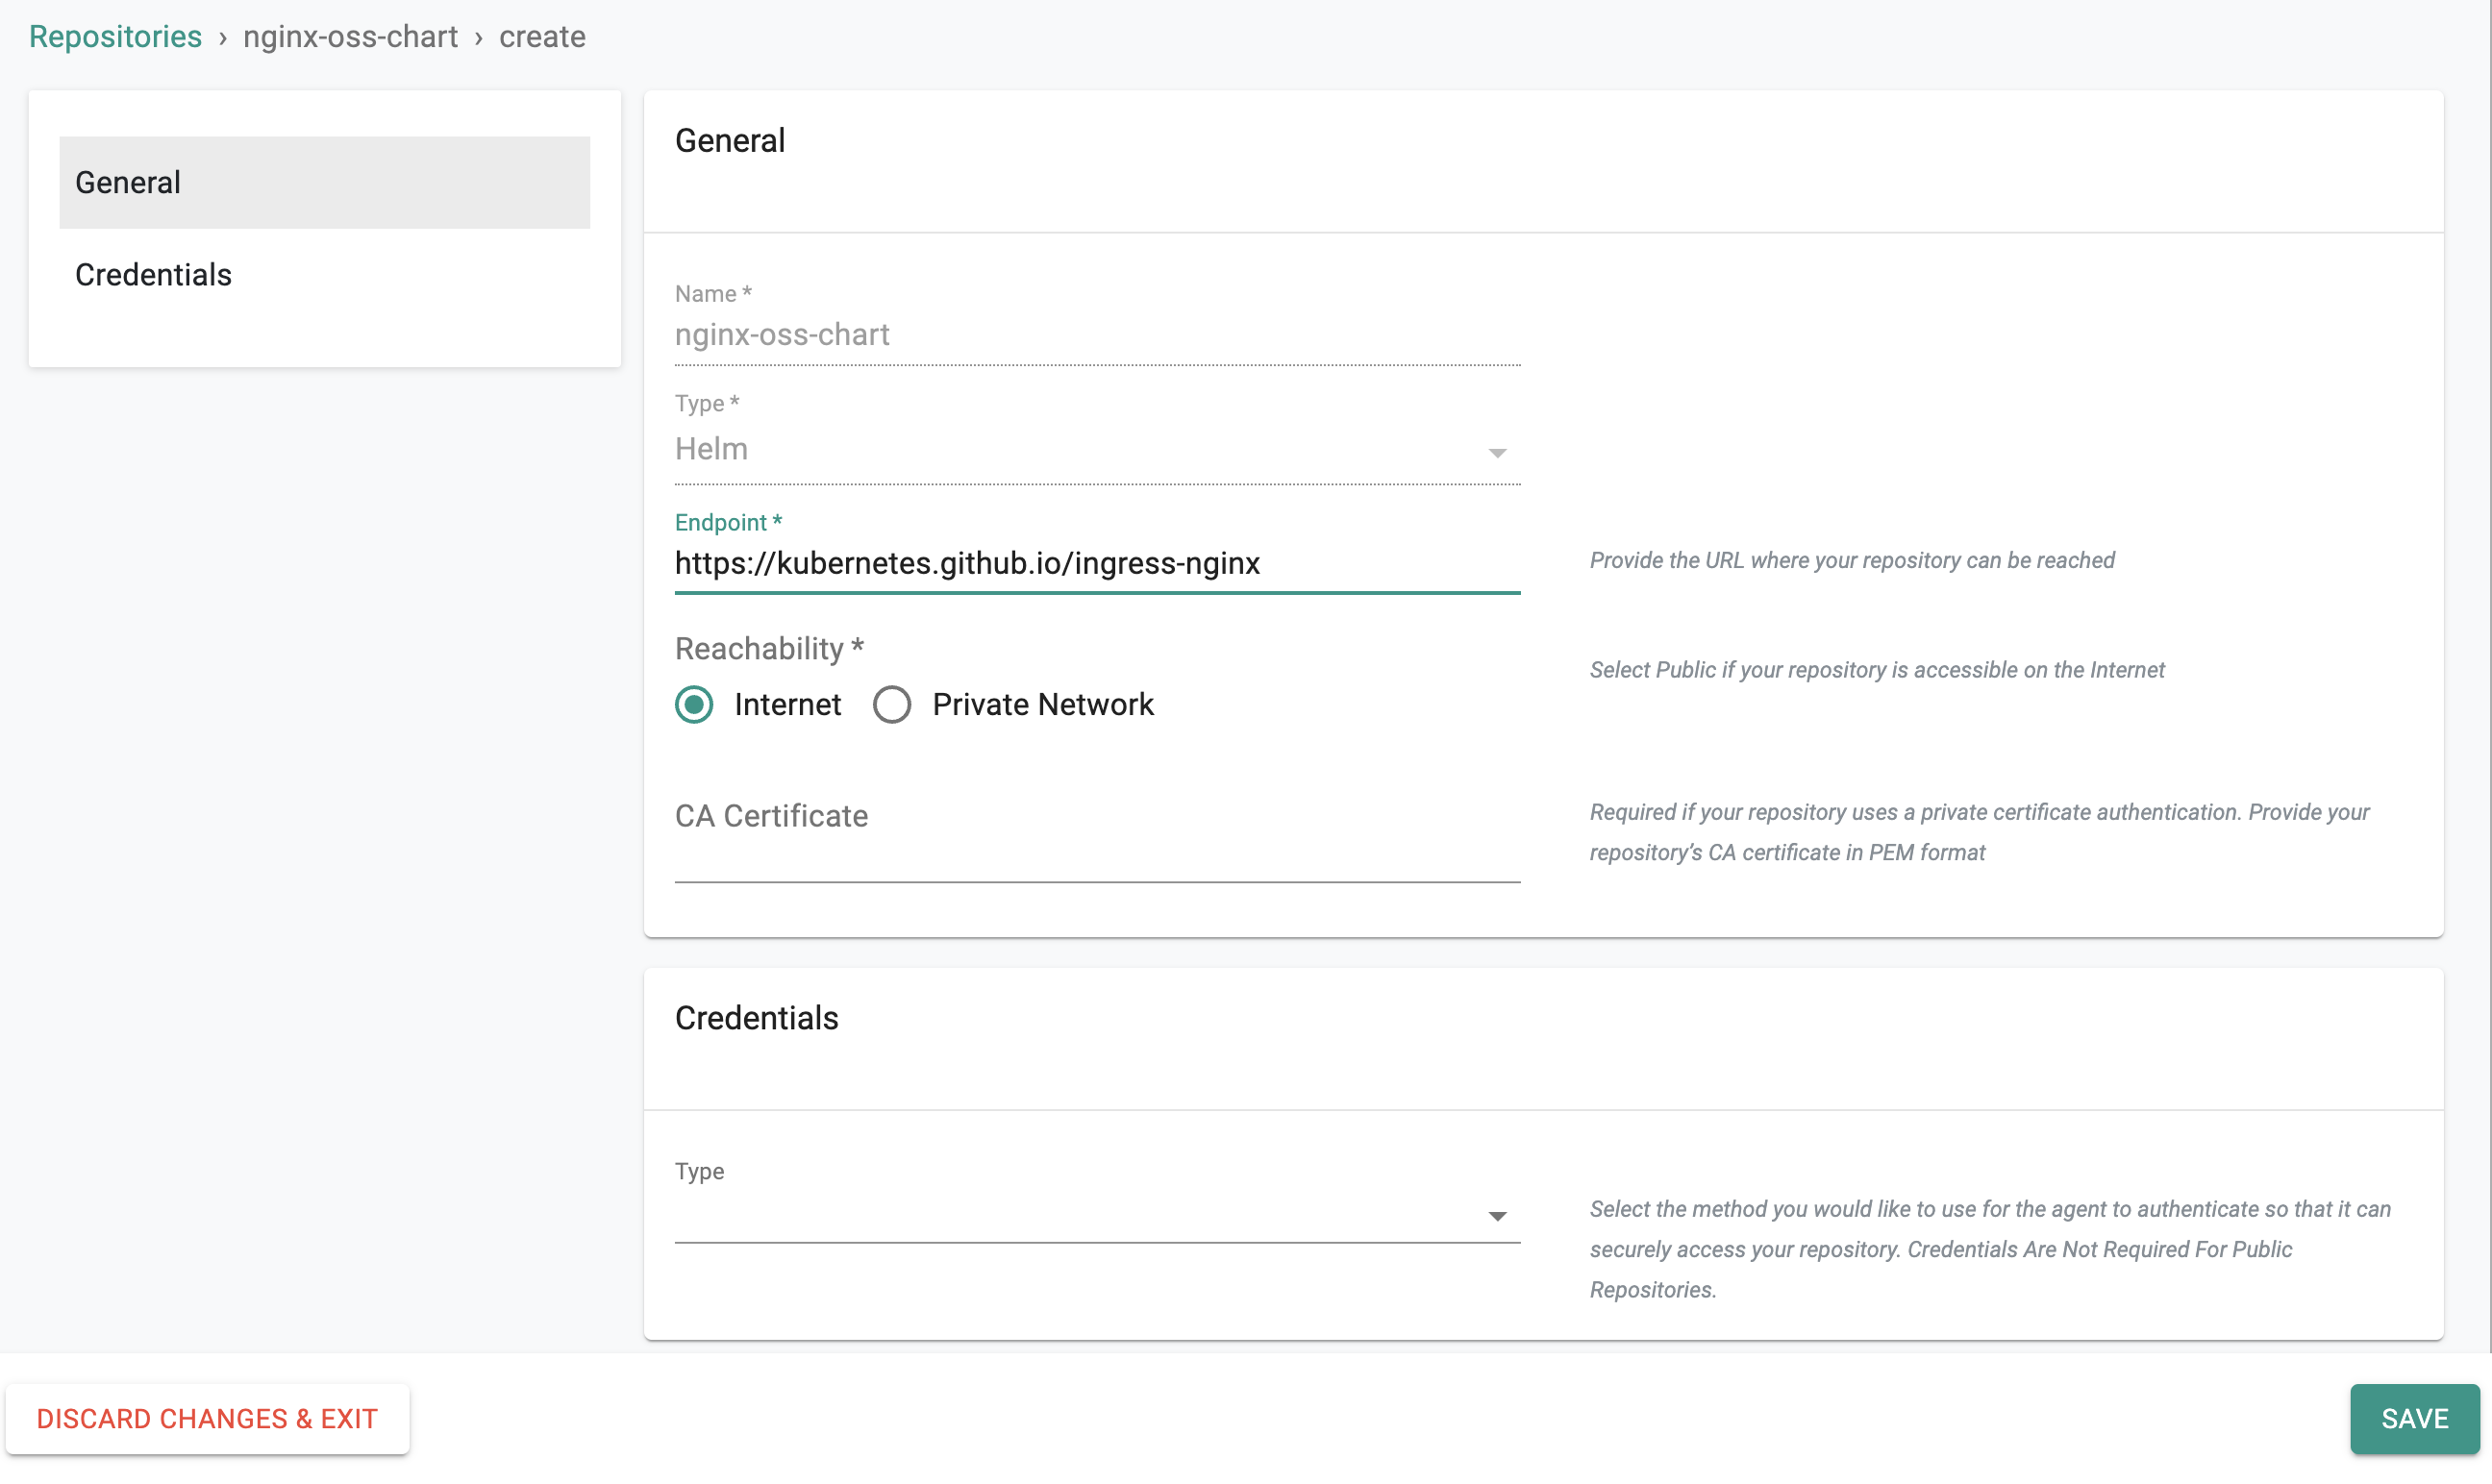
Create Repository
In this step, we will connect the controller to the Helm repository that stores NGINX Ingress Controller Helm chart which is used in the addon configuration.
- Log in to the controller web console and navigate to your Project as an Org Admin or Infrastructure Admin.
- Select Integrations and Repositories.
- Create a new repository with the name nginx-oss-chart by clicking on the New Repository button.
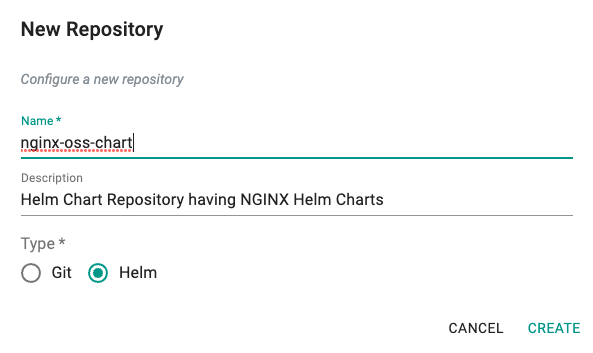
- Add NGINX Helm Chart repository URL: https://kubernetes.github.io/ingress-nginx in the endpoint and save it.
- The reachability for this repository is the default Internet.
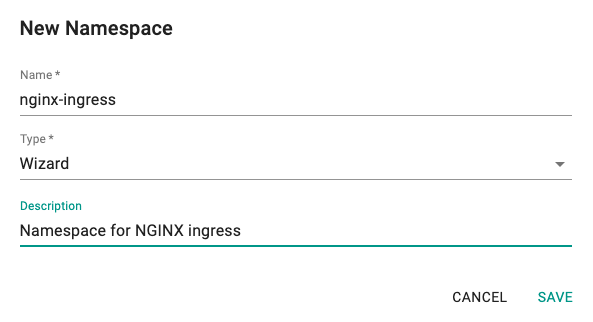
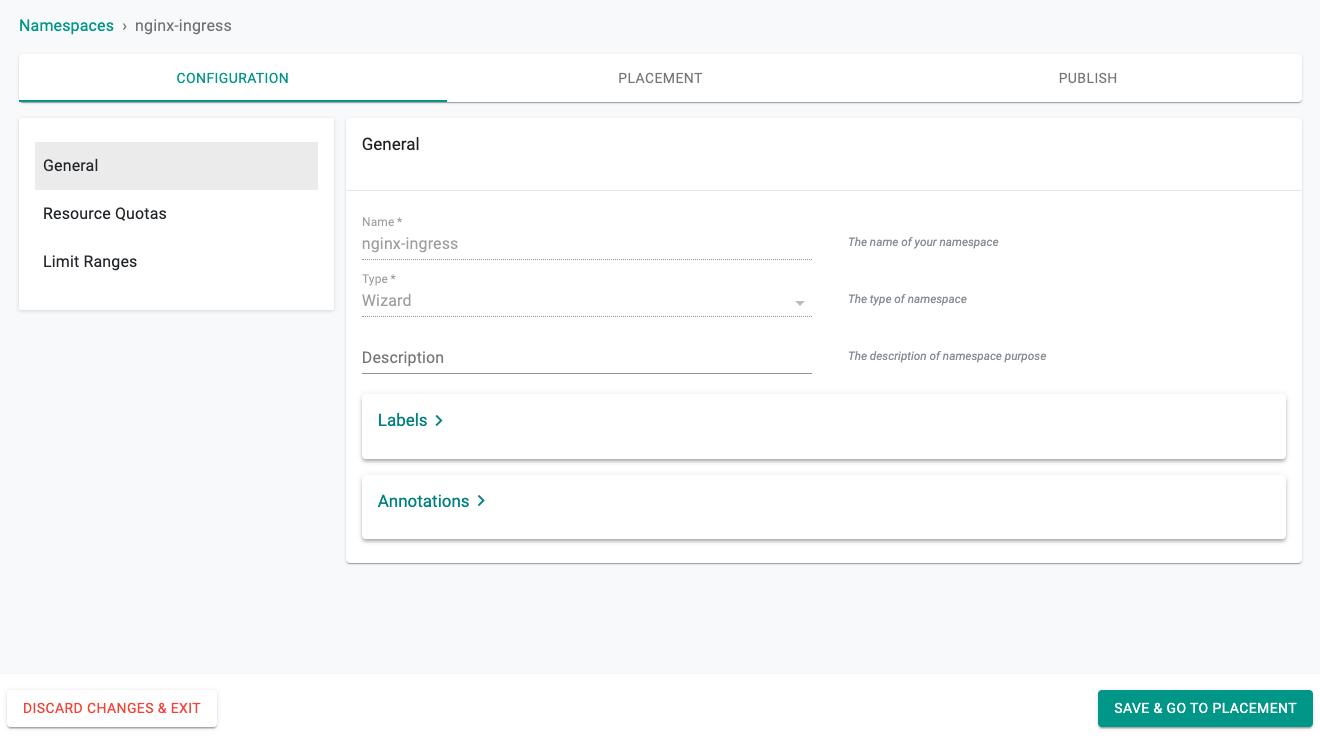
Namespace
Kubernetes namespaces are governed resources. In this step, we will create a namespace on the cluster where the NGINX resources will be deployed.
- Under Infrastructure select Namespaces and then create a new namespace called nginx-ingress by clicking on the New Namespace button.
- Click SAVE
- Select the target cluster from the list of available clusters
- Click SAVE & GO TO PUBLISH.
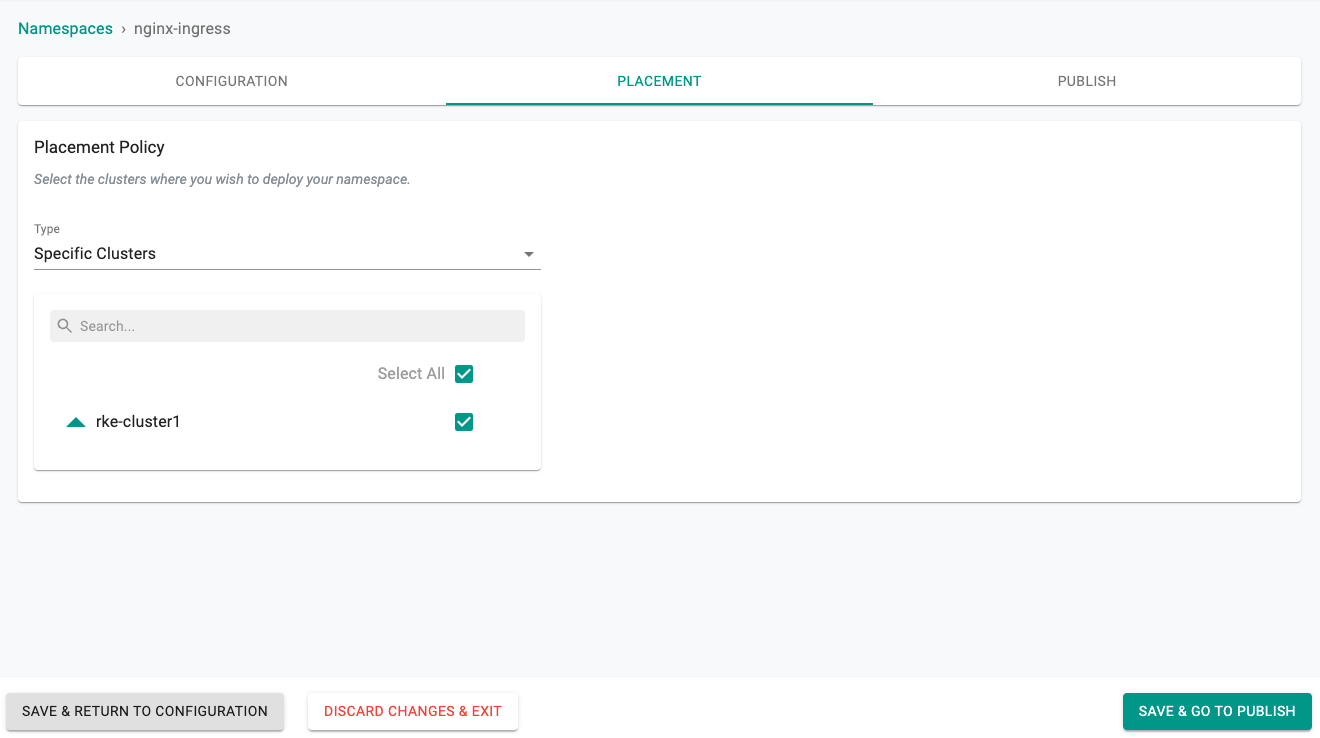
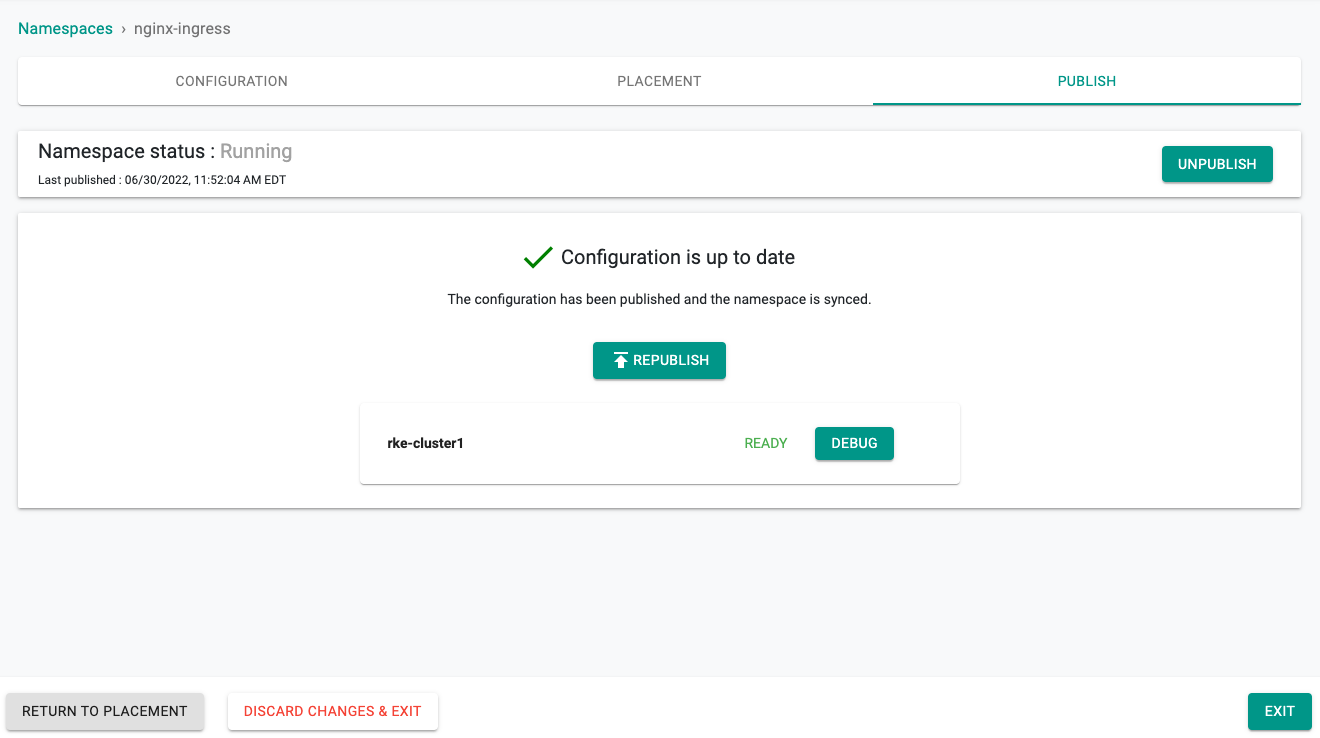
- Publish the namespace and make sure that it gets published successfully in the target cluster before moving to the next step.
NGINX Addon
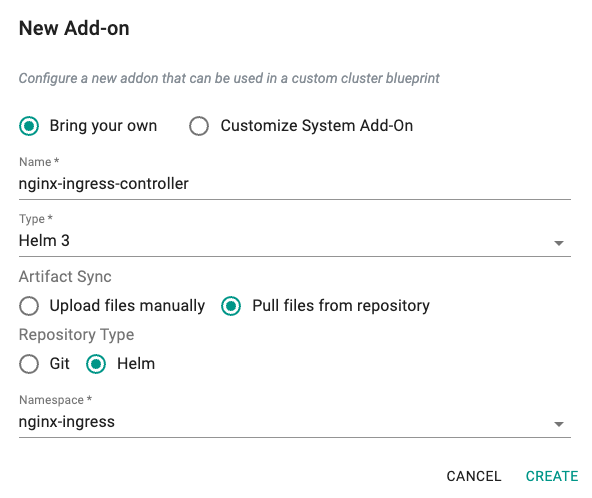
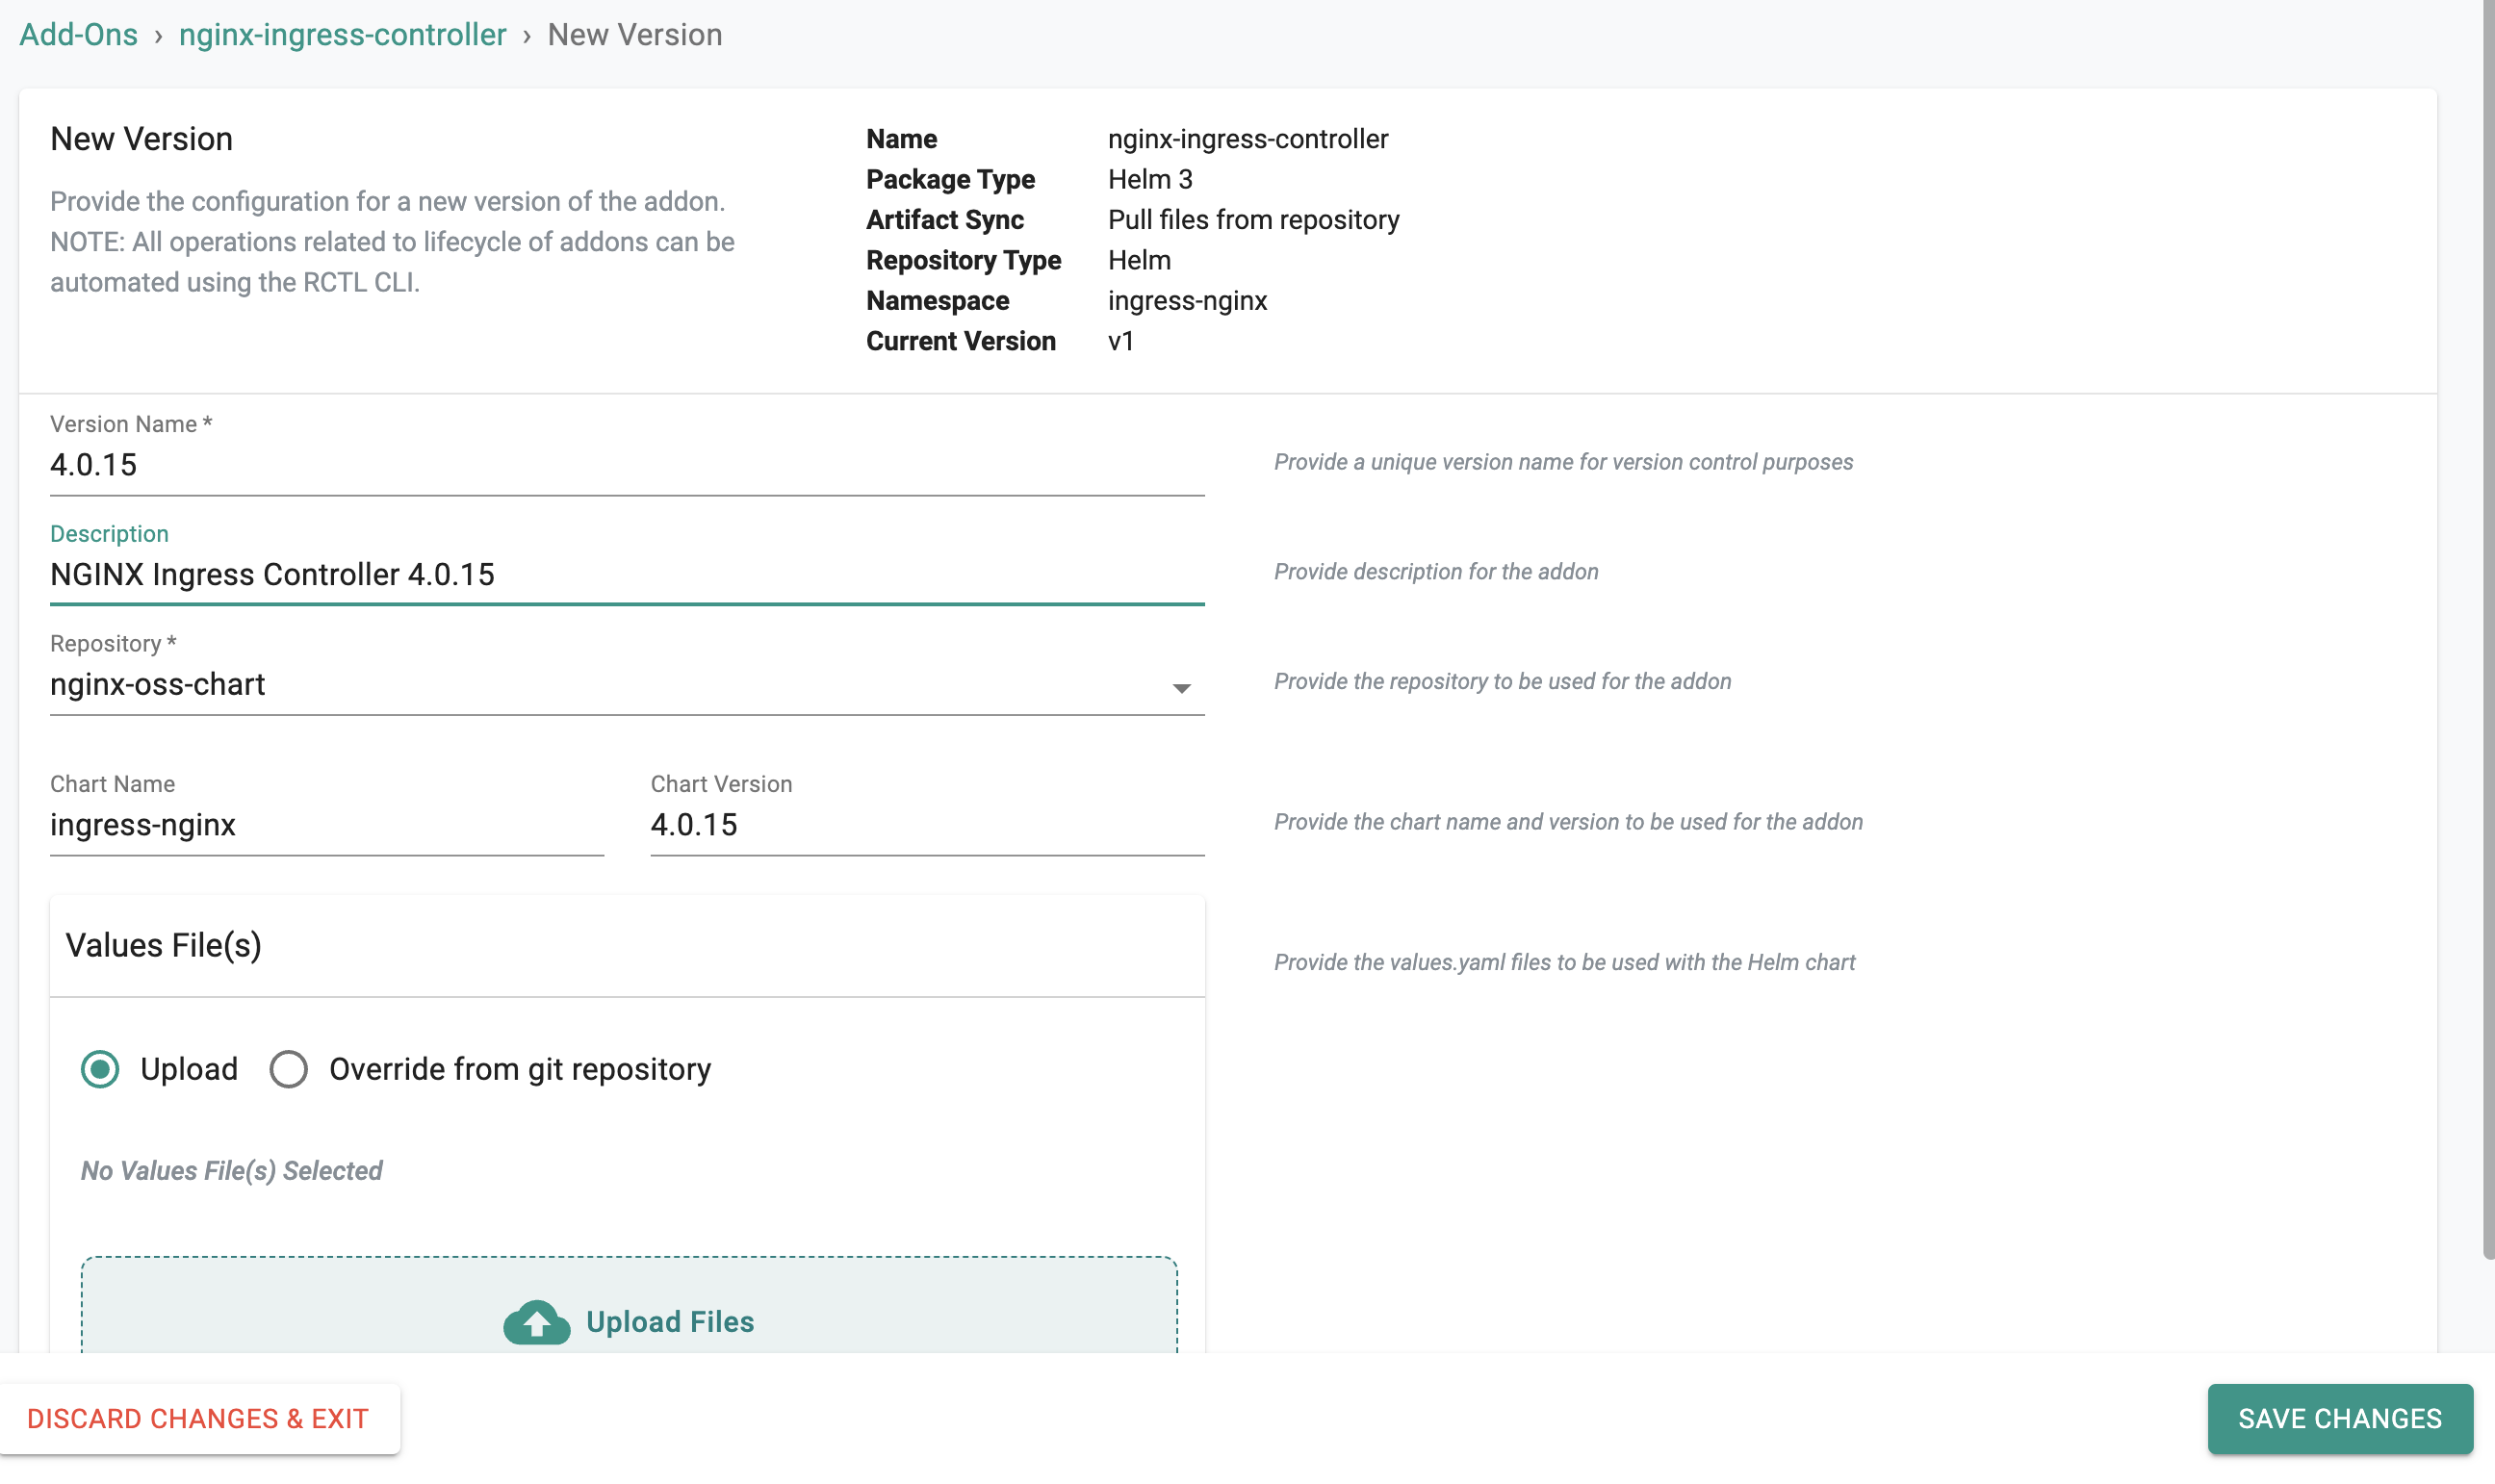
- Under Infrastructure, select Addon and create a new addon with the name nginx-ingress-controller.
- Ensure that you select Helm 3 for Type, Pull files from repository for Artifact Sync, Helm for Repository Type and select the namespace nginx-ingress.
- Create a new version of nginx-ingress-controller addon.
- Click the + New Version to launch the wizard.
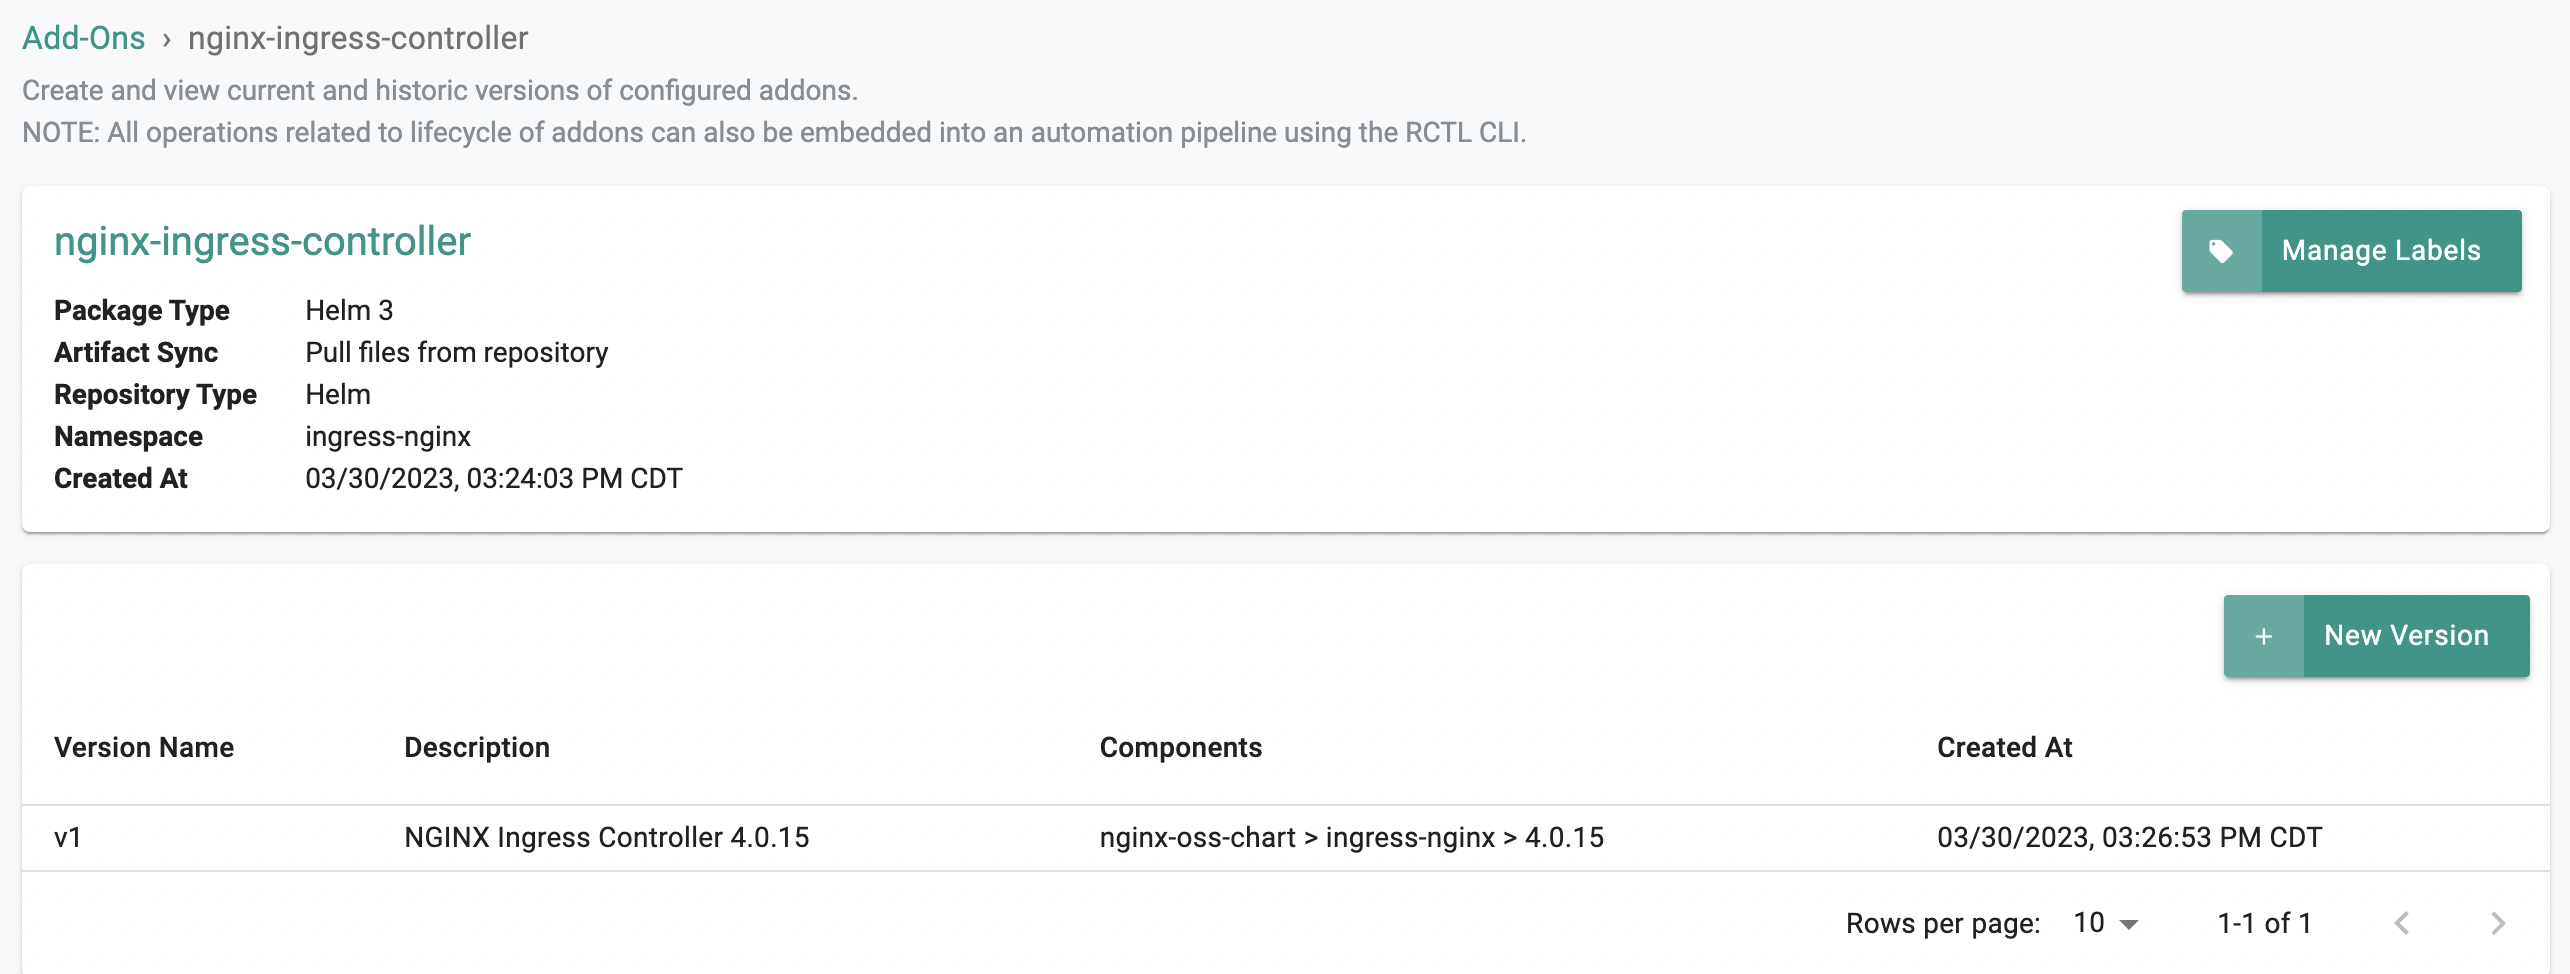
- Ensure that you select nginx-oss-chart for repository and provide the chart name as nginx-ingress-controller.
- The chart version can be any NGINX Ingress Controller version that has been released, as of now the latest released version is 0.13.2.
- In this example, the latest version is used.
Note
For information about NGINX Ingress Controller released versions, see the Release Notes
You can upload a values.yaml file that contains configurable parameters of NGINX Ingress Controller to be installed in the Kubernetes cluster. Click here for information about all the configurable parameters of NGINX Ingress Controller.
In this example we are going to skip the values.yaml file and instead create a Cluster Override.
Cluster Override
- Under Infrastructure, select Cluster Overrides
- Create a new override with the name nginx-ingress-overrides.
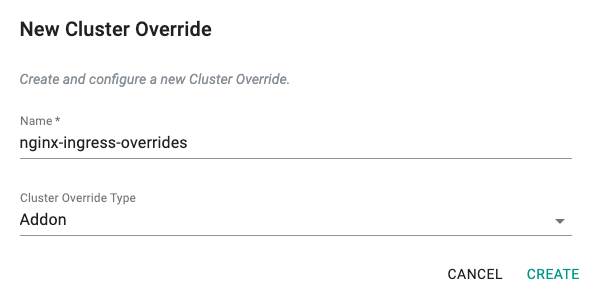
- For Selectors, choose nginx-ingress-controller and placement should be for Specific Clusters (in this example).
- You can upload a file or simply paste your options into the Override Configuration window.
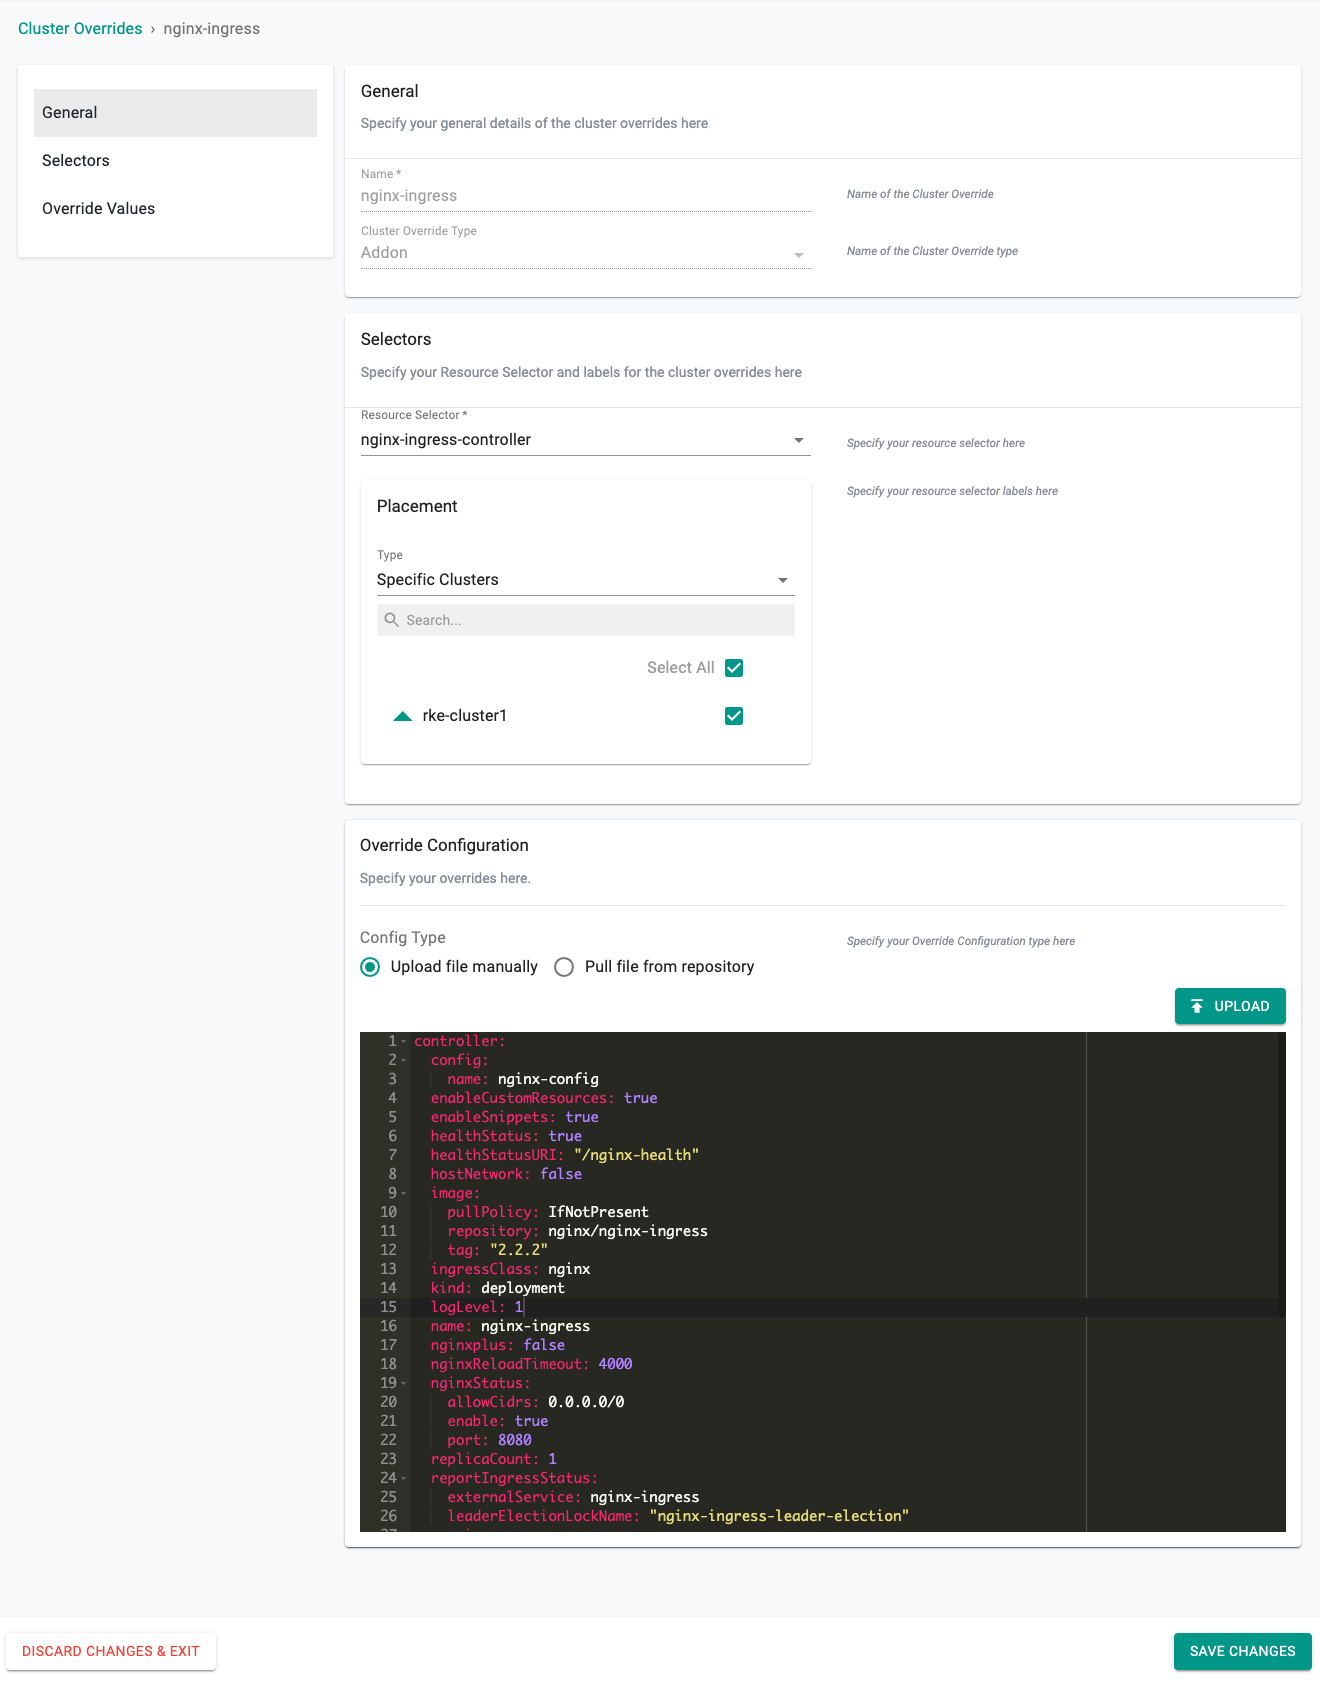
Here is a base configuration you can use for testing. For complete documentation on each of the options you can use, please refer to the documentation.
controller:
  config:
    name: nginx-config
  enableCustomResources: true
  enableSnippets: true
  healthStatus: true
  healthStatusURI: "/nginx-health"
  hostNetwork: false
  image:
    pullPolicy: IfNotPresent
    repository: nginx/nginx-ingress
    tag: "2.2.2"
  ingressClass: nginx
  kind: deployment
  logLevel: 1
  name: nginx-ingress
  nginxplus: false
  nginxReloadTimeout: 4000
  nginxStatus:
    allowCidrs: 0.0.0.0/0
    enable: true
    port: 8080
  replicaCount: 1
  reportIngressStatus:
    externalService: nginx-ingress
    leaderElectionLockName: "nginx-ingress-leader-election"
  service:
    create: true
    externalTrafficPolicy: Local
    httpPort:
      enable: false
      port: 80
      targetPort: 80
    httpsPort:
      enable: true
      port: 443
      targetPort: 443
    name: nginx-ingress
    type: LoadBalancer
  serviceAccount:
    name: nginx-ingress
  setAsDefaultIngress: true
  terminationGracePeriodSeconds: 30
prometheus:
  create: false
Blueprint
In this step, we will create a custom cluster blueprint using the addons created earlier. You can provision other addons to the same custom cluster blueprint as well, if required for your use case.
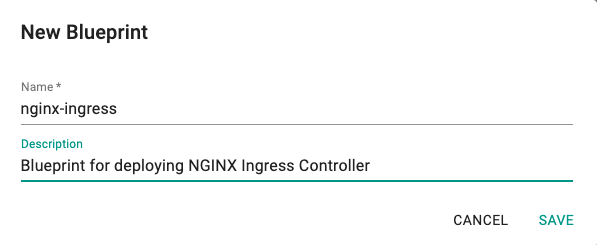
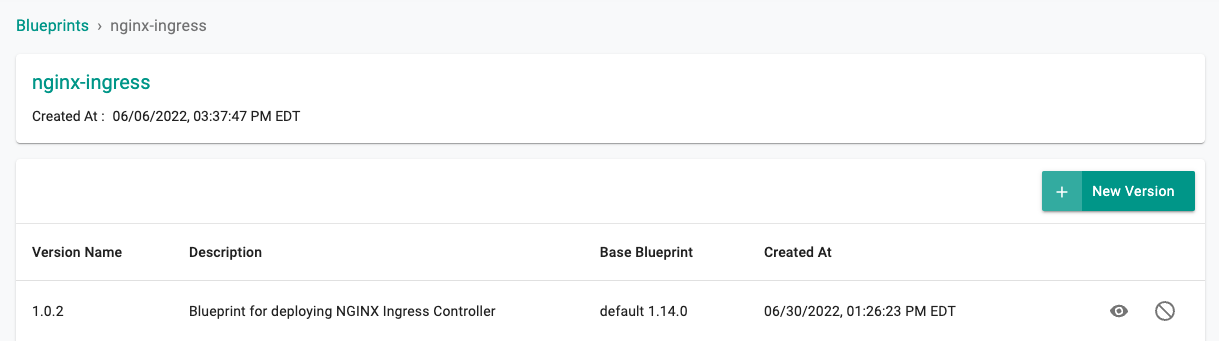
- Under Infrastructure, select Blueprints and add a new Blueprint with the name nginx-ingress.
- Create a new version in the blueprint. Any earlier version can be used, here we have used 1.0.2.
- We will use the Base Blueprint as the current default version (v1.14.0 in this case). You can modify this as appropriate.
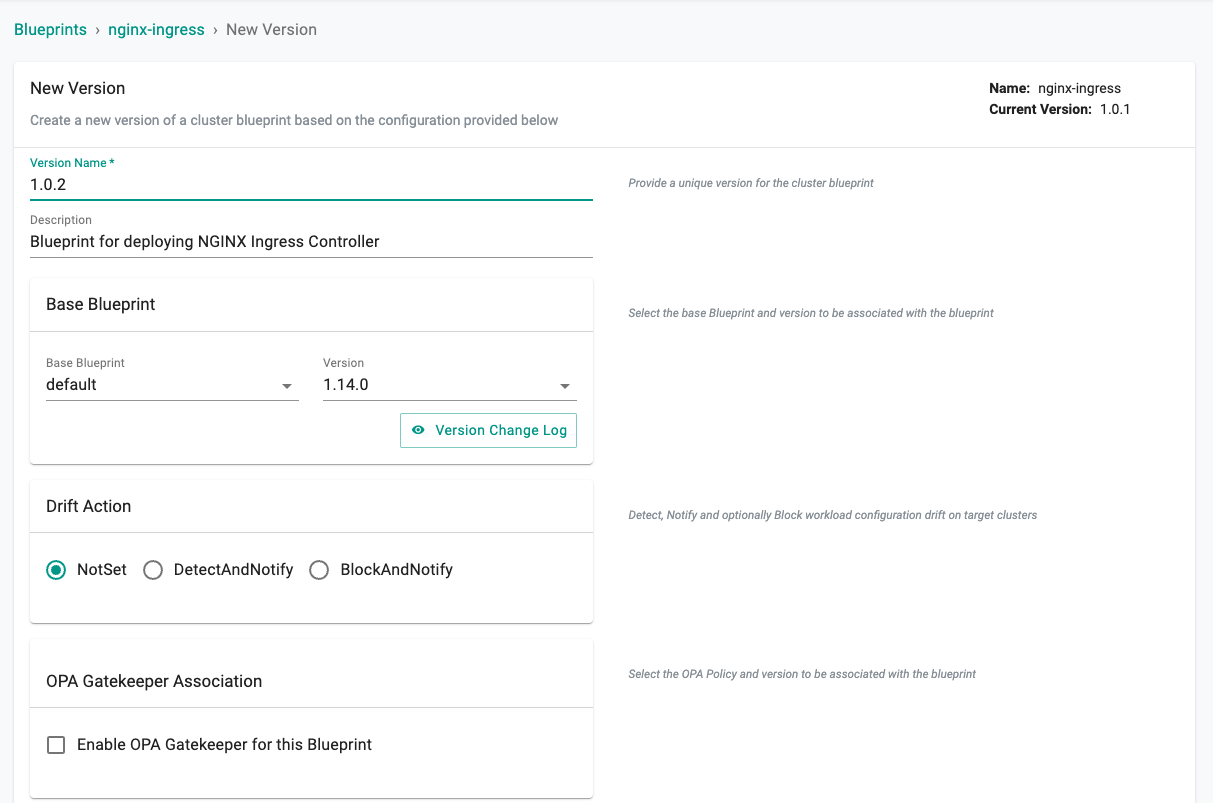
- Unselect the ingress controller from the Managed System Add-Ons as you will deploy NGINX Ingress Controller with this Blueprint.
The remaining managed addons can be selected in accordance with your preference. Here we have left Monitoring & Alerting turned on.
- Once finished, choose Save Changes. If there were any issues with creating the version, you can simply create a new version with the options corrected and deploy that. Verify that the new version in the blueprint was created successfully
Apply Blueprint
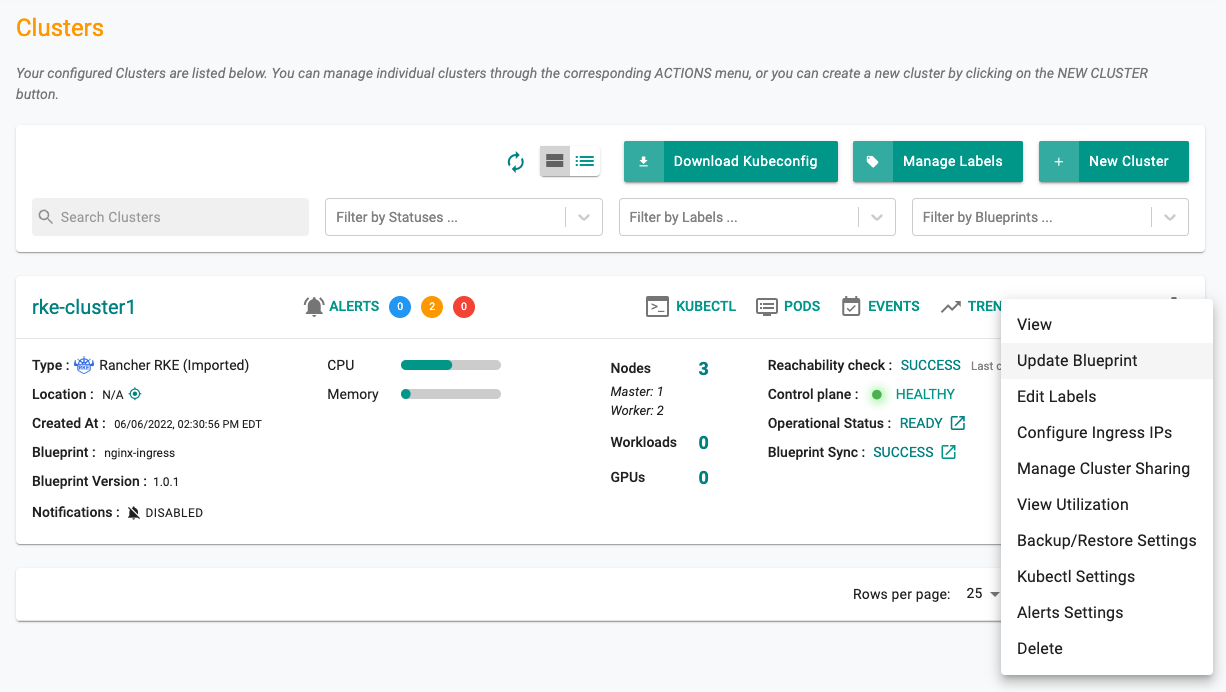
- Under Infrastructure, click Clusters and then select settings of the target cluster from the controller web console. In this example the target cluster is named rke-cluster1.
- Click the gear icon in the upper right and select Update Blueprint.
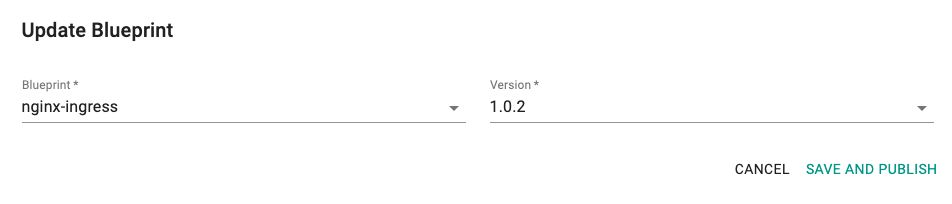
- Then select the nginx-ingress blueprint from the list and select the version that you created for custom cluster blueprint (1.0.2).
- Click SAVE AND PUBLISH
It starts the deployment of the addons configured in the nginx-ingress blueprint to the targeted cluster. The blueprint sync process takes a few minutes to complete. Once completed, the cluster displays the current cluster blueprint details and whether the sync was successful or not.
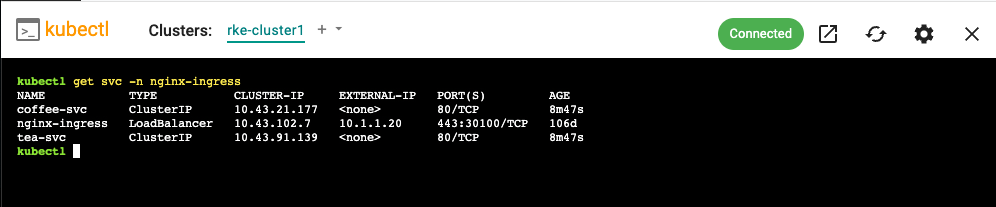
Verify Blueprint
You can verify whether the resources related to NGINX Ingress Controller is properly deployed in the cluster or not.
- Go to the Kubectl Web Shell
- Verify that NGINX Ingress Controller deployment is up and running using the following command
kubectl get pods -n nginx-ingress
- Verify the pod details with the following command
kubectl describe pod <ingress-controller-pod-name> -n nginx-ingress
You should see something like the following
ubuntu@dev:~$ kubectl describe pod nginx-ingress-d99c77fd7-qkxnv -n nginx-ingress

Name:         nginx-ingress-d99c77fd7-qkxnv
Namespace:    nginx-ingress
Priority:     0
Node:         k8s-01-wk-01/10.1.1.7
Start Time:   Mon, 06 Jun 2022 22:03:41 +0000
Labels:       app=nginx-ingress
              k8smgmt.io/project=defaultproject
              pod-template-hash=d99c77fd7
              rep-addon=nginx-ingress
              rep-cluster=2w7rqek
              rep-cluster-name=rke-cluster1
              rep-drift-reconcillation=disabled
              rep-organization=qko70l2
              rep-partner=rx28oml
              rep-placement=k373v82
              rep-project=g29vy1m
              rep-project-name=defaultproject
              rep-workloadid=2w0zdym
Annotations:  cni.projectcalico.org/containerID: a764f2a02eeb2b412f3e9cf821026b55c37f65c36e287c53ca4f9f43331df655
              cni.projectcalico.org/podIP: 10.42.1.74/32
              cni.projectcalico.org/podIPs: 10.42.1.74/32
              kubernetes.io/psp: global-unrestricted-psp
Status:       Running
IP:           10.42.1.74
IPs:
  IP:           10.42.1.74
Controlled By:  ReplicaSet/nginx-ingress-d99c77fd7
Containers:
  nginx-ingress-nginx-ingress:
    Container ID:  containerd://90ecae8cde9c00bb75558ea4932669470d896815795945c5fba323d2cd2b7ce6
    Image:         nginx/nginx-ingress:2.2.2
    Image ID:      docker.io/nginx/nginx-ingress@sha256:b6dec42d12651b12ced39434336b1022029c8534488aa2084b46f138c9f700ba
    Ports:         80/TCP, 443/TCP, 8081/TCP
    Host Ports:    0/TCP, 0/TCP, 0/TCP
    Args:
      -nginx-plus=false
      -nginx-reload-timeout=4000
      -enable-app-protect=false
      -enable-app-protect-dos=false
      -nginx-configmaps=$(POD_NAMESPACE)/nginx-config
      -default-server-tls-secret=$(POD_NAMESPACE)/nginx-ingress-nginx-ingress-default-server-tls
      -ingress-class=nginx
      -health-status=true
      -health-status-uri=/nginx-health
      -nginx-debug=false
      -v=1
      -nginx-status=true
      -nginx-status-port=8080
      -nginx-status-allow-cidrs=0.0.0.0/0
      -report-ingress-status
      -external-service=nginx-ingress
      -enable-leader-election=true
      -leader-election-lock-name=nginx-ingress-leader-election
      -enable-prometheus-metrics=false
      -prometheus-metrics-listen-port=9113
      -prometheus-tls-secret=
      -enable-custom-resources=true
      -enable-snippets=true
      -enable-tls-passthrough=false
      -enable-preview-policies=false
      -enable-cert-manager=false
      -enable-oidc=false
      -ready-status=true
      -ready-status-port=8081
      -enable-latency-metrics=false
    State:          Running
      Started:      Thu, 30 Jun 2022 15:40:09 +0000
    Last State:     Terminated
      Reason:       Unknown
      Exit Code:    255
      Started:      Thu, 30 Jun 2022 14:27:37 +0000
      Finished:     Thu, 30 Jun 2022 15:39:48 +0000
    Ready:          True
    Restart Count:  11
    Readiness:      http-get http://:readiness-port/nginx-ready delay=0s timeout=1s period=1s #success=1 #failure=3
    Environment:
      POD_NAMESPACE:  nginx-ingress (v1:metadata.namespace)
      POD_NAME:       nginx-ingress-d99c77fd7-qkxnv (v1:metadata.name)
    Mounts:
      /var/run/secrets/kubernetes.io/serviceaccount from kube-api-access-rgx65 (ro)
Conditions:
  Type              Status
  Initialized       True
  Ready             True
  ContainersReady   True
  PodScheduled      True
Volumes:
  kube-api-access-rgx65:
    Type:                    Projected (a volume that contains injected data from multiple sources)
    TokenExpirationSeconds:  3607
    ConfigMapName:           kube-root-ca.crt
    ConfigMapOptional:       <nil>
    DownwardAPI:             true
QoS Class:                   BestEffort
Node-Selectors:              <none>
Tolerations:                 node.kubernetes.io/not-ready:NoExecute op=Exists for 300s
                             node.kubernetes.io/unreachable:NoExecute op=Exists for 300s
Events:                      <none>