Scenario 2: Incorrect Container Image
In this scenario, we will try to deploy a workload with a "misconfigured container image name". Once deployed, the underlying Kubernetes cluster will not able to find/pull this container image and will result in the infamous ImagePullBackOff error message. We will use the integrated troubleshooting capabilities to debug and diagnose the issue and resolve the issue.
YAML File
Save the following YAML to a file. Notice the typo in the image name.
apiVersion: apps/v1
kind: Deployment
metadata:
  name: nginx
  labels:
    app: nginx
  annotations:
spec:
  replicas: 1
  selector:
    matchLabels:
      app: nginx
  template:
    metadata:
      labels:
        app: nginx
    spec:
      containers:
      - name: nginx
        image: nginx:latestt
        ports:
        - containerPort: 80
        resources:
          limits:
            cpu: "100m"
            memory: "30Mi"
          requests:
            cpu: "1000m"
            memory: "30Mi"
Create Workload
- Navigate to the project in your Org where the cluster is located.
- Select Applications -> Workloads
- Click New Workload -> Create New Workload
- Enter a Name for the Workload
- Select "k8s YAML" for the Package Type
- Select "Upload files manually"
- Select the namespace that was previously created, click "Continue"
- Click "Choose File" to select the saved YAML file
- Click "Save and Go To Placement"

- Select the cluster where the namespace was created
- Click "Save and Go To Publish"

Publish Workload
- Click "Publish"
The controller will send the specified YAML to the Kubernetes Operator on the remote cluster. The Kubernetes operator will then provide the manifest to the Kubernetes API server which will attempt to deploy it to the specified namespace. Once the Kubernetes operator receives an error message from the Kubernetes API server, it will propagate the error message back to the controller.
- Click "Publish"
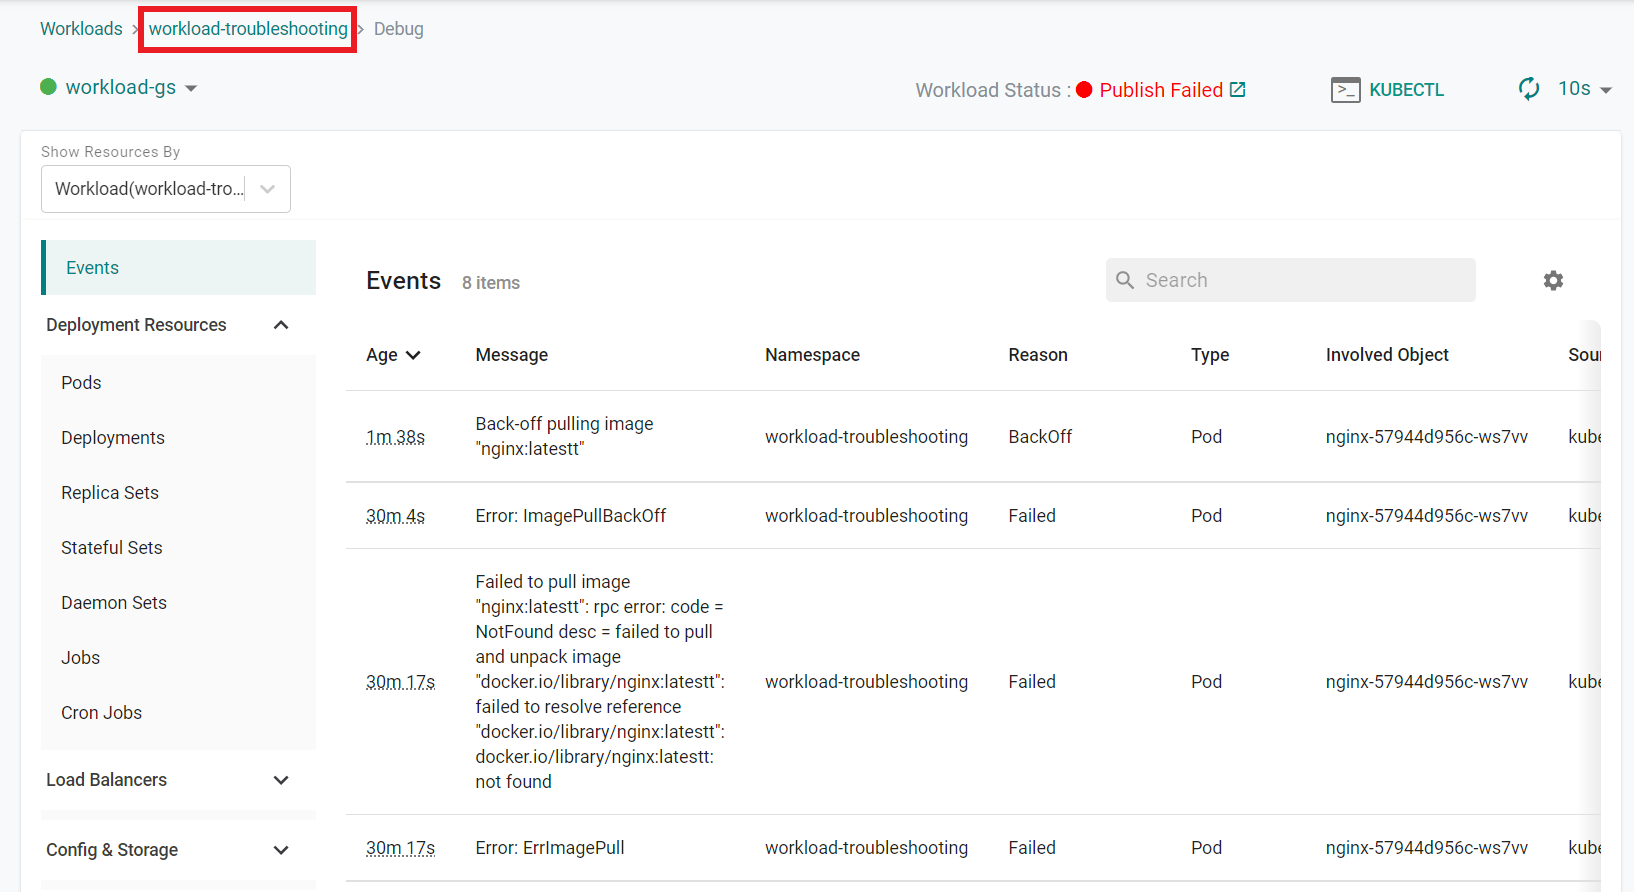
You will notice that the controller will retry publishing the workload a few times and will eventually fail.
Troubleshooting
Let us now use the integrated troubleshooting facilities in the platform to debug and diagnose the misconfigured workload.
- Click "Debug".
This will take you to an Integrated Kubernetes Resources Dashboard
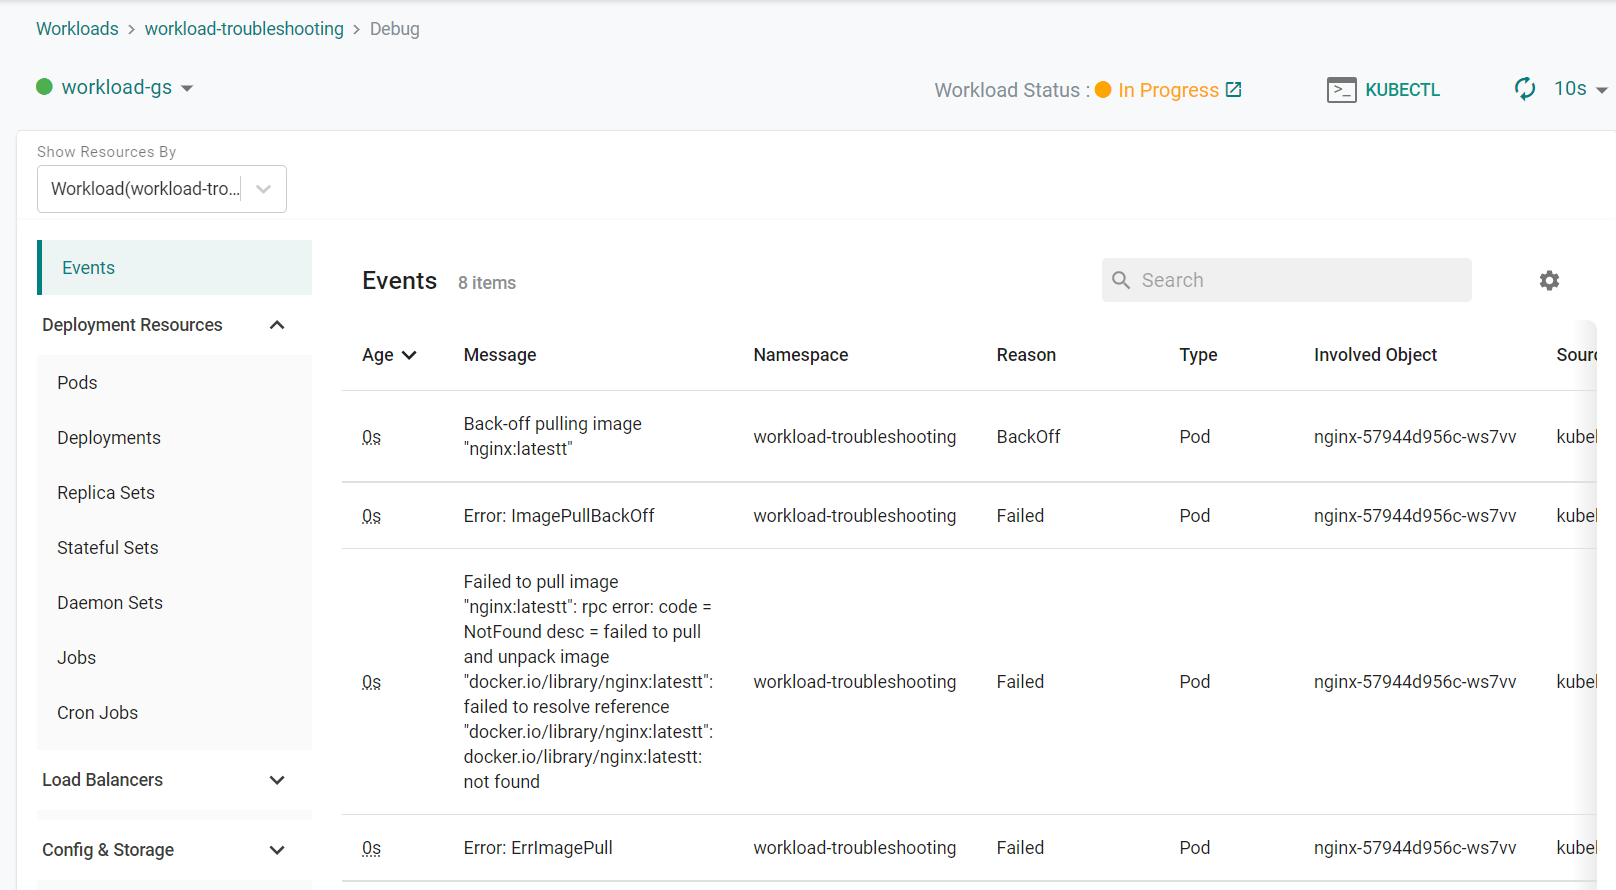
- Click on "Events"
This will retrieve the list of "Kubernetes Events" in real time. In our example, we should see several error messages relating to the the ability to pull the container image. If we look closely at the error messages, we can see there is a typo in the image name.
We can now go back and edit the workload again to correct the typo in the image name.
- Near the top of the page, click the workload name to go back to the workload
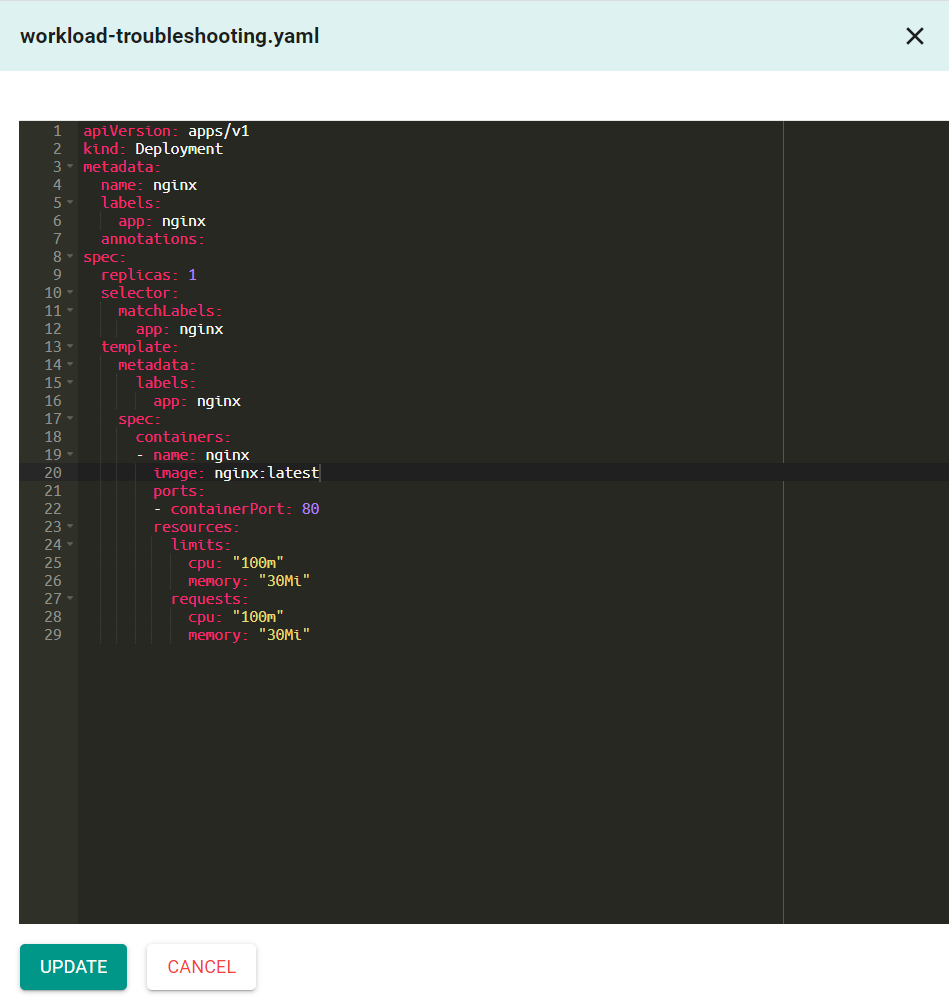
- Click "Edit" to edit the workload YAML
- Remove the extra "t" from the image value
image: nginx:latestt
The updated configuration is below:
apiVersion: apps/v1
kind: Deployment
metadata:
  name: nginx
  labels:
    app: nginx
  annotations:
spec:
  replicas: 1
  selector:
    matchLabels:
      app: nginx
  template:
    metadata:
      labels:
        app: nginx
    spec:
      containers:
      - name: nginx
        image: nginx:latest
        ports:
        - containerPort: 80
        resources:
          limits:
            cpu: "100m"
            memory: "30Mi"
          requests:
            cpu: "100m"
            memory: "30Mi"
- Click "Update"
- Click "Save and Go To Placement"
- Click "Save and Go To Publish"
- Click "Publish"
The workload will publish successfully within a few seconds.
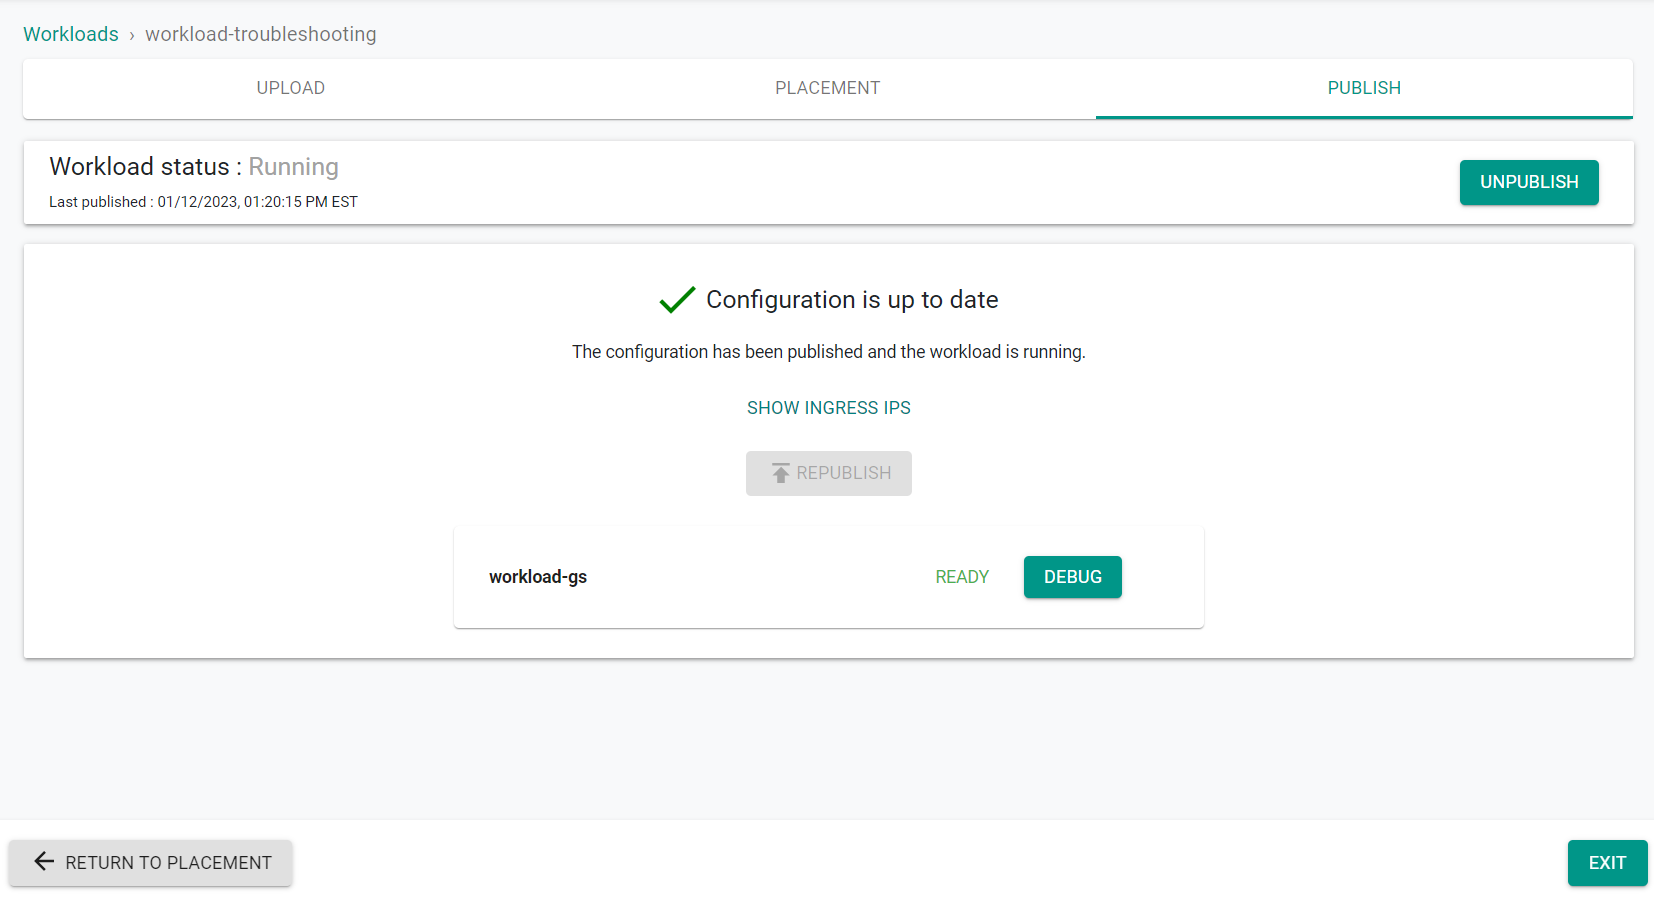
Now that the workload has published, we will use the web console to validate the application status.
- Click "Debug"
- Click "Pods" on the left side of the window
You will see that the workload is in a running state and everything is healthy.