Part 4: Workload
What Will You Do
In this part of the self-paced exercise, you will deploy a "test workload" of NGINX to your Amazon EKS cluster that will be used to change the load on the cluster and trigger Cluster Autoscaler to scale the cluster up and down.
Step 1: Namespace
In a typical production environment, administrators will have already created a "Kubernetes Namespace" for your workload. In this exercise, let us go ahead and create a namespace.
- Open Terminal (on macOS/Linux) or Command Prompt (Windows) and navigate to the folder where you forked the Git repository
- Navigate to the folder "
/getstarted/autoscaler/workload" - Type the command
rctl create namespace -f nginx-workload-namespace.yaml
This step creates a namespace in your project. The controller can create a namespace on "multiple clusters" based on its placement policy.
rctl publish namespace nginx-test
Verify
To verify that the namespace was successfully created on your EKS cluster
rctl get namespace nginx-test
You should see results like the following. Note that the namespace was successfully created on your EKS cluster.
+------------+-------------+------------------------------+------------------+---------+--------+-------------+
| NAME       | TYPE        | CREATEDAT                    | DEPLOYEDCLUSTERS | ID      | LABELS | ANNOTATIONS |
+------------+-------------+------------------------------+------------------+---------+--------+-------------+
| nginx-test | RafayWizard | Thu Dec  2 01:40:53 UTC 2021 |                  | ky7p90k | []     | []          |
+------------+-------------+------------------------------+------------------+---------+--------+-------------+
Step 2: Deploy Workload
The "nginx-workload.yaml" file contains the declarative specification for our NGINX workload.
The following items may need to be updated/customized if you made changes to these or used alternate names.
- namespace: "nginx-test"
- project: "defaultproject"
- clusters: "autoscaler-cluster"
name: nginx-workload
namespace: nginx-test
project: defaultproject
type: NativeYaml
clusters: autoscaler-cluster
payload: ./nginx.yaml
Note that the workload's name is "nginx-workload" and it is of type "k8s YAML". The actual k8s YAML file is in the payload "nginx.yaml".
rctl create workload nginx-workload.yaml
If there were no errors, you should see a message like below
Workload created successfully
Now, let us publish the newly created workload to the EKS cluster. The workload can be deployed to multiple clusters as per the configured "placement policy". In this case, you are deploying to a single EKS cluster with the name "autoscaler-cluster".
rctl publish workload nginx-workload
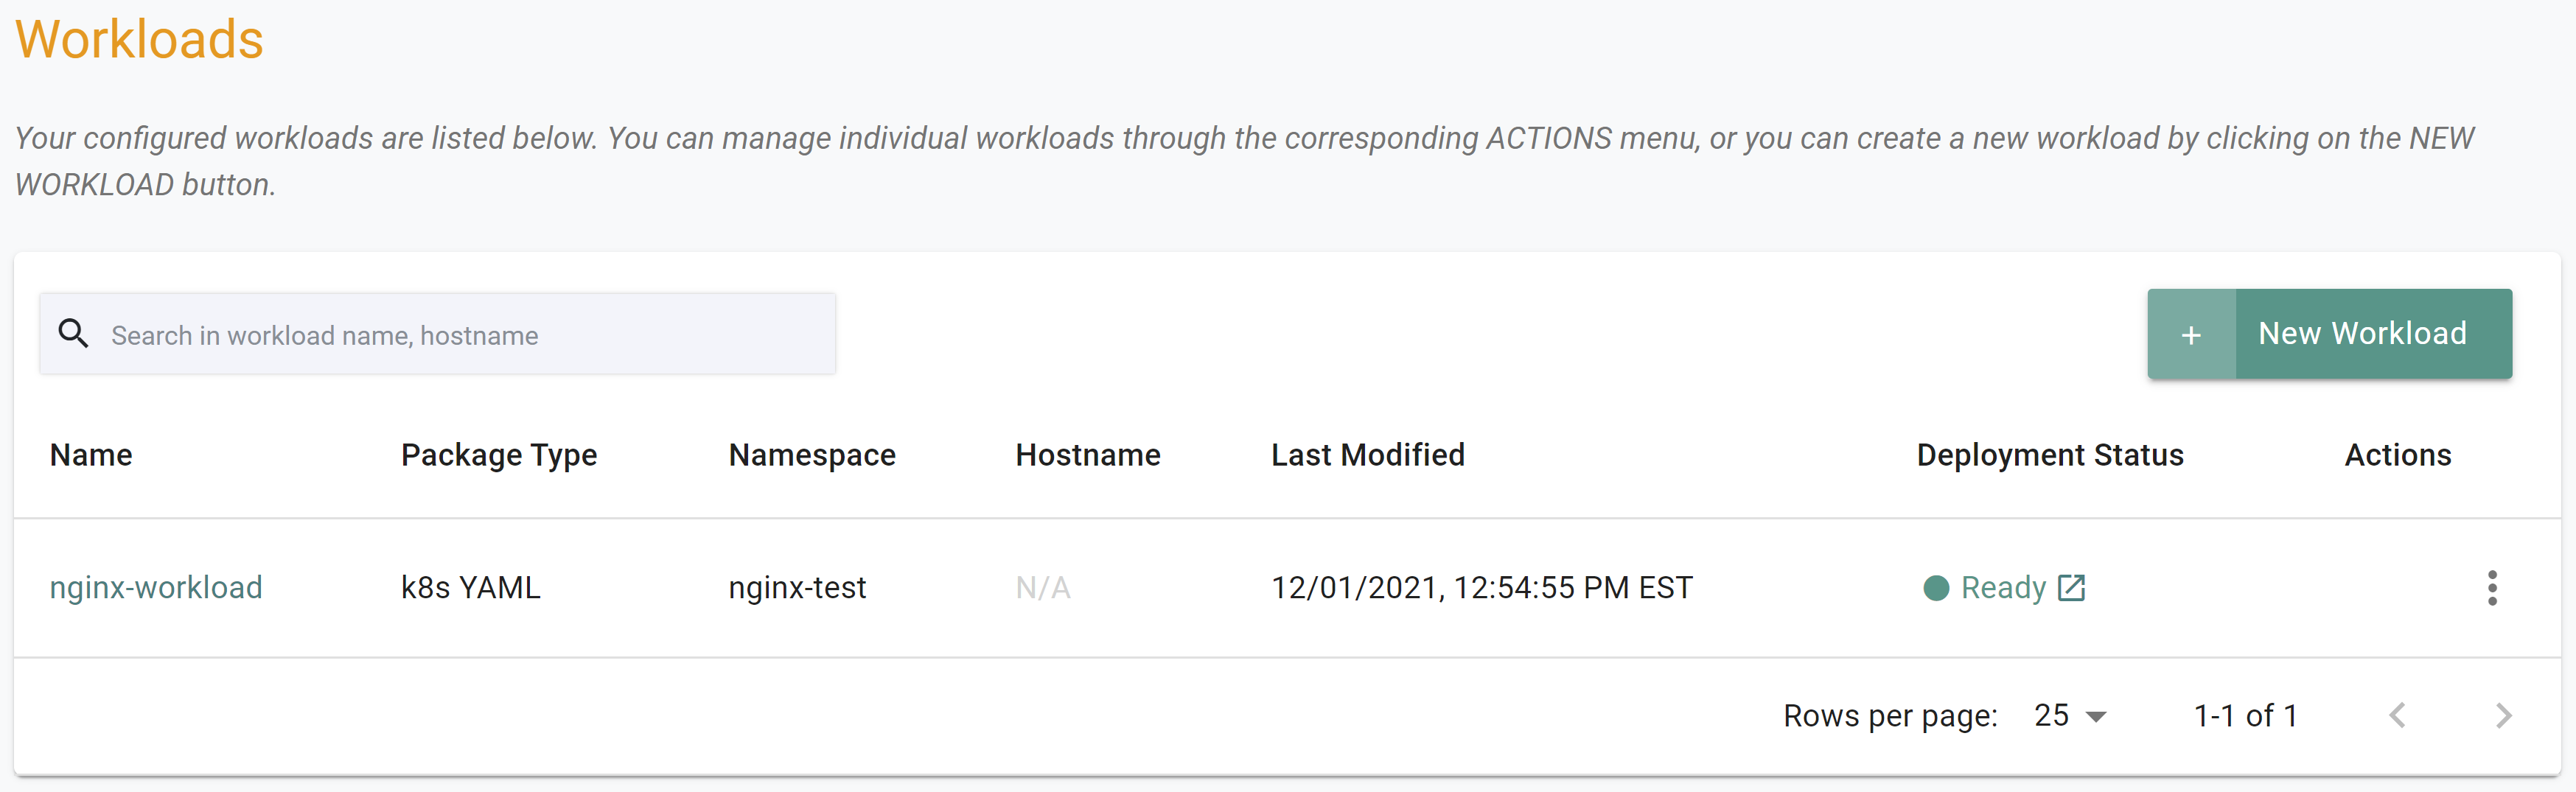
In the web console, click on Applications -> Workloads. You should see something like the following.
Step 3: Scale Workload
The NGINX workload can be scaled to consume the resources of the cluster. Once the cluster resources are constrained, Cluster Autoscaler will increase the number of nodes in the cluster as needed based on the minimum and maximum defined in the cluster specification.
- Navigate to Infrastructure -> Clusters
- Click on "KUBECTL" in the cluster card
- Verify the number of NGINX pods is 1
kubectl get pods --namespace nginx-test
- You should see a result like the following showing 1 nginx pod.
NAME                                READY   STATUS    RESTARTS   AGE
nginx-to-scaleout-6b86f644c-jlfjp   1/1     Running   0          55s
- Scale the number of NGINX replicas up to increase workload
kubectl scale --replicas=10 --namespace nginx-test deployment/nginx-to-scaleout
- To verify that the deployment was scaled up succesfully
kubectl get pods --namespace nginx-test
- You should see a result like the following showing 10 nginx pods where some are in a "Pending" state.
NAME                                READY   STATUS              RESTARTS   AGE
nginx-to-scaleout-6b86f644c-5pwdw   0/1     Pending             0          8s
nginx-to-scaleout-6b86f644c-92r4r   0/1     Pending             0          8s
nginx-to-scaleout-6b86f644c-c2svh   1/1     Running             0          8s
nginx-to-scaleout-6b86f644c-gg8cq   0/1     Pending             0          8s
nginx-to-scaleout-6b86f644c-jdvkh   0/1     Pending             0          8s
nginx-to-scaleout-6b86f644c-jlfjp   1/1     Running             0          3m7s
nginx-to-scaleout-6b86f644c-qvc6z   0/1     Pending             0          8s
nginx-to-scaleout-6b86f644c-vbk2c   0/1     ContainerCreating   0          8s
nginx-to-scaleout-6b86f644c-vn9mg   0/1     Pending             0          8s
nginx-to-scaleout-6b86f644c-z7p52   0/1     ContainerCreating   0          8s
- After a few minutes, you will see that the cluster CPU usage is high and that the number of nodes has scaled up to the maximum of 4.
- Scale the number of NGINX replicas down to decrease workload
kubectl scale --replicas=1 --namespace nginx-test deployment/nginx-to-scaleout
- To verify that the deployment was scaled down succesfully
kubectl get pods --namespace nginx-test
- You should see results like the following showing 1 nginx pod.
NAME                                READY   STATUS    RESTARTS   AGE
nginx-to-scaleout-6b86f644c-jlfjp   1/1     Running   0          6m24s
- After a few minutes, you will see that the cluster CPU usage is reduced and that the number of nodes has scaled down to the desired count of 2.

Recap
Congratulations! At this point, you have successfuly
- Deployed and scaled a "Test Workload" to the EKS Cluster and verified that Cluster Autoscaler automatically adjusted the number of nodes in the cluster