Part 3: Workload
What Will You Do
- Create a K8s YAML workload that will deploy sample application with a hostname in our hosted zone and a service of Type LoadBalancer
- Verify we can access the application via the LoadBalancer using the hostname
Step 1: Create Workload YAML
We are using a nginx deployment in this example to create a service of type LoadBalancer.
- Copy the K8s YAML manifest below to a file called "nginx-lb.yaml"
- Edit line 9 to a hostname for which an A record will be created in our hosted zone
apiVersion: v1
kind: Service
metadata:
  name: nginx
  annotations:
    external-dns.alpha.kubernetes.io/hostname: nginx-lb.dev.rafay-edge.net
spec:
  type: LoadBalancer
  ports:
  - port: 80
    name: http
    targetPort: 80
  selector:
    app: nginx
---
apiVersion: apps/v1
kind: Deployment
metadata:
  name: nginx
spec:
  selector:
    matchLabels:
      app: nginx
  template:
    metadata:
      labels:
        app: nginx
    spec:
      containers:
      - image: nginx
        name: nginx
        ports:
        - containerPort: 80
          name: http
Step 2: Create Workload
In this step, we will create a workload based on the YAML from the previous step and publish it to our cluster.
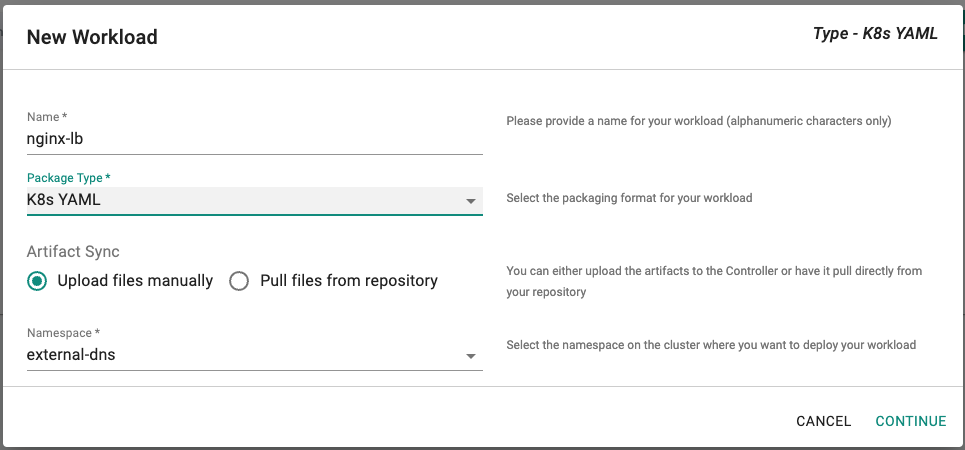
- Click on Application -> Workloads
- Click on "Create New Workload" with the name "nginx-lb"
- Select "K8s YAML" for the Package Type
- Select "Upload files manually" for Artifact Sync
- Select the "external-dns" namespace from the dropdown
- Click on "CONTINUE"
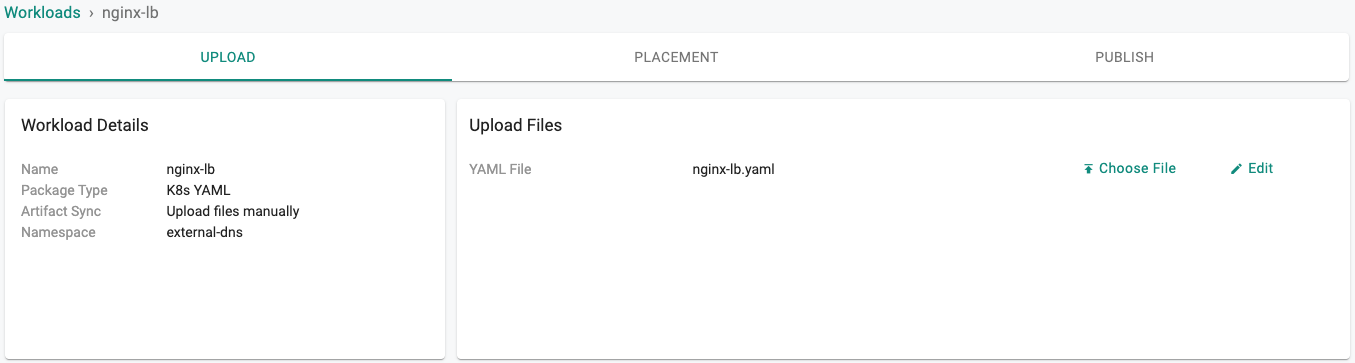
- Select the file created in the previous step
- Click on "SAVE AND GO TO PLACEMENT"
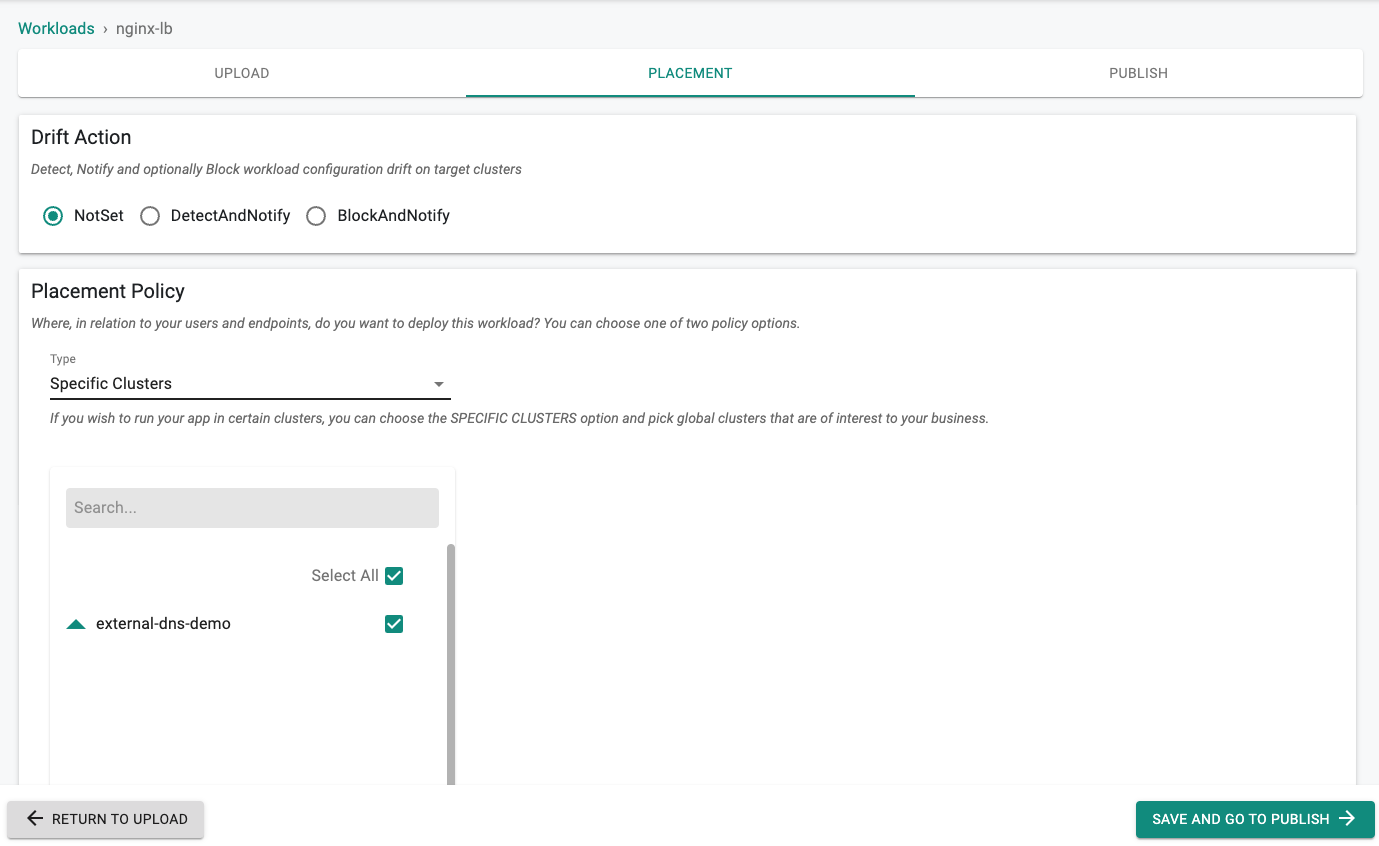
- Set the Drift Action to "NotSet"
- Select a cluster for the placement policy
- Click on "SAVE AND GO TO PUBLISH"
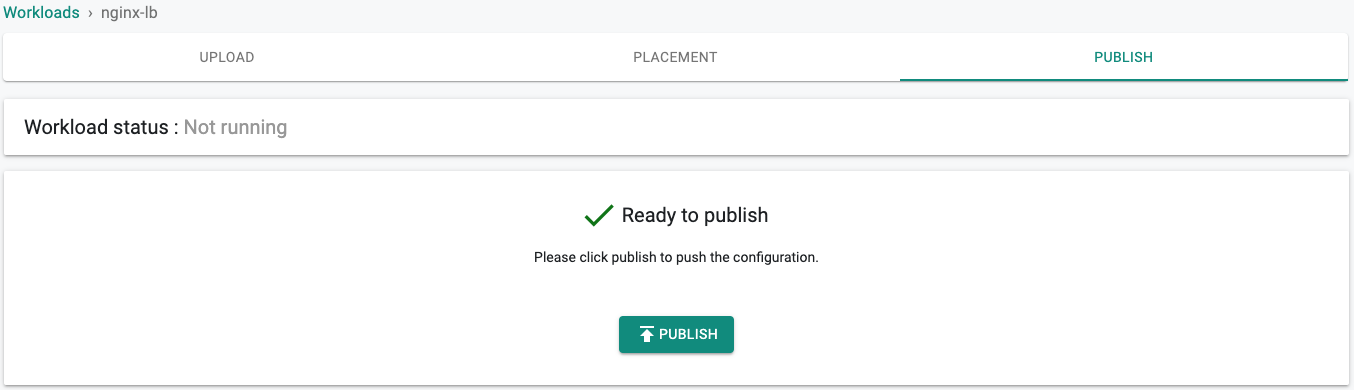
- Publish the workload
Step 3: Verify Workload
- Click on the Kubectl button on the cluster to open a virtual terminal and run the following kubectl command
kubectl get services -n external-dns
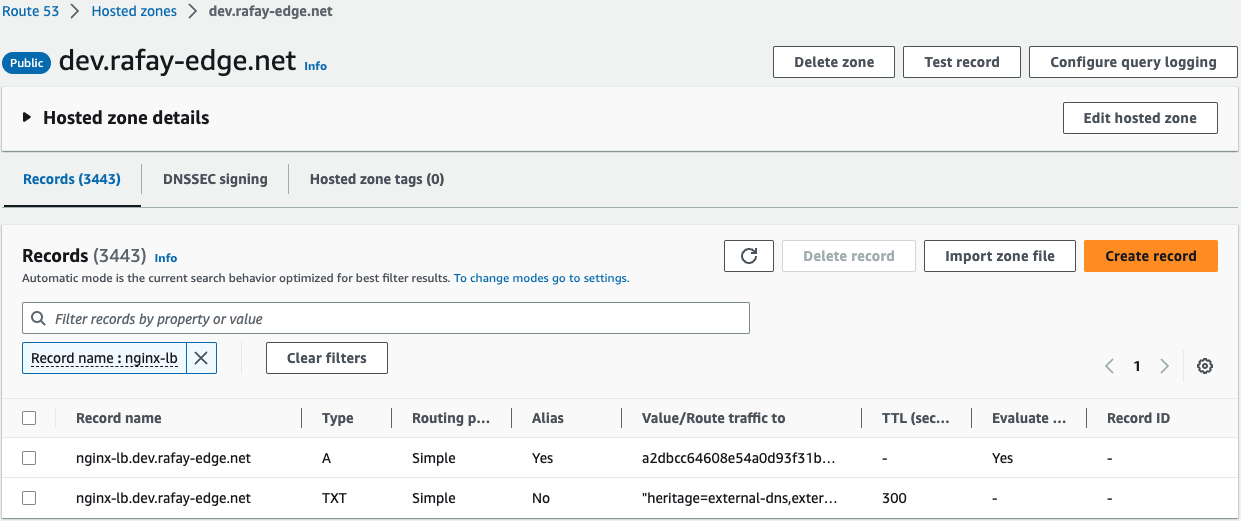
NAME TYPE CLUSTER-IP EXTERNAL-IP PORT(S) AGE
external-dns ClusterIP 10.100.217.116 <none> 7979/TCP 26m
nginx LoadBalancer 10.100.42.70 a2dbcc64608e54a0d93f31b2cd3bfdee-1212175333.us-west-2.elb.amazonaws.com 80:31377/TCP 116s
- Verify in Route 53 that the records have been properly created
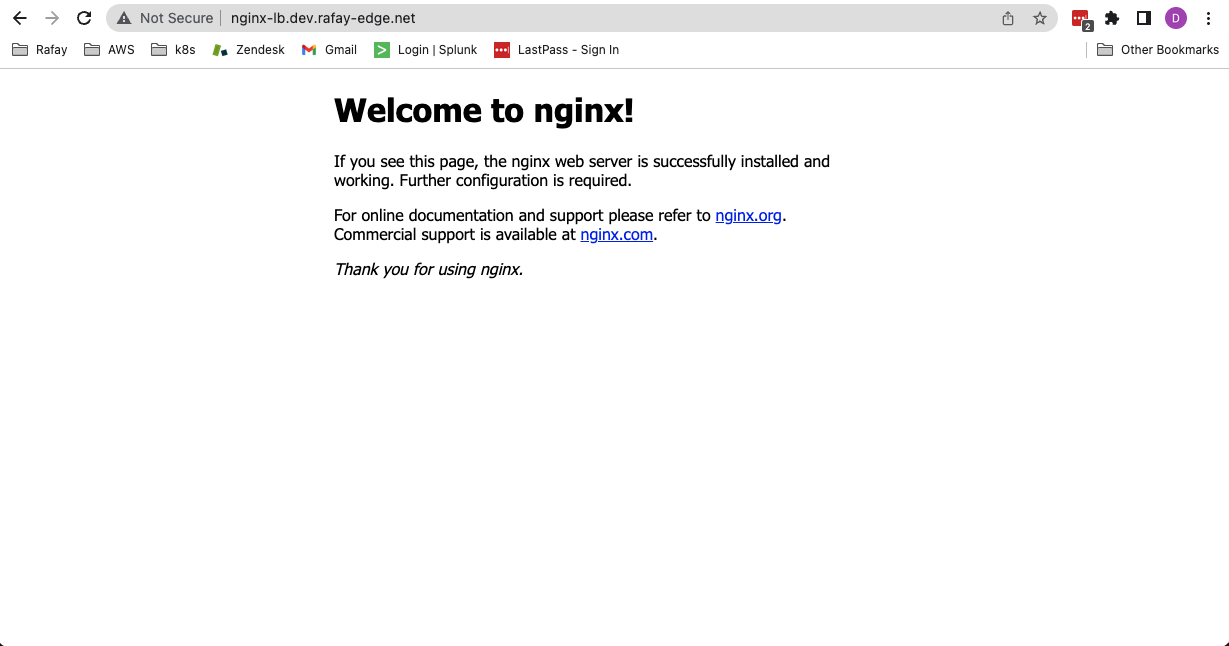
- Verify you can securely access the nginx app using your web browser and the newly created FQDN
Step 4: Unpublish Workload
In this step we will unpublish the workload and verify the Route 53 records are properly deleted
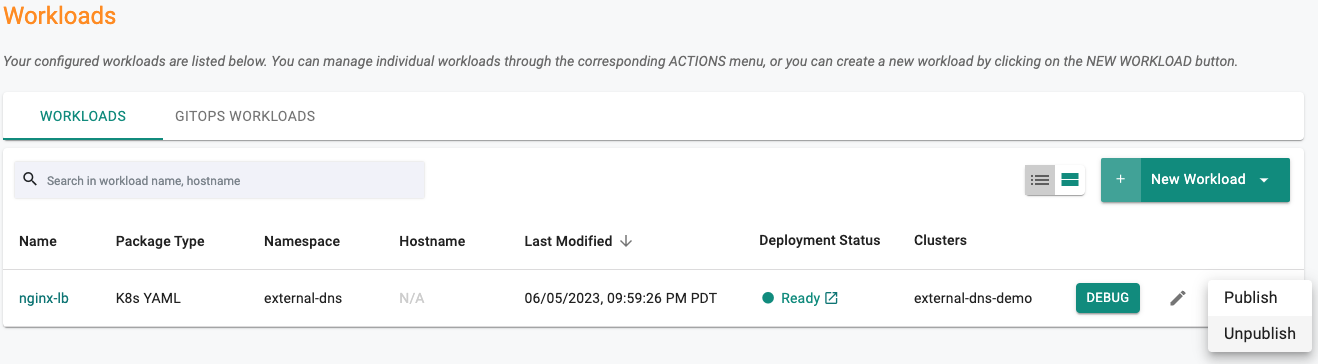
- Click on Application -> Workloads
- Click on the 3 dots of the nginx-lb workload
- Select "Unpublish"
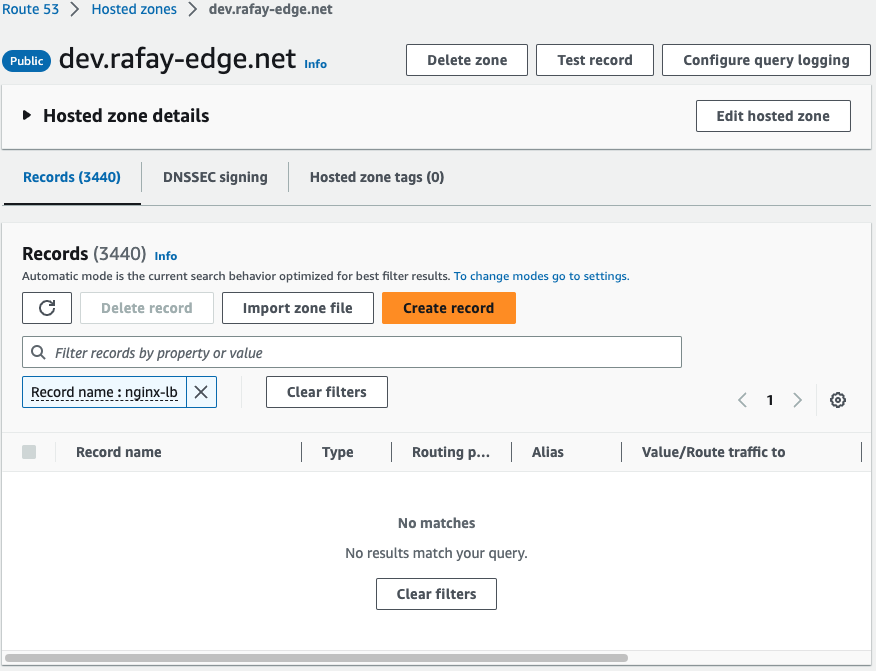
- You should see similar entries in the external-dns pod log showing that the records have been deleted
time="2023-06-06T05:27:49Z" level=info msg="Desired change: DELETE cname-nginx-lb.dev.rafay-edge.net TXT [Id: /hostedzone/Z1OM749F0P8E4R]"
time="2023-06-06T05:27:49Z" level=info msg="Desired change: DELETE nginx-lb.dev.rafay-edge.net A [Id: /hostedzone/Z1OM749F0P8E4R]"
time="2023-06-06T05:27:49Z" level=info msg="Desired change: DELETE nginx-lb.dev.rafay-edge.net TXT [Id: /hostedzone/Z1OM749F0P8E4R]"
time="2023-06-06T05:27:49Z" level=info msg="3 record(s) in zone dev.rafay-edge.net. [Id: /hostedzone/Z1OM749F0P8E4R] were successfully updated"
- Verify in Route 53 that the records have been properly deleted
Recap
Congratulations!
You have successfully created a custom cluster blueprint with the "external-dns" add-on and applied it to a cluster. You have created a service of type LoadBalancer and properly created the corresponding Route 53 A record. You can now use this blueprint on as many clusters as you require.