Troubleshooting
On successful External Git repos configuration, the webhook will be sent to the controller each time when one or more subscribed events occurs
Webhooks (for GitHub)
To verify the Github webhook process is successful or failed, perform the below steps:
- Login to the Github Repo and open the configured folder
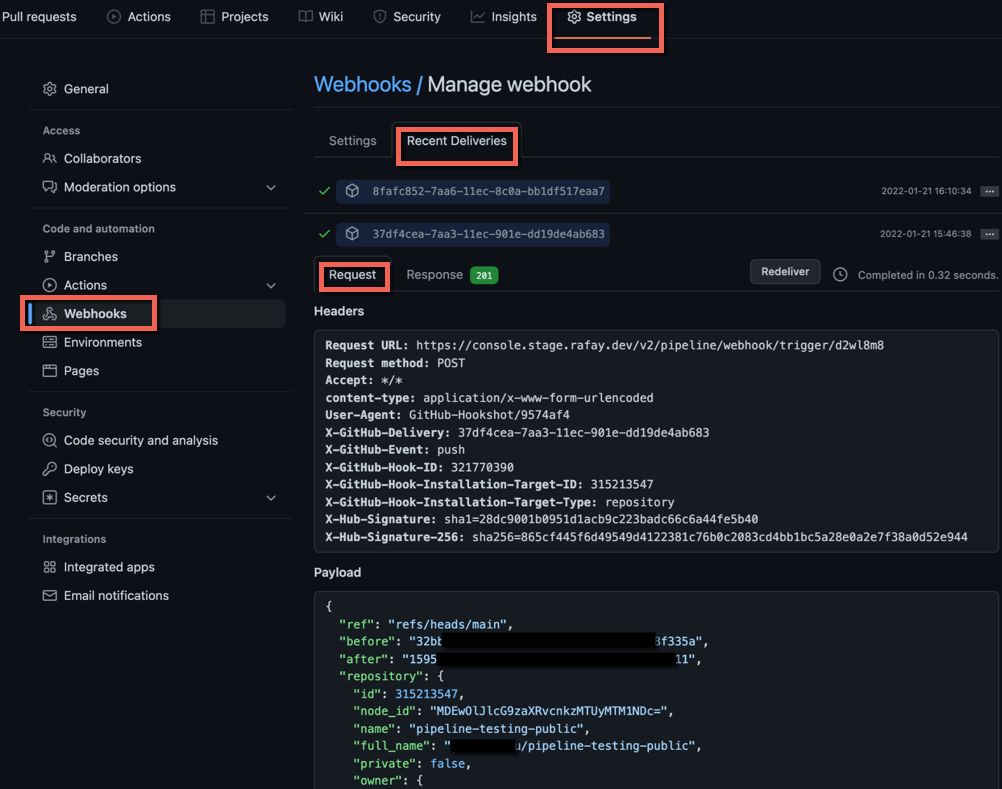
- Click Settings tab and select Webhooks under the Code and automation
- Click Recent Deliverables to view the Github webhook request and responses
Every Recent Deliveries screen lists the successful (green tick mark) or failed (red mark) deliverables. Also, users can identify the time of each deliverable
- Request tab provides information on which Headers were sent by GitHub and the details of the JSON payload
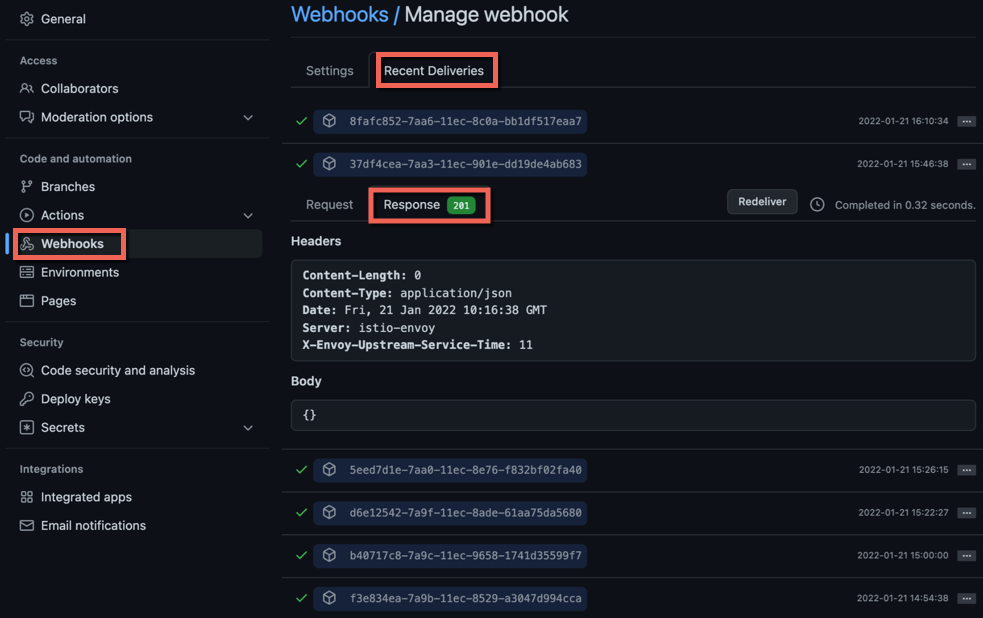
- Response tab lists how the server replied once it received the payload from GitHub. This includes the status code, the headers, and any additional data within the response body
Webhooks (for Gitlab)
To verify the Gitlab webhook process is successful or failed, perform the below steps:
- In your Gitlab project, click Settings -> Webhooks. Users can view all the recent webhook events
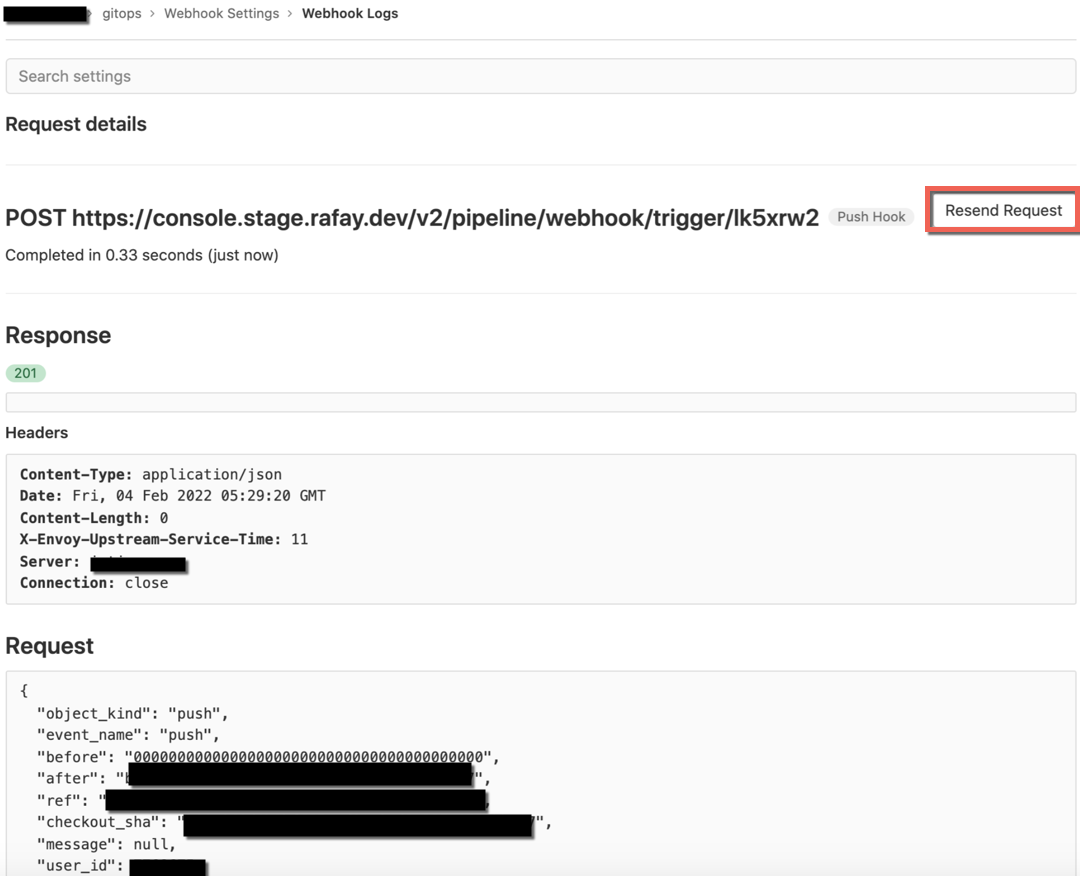
- Select the required webhook and click View details

- Response and Request details are shown in the Request Details page along with the Headers sent by Gitlab and the delivered time
- Click Resend Request to retry the failed webhook events
Webhooks (for Bitbucket)
Create Webhooks
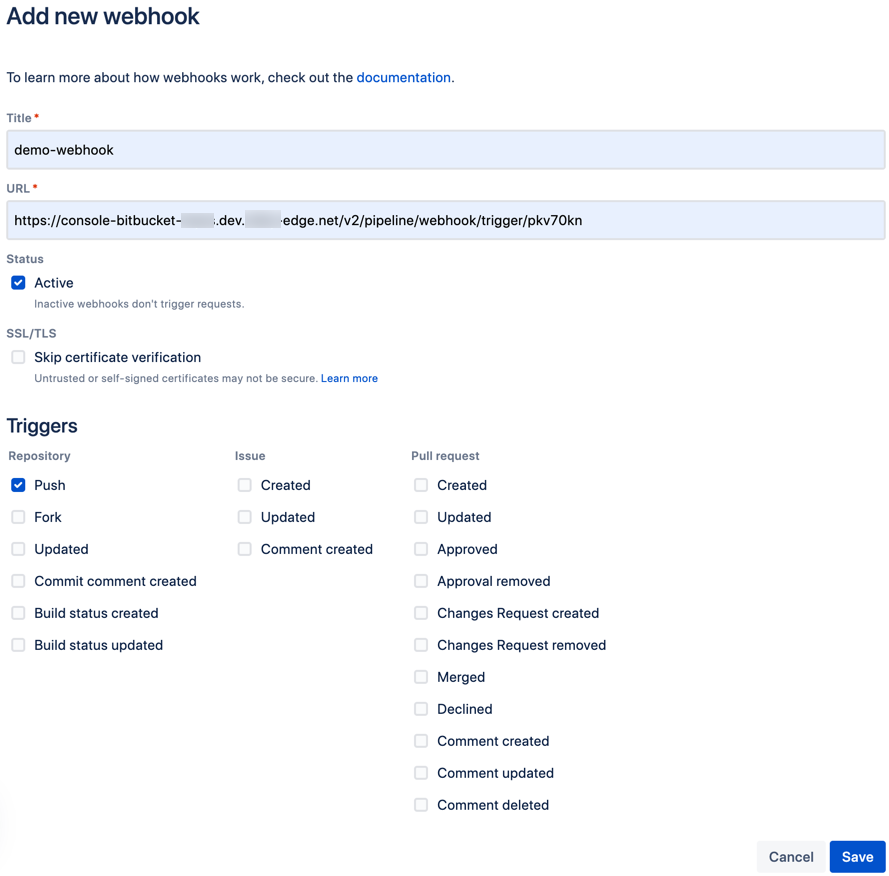
- To add a Bitbucket Webhook, click Add Webhook

- Enter a title and URL of the pipeline created in the controller
- Provide the required data and click Save
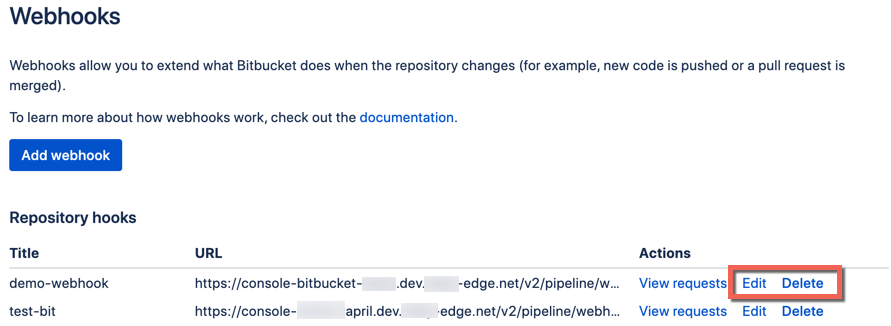
Edit/Delete Webhooks
Users are allowed to edit/delete the active Bitbucket Webhooks
Verify Webhooks
To verify whether the Bitbucket Webhook process is successful or failed, perform the below steps:
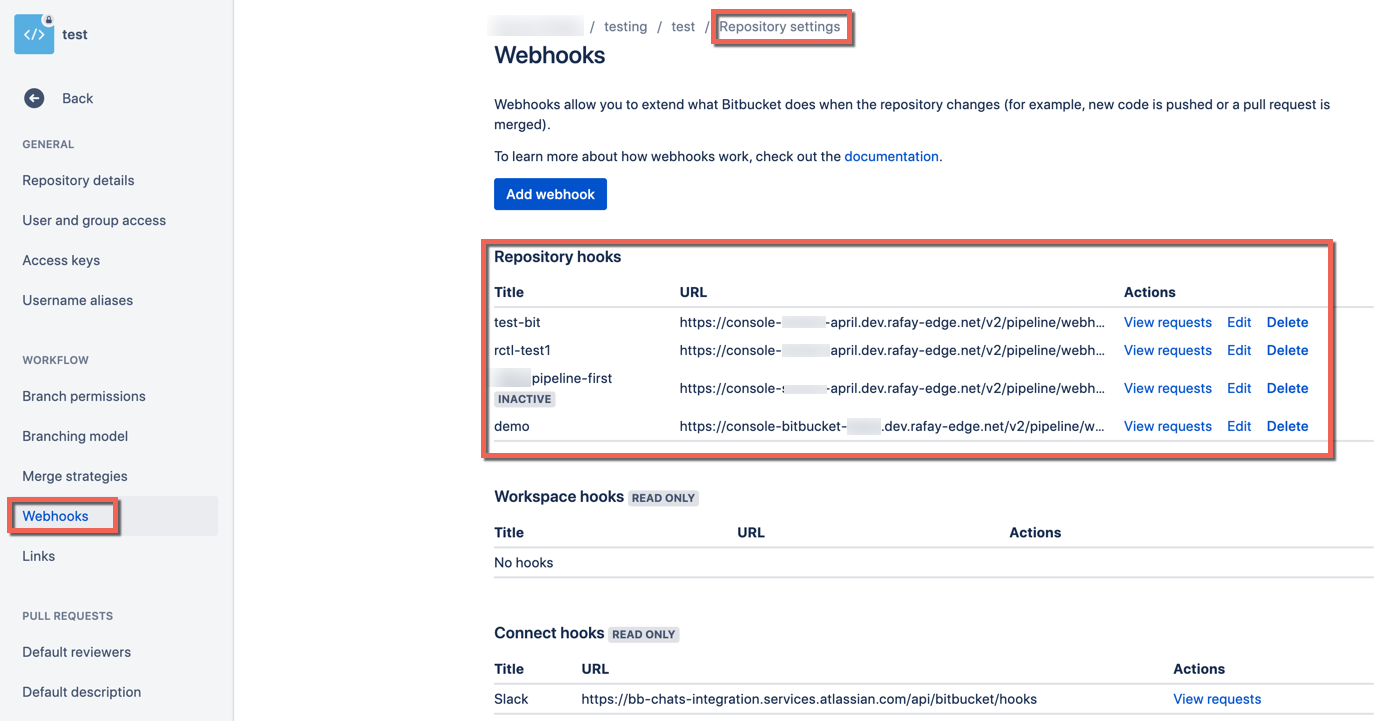
- In your Bitbucket project, click Repository Settings -> Webhooks available in the left pane. Users can view all the recent webhook events
- Select the required webhook and click View requests
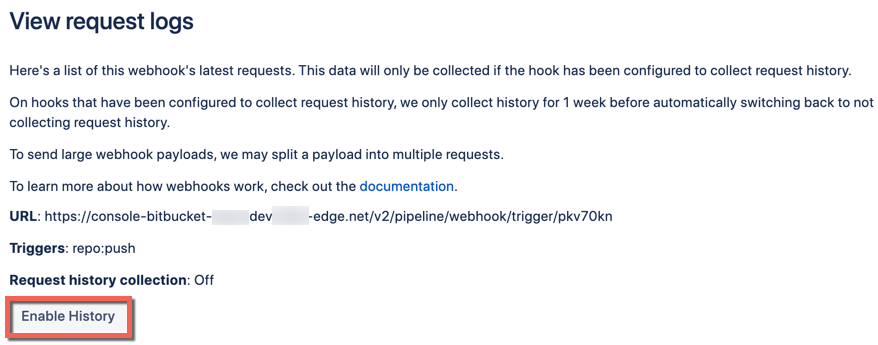
By default, Request history collection is set to Off
- Click Enable History to view the request logs along with the event history
- Click View details to know more about the webhook event requests
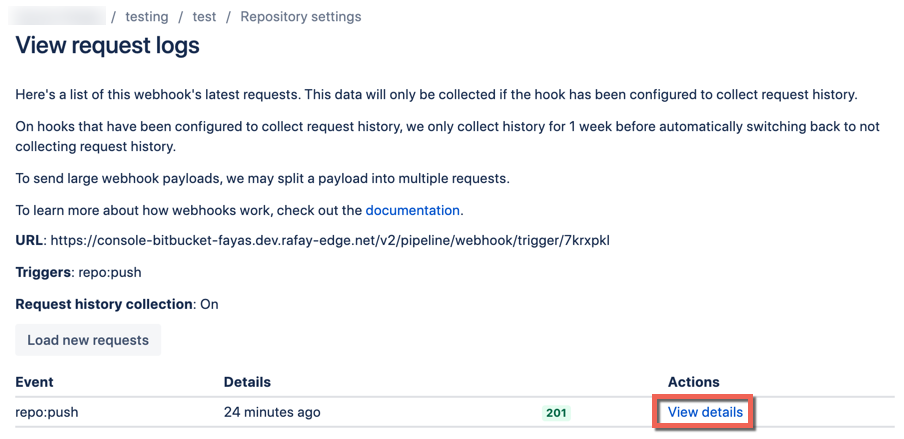
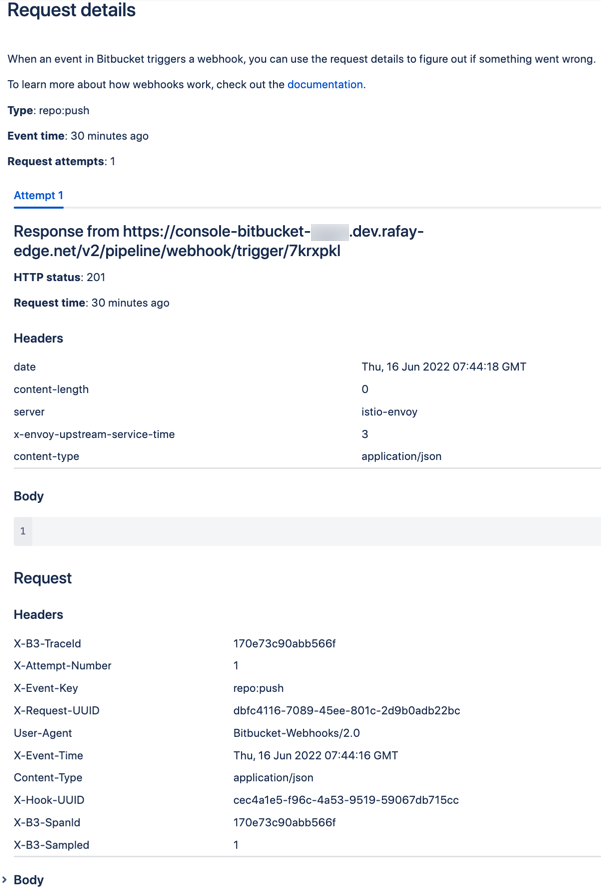
- You can view the request details here when an event in Bitbucket triggers a webhook
Webhooks (for Azure Repos)
Create Webhooks
- Login to the Azure Repo, navigate to your Organization -> Project
- Click Project Settings tab and select Service hooks under General settings
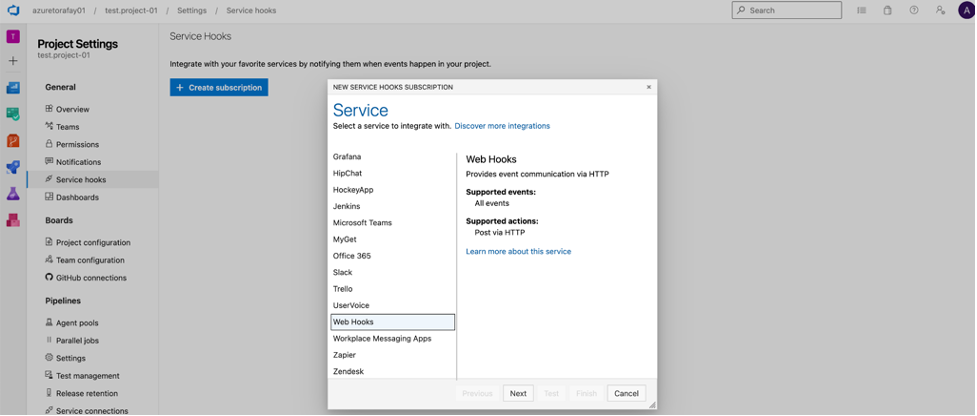
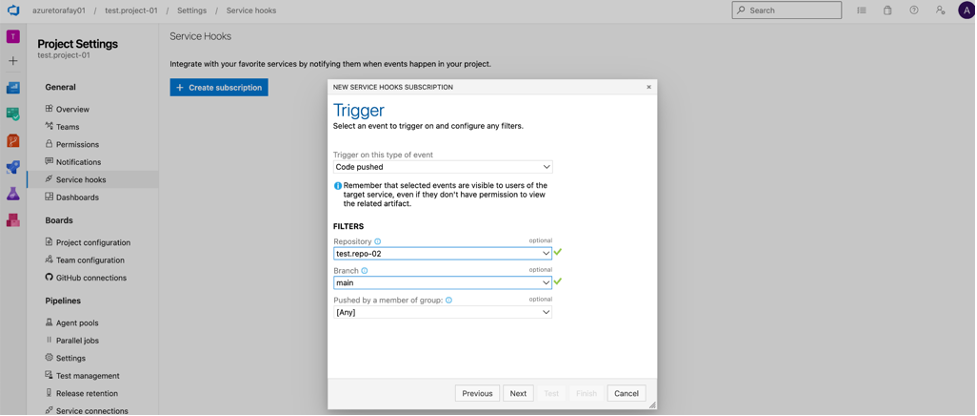
- Create a webhook subscription, with event configure for 'Code pushed'
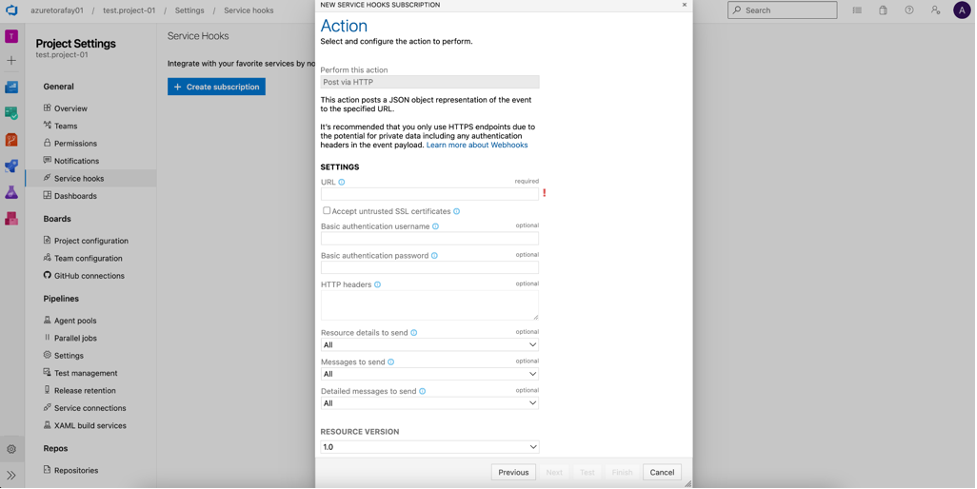
- Set the Rafay generated webhook URL and secret as the URL and Basic authentication password
Important
Although configuration of Basic authentication password is shown as optional, it must be set with the Rafay generated webhook secret to pass validation
- Click Finish to complete the configuration or click on Test to create a mock event
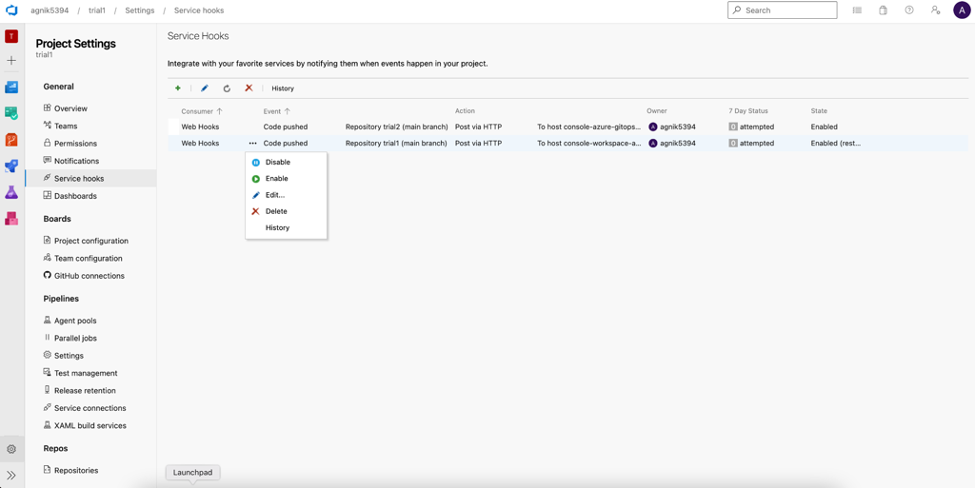
Edit/Delete Webhooks
- Existing webhook configuration can be updated by choosing Edit from the drop down Options
Verify Webhooks
To verify whether the Bitbucket Webhook process is successful or failed, perform the below steps:
- Login to the Azure Repo, navigate to your Organization -> Project
- Click on Project Settings tab and select Service hooks under General Settings
- Select the configured webhook, click Hisory to view the webhook events

- All events with status (Successful or Failed) are listed. Click on an event to view details such as Request, Response, Summary
