Portworx
Overview
Portworx is a software-defined storage platform. It was created for containers and microservices. To deliver a unified, overlay storage layer to cloud-native applications, it abstracts multiple storage devices. Users of Portworx can spread highly available stateful applications across a number of physical hosts in a datacenter, compute instances running across a number of zones, regions, and even several cloud providers.
What Will You Do
In this exercise,
- You will create Kubernetes manifests through Portworx portal.
- You will use the addon in a custom blueprint.
- You will then apply this cluster blueprint to a managed cluster.
Assumptions
- Rafay managed Kubernetes cluster is already provisioned.
- Check Portworx compatibility with your Kubernetes cluster.
- Portworx recommends running at least three storage nodes in a cluster.
- Check Hardware, Network and Software compatibility.
- An account on the Portworx portal. (We will be using Portworx Enterprise Essentials for this guide)
Step 1: Create Manifest spec.
-
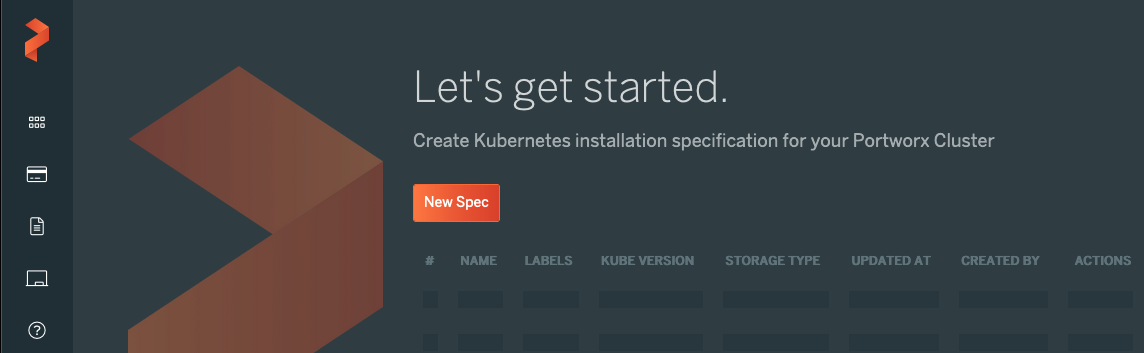
Login into Portworx site. Navigate to "Install and Run" on the left side of the window.
 - Click on "New Spec"
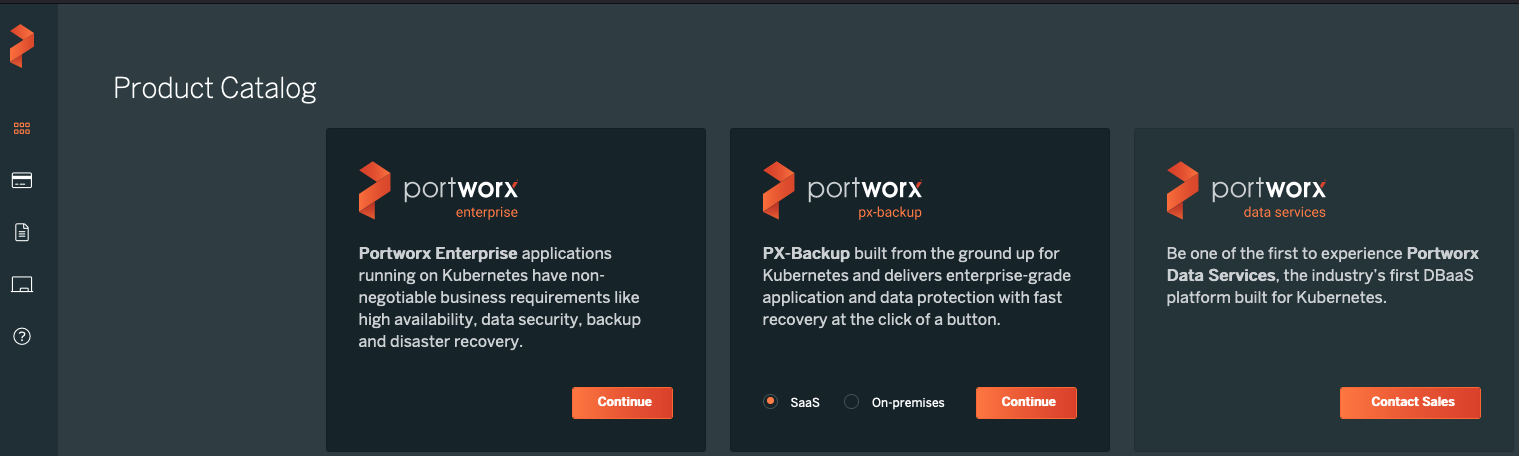
 - We are going to use portworx enterprise in this guide. Click on "Continue"
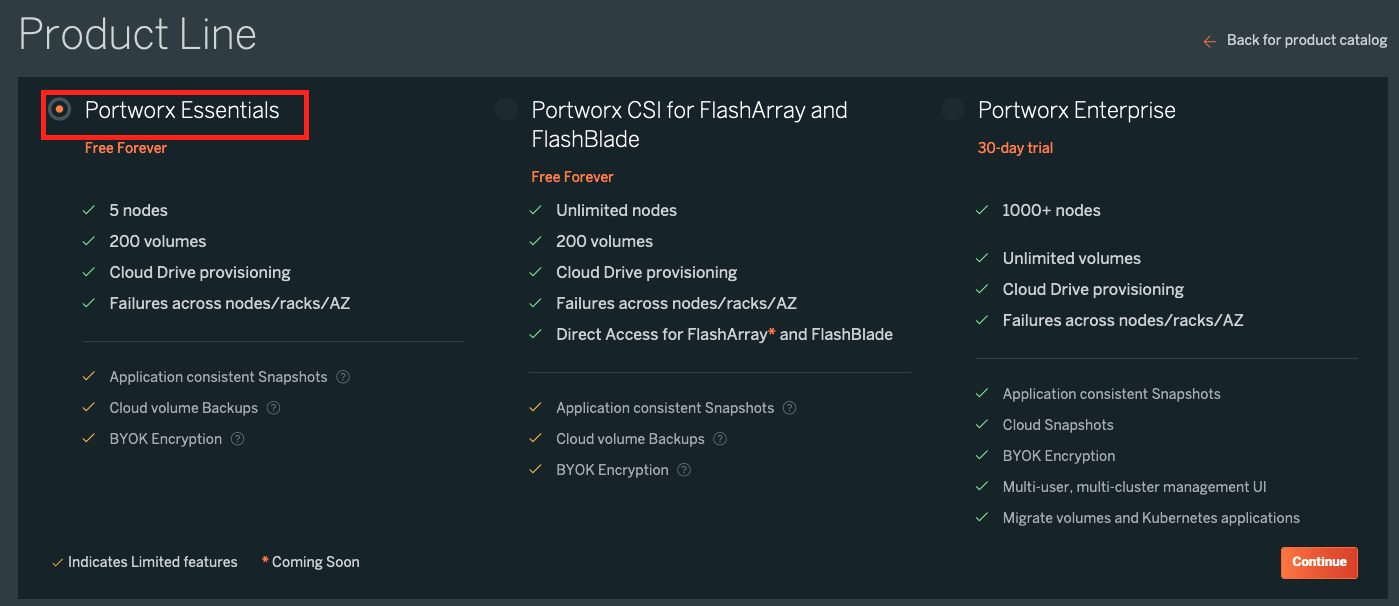
 - Select the product which you want to deploy. In this guide, we are going to deploy “Portworx Essentials”. After selecting the product click on continue.
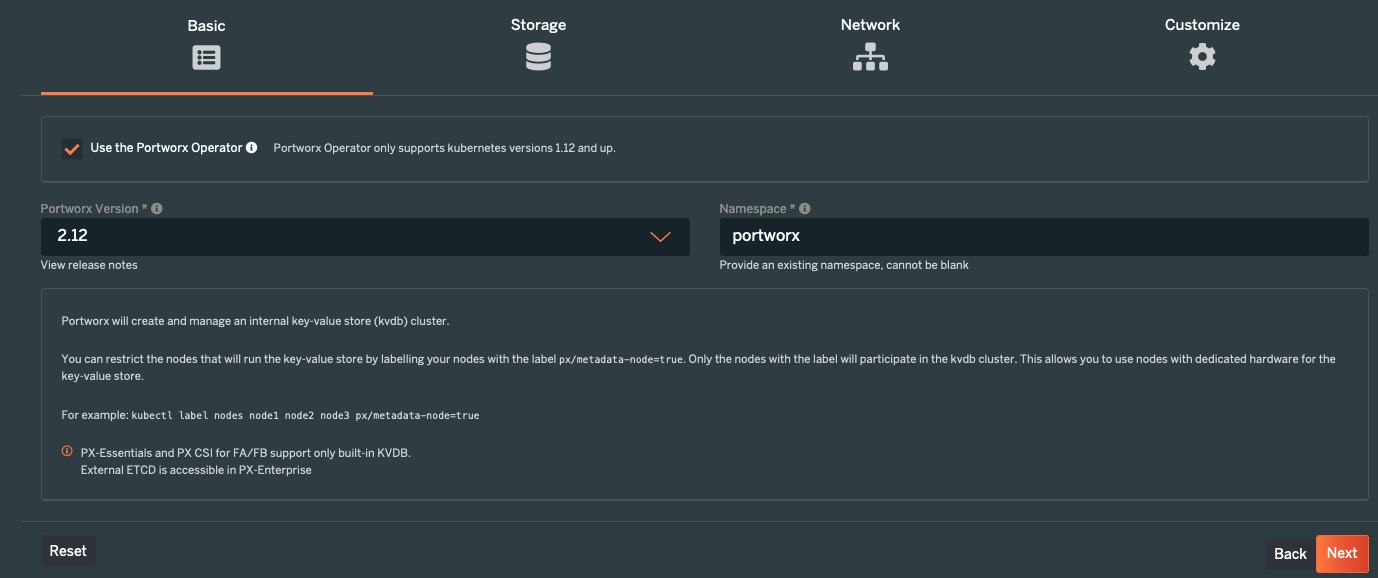
 - Select "Portworx Version" and configure "NameSpace" name.
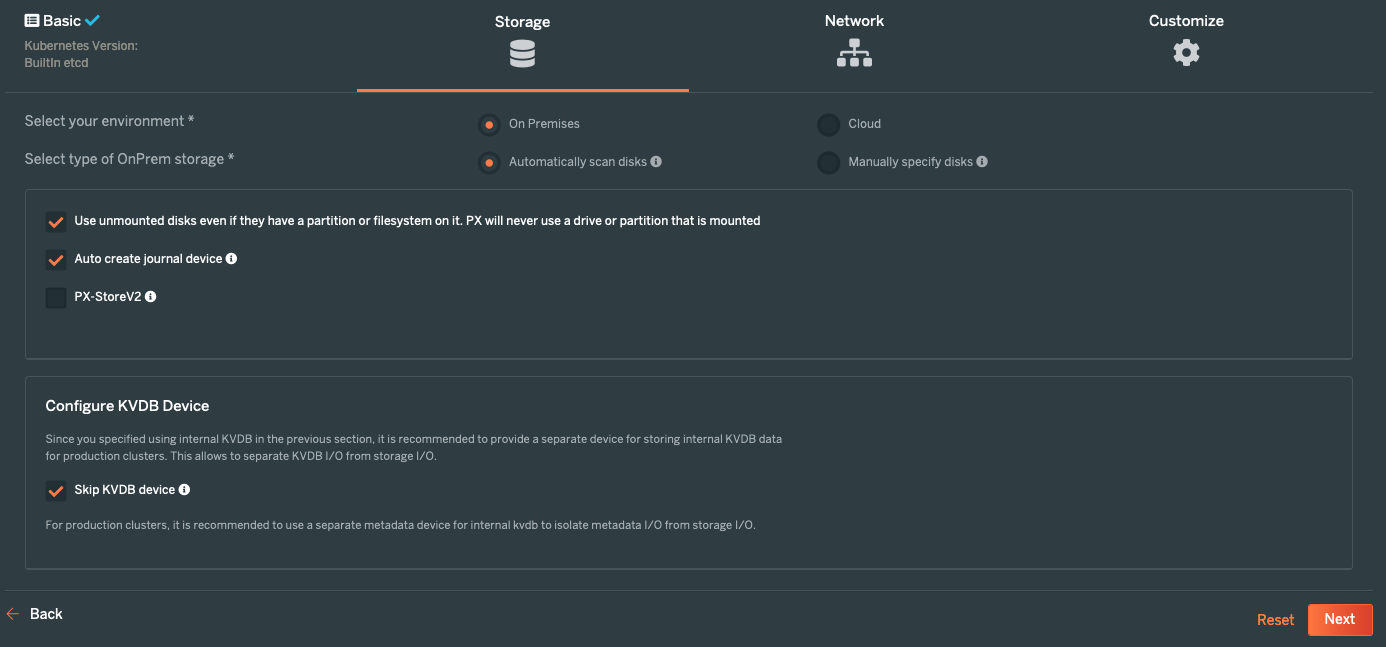
 - Select appropriate storage configurations. In this guide we are going to type of On-Prem & type of OnPrem storage to "Automatically scan disks". Select the check box for “Use unmounted disks even if they have a partition or filesystem on it. PX will never use a drive or partition that is mounted” and “Auto-create journal device”
Click on “skip KVDB device” as we are not going to use separate metadata device.
- Select appropriate storage configurations. In this guide we are going to type of On-Prem & type of OnPrem storage to "Automatically scan disks". Select the check box for “Use unmounted disks even if they have a partition or filesystem on it. PX will never use a drive or partition that is mounted” and “Auto-create journal device”
Click on “skip KVDB device” as we are not going to use separate metadata device.
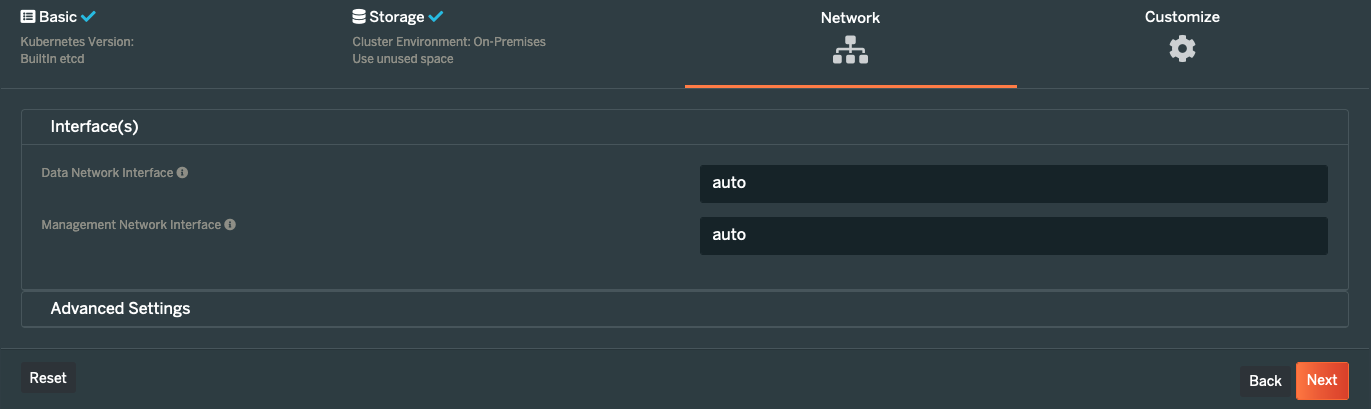
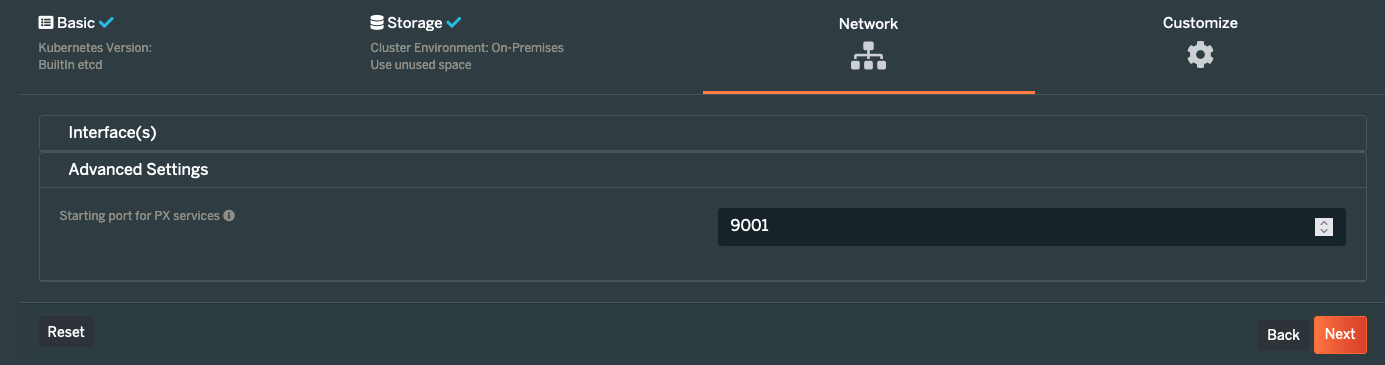
 - Select appropriate network configurations. If you want to segregate the network you can choose to add the name of your network interfaces and if you want to let portworx choose the network interfaces then keep it auto. Select port number under advanced settings..
 - Select details about the environment where you want to deploy the portworx. As we are using the Rafay-managed Kubernetes upstream cluster. Select "None" option.
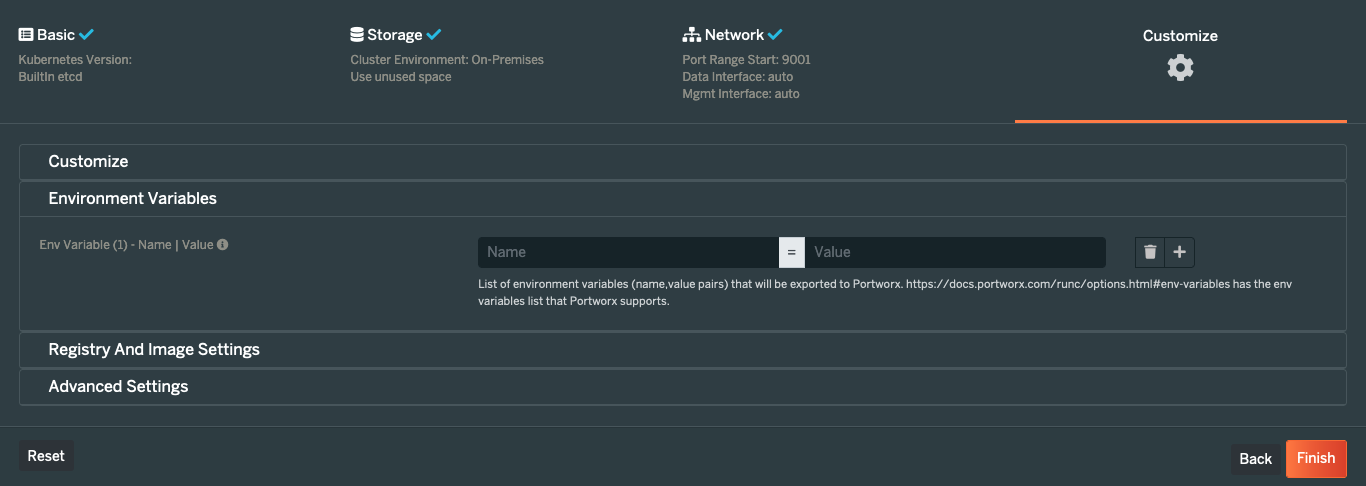
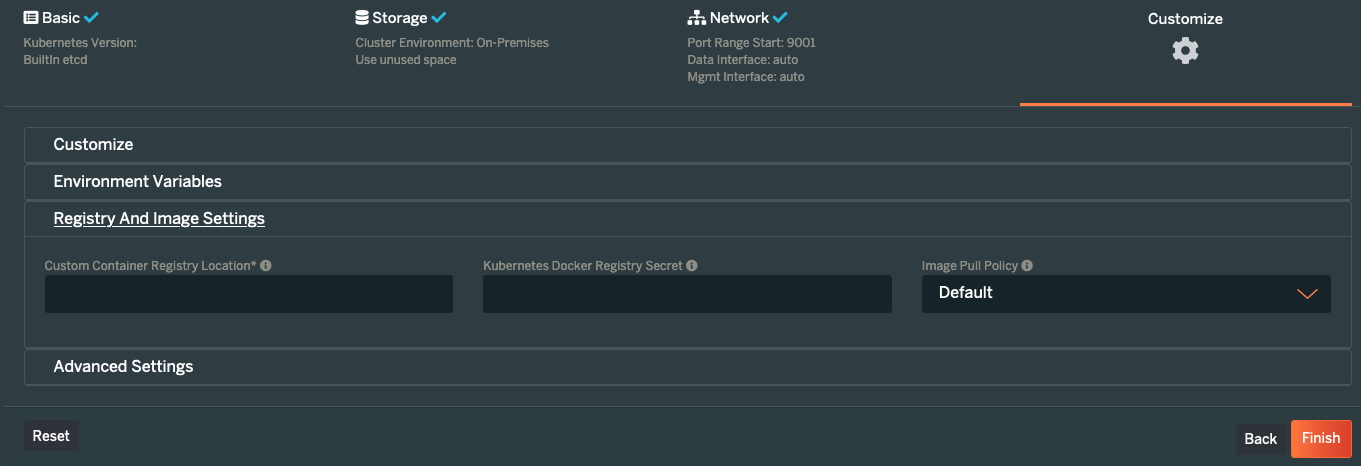
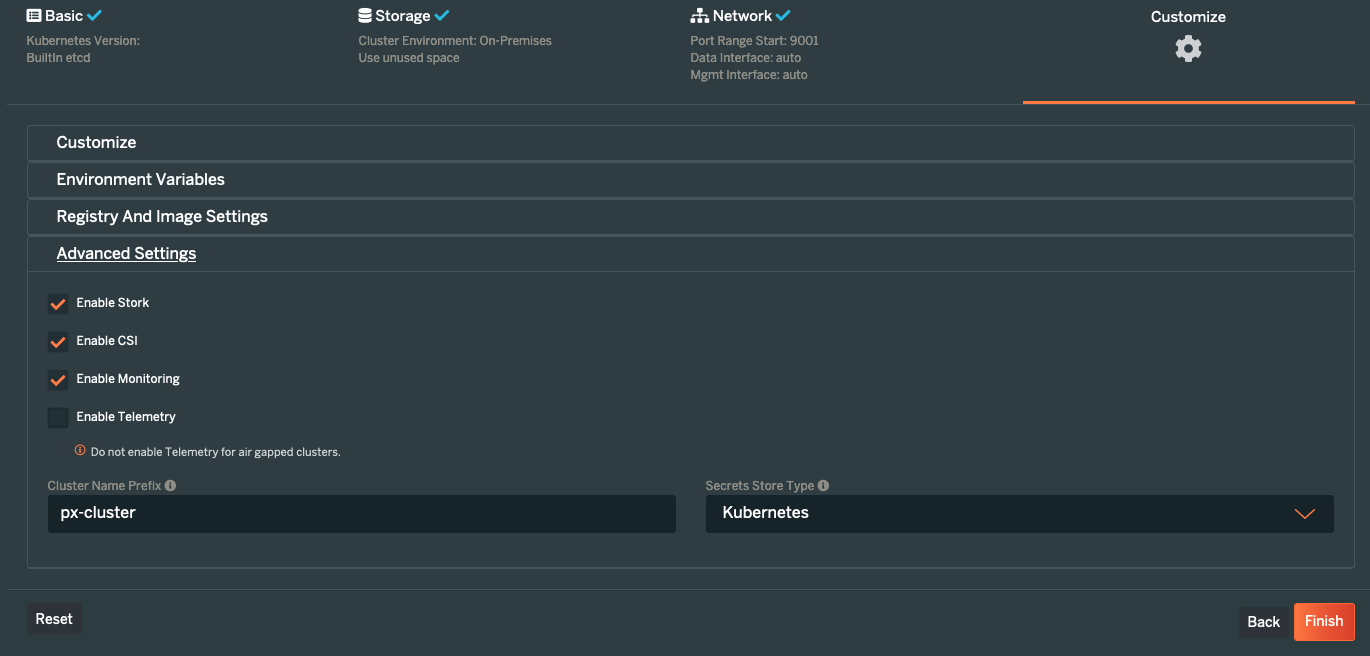
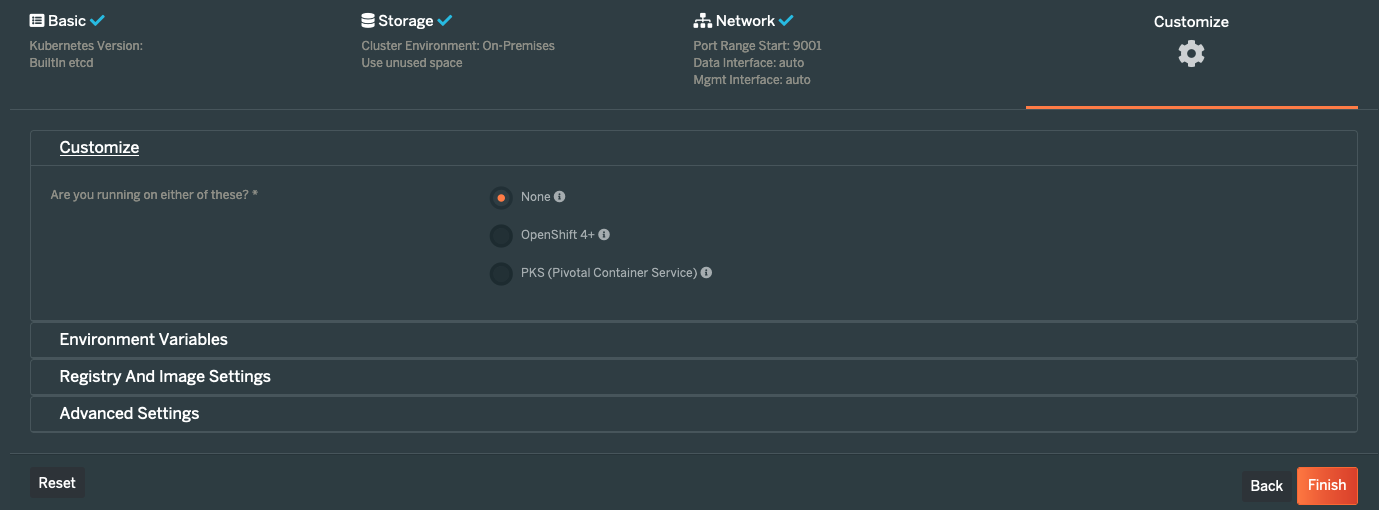 - If required, one can configure "Environment Variables", "Registry And Image Settings" and "Advanced Settings". For this guide, we are keeping default settings.
 - Click on “Finish” and you will get an option to download and save the portworx manifest files.
- Download Portworx operator manifest file.
- Click on “Finish” and you will get an option to download and save the portworx manifest files.
- Download Portworx operator manifest file.
wget -O portworx-operator.yaml https://install.portworx.com/2.12\?comp\=pxoperator\&ns\=portworx
Step 2: Create NameSpace
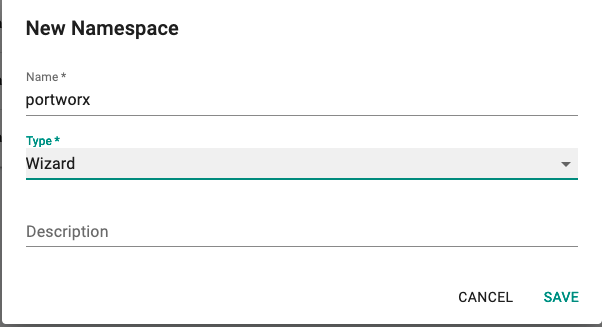
- Login into the Web Console and navigate to your Project.
- Under Infrastructure, select "Namespaces" and create a new namespace called "portworx"
- Save & Go To Placement and select appropriate cluster.
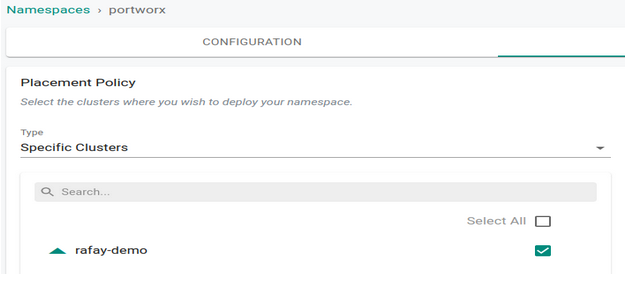
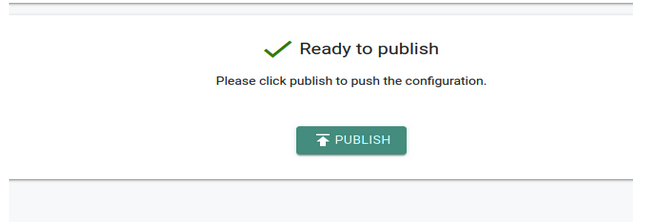
- Publish the namespace.
Step 3: Create Addon
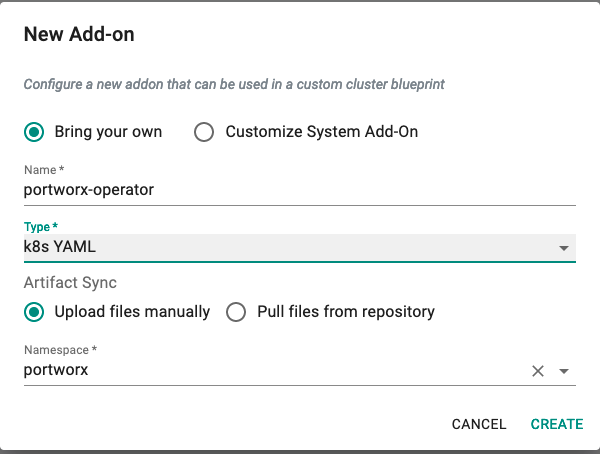
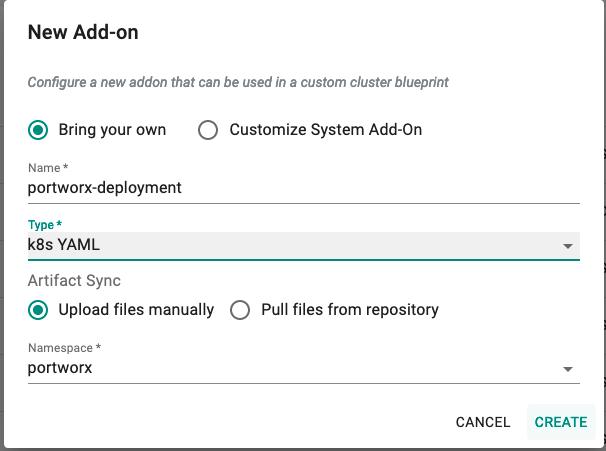
- Under Infrastructure, select "Addons" and create a new addon called "portworx-operator"
- Ensure that you select "k8s YAML" for type and select the namespace as "portworx"
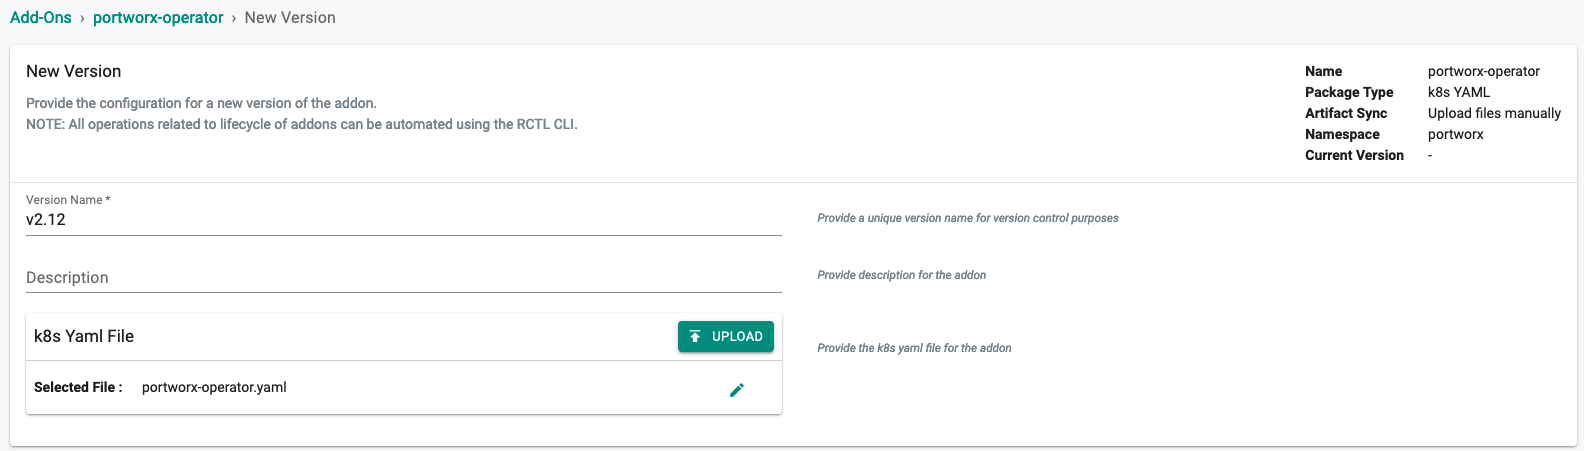
- Create new version of an addon. Specify version and upload the portworx operator manifest file.
- Repeate the above steps for "portworx-deploymant"

Step 4: Create Blueprint
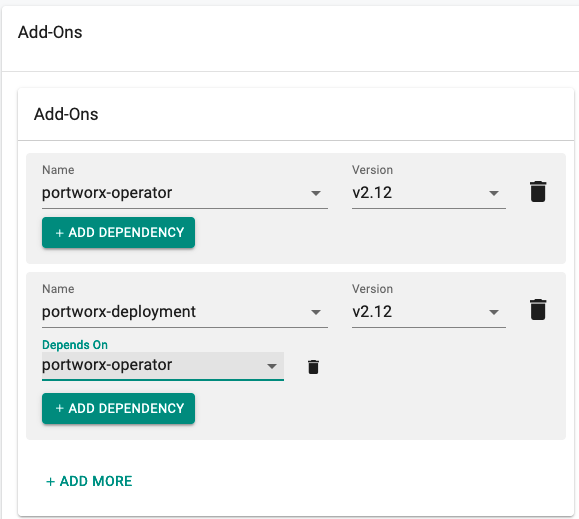
Now, we are ready to assemble a custom cluster blueprint using the newly created portworx addons. We can specify the order in which the addons will be deployed to a cluster.
- Under Infrastructure, select "Blueprints"
- Create a new blueprint and give it a name such as "standard-blueprint"
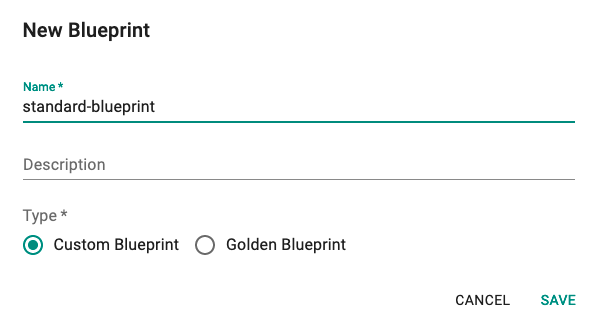
- Sepecify blueprint version and base blueprint configurations. We are going to use minimal blueprint with version as 1.20.0

- Add "portworx-operator" & "portworx-deployment" addon and set dependency.
Step 5: Apply Blueprint
Now, we are ready to apply this custom blueprint to a cluster.
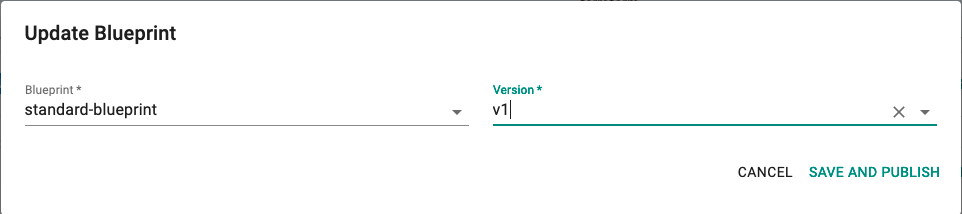
- Click on Options for the target Cluster in the Web Console
- Select "Update Blueprint" and select the "standard-blueprint" blueprint we created from the list
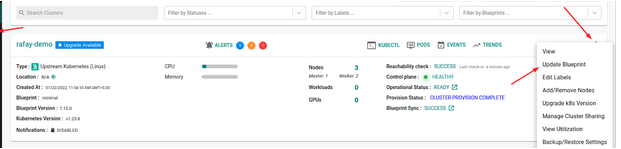
- Click on "Save and Publish".
This will start the deployment of the addons configured in the "standard-blueprint" blueprint to the targeted cluster. The blueprint sync process can take a few minutes. Once complete, the cluster will display the current cluster blueprint details and whether the sync was successful or not.
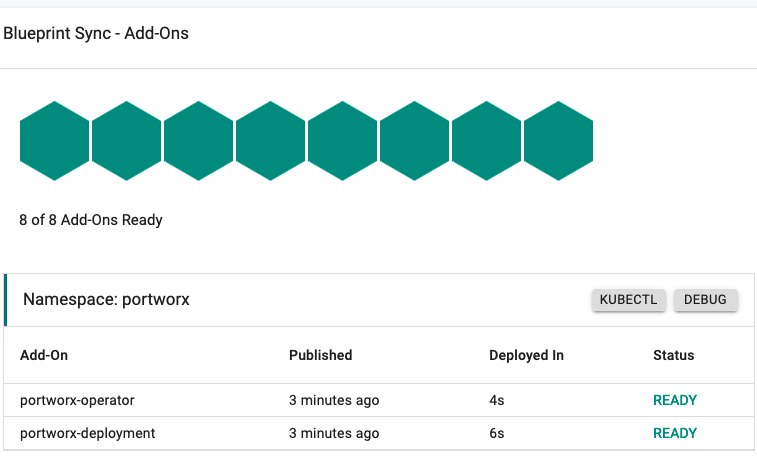
Step 6: Verify Blueprint
Users can optionally verify whether the required resources for the custom blueprint were created on the cluster. Blueprint Sync shows the status of each addon.
Step 7: Verify Portworx.
- We are going to create PersistentVolumeClaim with preconfigured storageclass (px-replicated) and attach it with the deployment/application using Rafay workload.
kind: PersistentVolumeClaim
apiVersion: v1
metadata:
  name: mysql-data
  annotations:
    volume.beta.kubernetes.io/storage-class: px-replicated
spec:
  accessModes:
    - ReadWriteOnce
  resources:
    requests:
      storage: 2Gi
---
apiVersion: apps/v1
kind: Deployment
metadata:
  name: mysql
spec:
  strategy:
    rollingUpdate:
      maxSurge: 1
      maxUnavailable: 1
    type: RollingUpdate
  replicas: 1
  selector:
    matchLabels:
      app: mysql
  template:
    metadata:
      labels:
        app: mysql
        version: "1"
    spec:
      containers:
      - image: mysql:5.6
        name: mysql
        env:
        - name: MYSQL_ROOT_PASSWORD
          value: password
        ports:
        - containerPort: 3306
        volumeMounts:
        - name: mysql-persistent-storage
          mountPath: /var/lib/mysql
      volumes:
      - name: mysql-persistent-storage
        persistentVolumeClaim:
          claimName: mysql-data
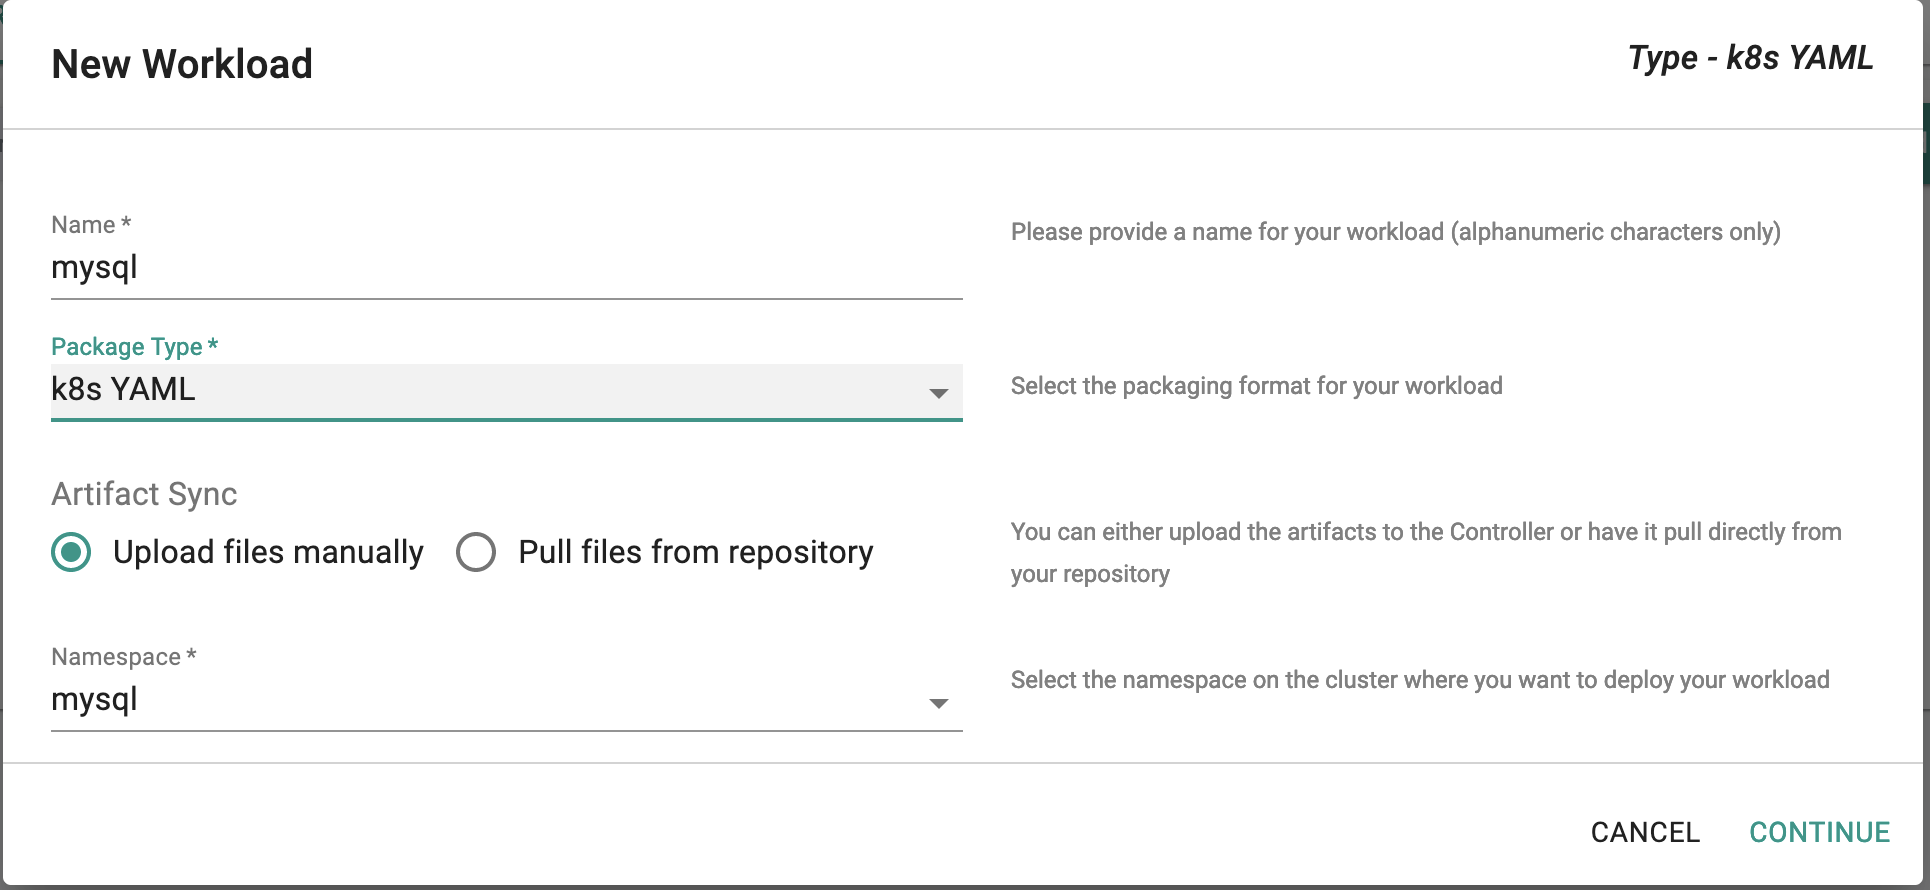 - Upload the above manifest file.
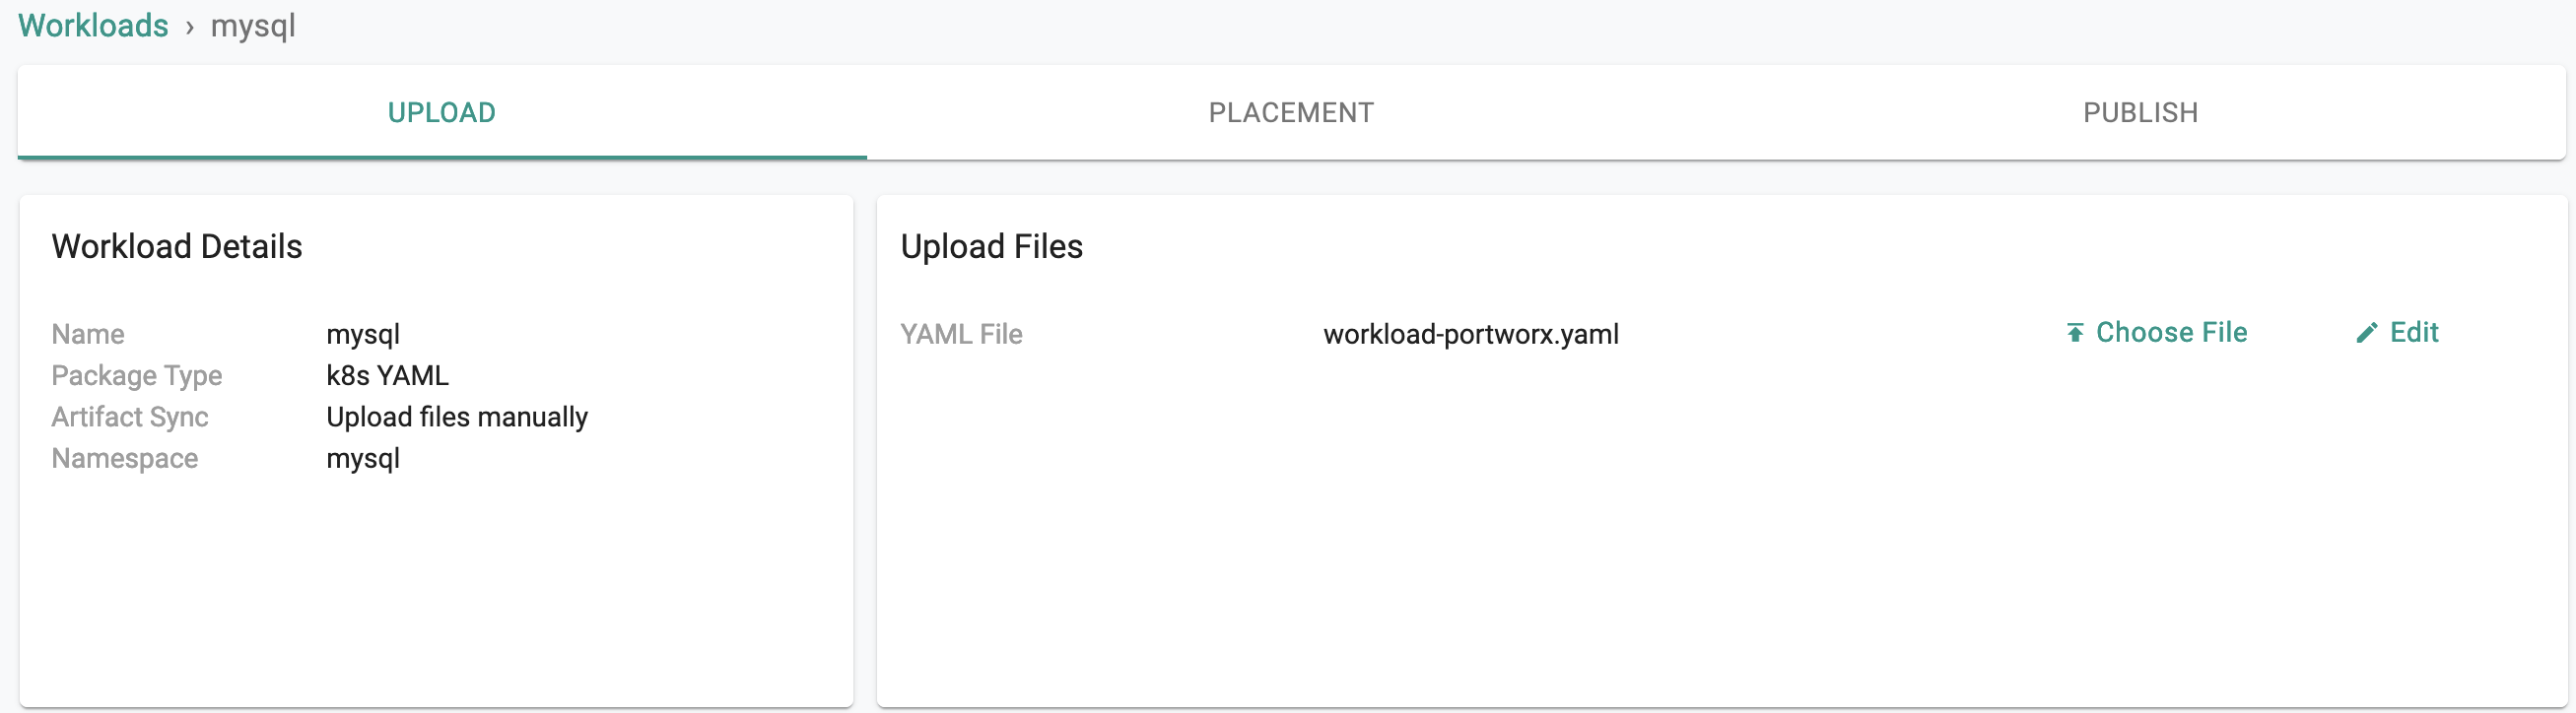 - Publish the workload.
- Verify that application is deployed.
- Publish the workload.
- Verify that application is deployed.
