CloudCasa
Overview
CloudCasa is a powerful and easy-to-use Kubernetes and cloud database backup service for DevOps and IT Ops teams. With CloudCasa, a storage or data protection expert are not required to backup and restore the Kubernetes clusters. CloudCasa performs all the arduous work to protect the cluster resources and persistent data from human error, security breaches, and service failures to provide the business continuity and compliance that a business requires
The CloudCasa agent must be installed on every Kubernetes cluster that you want to protect. Installation & configuration is rapid and easy as explained in the 9-step recipe below.
What Will You Do
In this exercise, perform the following steps along with the mentioned examples
- Add Helm chart repository
- Create Addon
- Create blueprint
- Apply blueprint
- Setup a CloudCasa account
- Add a Kubernetes cluster to CloudCasa
- Setup backup policies
- Define and run a backup
- Run a restore operation
Assumptions
- A supported Kubernetes cluster imported or provisioned by the controller
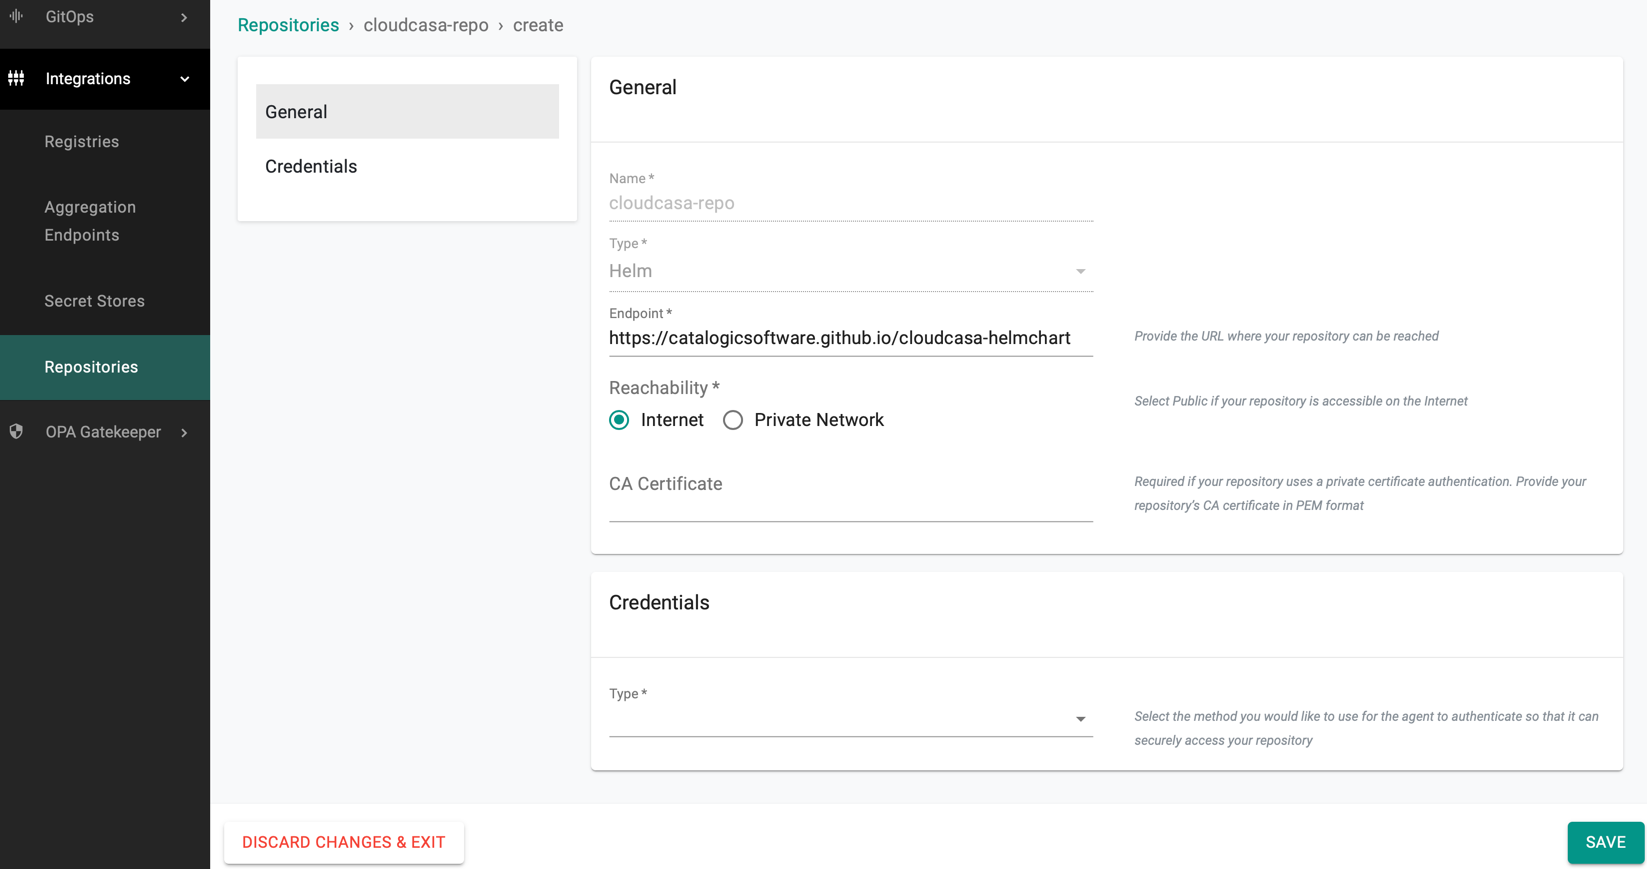
Step 1: Add Helm Chart Repository
Use the CloudCasa Agent Helm chart from the official repository. The below example is with CloudCasa agent v2.0.0
- Navigate to Integrations -> Repositories.
- Create a new Helm repository with the endpoint "https://catalogicsoftware.github.io/cloudcasa-helmchart"
Step 2: Create Add-On
- Login to the controller and open your Project as an Org Admin or Infrastructure Admin
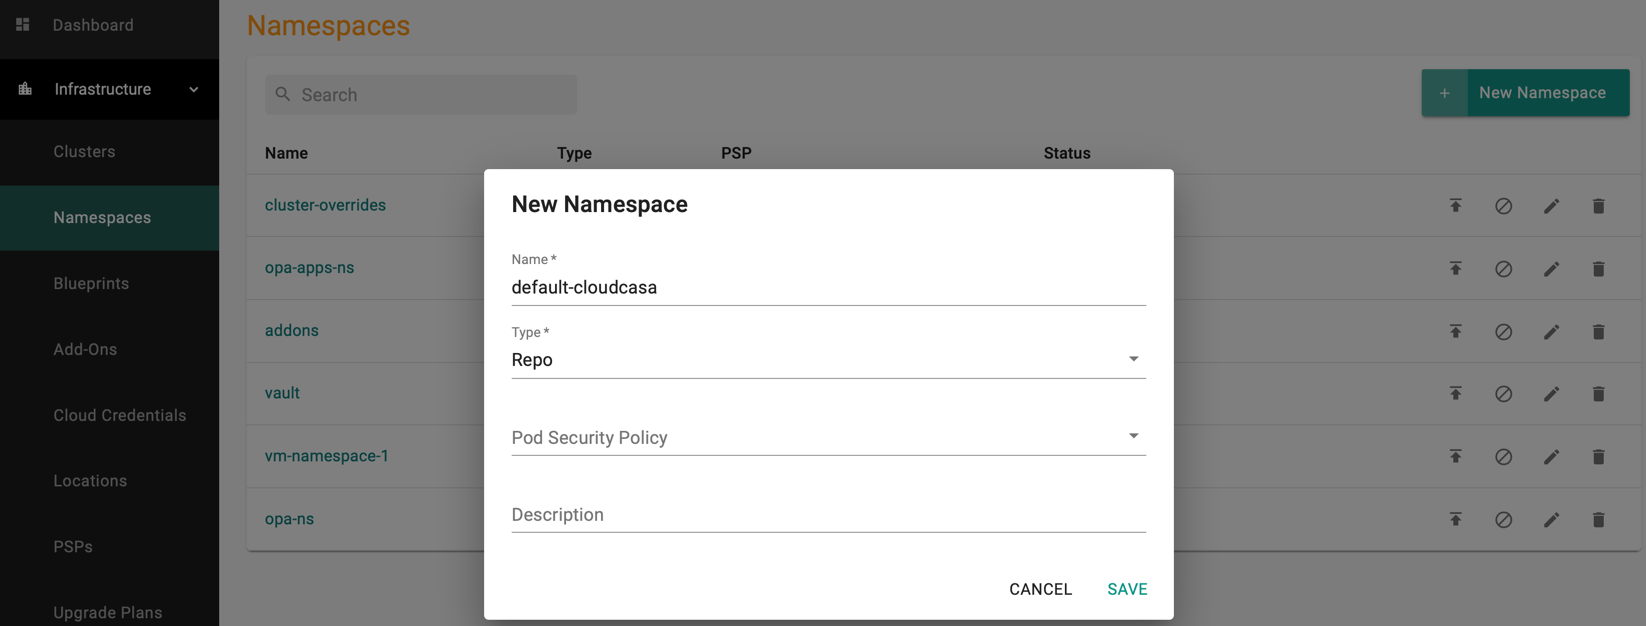
- Navigate to Infrastructure -> Namespaces and click New Namespace
- Create a new Namespace as default-cloudcasa
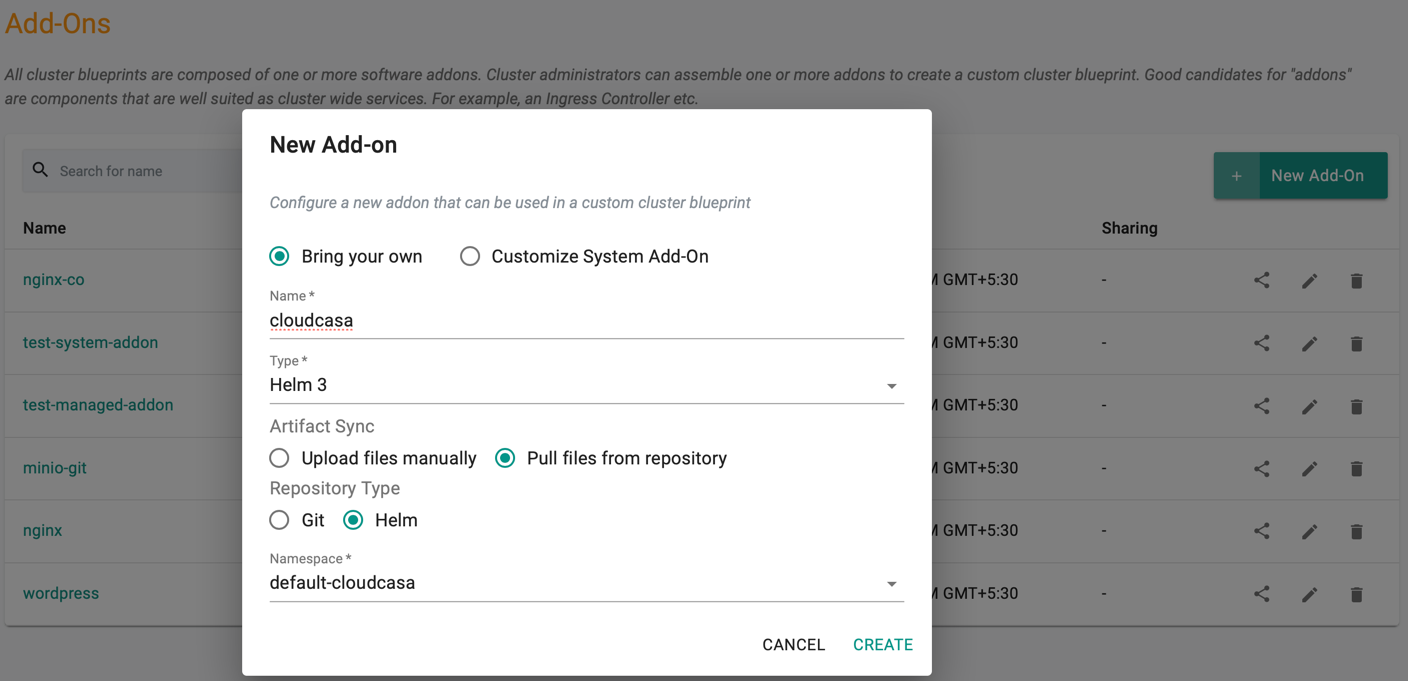
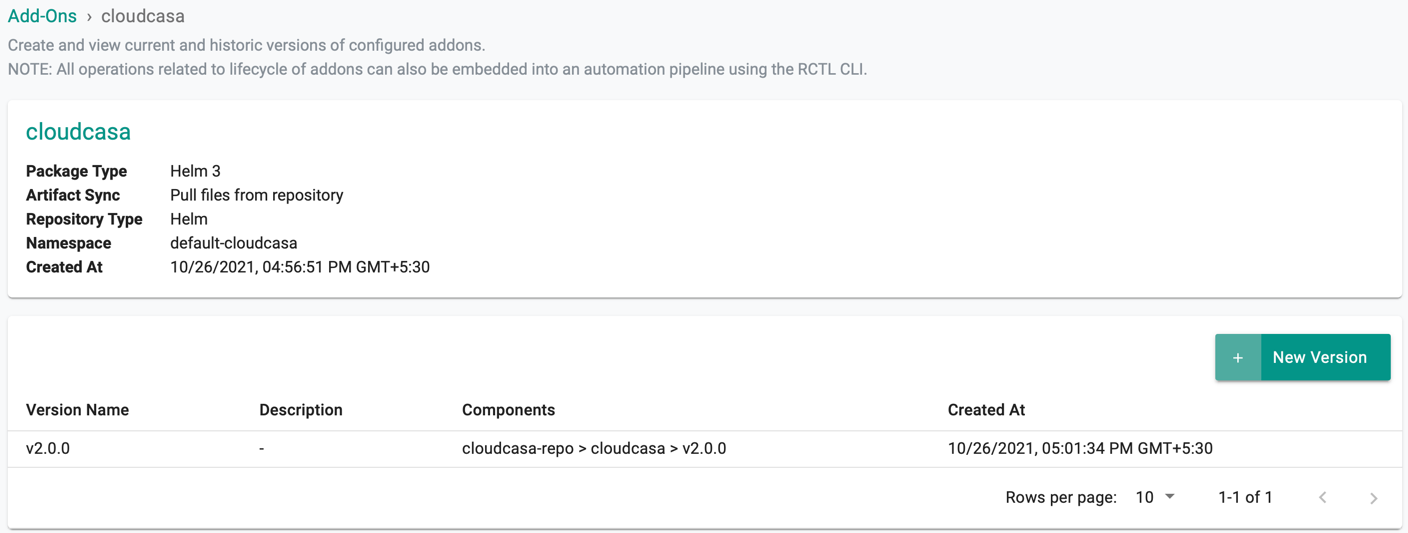
- Navigate to Infrastructure -> Add-Ons and click New Add-On
- Enter the new Add-on name as cloudcasa
- Select Helm 3 for type and the namespace default-cloudcasa
- Click Create
- Click New Version and enter the version v2.0.0
- Select the cloudcasa-repo and enter the chart name as cloudcasa and the chart version v2.0.0
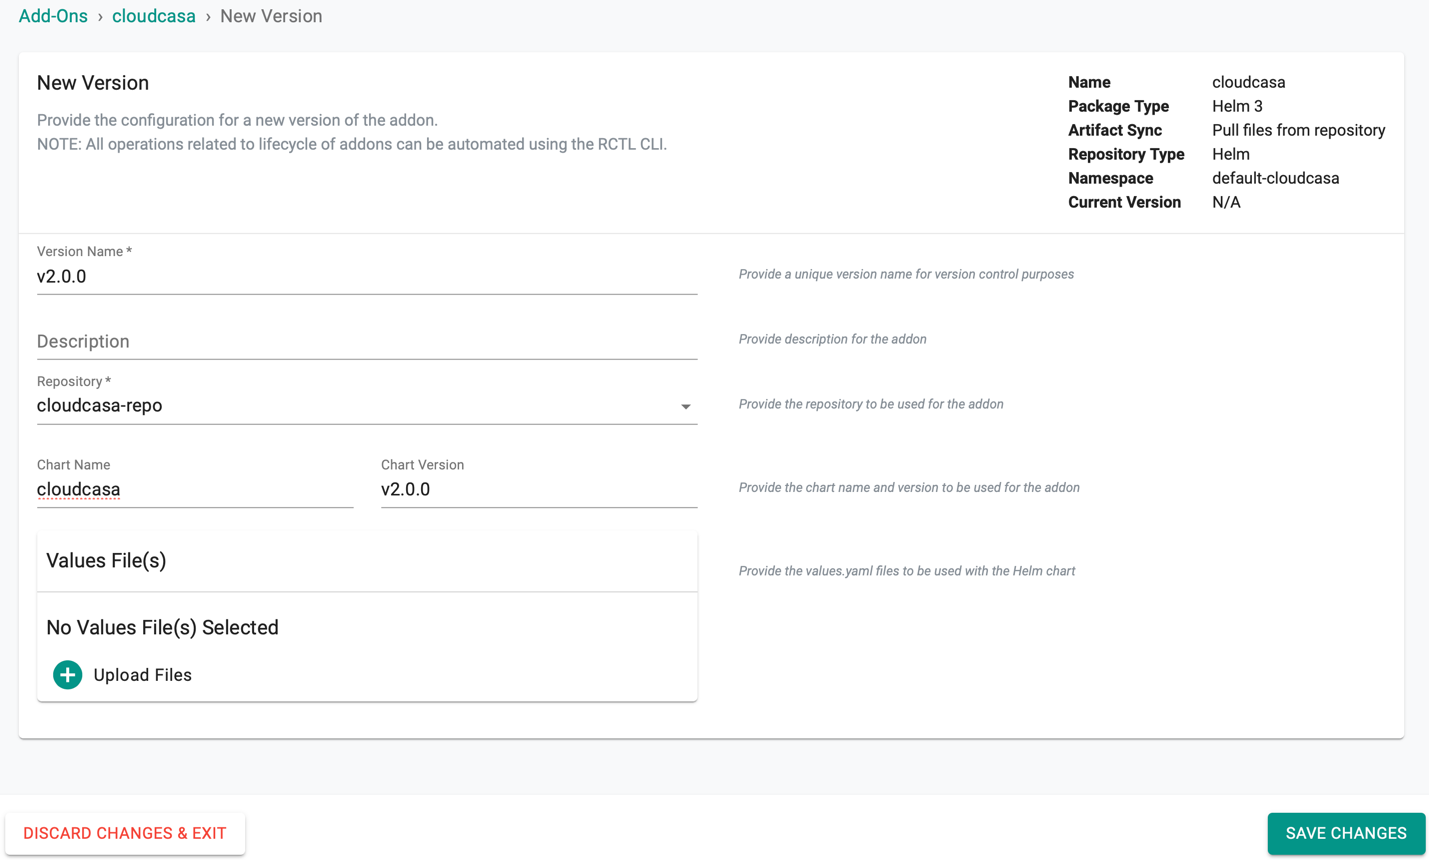
- Click Save Changes
Step 3: Create Blueprint
Create a custom cluster blueprint using the CloudCasa Addon
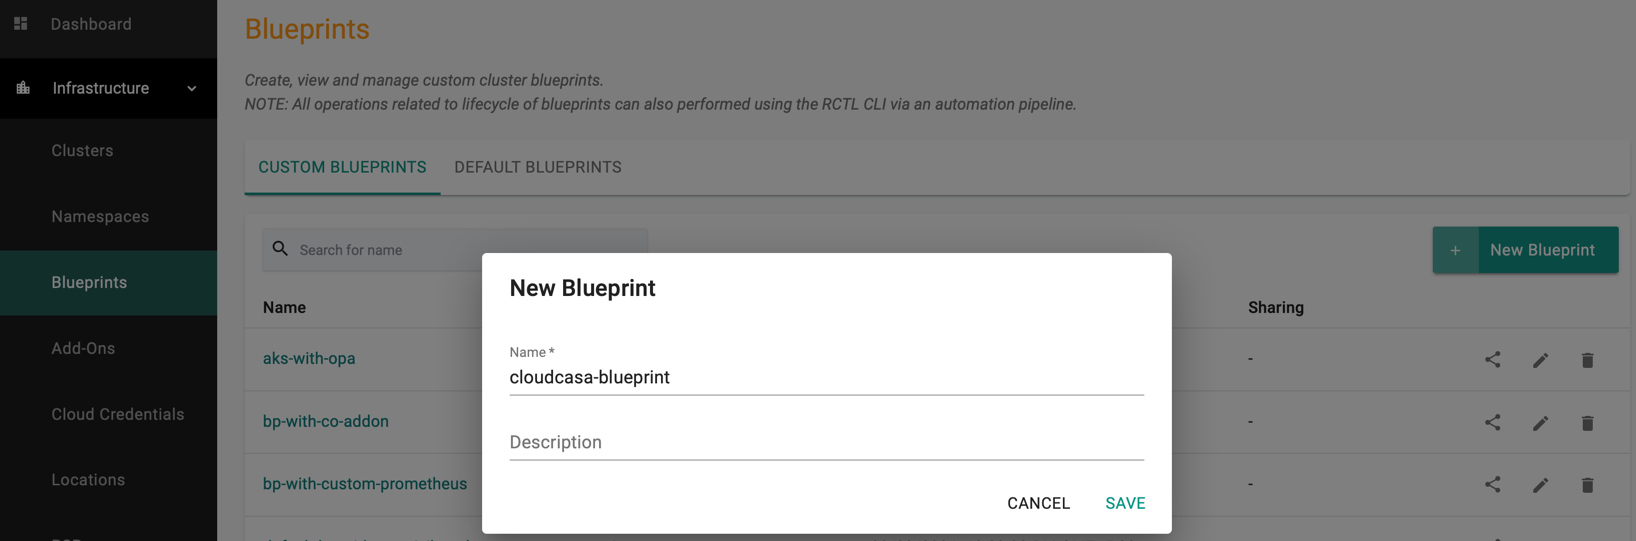
- Navigate to Infrastructure -> Blueprints in the controller and click New Blueprint
- Enter the name cloudcasa-blueprint and description (if required)
- Click Save
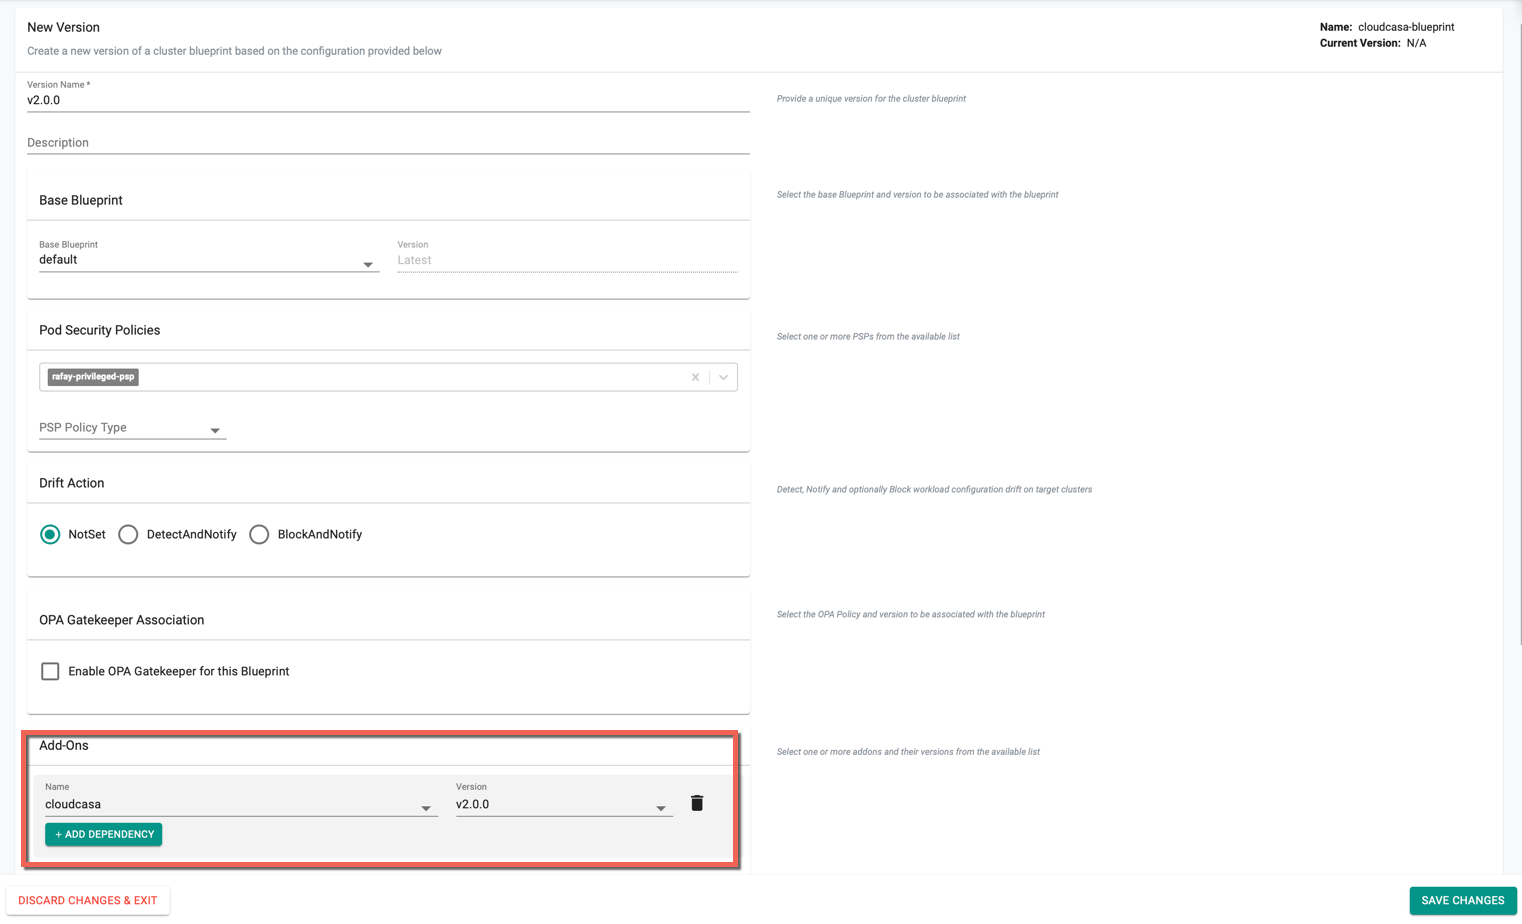
- Select the blueprint and click New Version
- Provide a version name v2.0.0 and select cloudcasa from the Add-Ons drop-down (created in Step 2)
Step 4: Apply Blueprint
Once the blueprint is ready, apply this blueprint to a cluster
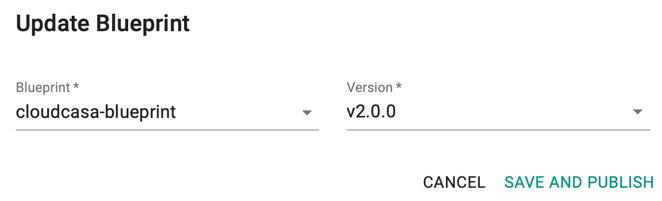
- Select the required cluster in the Controller and click the options gear icon
- Click Update Blueprint and select cloudcasa-blueprint blueprint from the drop-down
- Click Save and Publish. This will deploy the CloudCasa Agent on the selected cluster
Once the deployment is complete, the cluster displays the current blueprint details
Step 5: Setup a CloudCasa Account
Perform the below steps to setup a CloudCasa Account
- Open CloudCasa and click the Login/Sign Up button in the top right corner. Users are redirected to the cloudcasa login page, enabling to sign up with a few details
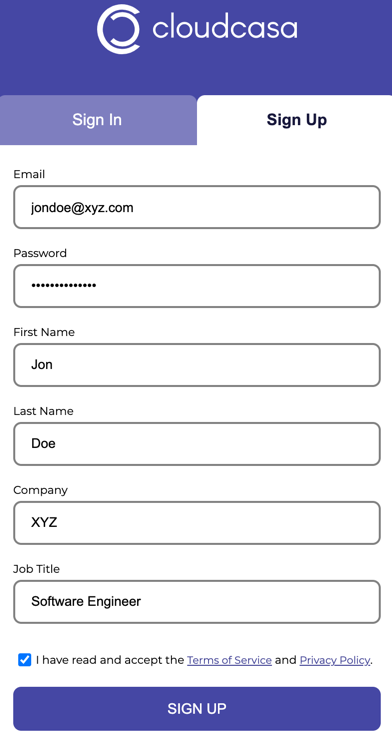
- Sign In to the account once the email address is verified
Step 6: Add a Kubernetes cluster to CloudCasa
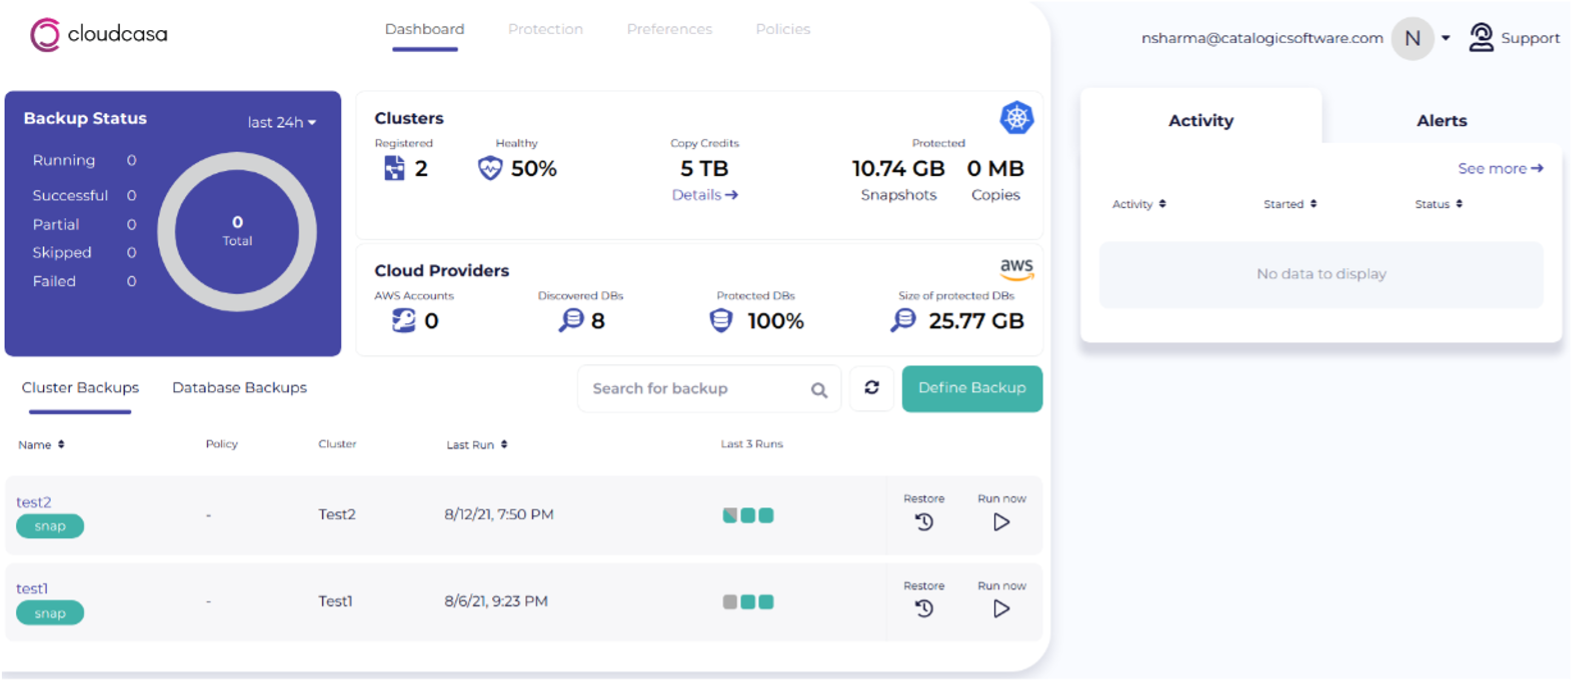
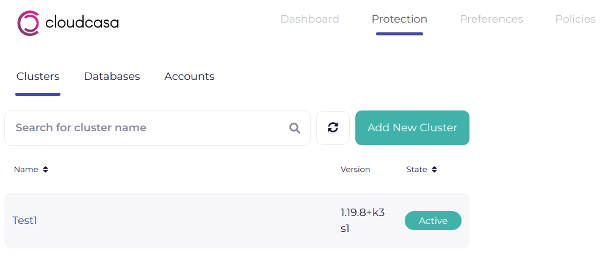
- On successful login to CloudCasa, click Protection tab
- Click Add New Cluster
Note: The CloudCasa agent deployment is complete in Step 4
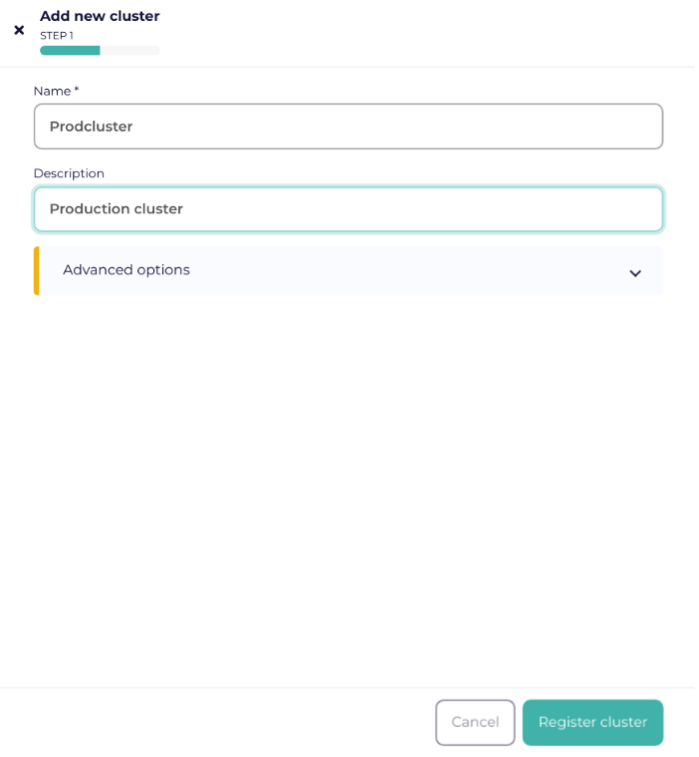
- Provide the cluster name, description and click Register Cluster
- Successful cluster registration generates a ClusterID and a Kubectl command to install/verify the agent. Copy the ClusterID
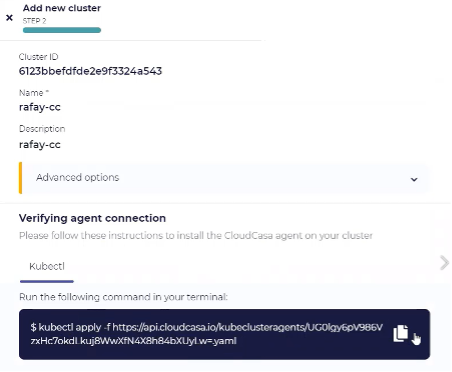
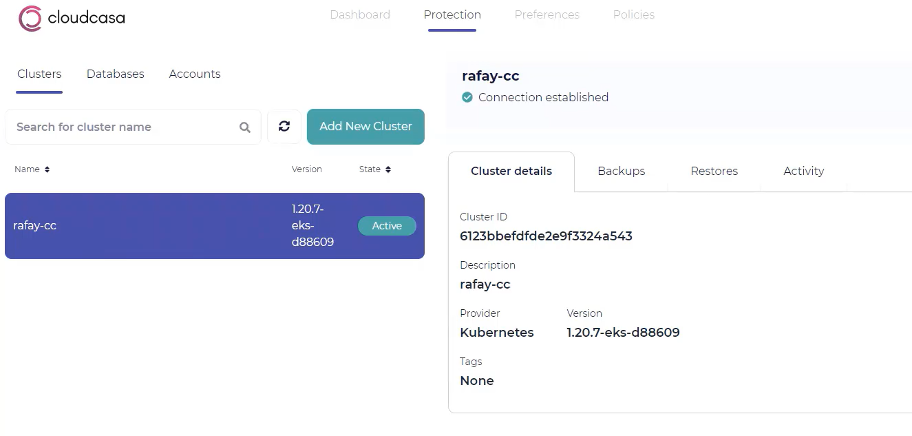
- Run the above Kubectl command on your cluster and confirm that the registered Kubernetes cluster moves into the Active state in the CloudCasa UI
Step 7: Setup backup policies
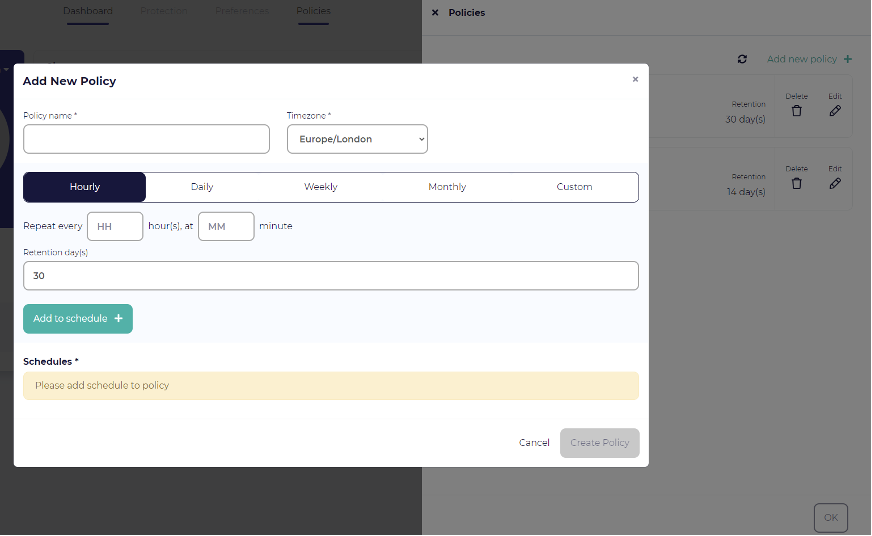
A backup policy allows to define when backups that use it will run and for how long they will be retained. You can have multiple schedules with different retention times in one policy. For example, a policy may specify the creation of hourly backups retained for 7 days, and daily backups retained for 30 days
- Open the Policies tab and click Add new policy
- Provide the required information and click Create Policy button
Step 8: Define and Run a Backup
- Click Define Backup from the dashboard
- Provide a Backup Name and select the Cluster for which you are defining a backup
- Select either Full Cluster (or) a Select Namespace
- Optionally, enable the select labels and. If backing up a specific namespace, enter the name of the namespace you want to protect
- For Backup operation, choose any of the below options to snapshot your PV’s:
- Snapshot only
- Snapshot and copy to CloudCasa (beta)
Important
The “Snapshot and copy to CloudCasa” option is only available with a paid subscription
- Select the newly created policy and click Next
- Enable Run to run the Backup operation immediately and provide Retention days
- Click Create to create a Backup profile
- Navigate to Dashboard tab and identify the Cluster Backup for which the Backup operation needs to be executed
- Click Run available in front of the Cluster Backup
Step 9: Run a Restore Operation
- The cluster that you wish to restore should already exist and registered with CloudCasa. Refer Step 3. Create a new cluster if it doesn't exist
- If your backup contains CSI snapshots of persistent volume (PVs), create it on storage that has access to the existing snapshots, and the CSI driver should contain same name as before to access the earlier snapshots
- If there is a need to recreate the cluster, identify the Cluster ID to which it should be registered
- The state of the registered cluster in the Protection tab should be Active
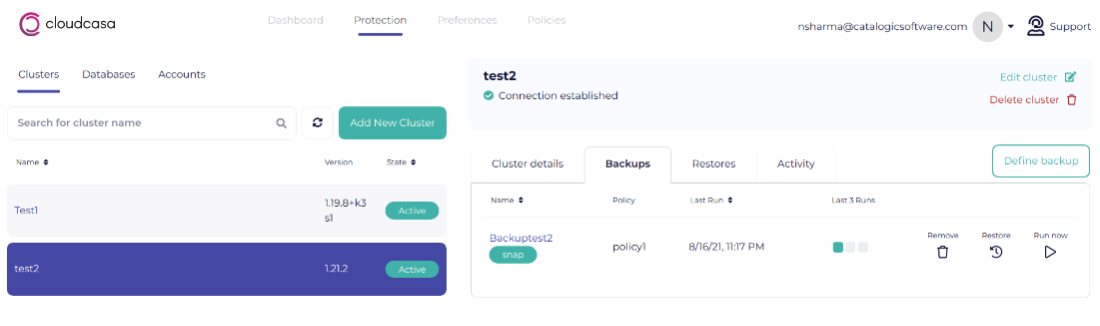
- Select your cluster and click Backups tab
- Find the backup you wish to restore from and click the Restore icon
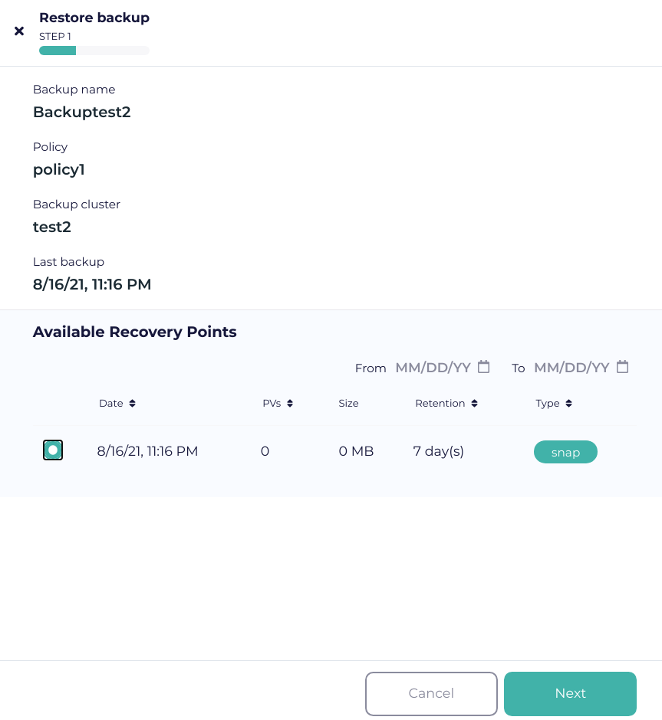
- In the Restore page, select a specific recovery point from the list of available recovery points and click Next
- Choose the required namespaces or all namespaces for backup
- Choosing the latter displays a list of namespaces from which a user can select the namespace that requires restore operation. Only the namespaces included in the backup appears
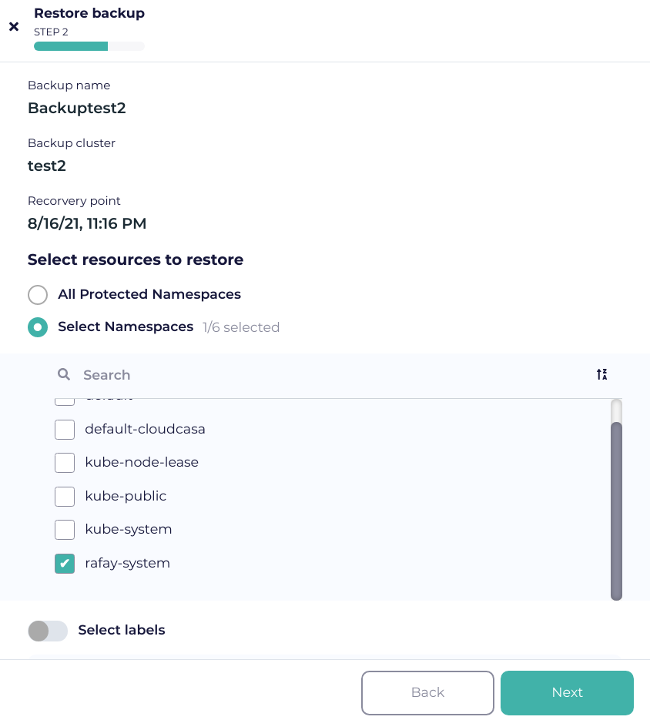
- The namespaces cannot be over-written, hence restore an existing namespace to a cluster, delete the existing namespace. Rename the namespaces when restoring (later)
- Add the required labels to select resources for restore. These are key: value pairs, not validated by the UI. Add the key:value pairs one at a time or add multiple pairs at once, separated by spaces.
- Choose whether or not to restore PV snapshots. If user toggle off the Exclude persistent volumes option, PVs are restored using the snapshots (or) copies associated with the selected recovery point
- If selecting specific namespaces or labels for restore, only PVs in the namespaces or with the labels are restored
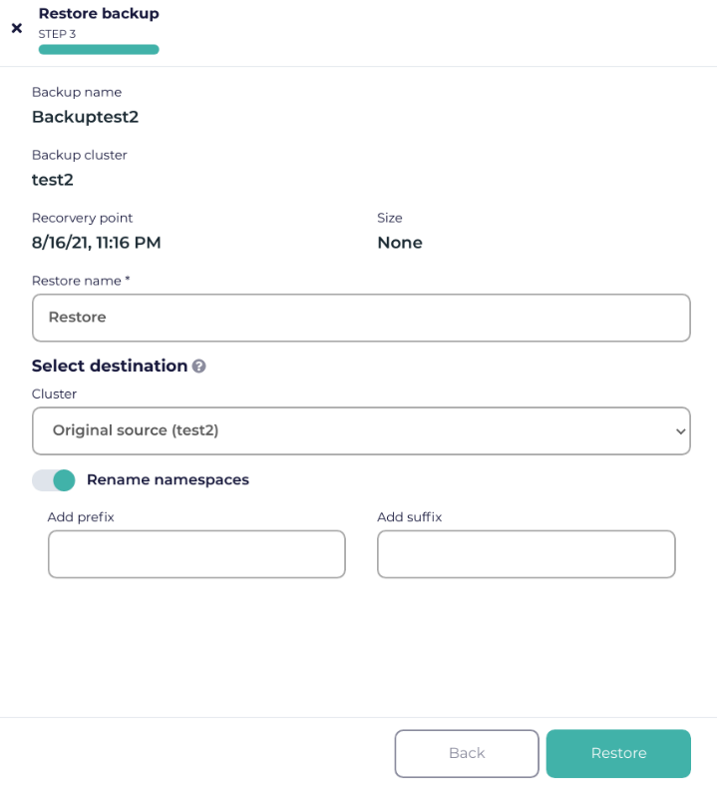
- Users are presented with a few more options in the next page
- Provide a Restore name for the restore job to easily track the restore job status
- Also, system saves the job under its name for any later modification and re-run process
- Users can choose alternate cluster to restore. By default, the restore occurs in the original cluster
- Add a prefix and/or suffix to rename the restored namespaces
- All the restored namespaces contain the prefixes or suffixes added, hence to rename only specific namespaces, run multiple restores and select those namespaces explicitly
- Click Restore and CloudCasa will do the rest!
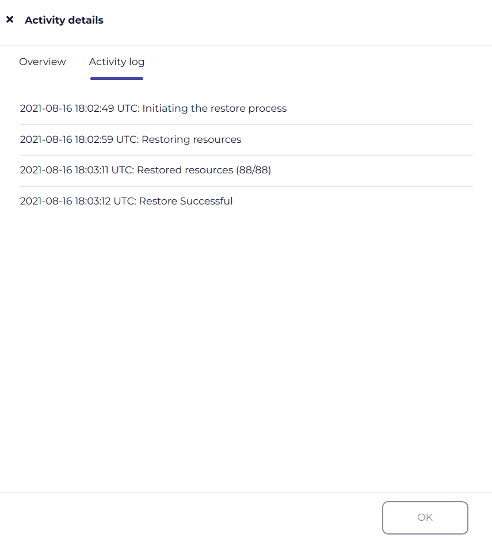
- Watch the progress of the restore job in the progress pane. Also, users can edit and re-run under the cluster’s Restore tab if required
Recap
Congratulations, You’re done! Your cluster is protected!
Take an ad-hoc or scheduled backup and complete restores of your Kubernetes cluster resources, persistent volumes and cloud-native applications