Fleet Management (Deprecated)
⚠️ Deprecated Notice
This feature has been deprecated and will be removed in a future release. Fleet Operations supersedes this capability and is the recommended approach for orchestrating bulk blueprints across clusters in your organization.
Overview
Users can manage a group of clusters as a single fleet and simultaneously apply custom blueprint(s) to one or more fleet(s). This is extremely useful when you are managing a larger group of clusters and want clusters to be updated after any blueprint update without having to update every single cluster one by one.
Important
In order to use this, custom blueprints or golden blueprints must be used.
Fleet Management is driven through cluster labels. Refer to Cluster Labels to know how to Add/Remove Labels For A Cluster before proceeding with the next steps.
Enabling Fleet Management
The following outlines the steps needed to perform this:
Step 1: Assign Clusters To Fleet
For all the clusters in the fleet, cluster labels representing the key value pair for the fleet must be added.
- Go to Infrastructure -> Clusters
- Click the name of your cluster and go to Configuration.
- Under Cluster Labels, click EDIT.
- Add a cluster label with the following values:
- Key: k8smgmt.io/fleet
- Value: The value representing the fleet label. This value must be consistent across all the clusters you add to a fleet
Step 2: Create/Update a custom blueprint with the fleet label
- Go to Infrastructure -> Blueprints -> Custom Blueprint Tab.
- Create a new custom blueprint or for an existing blueprint, click the name and new version to edit the blueprint.
- Go to the Advanced Section.
- Under Fleet Configuration, check auto update clusters
- In Fleet Value, click Add Value and use the value of the label you set in the previous step.
- Click SAVE CHANGES.
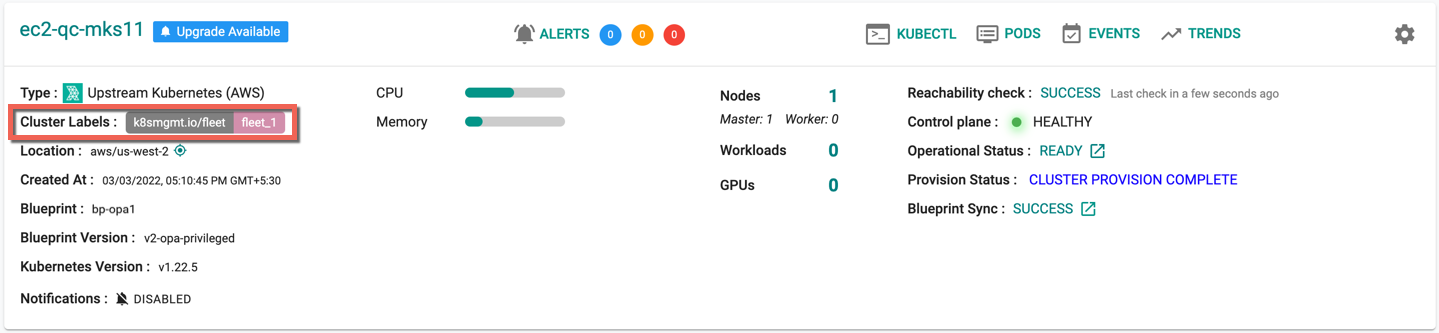
Below is an example of fleet label k8smgmt.io/fleet and value fleet_1 tagged to a cluster
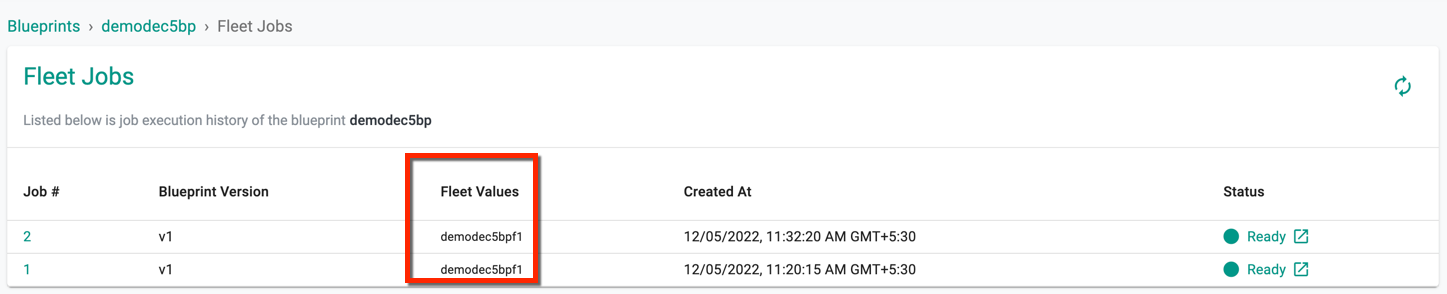
Step 3: Wait for Blueprint Sync
Once the set of clusters are marked with this label k8smgmt.io/fleet and a custom blueprint is assigned to manage the fleet values, publishing a version of the blueprint to the fleet will update ALL the clusters in that fleet i.e. all the clusters with that label.
Once the label(s) are tagged, users can also create and add a blueprint to this fleet using RCTL commands. To know more information on Blueprint RCTL setup, refer Blueprint CLI
Adding A Cluster To The Fleet
To add a cluster to an existing fleet, a cluster label representing the key value pair for the fleet must be added. To do this:
- Go to Infrastructure -> Clusters
- Click the name of your cluster and go to Configuration.
- Under Cluster Labels, click EDIT.
- Add a cluster label with the following values:
- Key: k8smgmt.io/fleet
- Value: The value representing the fleet label.
Removing A Cluster From The Fleet
To remove a cluster from an existing fleet, the cluster label representing the key value pair for the fleet must be removed from the cluster. To do this:
- Go to Infrastructure -> Clusters
- Click the name of your cluster and go to Configuration.
- Under Cluster Labels, click EDIT.
- Remove the cluster label by clicking the delete icon next to the label in the existing list.
Sharing Blueprints With Fleet Labels
The custom blueprints with fleet values can be shared with the project(s) if required and the fleet jobs will reflect the blueprint publish status as per the project scope (either a blueprint under a project or shared with)