Part 1: Provision
What Will You Do
In this part of the self-paced exercise, you will provision an Amazon EKS cluster which contains two (2) managed nodes groups. The first managed node group will be comprised of Linux on-demand compute instances and run the system level resources while the second managed node group will be comprised of Windows instances and run application workloads. The cluster will use the minimal blueprint.
Step 1: Provision Cluster
In this step, we will provision an EKS cluster through the web console. We will first deploy the cluster with a single node group for system level resources. We will then add the Windows node group to the cluster.
- Navigate to the "defaultproject" project in your Org
- Select Infrastructure -> Clusters
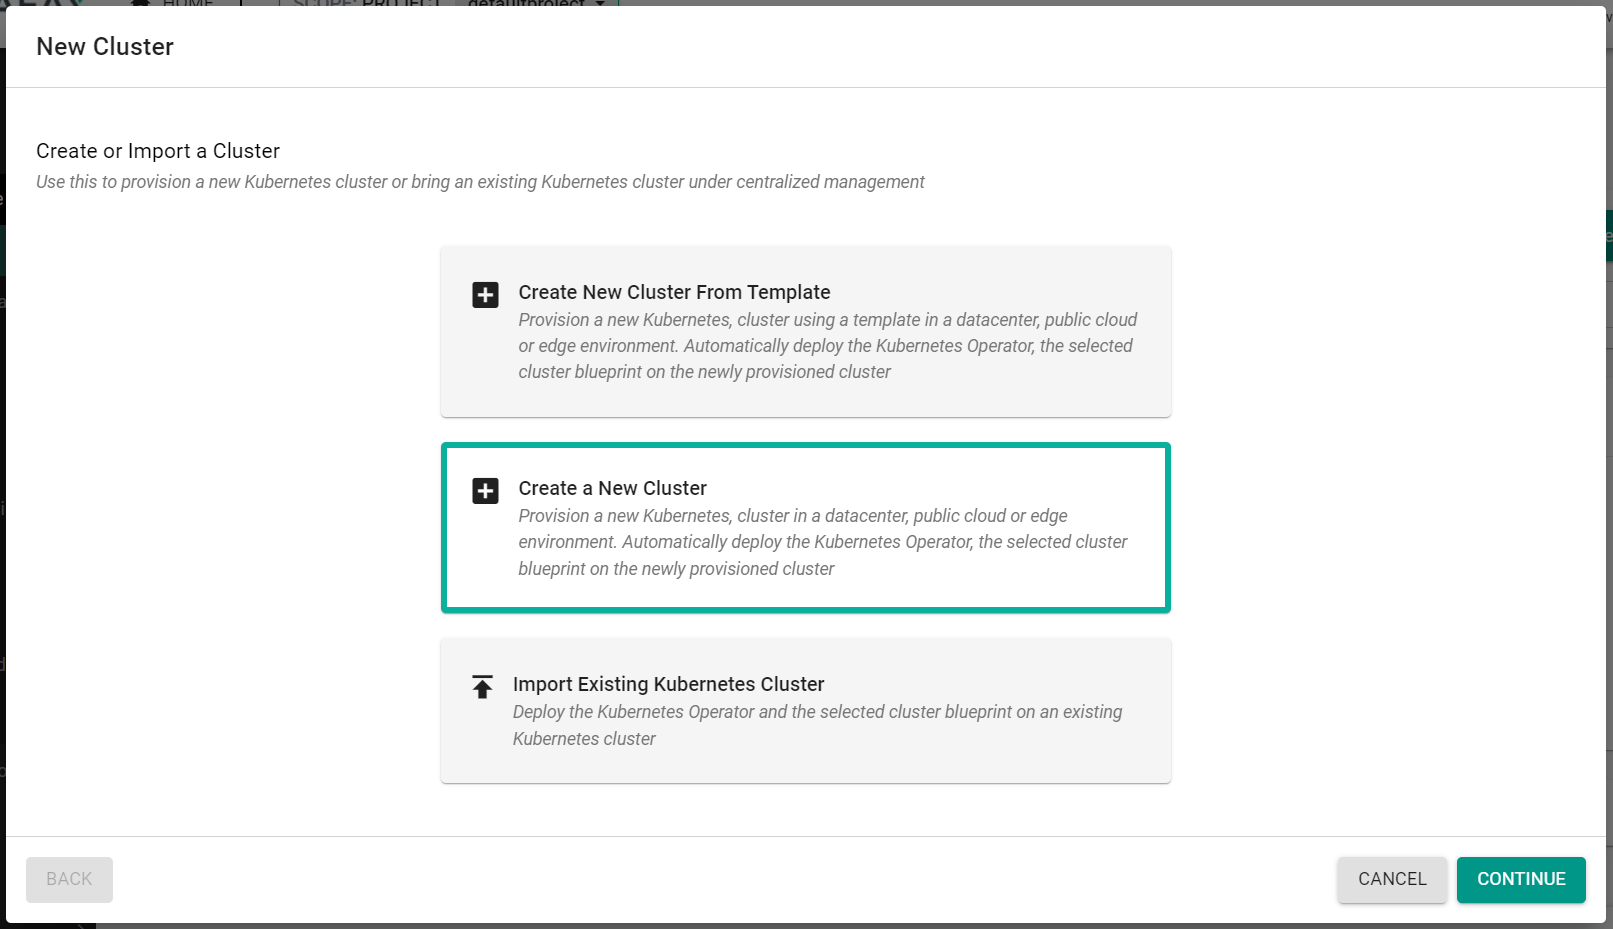
- Click "New Cluster"
- Select "Create a New Cluster"
- Click "Continue"
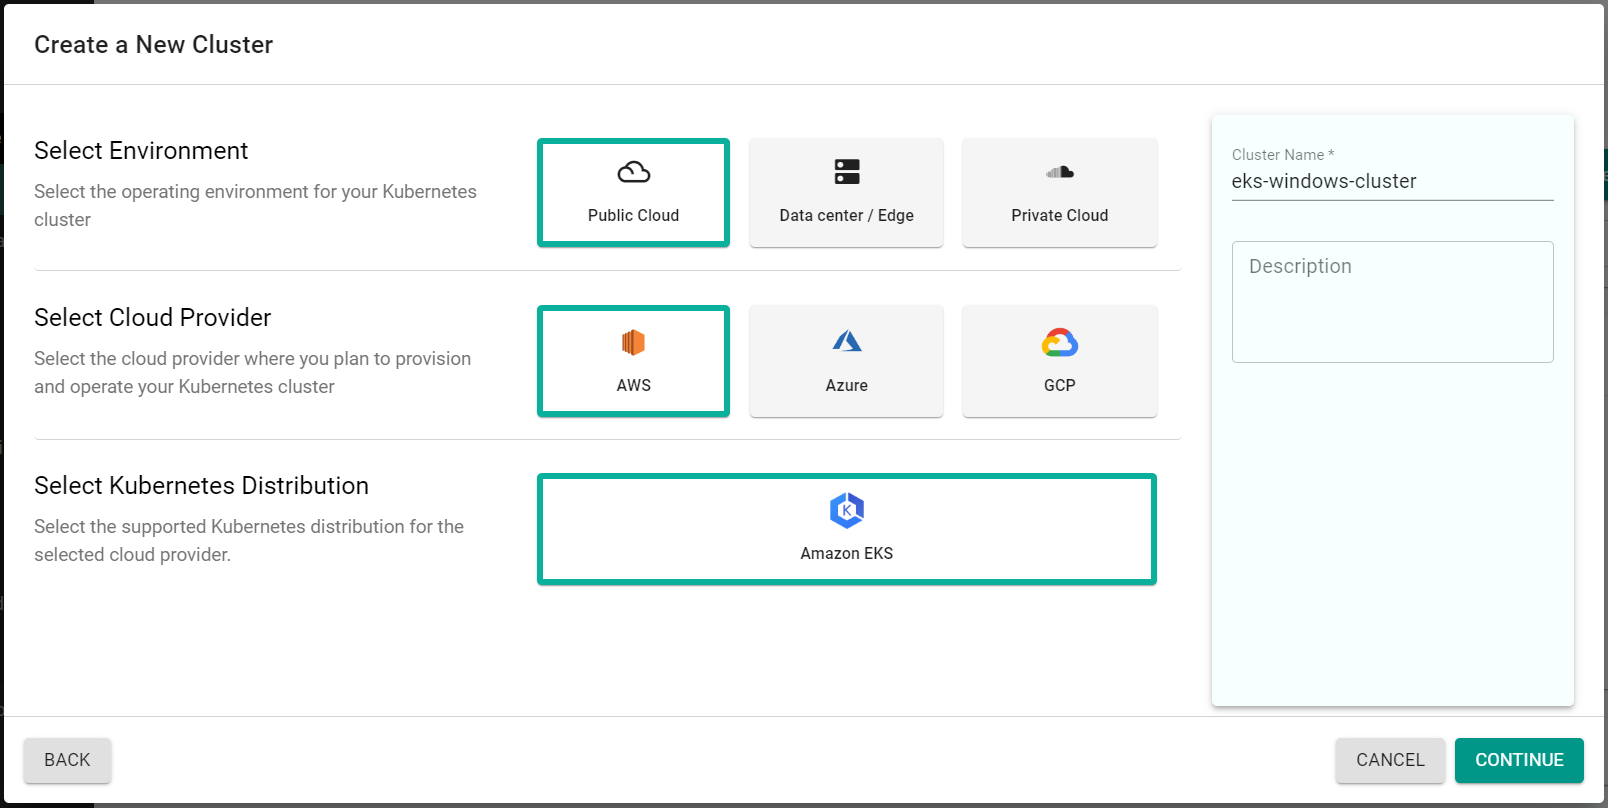
- Select "Public Cloud"
- Select "AWS"
- Select "Amazon EKS"
- Enter a cluster name
- Click "Continue"
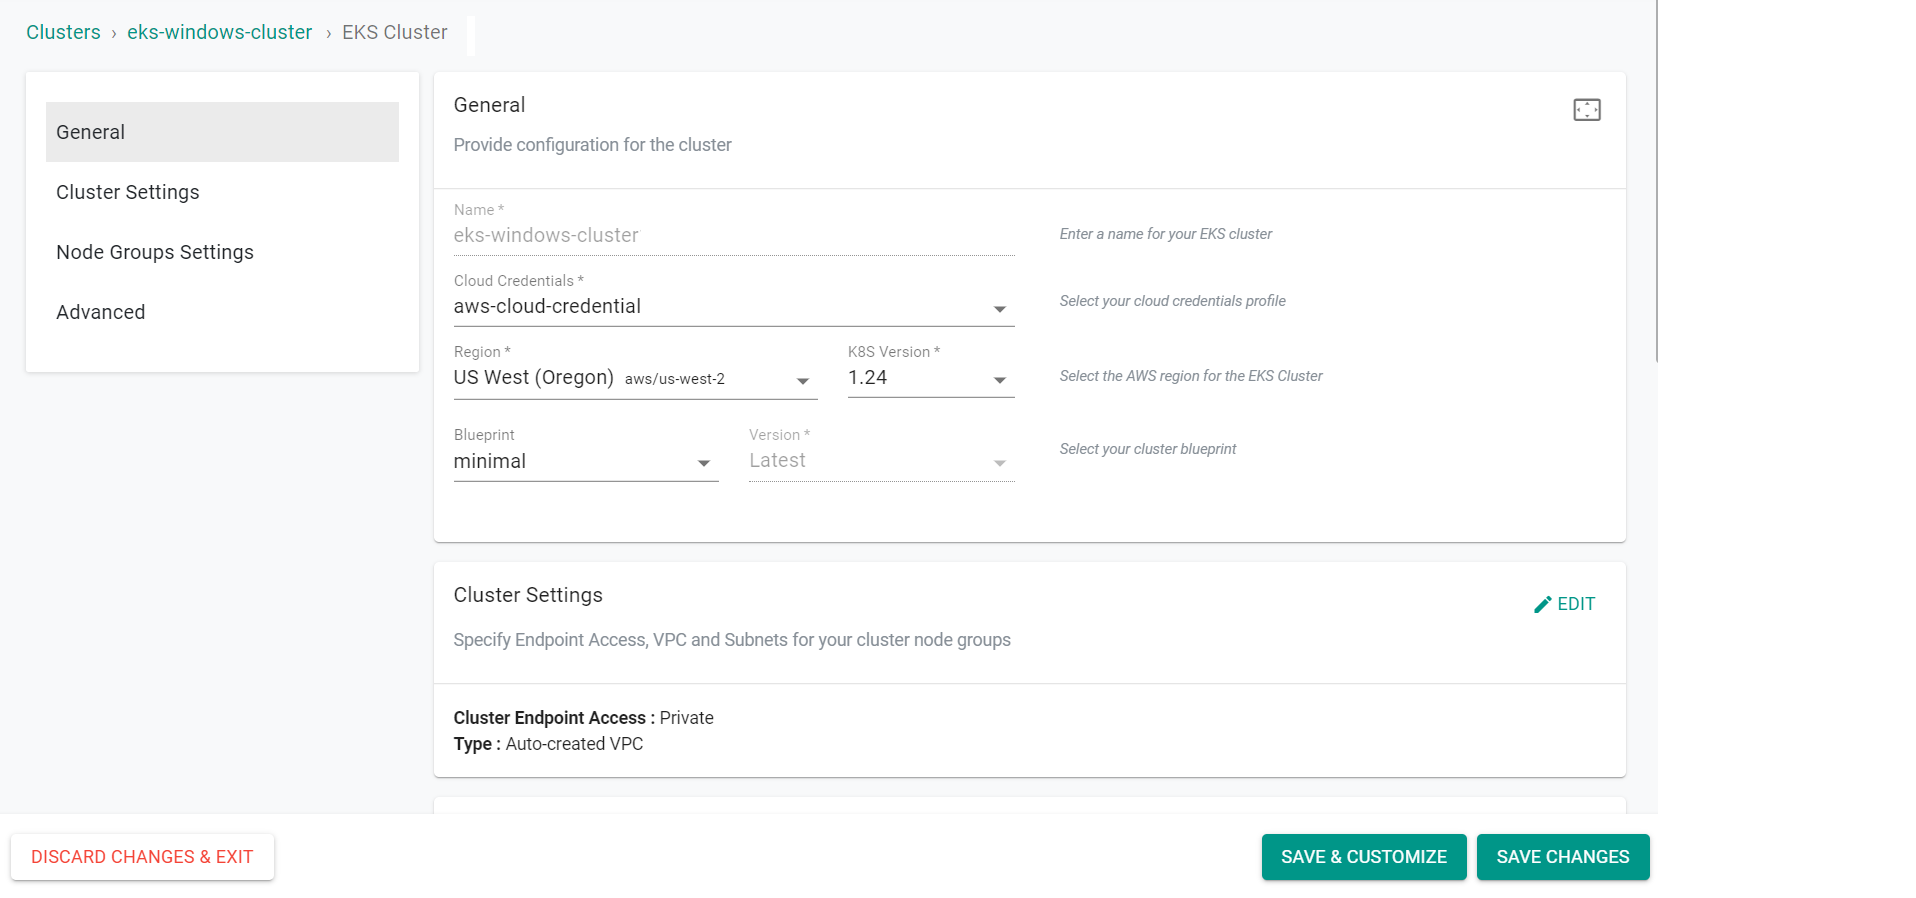
- Select a previously created Cloud Credential
- Select the AWS Region for the cluster
- Click "Save Changes"
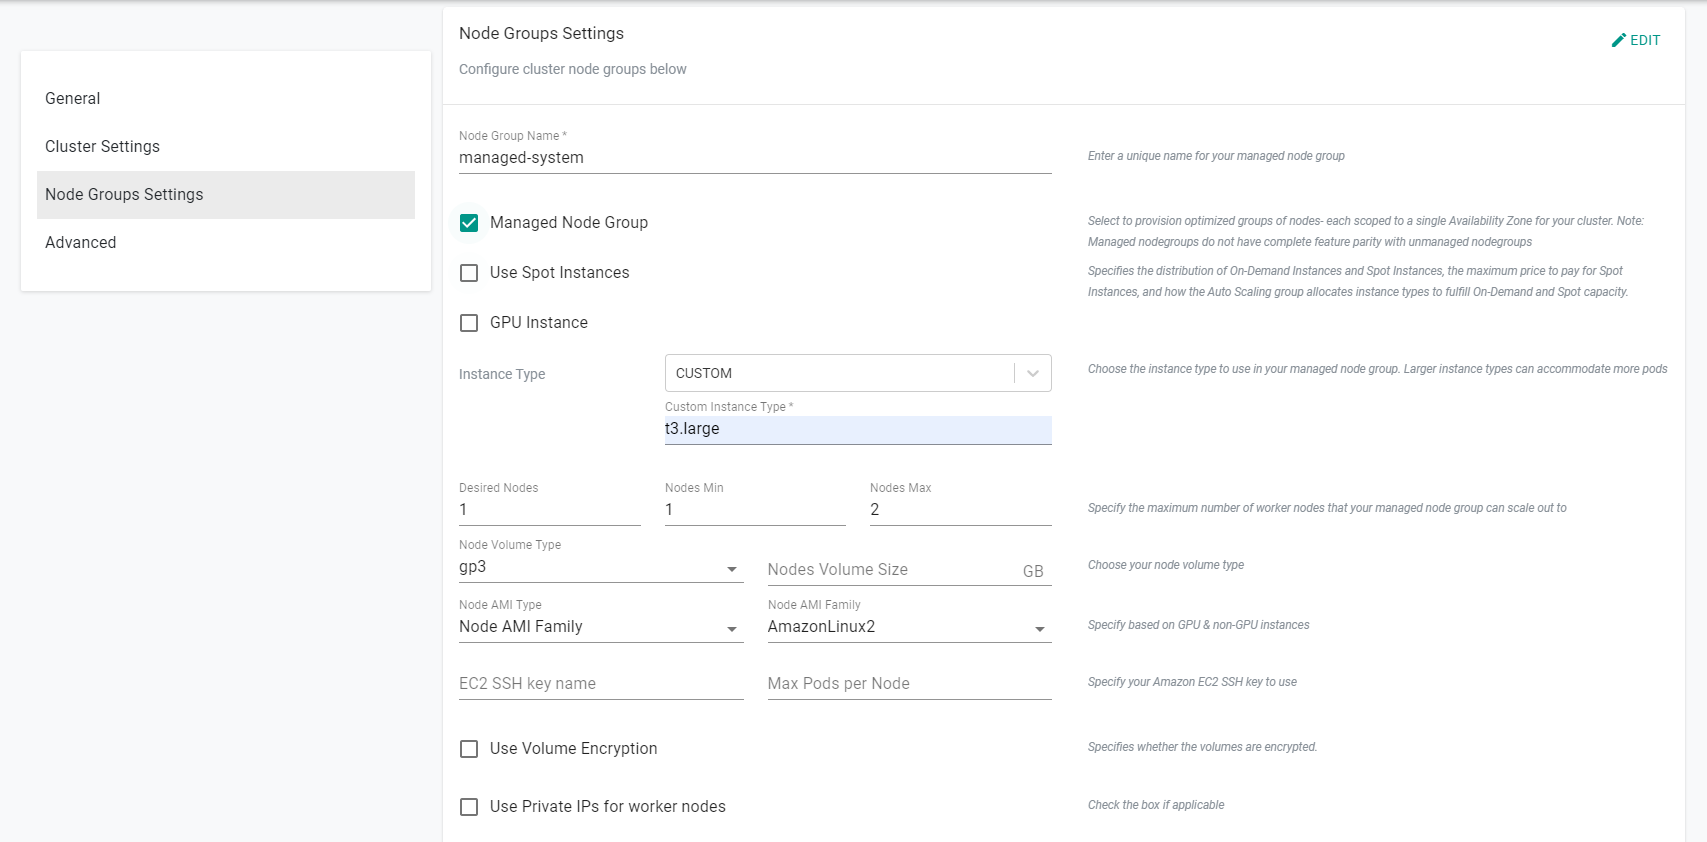
- Click "Edit" on the "Node Group Settings" section
- Enter a node group name for the system resources node group
- Select "Managed Node Group"
- Select "Custom" for "Instance Type"
- Enter "t3.large" for the "Custom Instance Type"
- Set the "Desired Nodes" to "1"
- Set the "Nodes Min" to "1"
- Click "Add Key-Value Label" in the "Labels" subsection
- Enter "nodes" for the Key
- Enter "system" for the Value

- Click "Add Taint" in the "Taints" subsection
- Click "Create Key-Value-Effect Taint"
- Enter "components" for the Key
- Enter "system" for the Value
- Select "NoSchedule" for the Effect
- Click "Save"

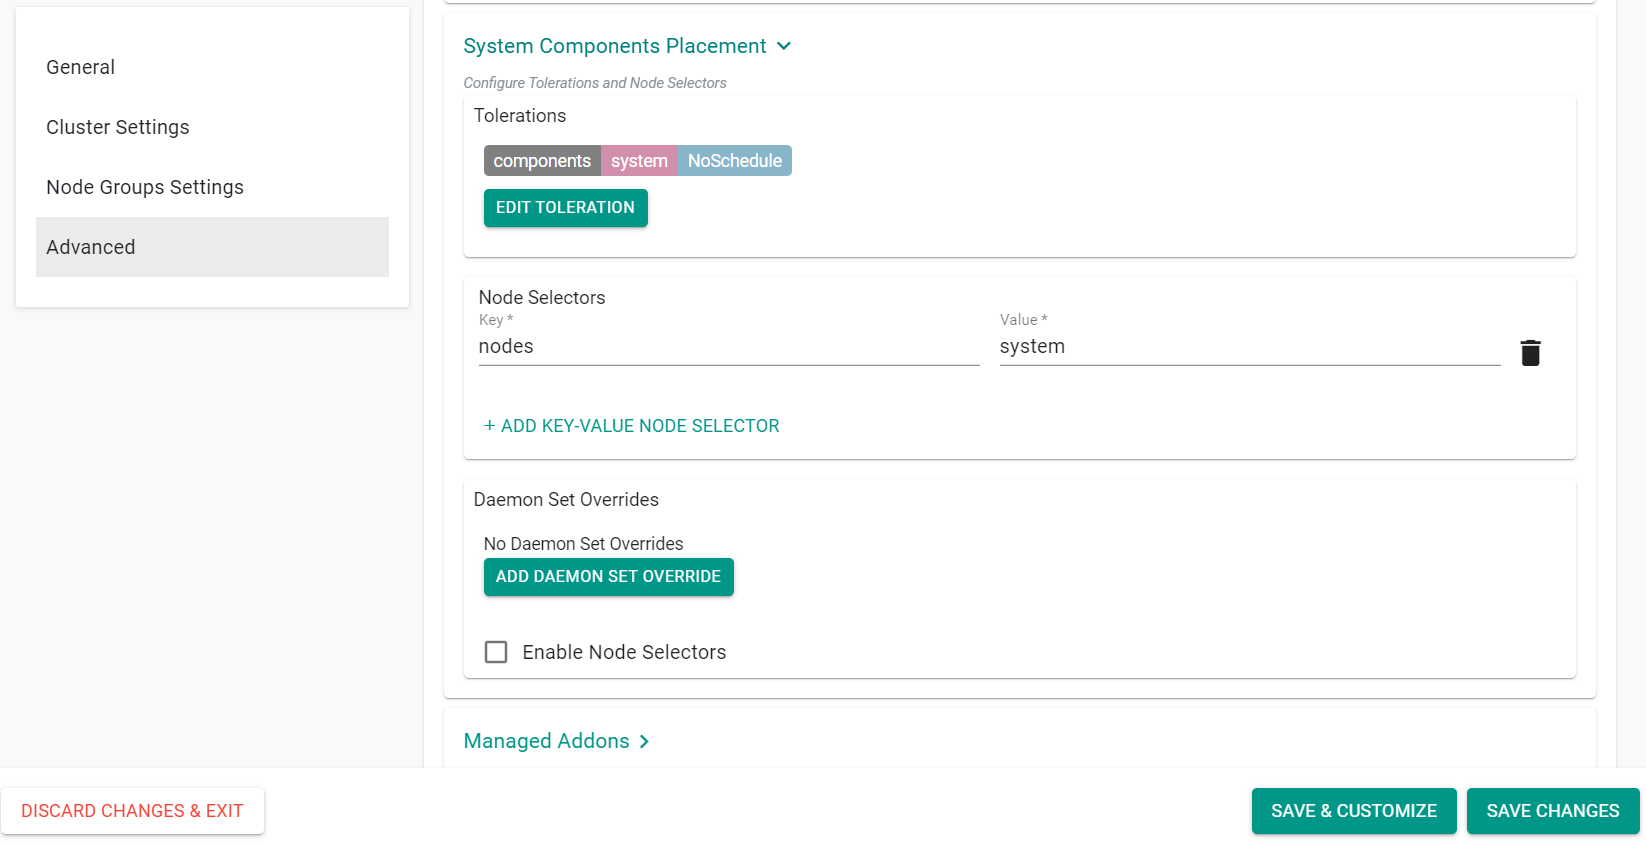
- Expand the "System Components Placement" section
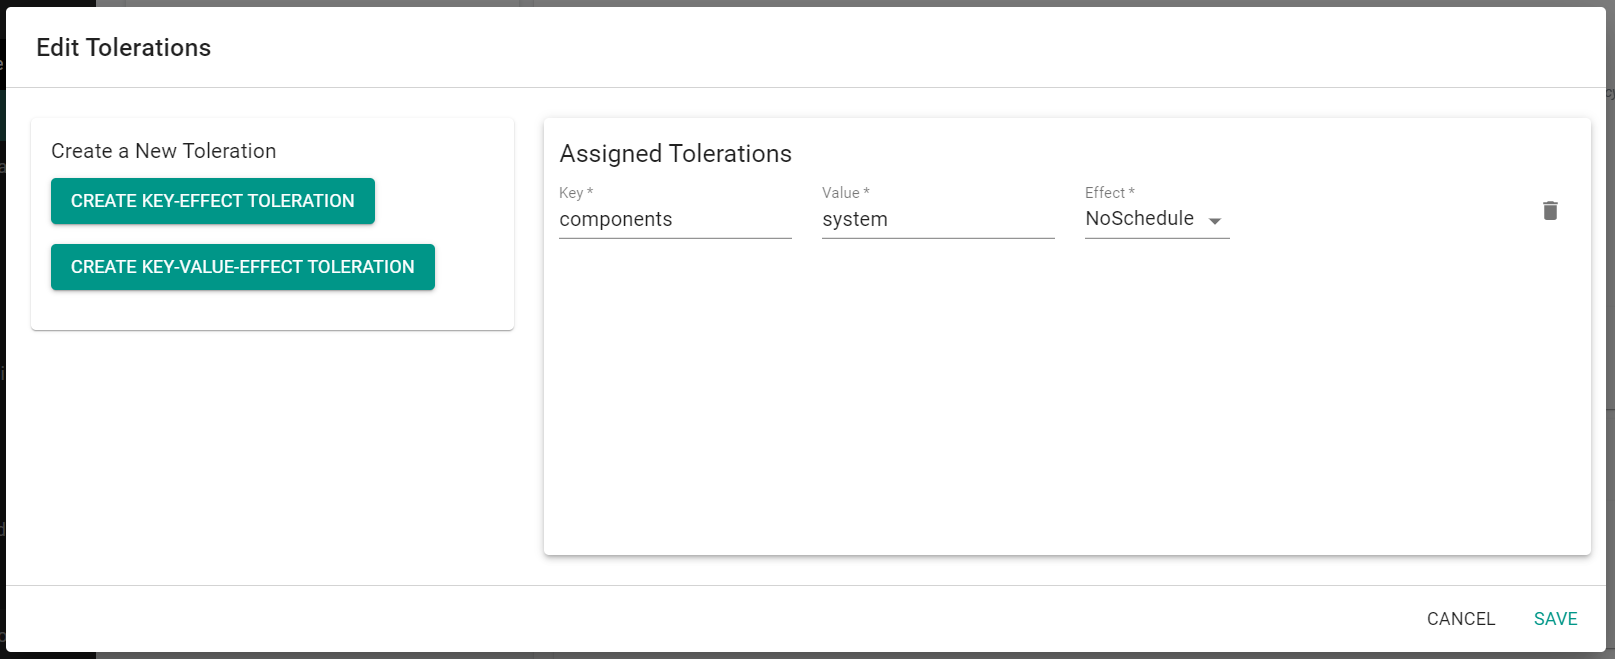
- Click "Add Toleration"
- Click "Create Key-Value-Effect Toleration"
- Enter "components" for the Key
- Enter "system" for the Value
- Select "NoSchedule" for the Effect
- Click "Save"
- Click "Add Key-Value Node Selector" in the "Node Selectors" subsection
- Enter "nodes" for the Key
- Enter "system" for the Value
- Click "Save Changes"
- Click "Provision"
Step 2: Add Windows Node Group
In this step, we will add a Windows node group to the cluster through the web console.
-
Add the below node group configuration to the "managedNodeGroups" section of the "eks-windows-cluster.yaml" file that was previously saved.
-
Login to the web console
- Navigate to your project
- Select Infrastructure -> Clusters
- Click the Windows cluster name
- Click "Node Groups" tab
You can see the windows node group creating
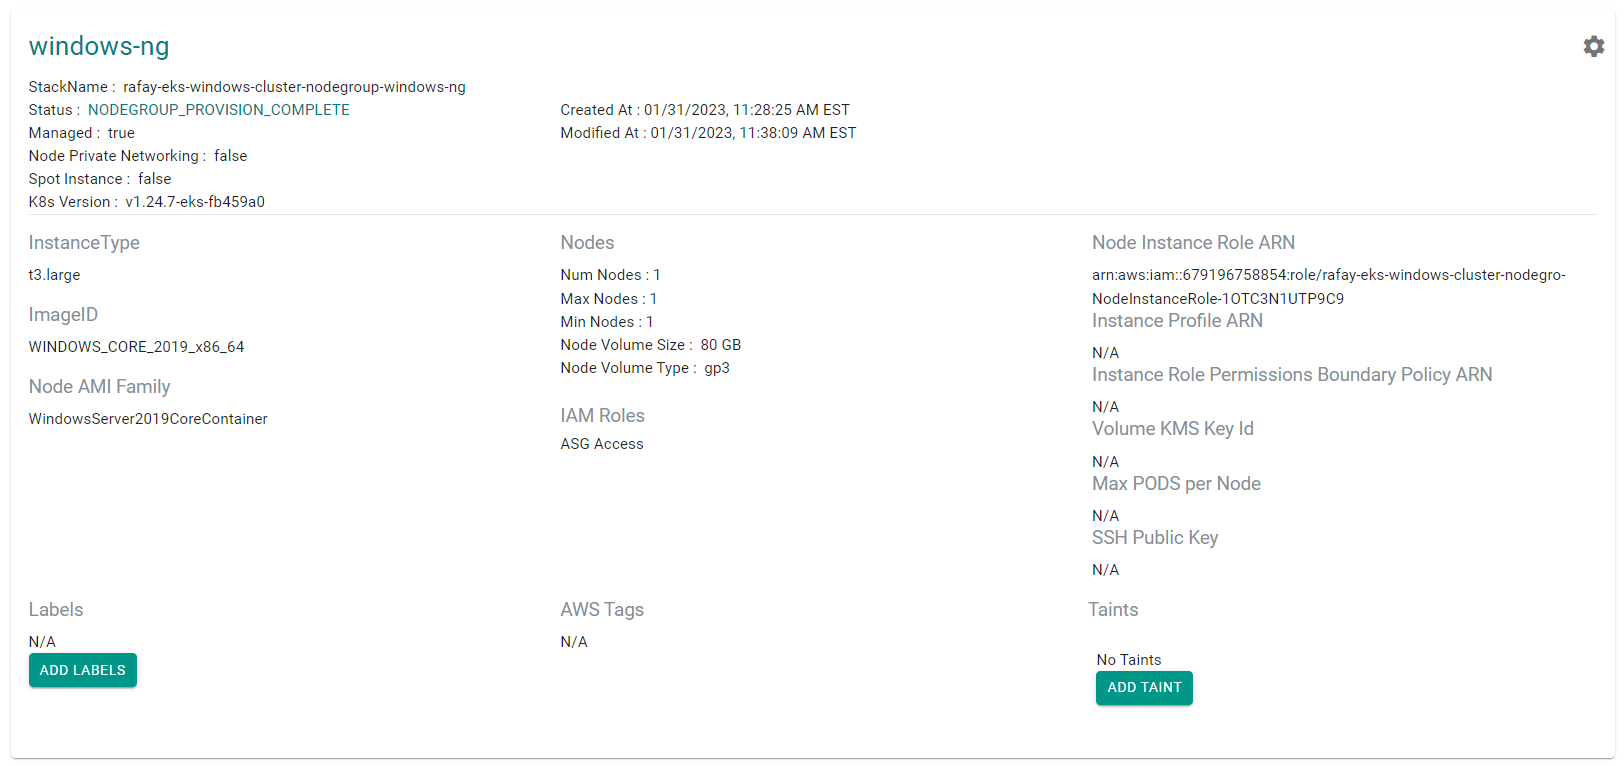
After a few minutes, the Windows node group finishes provisioning. You can see the node group is using the Windows Server AMI.
Step 3: Verify Cluster
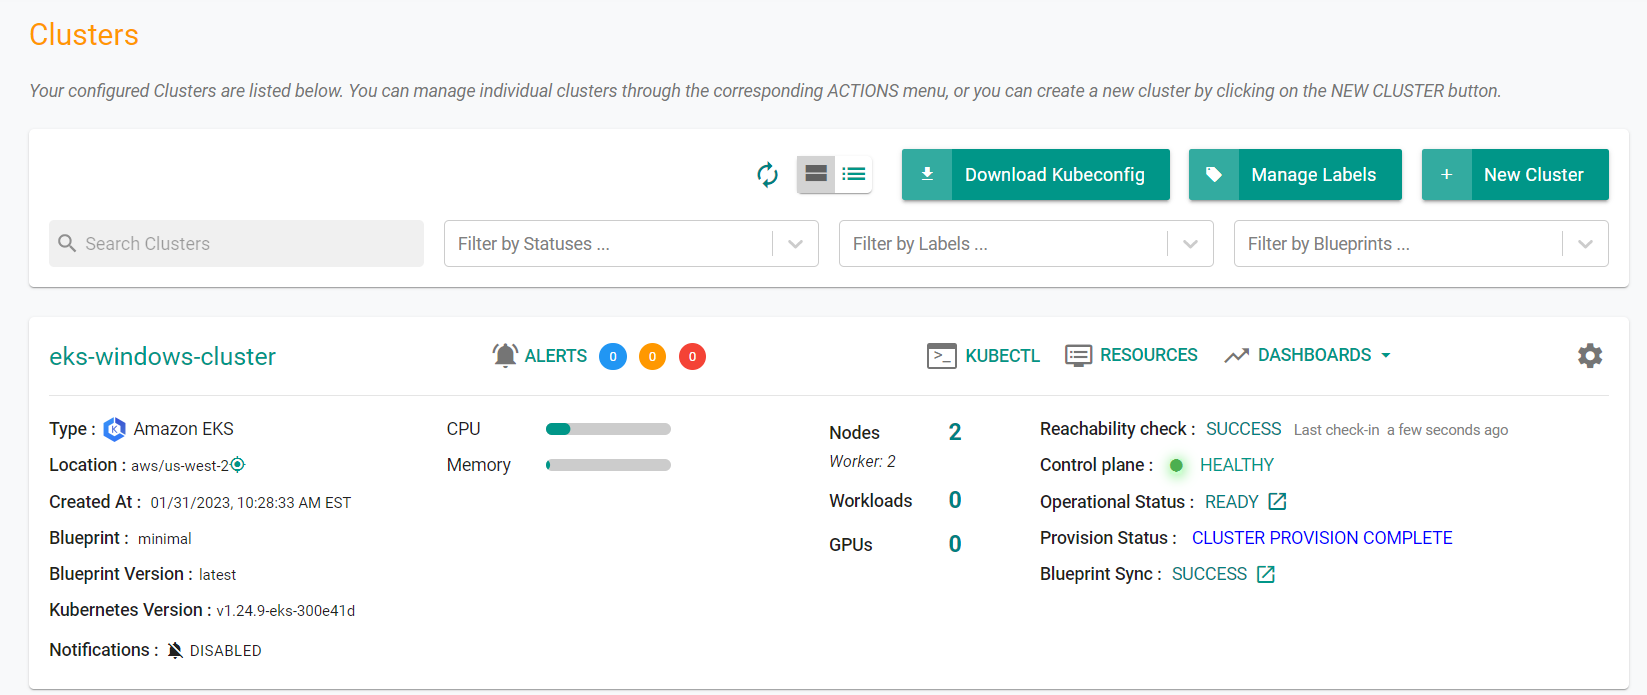
Once provisioning is complete, you should see the cluster in the web console with two nodes.
- Click on the kubectl link and type the following command
kubectl get nodes -o wide
You should see output similar to the following showing the Linux and Windows nodes.
NAME                                           STATUS   ROLES    AGE   VERSION               INTERNAL-IP      EXTERNAL-IP      OS-IMAGE                         KERNEL-VERSION                 CONTAINER-RUNTIME
ip-192-168-58-114.us-west-2.compute.internal   Ready    <none>   80m   v1.24.7-eks-fb459a0   192.168.58.114   35.92.212.8      Amazon Linux 2                   5.4.226-129.415.amzn2.x86_64   containerd://1.6.6
ip-192-168-80-118.us-west-2.compute.internal   Ready    <none>   30m   v1.24.7-eks-fb459a0   192.168.80.118   44.234.144.188   Windows Server 2019 Datacenter   10.0.17763.3887                containerd://1.6.6
Now we will verify the system resources are running on the on-demand Linux node group.
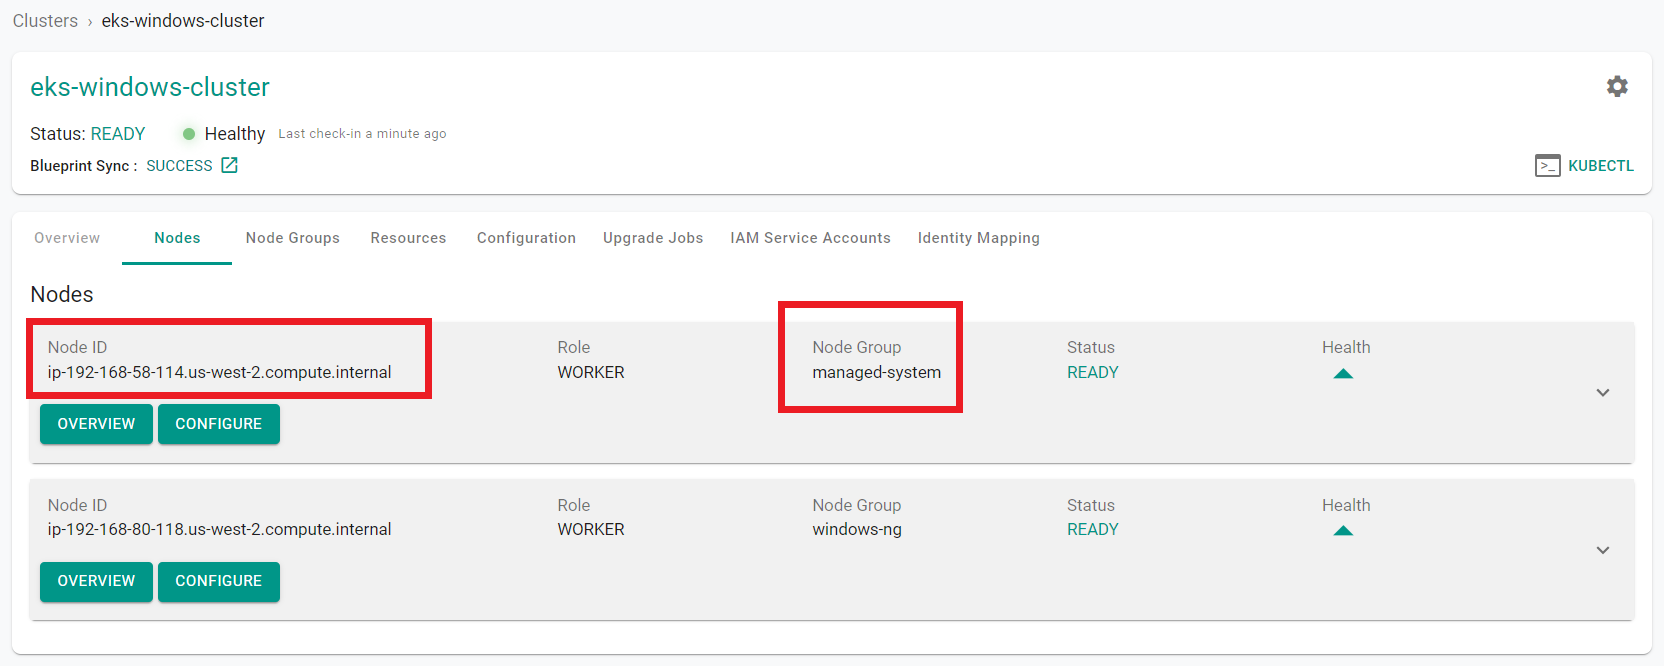
- Click "Nodes" in the tree at the top of the page to return to the nodes tab
- Locate the "Node ID" of the node in the "managed-system" node group
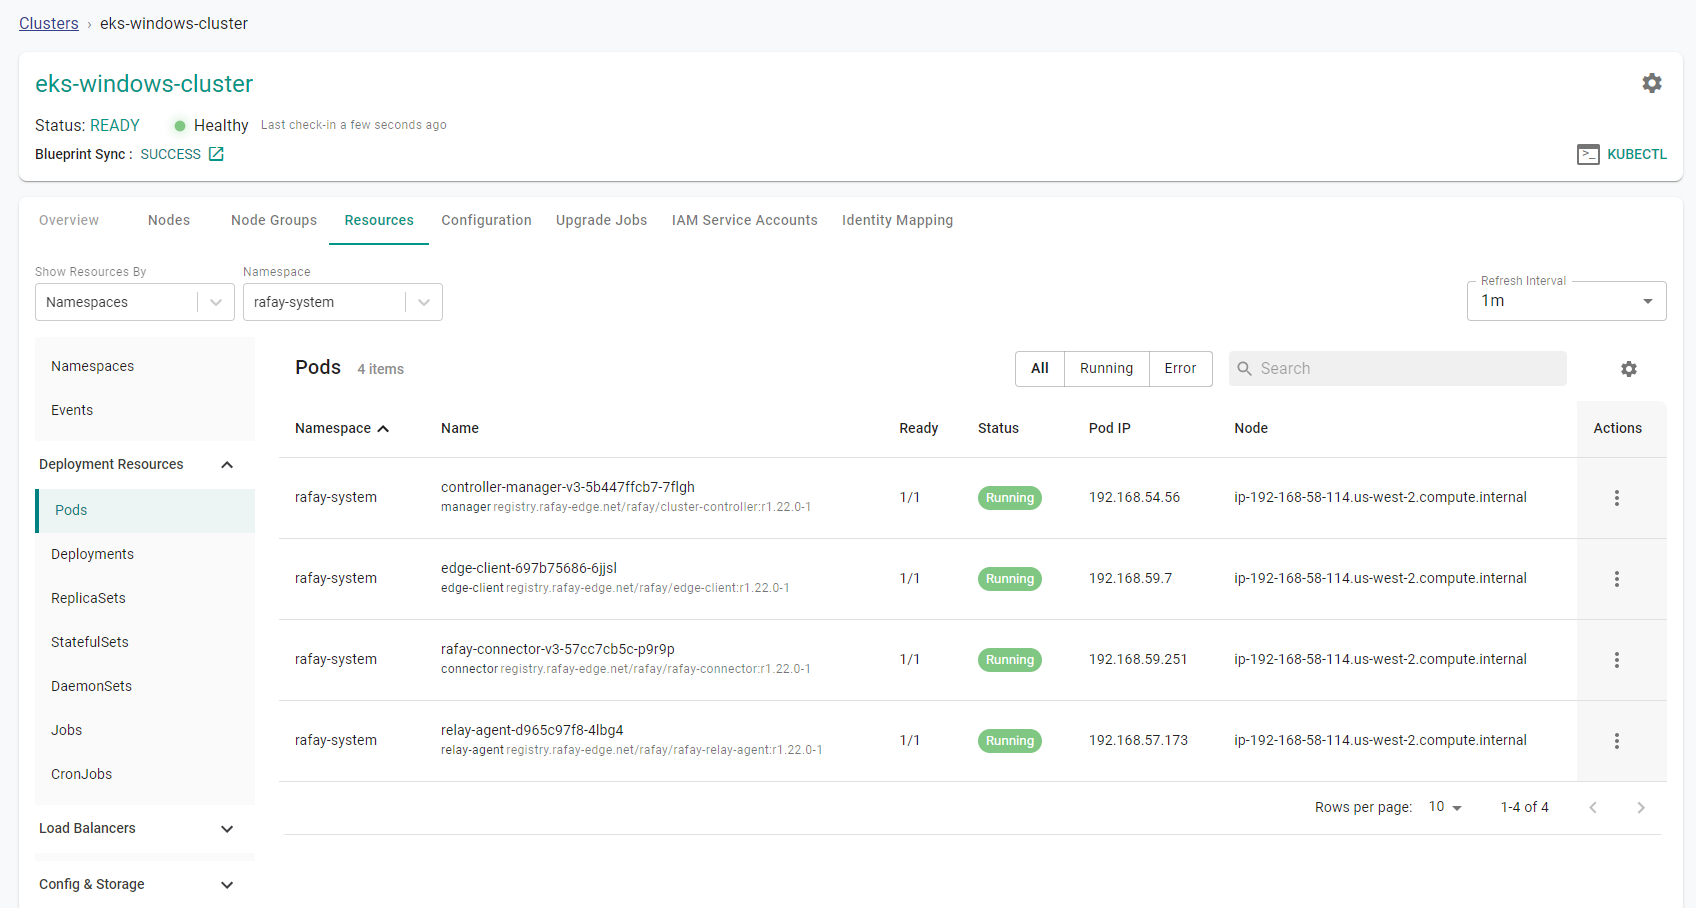
- Click on the "Resources" tab
- Click on "Pods" in the left side window
- Select "rafay-system" from the namespace drop down menu
- Click the gear icon on the right side of the page and select "Node"
You will see that all of the system components are running on the "managed-system" node that was previously identified.
Step 4: Create Namespace
In this step, we will create a namespace using the web console. The namespace will be used to deploy workloads in future steps.
- Navigate to the project in your Org where the cluster is located.
- Select Infrastructure -> Namespaces
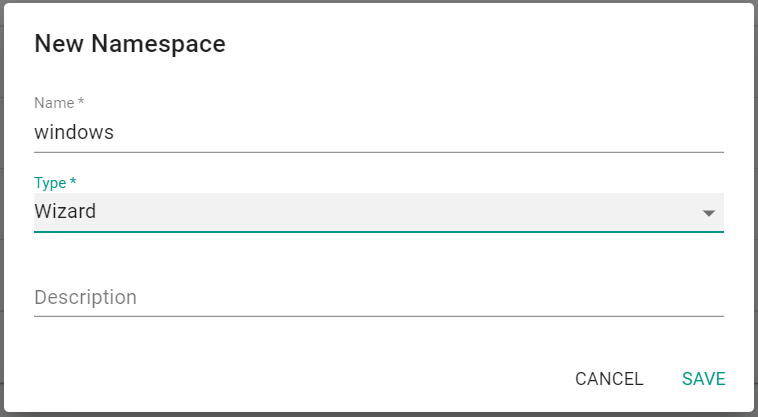
- Click "New Namespace"
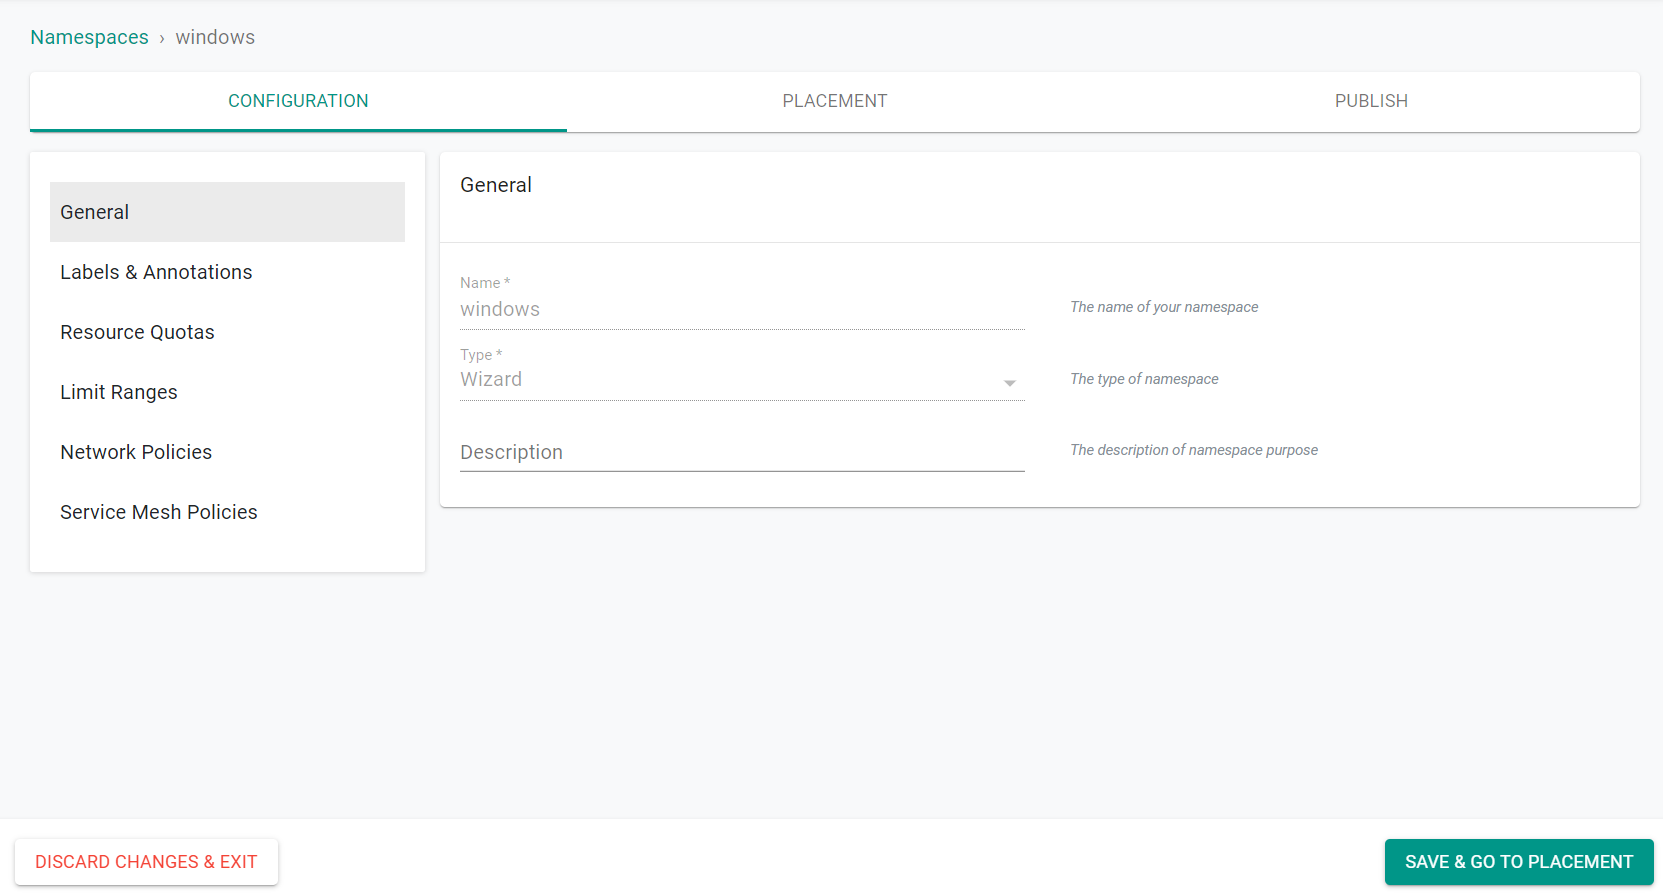
- Enter "windows" for the name
- Select "Wizard" for the Type
- Click "Save"
- Click "Save & Go To Placement"
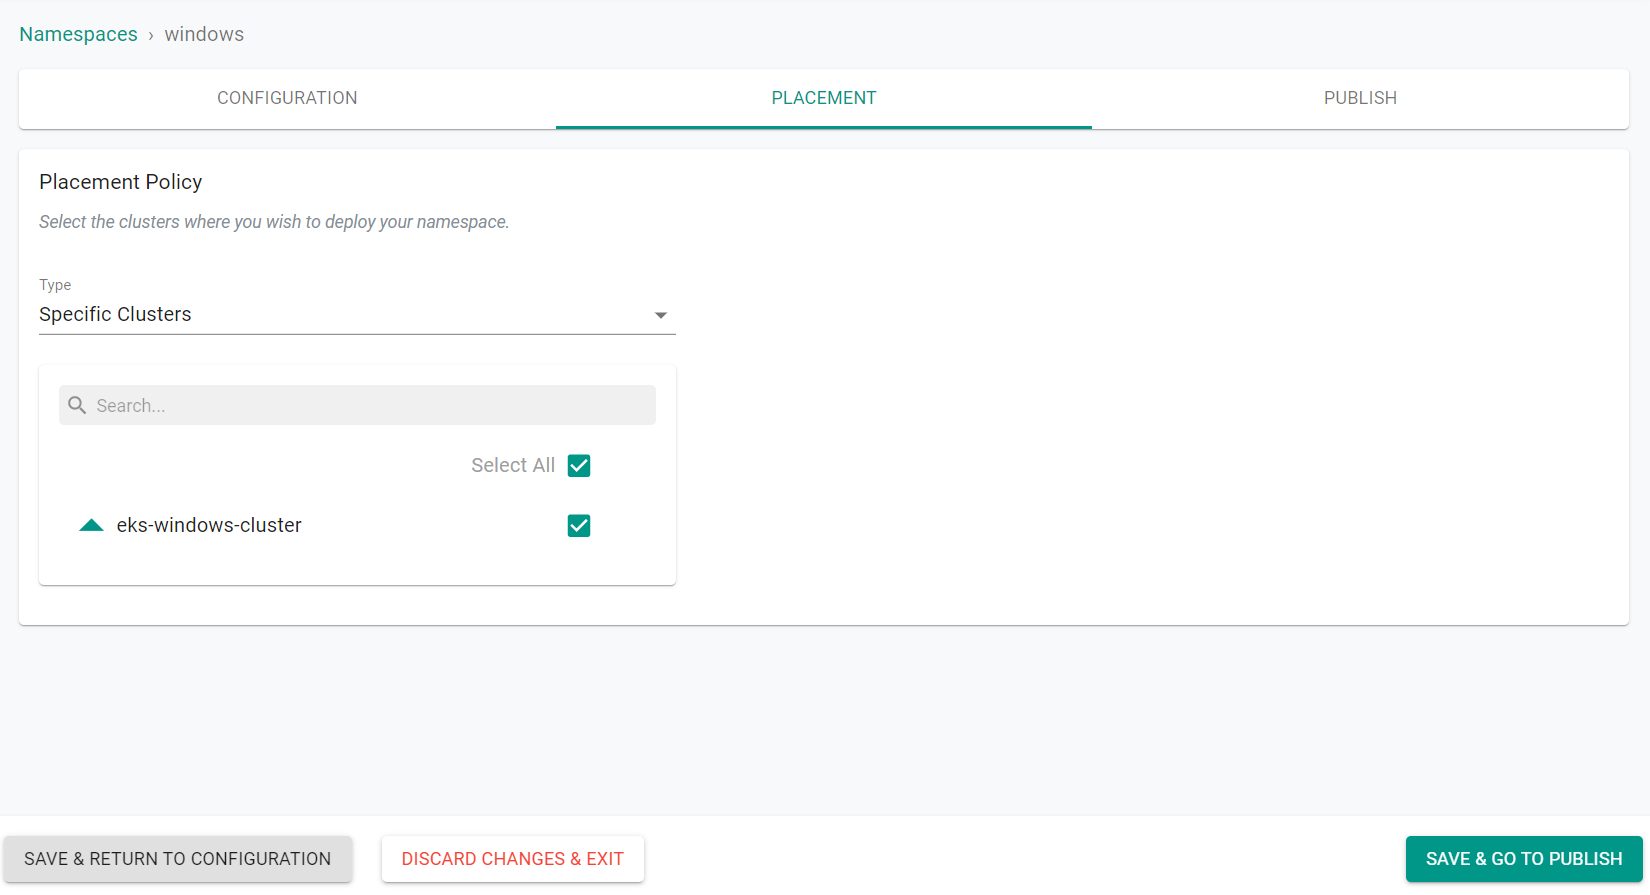
- Select the cluster to create the namespace on
- Click "Save & Go To Publish"
- Click "Publish"
The namespace is now published on the cluster.
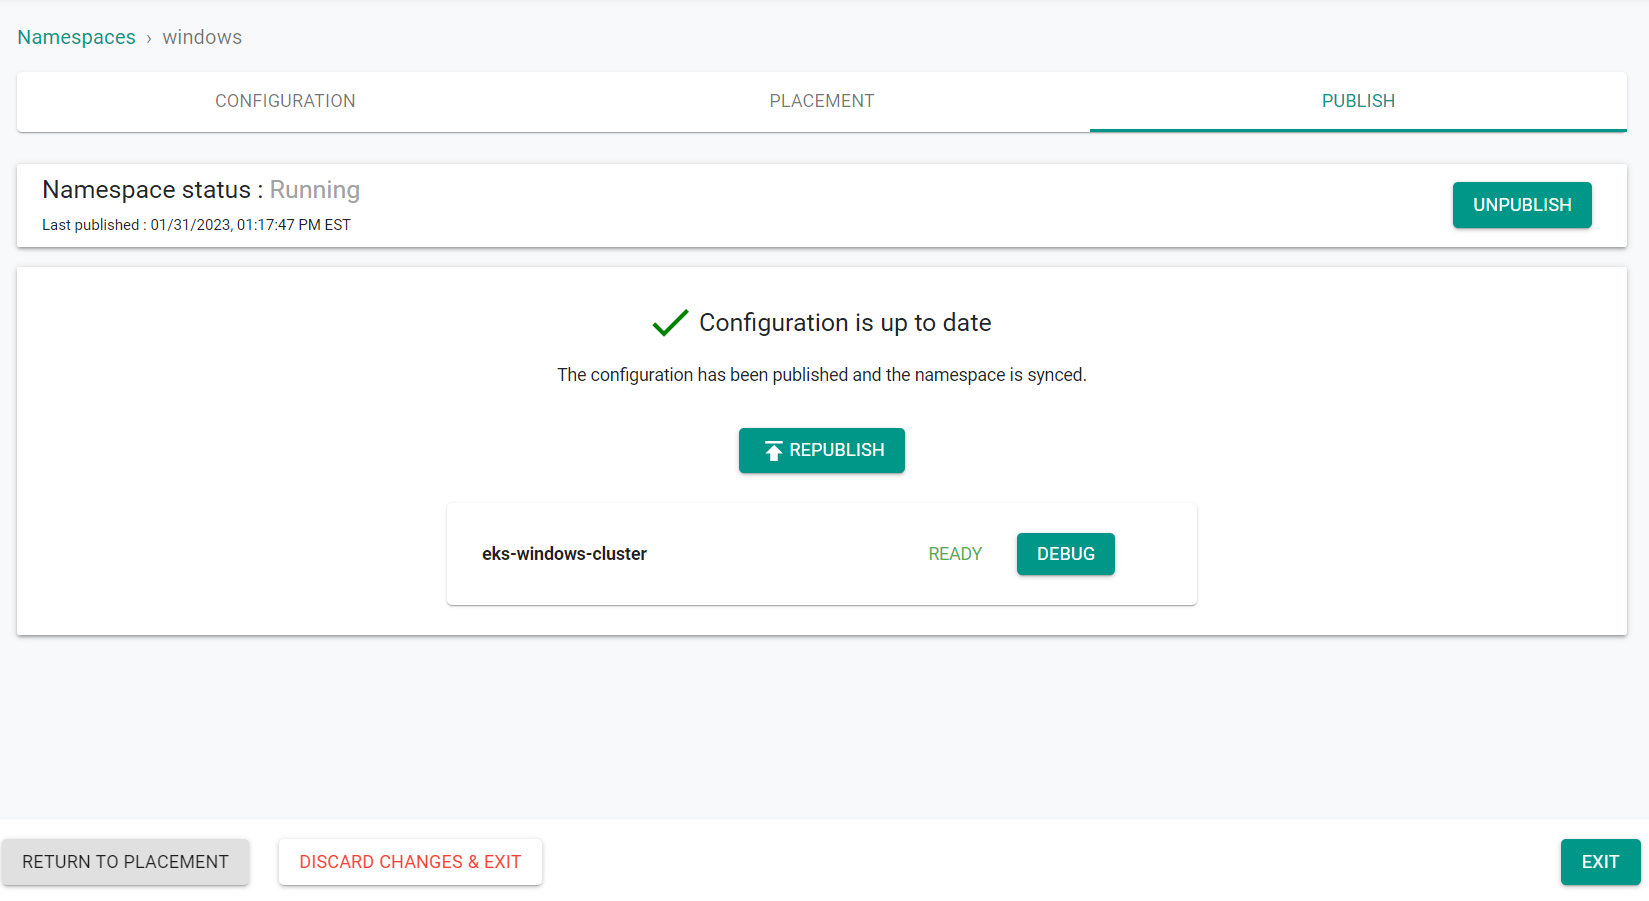
- Click "Exit"
Step 5: Enable Windows Support
In this step, we will create a YAML based workload and publish the workload to the cluster. The workload will create a configmap to enable Windows Support on the cluster.
By default, the amazon-vpc-cni doesn't have Windows support enabled, and to deploy Windows pods so it can have its own VPC IP, we need to enable it in the EKS control plane. To do this, we will create a configmap in the cluster.
- Navigate to the project in your Org where the cluster is located.
- Select Applications -> Workloads
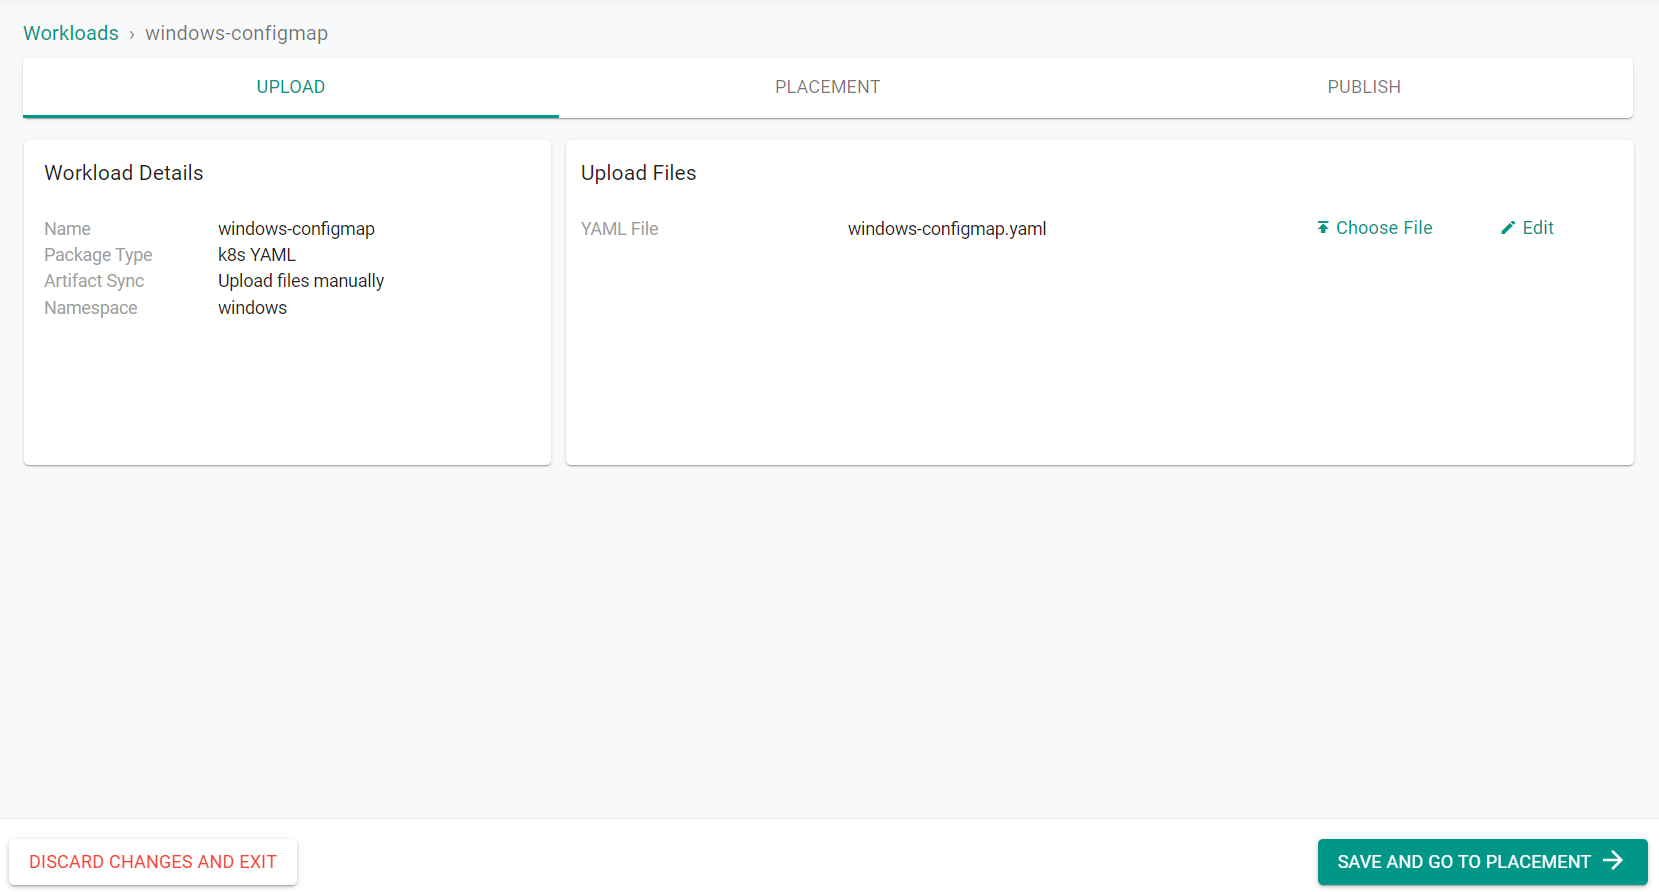
- Click New Workload -> Create New Workload
- Enter a Name for the Workload
- Select "k8s YAML" for the Package Type
- Select "Upload files manually"
- Select the namespace that was previously created
- Click "Continue"

- Save the following YAML to a file
apiVersion: v1
kind: ConfigMap
metadata:
  name: amazon-vpc-cni
  namespace: kube-system
data:
  enable-windows-ipam: "true"
- Click "Choose File" to select the saved YAML file
- Click "Save and Go To Placement"
- Select the cluster where the namespace was created
- Click "Save and Go To Publish"

- Click "Publish"
The YAML workload is now published on the cluster.
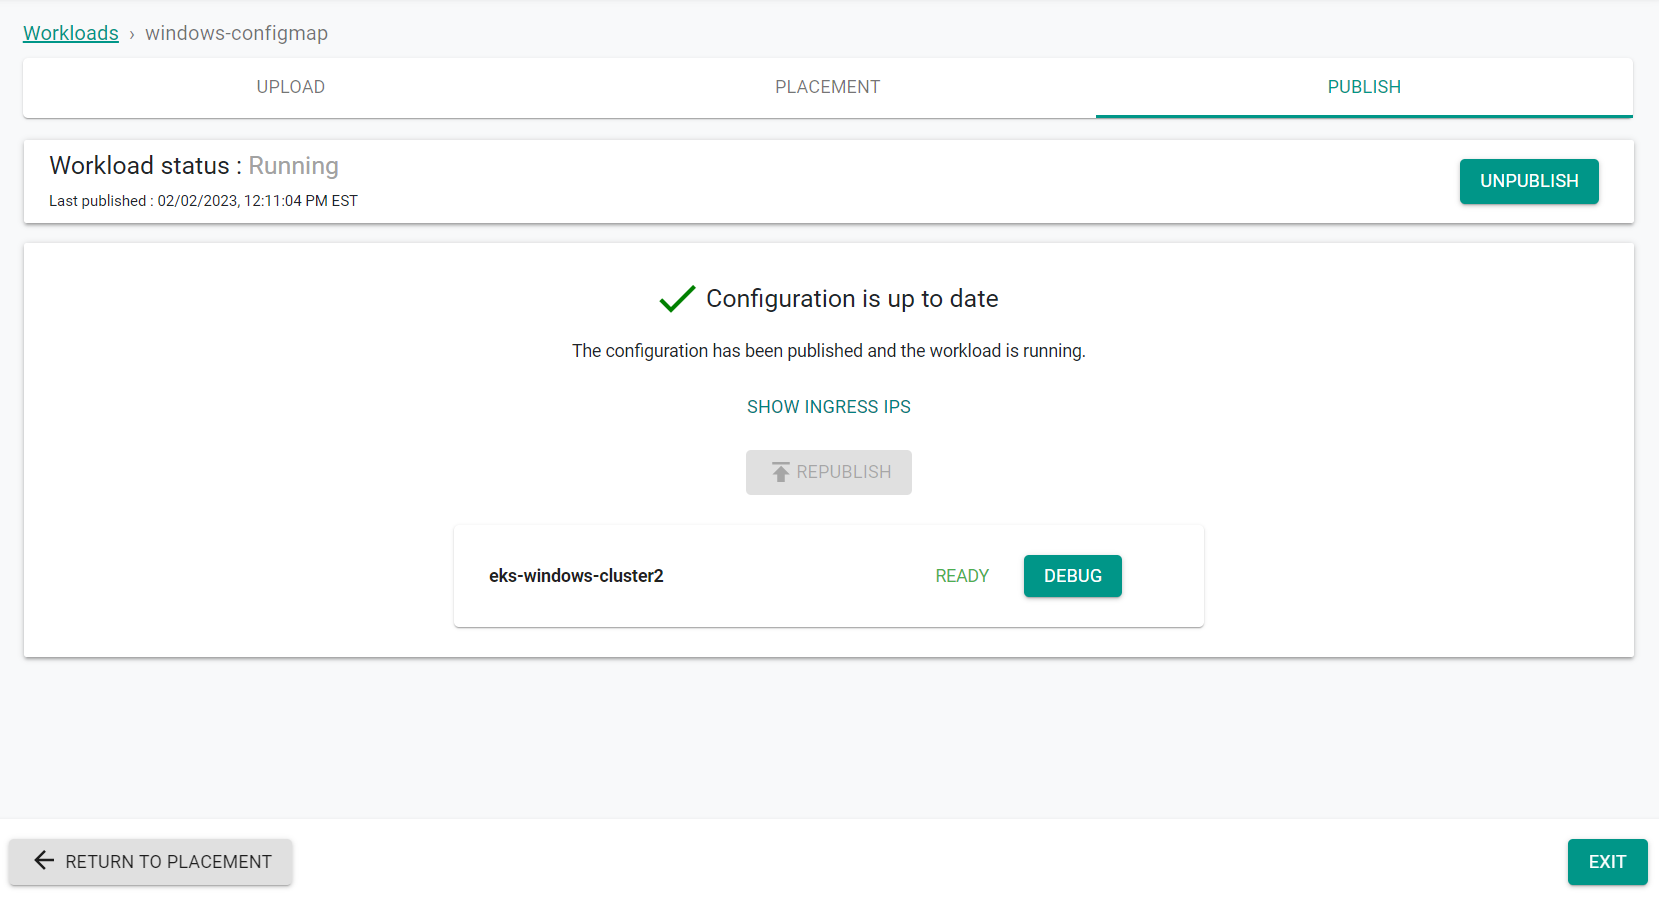
-
Click "Exit"
-
Click on the kubectl link for the cluster and type the following command
kubectl get configmap -n kube-system
You should see output similar to the following showing the "amazon-vpc-cni "
NAME                                 DATA   AGE
amazon-vpc-cni                       1      2m4s
aws-auth                             1      141m
coredns                              1      147m
cp-vpc-resource-controller           0      147m
eks-certificates-controller          0      147m
extension-apiserver-authentication   6      147m
kube-proxy                           1      147m
kube-proxy-config                    1      147m
kube-root-ca.crt                     1      147m
Step 1: Provision Cluster
In this step, we will create the declarative cluster specification file and use the RCTL CLI to provision the cluster from the specification file. We will first deploy the cluster with a single node group for system level resources. We will then add the Windows node group to the cluster.
- Save the below specification file to your computer as "eks-windows-cluster.yaml". Note, the highlighted sections in the spec will need to be updated to match your environment.
apiVersion: infra.k8smgmt.io/v3
kind: Cluster
metadata:
  # The name of the cluster
  name: eks-windows-cluster
  # The name of the project the cluster will be created in
  project: defaultproject
spec:
  blueprintConfig:
    # The name of the blueprint the cluster will use
    name: minimal
    # The version of the blueprint the cluster will use
    version: latest
  # The name of the cloud credential that will be used to create the cluster
  cloudCredentials: aws-cloud-credential
  config:
    # The EKS addons that will be applied to the cluster
    addons:
    - name: kube-proxy
      version: latest
    - name: vpc-cni
      version: latest
    - name: coredns
      version: latest
    managedNodeGroups:
      # The AWS AMI family type the nodes will use
    - amiFamily: AmazonLinux2
      # The desired number of nodes that can run in the node group
      desiredCapacity: 1
      iam:
        withAddonPolicies:
          # Enables the IAM policy for cluster autoscaler
          autoScaler: true
      # The AWS EC2 instance type that will be used for the nodes
      instanceType: t3.large
      # The labels applied to the nodes in the node group
      labels:
        nodes: system
      # The maximum number of nodes that can run in the node group
      maxSize: 2
      # The minimum number of nodes that can run in the node group
      minSize: 1
      # The name of the node group that will be created in AWS
      name: managed-system
      # Apply taints to the node group to allow only system resources to be scheduled on these nodes
      taints:
      - effect: NoSchedule
        key: components
        value: system
    metadata:
      # The name of the cluster
      name: eks-windows-cluster
      # The AWS region the cluster will be created in
      region: us-west-2
      # The Kubernetes version that will be installed on the cluster
      version: latest
    vpc:
      # AutoAllocateIPV6 requests an IPv6 CIDR block with /56 prefix for the VPC
      autoAllocateIPv6: false
      clusterEndpoints:
        # Enables private access to the Kubernetes API server endpoints
        privateAccess: true
        # Enables public access to the Kubernetes API server endpoints
        publicAccess: false
      # The CIDR that will be used  by the cluster VPC
      cidr: 192.168.0.0/16
  # Configure the scheduler to only place system resources on the managed-system node group
  systemComponentsPlacement:
    nodeSelector:
      nodes: system
    tolerations:
    - effect: NoSchedule
      key: components
      operator: Equal
      value: system
  type: aws-eks
Update the following sections of the specification file with details to match your environment
-
Update the name section with the name of the cluster to be created and the project section with the name of the Rafay project you previously created
name: eks-windows-cluster project: defaultproject -
Update the cloudCredentials section with the name of the AWS cloud credential that was previously created
cloudCredentials: aws-cloud-credential -
Update the name and region sections with the cluster name and the AWS region where the cluster will be located
metadata: name: eks-windows-cluster region: us-west-2 -
Save the updates that were made to the file
- Open Terminal (on macOS/Linux) or Command Prompt (Windows) and navigate to the folder where you saved the file
-
Execute the following command to provision the cluster from the specification file previously saved
./rctl apply -f eks-windows-cluster.yaml -
Login to the web console
- Navigate to your project
- Select Infrastructure -> Clusters
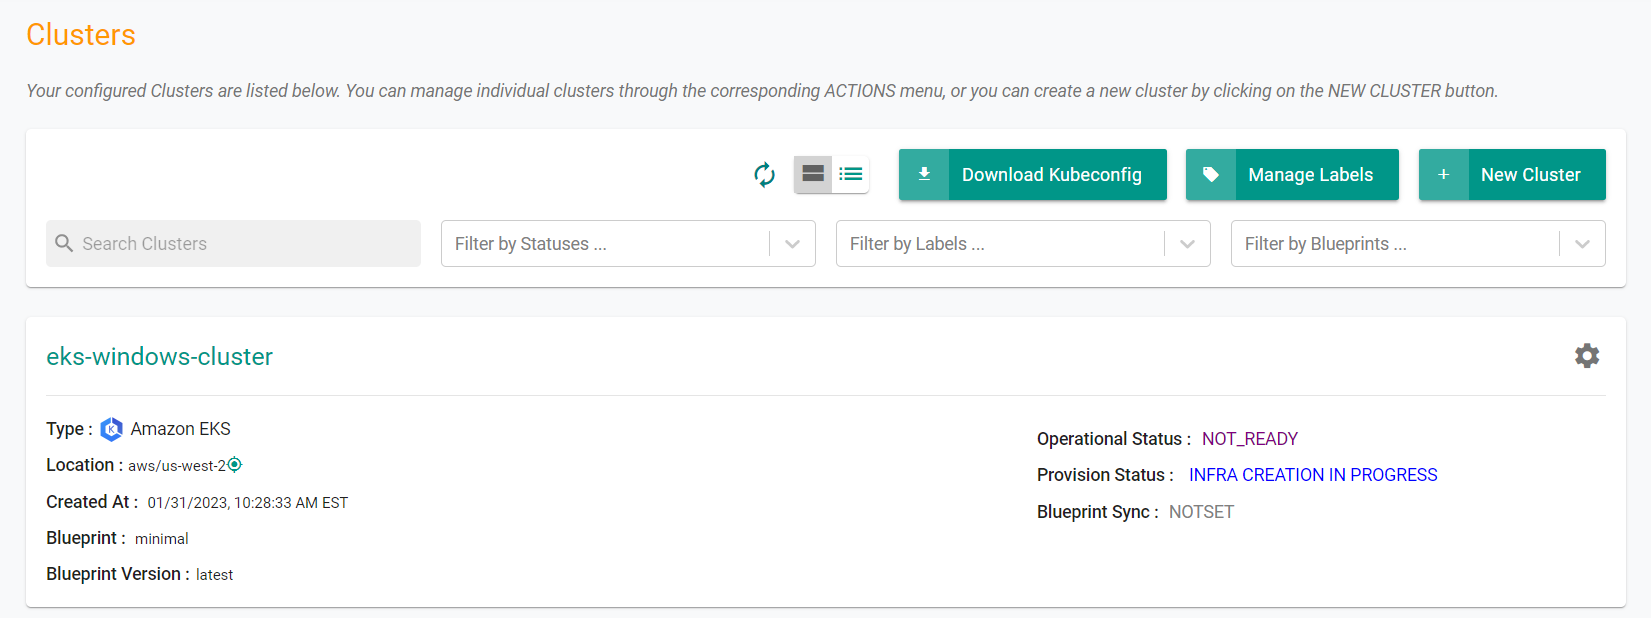
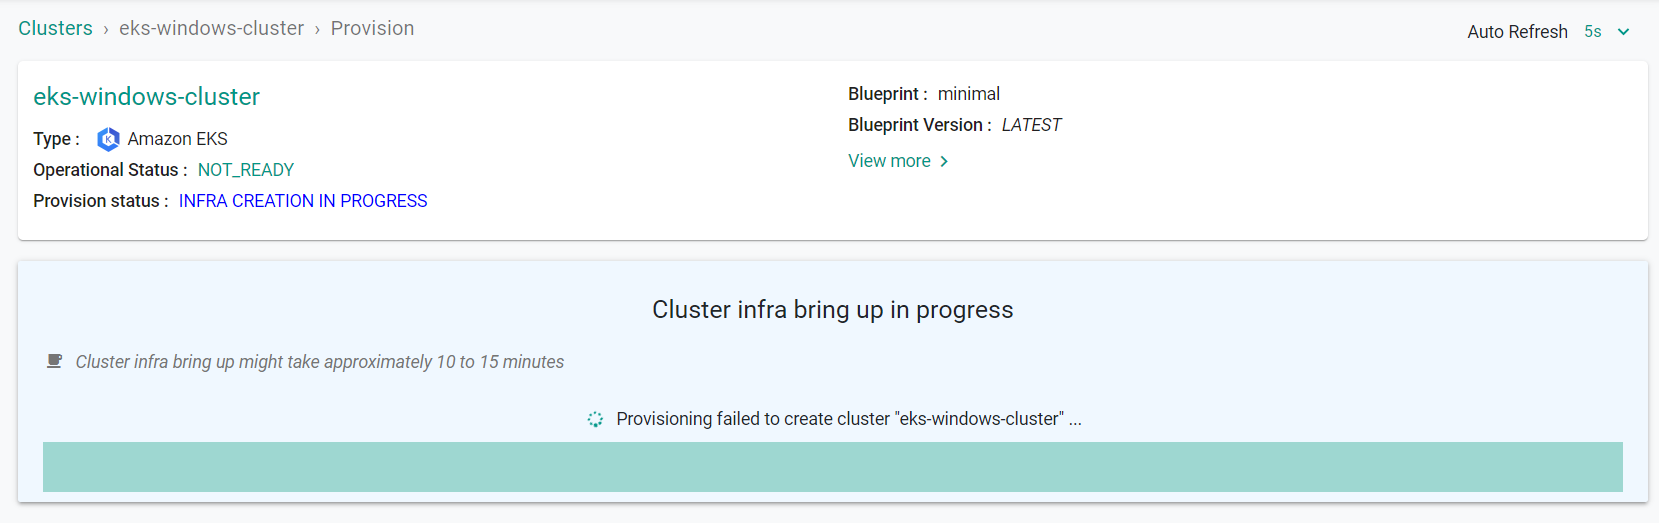
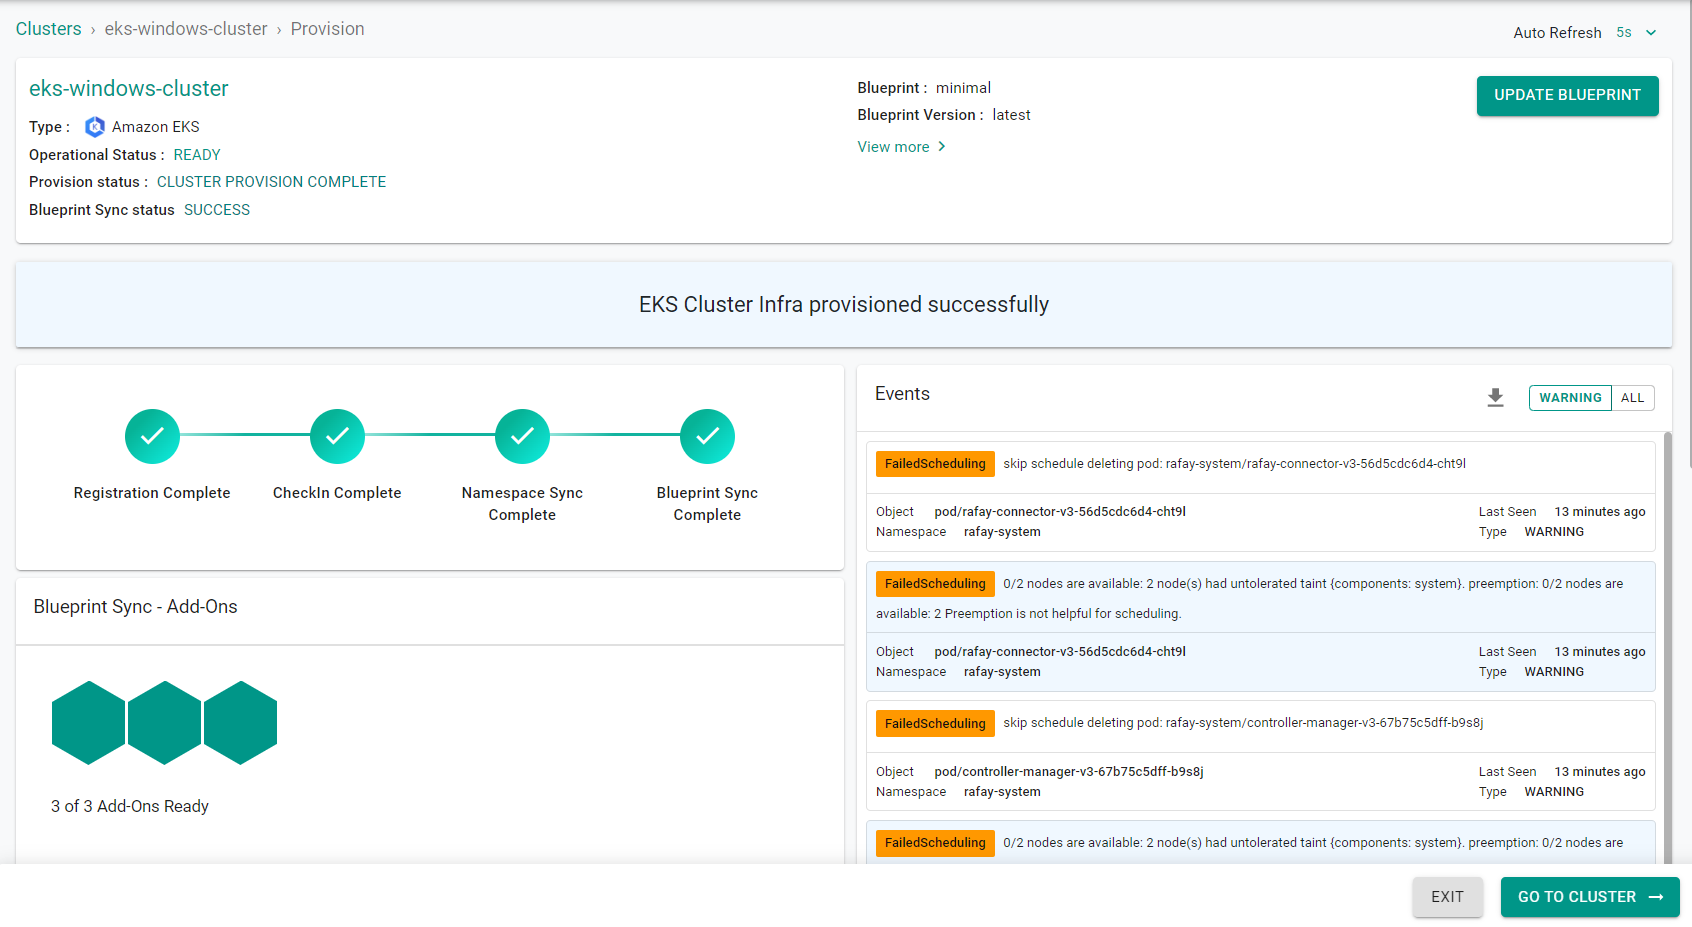
- Click on the cluster name to monitor progress
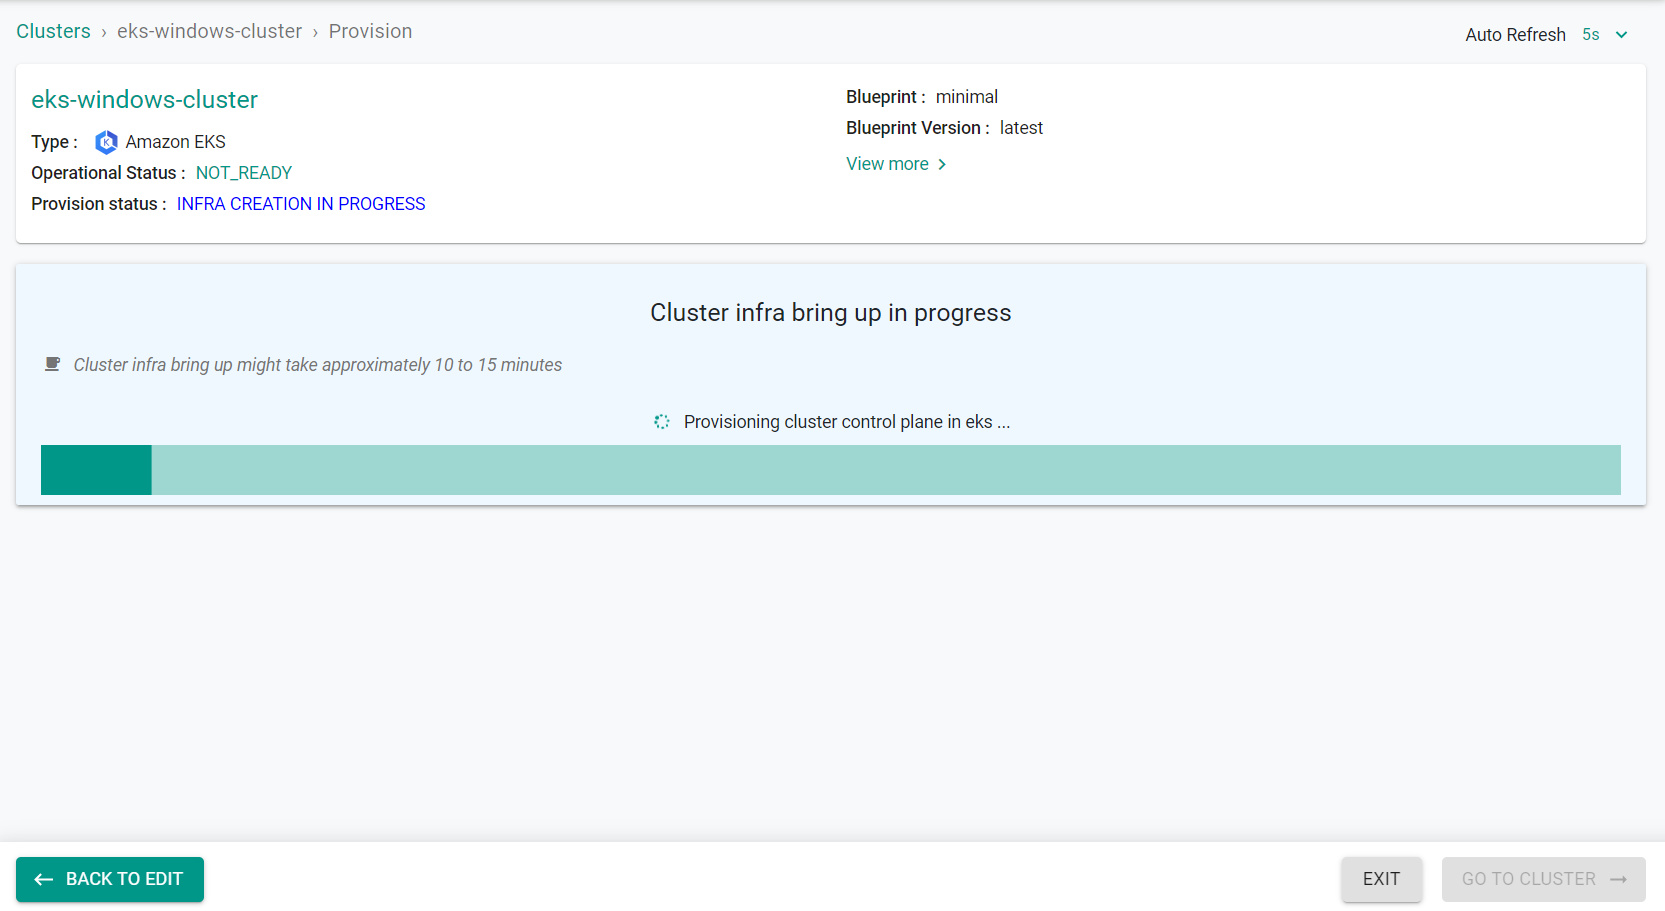
Provisioning the infrastructure will take approximately 45 minutes to complete. The final step in the process is the blueprint sync.
Step 2: Add Windows Node Group
In this step, we will add a Windows node group to the cluster by updating the cluster specification file.
- Add the below node group configuration to the "managedNodeGroups" section of the "eks-windows-cluster.yaml" file that was previously saved.
  - amiFamily: WindowsServer2019CoreContainer
    desiredCapacity: 1
    iam:
      withAddonPolicies:
        autoScaler: true
    instanceType: t3.large
    maxSize: 1
    minSize: 1
    name: windows-ng
The updated file should look like the following specification file.
apiVersion: infra.k8smgmt.io/v3
kind: Cluster
metadata:
  name: eks-windows-cluster
  project: defaultproject
spec:
  blueprintConfig:
    name: minimal
    version: latest
  cloudCredentials: aws-cloud-credential
  config:
    addons:
    - name: kube-proxy
      version: latest
    - name: vpc-cni
      version: latest
    - name: coredns
      version: latest
    managedNodeGroups:
    - amiFamily: AmazonLinux2
      desiredCapacity: 1
      iam:
        withAddonPolicies:
          autoScaler: true
      instanceType: t3.large
      labels:
        nodes: system
      maxSize: 2
      minSize: 1
      name: managed-system
      taints:
      - effect: NoSchedule
        key: components
        value: system
    - amiFamily: WindowsServer2019CoreContainer
      desiredCapacity: 1
      iam:
        withAddonPolicies:
          autoScaler: true
      instanceType: t3.large
      maxSize: 1
      minSize: 1
      name: windows-ng
    metadata:
      name: eks-windows-cluster
      region: us-west-2
      version: latest
    network:
      cni:
        name: aws-cni
    vpc:
      autoAllocateIPv6: false
      clusterEndpoints:
        privateAccess: true
        publicAccess: false
      cidr: 192.168.0.0/16
  systemComponentsPlacement:
    nodeSelector:
      nodes: system
    tolerations:
    - effect: NoSchedule
      key: components
      operator: Equal
      value: system
  type: aws-eks
- Save the updates that were made to the file
- Open Terminal (on macOS/Linux) or Command Prompt (Windows) and navigate to the folder where you saved the file
-
Execute the following command to update the cluster from the specification file previously saved
./rctl apply -f eks-windows-cluster.yaml -
Login to the web console
- Navigate to your project
- Select Infrastructure -> Clusters
- Click the Windows cluster name
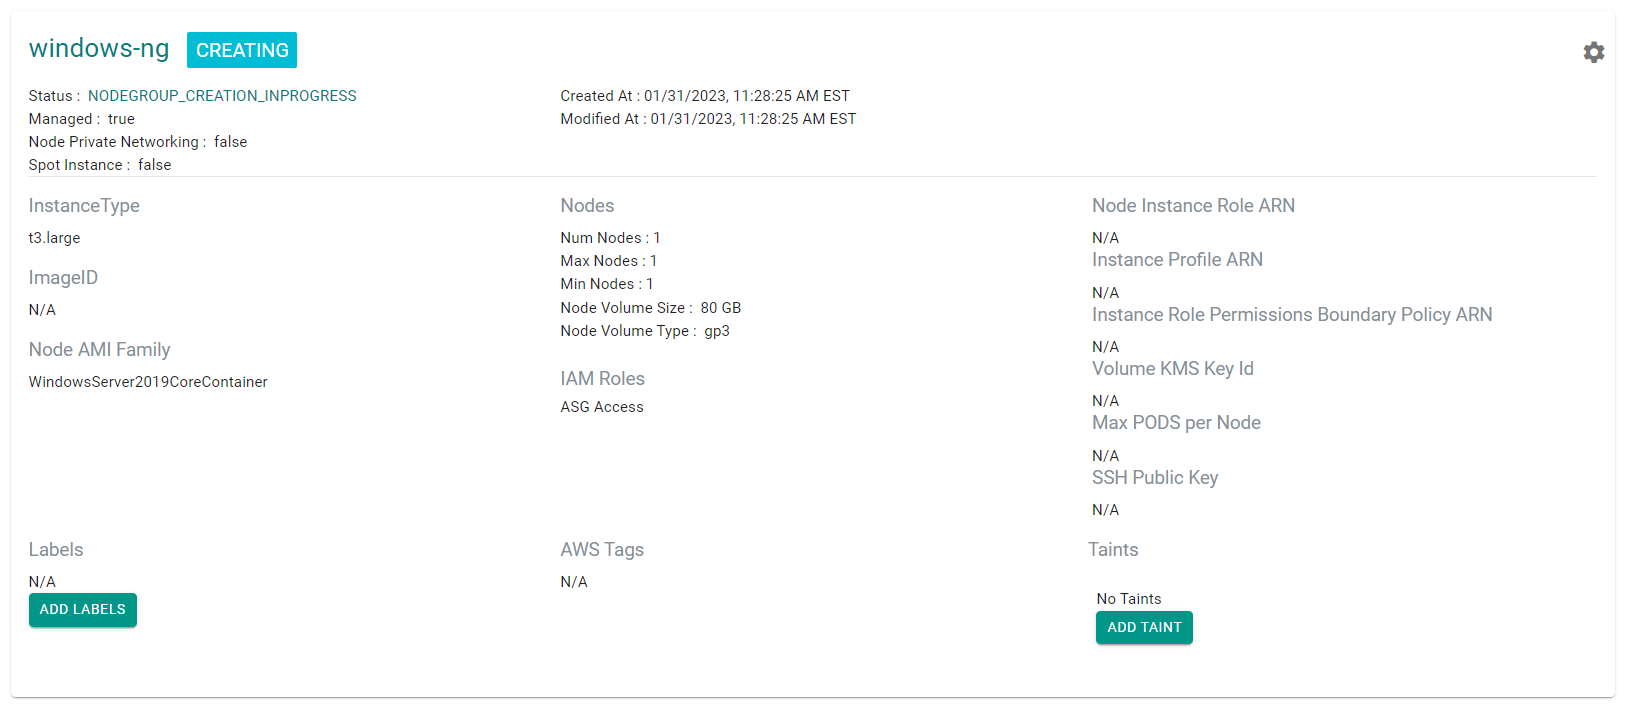
- Click "Node Groups" tab
You can see the windows node group creating
After a few minutes, the Windows node group finishes provisioning. You can see the node group is using the Windows Server AMI.
Step 3: Verify Cluster
Once provisioning is complete, you should see the cluster in the web console with two nodes.
- Click on the kubectl link and type the following command
kubectl get nodes -o wide
You should see output similar to the following showing the Linux and Windows nodes.
NAME                                           STATUS   ROLES    AGE   VERSION               INTERNAL-IP      EXTERNAL-IP      OS-IMAGE                         KERNEL-VERSION                 CONTAINER-RUNTIME
ip-192-168-58-114.us-west-2.compute.internal   Ready    <none>   80m   v1.24.7-eks-fb459a0   192.168.58.114   35.92.212.8      Amazon Linux 2                   5.4.226-129.415.amzn2.x86_64   containerd://1.6.6
ip-192-168-80-118.us-west-2.compute.internal   Ready    <none>   30m   v1.24.7-eks-fb459a0   192.168.80.118   44.234.144.188   Windows Server 2019 Datacenter   10.0.17763.3887                containerd://1.6.6
Now we will verify the system resources are running on the on-demand Linux node group.
- Click "Nodes" in the tree at the top of the page to return to the nodes tab
- Locate the "Node ID" of the node in the "managed-system" node group
- Click on the "Resources" tab
- Click on "Pods" in the left side window
- Select "rafay-system" from the namespace drop down menu
- Click the gear icon on the right side of the page and select "Node"
You will see that all of the system components are running on the "managed-system" node that was previously identified.
Step 4: Create Namespace
In this step, we will create a namespace using the RCTL CLI. The namespace will be used to deploy workloads in future steps.
- Save the below specification file to your computer as "namespace.yaml". Note, the highlighted sections in the spec will need to be updated to match your environment.
kind: ManagedNamespace
apiVersion: config.rafay.dev/v2
metadata:
  name: windows
  labels:
  annotations:
spec:
  type: RafayWizard
  resourceQuota:
  placement:
    placementType: ClusterSpecific
    clusterLabels:
    - key: rafay.dev/clusterName
      value: eks-windows-cluster
Update the following section of the specification file with the name of the cluster in your environment.
value: eks-windows-cluster
- Save the updates that were made to the file
-
Execute the following command to create the namespace from the declarative spec file.
./rctl create namespace -f namespace.yaml -
Login to the web console
- Navigate to the project in your Org where the cluster is located
- Select Infrastructure -> Namespaces
You will see the namespace has been created, but has not been published

- Execute the following command to publish the namespace to the cluster
./rctl publish namespace windows
In the web console, you will see the namespace is now published.

Step 5: Enable Windows Support
In this step, we will create a YAML based workload and publish the workload to the cluster. The workload will create a configmap to enable Windows Support on the cluster.
By default, the amazon-vpc-cni doesn't have Windows support enabled, and to deploy Windows pods so it can have its own VPC IP, we need to enable it in the EKS control plane. To do this, we will create a configmap in the cluster by deploying a workload.
- Save the below specification file to your computer as "configmap.yaml".
apiVersion: v1
kind: ConfigMap
metadata:
  name: amazon-vpc-cni
  namespace: kube-system
data:
  enable-windows-ipam: "true"
- Save the below specification file to your computer as "configmap-workload.yaml". Note, the highlighted sections in the spec will need to be updated to match your environment.
name: windows-configmap
namespace: windows
project: defaultproject
type: NativeYaml
clusters: eks-windows-cluster
payload: configmap.yaml
Update the following section of the specification file with the name of the previously created namespace.
namespace: windows
Update the following section of the specification file with the name of the project where the workload should be created. This should be the same project as the cluster you are using.
project: defaultproject
Update the following section of the specification file with the name of the cluster where the workload will be deployed.
clusters: eks-windows-cluster
Update the following section of the specification file with the name of the workload specification file that was created earlier in this step.
payload: configmap.yaml
- Save the updates that were made to the file
-
Execute the following command to create the workload from the declarative spec file.
./rctl create workload configmap-workload.yaml -
Login to the web console
- Navigate to the project in your Org where the cluster is located
- Select Applications -> Workloads
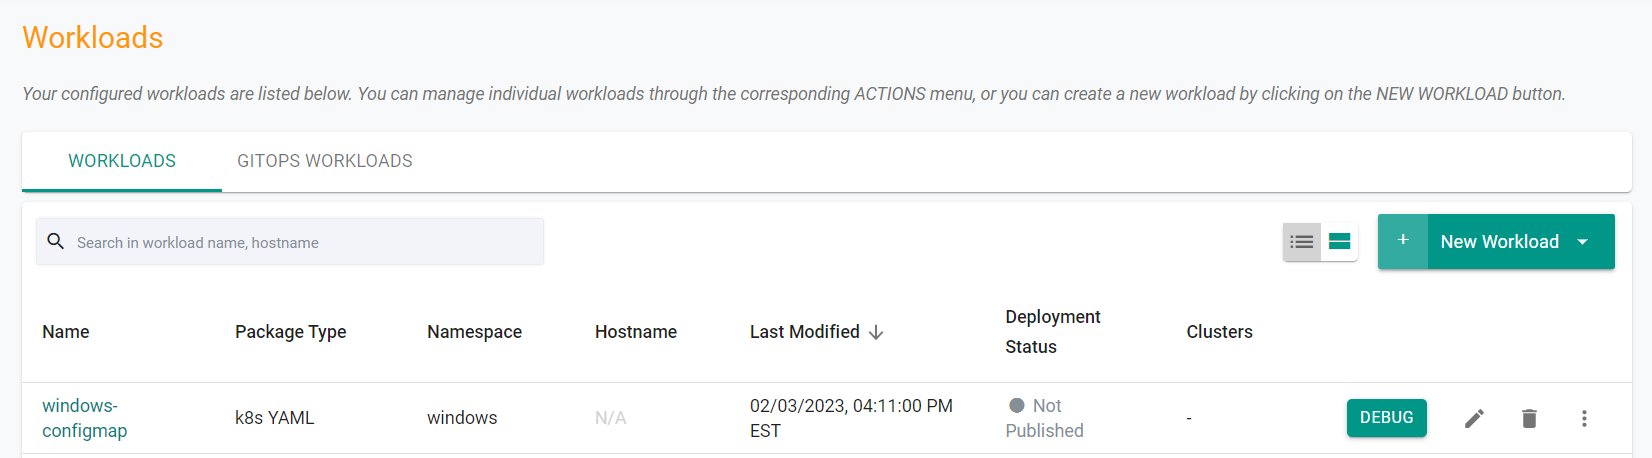
You will see the YAML workload has been created, but has not been published
- Execute the following command to publish the workload to the cluster
./rctl publish workload windows-configmap
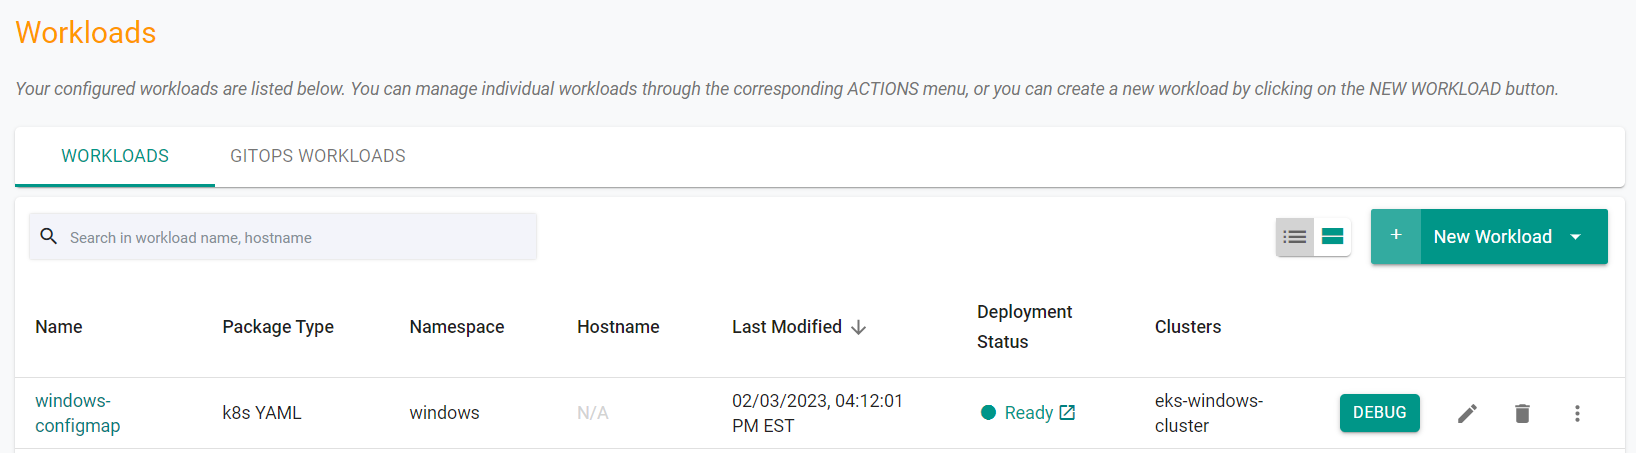
In the web console, you will see the workload is now published.
Additionally, you can use the Zero Trust KubeCTL access to check the configmap on the cluster.
- Navigate to the project in your Org where the cluster is located.
- Select Applications -> Workloads
- Click New Workload -> Create New Workload
- Enter a Name for the Workload
- Select "k8s YAML" for the Package Type
- Select "Upload files manually"
- Select the namespace that was previously created
- Click "Continue"
- Save the following YAML to a file
apiVersion: v1
kind: ConfigMap
metadata:
  name: amazon-vpc-cni
  namespace: kube-system
data:
  enable-windows-ipam: "true"
- Click "Choose File" to select the saved YAML file
- Click "Save and Go To Placement"
- Select the cluster where the namespace was created
- Click "Save and Go To Publish"
- Click "Publish"
The YAML workload is now published on the cluster.
-
Click "Exit"
-
Click on the kubectl link for the cluster and type the following command
kubectl get configmap -n kube-system
You should see output similar to the following showing the "amazon-vpc-cni "
NAME                                 DATA   AGE
amazon-vpc-cni                       1      2m4s
aws-auth                             1      141m
coredns                              1      147m
cp-vpc-resource-controller           0      147m
eks-certificates-controller          0      147m
extension-apiserver-authentication   6      147m
kube-proxy                           1      147m
kube-proxy-config                    1      147m
kube-root-ca.crt                     1      147m
Recap
Congratulations! At this point, you have successfully provisioned an Amazon EKS cluster with a managed Windows node group in your AWS account.