Scenario 1: Misconfigured Requests
In this scenario, we will attempt to deploy a workload which has "misconfigured resource requests". Specifically, we will simulate accidental misconfiguration where the resource "request" is larger than the configured "limit". Learn more about Kubernetes resource requests and limits.
- Navigate to the project in your Org where the cluster is located.
- Select Applications -> Workloads
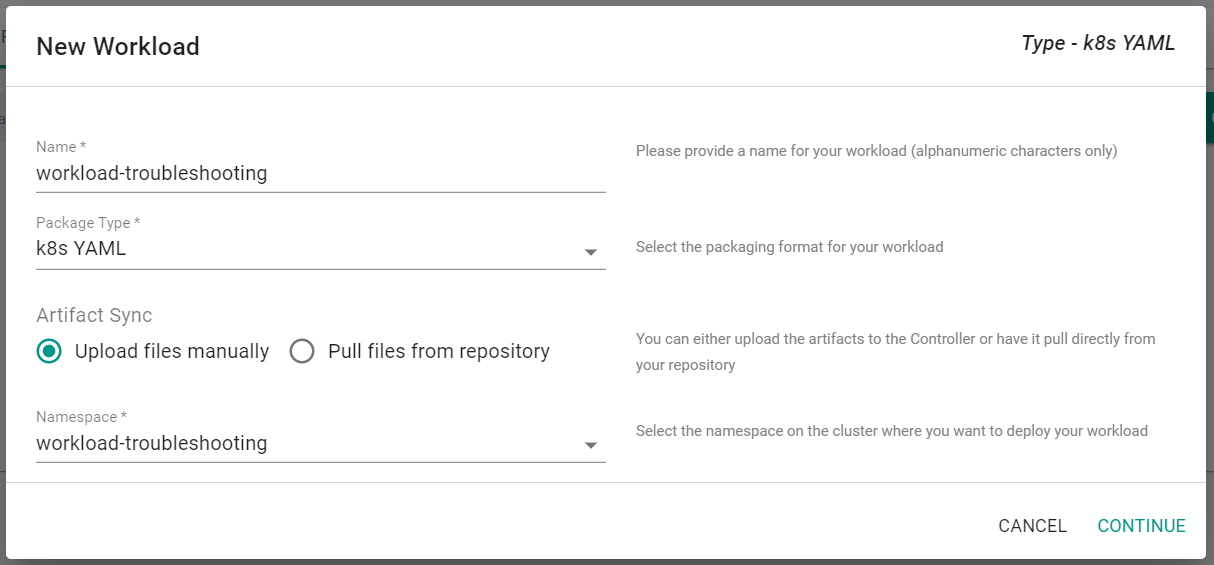
- Click New Workload -> Create New Workload
- Enter a Name for the Workload
- Select "k8s YAML" for the Package Type
- Select "Upload files manually"
- Select the namespace that was previously created
- Click "Continue"
- Save the following YAML to a file
apiVersion: apps/v1
kind: Deployment
metadata:
  name: nginx
  labels:
    app: nginx
  annotations:
spec:
  replicas: 1
  selector:
    matchLabels:
      app: nginx
  template:
    metadata:
      labels:
        app: nginx
    spec:
      containers:
      - name: nginx
        image: nginx:latest
        ports:
        - containerPort: 80
        resources:
          limits:
            cpu: "100m"
            memory: "30Mi"
          requests:
            cpu: "1000m"
            memory: "30Mi"
- Click "Choose File" to select the saved YAML file
- Click "Save and Go To Placement"

- Select the cluster where the namespace was created
- Click "Save and Go To Publish"

- Click "Publish"
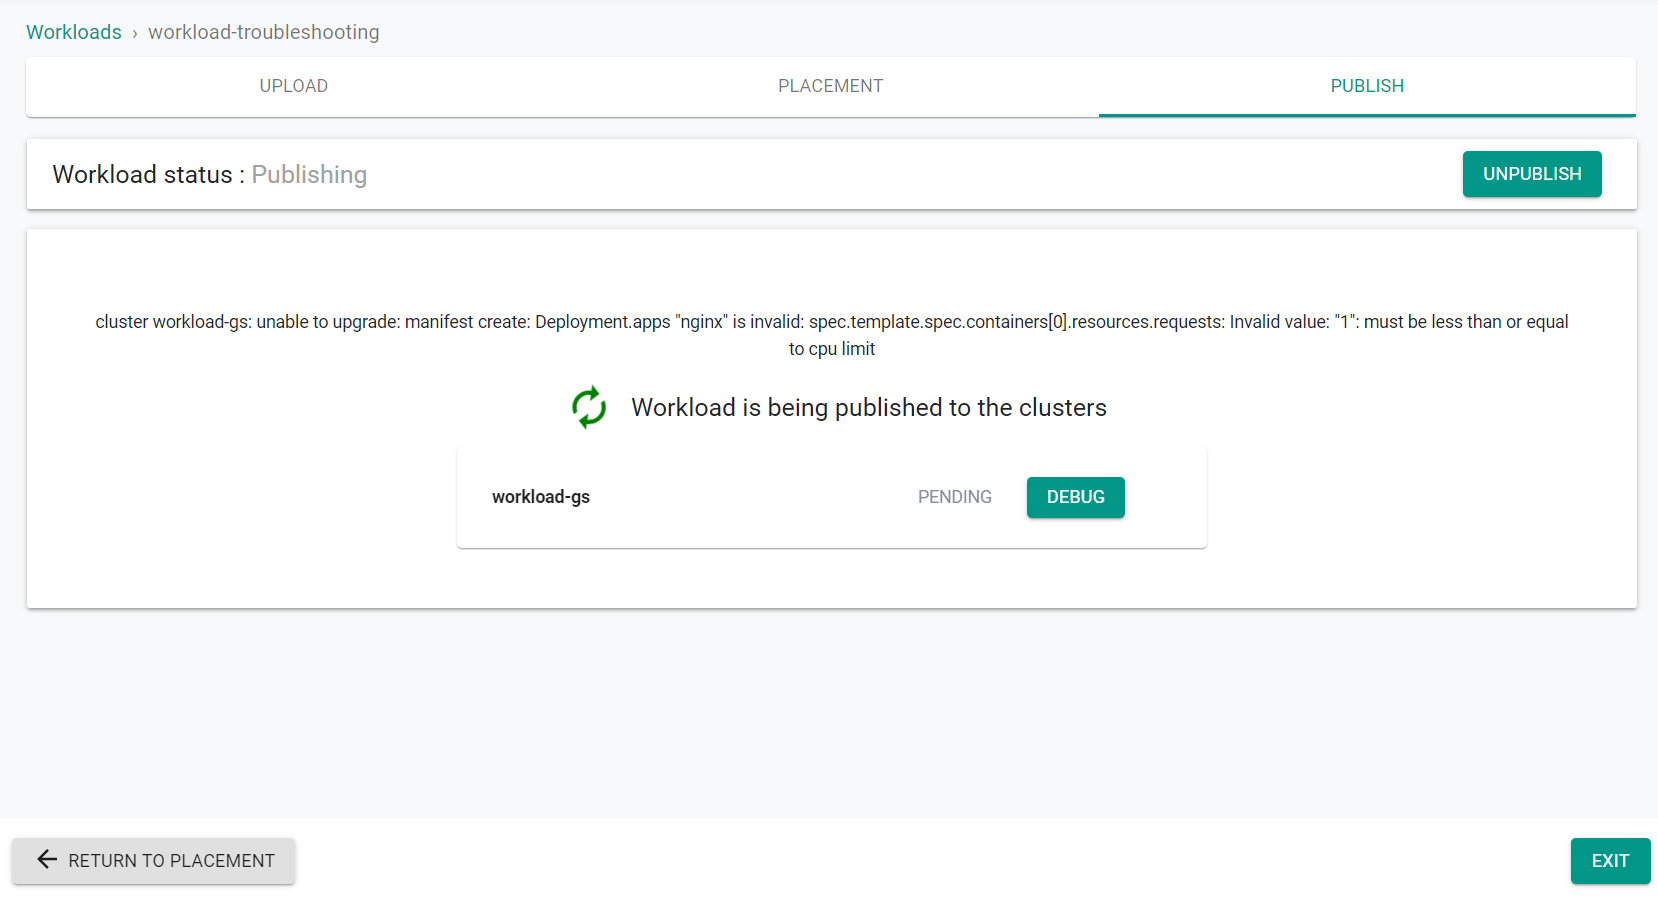
The controller will send the YAML to the Kubernetes Operator on the remote cluster and it will attempt to deploy it to the specified namespace. Once it receives an error message from the Kubernetes API server, it will propagate the error message back to the controller.
Failure
You should see an error message like "cluster workload-gs: unable to upgrade: manifest create: Deployment.apps "nginx" is invalid: spec.template.spec.containers[0].resources.requests: Invalid value: "1": must be less than or equal to cpu limit". This message indicates that the application resource requests are larger than the resource limits defined.
We can now go back to the workload and edit the specification file to correct this problem.
Info
As you can see, the developer can use the platform to not only deploy and operate workloads to remote clusters, but is also provided with integrated facilities to view and process errors from the remote cluster.
- Click "Unpublish"
- Click "Yes" to confirm unpublishing the workload
- Click the "Upload" tab near the top of the screen
- Click "Edit"
- Update the CPU Requests to be less than or equal to the CPU Limit.
The updated configuration is below:
apiVersion: apps/v1
kind: Deployment
metadata:
  name: nginx
  labels:
    app: nginx
  annotations:
spec:
  replicas: 1
  selector:
    matchLabels:
      app: nginx
  template:
    metadata:
      labels:
        app: nginx
    spec:
      containers:
      - name: nginx
        image: nginx:latest
        ports:
        - containerPort: 80
        resources:
          limits:
            cpu: "100m"
            memory: "30Mi"
          requests:
            cpu: "100m"
            memory: "30Mi"
- Click Update
- Click "Save and Go To Placement"
- Click "Save and Go To Publish"
Incorrect Container Image Name
In this scenario, we will try to deploy a workload with a misconfigured container image name.
- Click "Publish"
You will notice that the controller will attempt to publish the workload a few times and will eventually fail because of a "misconfigured container name". Let us know use one of the integrated troubleshooting facilities in the platform to debug and diagnose the misconfiguration.
- Click "Debug"
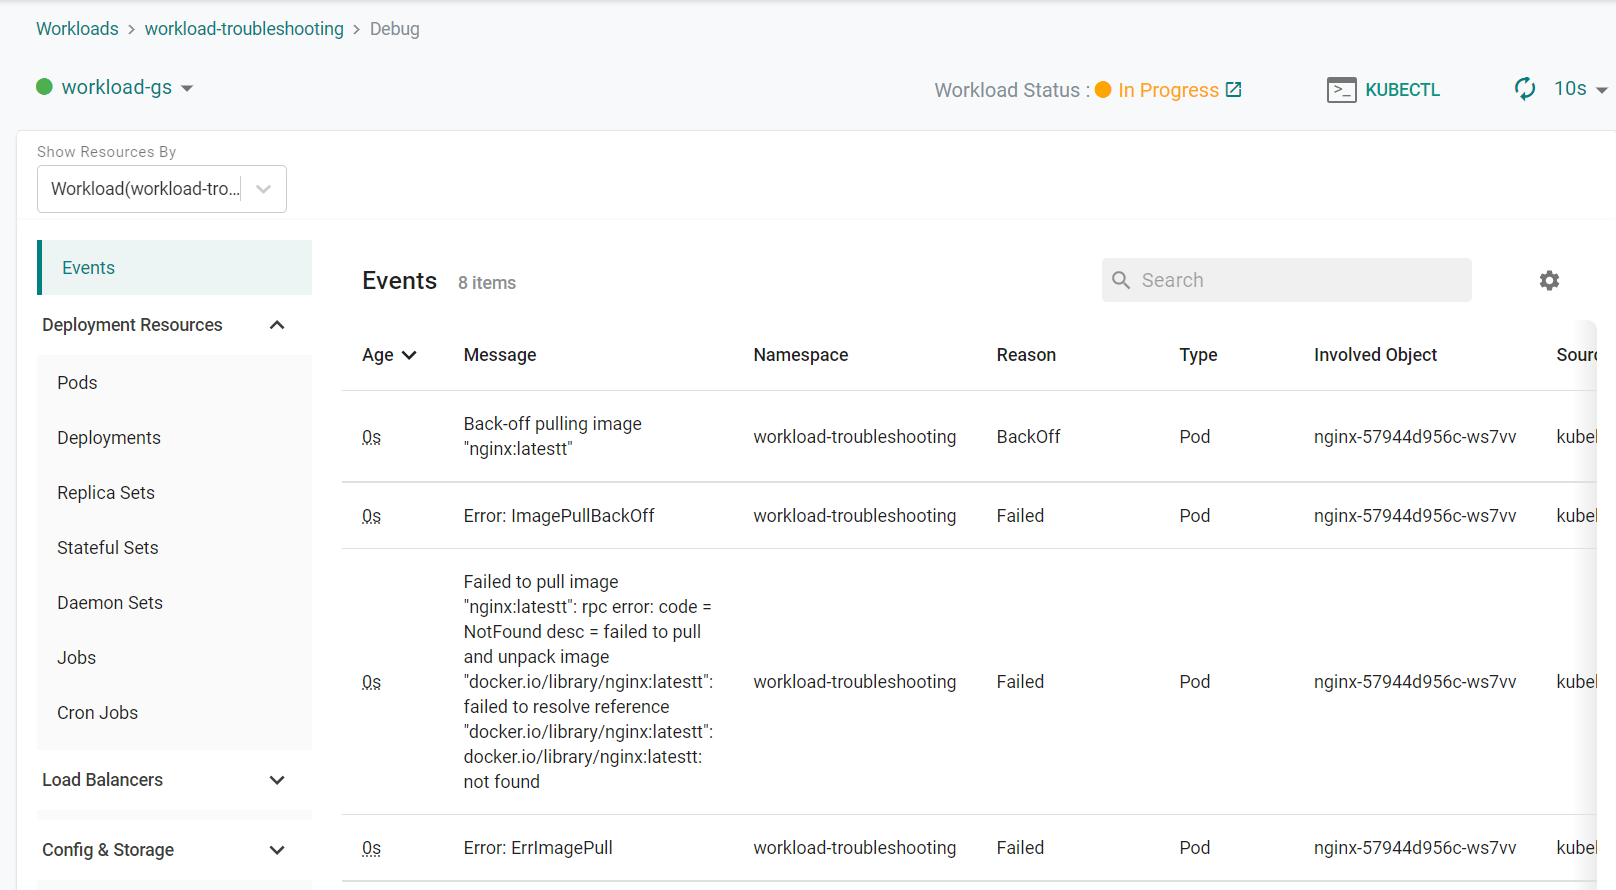
You will see a list of "Kubernetes Events" related to the workload. We can see there are several error messages relating to the the ability to pull the container image. If we look closely at the error messages, we can see there is a typo in the image name.
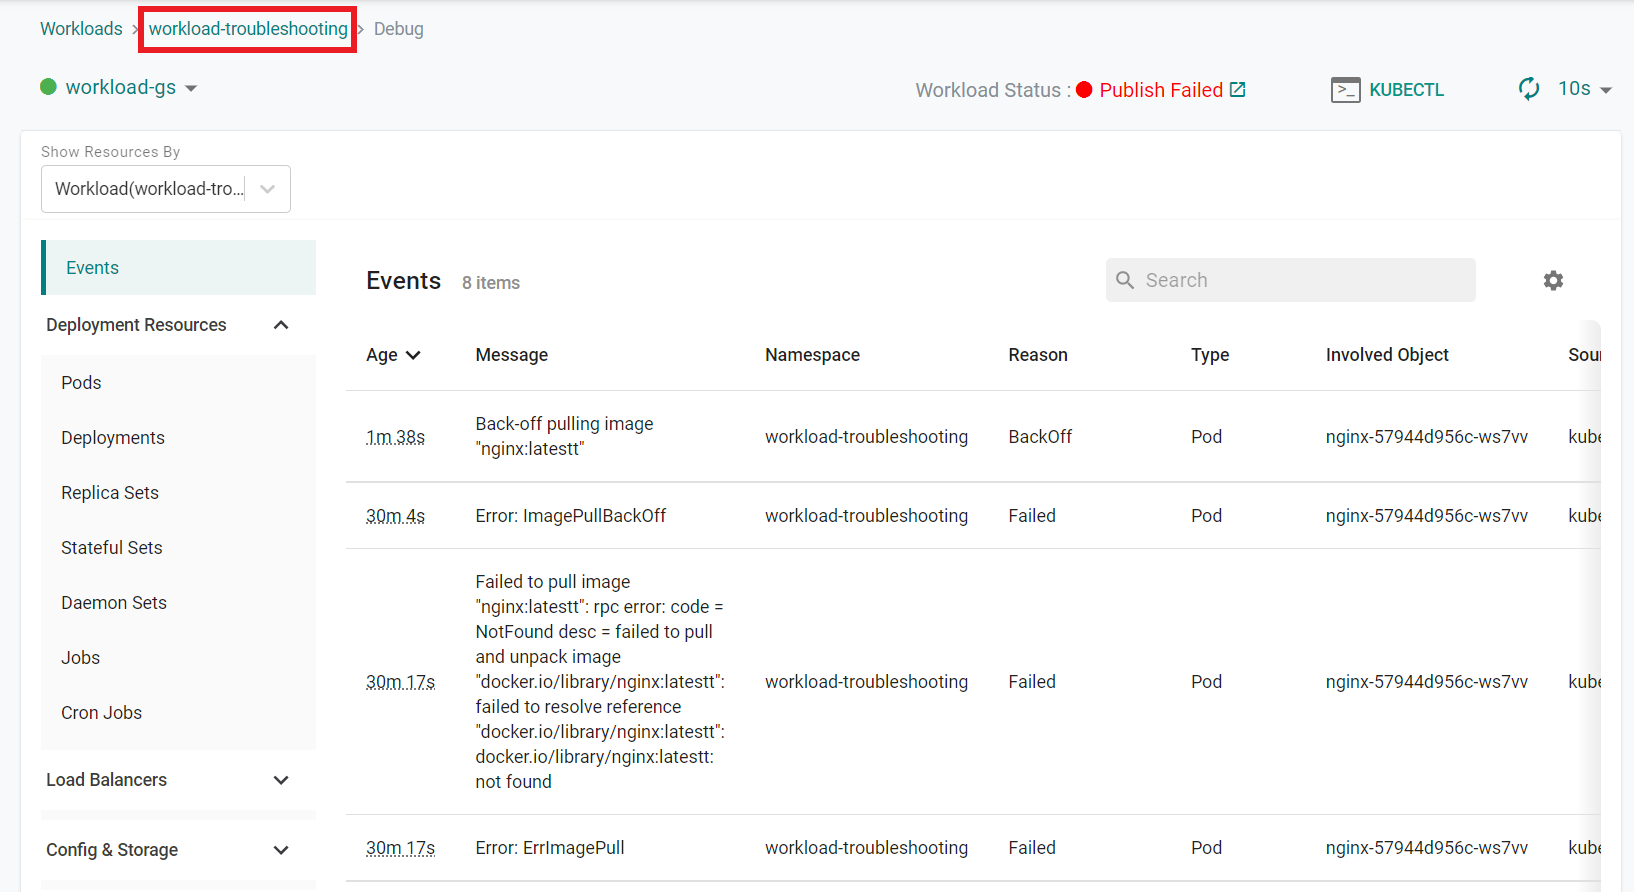
We can now go back and edit the workload again to correct the typo in the image name.
- Near the top of the page, click the workload name to go back to the workload
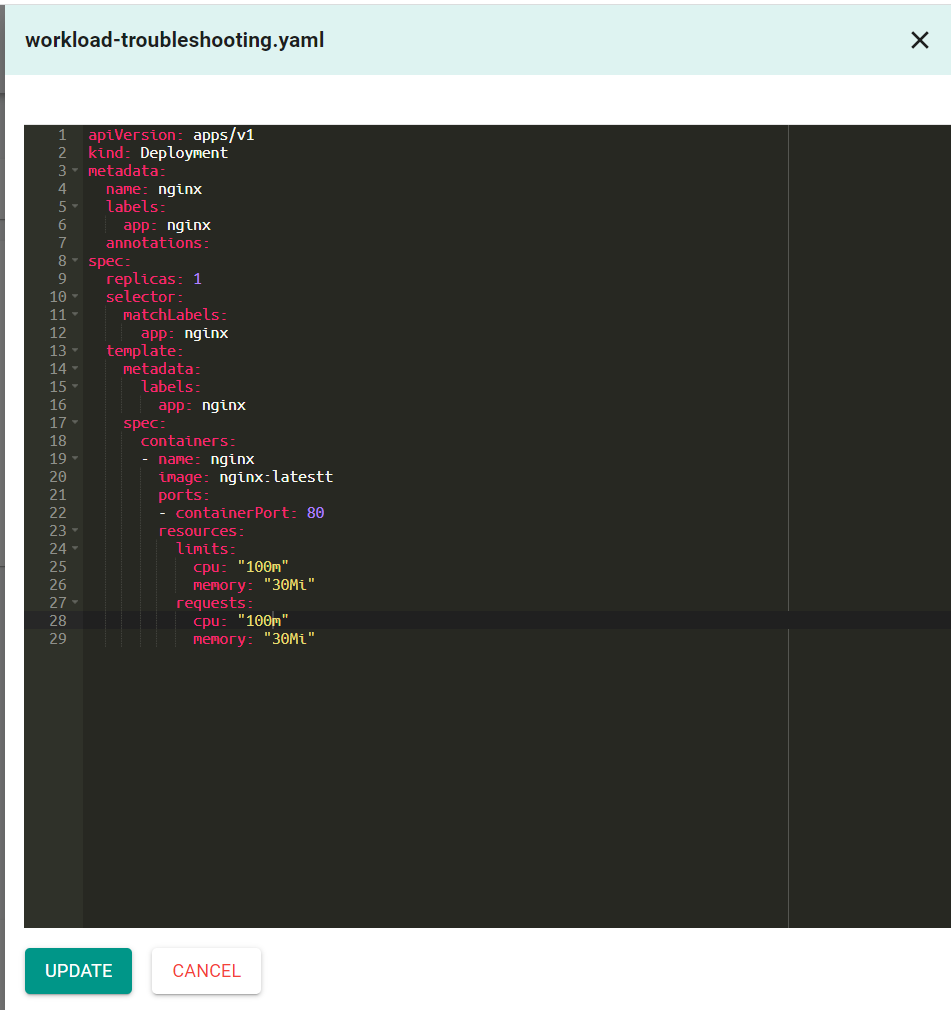
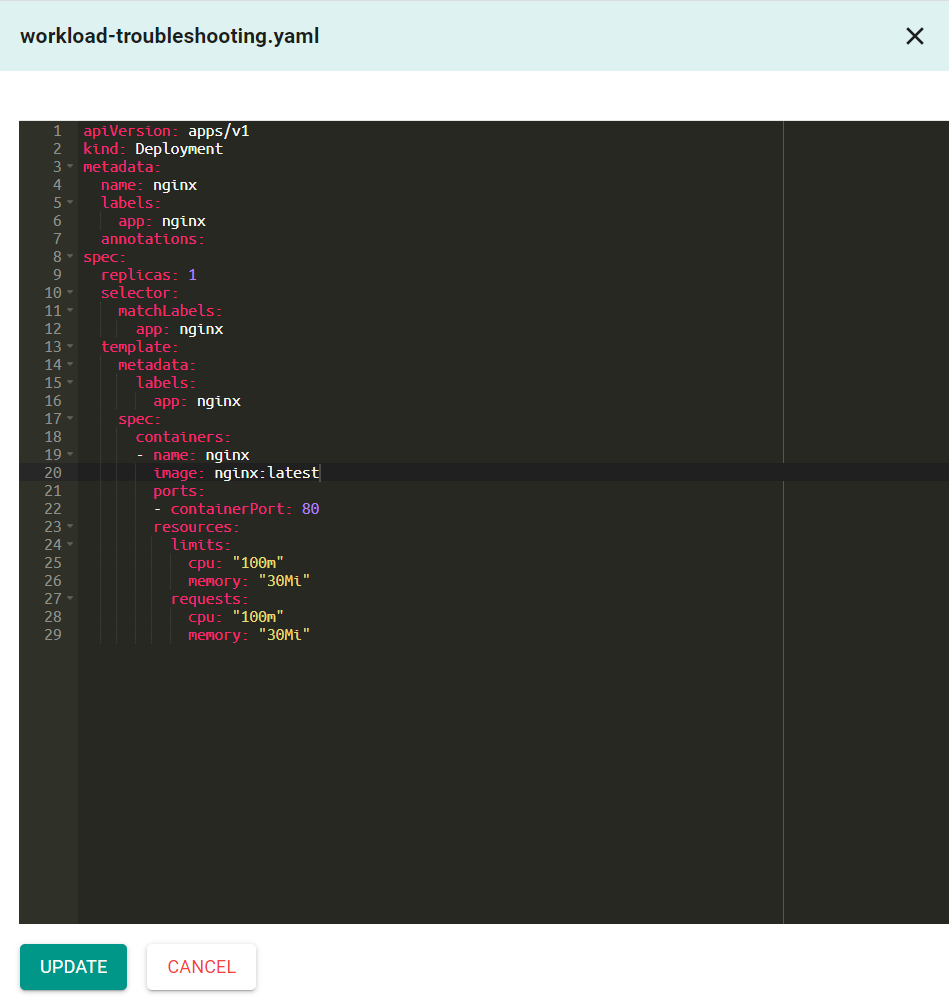
- Click "Edit" to edit the workload YAML
- Remove the extra "t" from the image value
image: nginx:latestt
The updated configuration is below:
apiVersion: apps/v1
kind: Deployment
metadata:
  name: nginx
  labels:
    app: nginx
  annotations:
spec:
  replicas: 1
  selector:
    matchLabels:
      app: nginx
  template:
    metadata:
      labels:
        app: nginx
    spec:
      containers:
      - name: nginx
        image: nginx:latest
        ports:
        - containerPort: 80
        resources:
          limits:
            cpu: "100m"
            memory: "30Mi"
          requests:
            cpu: "100m"
            memory: "30Mi"
- Click "Update"
- Click "Save and Go To Placement"
- Click "Save and Go To Publish"
- Click "Publish"
The workload publishes within a few seconds.
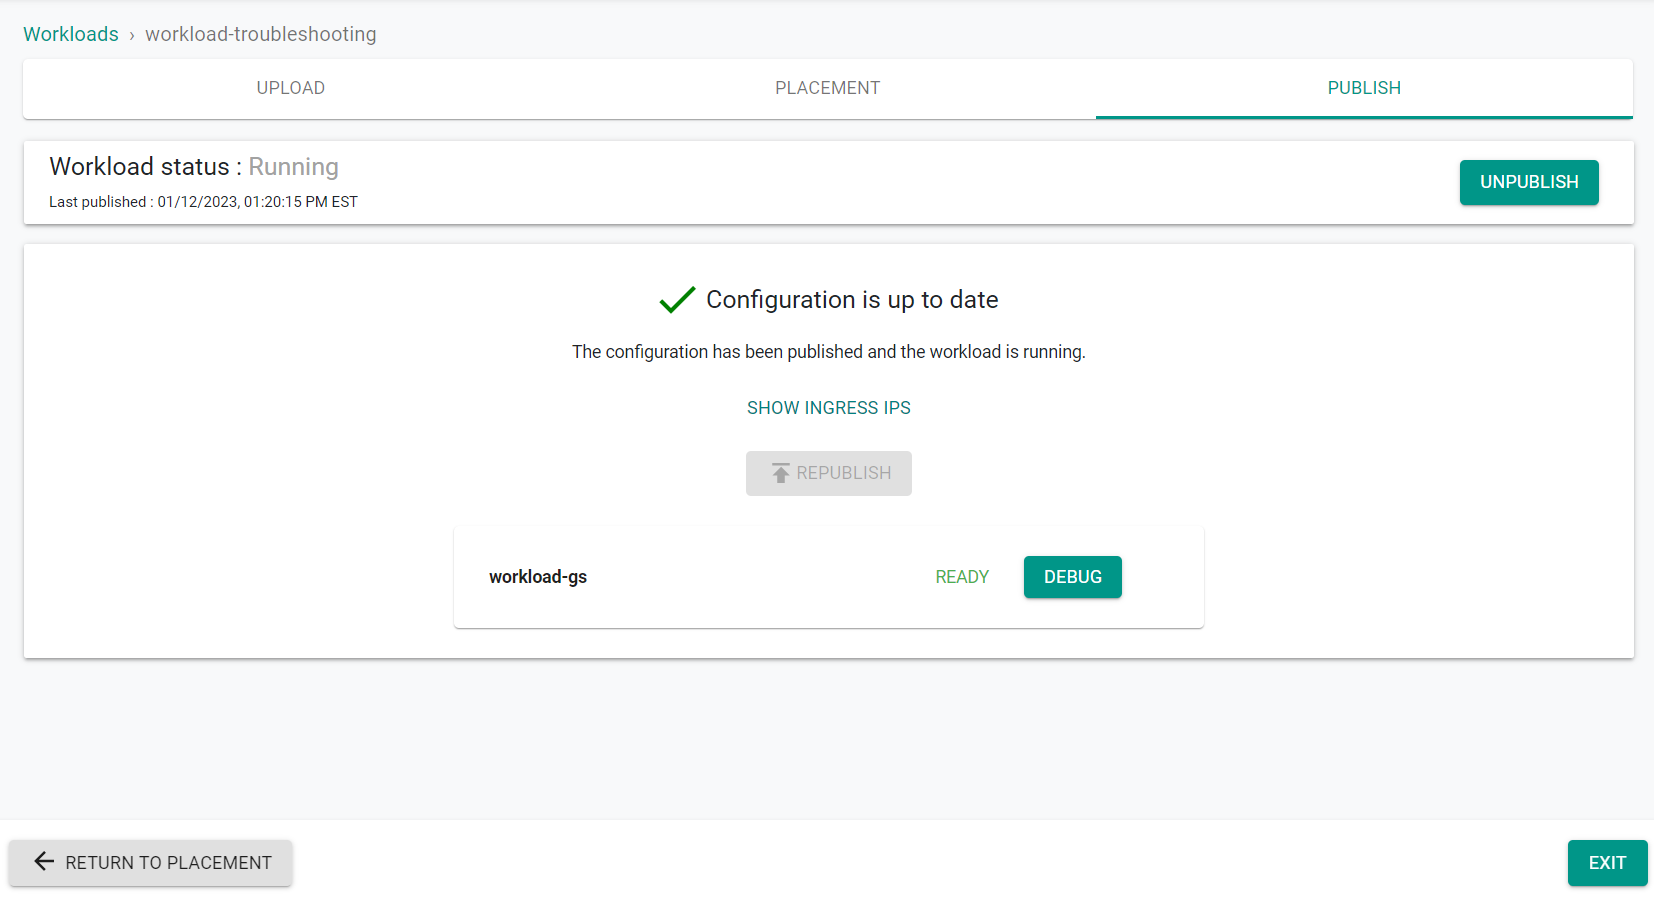
Now that the workload has published, we will use the web console to validate the application status.
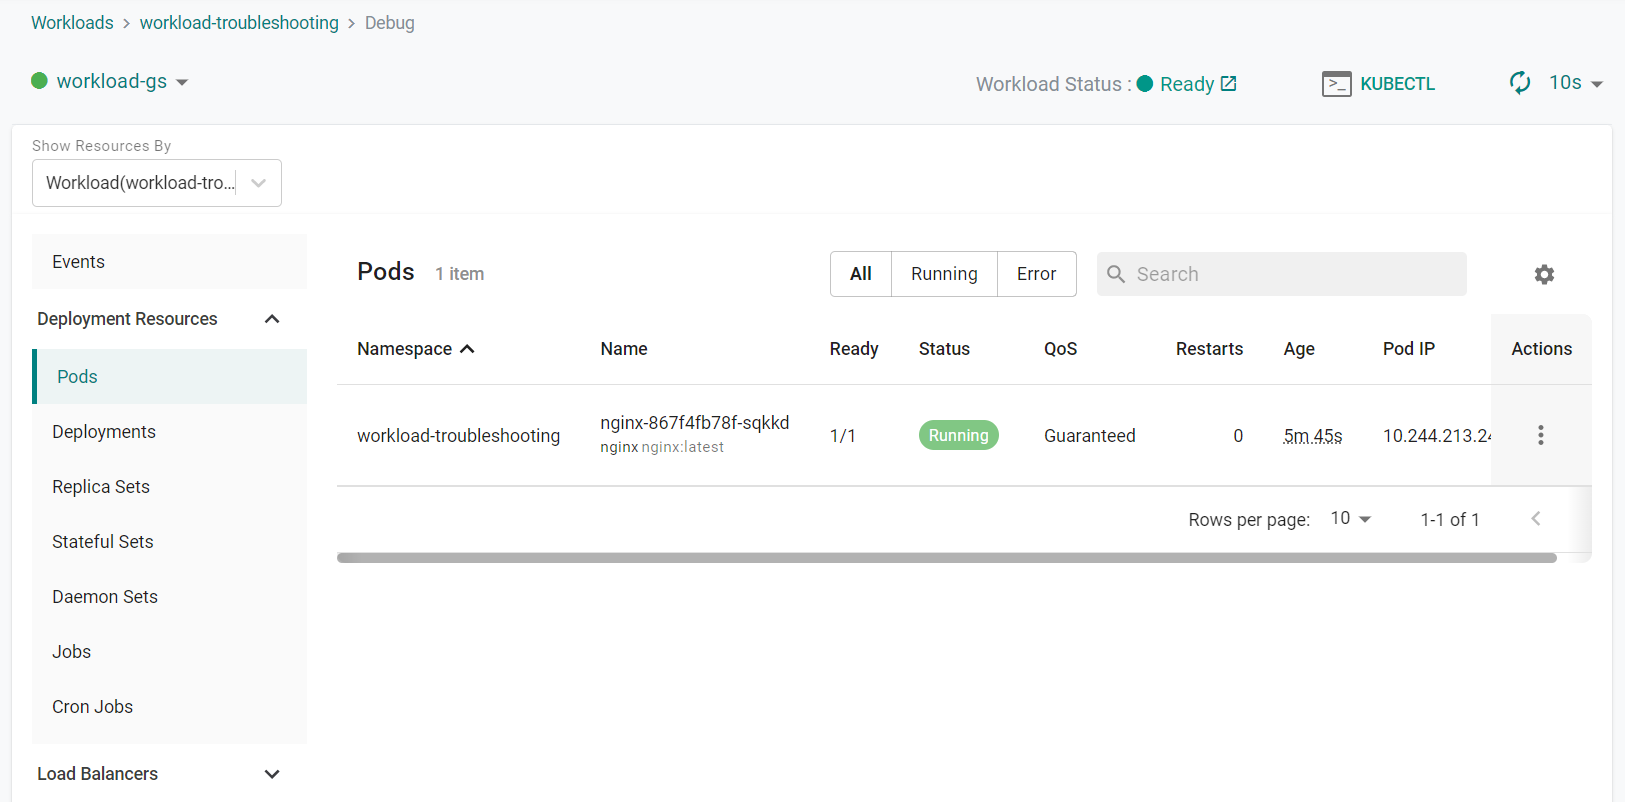
- Click "Debug"
- Click "Pods" on the left side of the window
You will see that the workload is in a running state.