Configure
In this section, you will create a standardized cluster blueprint with the StormForge add-on. You can then reuse this blueprint with all your clusters.
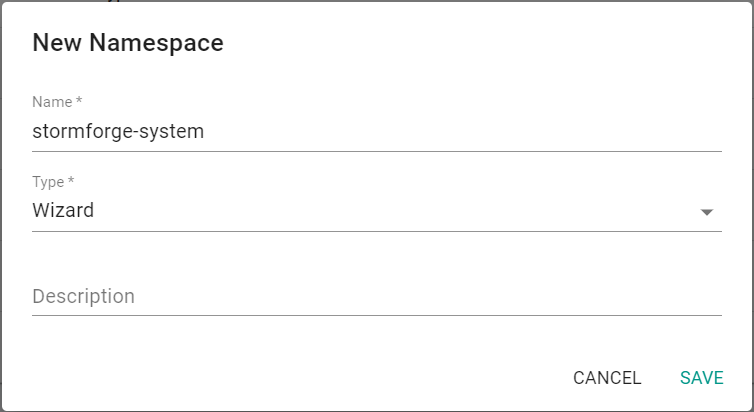
Step 1: Create Namespace
In this step, you will create a namespace for the StormForge agent.
- Navigate to a project in your Org
- Select Infrastructure -> Namespaces
- Click New Namespace
- Enter the name stormforge-system
- Select wizard for the type
- Click Save
- Click Discard Changes & Exit
Step 2: Download Agent Helm Chart
In this step, you will download the latest agent Helm chart. The downloaded chart will be used in a later step.
- Enter the following command into your Helm client
helm pull oci://registry.stormforge.io/library/stormforge-agent
Step 3: Create StormForge Credentials
In this step, you will create a credentials file that the StormForge agent will use to authenticate with your StormForge account. The credentials will be used in a custom values file for the Helm chart.
- Install the StormForge CLI - Instructions
- Generate the access credentials - Instructions
Step 4: Create Custom Values File
In this step, you will create a custom values file to be used with the Helm chart. The values file will contain the previously created access credentials and the cluster name.
- Create a file named values.yaml
- Enter in the following line at the top of the file clusterName: {{{ .global.Rafay.ClusterName }}}
- Enter the contents of the previously saved credentials file
The file should look similar to the following file.
clusterName: {{{ .global.Rafay.ClusterName }}}
stormforge:
  address: https://api.stormforge.io/
authorization:
  issuer: https://api.stormforge.io/
  clientID: ***** # stormforge_creds
  clientSecret: ****
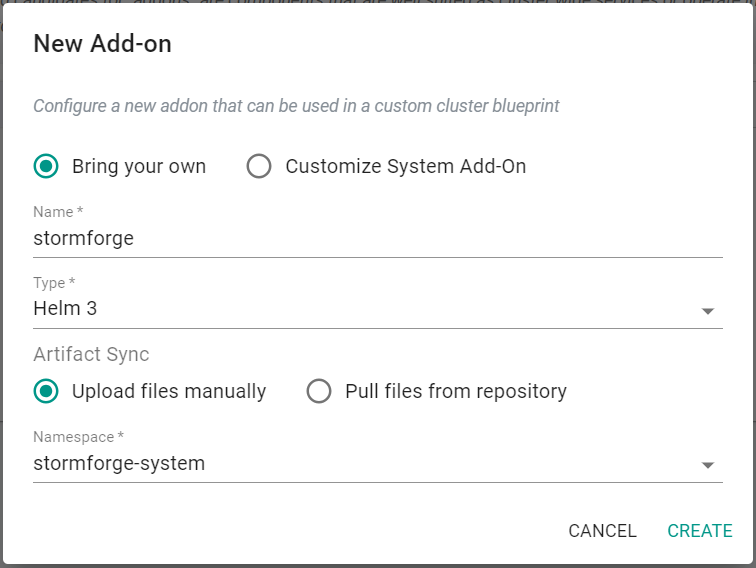
Step 5: Create StormForge Add-on
In this step, you will create a custom add-on for the StormForge agent.. This add-on will be added to a custom cluster blueprint in a later step.
- Select Infrastructure -> Add-Ons
- Click New Add-On -> Create New Add-On
- Enter the name stormforge
- Select Helm 3 for the type
- Select Upload files manually
- Select stormforge-system for the namespace
- Click Create
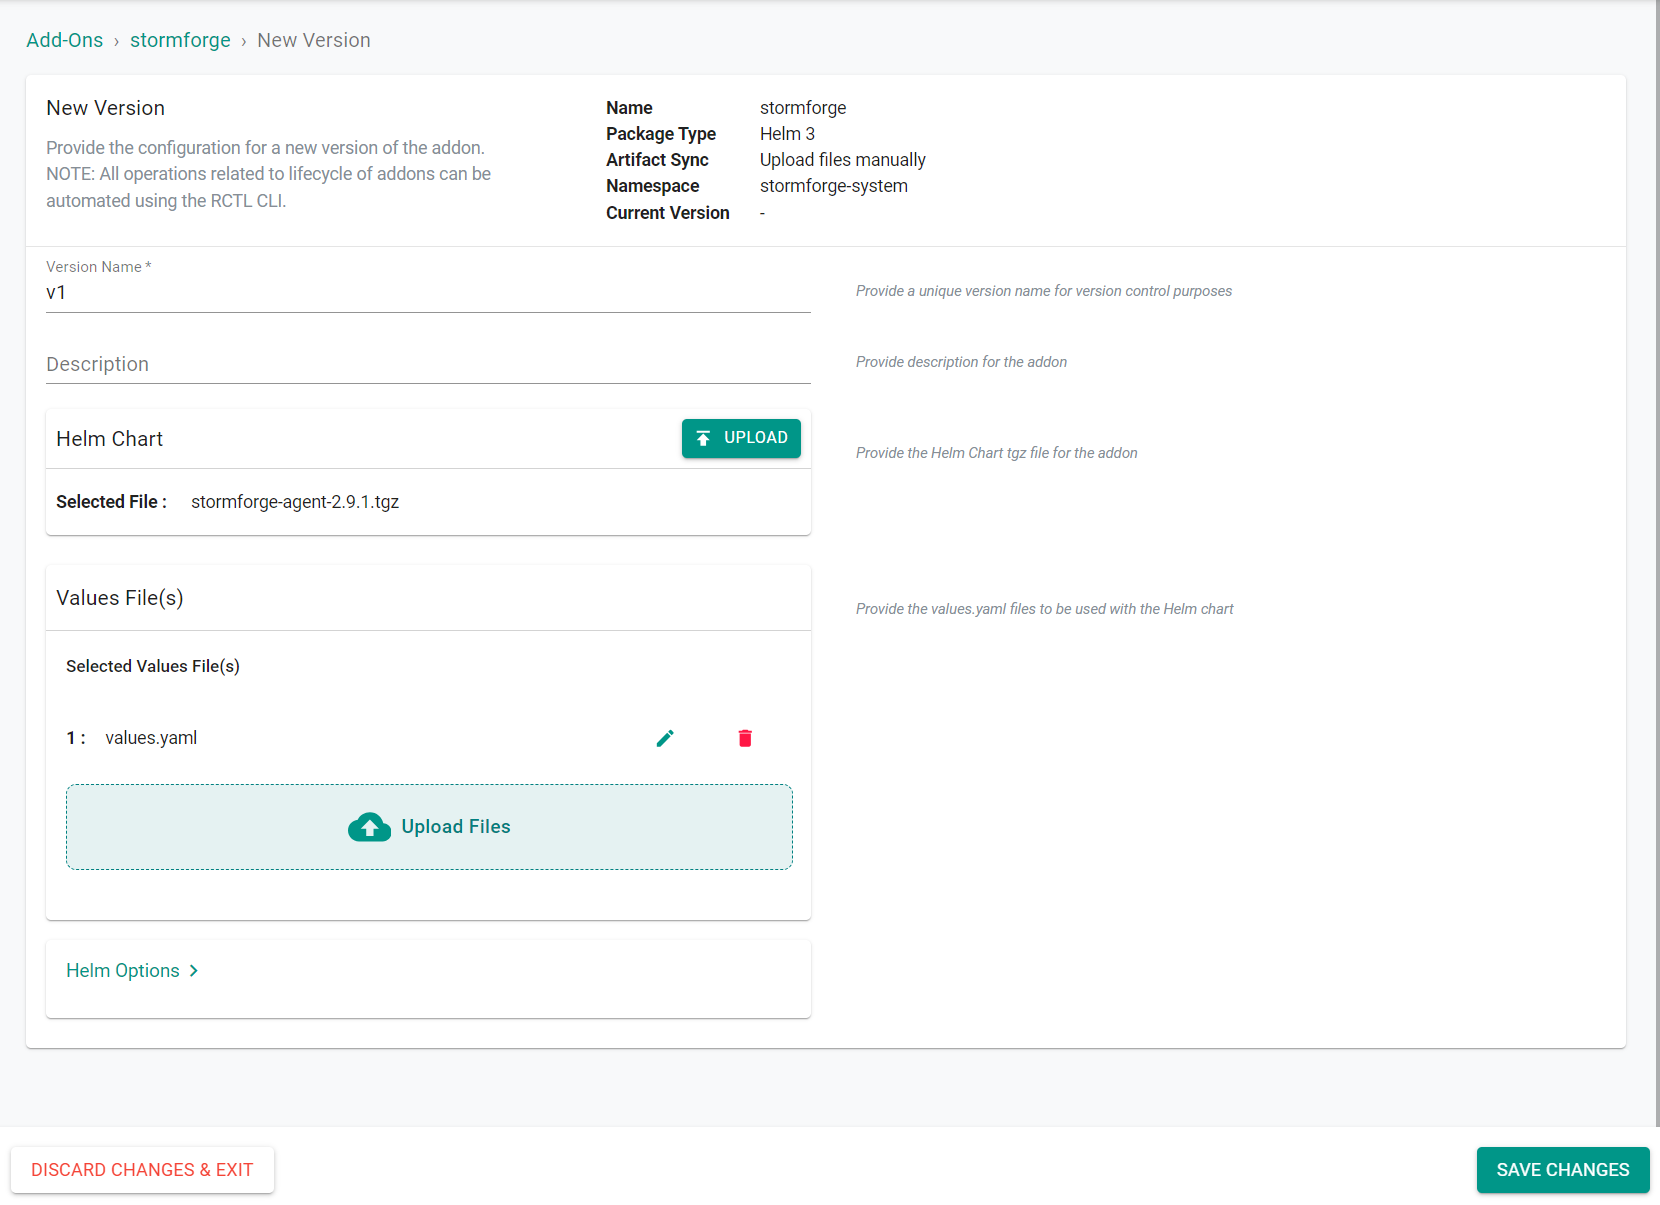
- Click New Version
- Enter a version name
- Click Upload
- Select the previously downloaded Helm chart
- Click Upload Files
- Select the previously created values file
- Click Save Changes
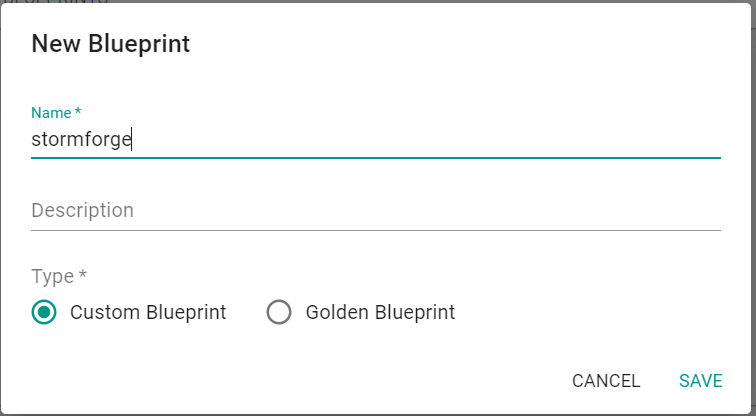
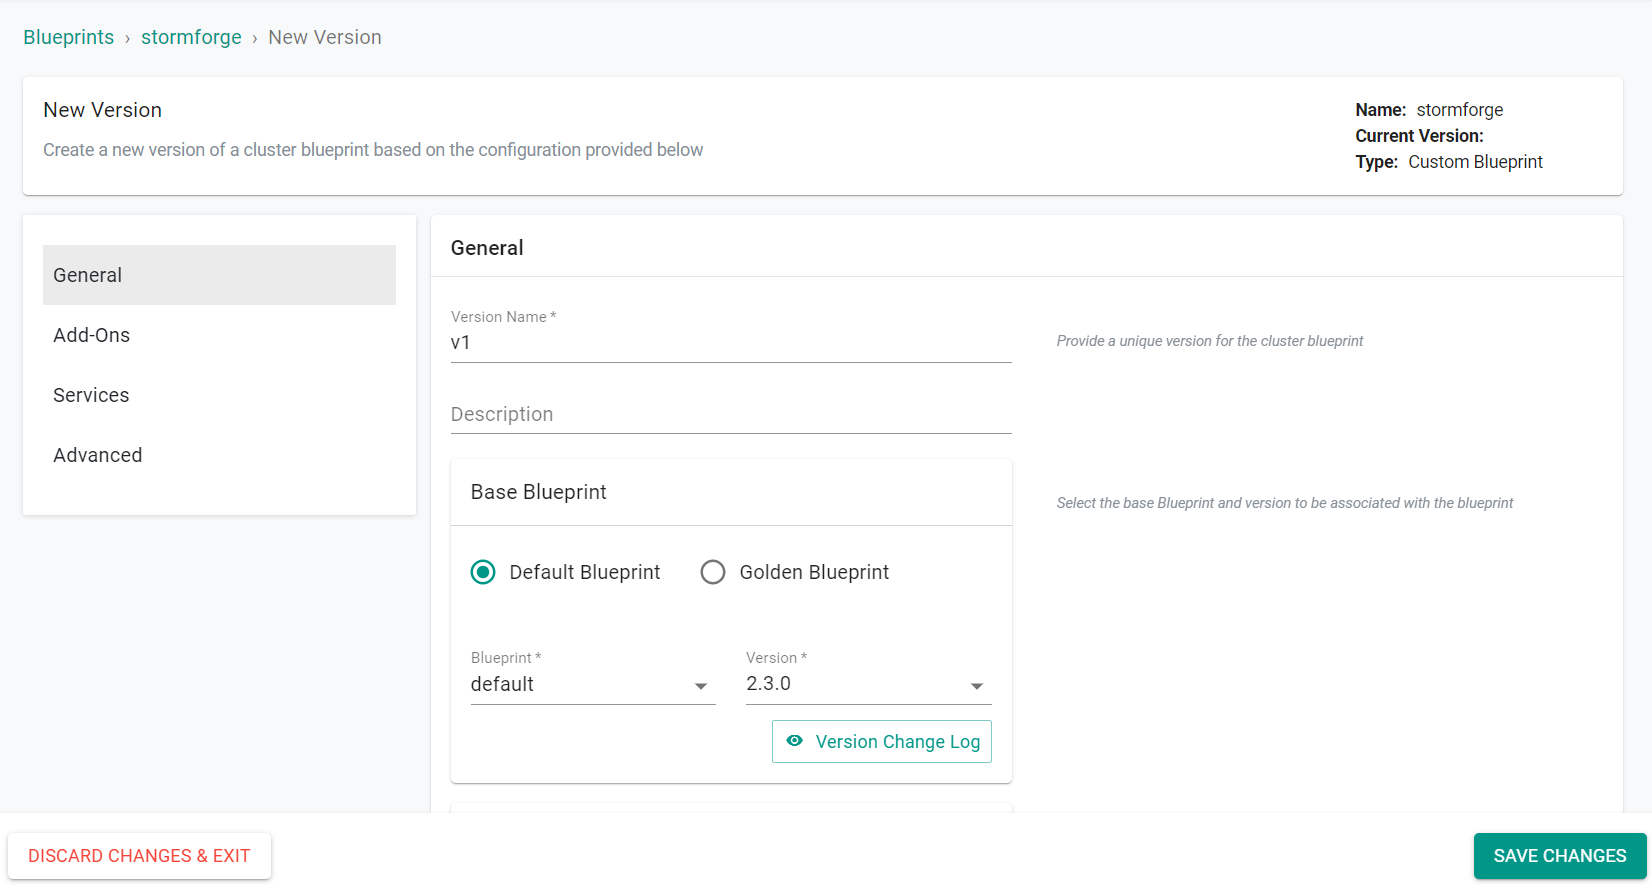
Step 6: Create Blueprint
In this step, you will create a custom cluster blueprint that contains the StormForge agent add-on that was previously created. The cluster blueprint can be applied to one or multiple clusters.
- Select Infrastructure -> Blueprints
- Click New Blueprint
- Enter the name stormforge
- Click Save
- Enter a version name
- Select default for the base blueprint
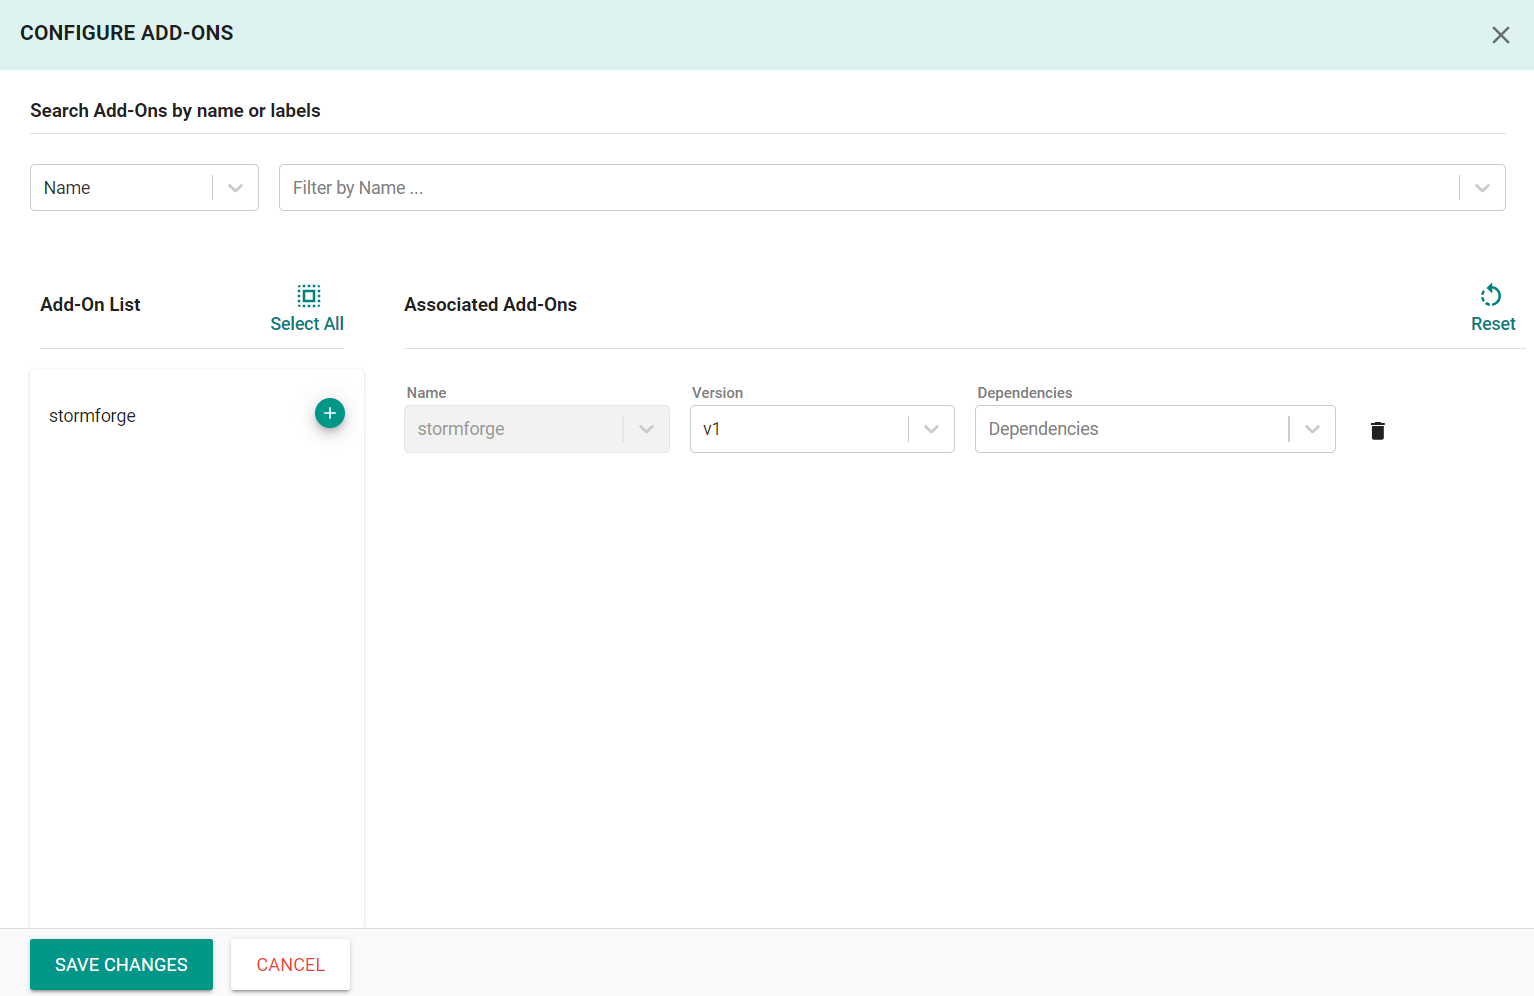
- In the add-ons section, click Configure Add-Ons
- Click the + symbol next to the previously created add-on to add it to the blueprint
- Click Save Changes
- Click Save Changes
Step 7: Apply Blueprint
In this step, you will apply the previously created cluster blueprint to an existing cluster. The blueprint will deploy the StormForge agent to the cluster.
- Select Infrastructure -> Clusters
- Click the gear icon on the cluster card -> Update Blueprint
- Select the previously created StormForge blueprint and version
- Click Save and Publish
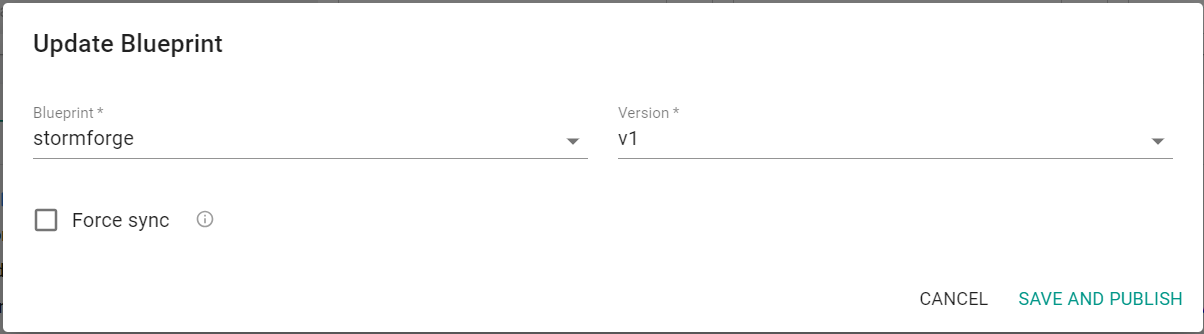
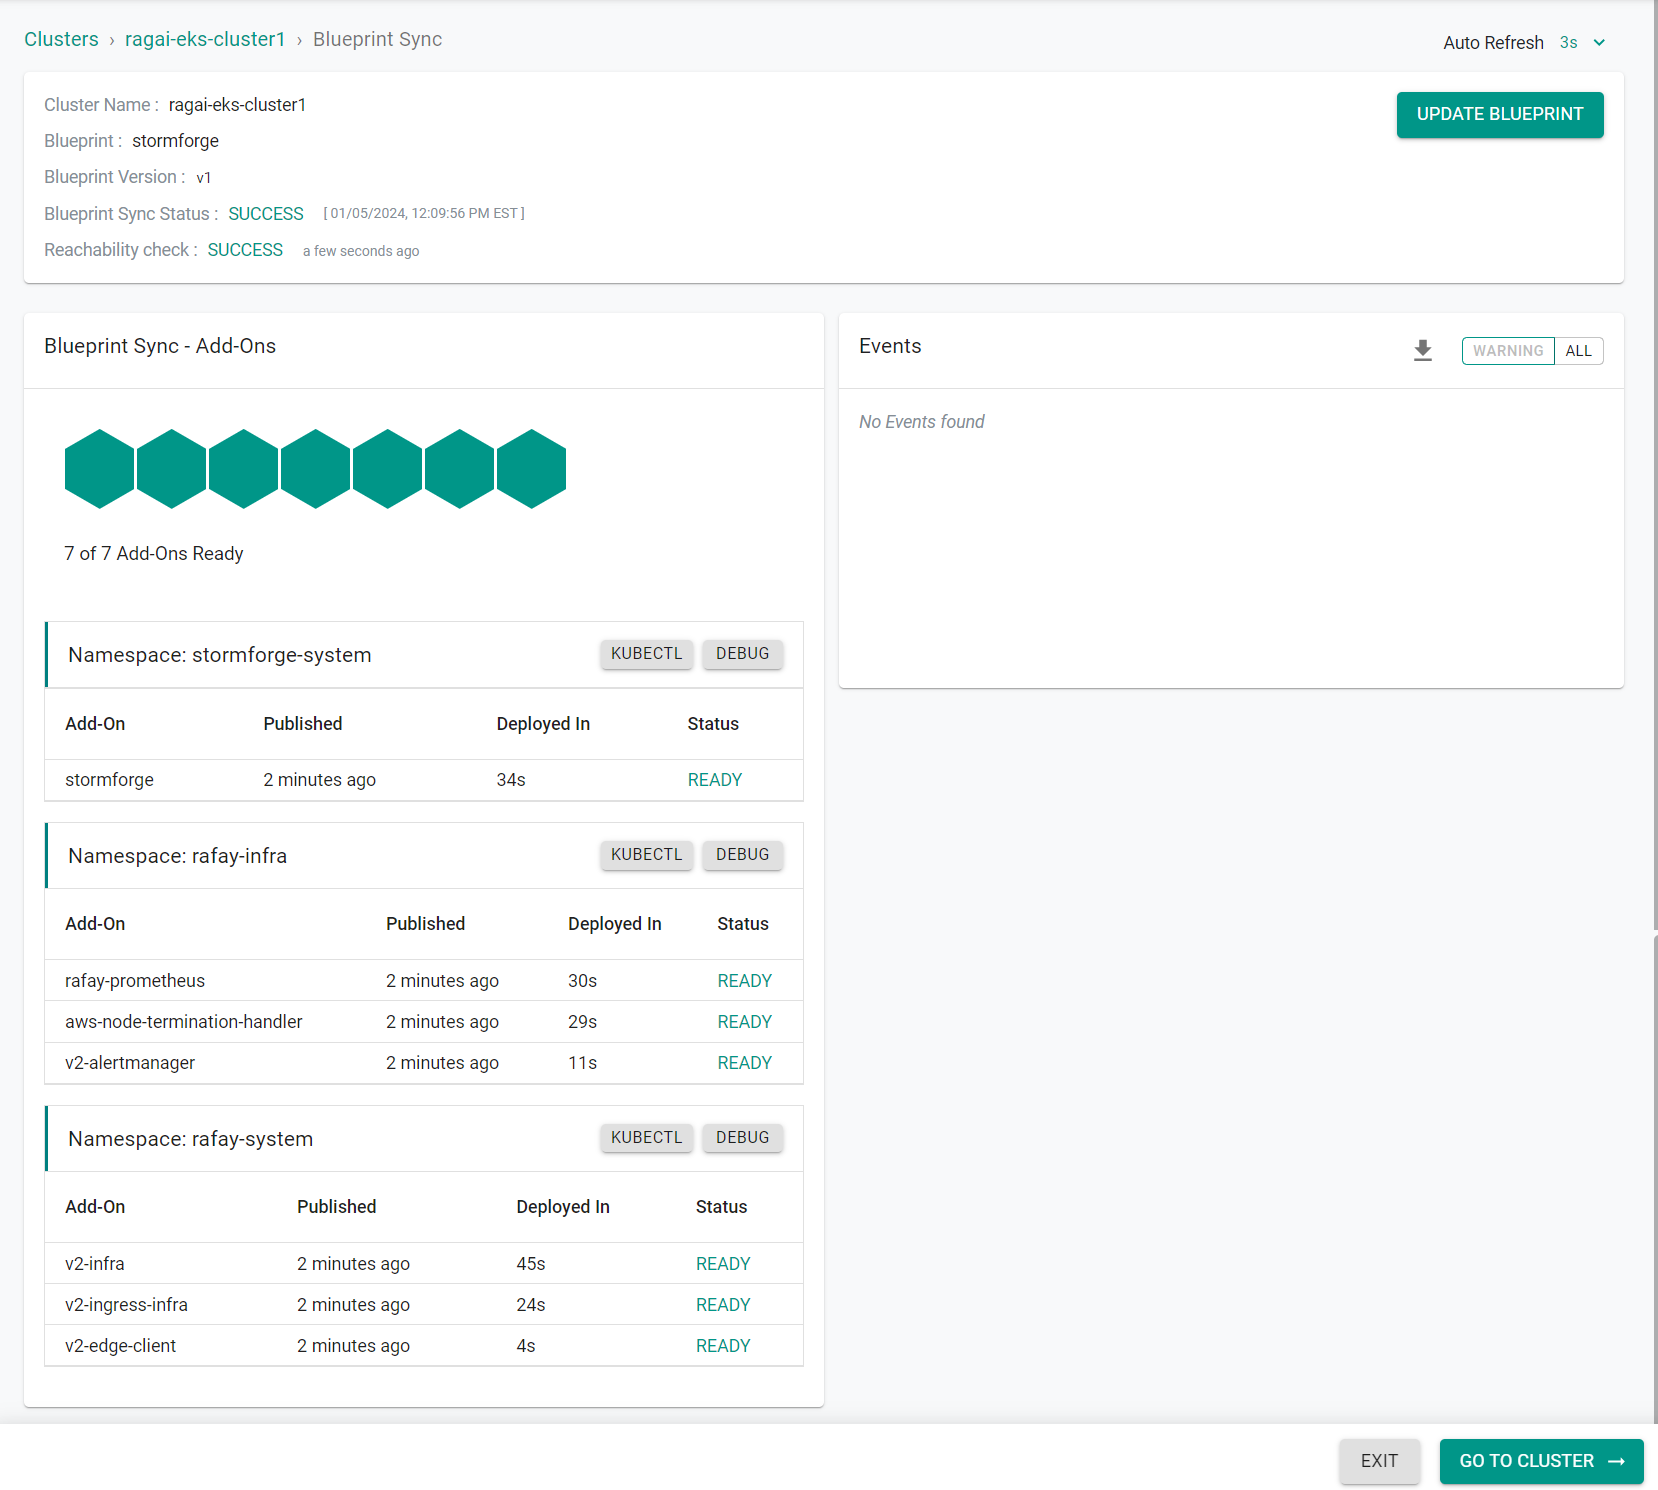
The controller will publish and reconcile the blueprint on the target cluster. This can take a few seconds to complete.
Step 7: Validate Agent Reporting
In this step, you will access your StormForge account to ensure the StormForge agent is reporting to your account.
- Login into your StormForge account
- Navigate to the Clusters section
You will see the cluster in which you previously applied the blueprint with the StormForge agent.
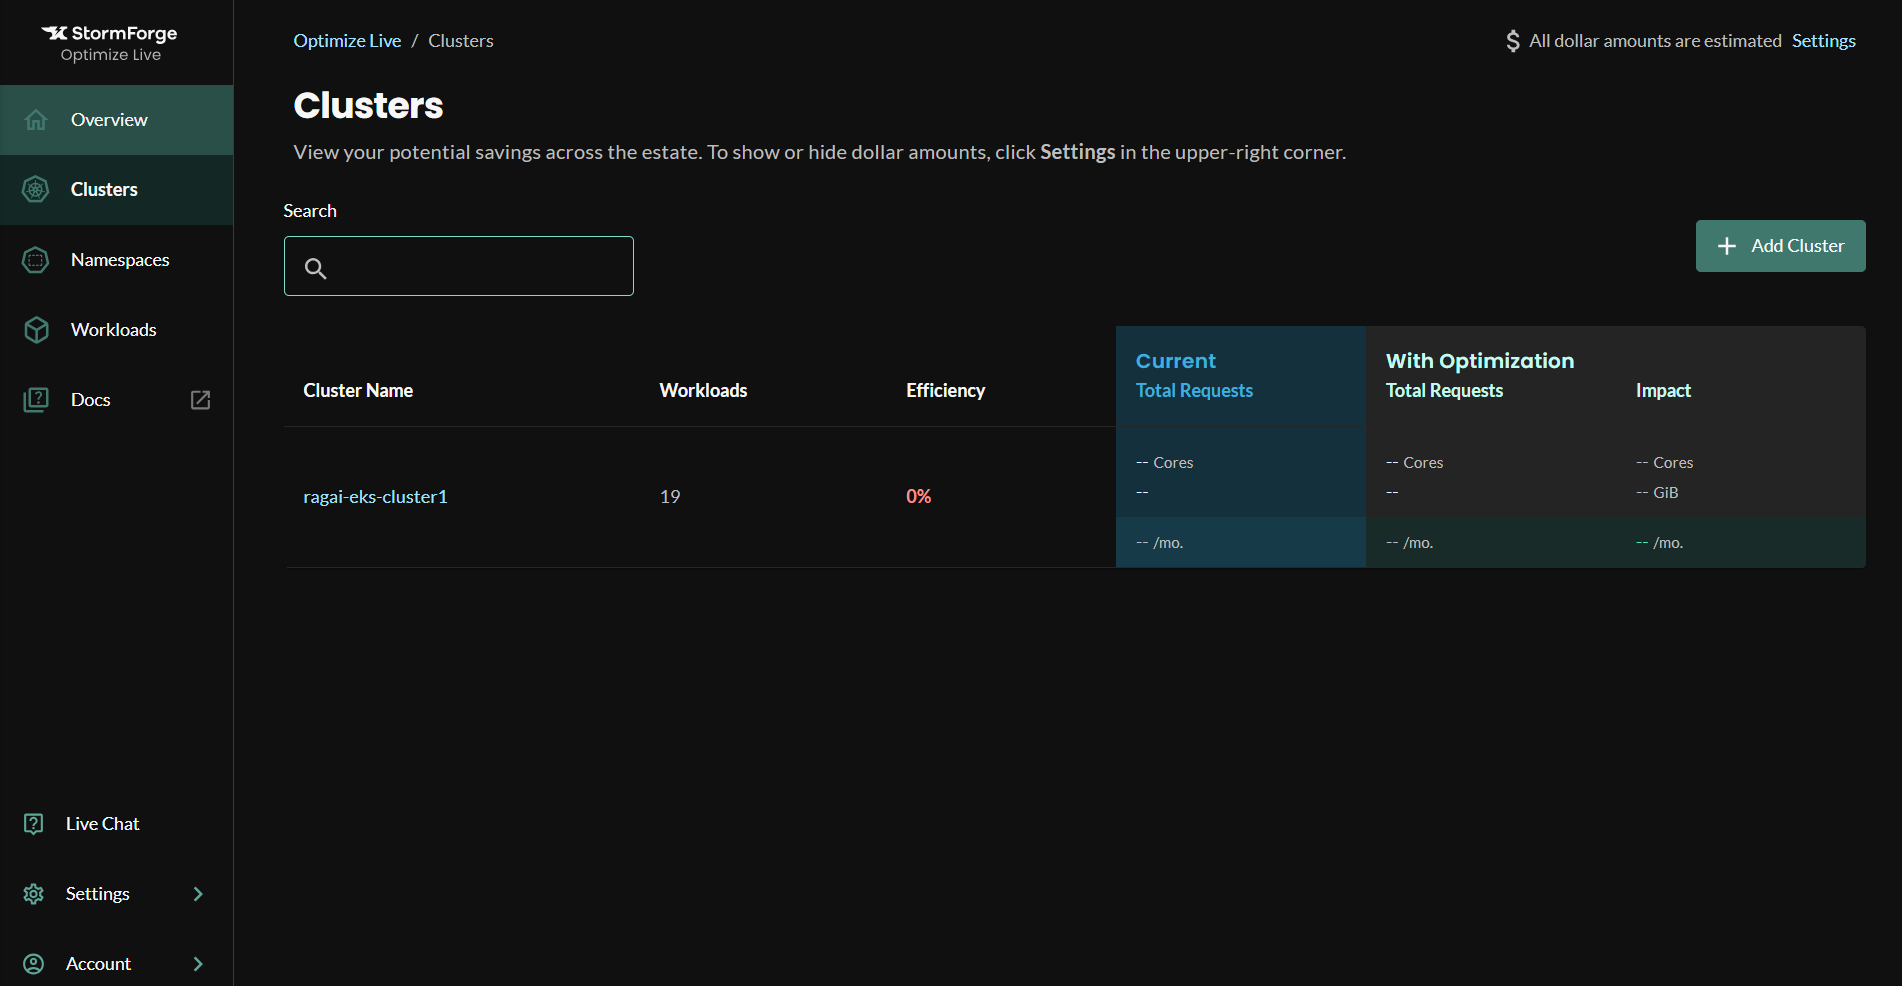
- Click on the cluster name to see additional details
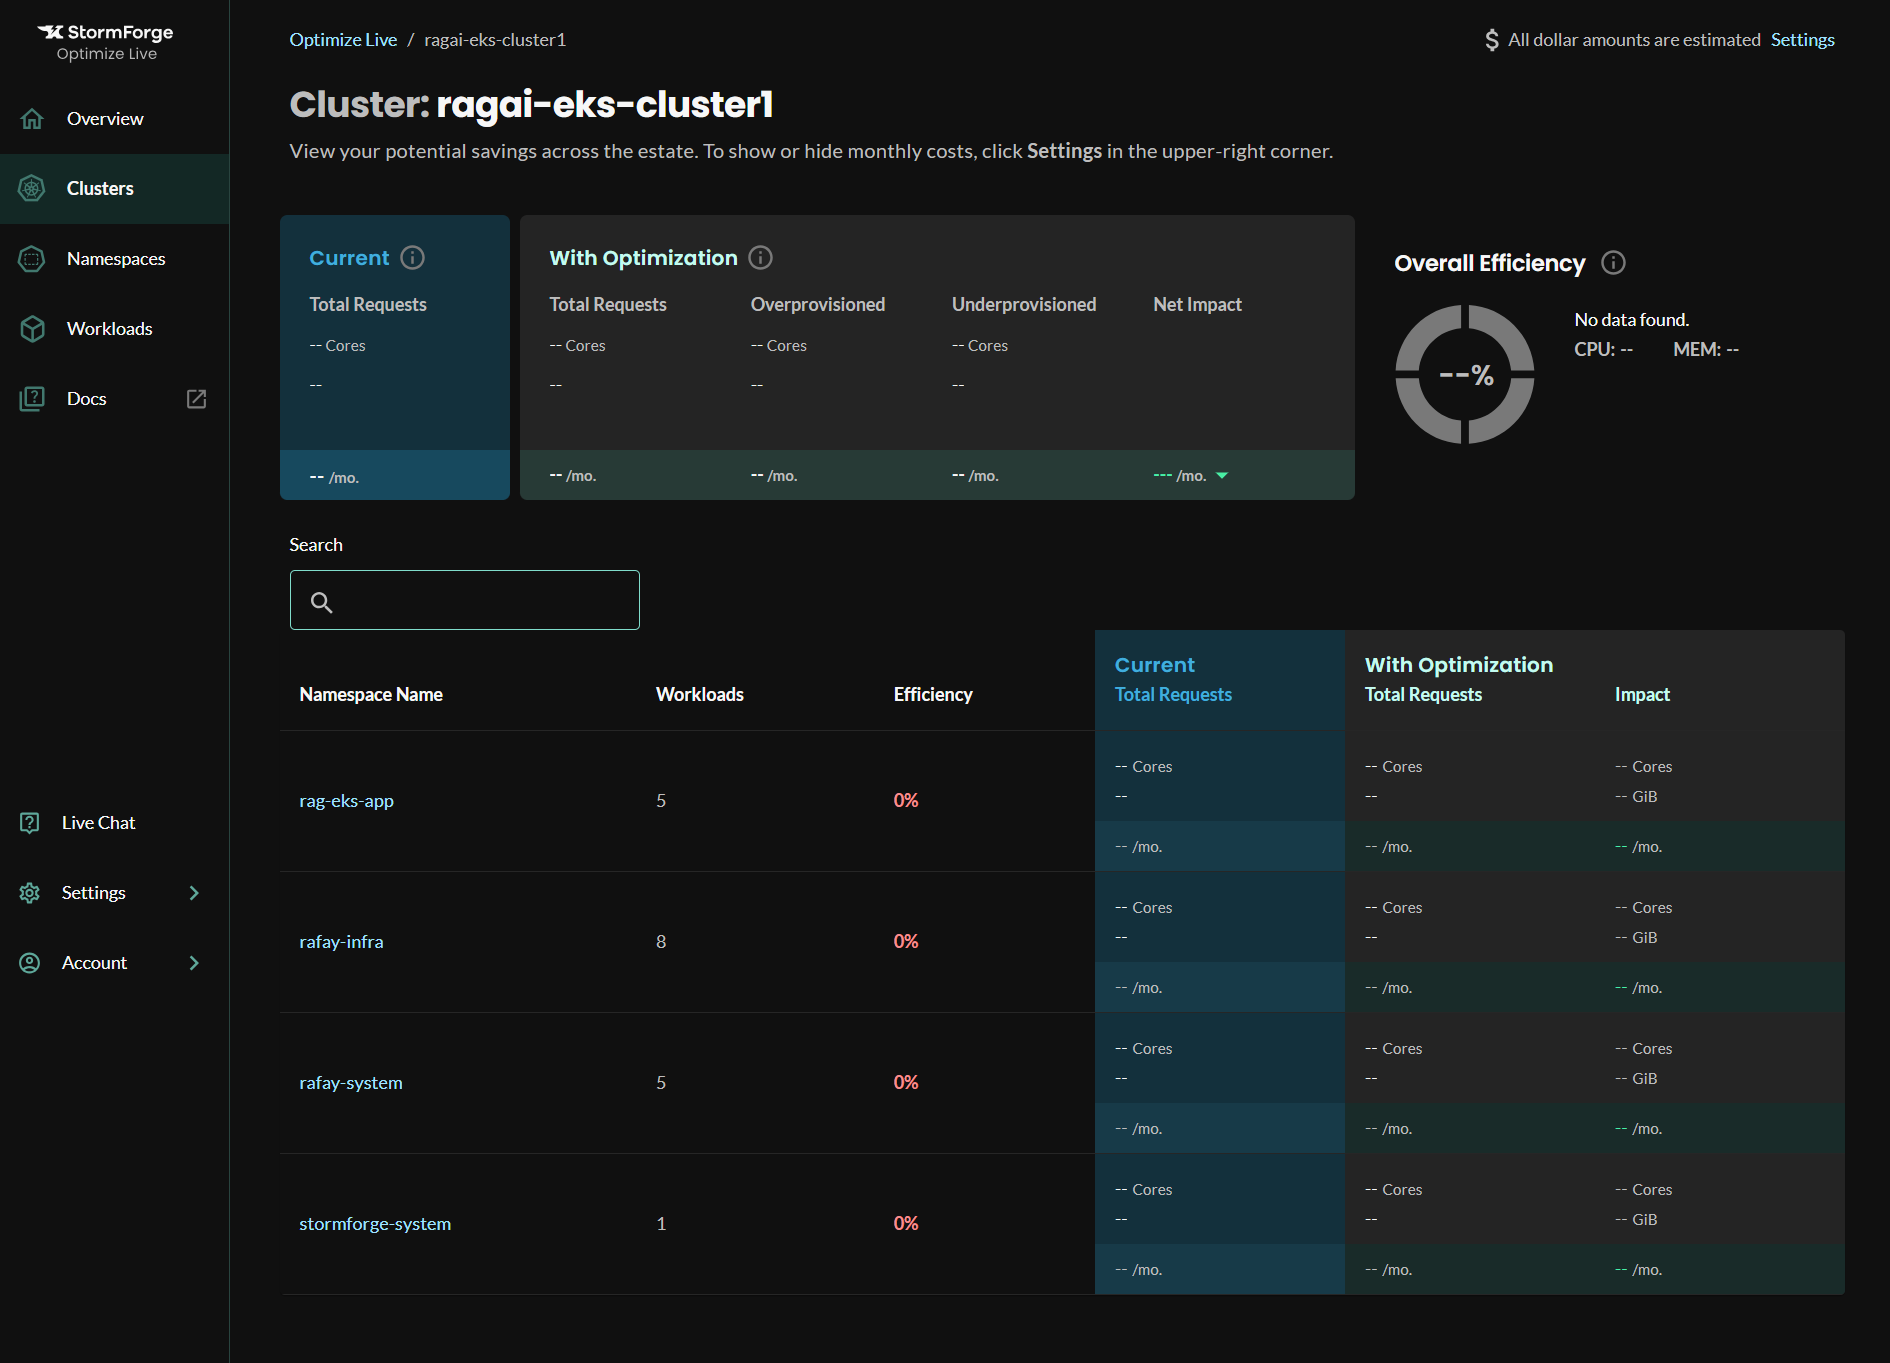
Note
It could take up to 1 hour to begin to see insights for the cluster.
Recap
Congratulations! You have successfully deployed the StormForge agent on your managed Kubernetes cluster as an add-on in a custom cluster blueprint. You then validated the agent was communicating with your StormForge account.