Create
Users with appropriate roles are allowed to create k8s resources from the K8s Resources dashboard. An intuitive workflow is available in the console to create these resources quickly and efficiently.
Deployment Resources
Deployments
To create Deployments, perform the following steps:
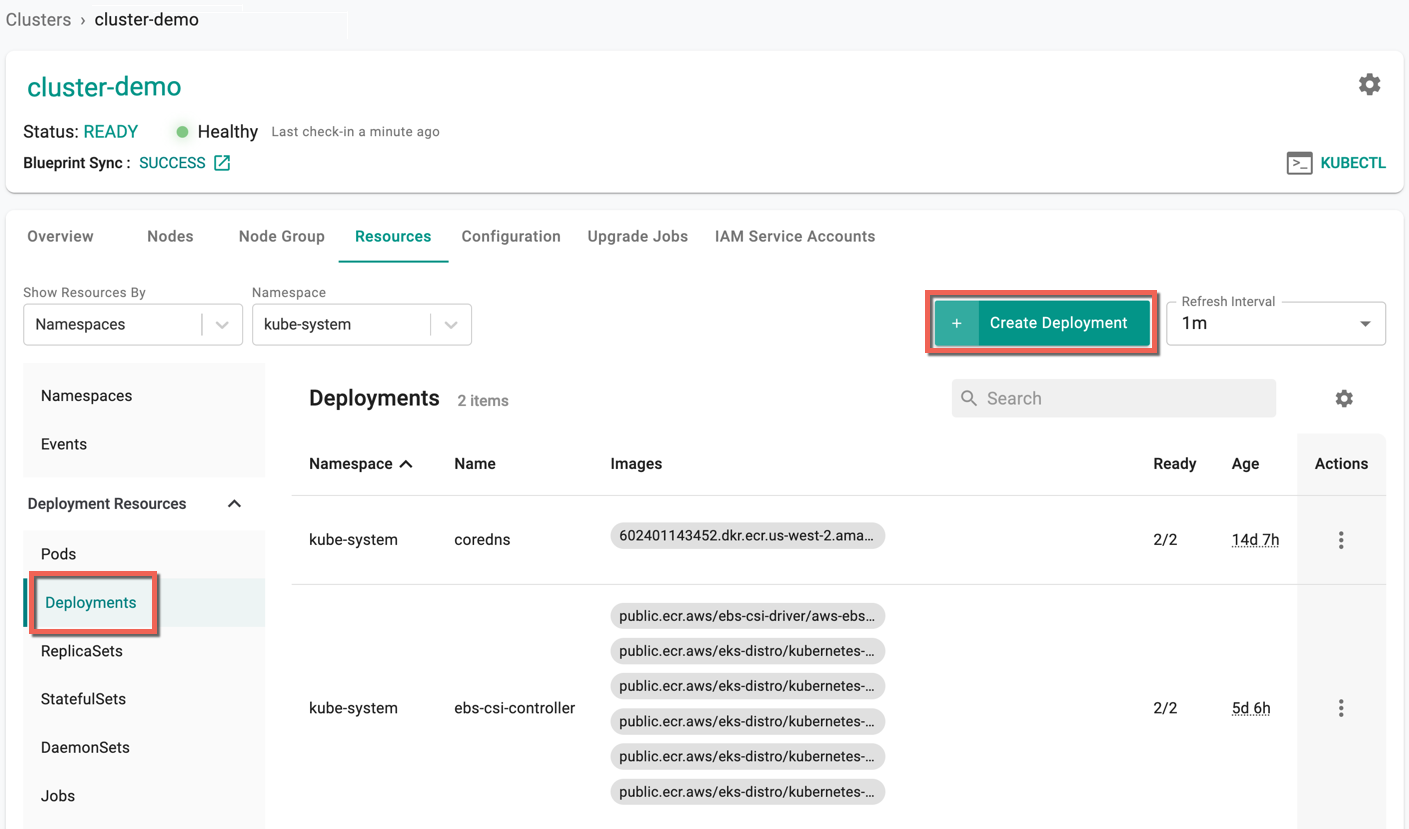
- Select a cluster and click the Resources tab
- Select Deployments under the Deployment Resources and click Create Deployment
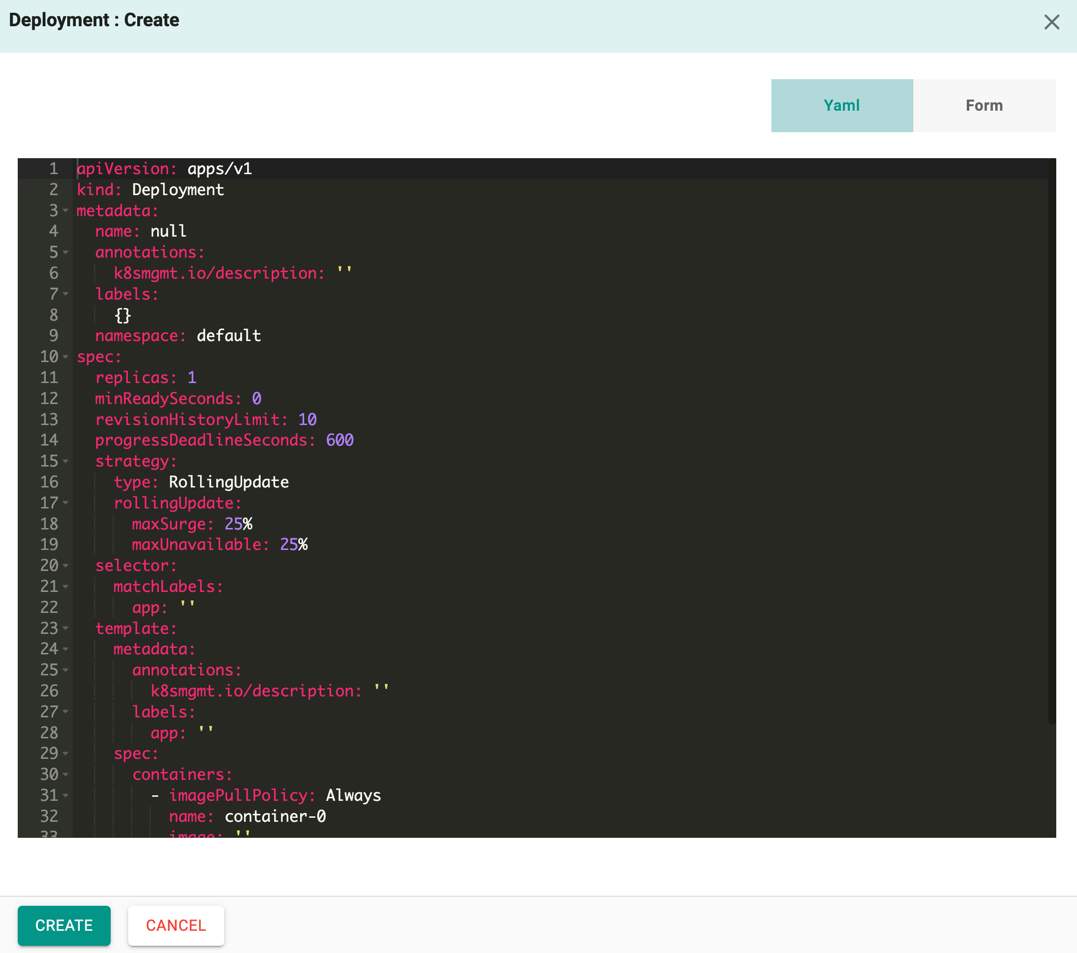
Deployment : Create screen appears
- By default, Yaml config screen appears. You can directly add the required parameters to this config file and create a Deployment
-
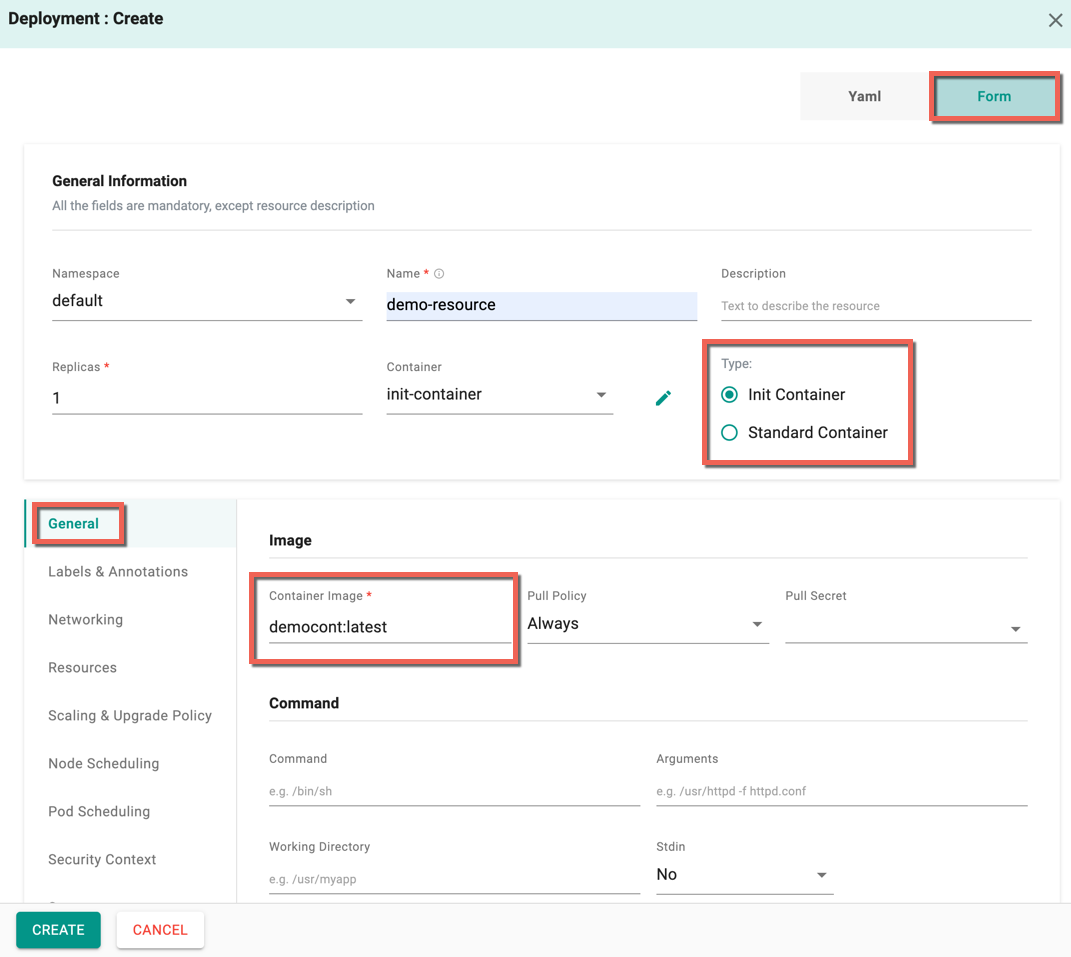
Form allows to select and enter the required data
-
Select the Namespace and enter the Resource Name
- Optionally, enter the Description
- Enter the Replicas count and optionally, add container(s). Each deployment can have one or more container(s). On adding two or more containers, users can select one container initially and provide the required details followed by other containers
- Select the type of container for each container, either Init Container (or) Standard Container. Standard Container is selected by default
General
- In the General tab, enter the Container Image value of the container selected in the above step
- To pull images from private registry, select from Pull Secret drop-down and optionally, provide the other details
Below is an example of Init Container
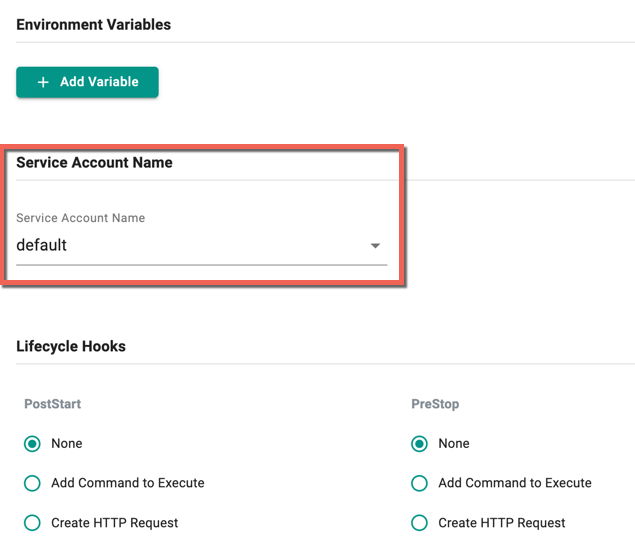
- The service account(s) associated with the selected namespaces are listed here and the user can select the required one
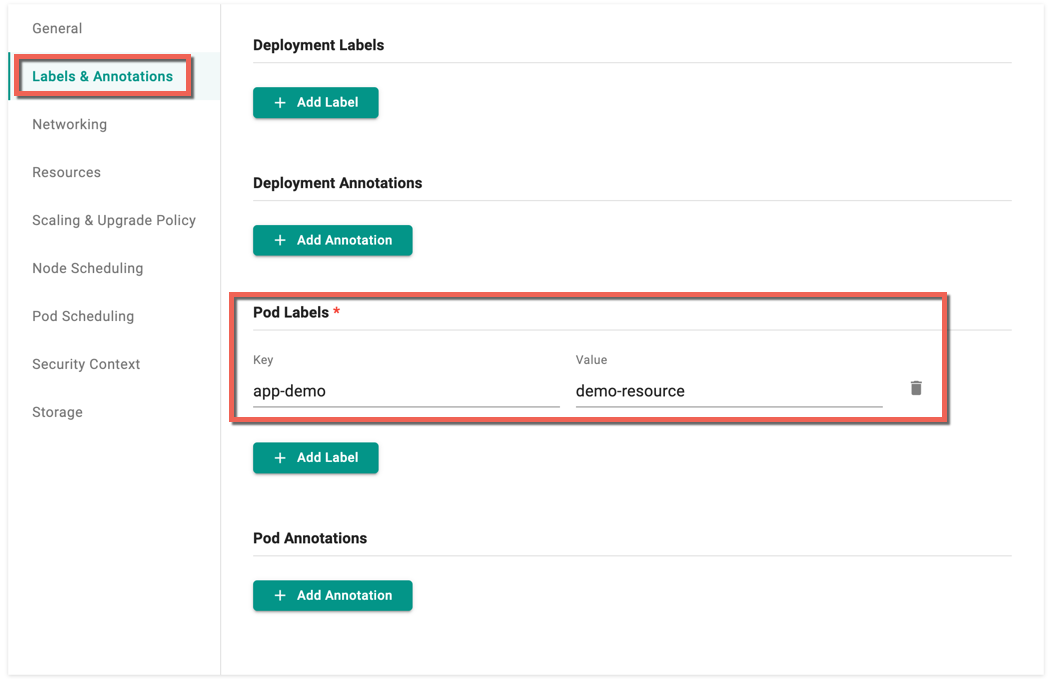
Labels & Annotations
- In the Labels & Annotations tab, enter the Pod Labels and optionally, provide the other details
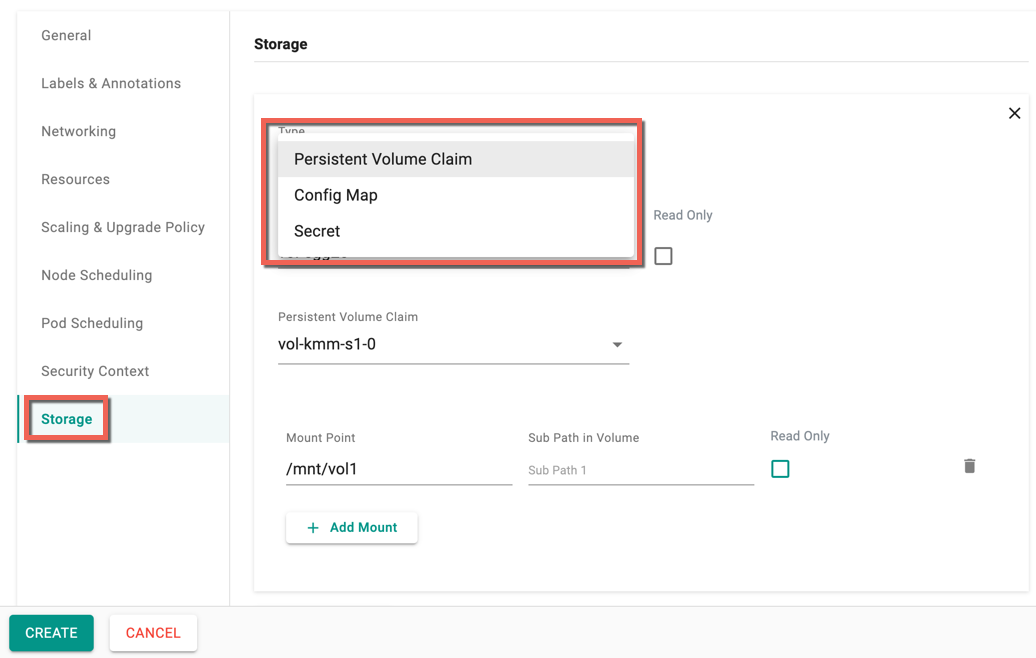
Storage
Note: It is recommended to provide the storage details though its optional
- Select the Storage Type from the drop-down
- Based on the storage type selection, Persistent Volume Claim (PVC), Config Map, and Secret created in that specific namespace are listed and the input field varies for each type
Below is an example of PVC type, where the Volume Name, PVC, and Mount Point values are provided
Optionally, the user can provide the values for Networking, Resources, Scaling & Upgrade Policy, Node Scheduling, Pod Scheduling, and Security Context
- Once the required values are provided, click Create
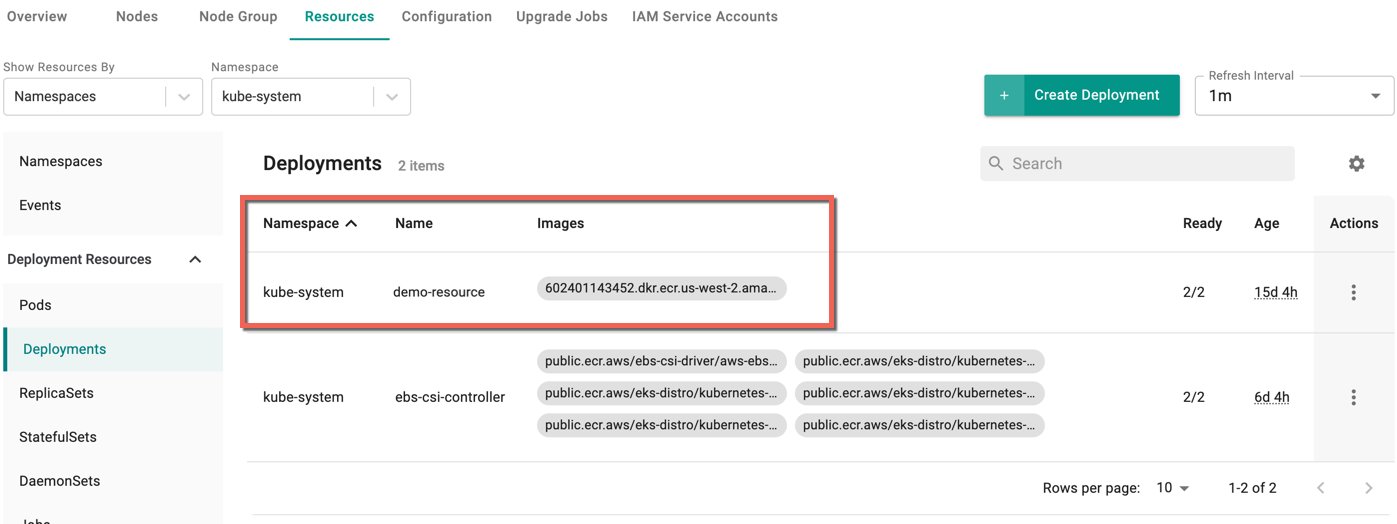
- On successful creation, you can view the deployment as shown below
For more details, refer Deployments
Create StatefulSet
To create StatefulSet, perform the following steps:
- Select a cluster and click the Resources tab
- Select StatefulSets under the Deployment Resources and click Create StatefulSet
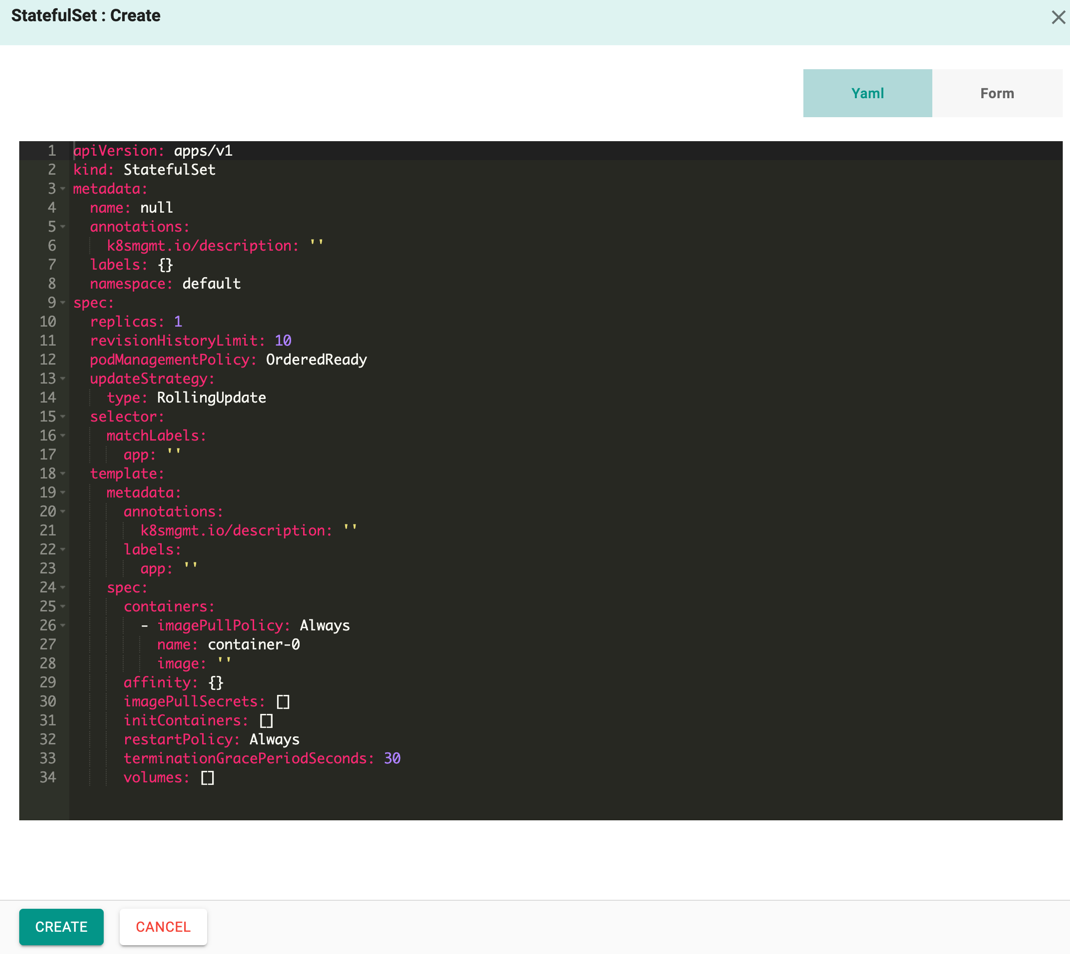
StatefulSet : Create screen appears
By default, Yaml config screen appears. You can directly add the required parameters to this config file and create a StatefulSet
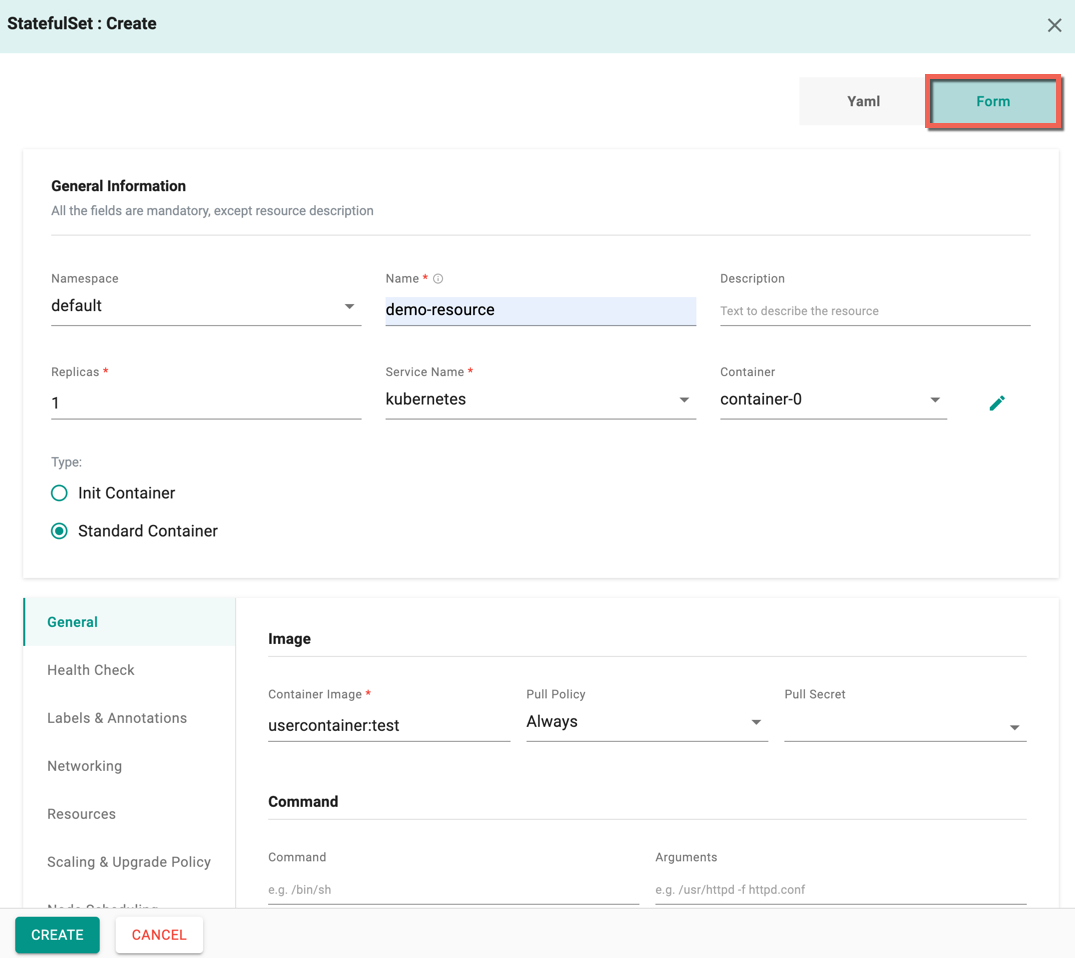
Form allows to select and enter the required data
- Select the Namespace and enter the Resource Name
- Optionally, enter the Description
- Enter the Replicas count and select the Service Name from the drop-down. The services associated with this specific namespace are listed here
- Select the Container Type, either Init Container (or) Standard Container. Standard Container is selected by default
Similar to Create Deployments, provide all the mandatory values and optionally, enter the required details.
- Click Create
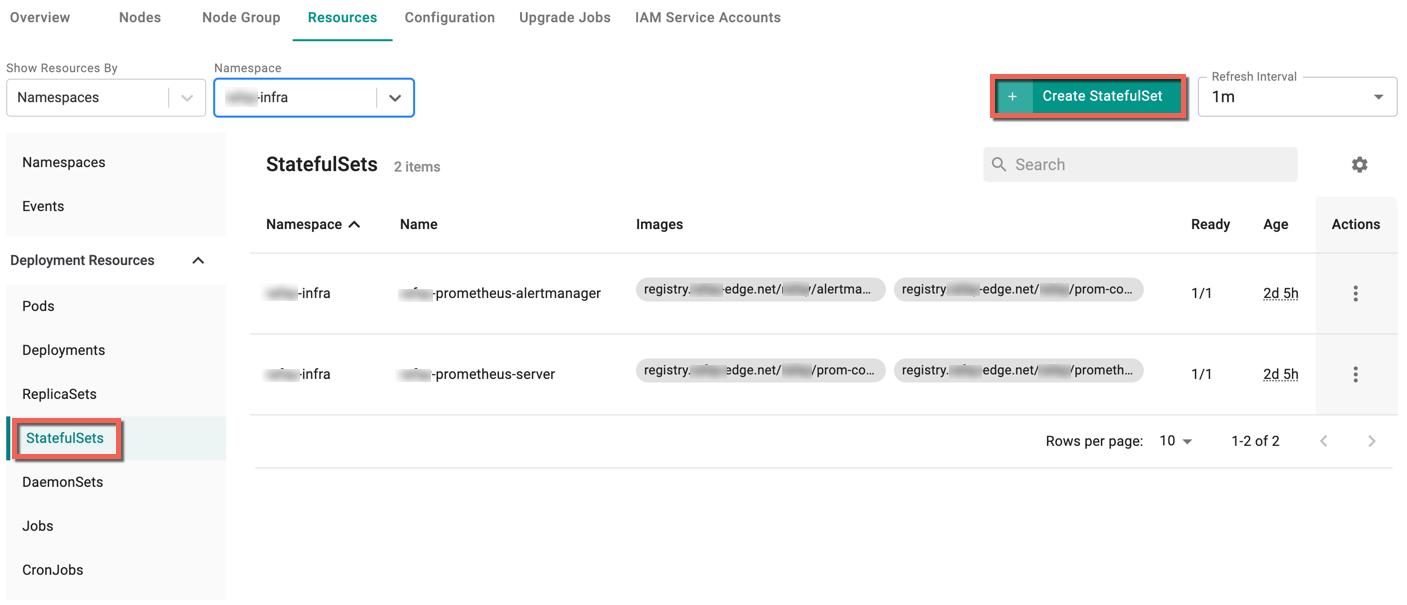
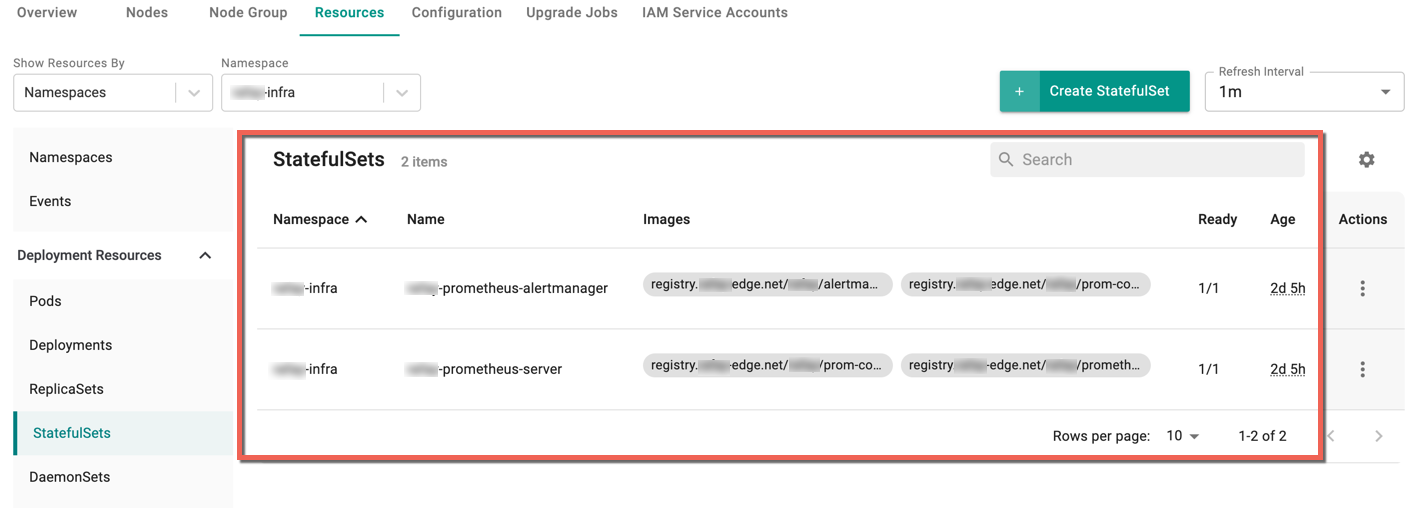
On successful creation, you can view the StatefulSet as shown below
For more details, refer StatefulSets
Create DaemonSets
To create DaemonSets, perform the following steps:
- Select a cluster and click the Resources tab
- Select DaemonSets under the Deployment Resources and click Create DaemonSet
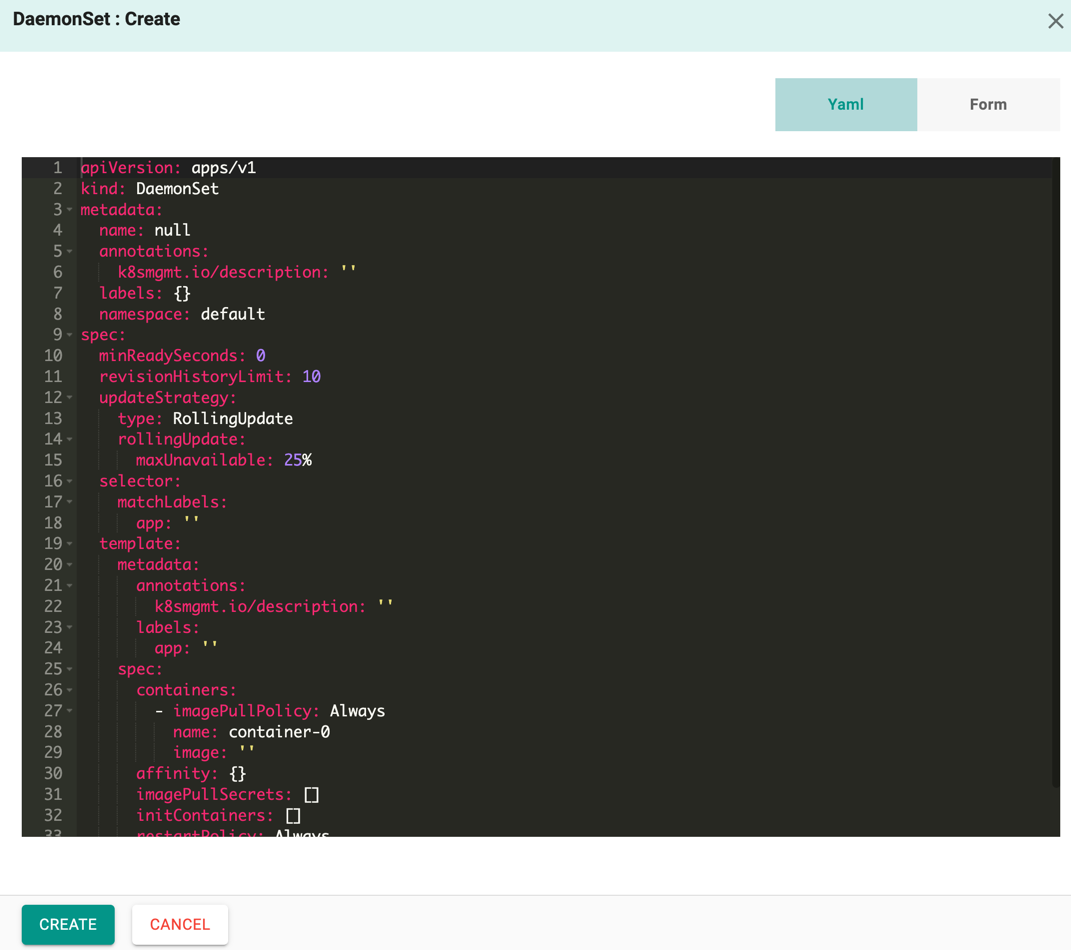
DaemonSet : Create screen appears
By default, Yaml config screen appears. You can directly add the required parameters to this config file and create a DaemonSet
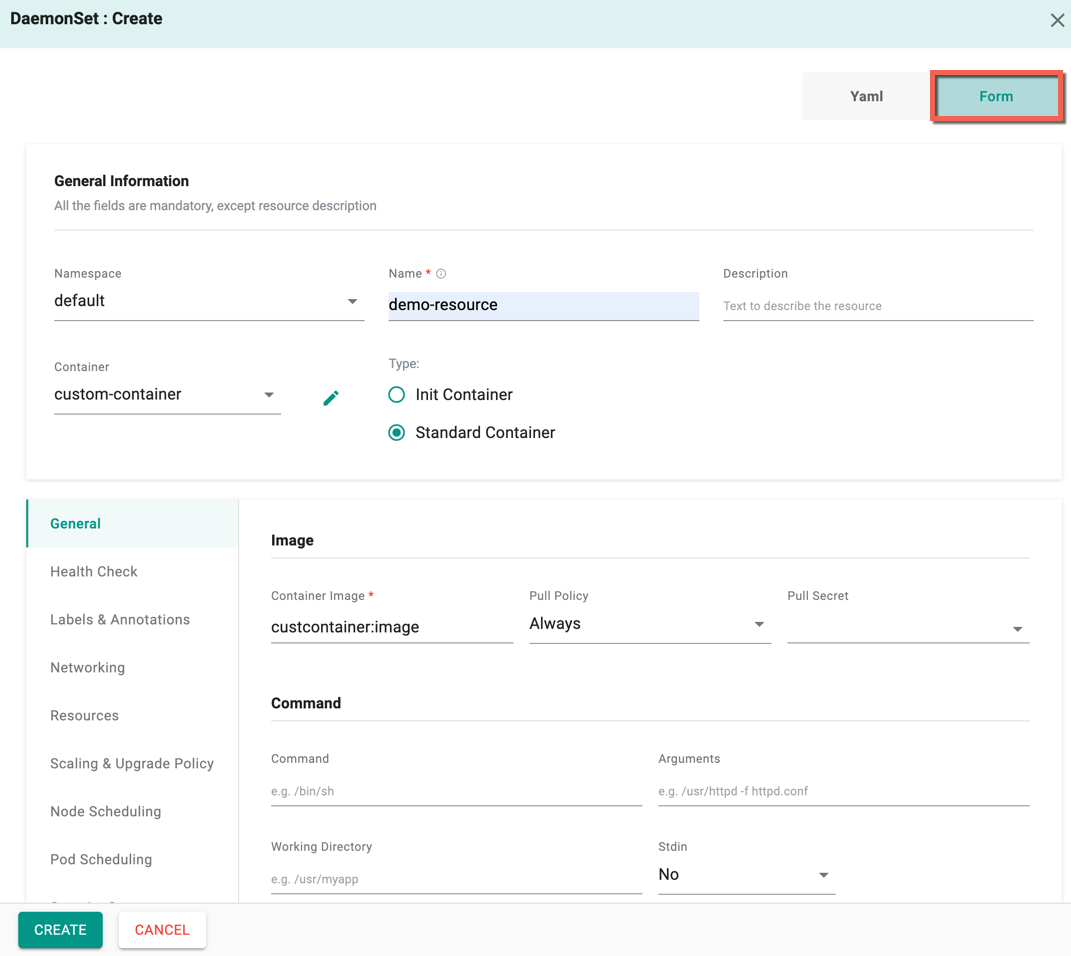
Form allows to select and enter the required data
- Select the Namespace and enter the Resource Name
- Optionally, enter the Description
- Select the Container Type, either Init Container (or) Standard Container. Standard Container is selected by default
Similar to Create Deployments, provide all the mandatory values and optionally, enter the required details.
- Click Create
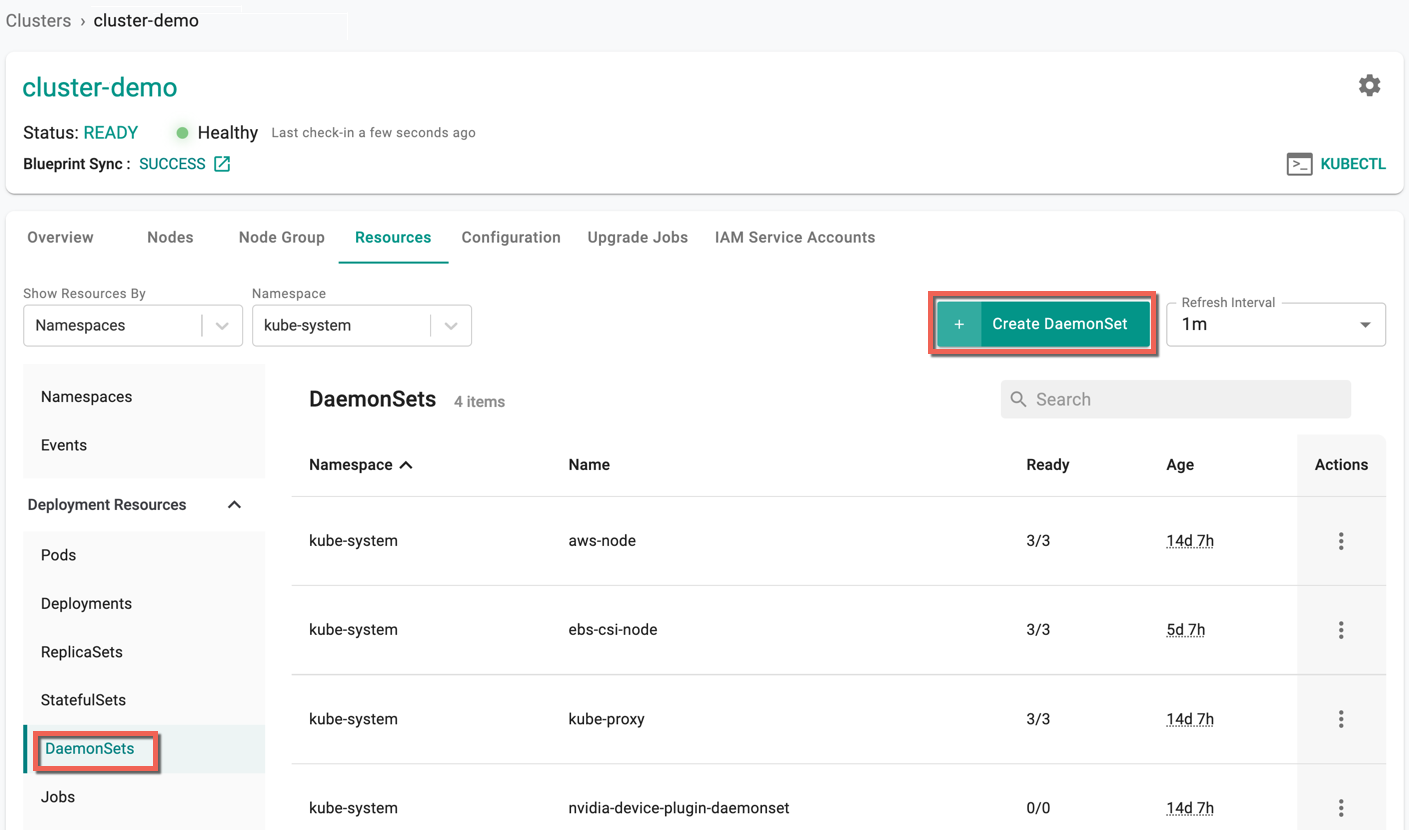
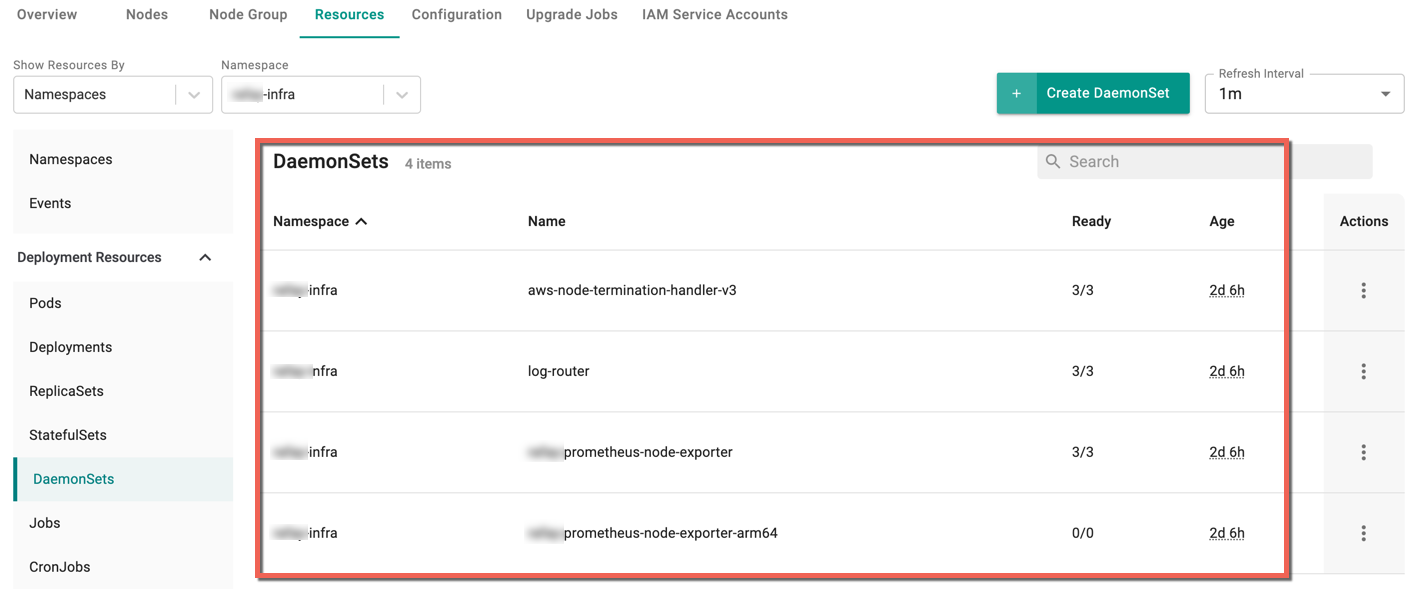
On successful creation, you can view the DaemonSet as shown below
For more details, refer DaemonSets
Create Jobs
To create Jobs, perform the following steps:
- Select a cluster and click the Resources tab
- Select Jobs under the Deployment Resources and click Create Job
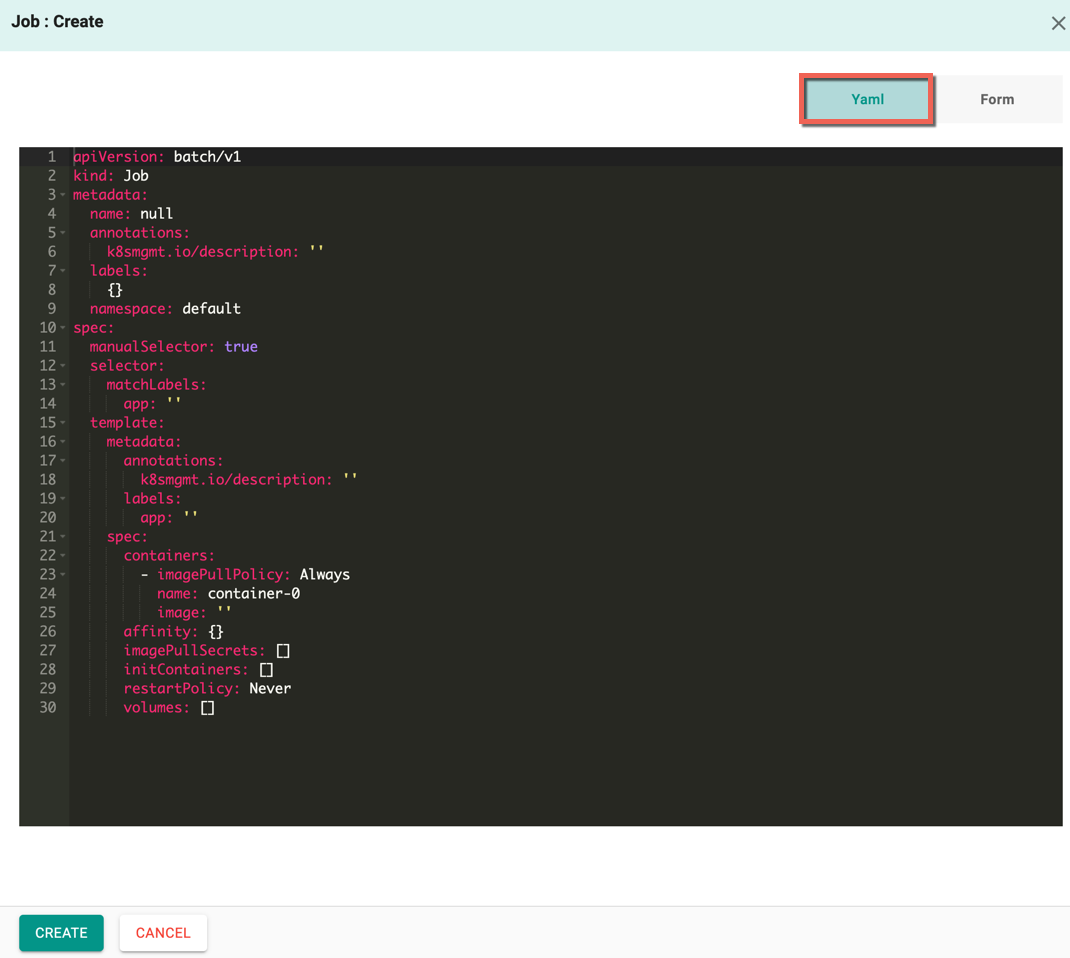
Job : Create screen appears
By default, Yaml config screen appears. You can directly add the required parameters to this config file and create a job
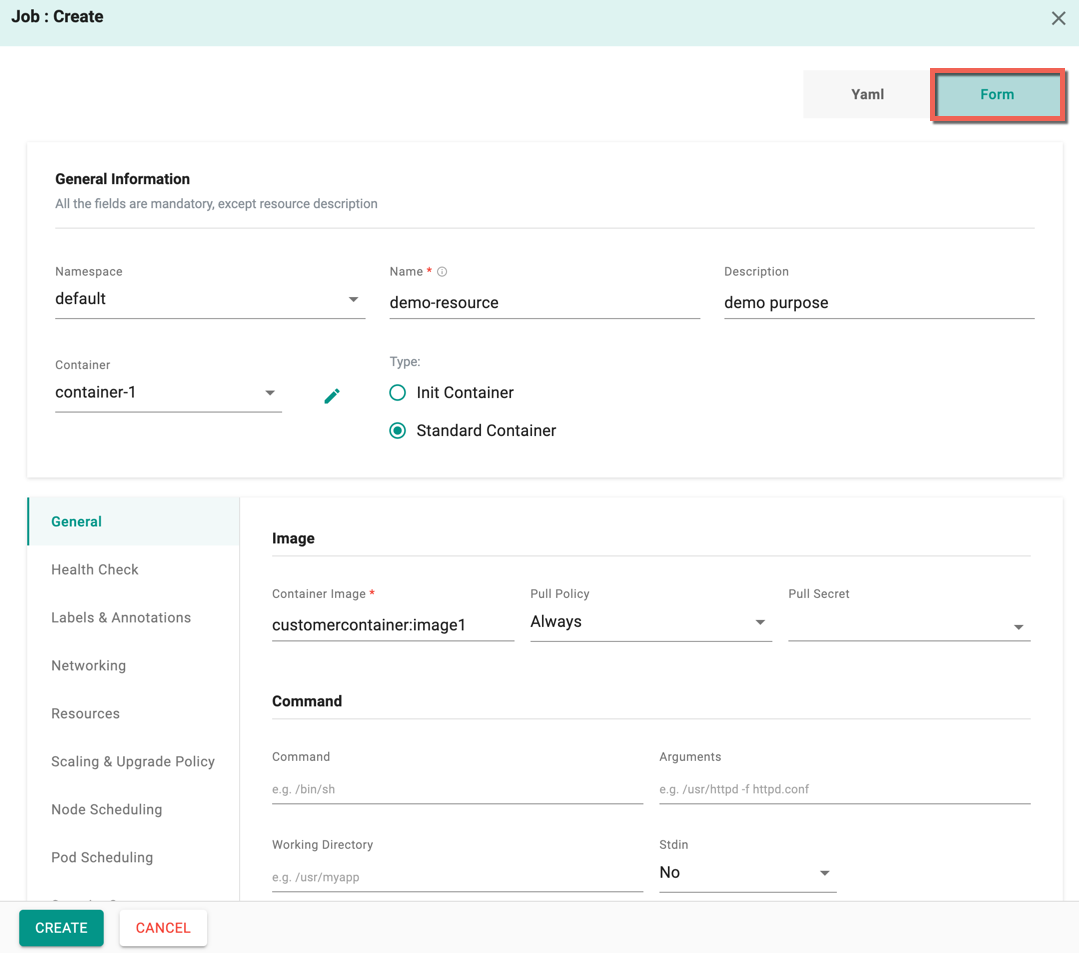
Form allows to select and enter the required data
- Select the Namespace and enter the Resource Name
- Optionally, enter the Description
- Select the Container Type, either Init Container (or) Standard Container. Standard Container is selected by default
Similar to Create DaemonSets, provide all the mandatory values and optionally, enter the required details.
- Click Create
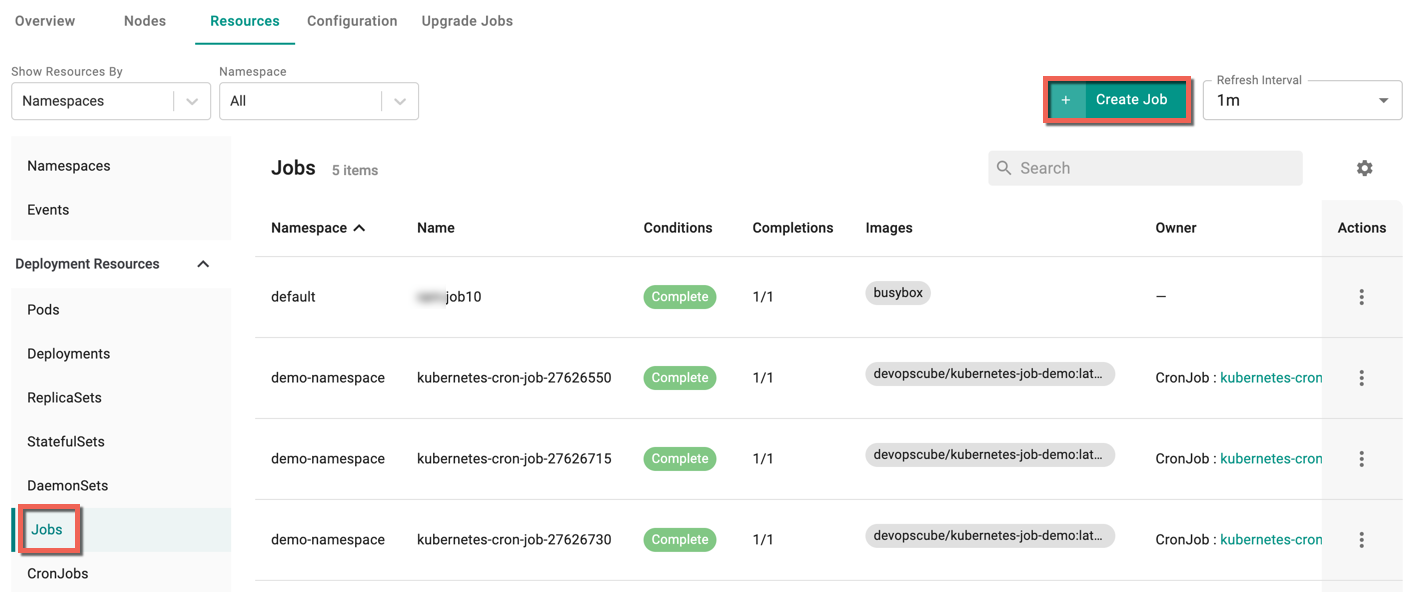
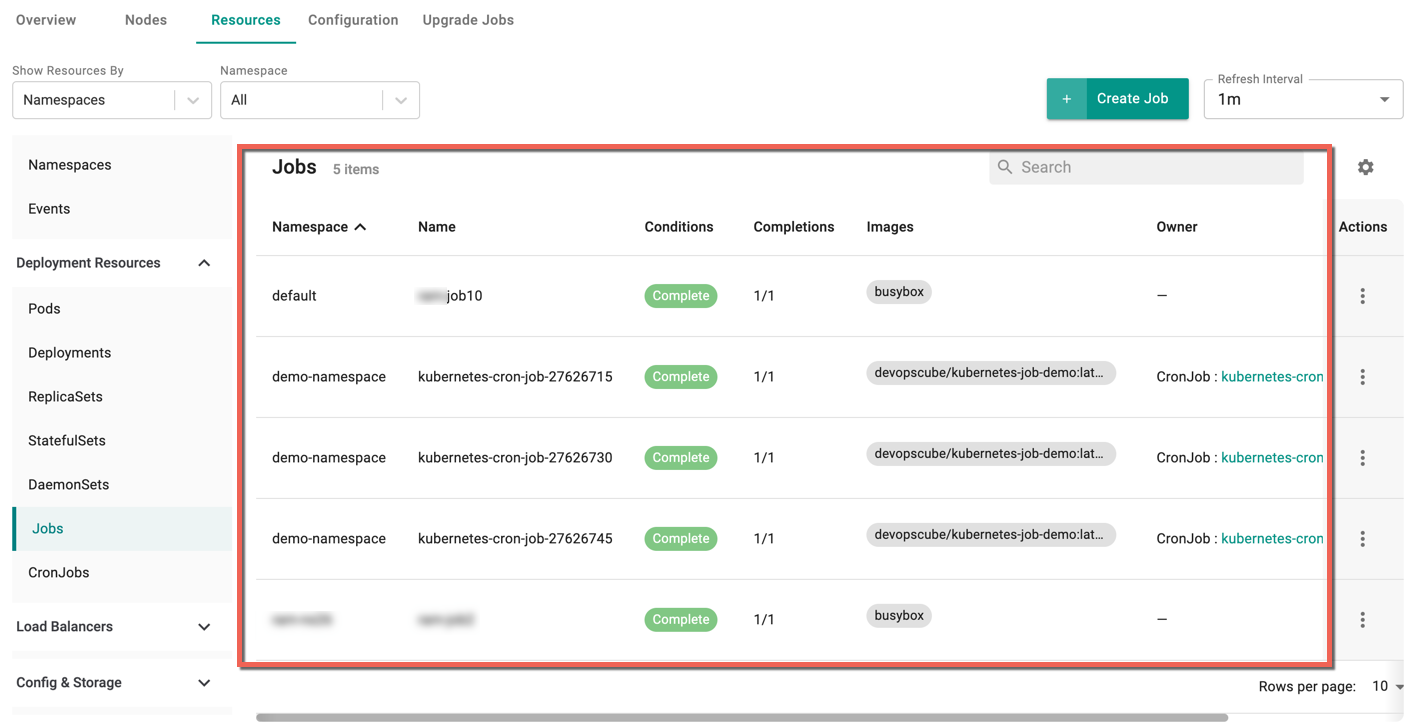
On successful creation, you can view the Job as shown below
For more details, refer Jobs
Create CronJobs
To create CronJobs, perform the following steps:
- Select a cluster and click the Resources tab
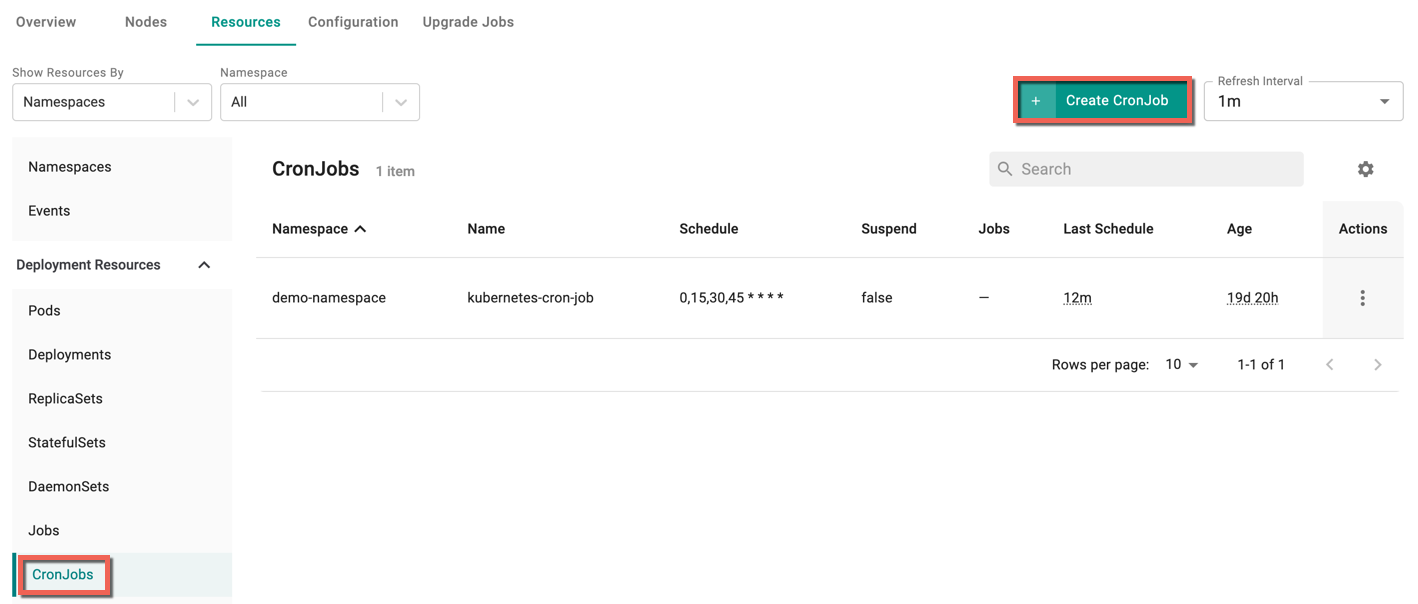
- Select CronJobs under the Deployment Resources and click Create CronJob
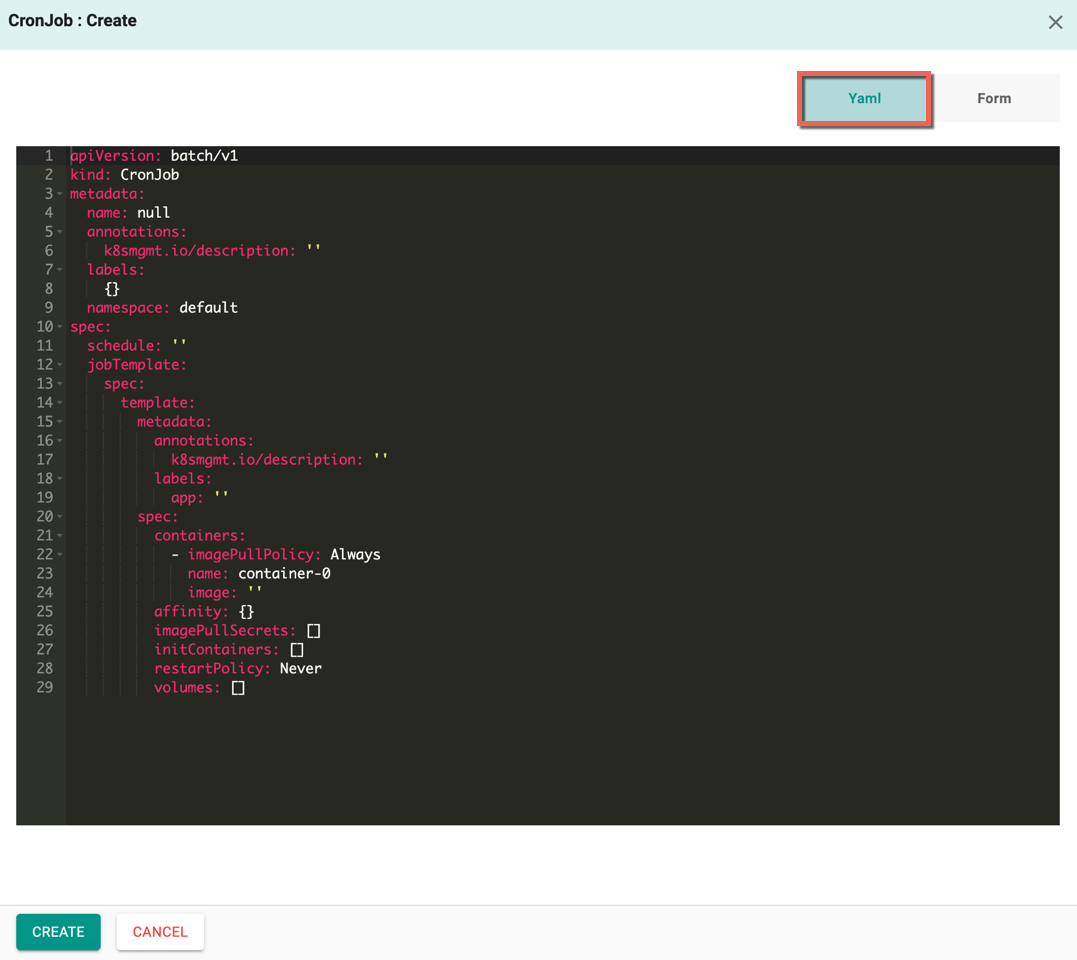
CronJob : Create screen appears
By default, Yaml config screen appears. You can directly add the required parameters to this config file and create a cronjob
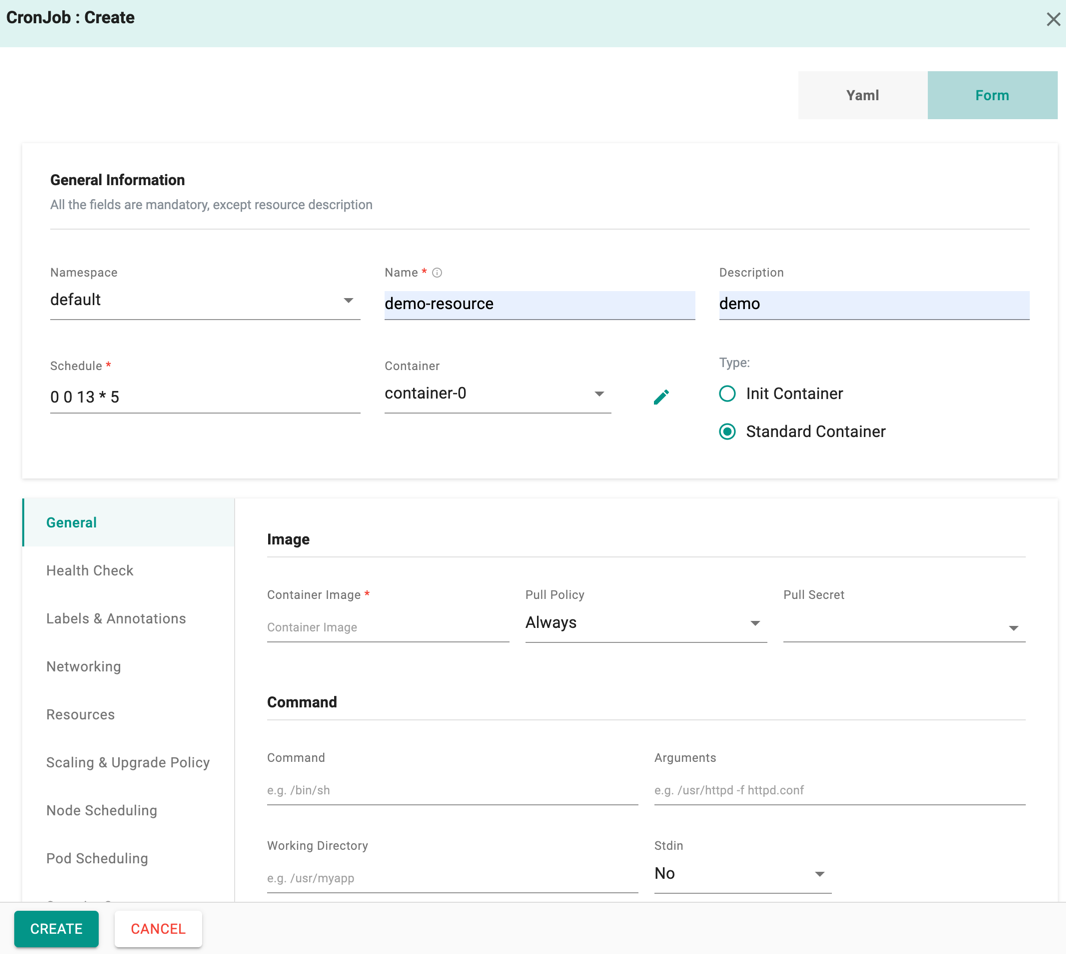
Form allows to select and enter the required data
- Select the Namespace and enter the Resource Name
- Optionally, enter the Description
- Enter the Schedule to run the job in a specific time interval. For example, 0 0 13 * 5: task must be started every Friday at midnight, as well as on the 13th of each month at midnight
- Select the Container Type, either Init Container (or) Standard Container. Standard Container is selected by default
Similar to Create Jobs, provide all the mandatory values and optionally, enter the required details.
- Click Create
On successful creation, you can view the CronJob as shown below

For more details, refer CronJob
Load Balancers
Create Ingress
To create Ingress, perform the following steps:
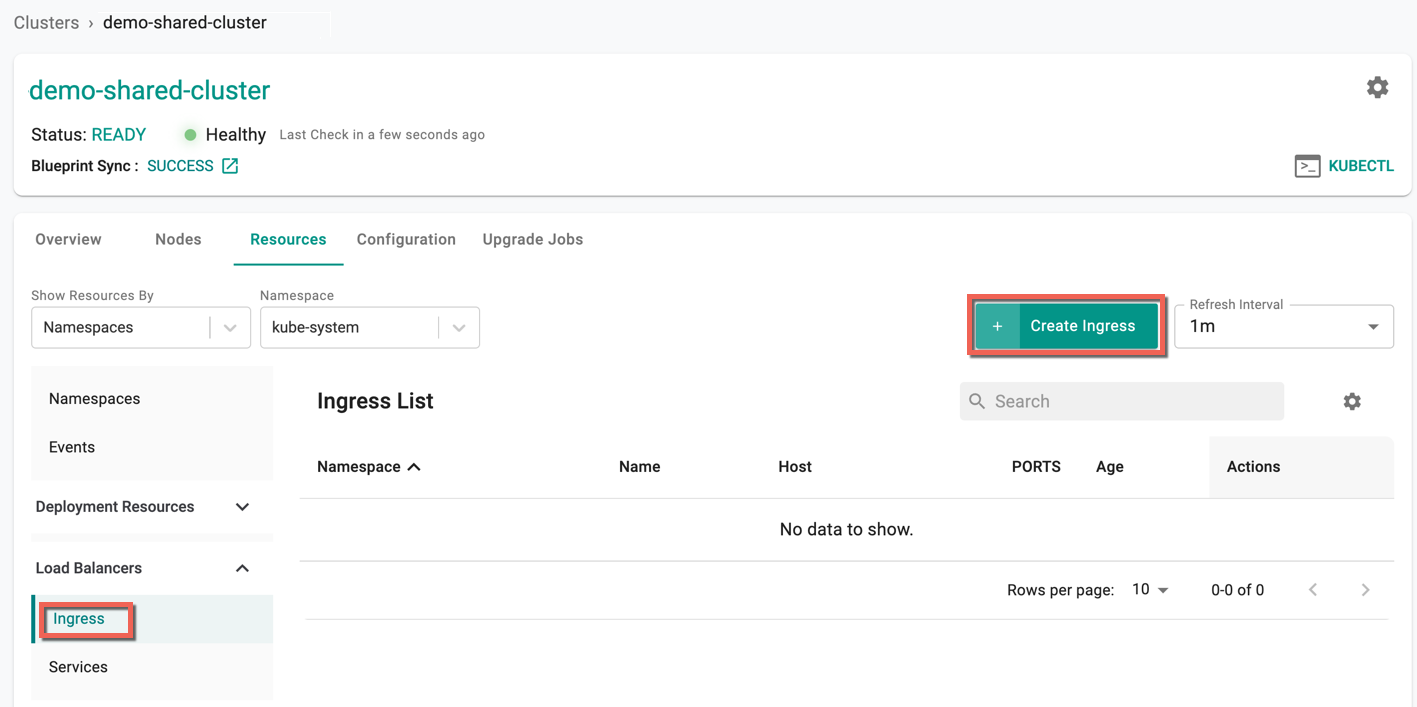
- Select a cluster and click the Resources tab
- Select Ingress under the Load Balancers
- Click Create Ingress
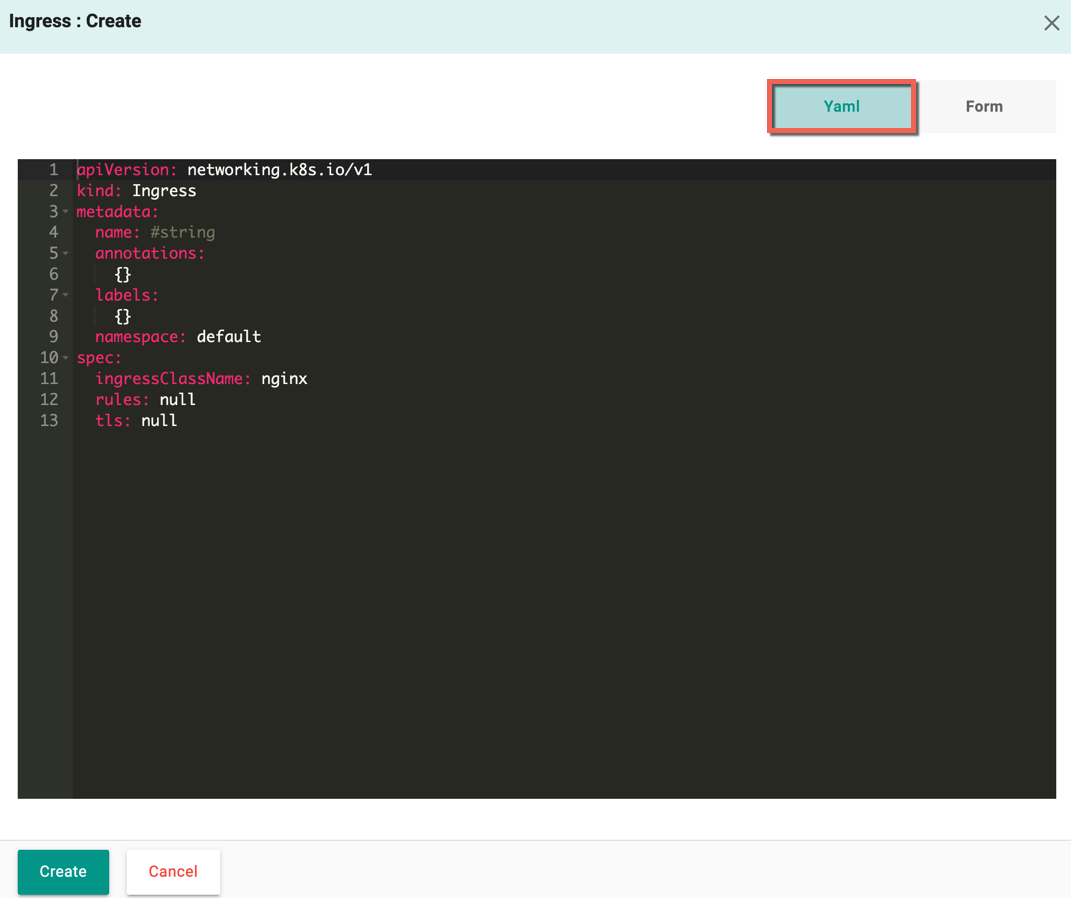
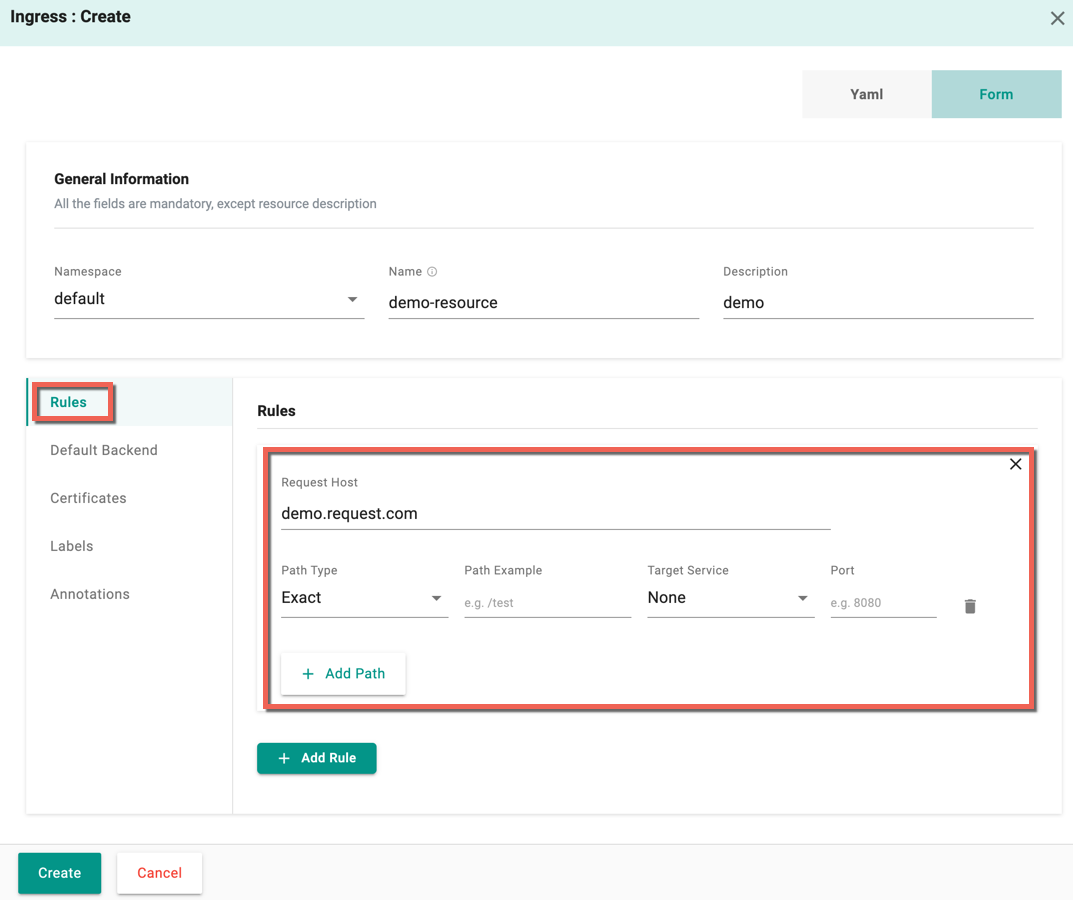
Ingress : Create screen appears
By default, Yaml config screen appears. You can directly add the required parameters to this config file and create an Ingress
Form allows to select and enter the required data
- Select the Namespace and enter the Resource Name
- Optionally, enter the Description
-
Optionally add Rules
-
Enter the Request Host details. If a host is provided, the rules is applied only to that specific host (or) rule gets applied to all inbound HTTP traffic through the IP address specified
-
Click Add Path and select the required Path Type from the drop-down. Each path has an associated backend defined with a
service.nameand aservice.port.nameorservice.port.number. You can add one or more paths. Both the host and path must match the content of an incoming request before the load balancer directs traffic to the referenced Service
-
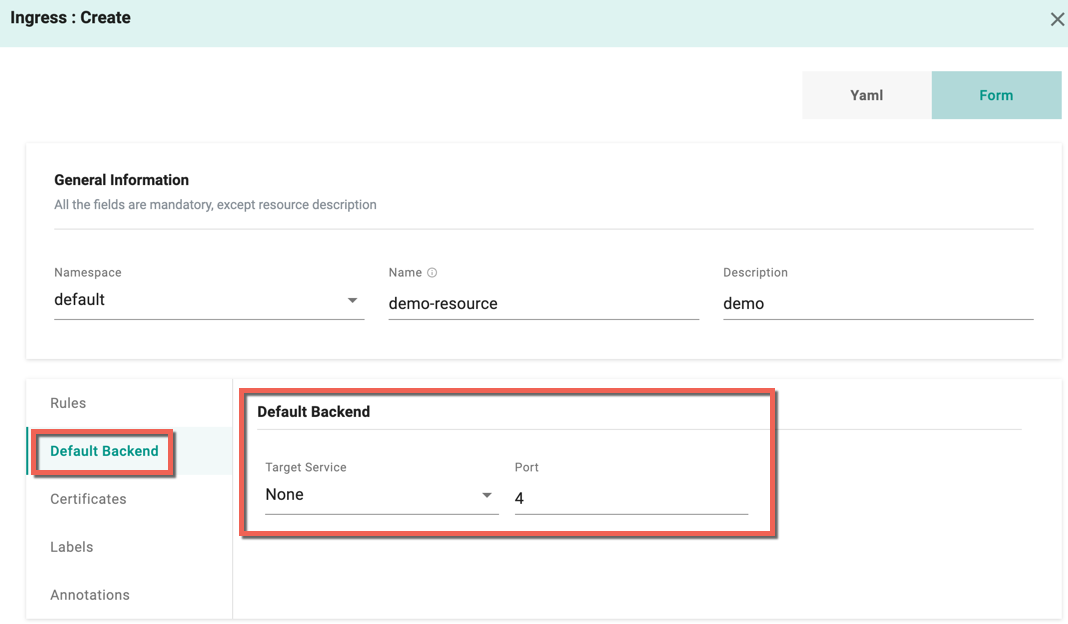
- Optionally, add Default Backend. The Default Backend is conventionally a configuration option of the Ingress controller. Select the required Target Service from the drop-down and Port.
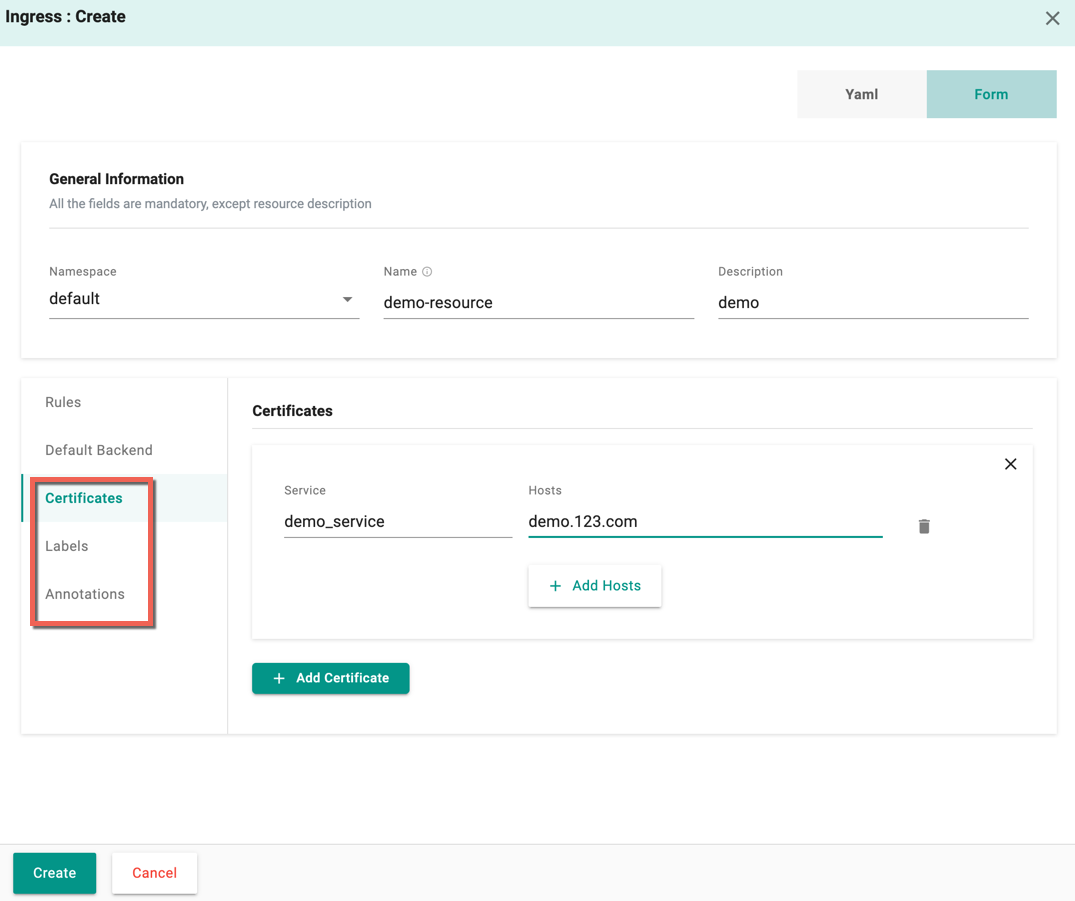
- Optionally add Certificates (if available) for security purpose
- Optionally add Labels, and Annotations
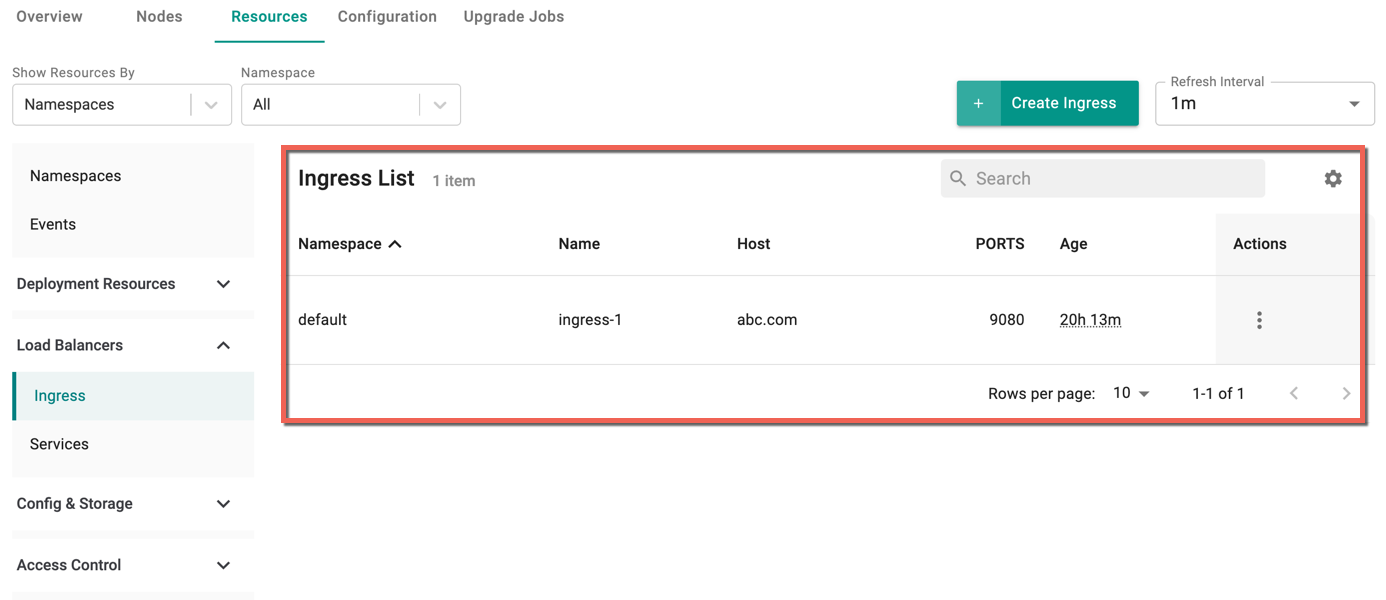
- Click Create
- On successful creation, the resource is displayed in the Ingress list
For more details, refer Ingress - K8s Resource
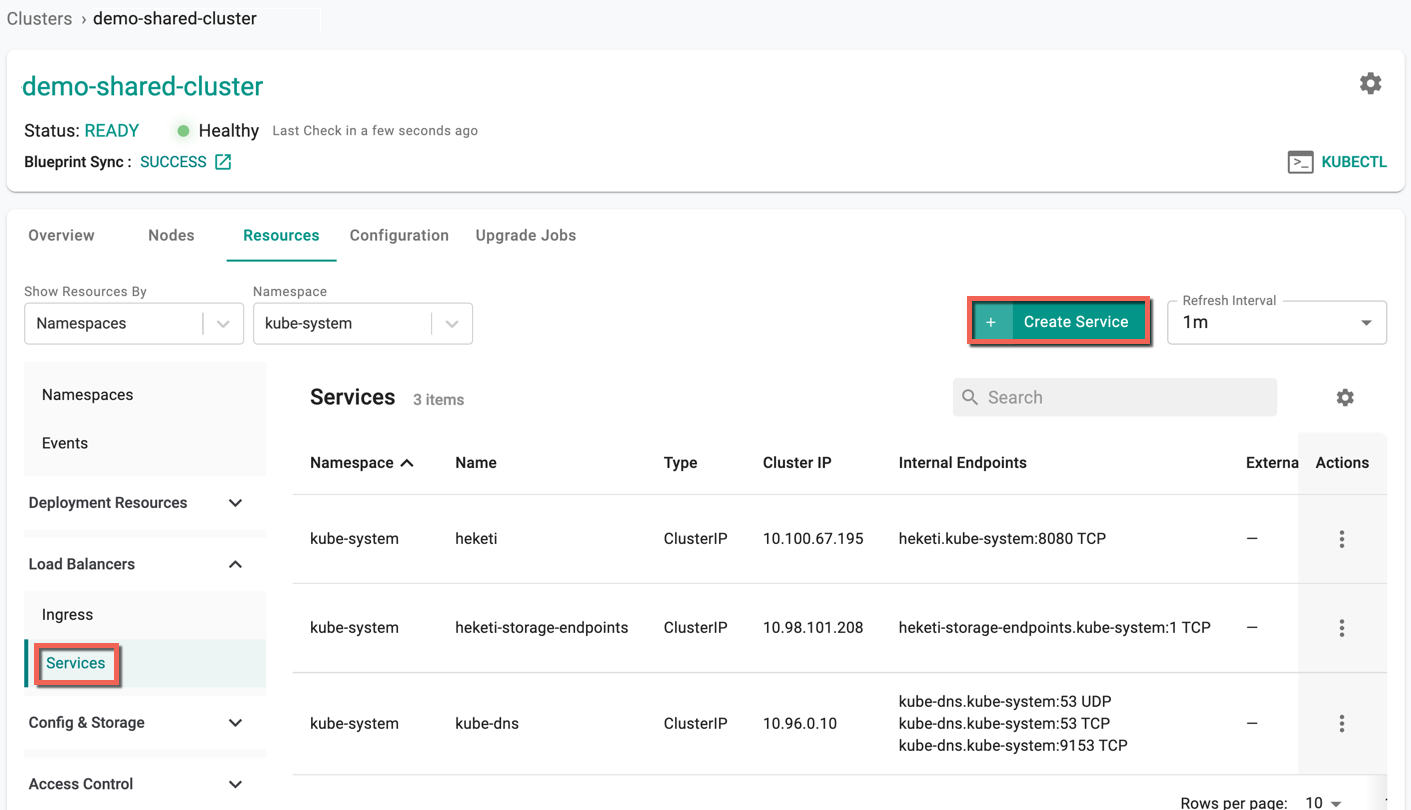
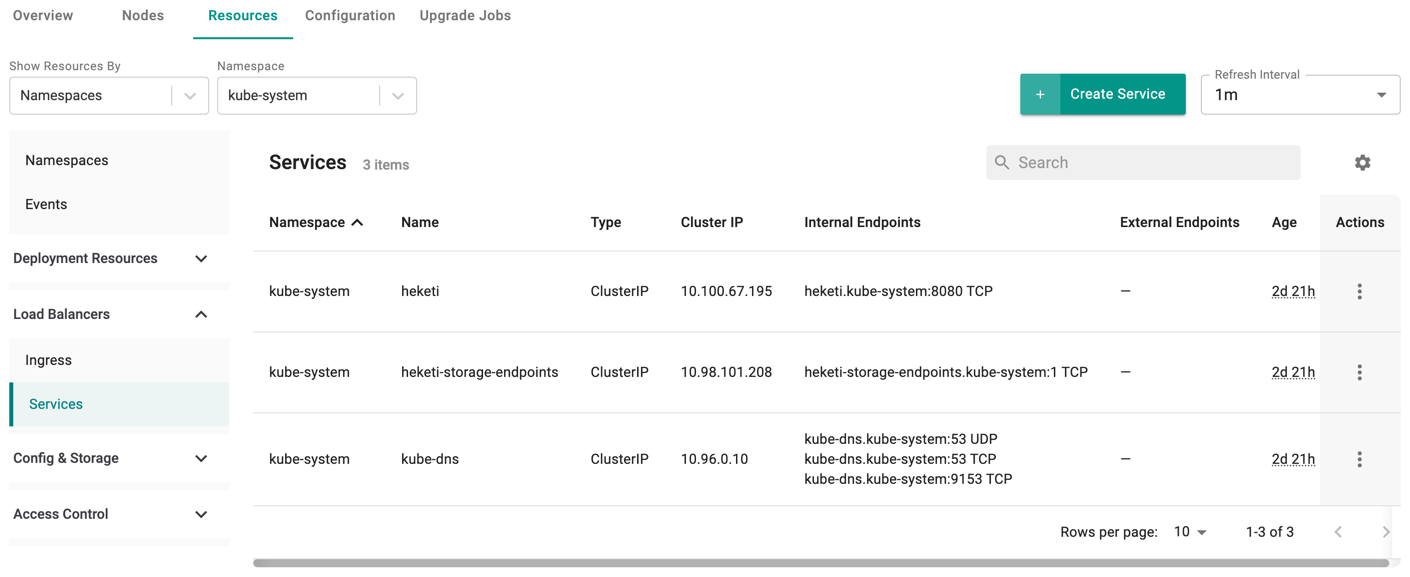
Create Services
To create Services, perform the following steps:
- Select a cluster and click the Resources tab
- Select Services under the Load Balancers
- Click Create Service
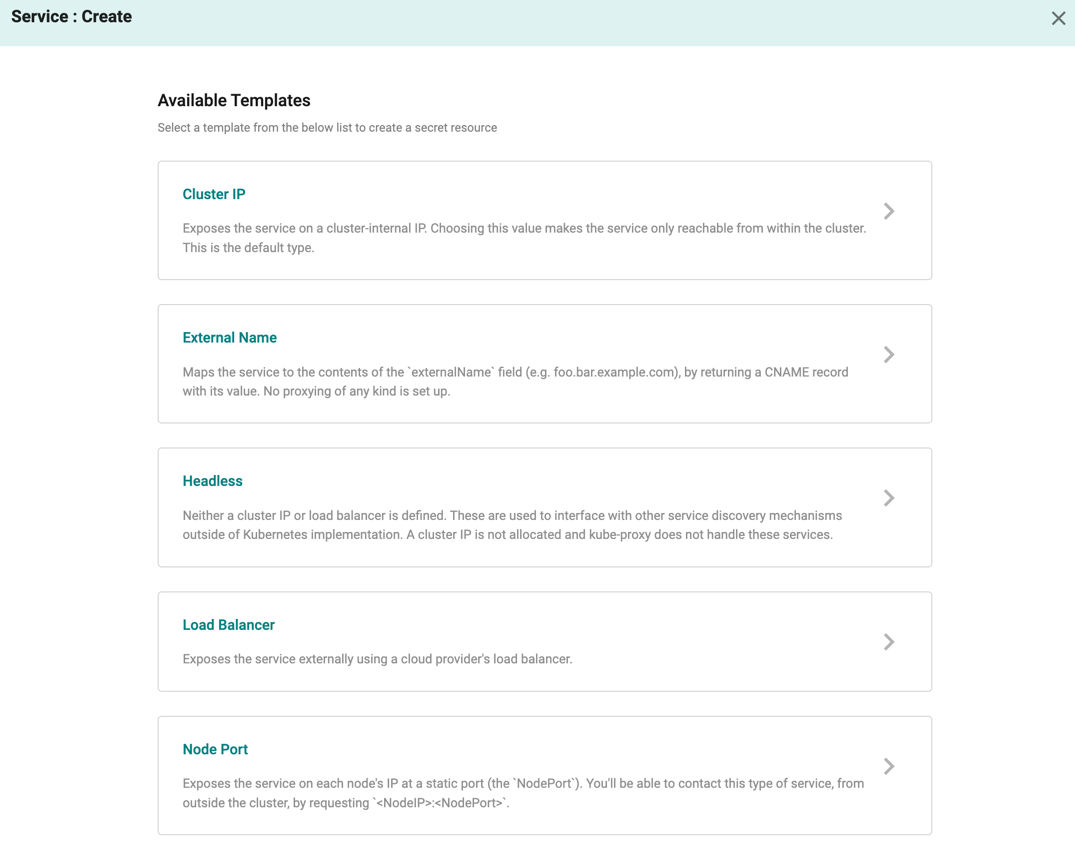
Service : Create screen appears. Five (5) secret templates are available, allowing the users to select the required template
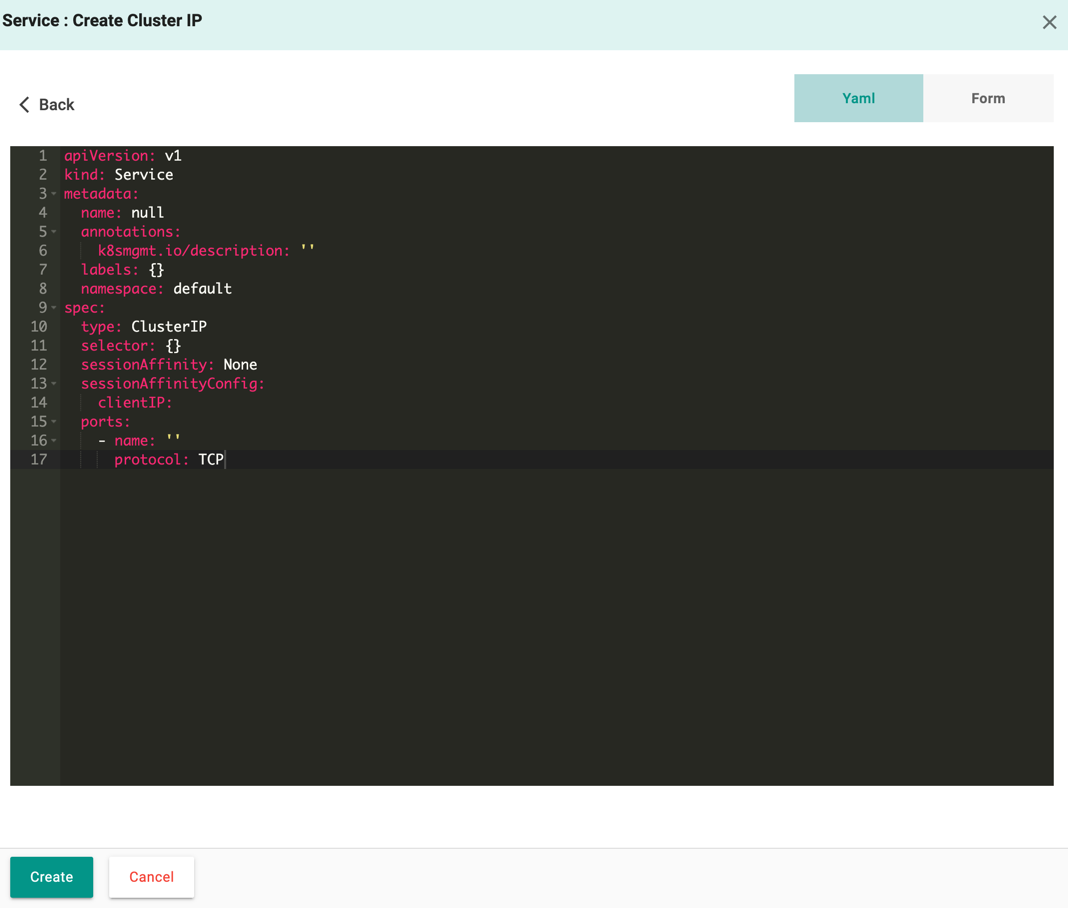
Here is an illustrative example of one template to create a Cluster IP
Cluster IP
- By default, Yaml config screen appears. You can directly add the required parameters to this config file and create a Cluster IP
-
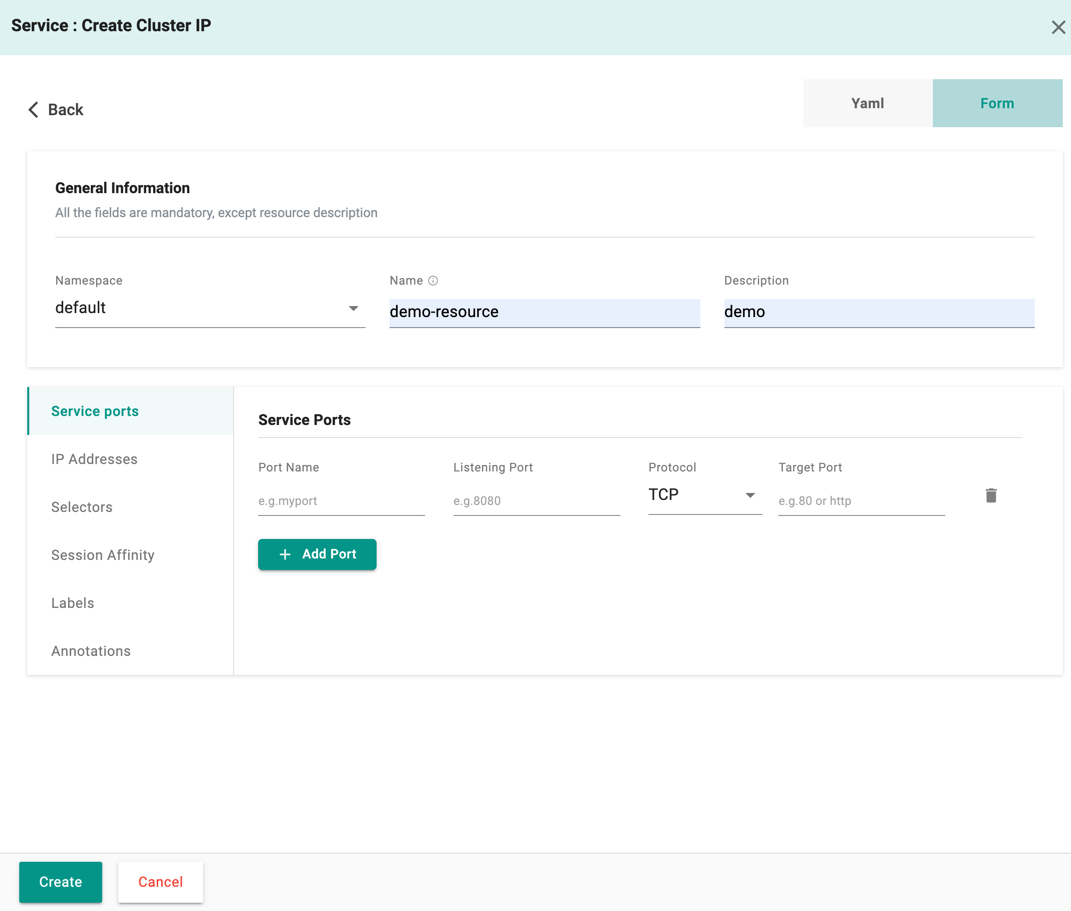
Form allows to select and enter the required data
- Select the Namespace and enter the Resource Name
- Provide the required details
-
Click Create
- On successful creation, the resource is displayed in the Services List
For more details, refer Service - K8s Resource
Config & Storage Resources
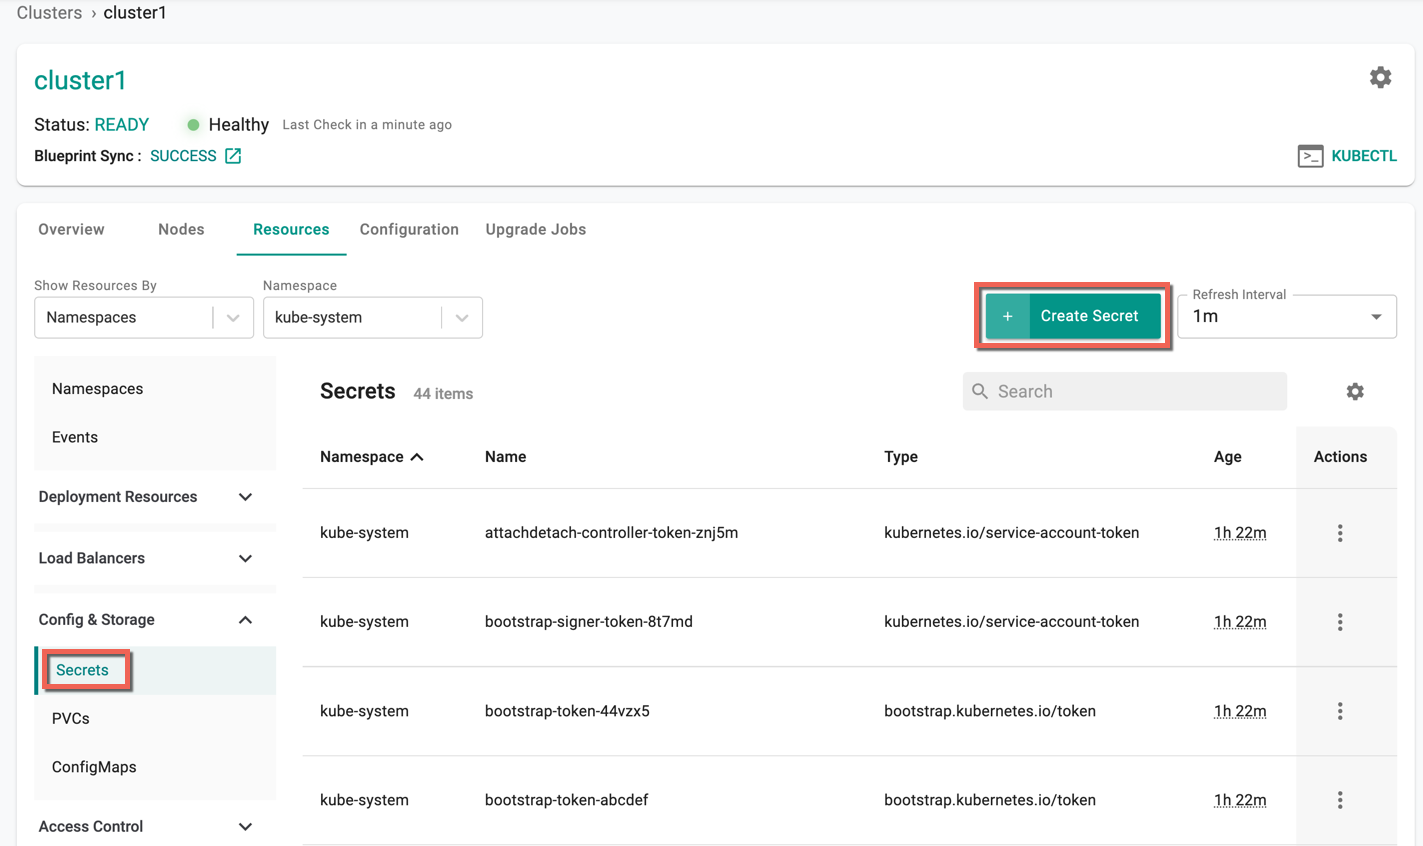
Create Secret
A Secret is a Kubernetes object designed to hold small amounts of sensitive data, like passwords, tokens, or keys. By utilizing Secrets, users can avoid embedding confidential information directly into your application code.
To create Secrets, perform the following steps:
- Select a cluster and click the Resources tab
- Select Secrets under the Config & Storage
- Click Create Secret
Secret : Create screen appears. Five (5) secret templates are available, allowing the users to select the required template
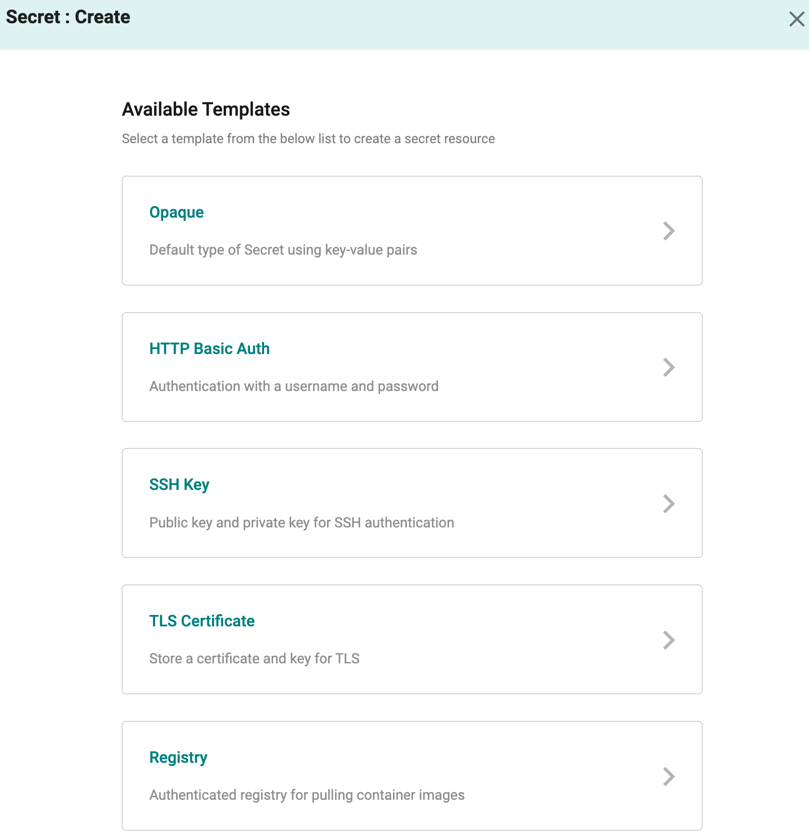
Here is an illustrative example of one template to create a secret
Opaque
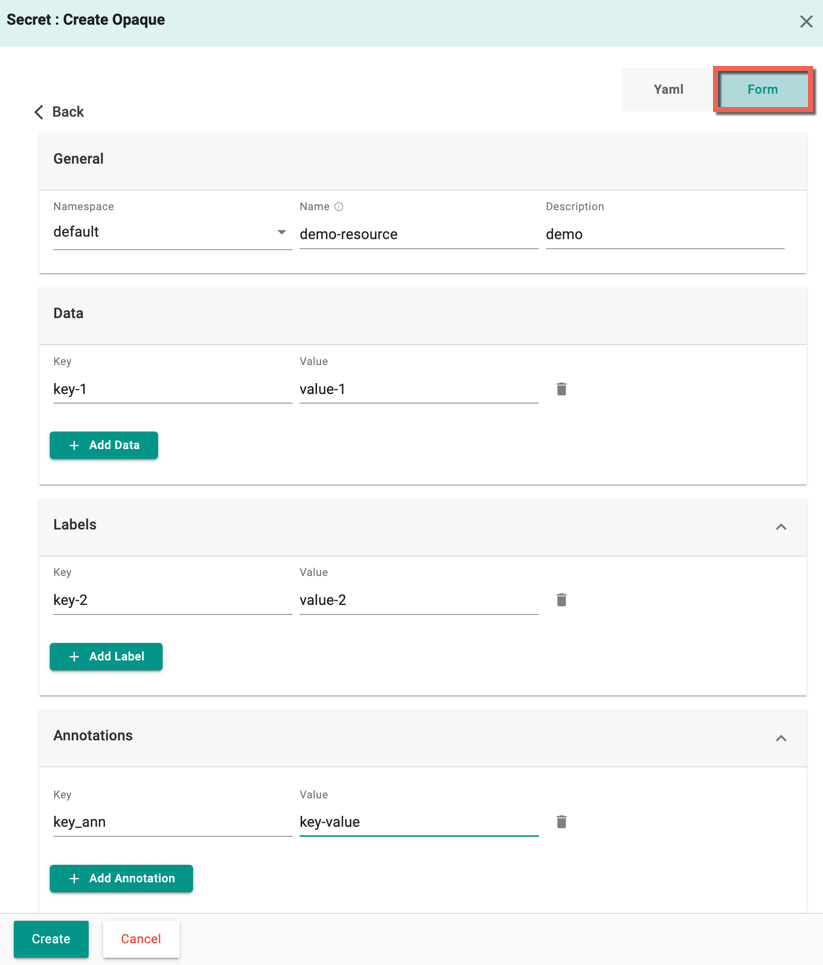
Opaque is the default Secret type and the users can create the secrets in two ways using the Opaque template
- By default, Yaml config screen appears. You can directly add the required parameters to this config file and create a secret

-
Form allows to select and enter the required data
- Select the Namespace and enter the Resource Name
- Provide one or more Data
- Optionally, add Labels and Annotations
-
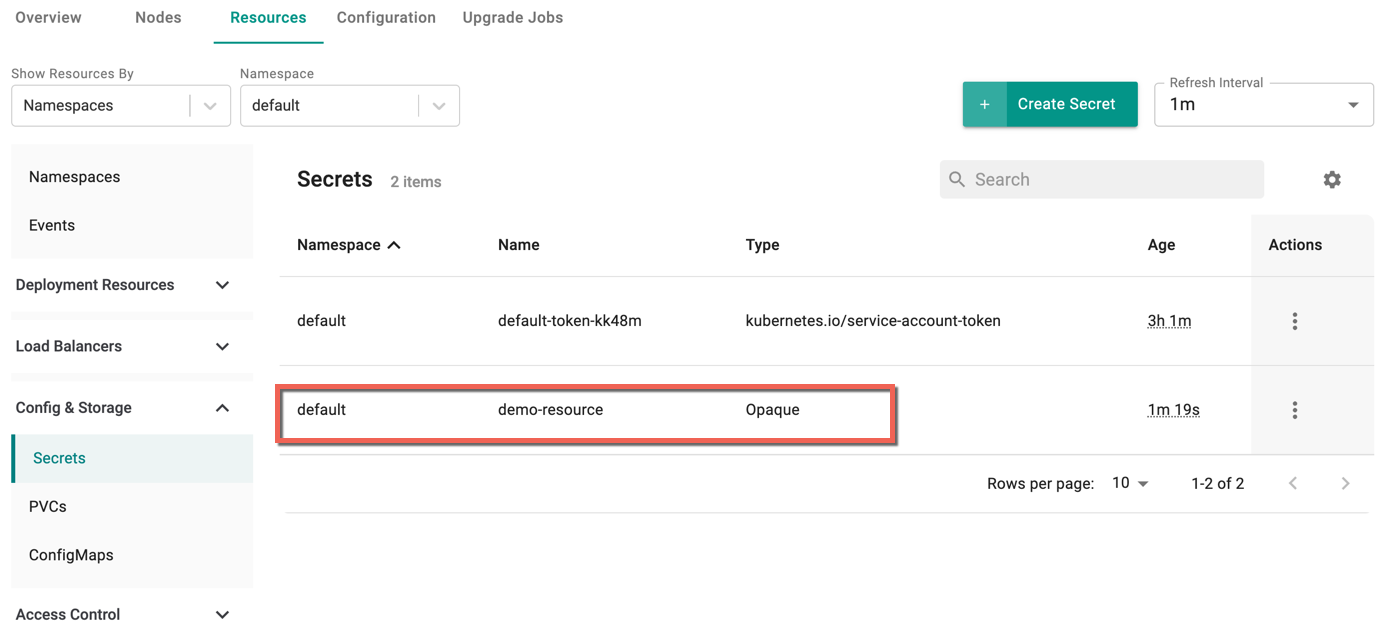
Click Create
- On successful creation, the resource is displayed in the Secrets list
Refer Types of Secret for more information on each template
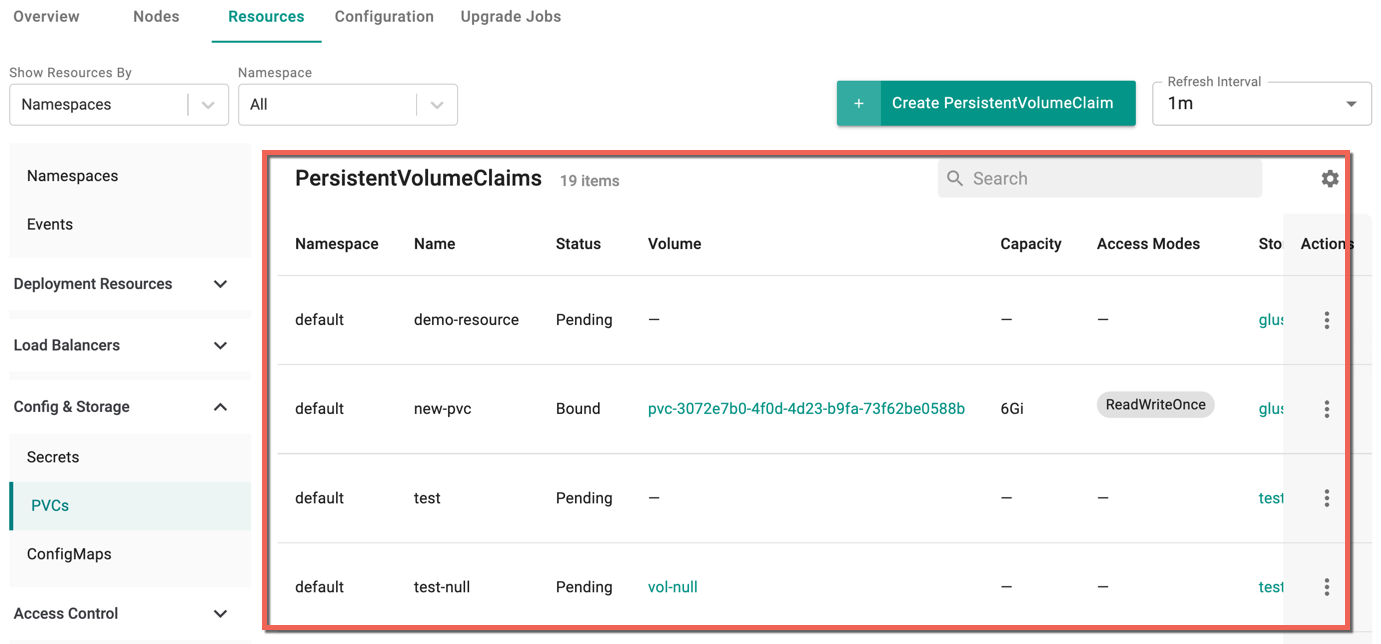
Create PVCs
A PersistentVolumeClaim (PVC) is a storage request, resembling a Pod's resource request for node allocation.
To create PVCs, perform the following steps:
- Select a cluster and click the Resources tab
- Select PVCs under the Config & Storage
- Click Create PersistentVolumeClaim
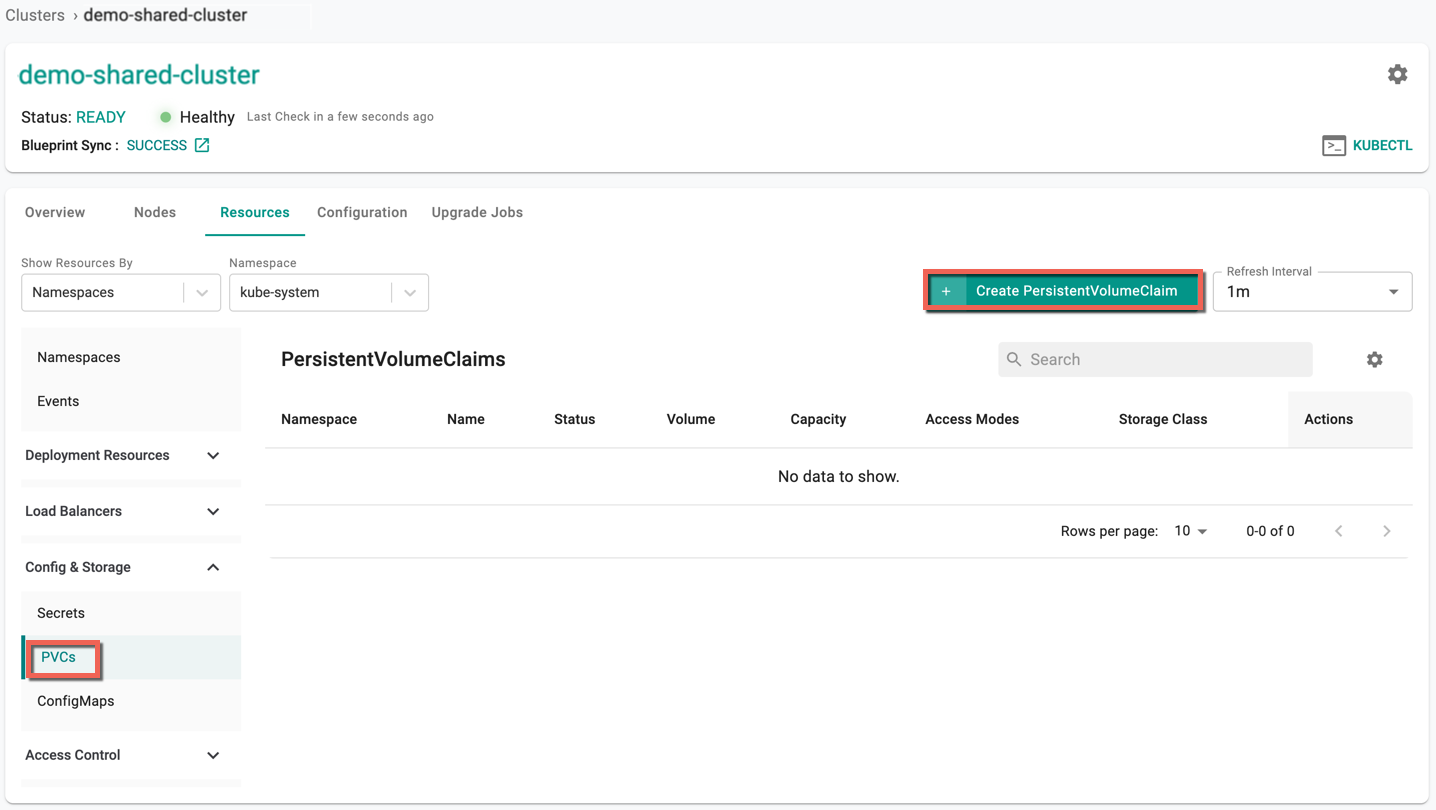
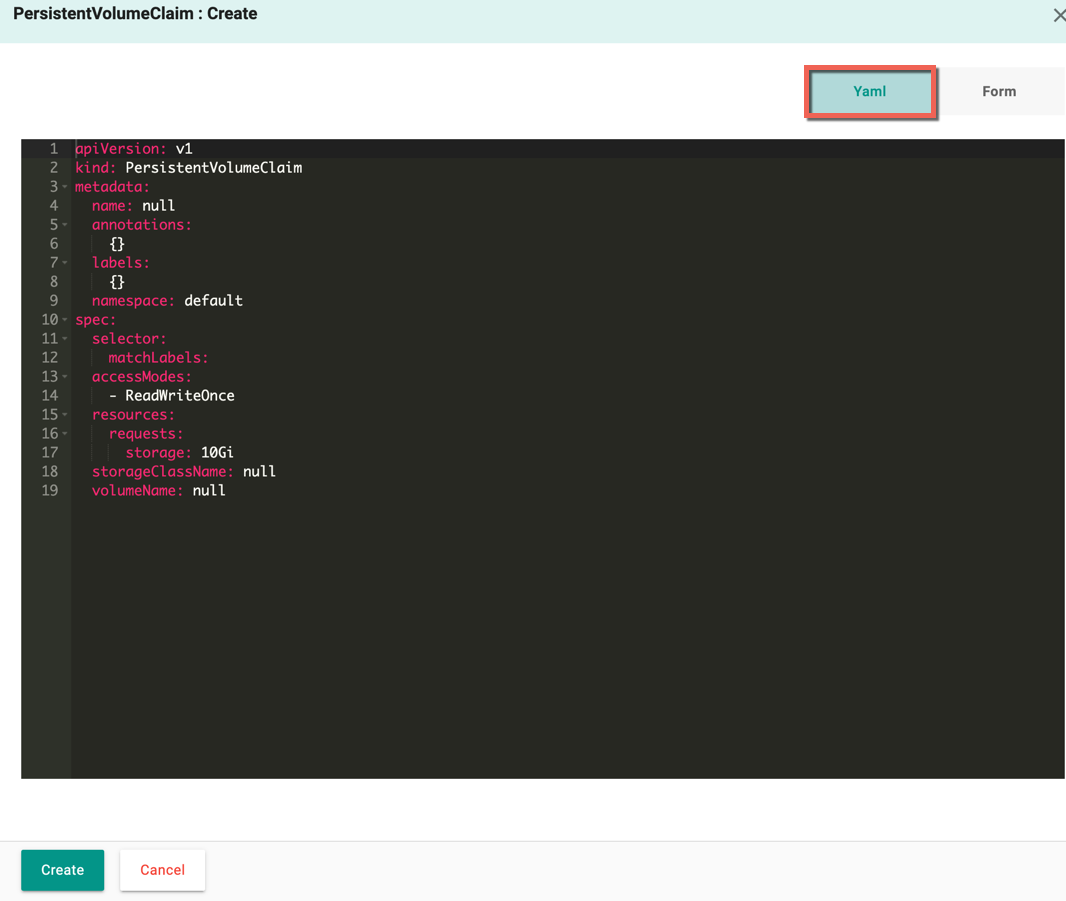
PersistentVolumeClaim : Create screen appears.
- By default, Yaml config screen appears. You can directly add the required parameters to this config file and create a PVC
-
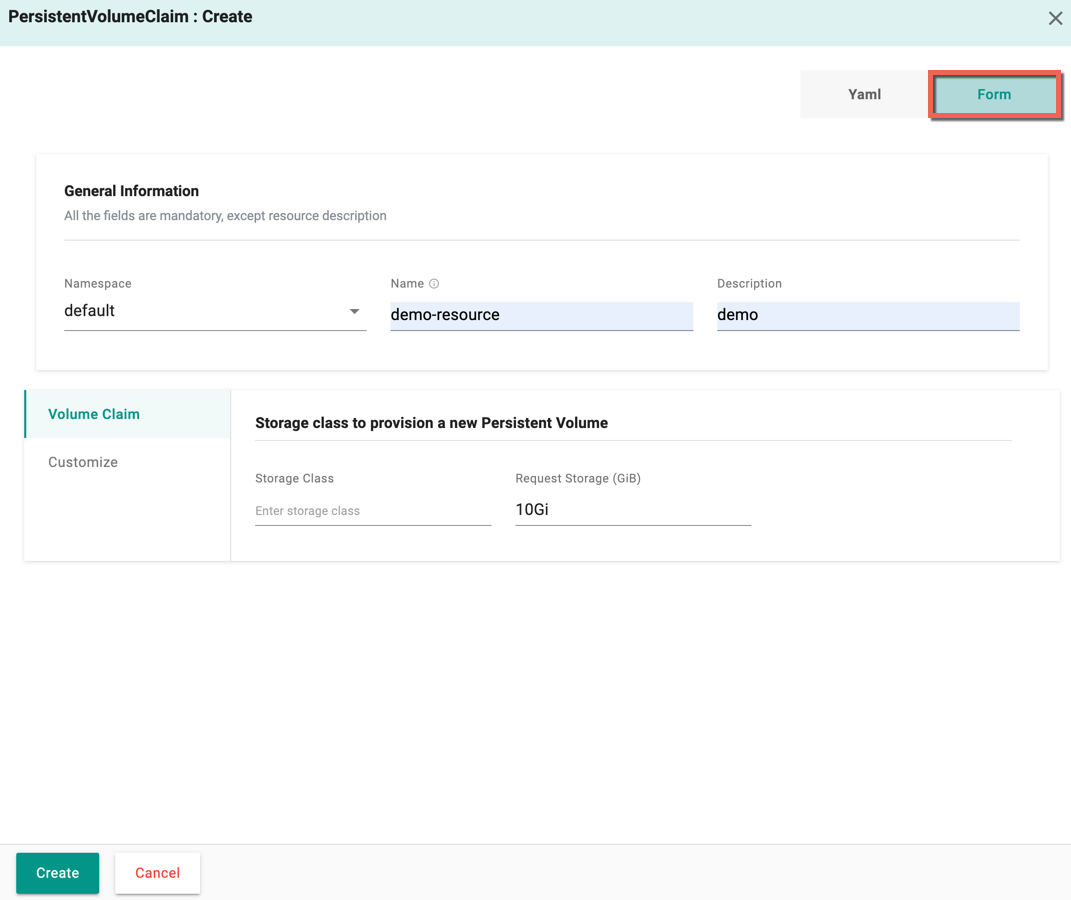
Form allows to select and enter the required data
- Select the Namespace and enter the Resource Name
- Provide the Volume Claim details (Storage Class and Request Storage)
- Click Customize and select the required **Access Mode(s)
- Click Create
- On successful creation, the resource is displayed in the PersistentVolumeClaims list
For more details, refer Persistent Volume Claim (PVC) - K8s Resource
Create ConfigMap
A ConfigMap is used to store non-confidential data in key-value pairs.
To create ConfigMap resource, perform the following steps:
- Select a cluster and click the Resources tab
- Select ConfigMaps under the Config & Storage
- Click Create ConfigMap
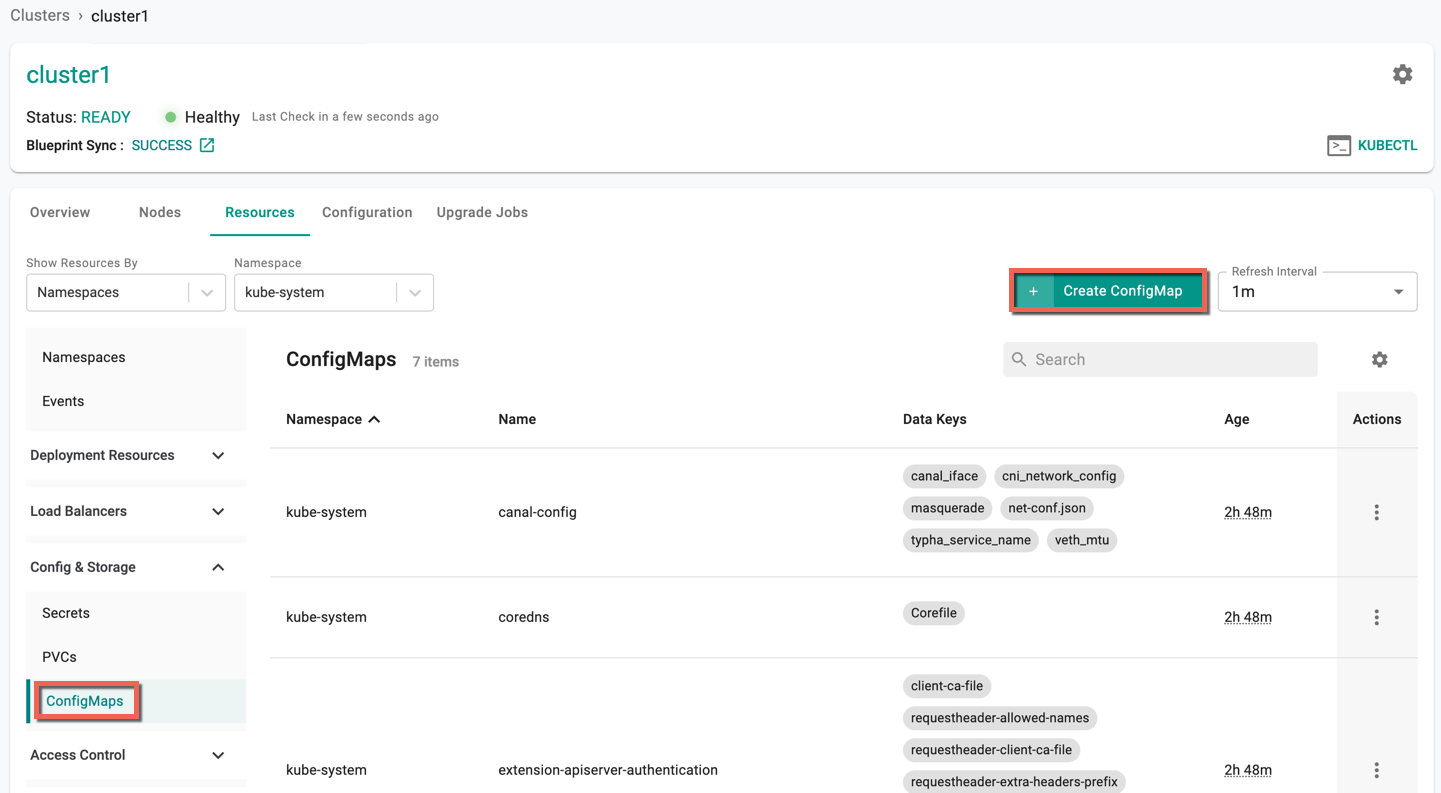
ConfigMap : Create screen appears
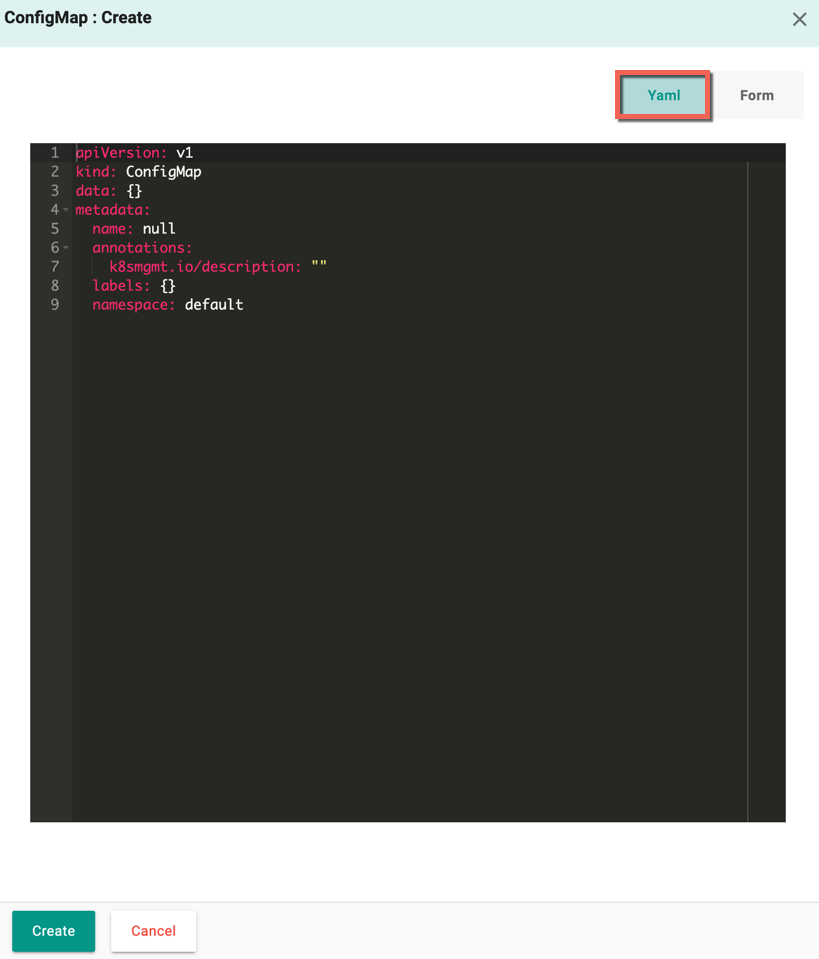
- By default, Yaml config screen appears. You can directly add the required parameters to this config file and create a ConfigMap
-
Form allows to select and enter the required data
- Select the Namespace and enter the Resource Name
- Provide one or more Data
- Optionally, add Labels and Annotations
-
Click Create
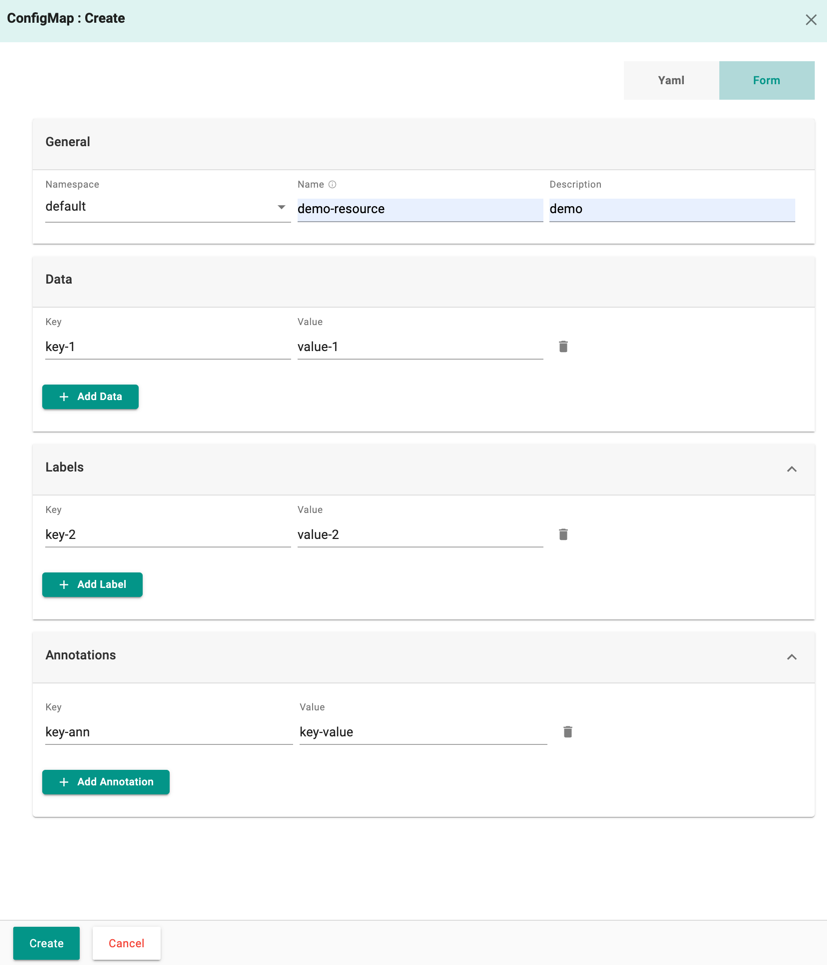
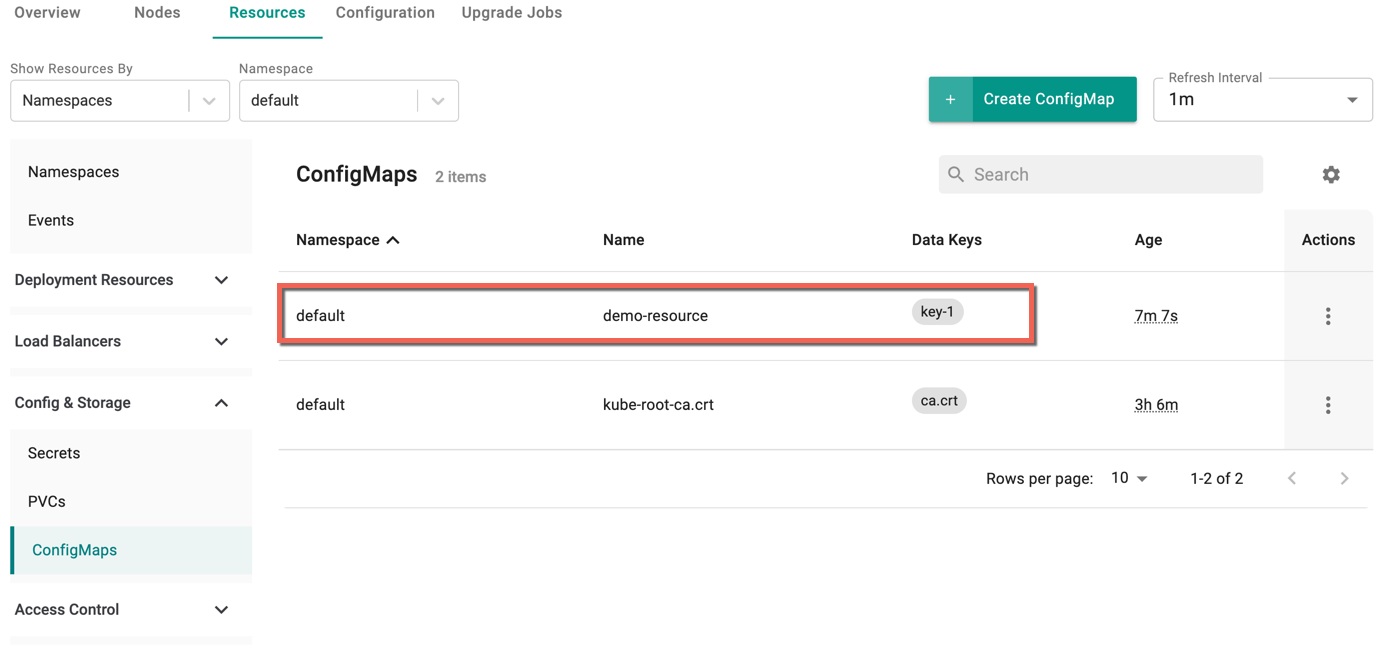
- On successful creation, the resource is displayed in the ConfigMaps list
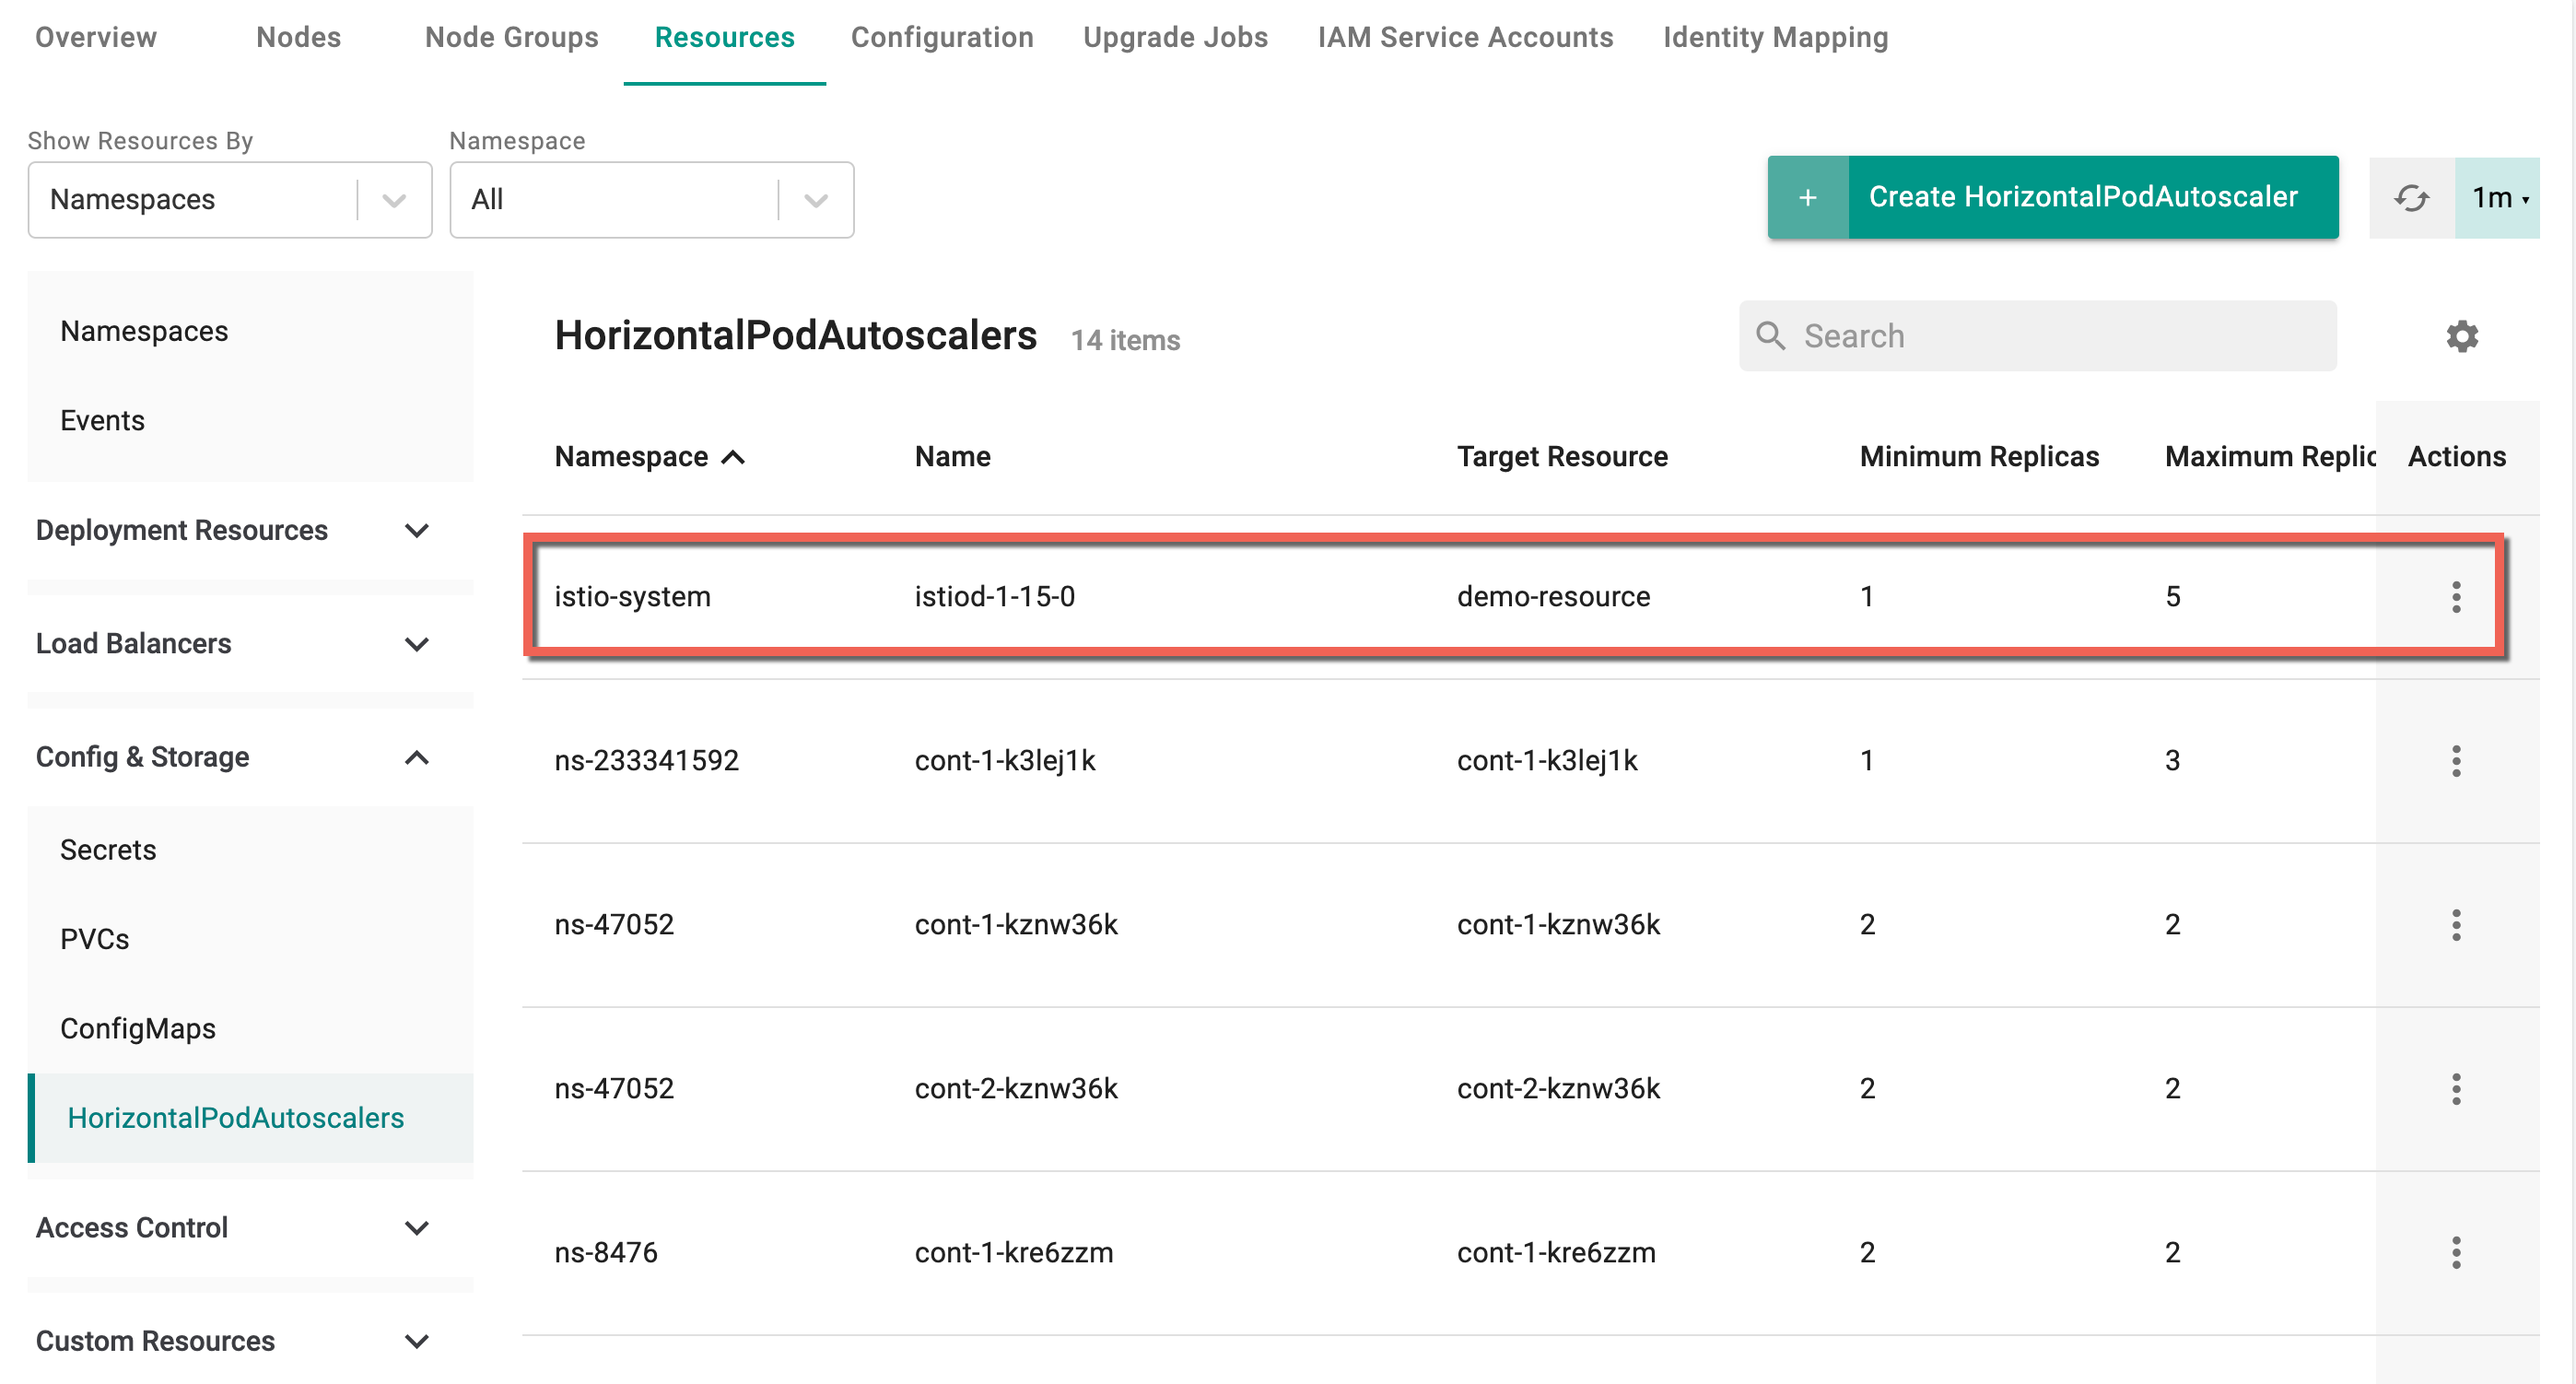
Create HorizontalPodAutoscalers
HorizontalPodAutoscaler is to automatically adjust a workload resource, such as a Deployment or StatefulSet, in response to changes in demand. Its goal is to ensure that the workload dynamically scales up or down to match the current demand efficiently.
To create HorizontalPodAutoscalers, perform the following steps:
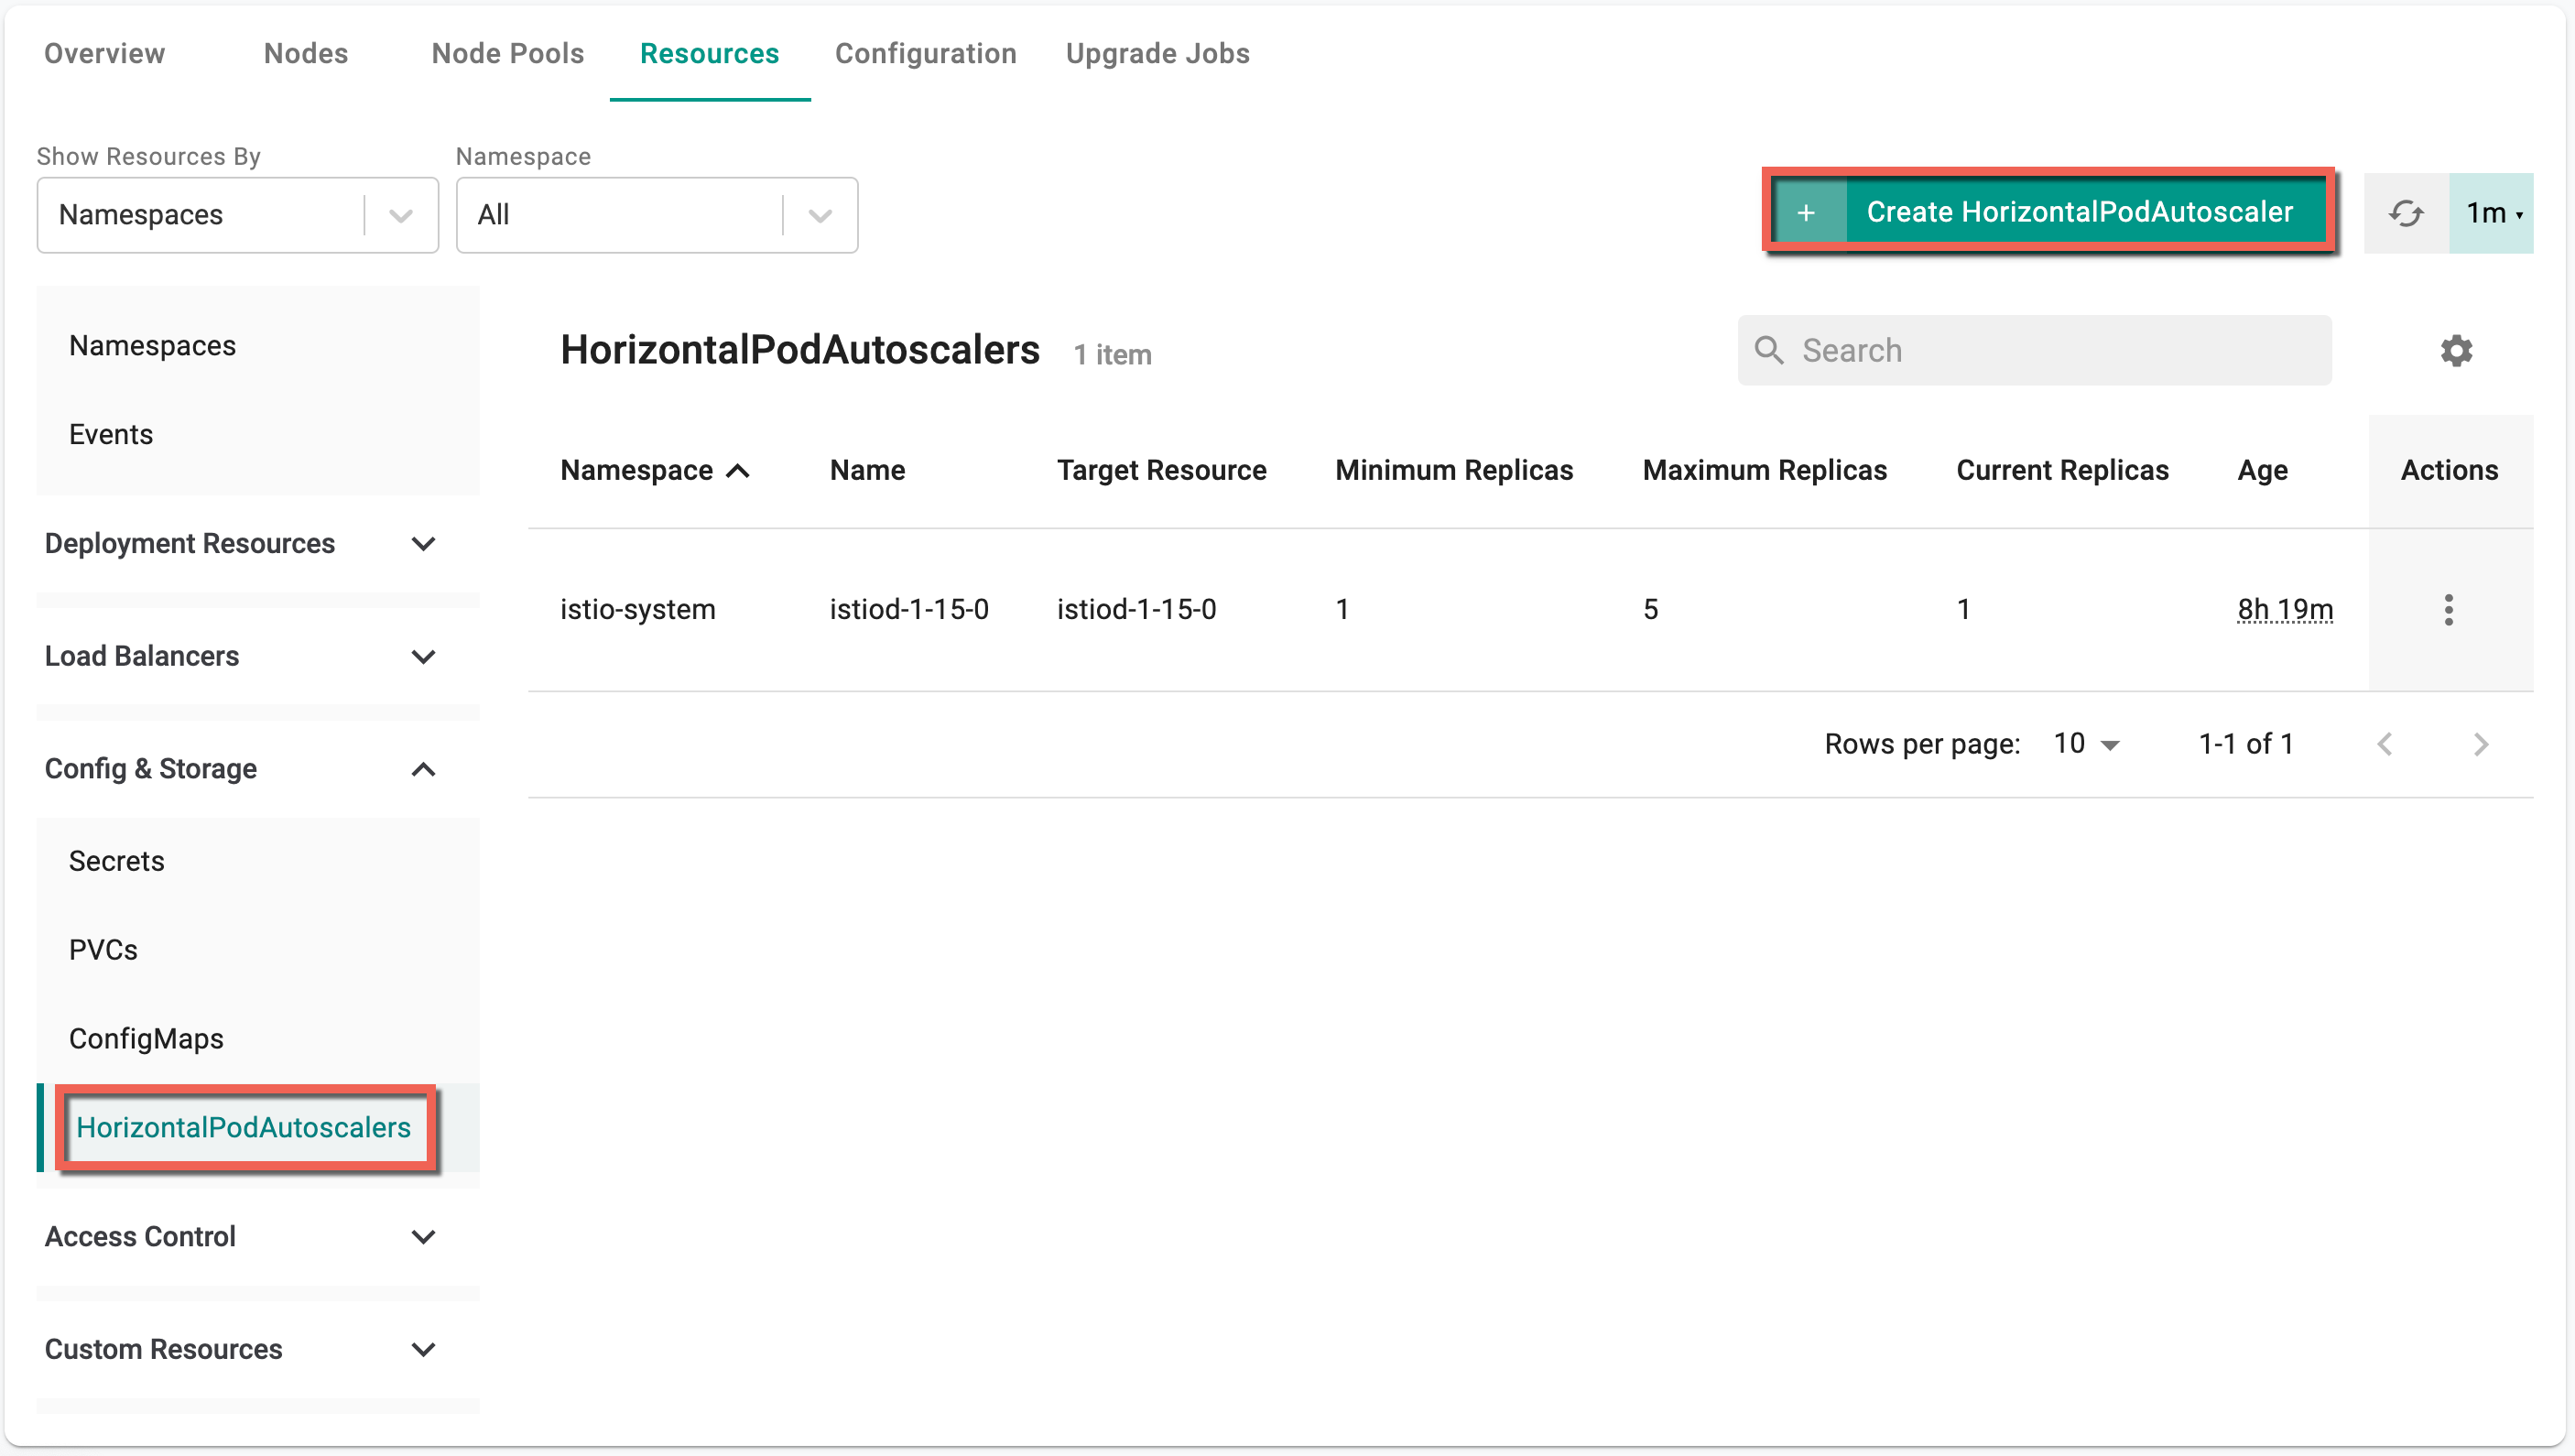
- Select a cluster and click the Resources tab
- Select HorizontalPodAutoscalers under the Config & Storage
- Click Create HorizontalPodAutoscalers
HorizontalPodAutoscalers : Create screen appears
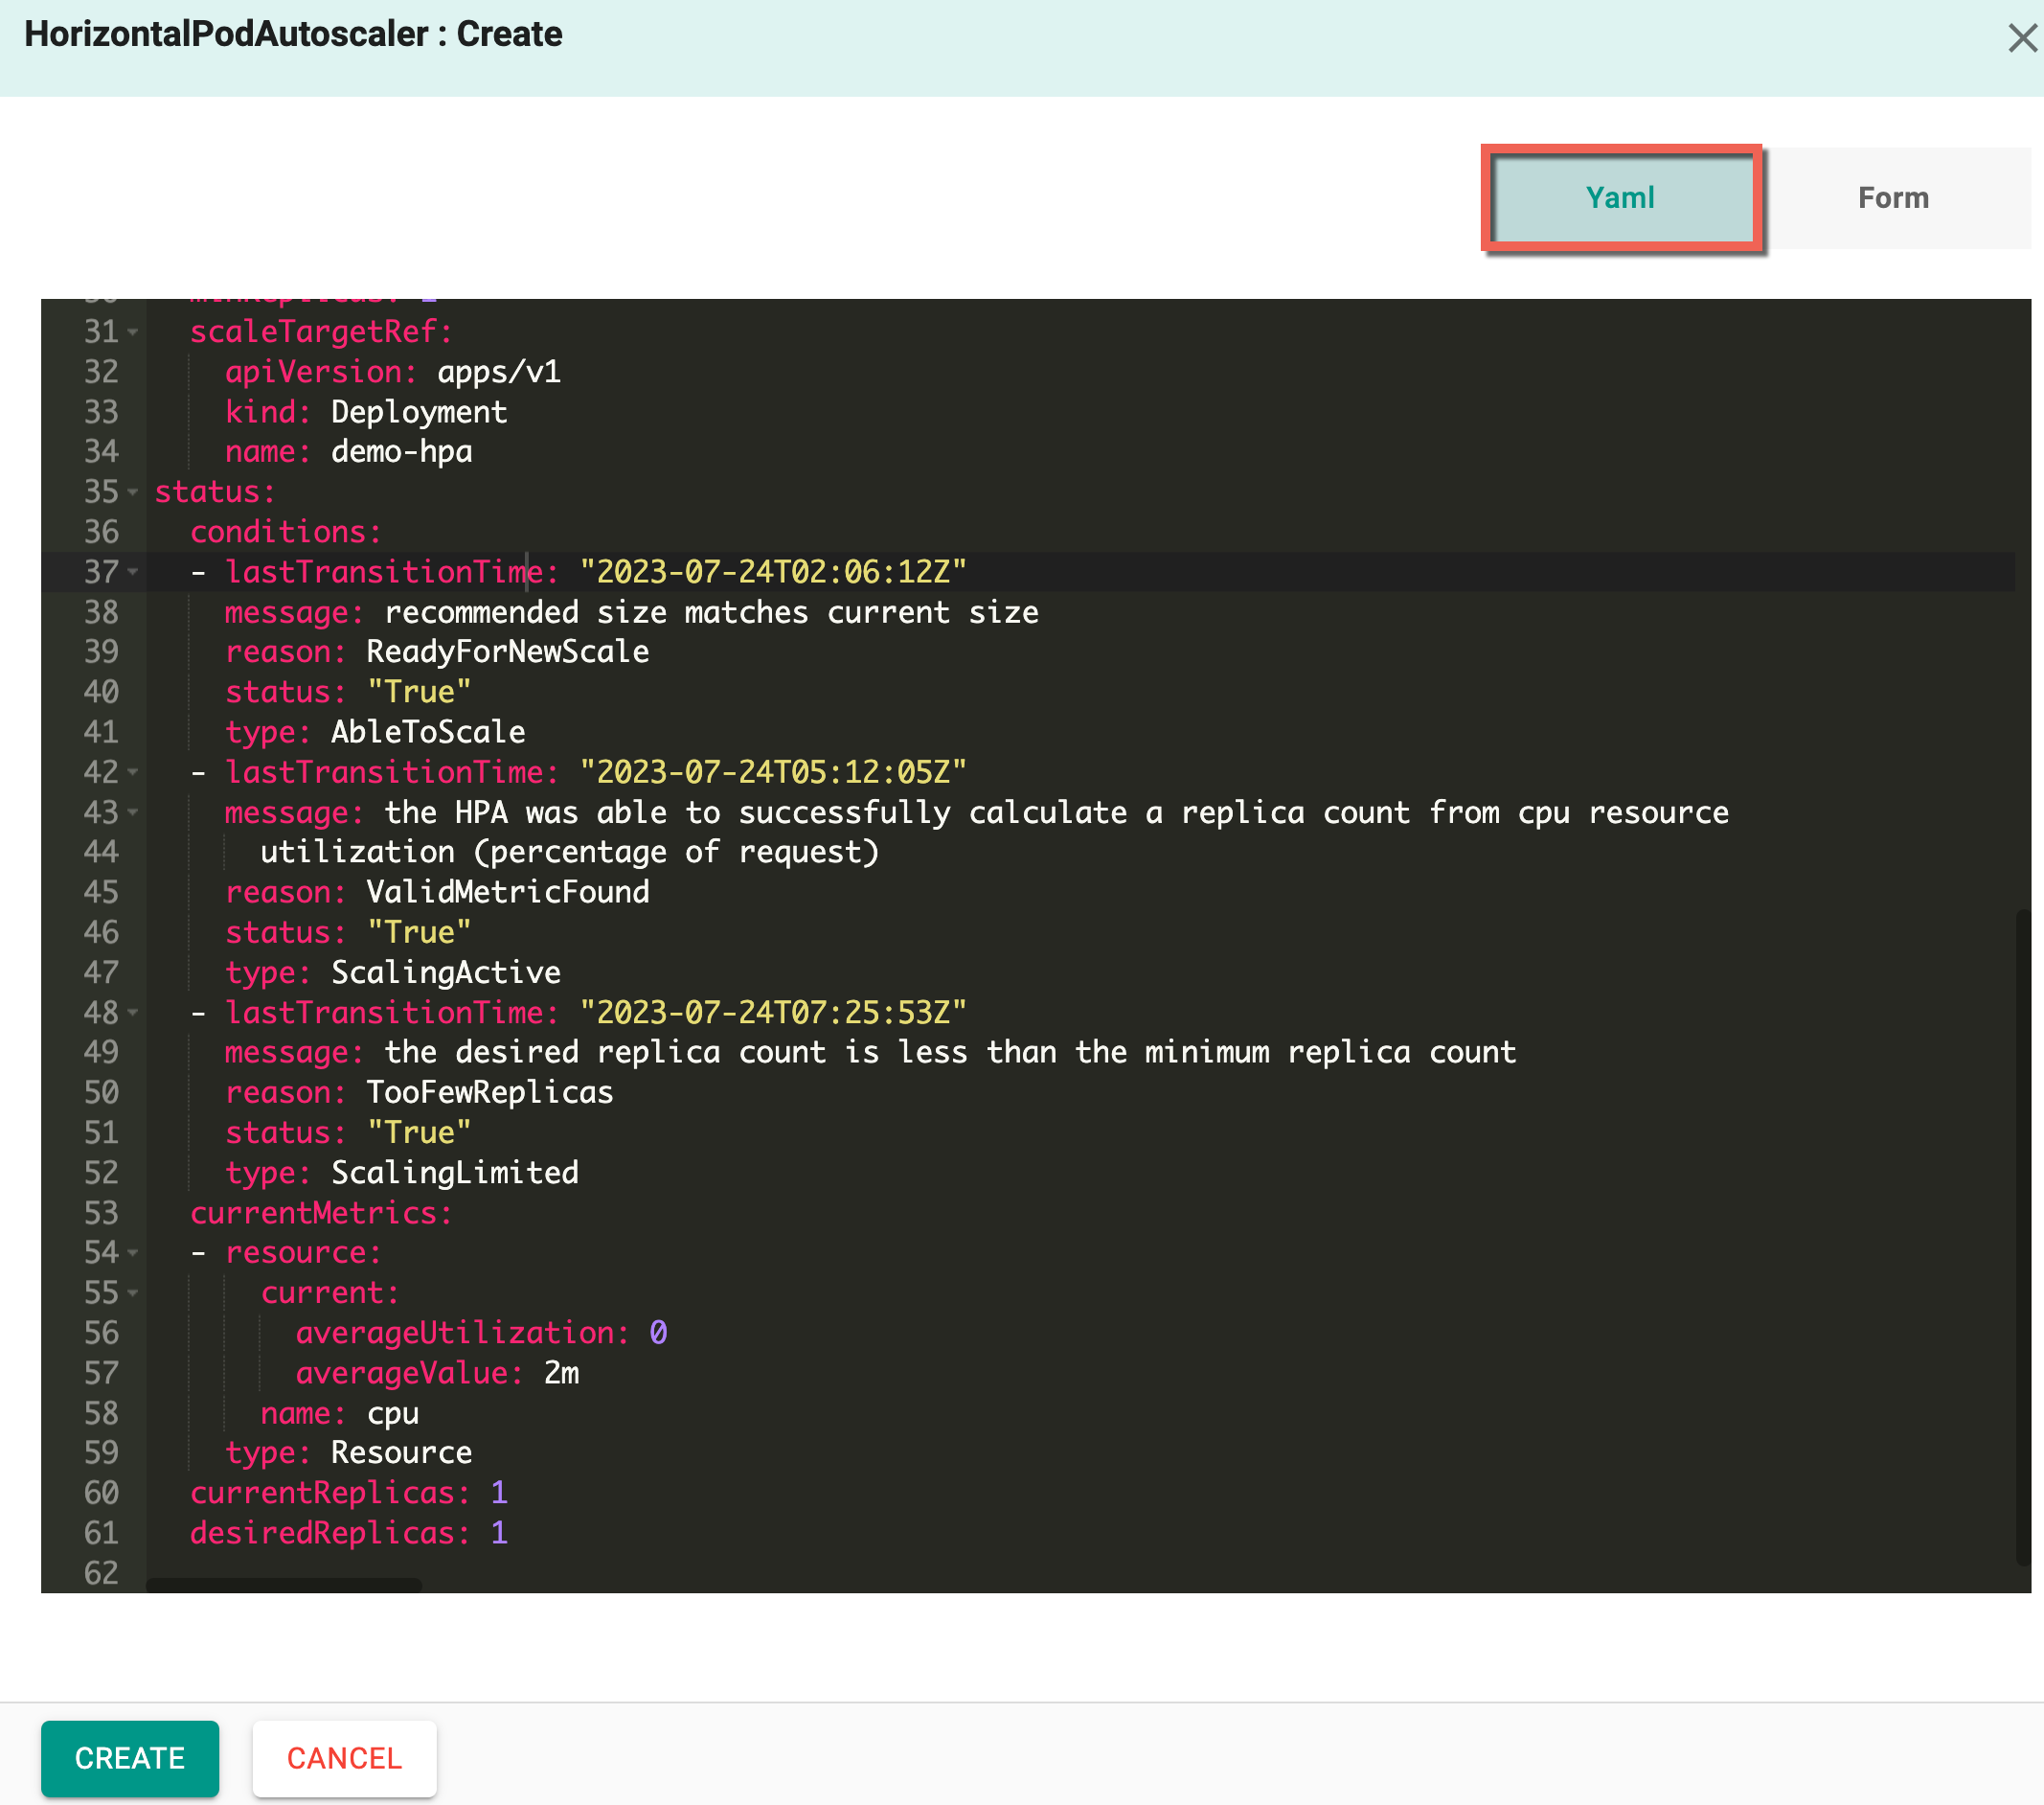
- By default, Yaml config screen appears. You can directly add the required parameters to this config file and create a HorizontalPodAutoscalers
-
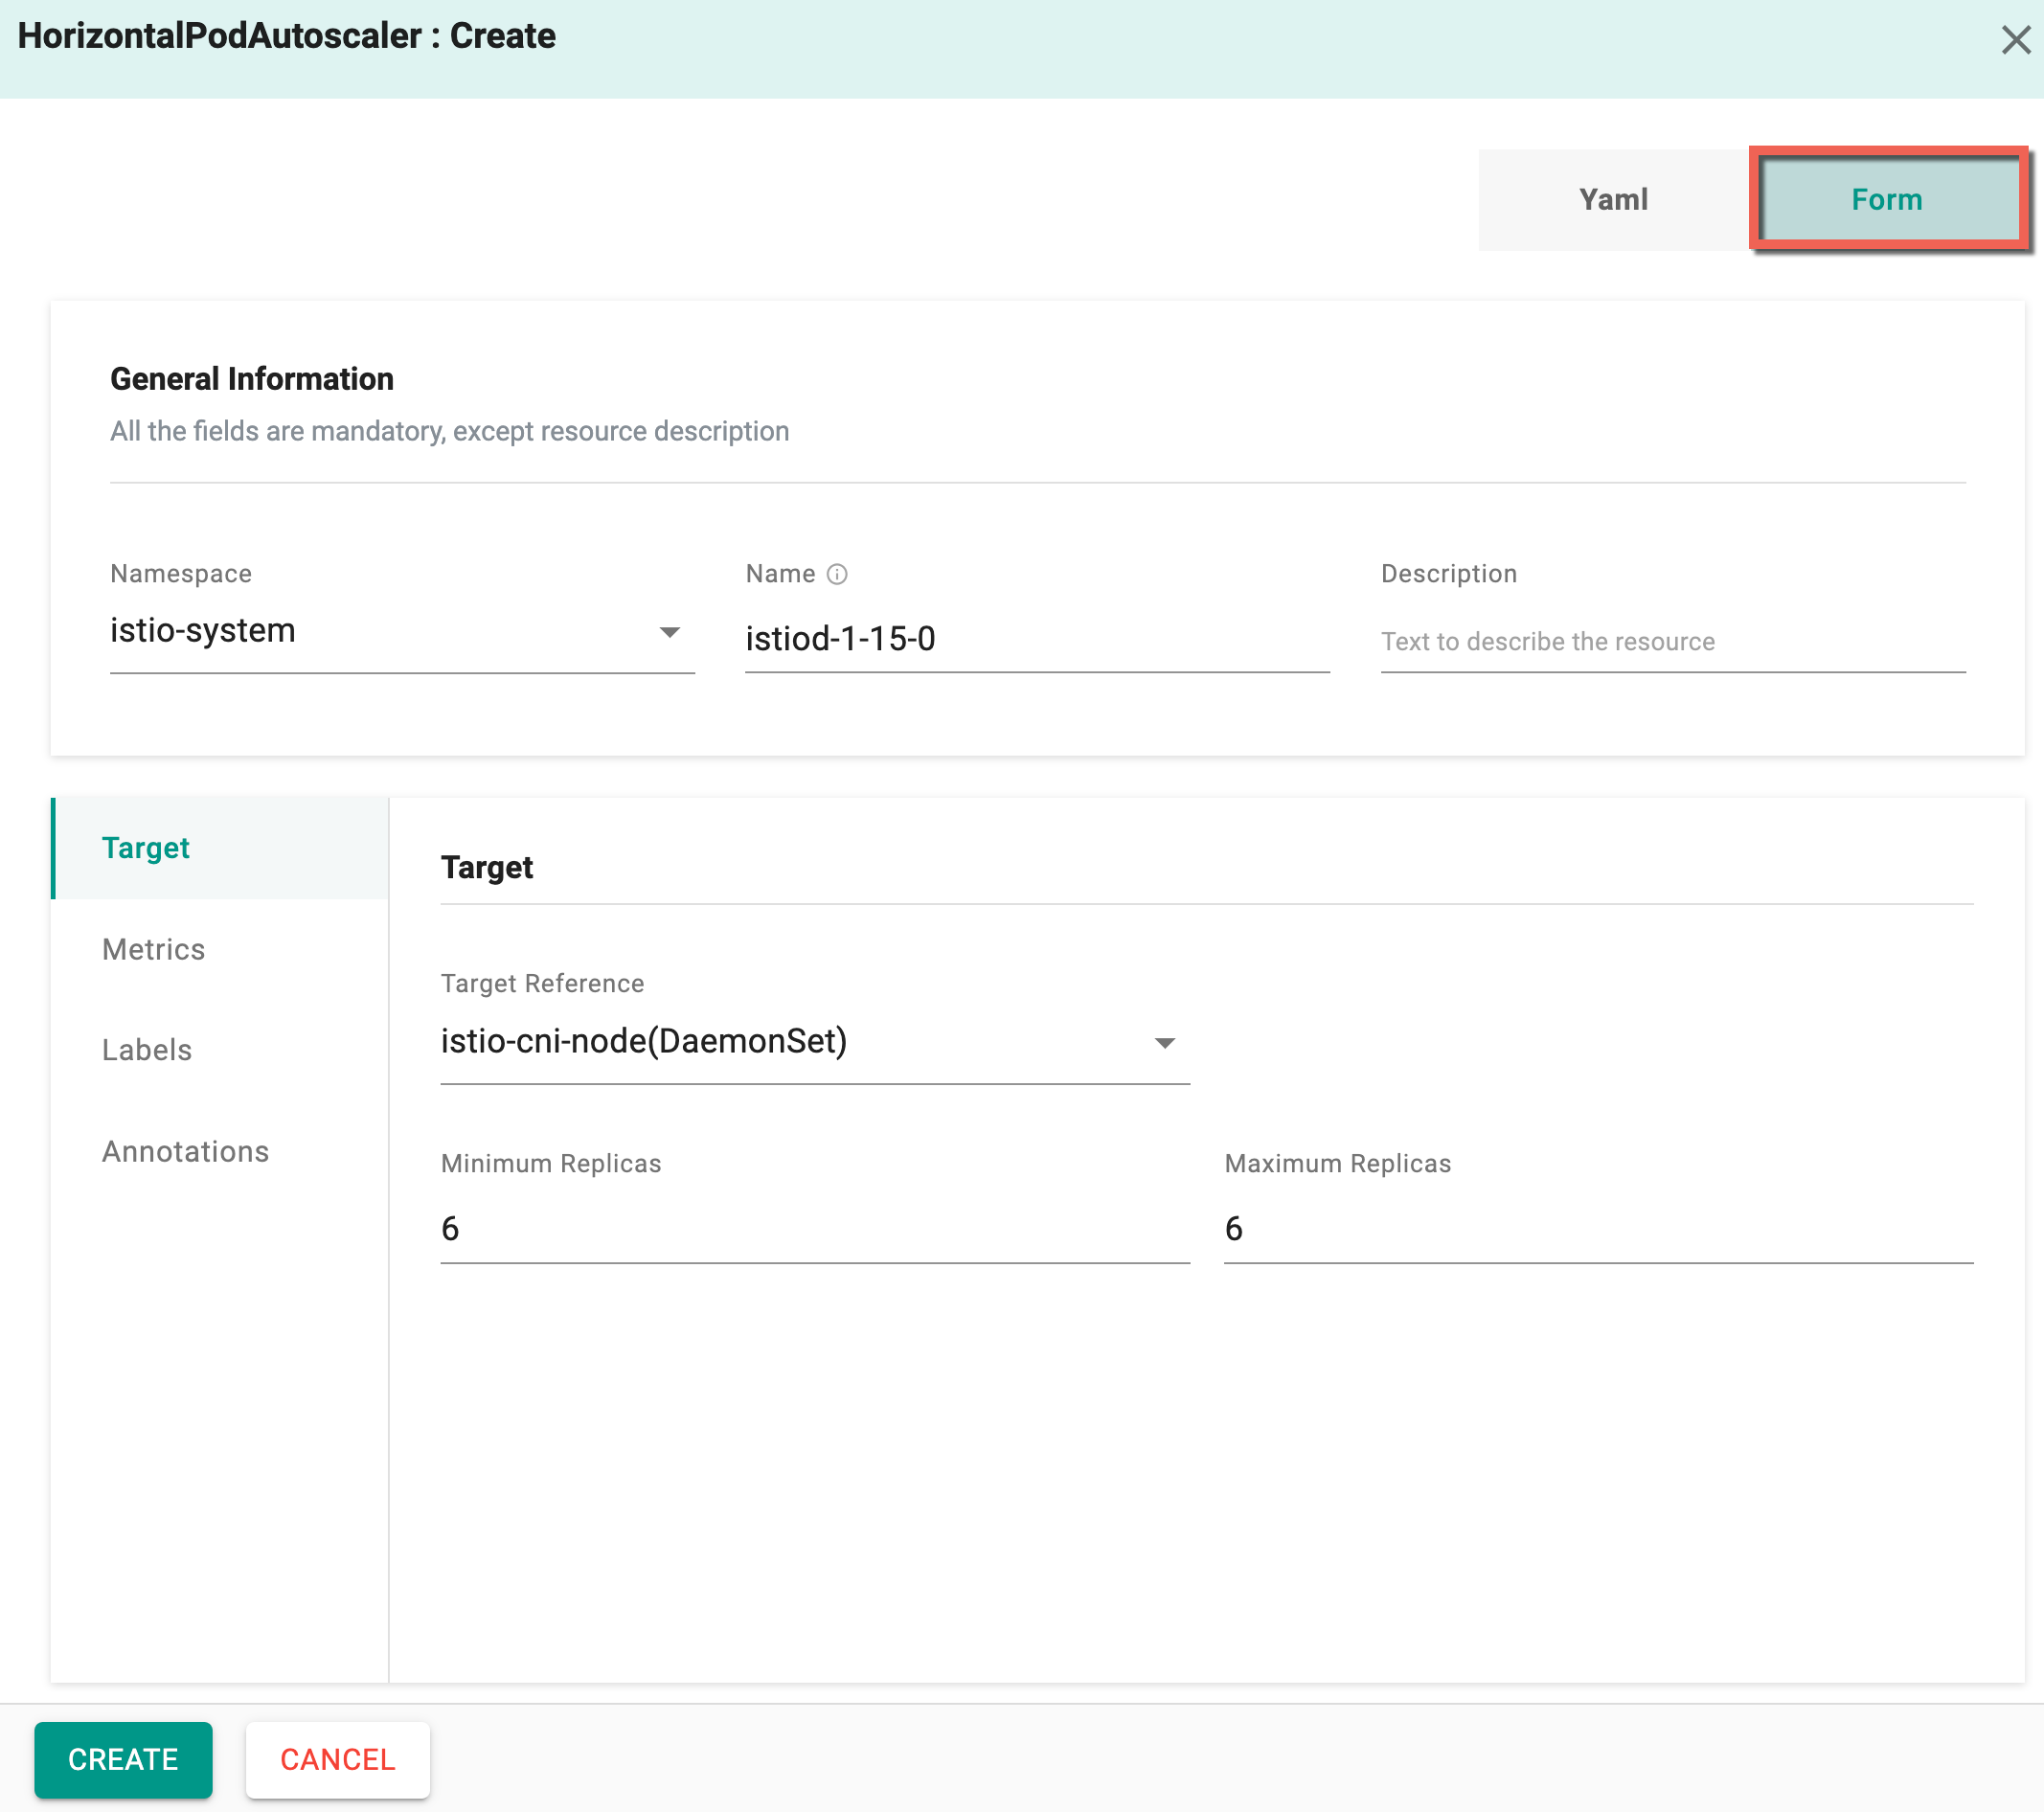
Form allows to select and enter the required data
- Select a Target Reference and provide minimum/maximum replicas
- Provide the required metrics (source, resource name, type, and quantity)
- Optionally, add Labels and Annotations
-
Click Create
- On successful creation, the resource is displayed in the HorizontalPodAutoscaler list
Access Control Resources
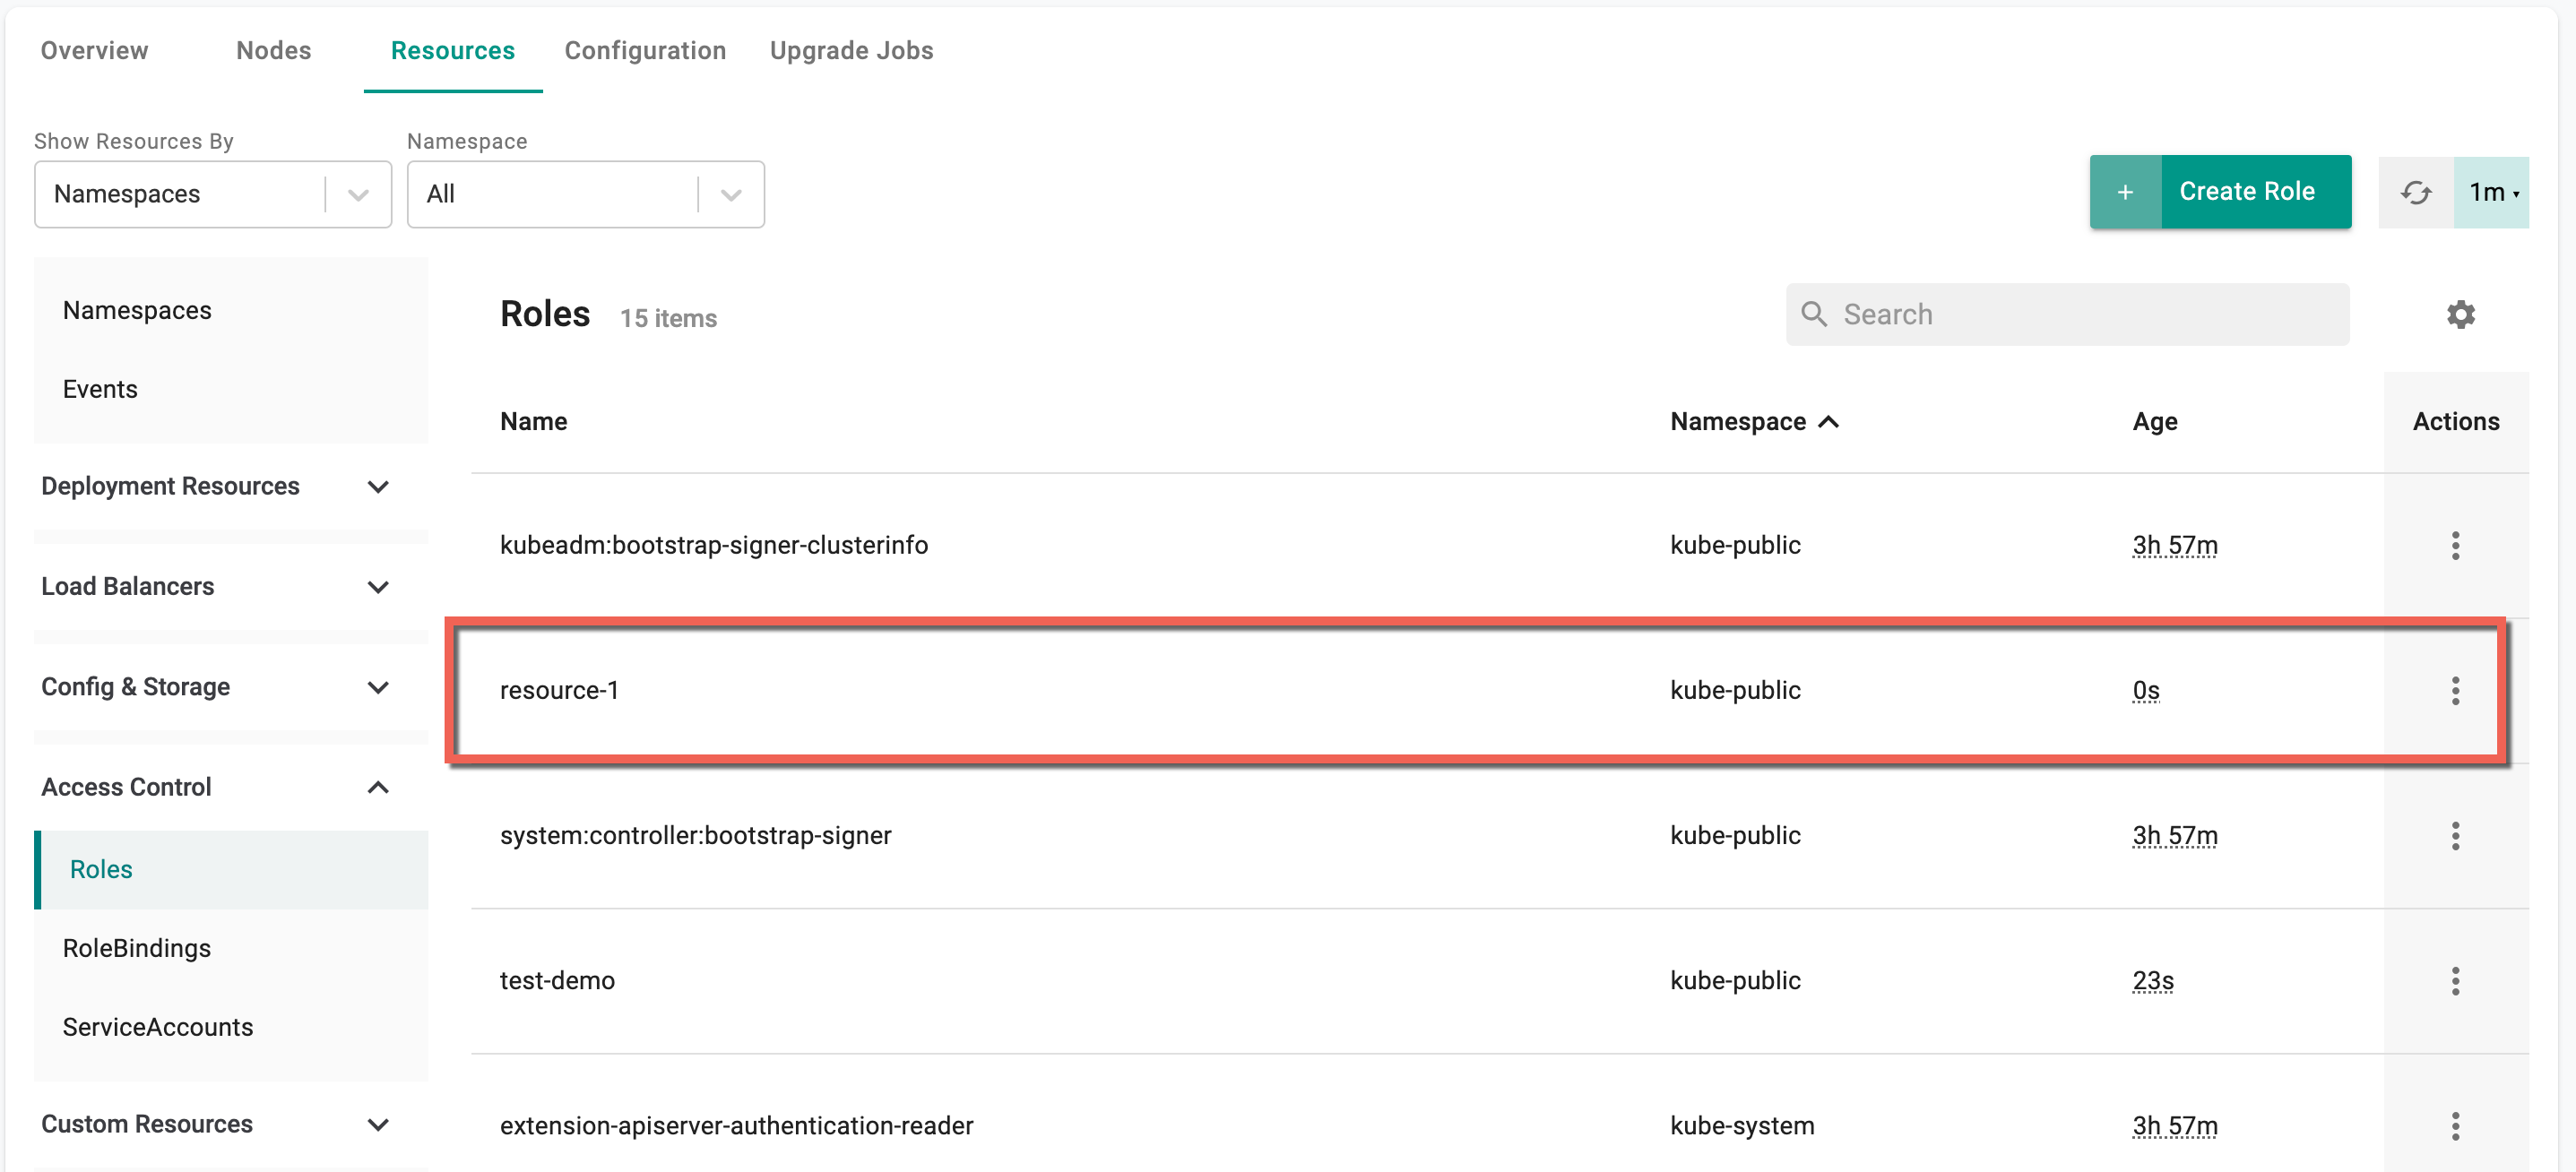
Roles
To create roles, perform the following steps:
- Select a cluster and click the Resources tab
- Select Roles under the Access Control
- Click Create Role
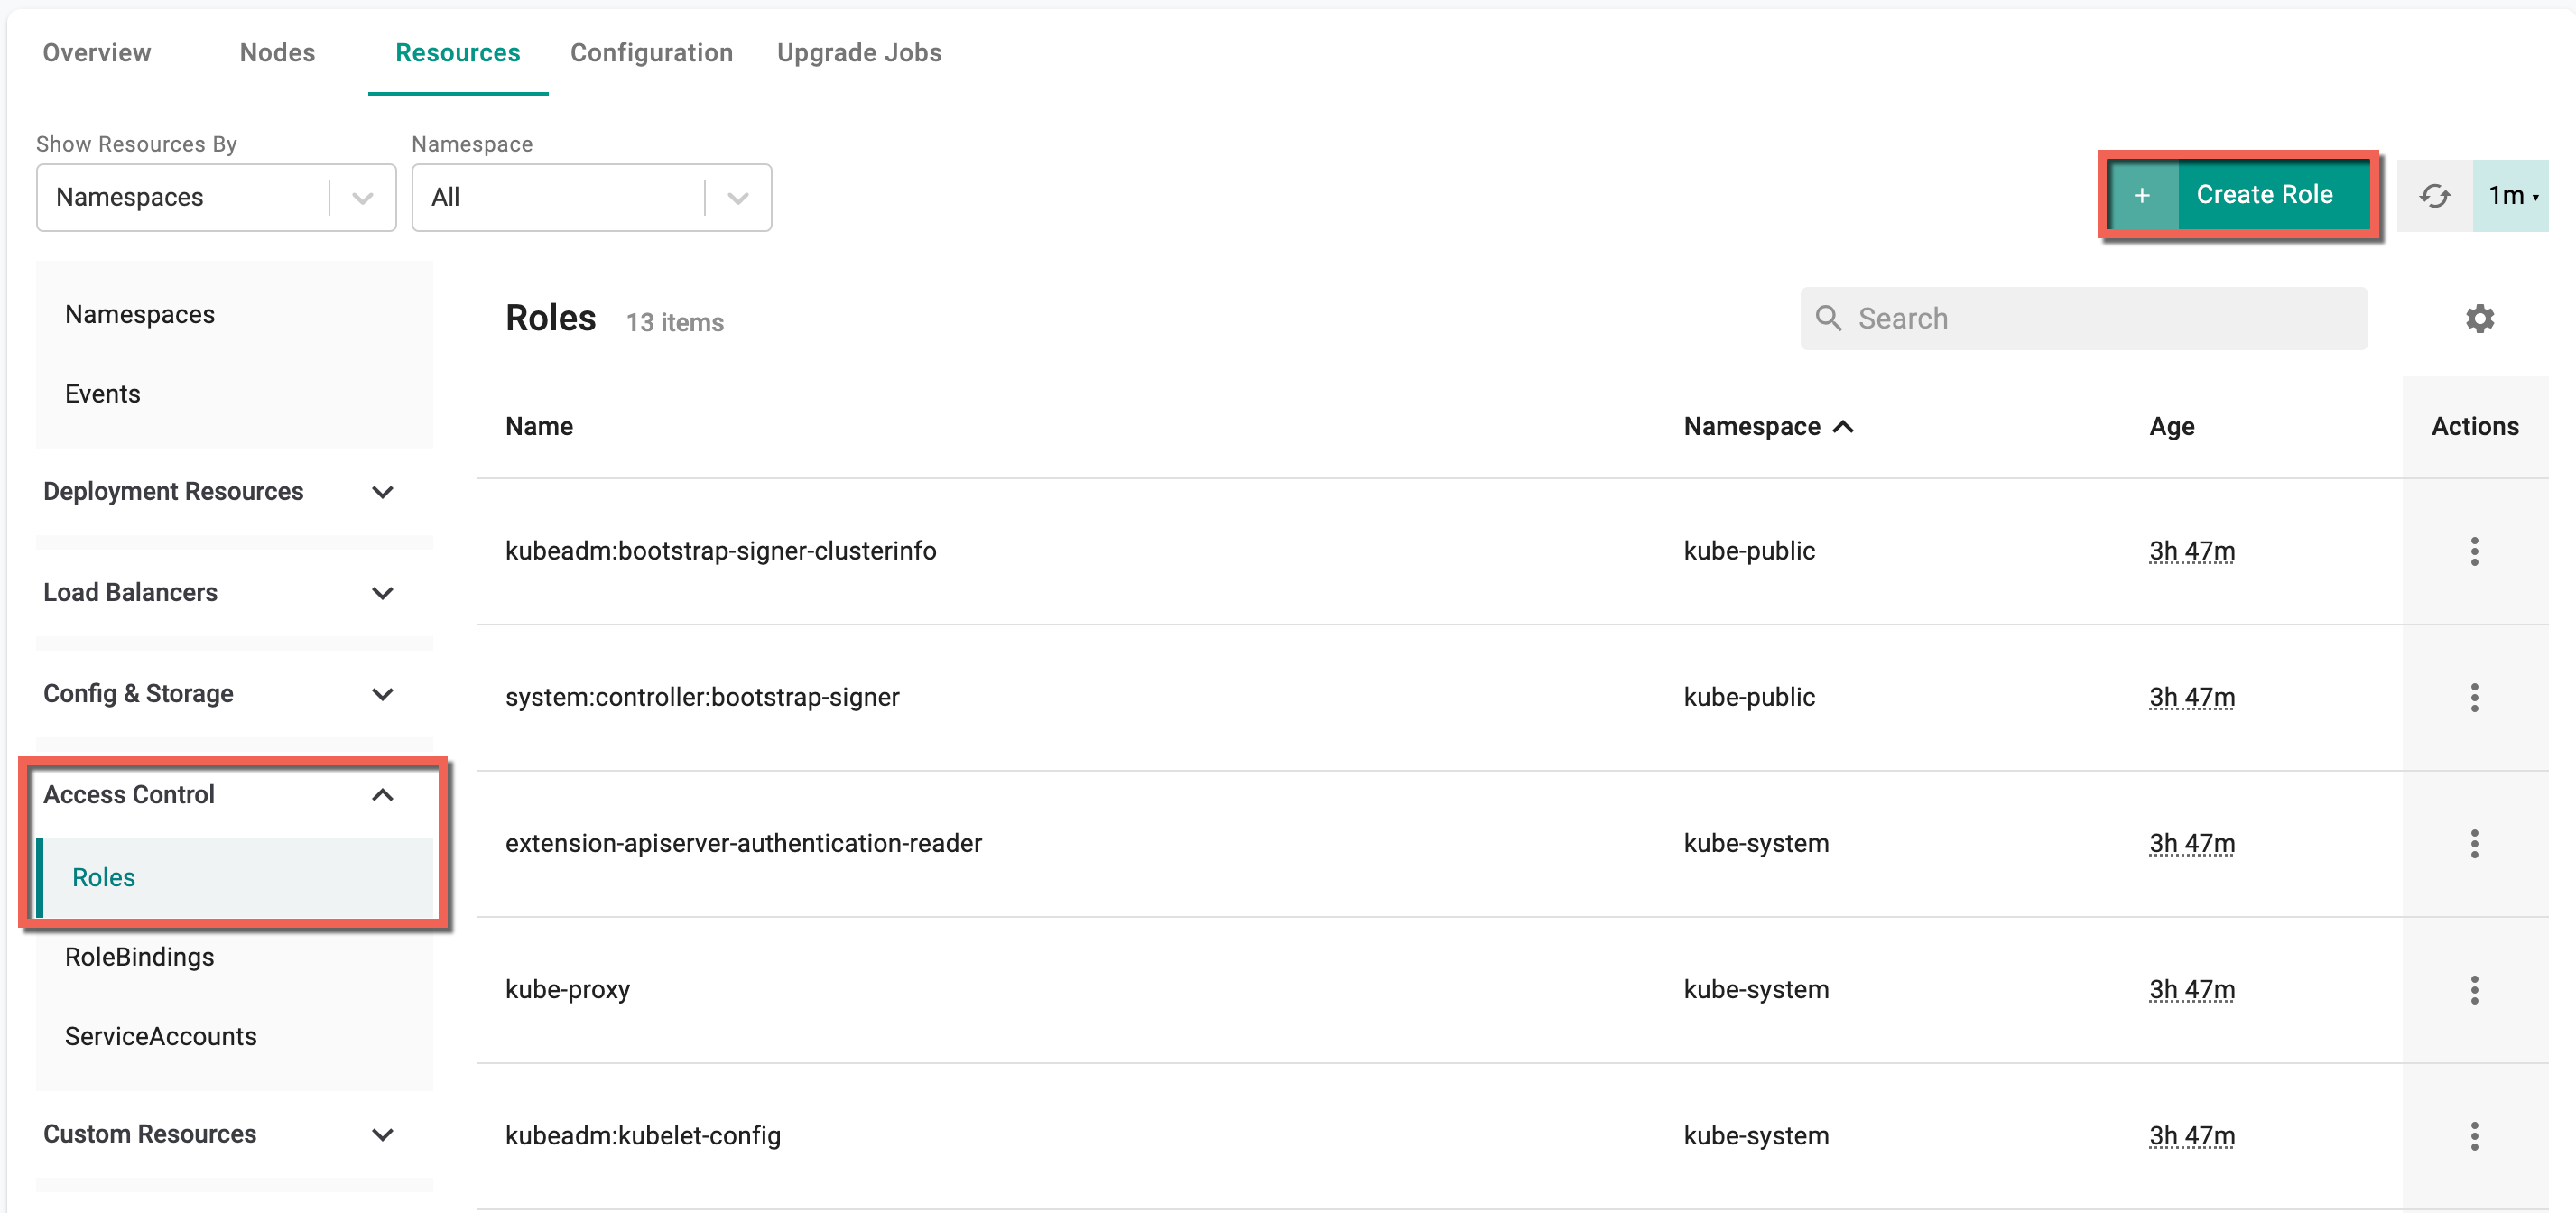
Role : Create screen appears
- By default, Yaml config screen appears. You can directly add the required parameters to this config file and create a role
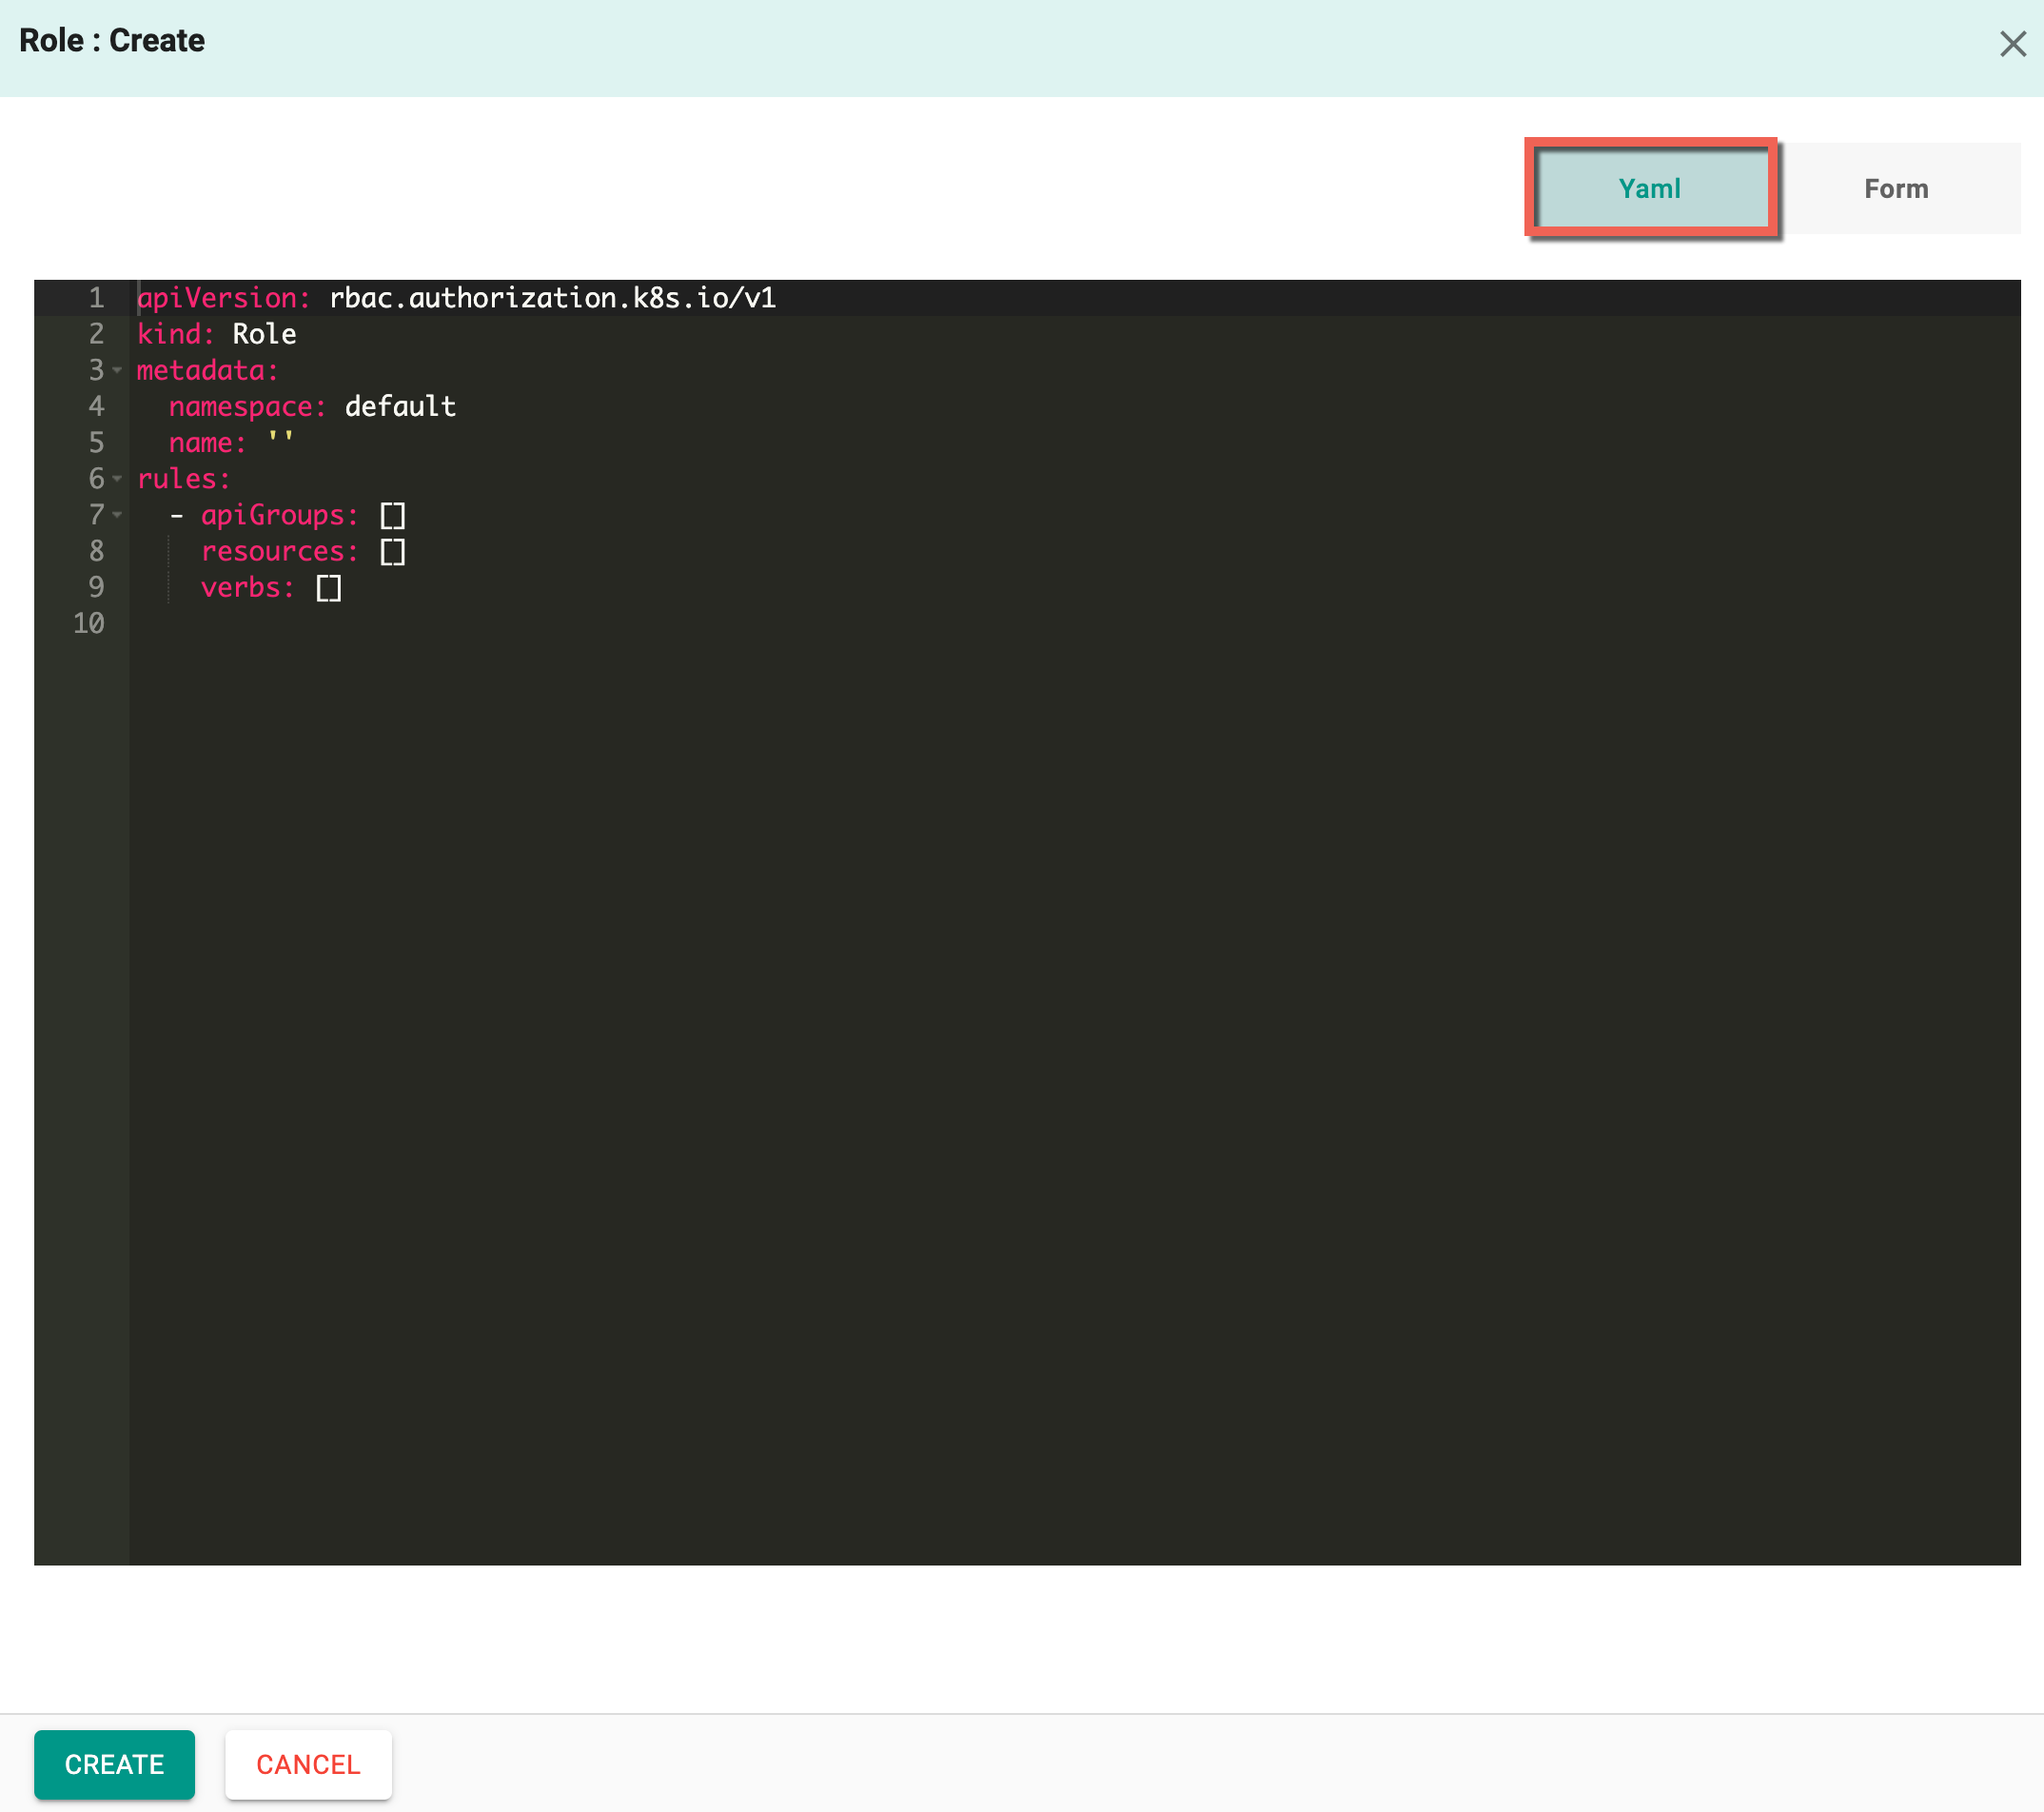
-
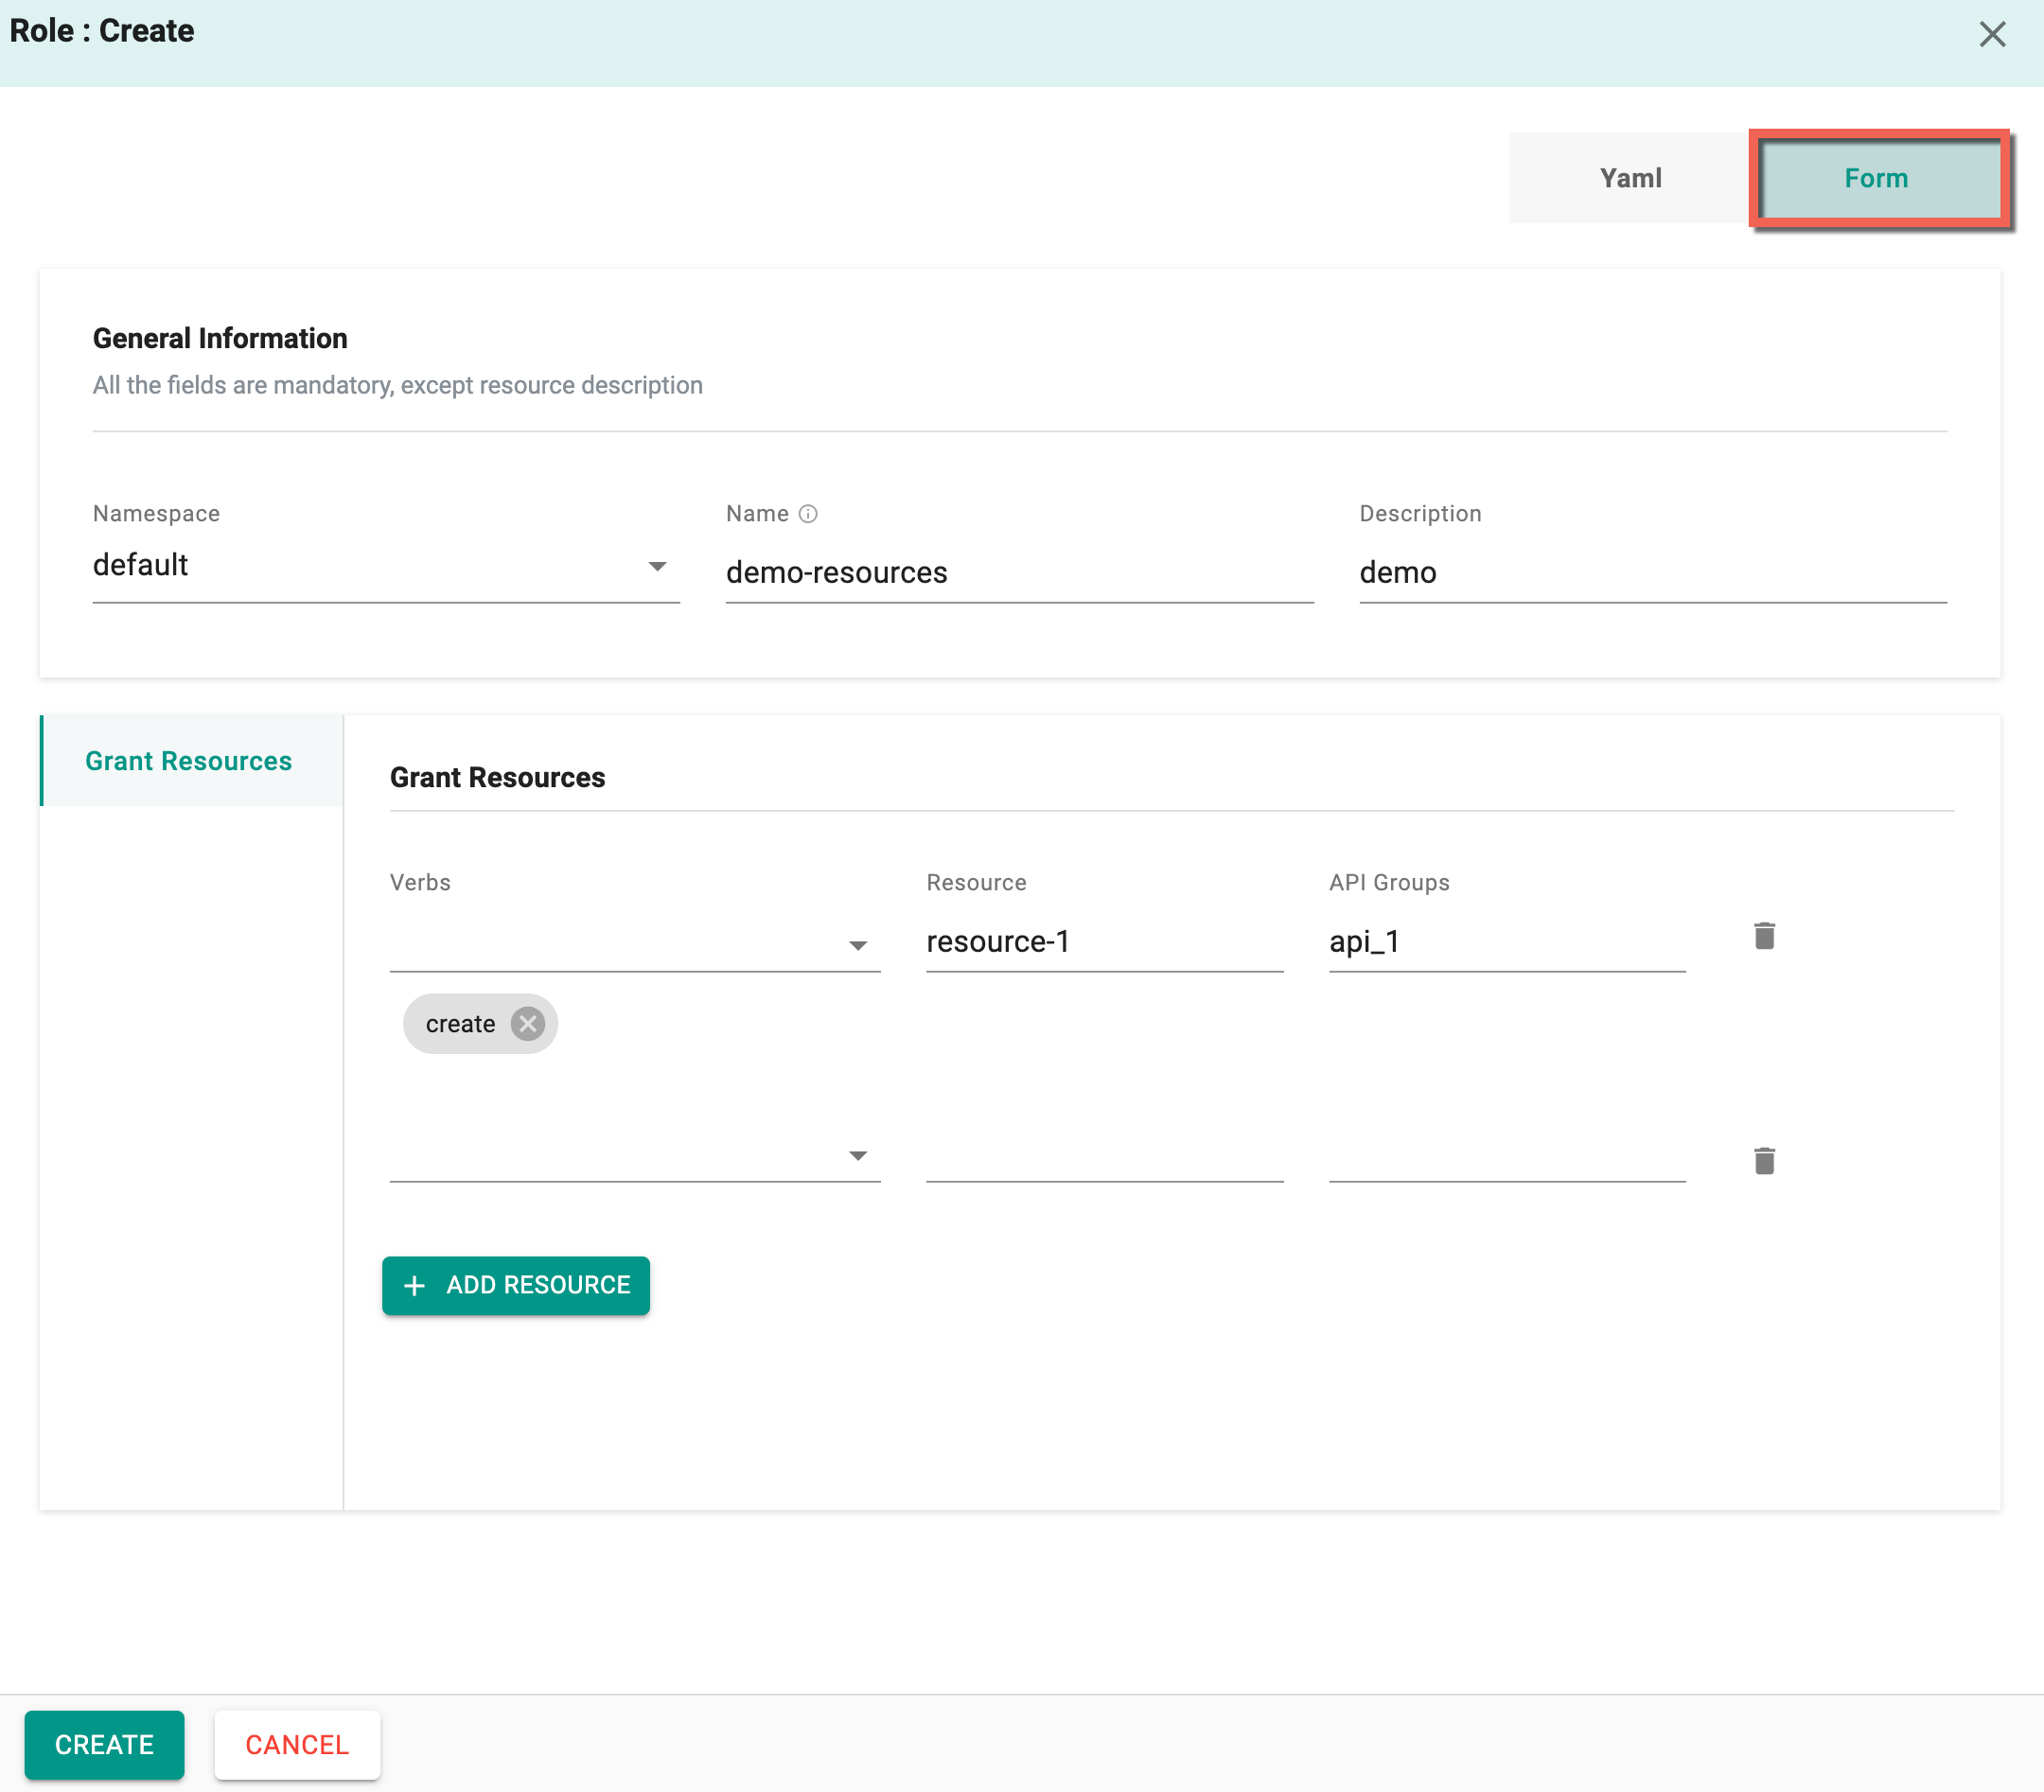
Form allows to select and enter the required data
- Select the Namespace and enter the Resource Name
- Provide one or more Resource Data with API Groups
-
Click Create
- On successful creation, the resource is displayed in the Roles list
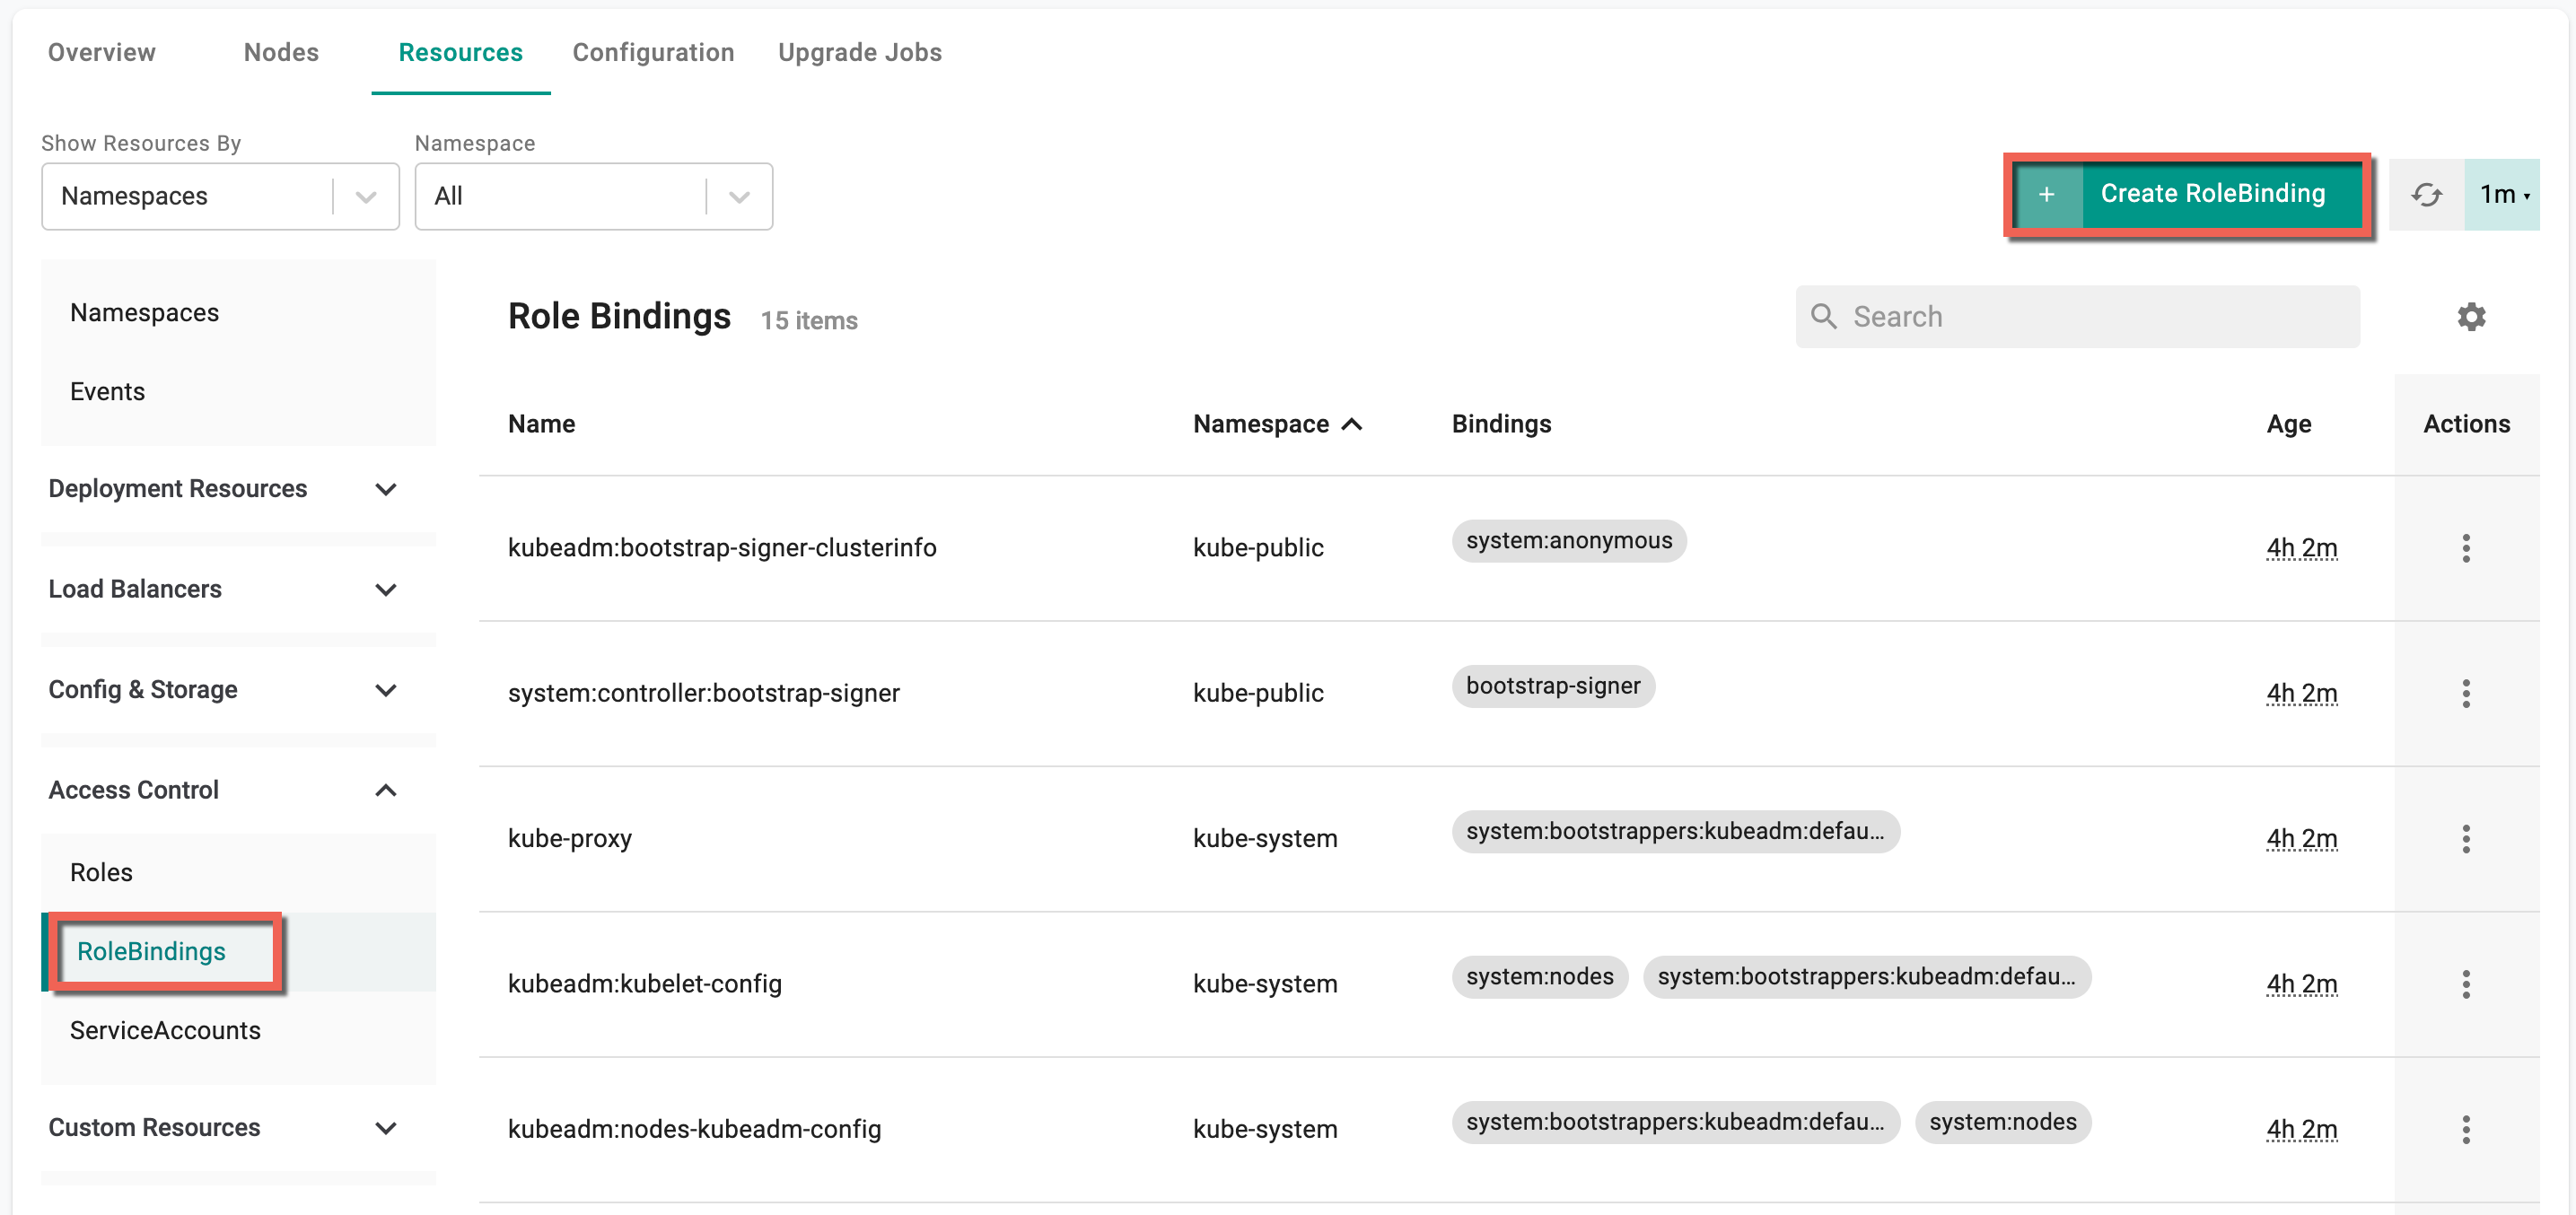
RoleBindings
To create RoleBindings, perform the following steps:
- Select a cluster and click the Resources tab
- Select RoleBindings under the Access Control
- Click Create RoleBinding
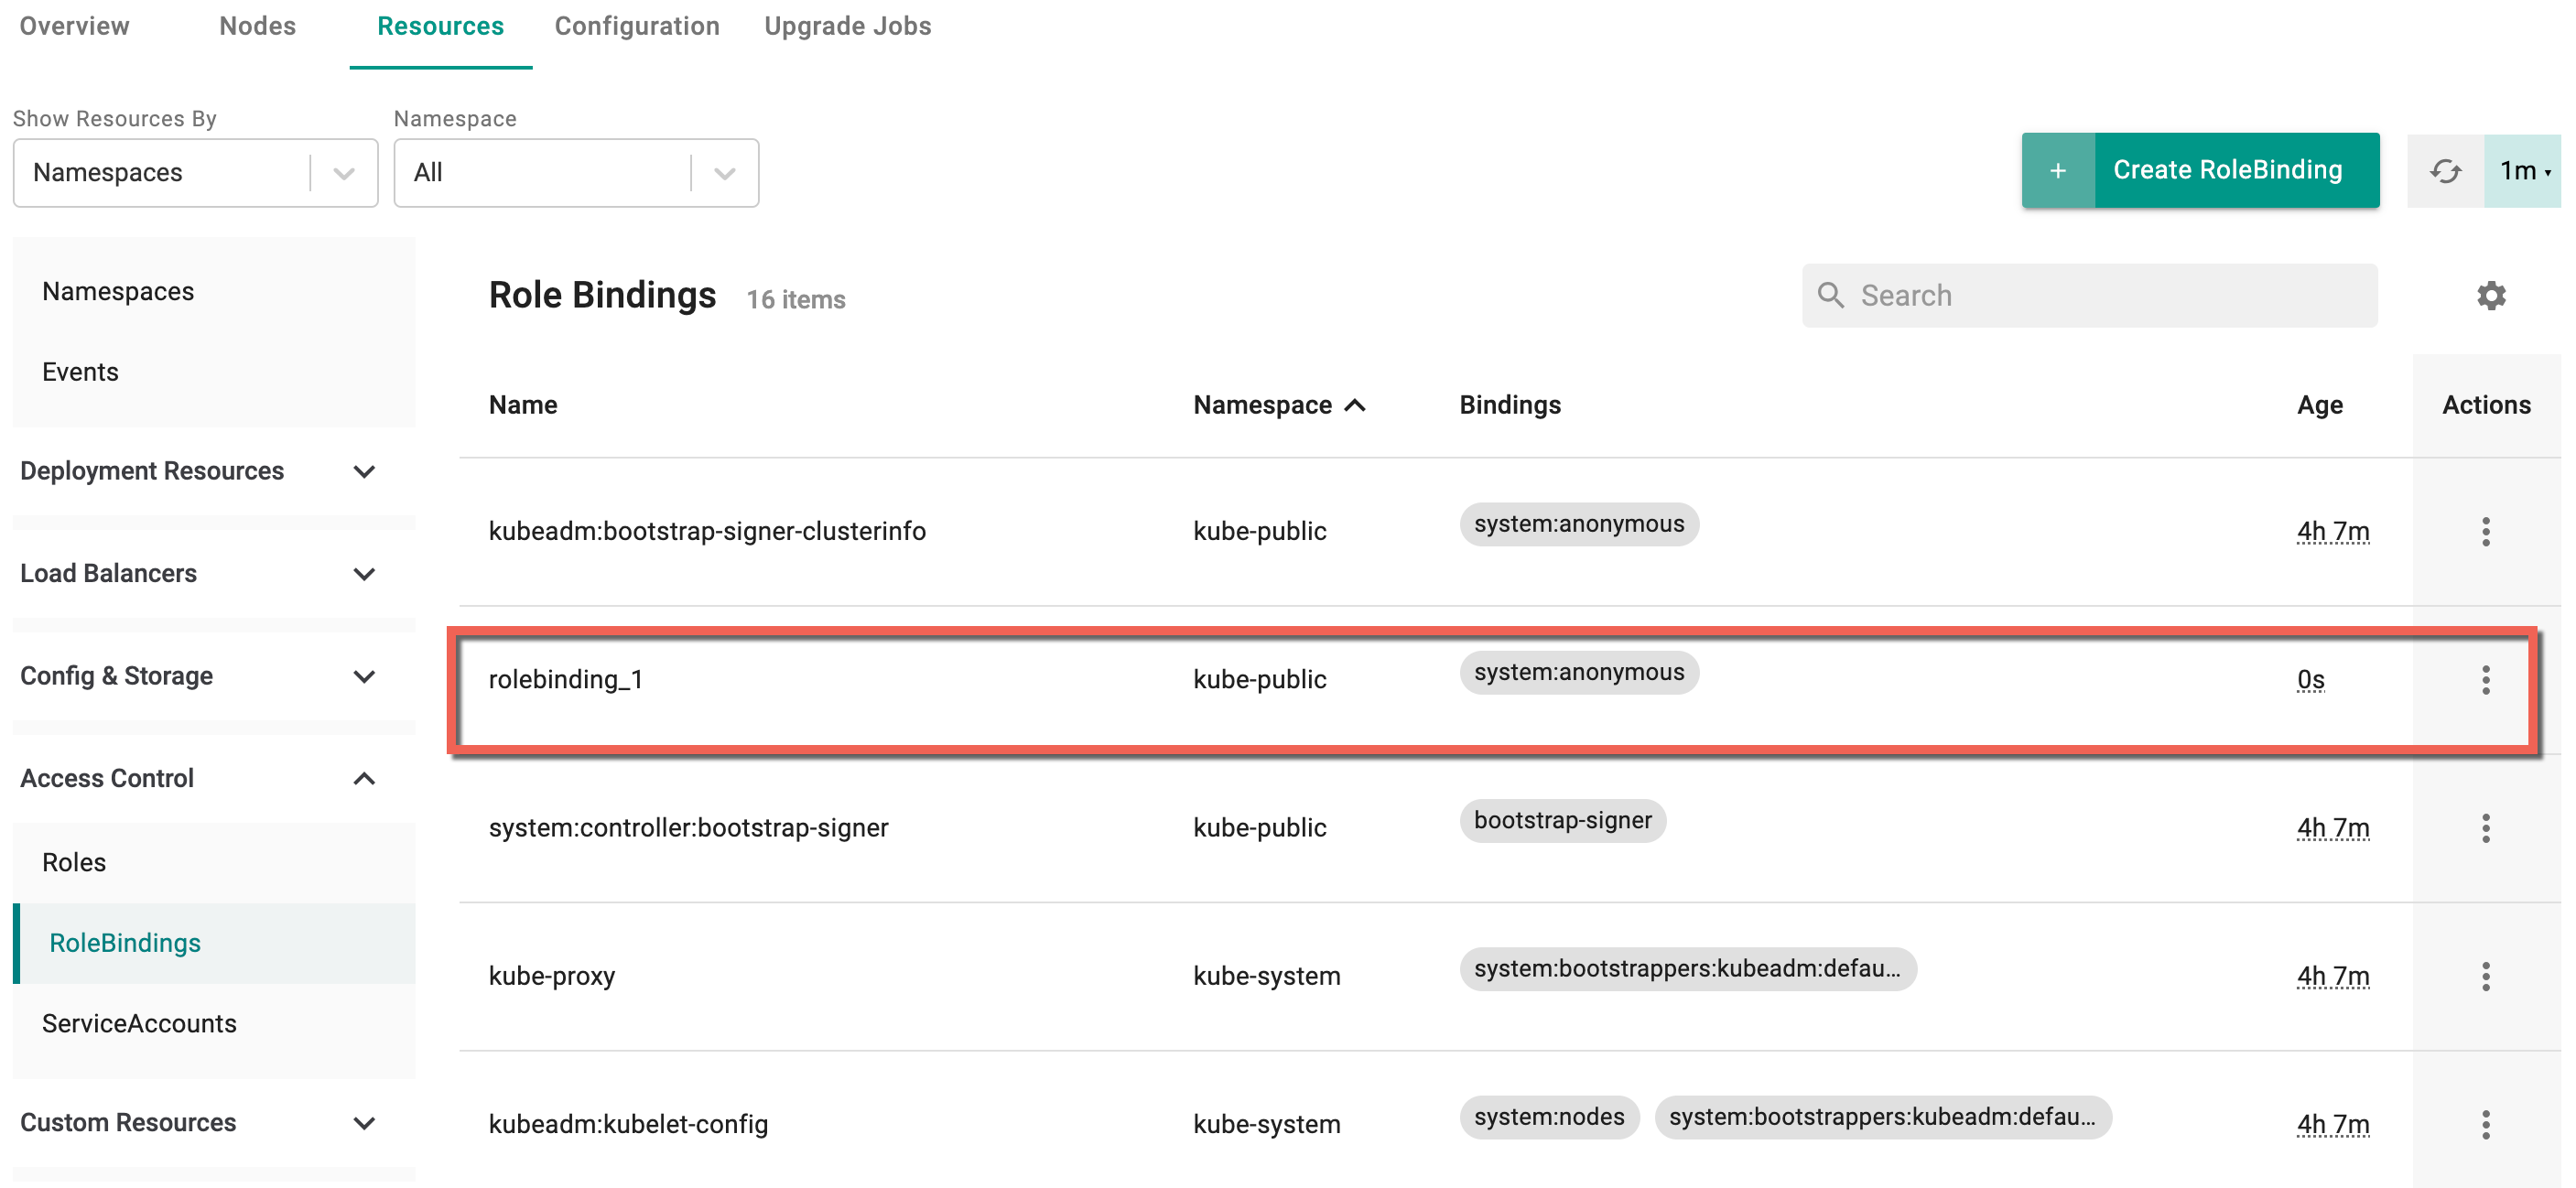
RoleBinding : Create screen appears
- Yaml config screen appears. You can directly add the required parameters to this config file and create a RoleBinding

- Click Create
- On successful creation, the resource is displayed in the RoleBindings list
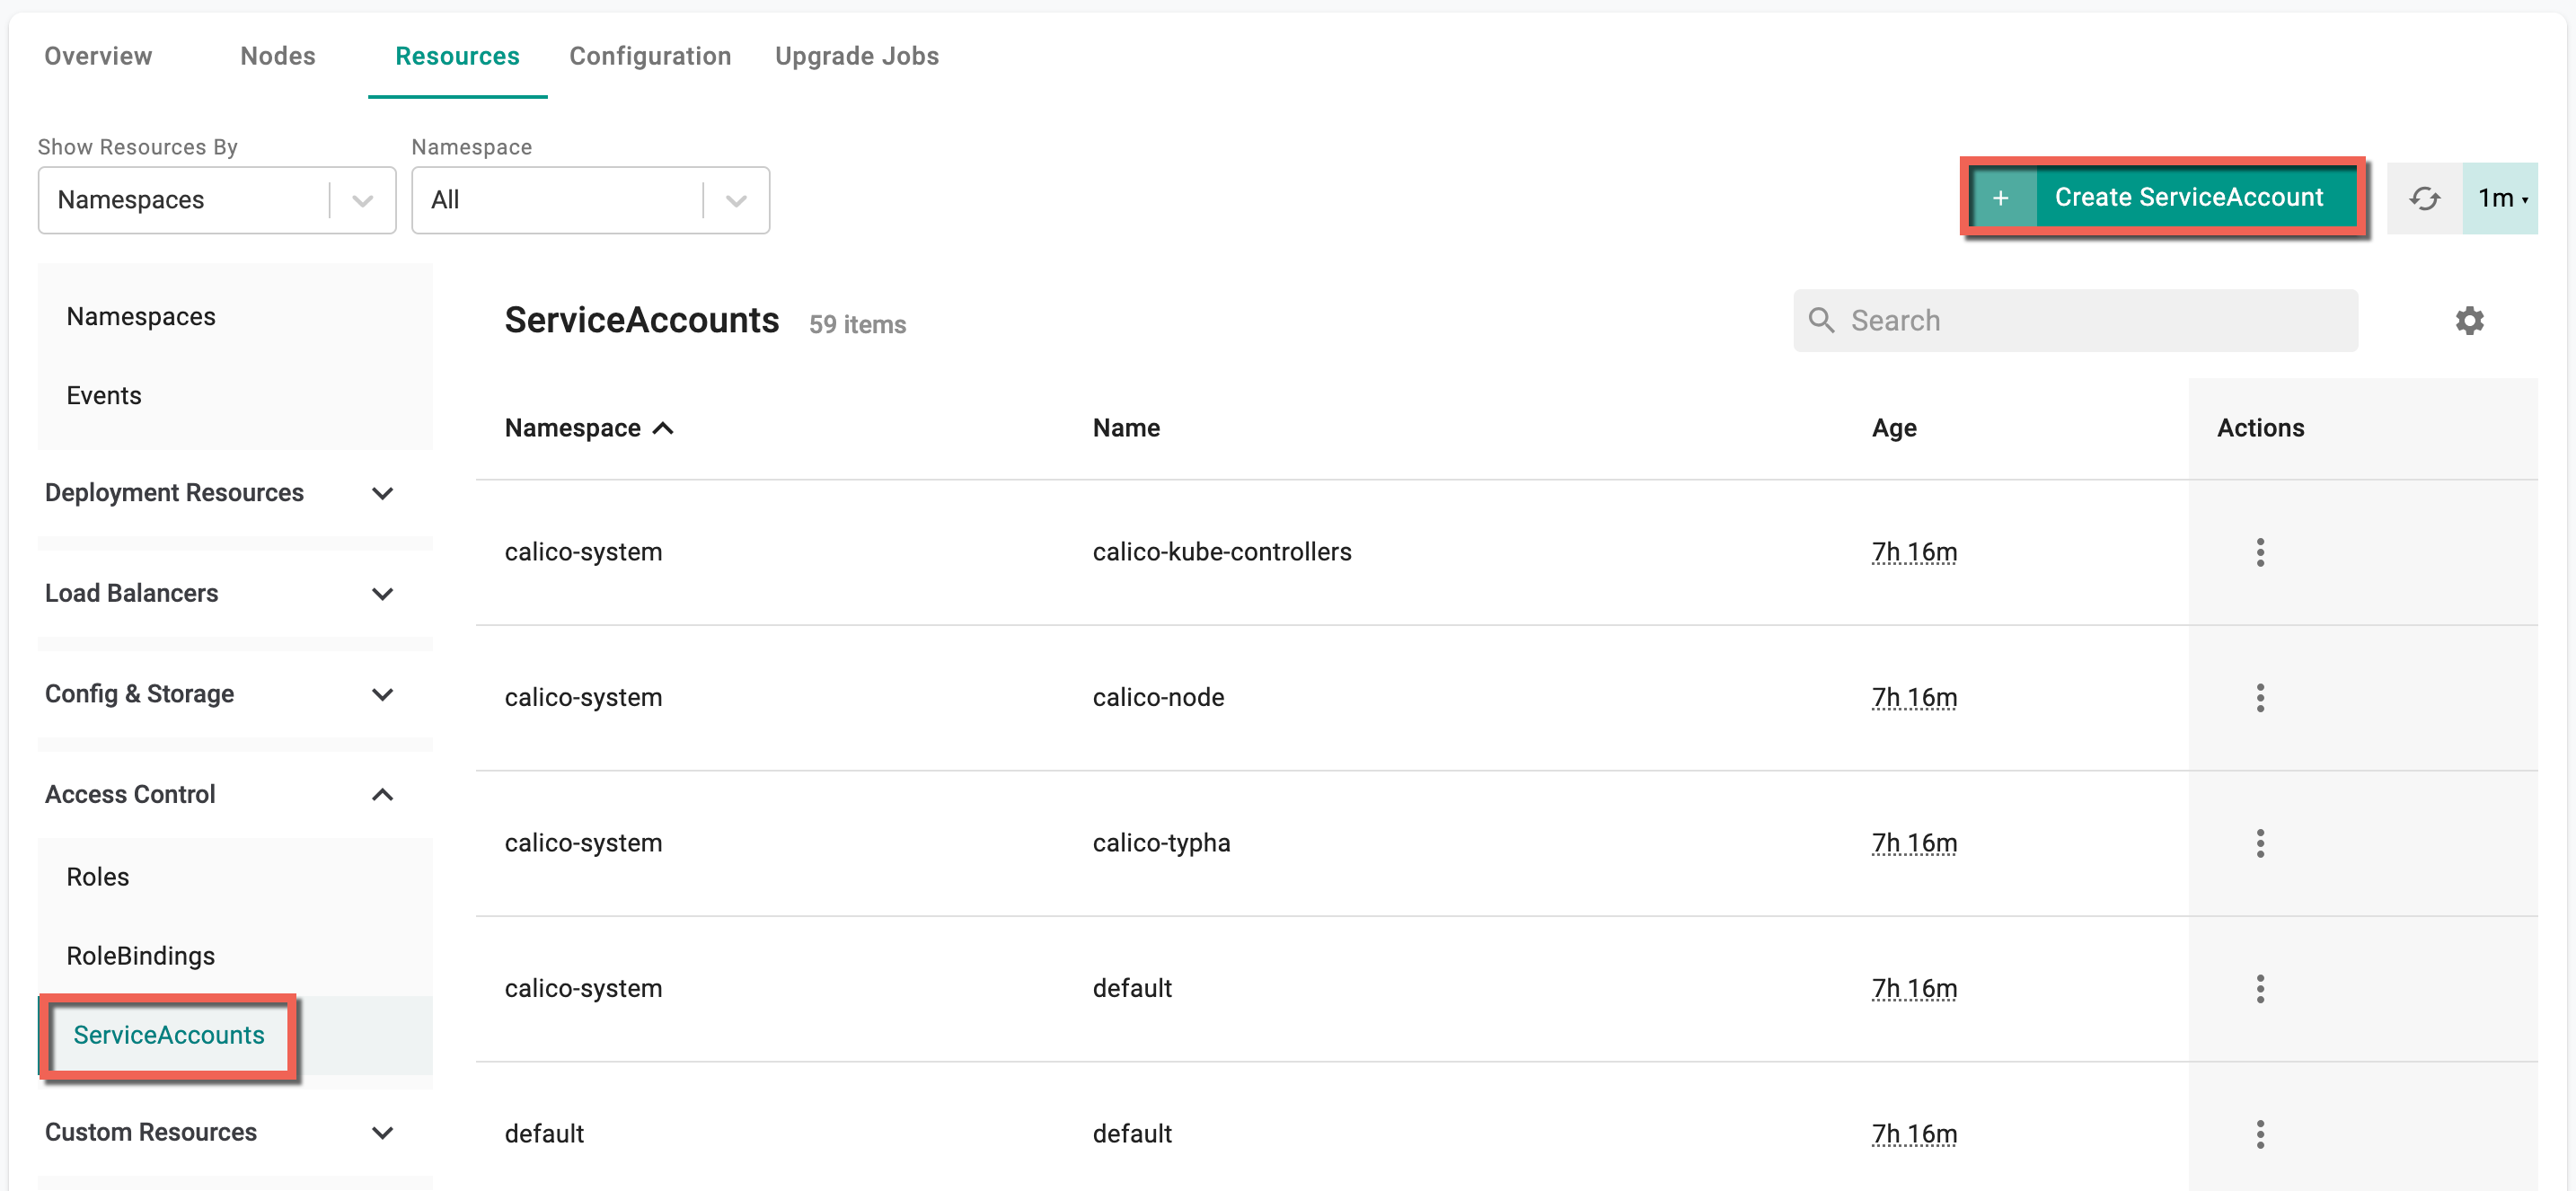
ServiceAccounts
To create ServiceAccounts, perform the following steps:
- Select a cluster and click the Resources tab
- Select ServiceAccounts under the Access Control
- Click Create ServiceAccount
ServiceAccount : Create screen appears
- By default, Yaml config screen appears. You can directly add the required parameters to this config file and create a ServiceAccount
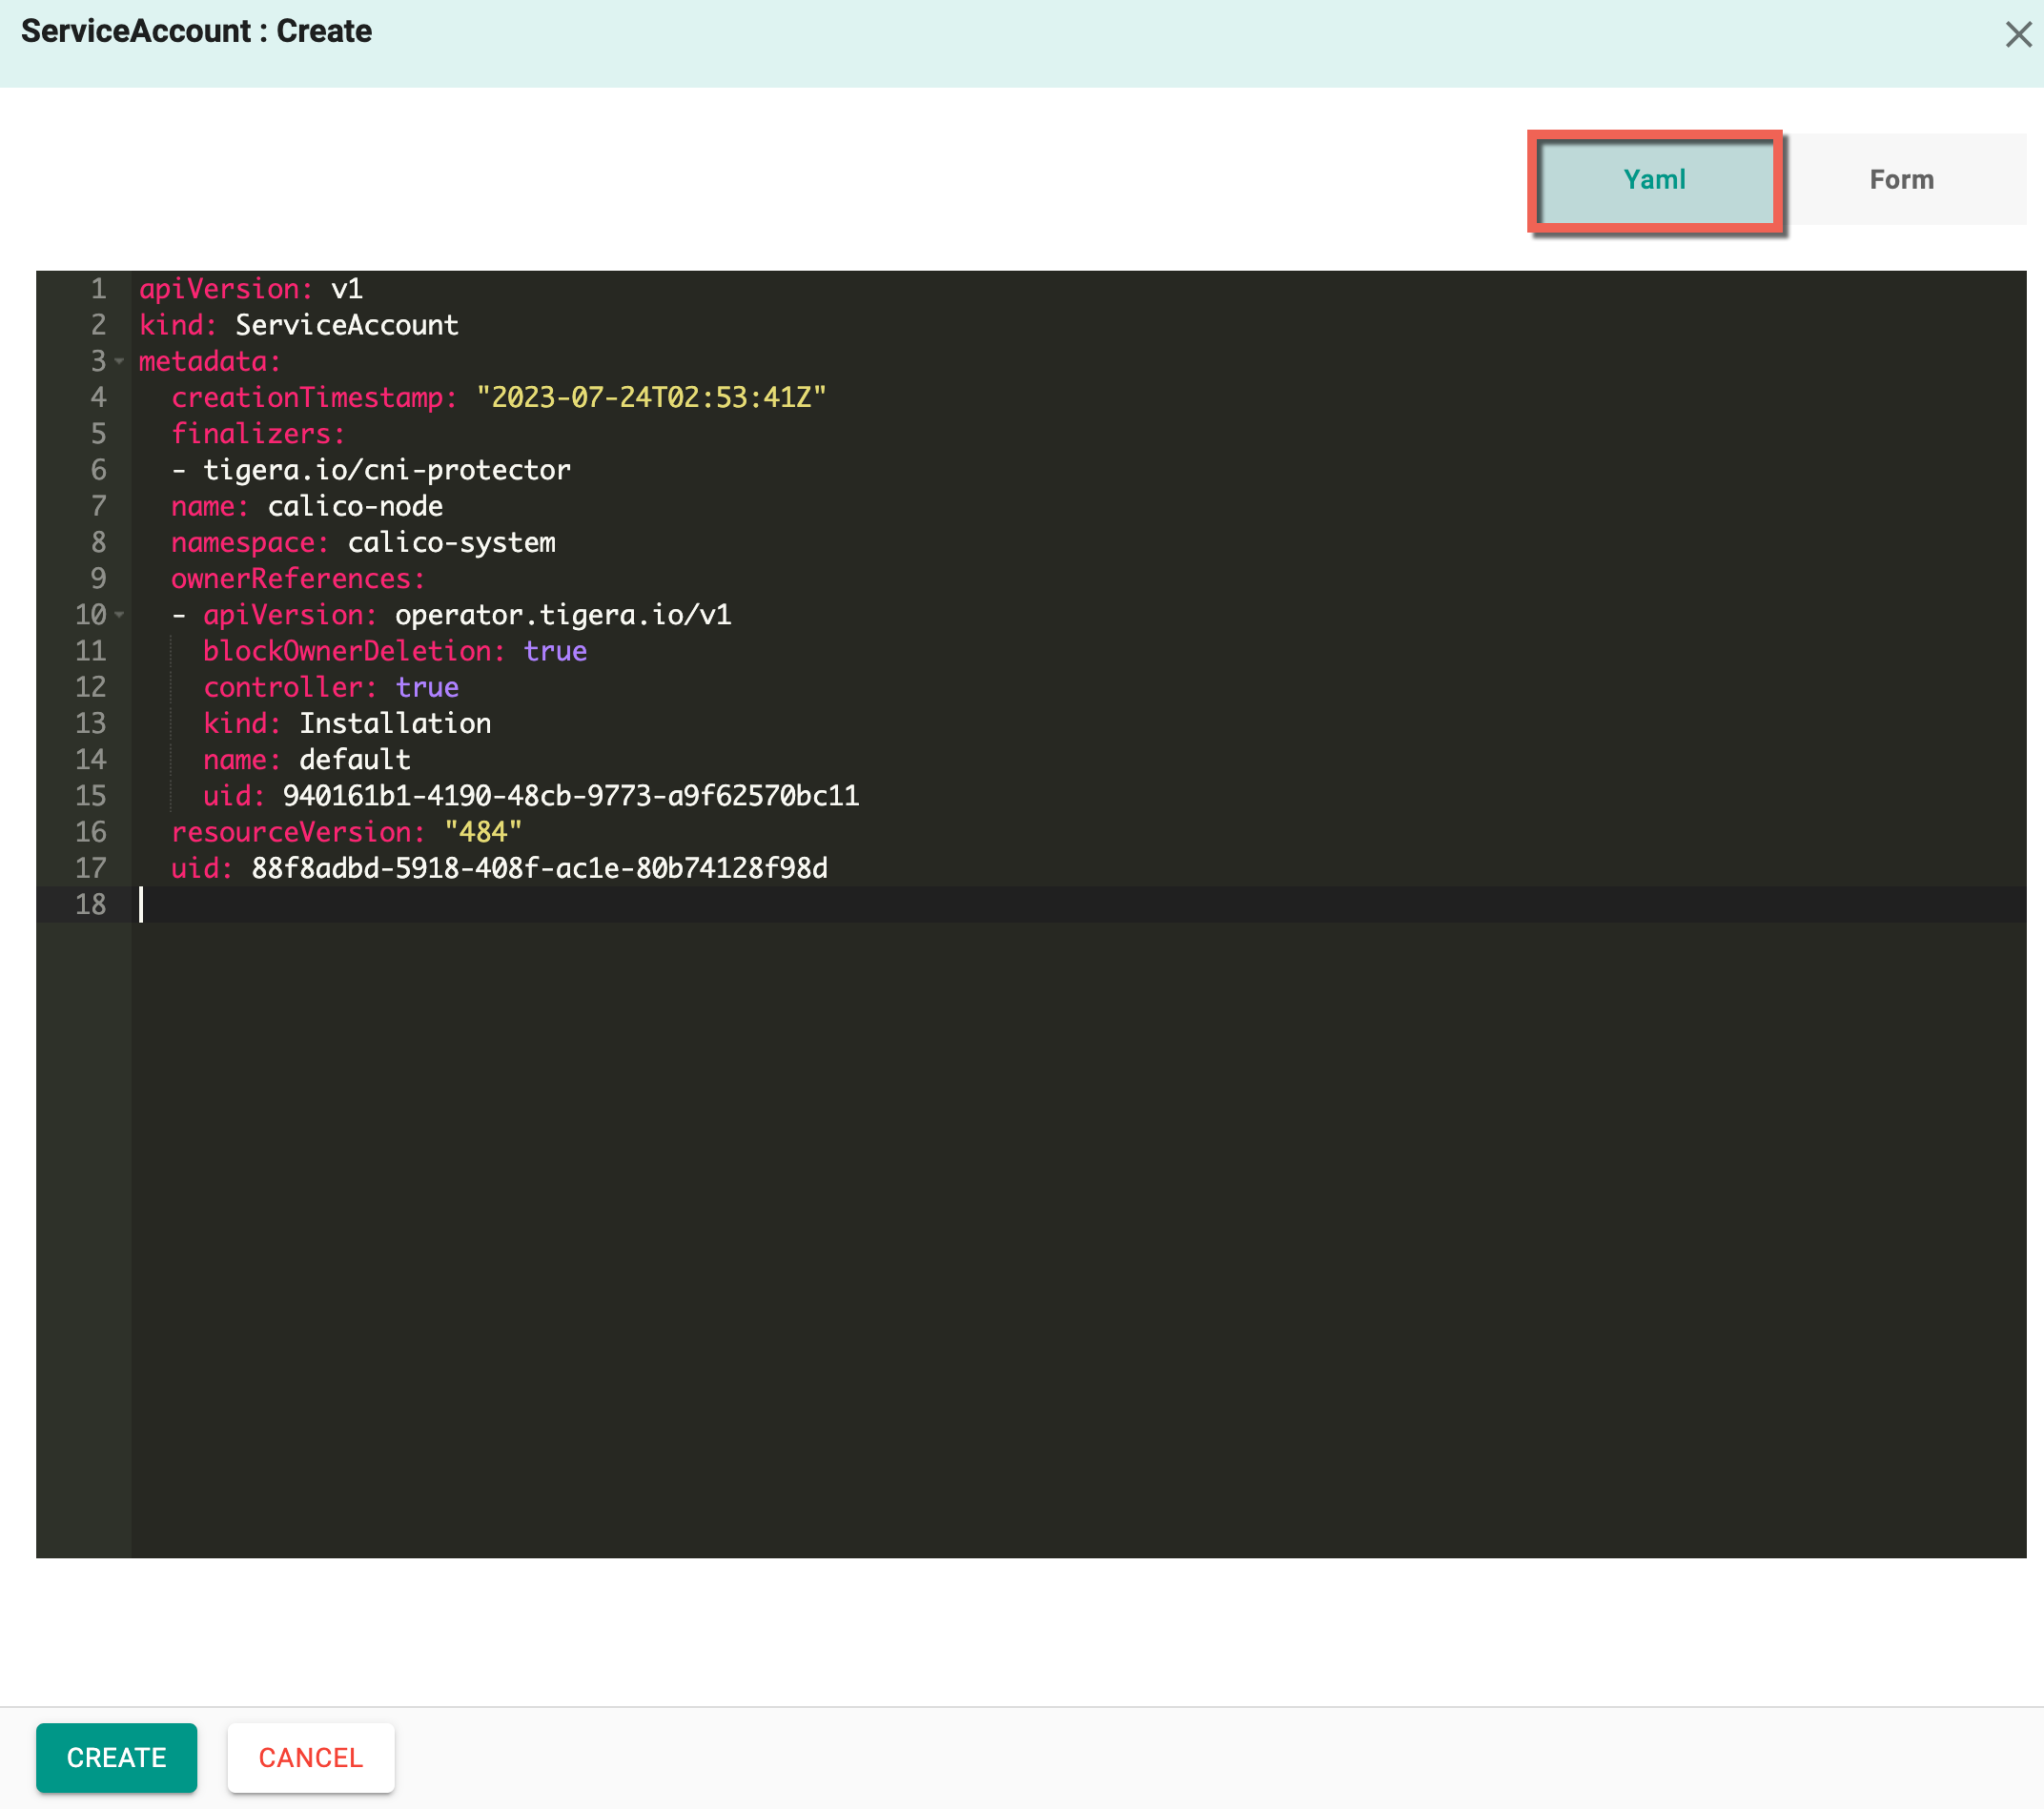
-
Form allows to select and enter the required data
- Select a Namespace and enter a name
- Optionally, enable the Automount Service Account Token
- Select one or more Image Pull Secret
- Optionally, add Labels and Annotations
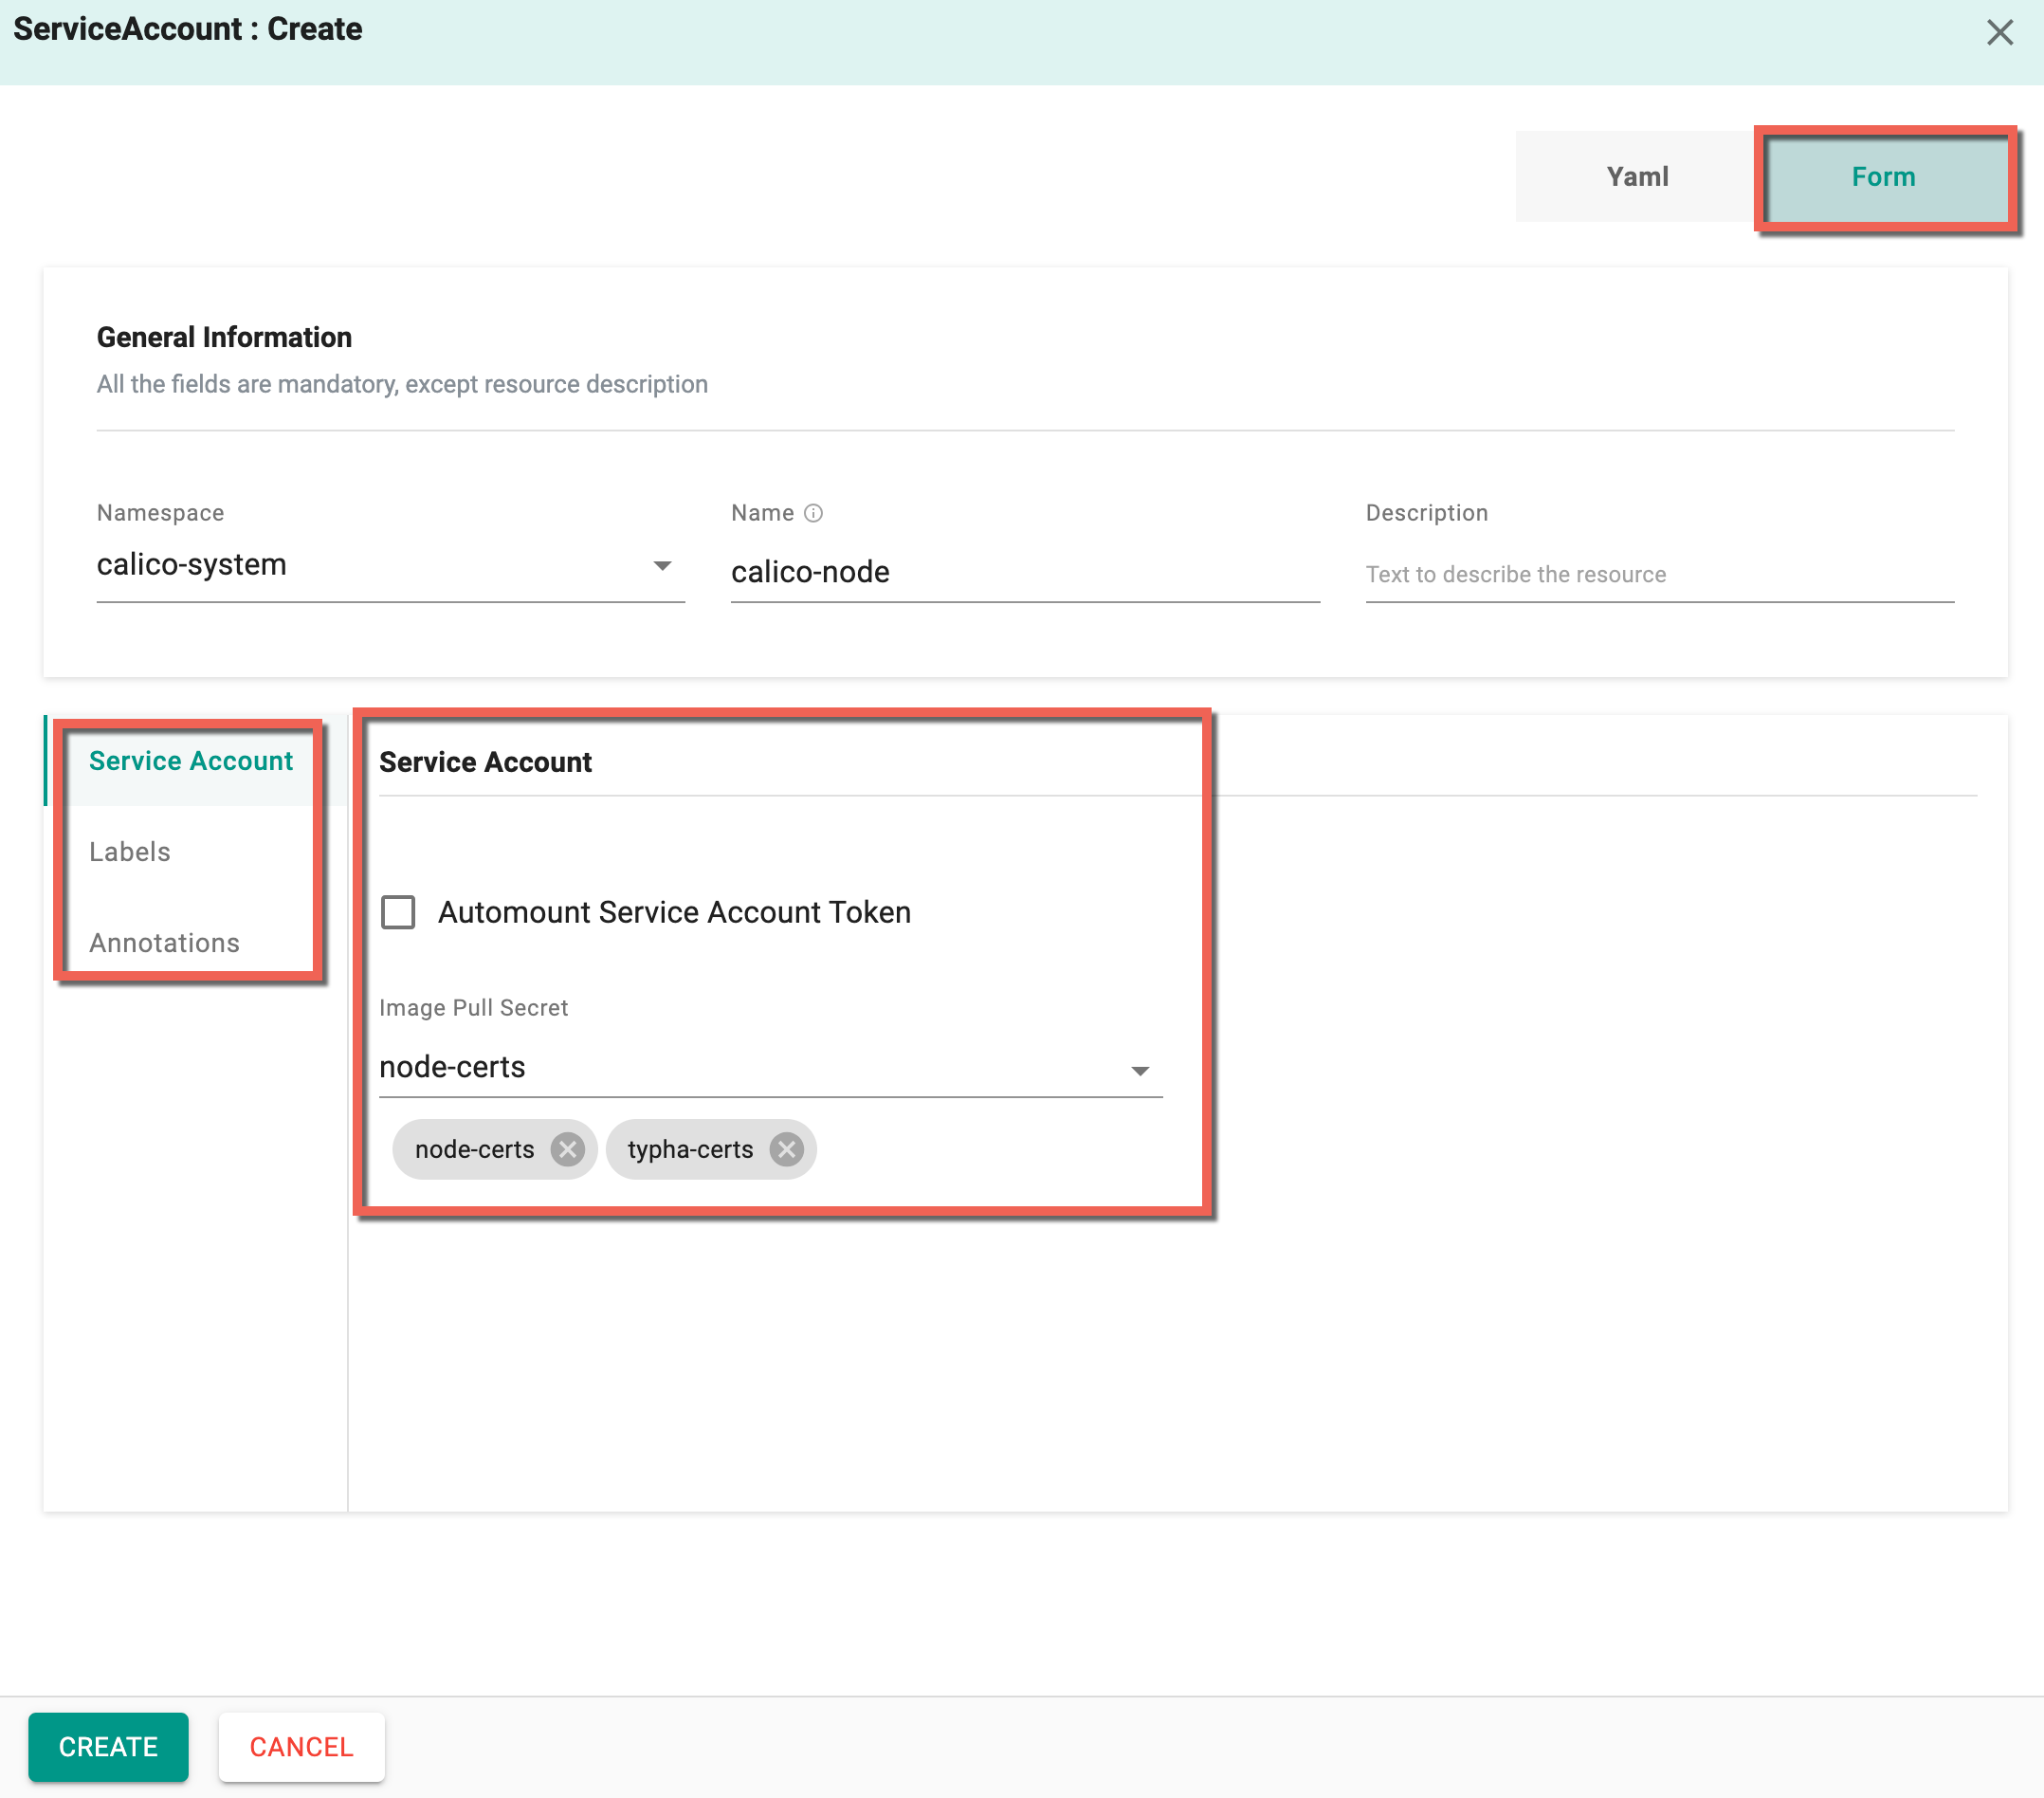
-
Click Create
- On successful creation, the resource is displayed in the ServiceAccounts list
