Part 1: YAML
This is Part 1 of the exercise that will focus on deploying a YAML based workload. You will upload the YAML file to the controller which in turn will deploy it on the remote cluster.
What Will You Do
In part 1, you will:
- Create a namespace for the workload
- Create and publish a YAML workload
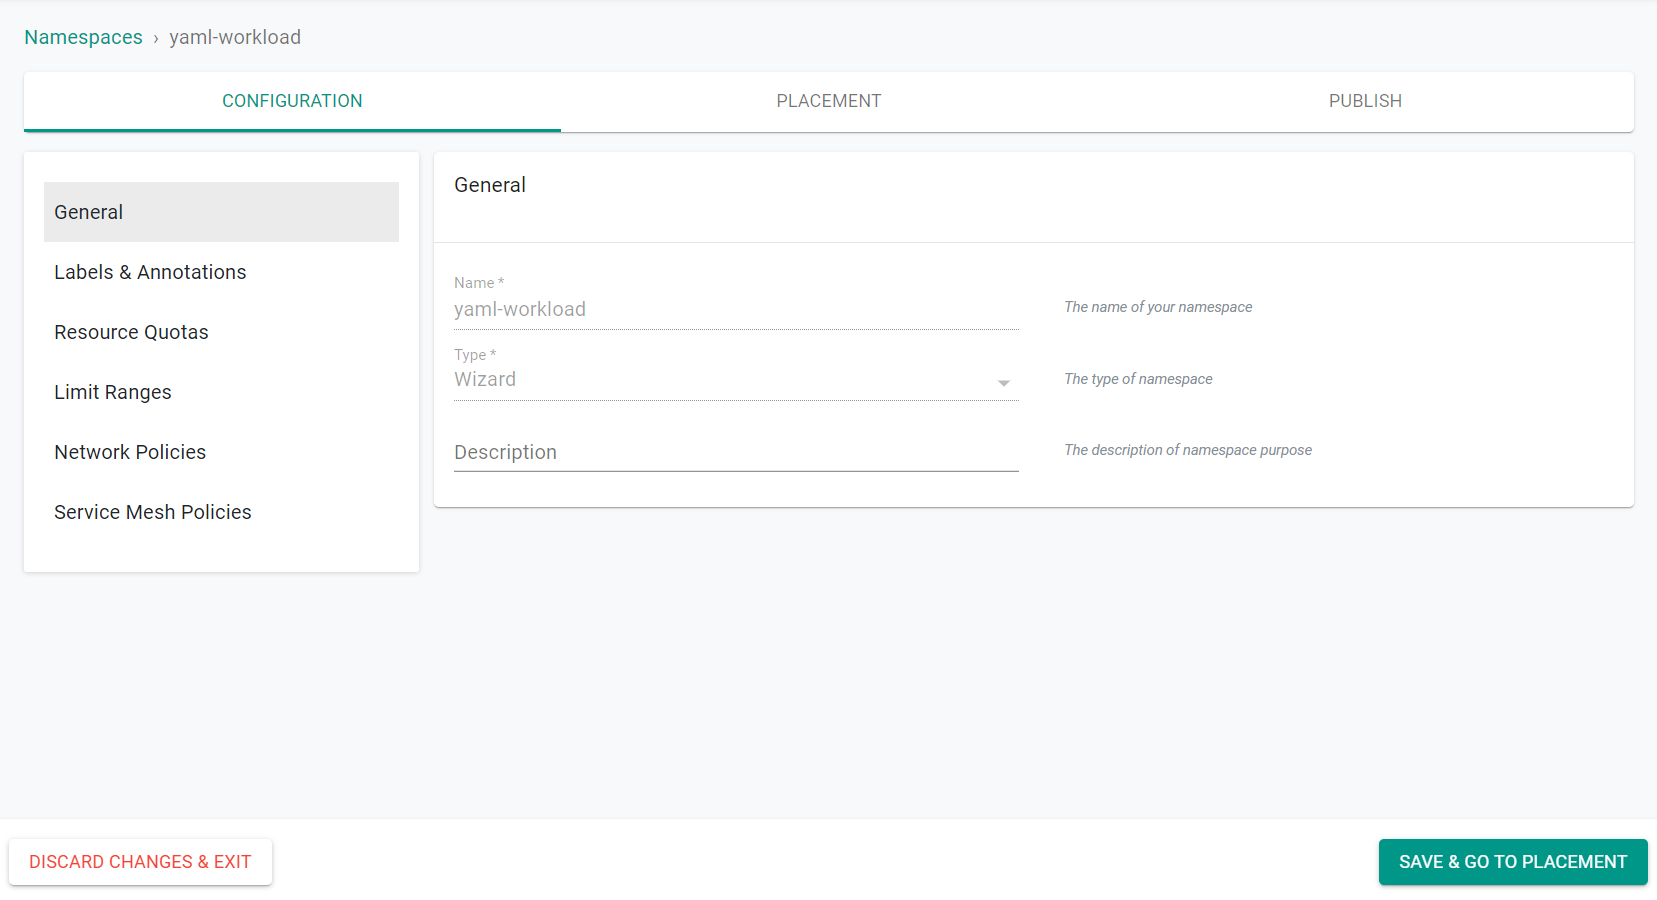
Step 1: Create Namespace
In this step, we will create a namespace through the UI.
- Navigate to the project in your Org where the cluster is located
- Select Infrastructure -> Namespaces
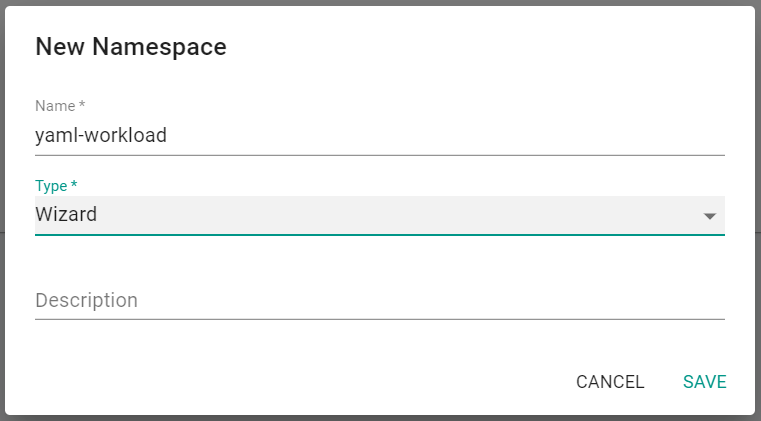
- Click "New Namespace"
- Enter a Name for the namespace
- Select "Wizard" for the Type
- Click "Save"
- Click "Save & Go To Placement"
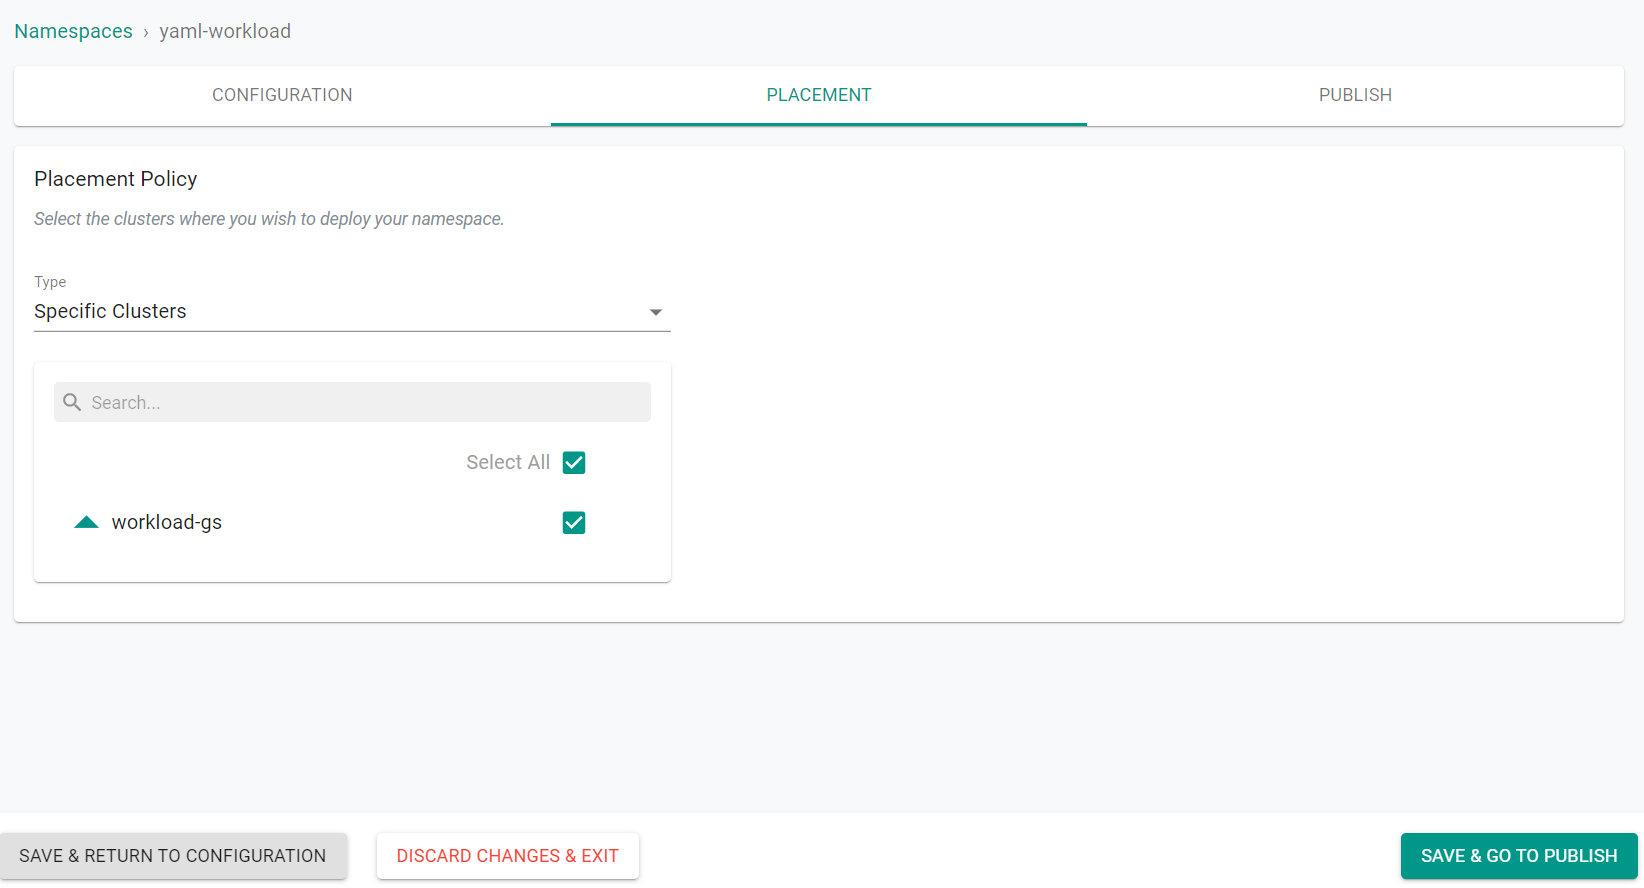
- Select the cluster to create the namespace on
- Click "Save & Go To Publish"
- Click "Publish"
The namespace is now published on the cluster.
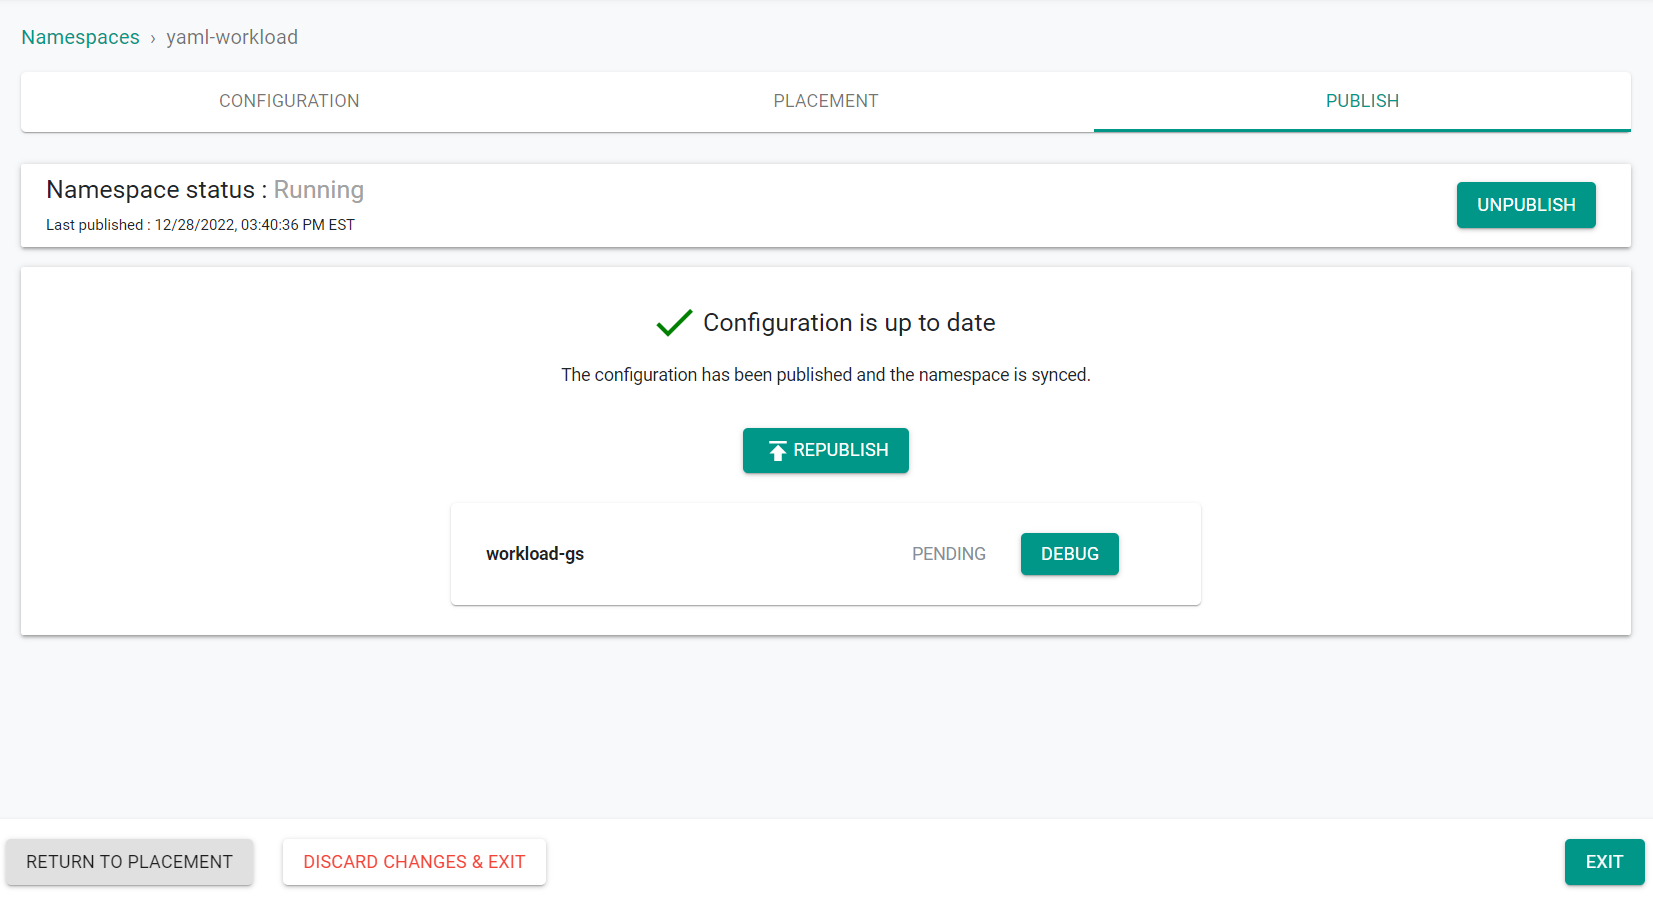
- Click "Exit"
Step 2: Create YAML Workload
In this step, we will create a YAML based workload and publish the workload to the cluster.
- Navigate to the project in your Org where the cluster is located.
- Select Applications -> Workloads
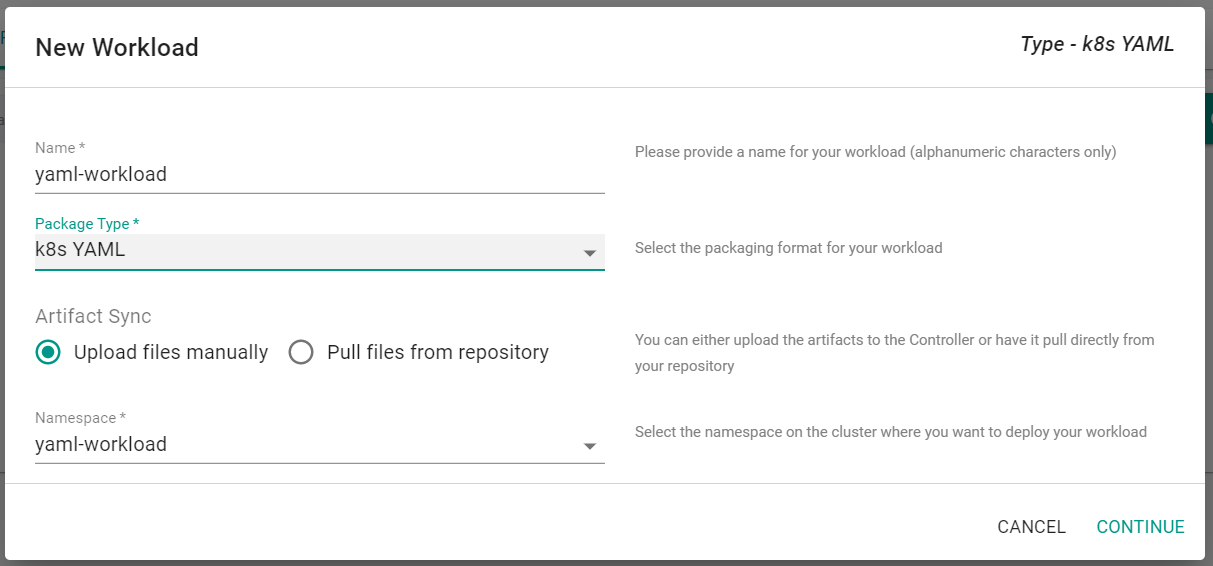
- Click New Workload -> Create New Workload
- Enter a Name for the Workload
- Select "k8s YAML" for the Package Type
- Select "Upload files manually"
- Select the namespace that was previously created
- Click "Continue"
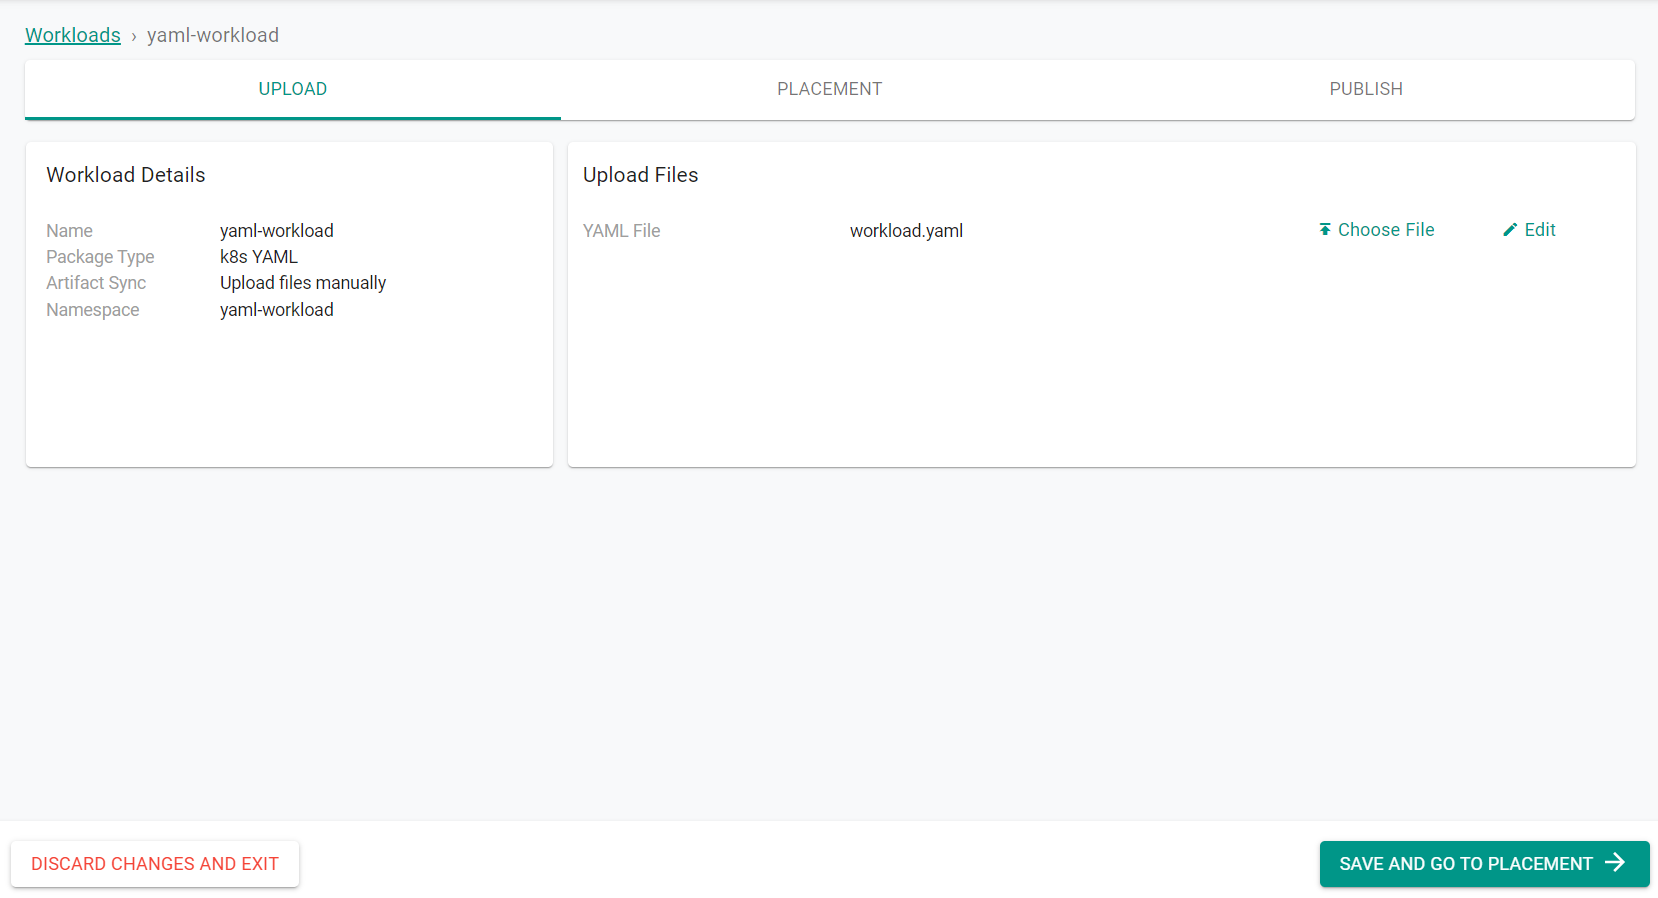
- Save the following YAML to a file
apiVersion: apps/v1
kind: Deployment
metadata:
  name: nginx-yaml
  labels:
    app: nginx
  annotations:
spec:
  replicas: 1
  selector:
    matchLabels:
      app: nginx
  template:
    metadata:
      labels:
        app: nginx
    spec:
      containers:
      - name: nginx-yaml
        image: nginx
        ports:
        - containerPort: 80
- Click "Choose File" to select the saved YAML file
- Click "Save and Go To Placement"
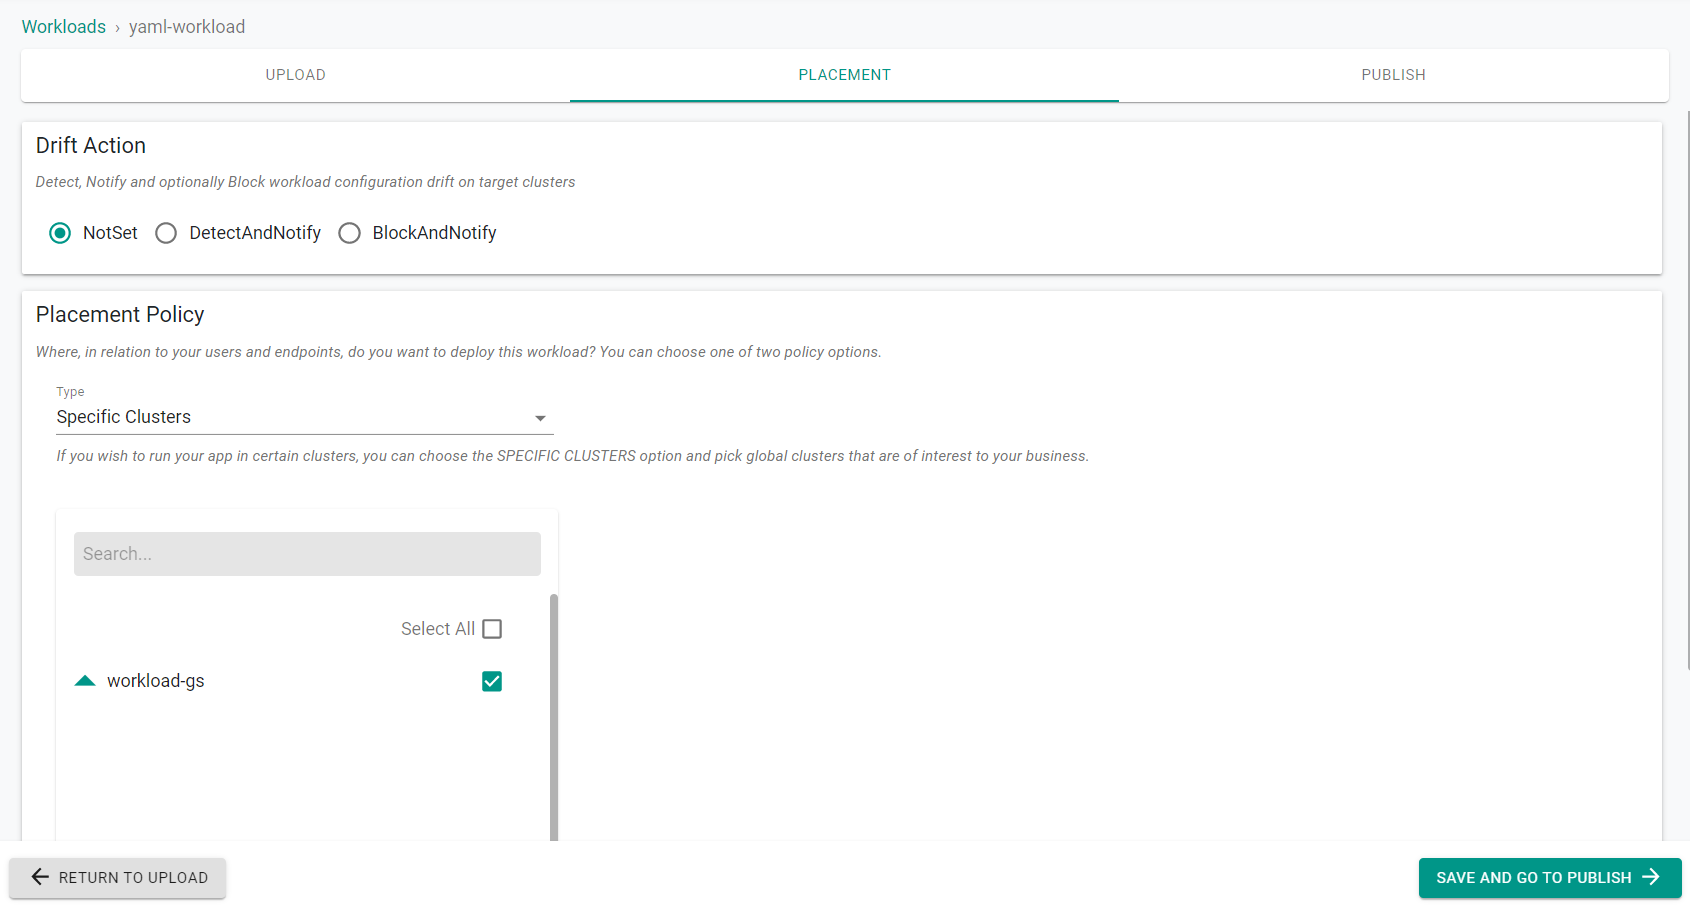
- Select the cluster where the namespace was created
- Click "Save and Go To Publish"
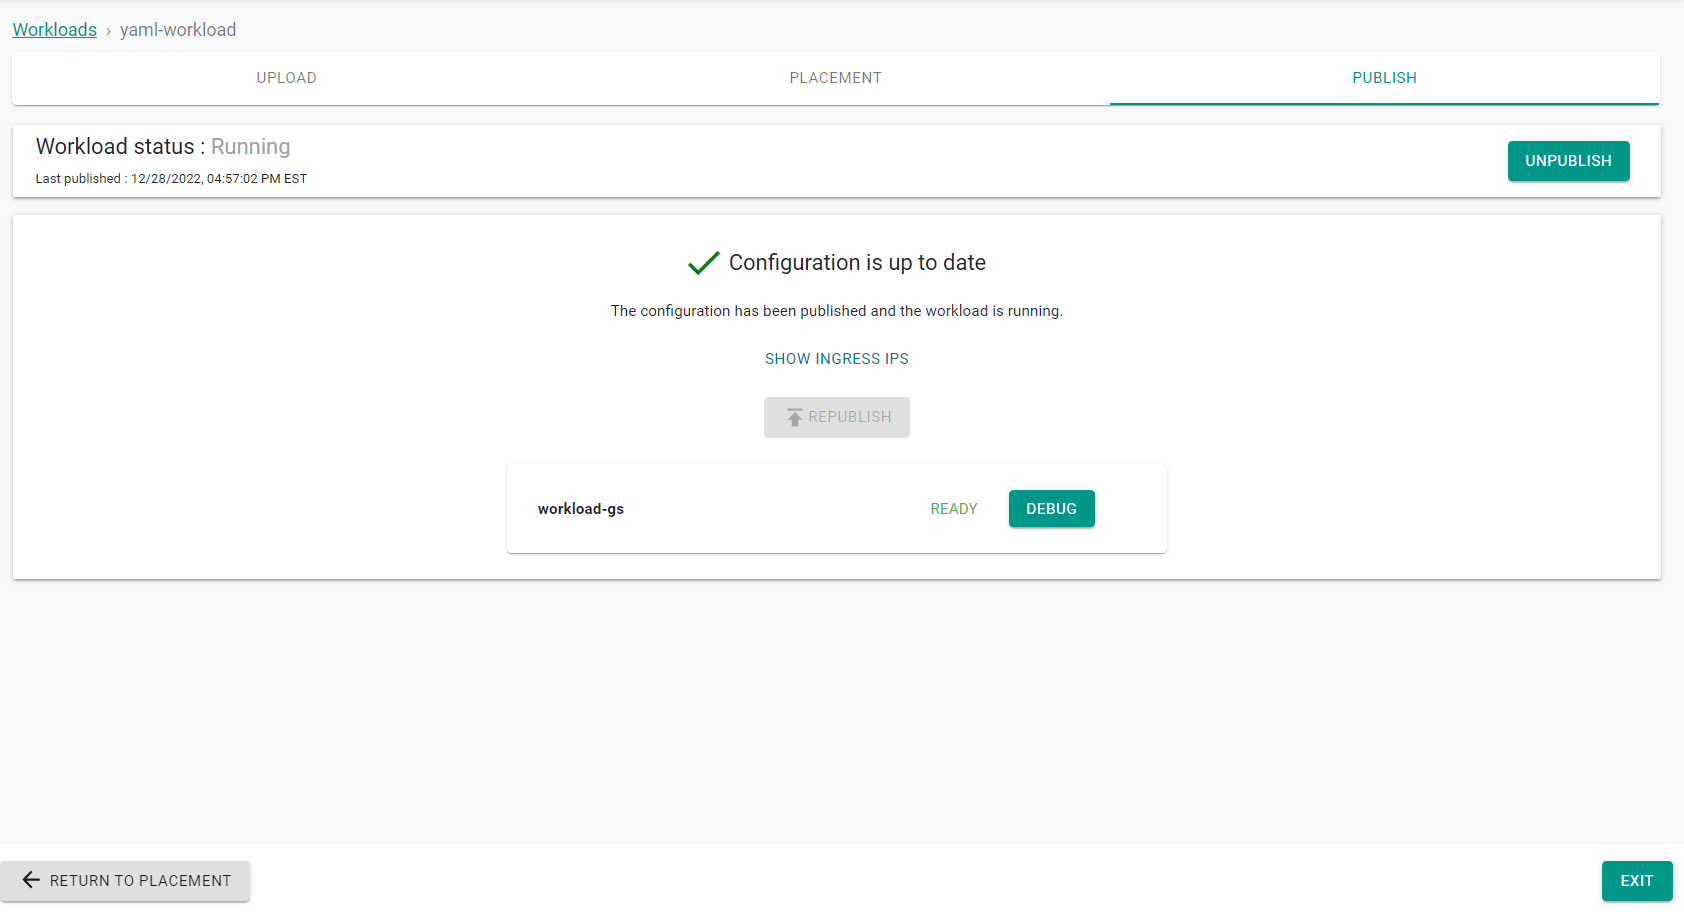
- Click "Publish"
The YAML workload is now published on the cluster.
- Click "Exit"
Additionally, you can use the Zero Trust KubeCTL access to check the workload running on the cluster.
Step 1: Create Namespace
In this step, we will create a namespace using the RCTL CLI.
- Save the below specification file to your computer as "yaml-namespace.yaml". Note, the highlighted sections in the spec will need to be updated to match your environment.
kind: ManagedNamespace
apiVersion: config.rafay.dev/v2
metadata:
  name: yaml-workload
  labels:
  annotations:
spec:
  type: RafayWizard
  resourceQuota:
  placement:
    placementType: ClusterSpecific
    clusterLabels:
    - key: rafay.dev/clusterName
      value: workload-gs
Update the following section of the specification file with the name of the cluster in your environment.
value: workload-gs
- Save the updates that were made to the file
-
Execute the following command to create the namespace from the declarative spec file.
./rctl create namespace -f yaml-namespace.yaml -
Login to the web console
- Navigate to the project in your Org where the cluster is located
- Select Infrastructure -> Namespaces
You will see the namespace has been created, but has not been published

- Execute the following command to publish the namespace to the cluster
./rctl publish namespace yaml-workload
In the web console, you will see the namespace is now published.

Step 2: Create YAML Workload
In this step, we will create a YAML based workload and publish the workload to the cluster using the RCTL CLI.
- Save the below specification file to your computer as "yaml-workload.yaml".
apiVersion: apps/v1
kind: Deployment
metadata:
  name: nginx-yaml
  labels:
    app: nginx
  annotations:
spec:
  replicas: 1
  selector:
    matchLabels:
      app: nginx
  template:
    metadata:
      labels:
        app: nginx
    spec:
      containers:
      - name: nginx-yaml
        image: nginx
        ports:
        - containerPort: 80
- Save the below specification file to your computer as "yaml-workload-resource.yaml". Note, the highlighted sections in the spec will need to be updated to match your environment.
name: yaml-workload
namespace: yaml-workload
project: defaultproject
type: NativeYaml
clusters: workload-gs
payload: yaml-workload.yaml
Update the following section of the specification file with the name of the previously created namespace.
namespace: yaml-workload
Update the following section of the specification file with the name of the project where the workload should be created. This should be the same project as the cluster you are using.
project: defaultproject
Update the following section of the specification file with the name of the cluster where the workload will be deployed.
clusters: workload-gs
Update the following section of the specification file with the name of the workload specification file that was created earlier in this step.
payload: yaml-workload.yaml
- Save the updates that were made to the file
-
Execute the following command to create the workload from the declarative spec file.
./rctl create workload -f yaml-workload-resource.yaml -
Login to the web console
- Navigate to the project in your Org where the cluster is located
- Select Applications -> Workloads
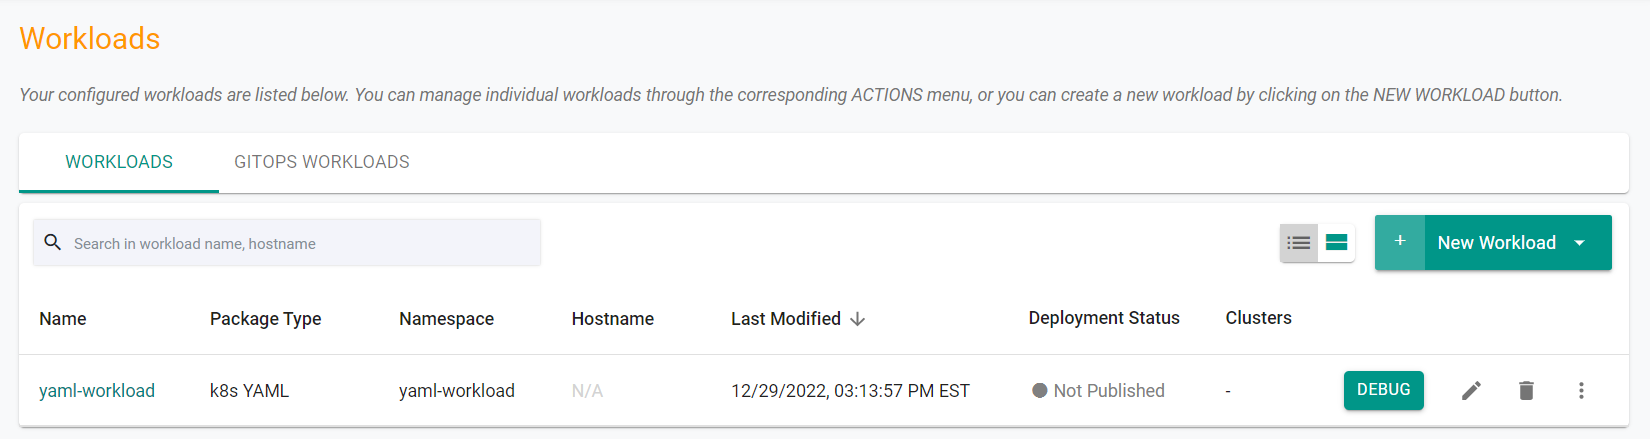
You will see the YAML workload has been created, but has not been published
- Execute the following command to publish the workload to the cluster
./rctl publish workload yaml-workload
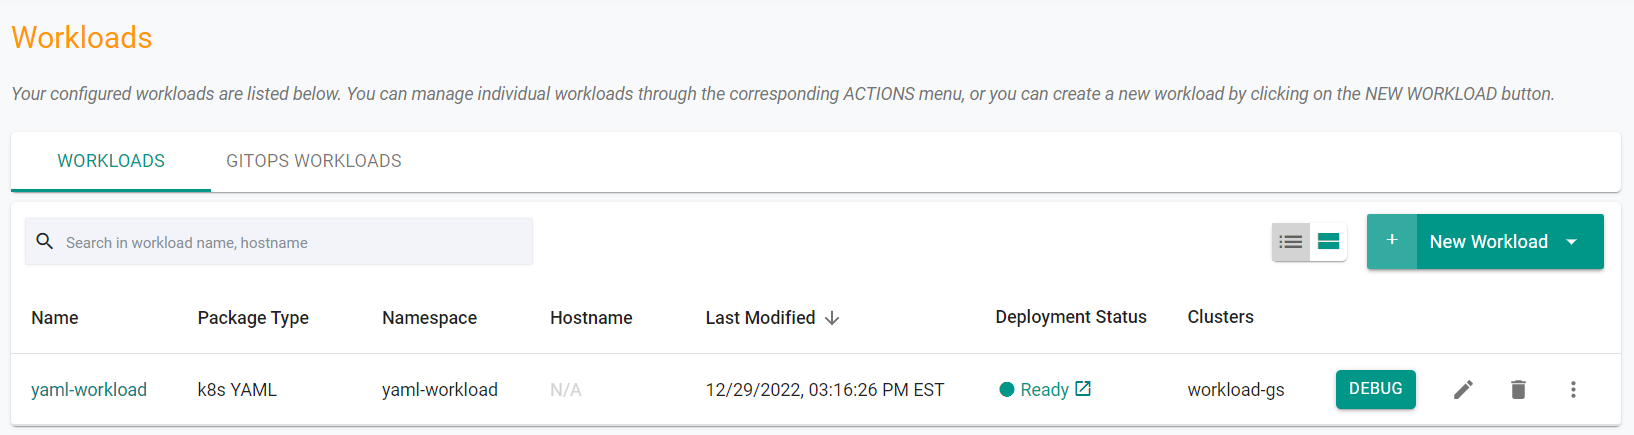
In the web console, you will see the workload is now published.
Additionally, you can use the Zero Trust KubeCTL access to check the workload running on the cluster.
Recap
Congratulations! You have successfully deployed a YAML workload to your cluster.