Part 3: Backup/Restore
This is Part 3 of a multi-part, self-paced quick start exercise.
What Will You Do
In part 3, you will use the previously created workload and backup/restore resources to test backup and restore operations across clusters. You will:
- Run a backup job
- Run a restore job
- Verify restore operation
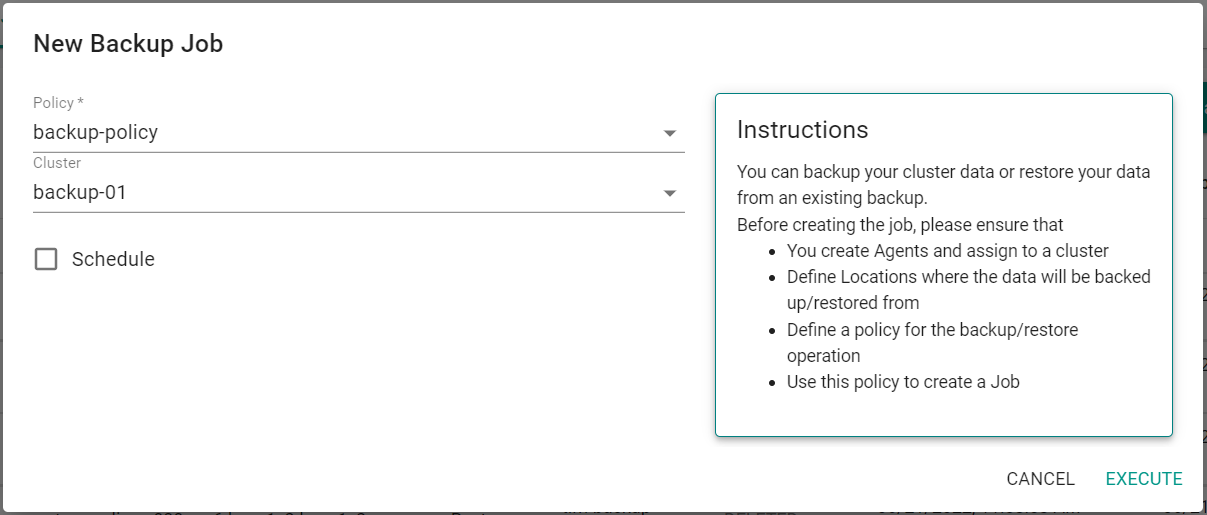
Step 1: Run Backup Job
In this step, you will run a one time backup job to create a backup of your cluster that is running the Wordpress workload. The backup will be stored in your S3 backup location and will consist of both the control plane and peristent volume data.
- In your project, navigate to Backup/Restore -> Jobs
- Click on "Backup Job"
- Select the previously created backup policy for Policy
- Select the cluster running the Wordpress workload for Cluster
- Click "Execute"
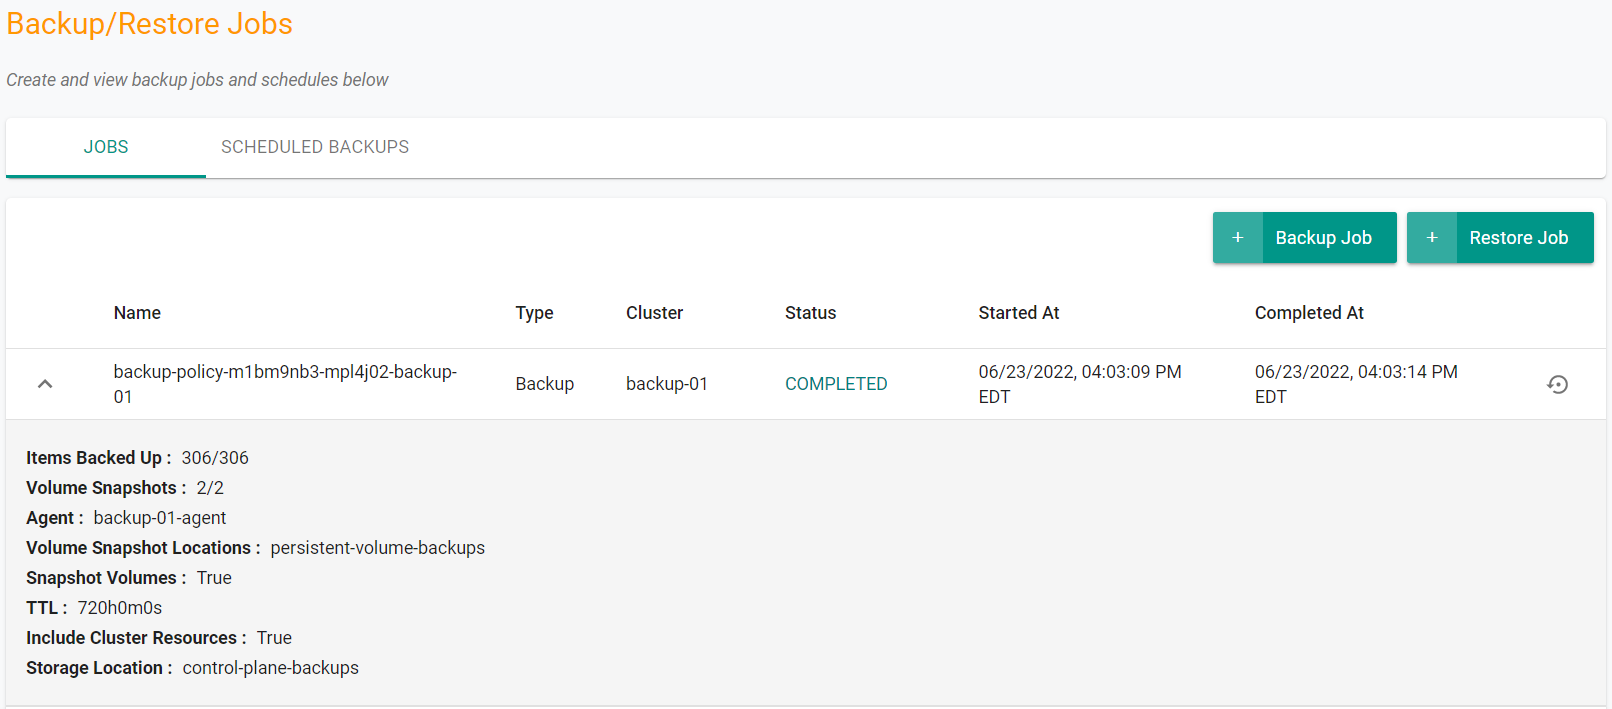
In the Jobs window, you can see the job status.
Alternatively, you can run the backup job using RCTL and build this into an automation pipeline. The following command could be used ensuring the policy name and cluster name are updated first.
rctl create dp-job --policy <policy> --cluster <clustername>
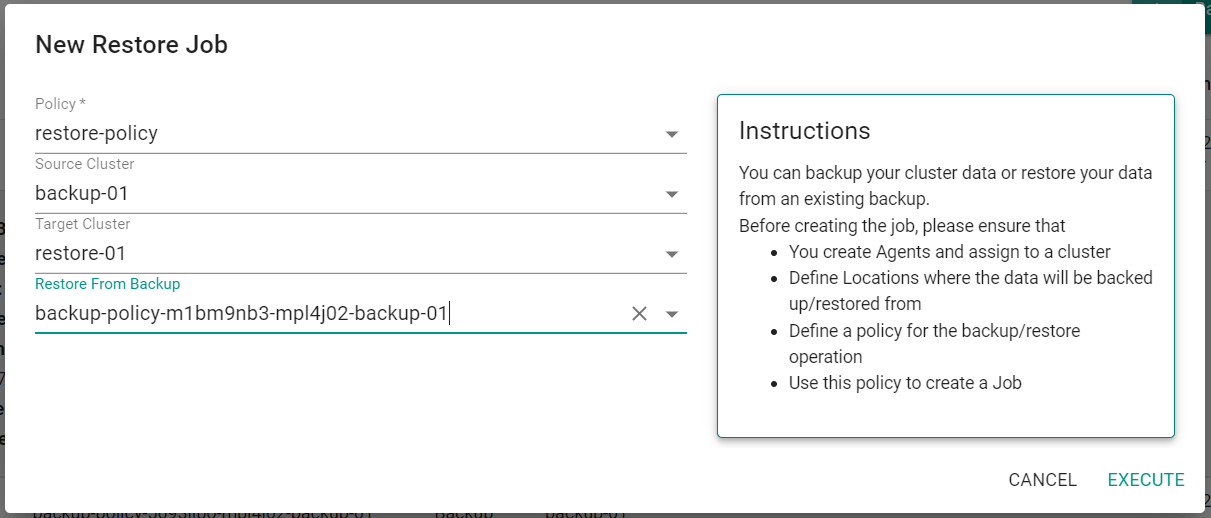
Step 2: Run Restore Job
In this step, you will use the previously created backup and restore it on the second cluster using a restore job. This restore job will restore the control plane and the persistent volumes of the Wordpress workload on the cluster.
- In your project, navigate to Backup/Restore -> Jobs
- Click on "Restore Job"
- Select the previously created restore policy for Policy
- Select the previously backed up cluster running the Wordpress workload for the Source Cluster
- Select the other cluster for the Target Cluster
- Select the previosuly created backup for the Restore From Backup
- Click "Execute"
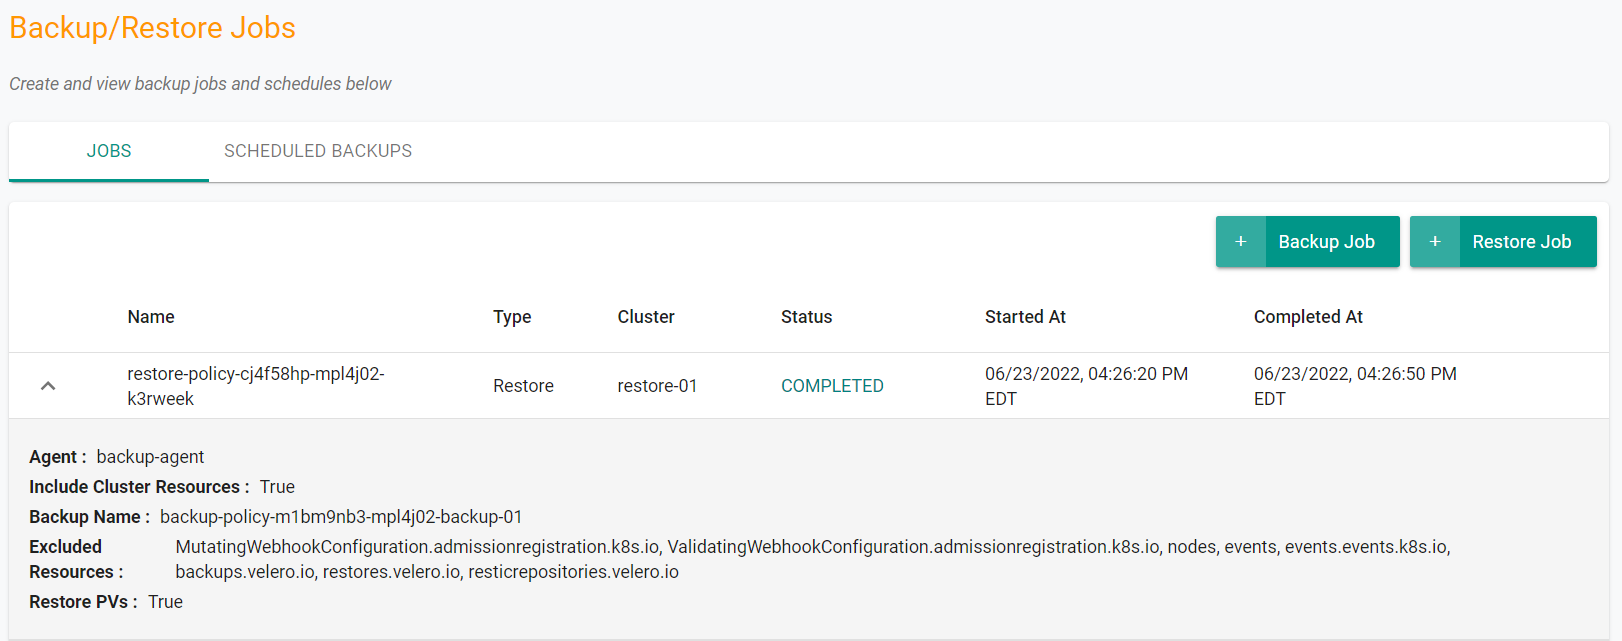
In the Jobs window, you can see the job status.
Alternatively, you can run the restore job using RCTL and build this into an automation pipeline. The following command could be used ensuring the policy name, target cluster name, source cluster name and backup name are updated first.
rctl create dp-job --policy <policy> --cluster <cluster-name> --source-cluster <source-cluster> --restore-from-backup <backup>
Step 3: Verify Restore
In this step, you will validate that the restore operation successfully restored the workload and the persistent volumes of the Wordpress workload that was in the backup.
- Open a kubtctl prompt on the cluster where the restore operation was performed
- Enter the following command
kubectl get pod -n wordpress
You should see something like the following:
NAME                         READY   STATUS    RESTARTS   AGE
wordpress-7f7749fb9d-gxjv6   1/1     Running   0          7m19s
wordpress-mariadb-0          1/1     Running   0          7m19s
You can also validate the persistant volumes were created and bound to the workload.
- Enter the following command
kubectl get pvc -n wordpress
You should see something like the following:
NAME                       STATUS   VOLUME                                     CAPACITY   ACCESS MODES   STORAGECLASS   AGE
data-wordpress-mariadb-0   Bound    pvc-ef3b8039-79be-4d36-a59e-caec0ff3aabd   8Gi        RWO            gp2            7m43s
wordpress                  Bound    pvc-a0ac32ad-c878-46b7-981c-ec1fde922a52   10Gi       RWO            gp2            7m43s
Recap
In this guide, you configured multiple EKS clusters for backup and restore operations using an Amazon S3 bucket to store the backup data. You are able to perform these operations from both the console UI and RCTL for automation purposes.