Part 1: Provision
What Will You Do
In this part of the self-paced exercise, you will provision an MKS cluster which contains two (2) nodes. The first node will be comprised of Linux machine which will run the system level resources while the second node will be comprised of Windows machine and run application workloads. The cluster will use the minimal blueprint.
Step 1: Provision Cluster
In this step, we will provision an MKS cluster through the web console.
- Navigate to the previously created project in your Org
- Select Infrastructure -> Clusters
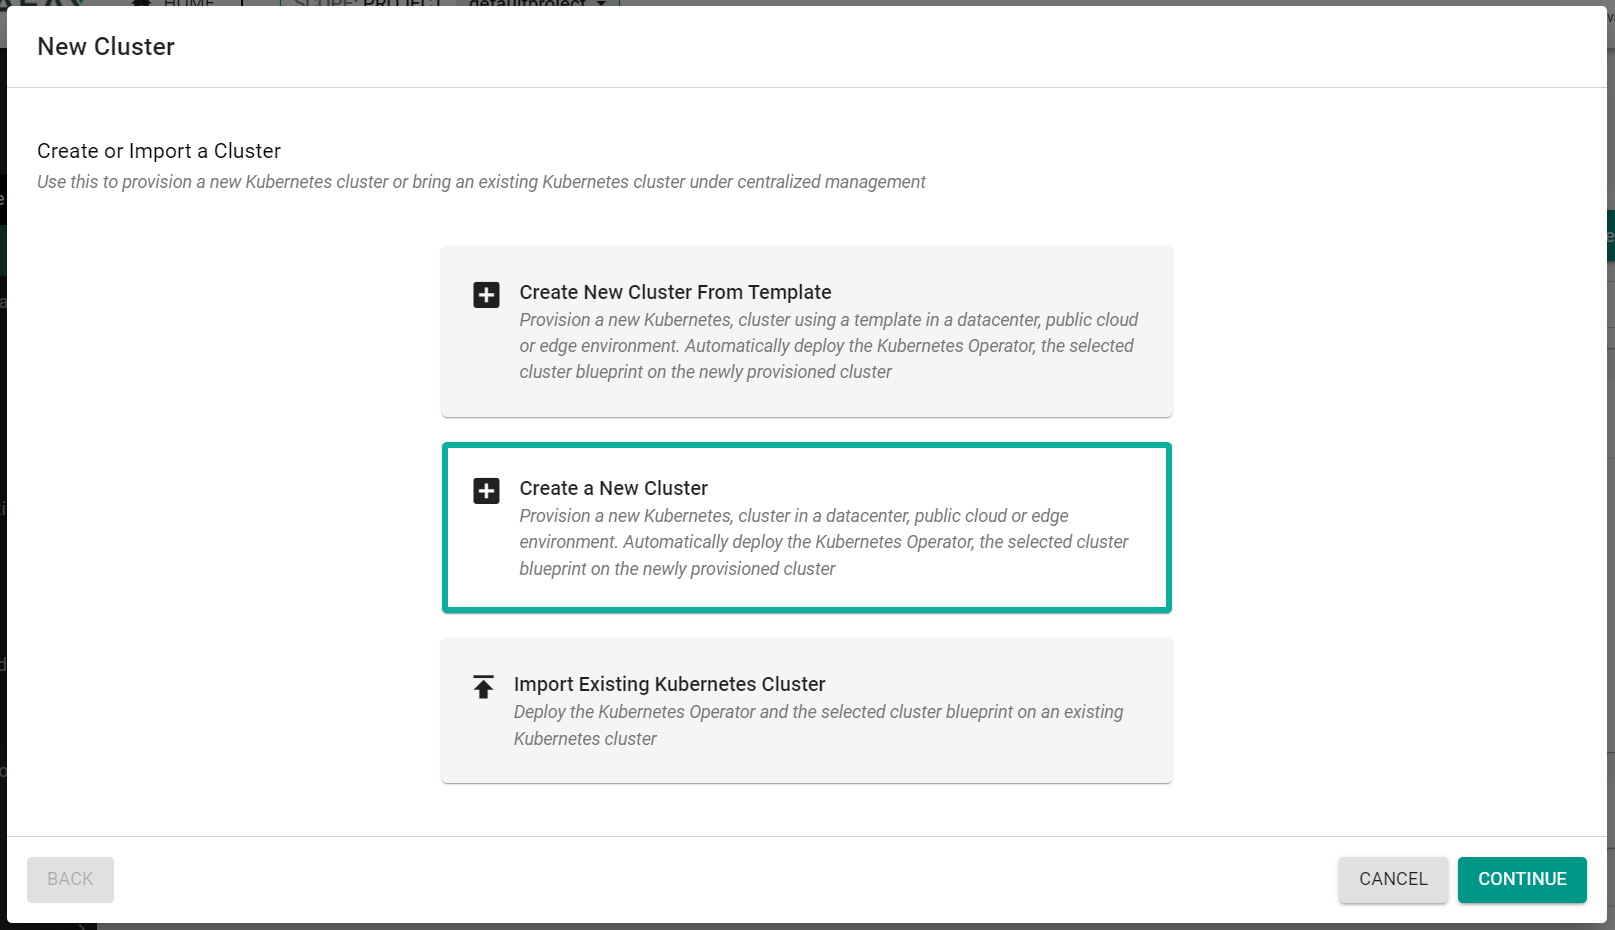
- Click "New Cluster"
- Select "Create a New Cluster"
- Click "Continue"
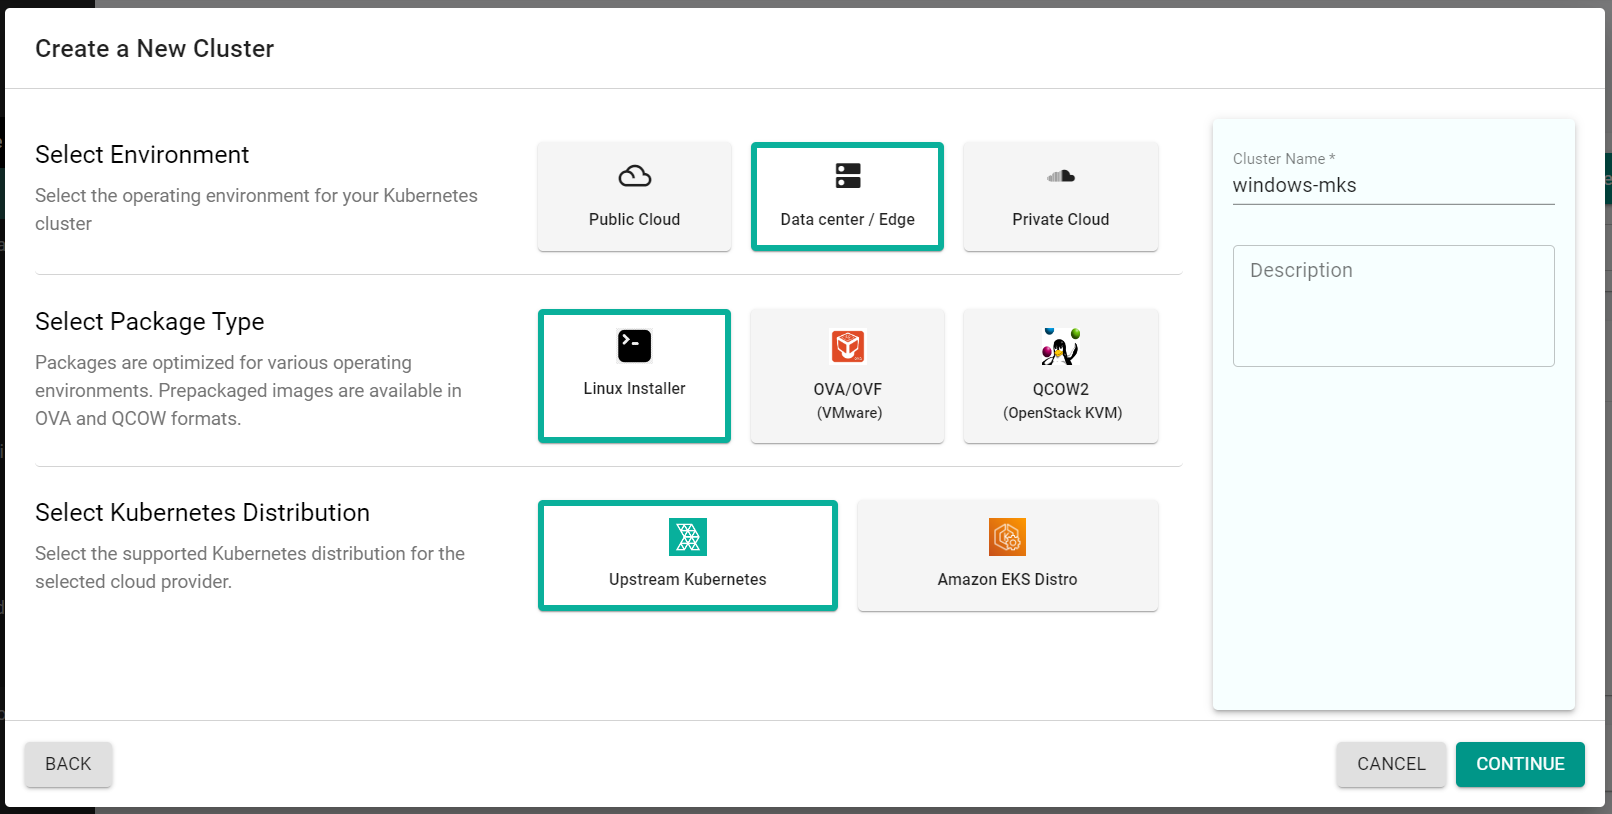
- Select "Data center / Edge"
- Select "Linux Installer"
- Select "Upstream Kubernetes"
- Enter a cluster name
- Click "Continue"
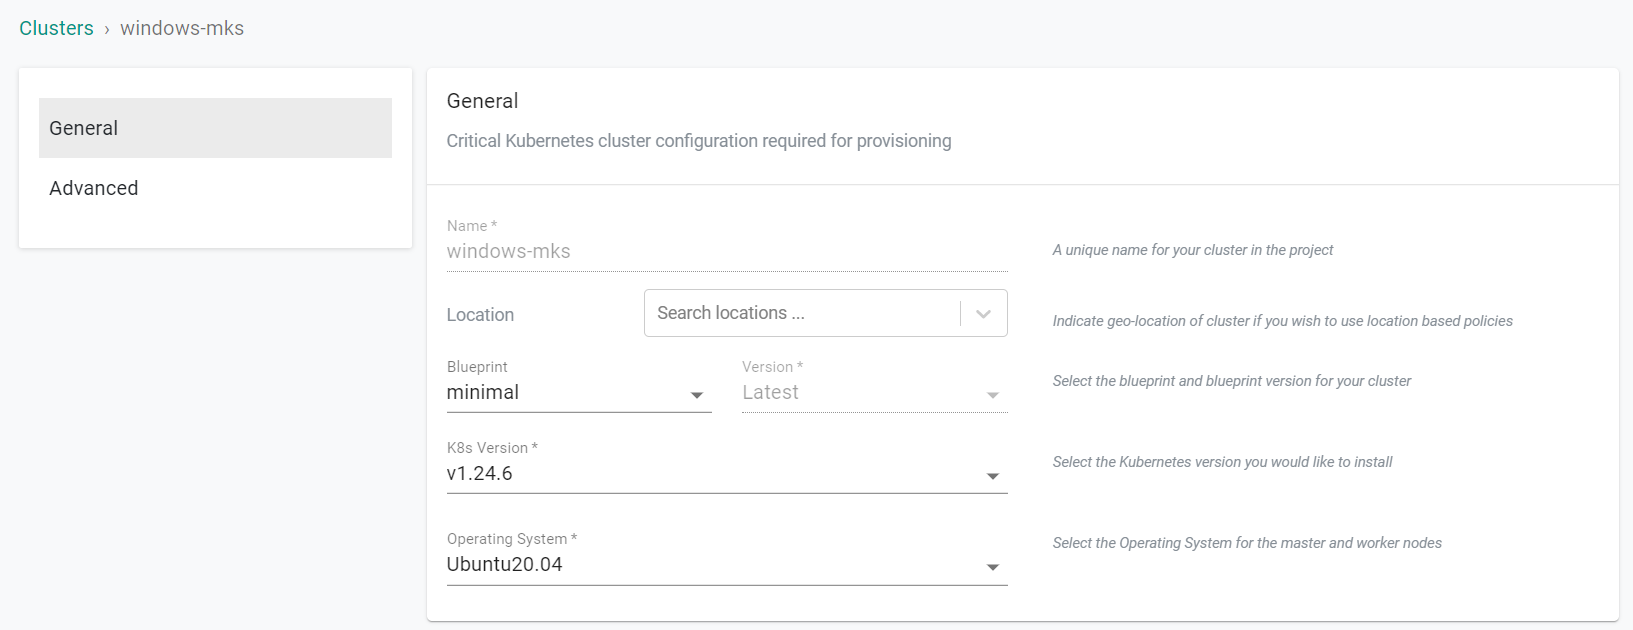
- Select the "minimal" blueprint
- Select the "K8s Version"
- Select an "Operating System"
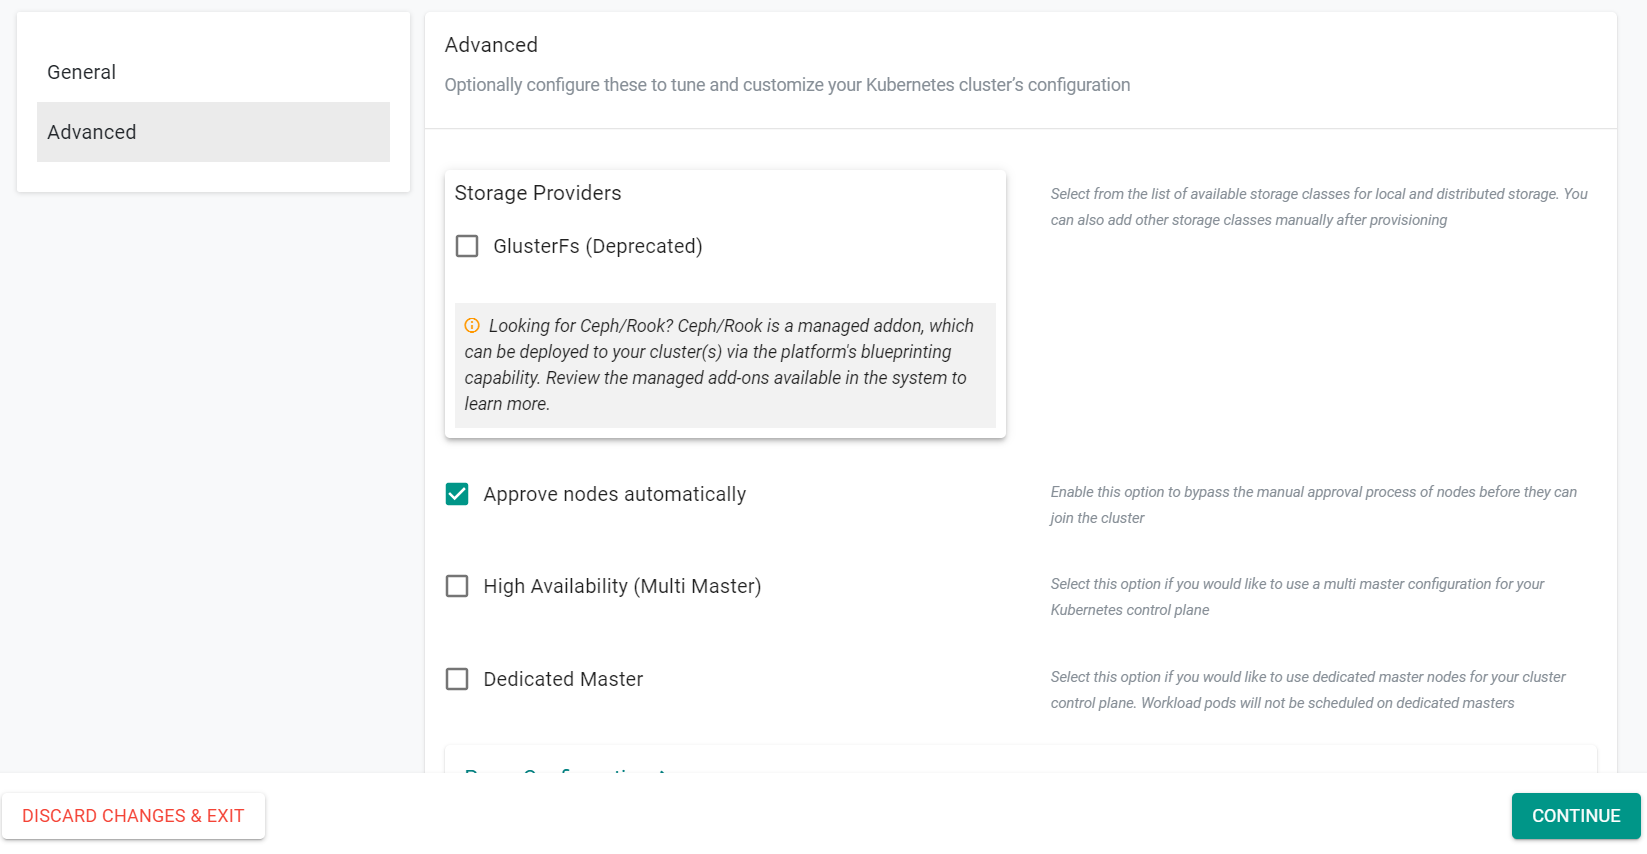
- Under the "Advanced" section, deselect "GlusterFs"
- Select "Approve nodes automatically"
- Click "Continue"
- Follow the "Node Installation Instructions" on the right side of the console screen. These instructions will require you to have a shell into the nodes. You will need to copy the commands in the installation instructions and execute them on both the linux and windows nodes. Be sure to use the appropriate commands for each node type. The nodes will then be configured and presented in the provisioning window.
Note
After the commands are executed on the Windows nodes, the nodes must be rebooted when prompted.
- Once the nodes have been discovered and automatically approved, click "Configure" on the linux node
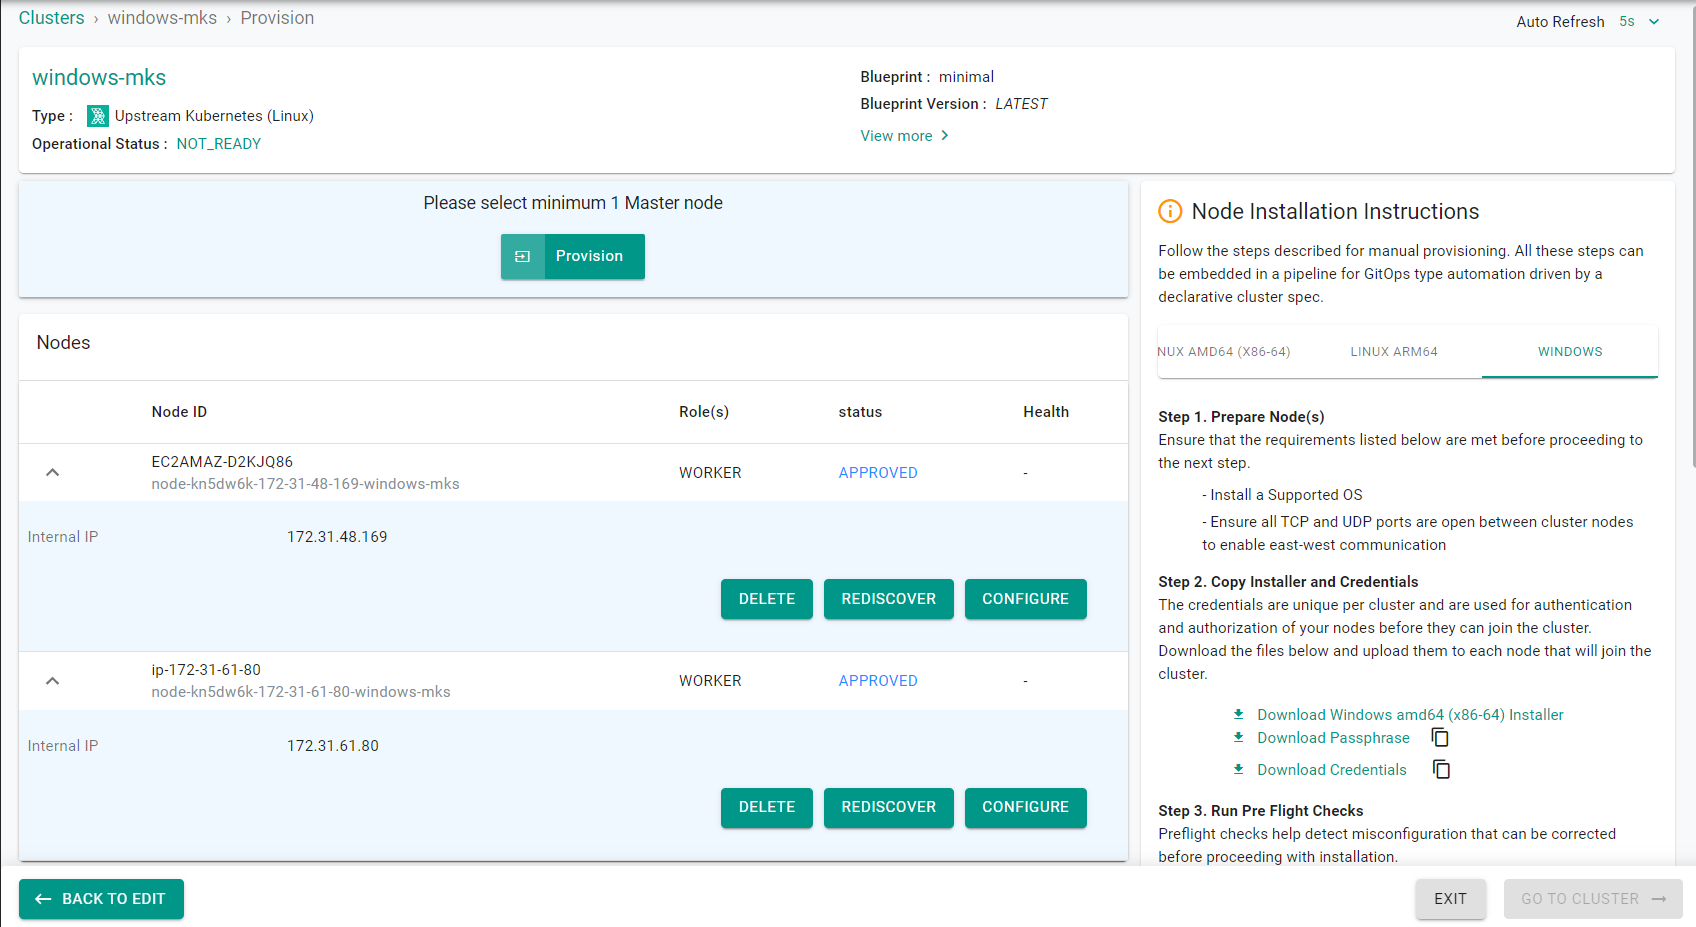
- Select "Master" for the node role
- Click "Save"

- Click "Provision"
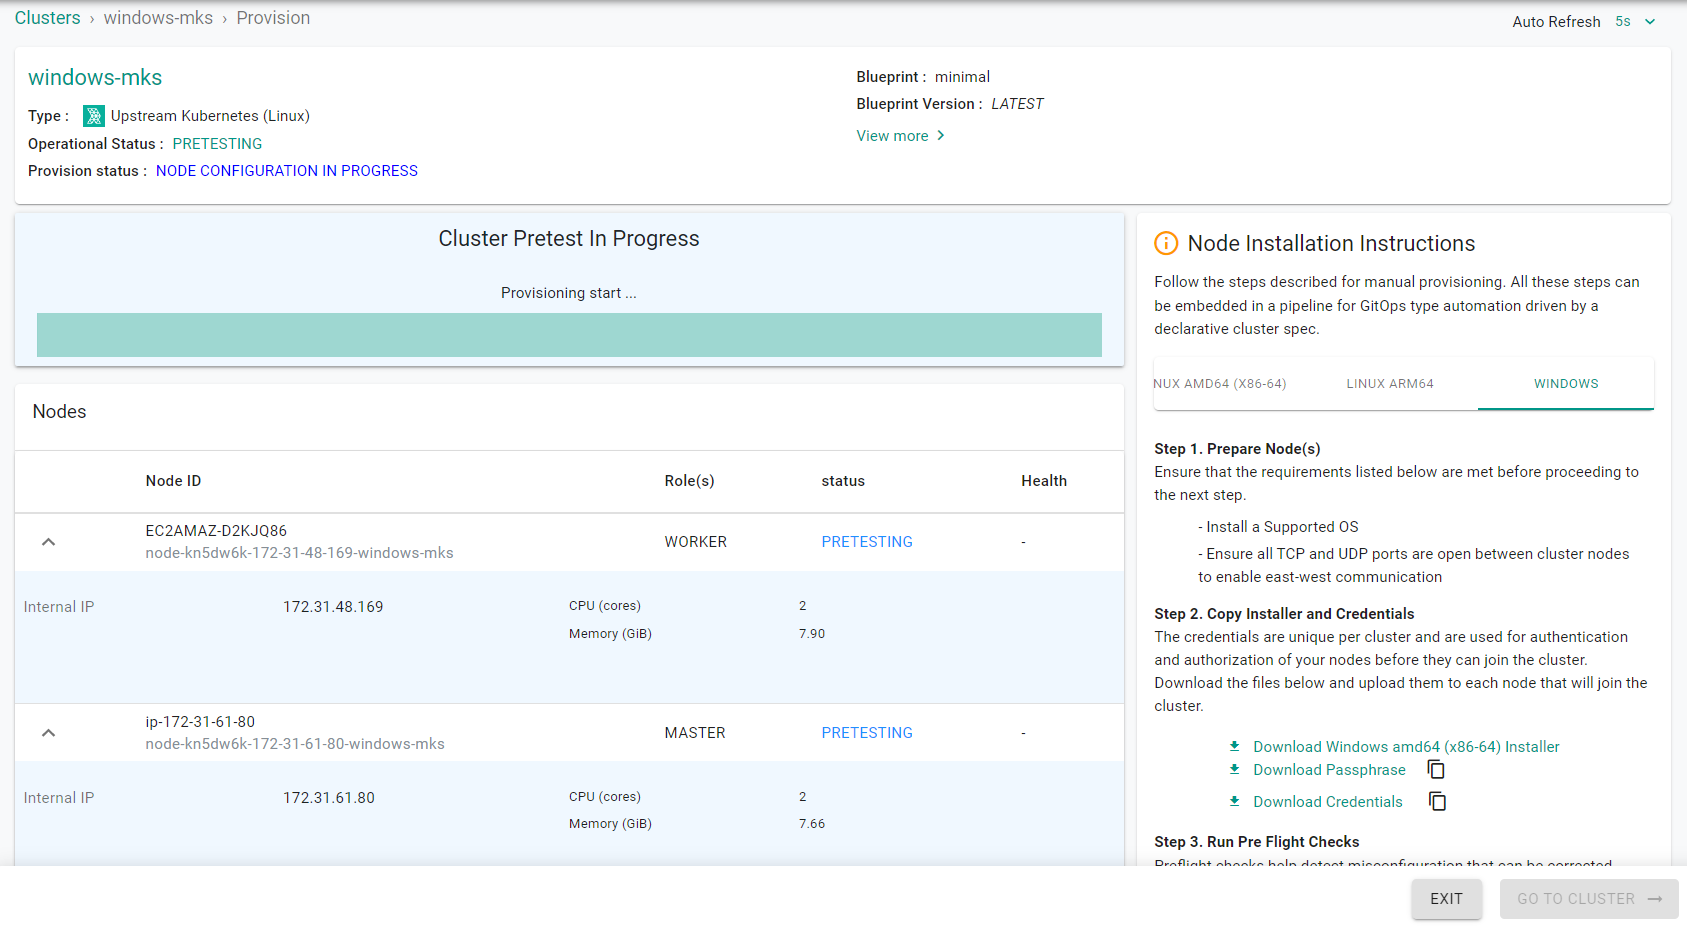
Provisioning will take approximately 15 minutes to complete. The final step in the process is the blueprint sync for the minimal blueprint. This can take a few minutes to complete because this requires the download of several container images and deployment of monitoring and log aggregation components.
Step 2: Verify Cluster
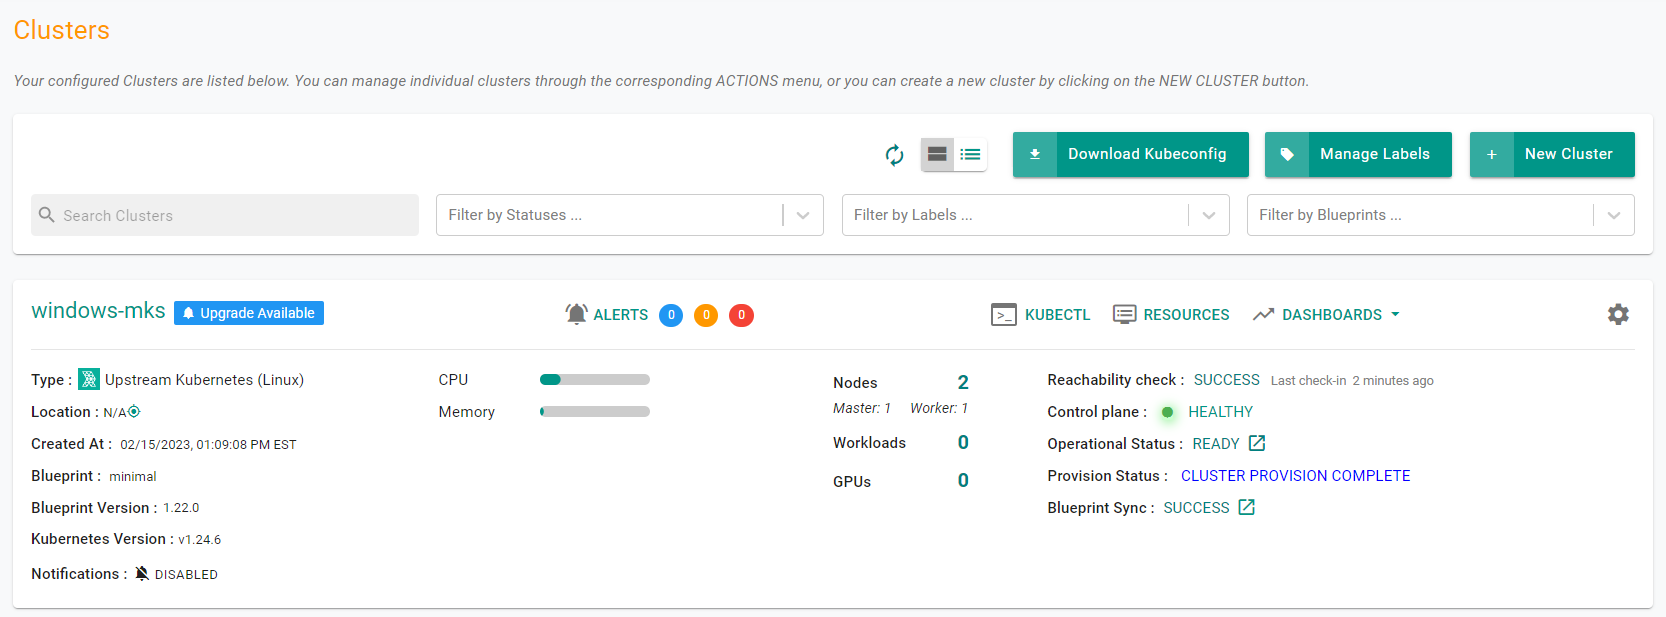
Once provisioning is complete, you should see the cluster in the web console with two nodes.
- Click on the kubectl link and type the following command
kubectl get nodes -o wide
You should see output similar to the following showing the Linux and Windows nodes.
NAME              STATUS   ROLES           AGE   VERSION   INTERNAL-IP     EXTERNAL-IP   OS-IMAGE                         KERNEL-VERSION    CONTAINER-RUNTIME
ec2amaz-d2kjq86   Ready    <none>          13m   v1.24.6   172.31.48.169   <none>        Windows Server 2019 Datacenter   10.0.17763.3887   containerd://1.6.10
ip-172-31-61-80   Ready    control-plane   22m   v1.24.6   172.31.61.80    <none>        Ubuntu 20.04.5 LTS               5.15.0-1028-aws   containerd://1.6.10
Recap
Congratulations! At this point, you have successfully provisioned an MKS cluster with a Windows node.