Create Addon
What Will You Do
In this exercise,
- You will create a cluster blueprint with a "cert-manager" addon
- You will then apply this cluster blueprint to a managed cluster
Important
This tutorial describes the steps to create and use a cert-manager based blueprint using the Web Console. The entire workflow can also be fully automated and embedded into an automation pipeline.
Assumptions
- You have already provisioned or imported a Kubernetes cluster using the Controller
- We will be using the http01 challenge validation method for cert-manager
To use cert-manager with Let’s Encrypt, we should be able to resolve the challenge that Let’s Encrypt makes to verify that we own the domain. In this particular example, we will use Ingress to resolve the challenge and therefore will use the managed Ingress controller from the default cluster blueprint.
Challenges
In order for the ACME CA server to verify that a requester owns the domain, a certificate is being requested for, the client must complete “challenges”. This is to ensure clients are unable to request certificates for domains they do not own and as a result, fraudulently impersonate another’s site.
The ACME Issuer type represents a single account registered with the Automated Certificate Management Environment (ACME) Certificate Authority server. When you create a new ACME Issuer, cert-manager will generate a private key which is used to identify you with the ACME server.
- Cert-manager supports two challenge validations (HTTP01 and DNS01).
- The HTTP01 challenges are completed by presenting a computed key, that should be present at a HTTP URL endpoint and is routable over the Internet.
- This URL will use the domain name requested for the certificate.
- Once the ACME server is able to get this key from this URL over the internet, the ACME server can validate you are the owner of this domain.
- When a HTTP01 challenge is created, cert-manager will automatically configure your cluster ingress to route traffic for this URL to a small web server that presents this key.
Step 1: Download Helm Chart
Use your helm client to download the latest release of Cert Manager helm chart file cert-manager-x.y.z.tgz to your machine. In this recipe, we use Cert Manager v1.2.0.
- Add Cert Manager's repo to your Helm CLI
helm repo add jetstack https://charts.jetstack.io
- Now, fetch the latest Helm chart from this repo.
helm fetch jetstack/cert-manager
Step 2: Customize Values
In this step, we will be creating a custom "cert-manager-values.yaml" file so that CRD's get installed.
installCRDs: true
Step 3: Create Addon
- Login into the Web Console and navigate to your Project as an Org Admin or Infrastructure Admin
- Under Infrastructure, select "Namespaces" and create a new namespace called "cert-manager"
- Select "Addons" and "Create" a new Addon called "cert-manager"
- Ensure that you select "Helm 3" for type and select the namespace as "cert-manager"
- Click CREATE to goto next step
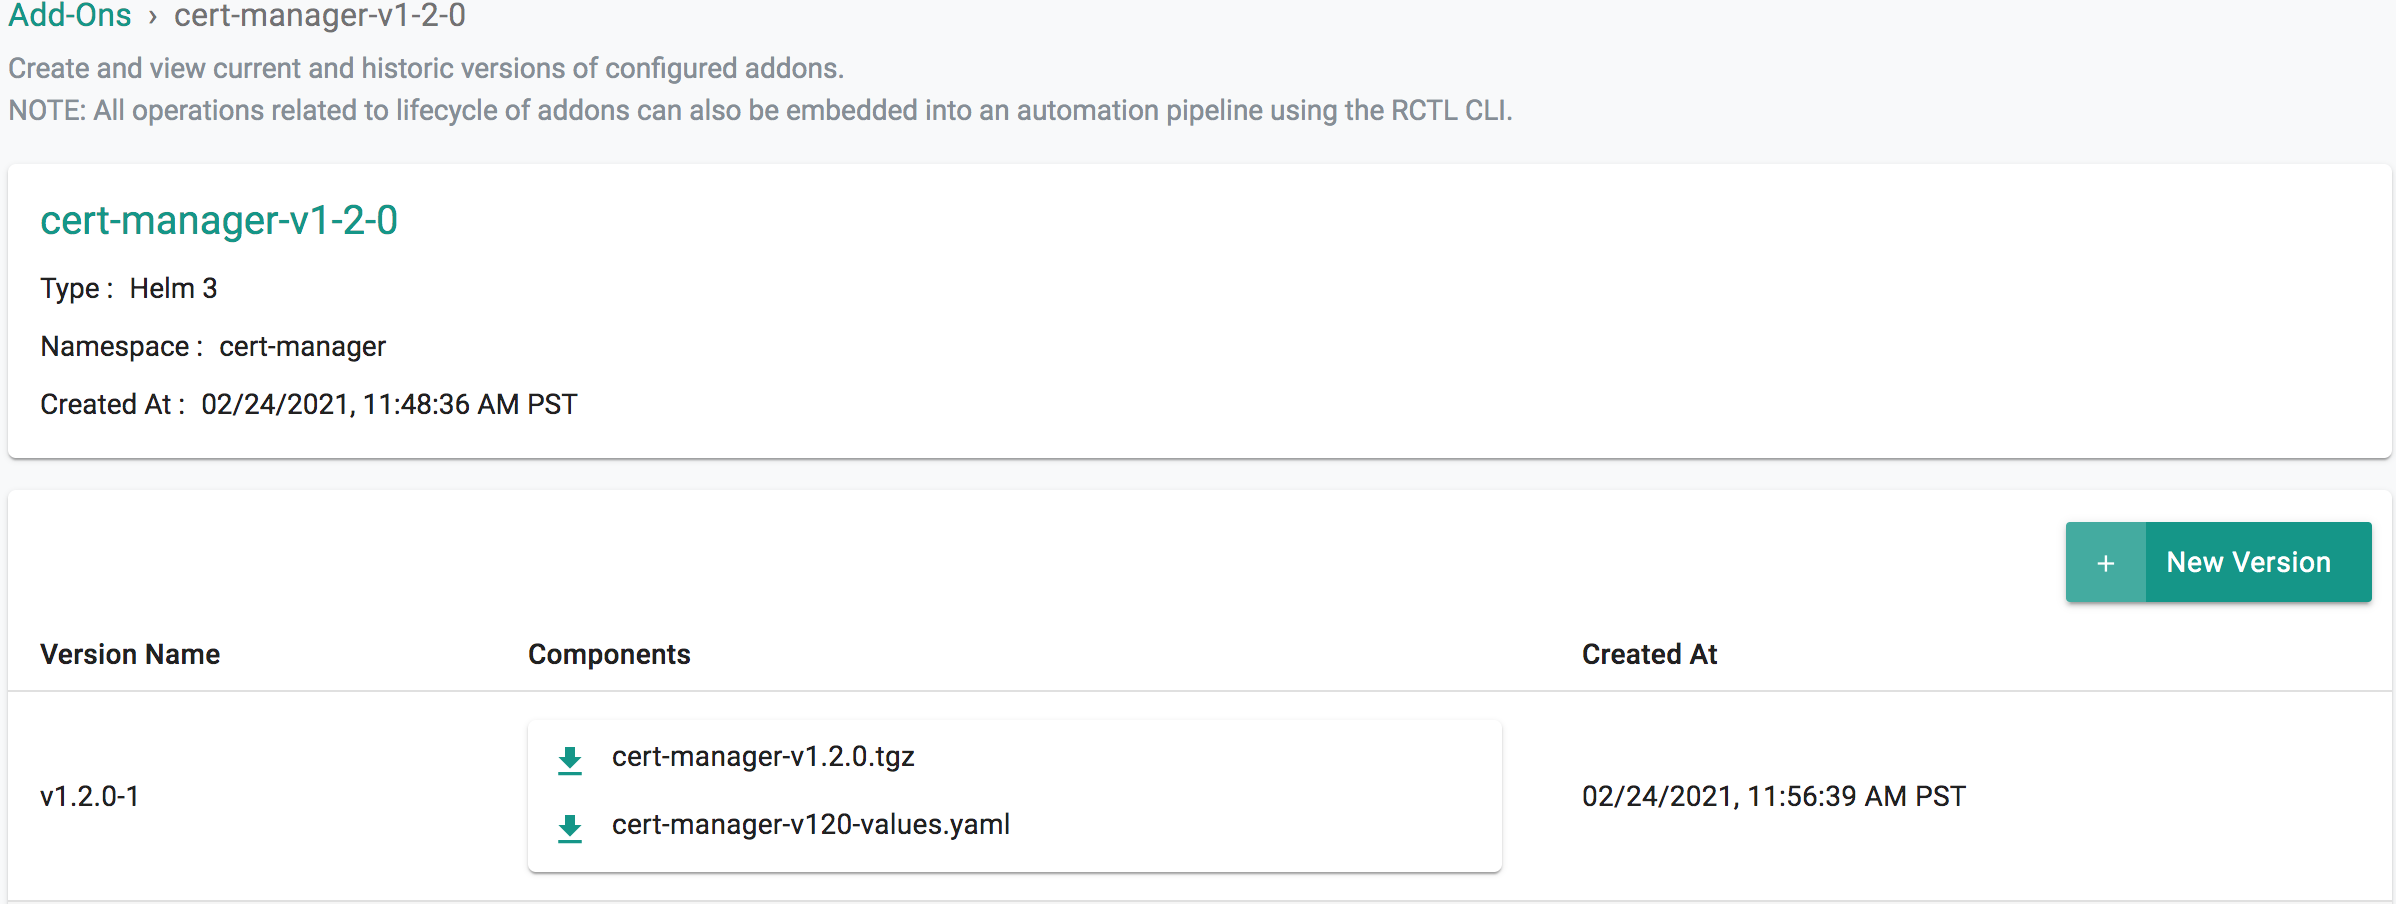
- Select "New Version" and give it a name called "v1.2.0"
- Upload the Helm chart "cert-manager-v1.2.0.tgz". From the previous step, upload the "cert-manager-values.yaml" file.
- Click "SAVE CHANGES"
Step 4: Create Blueprint
Now, we are ready to assemble a custom cluster blueprint using this addon.
- Under Infrastructure, select "Blueprints"
- Create a new blueprint and give it a name such as "cert-manager"
- Ensure that you have the managed Ingress enabled because this will be used by cert-manager
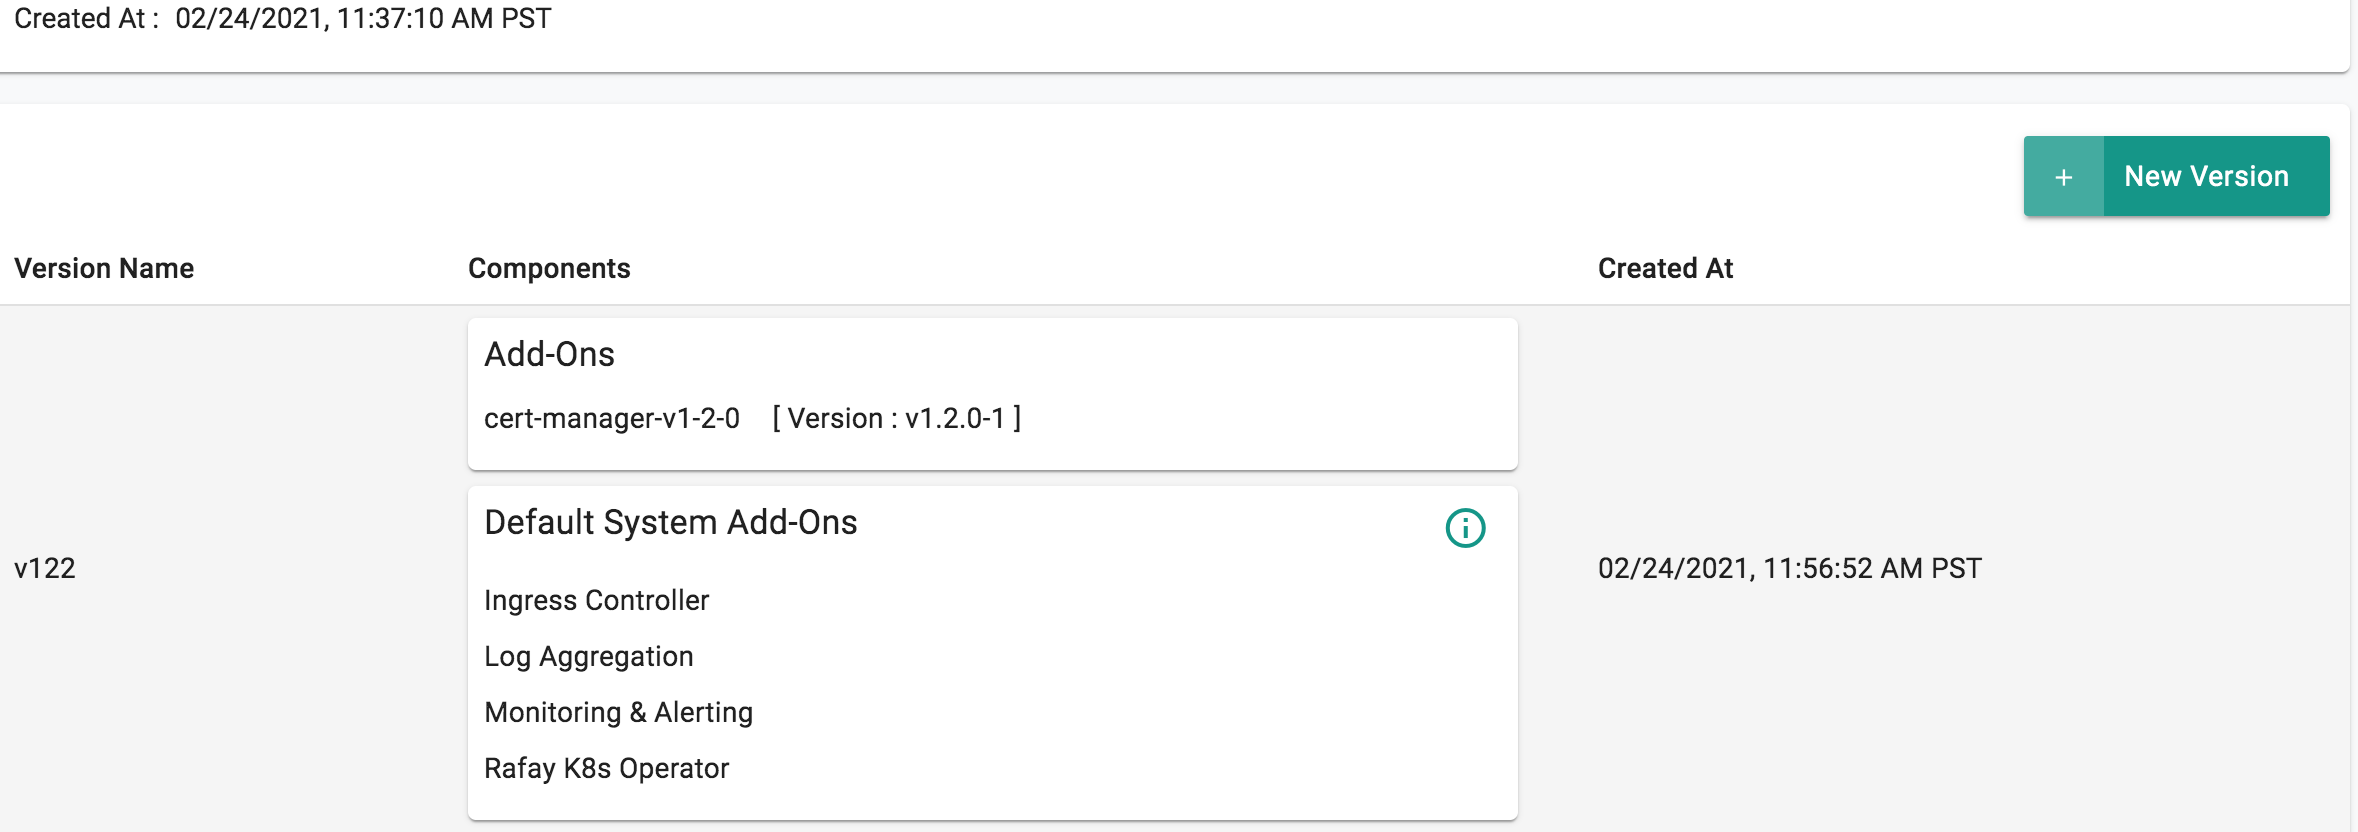
- Select "New Version" and give it a version name. Ex: v1
- Under Add-Ons, select "ADD MORE" and choose the "cert-manager" addon created in Step 3.
- Click "SAVE CHANGES"
Step 5: Apply Blueprint
Now, we are ready to apply this blueprint to a cluster.
- Click on Options for the target Cluster in the Web Console
- Select "Update Blueprint" and select the "cert-manager" blueprint from the dropdown and for the version select "v1" from the dropdown.
- Click on "Save and Publish".
This will start the deployment of the addons in the "cert-manager" blueprint to the targeted cluster. The blueprint sync process can take a few minutes. Once complete, the cluster will display the current cluster blueprint details and whether the sync was successful or not.
Step 6: Verify Deployment
Users can optionally verify whether the correct resources have been created on the cluster.
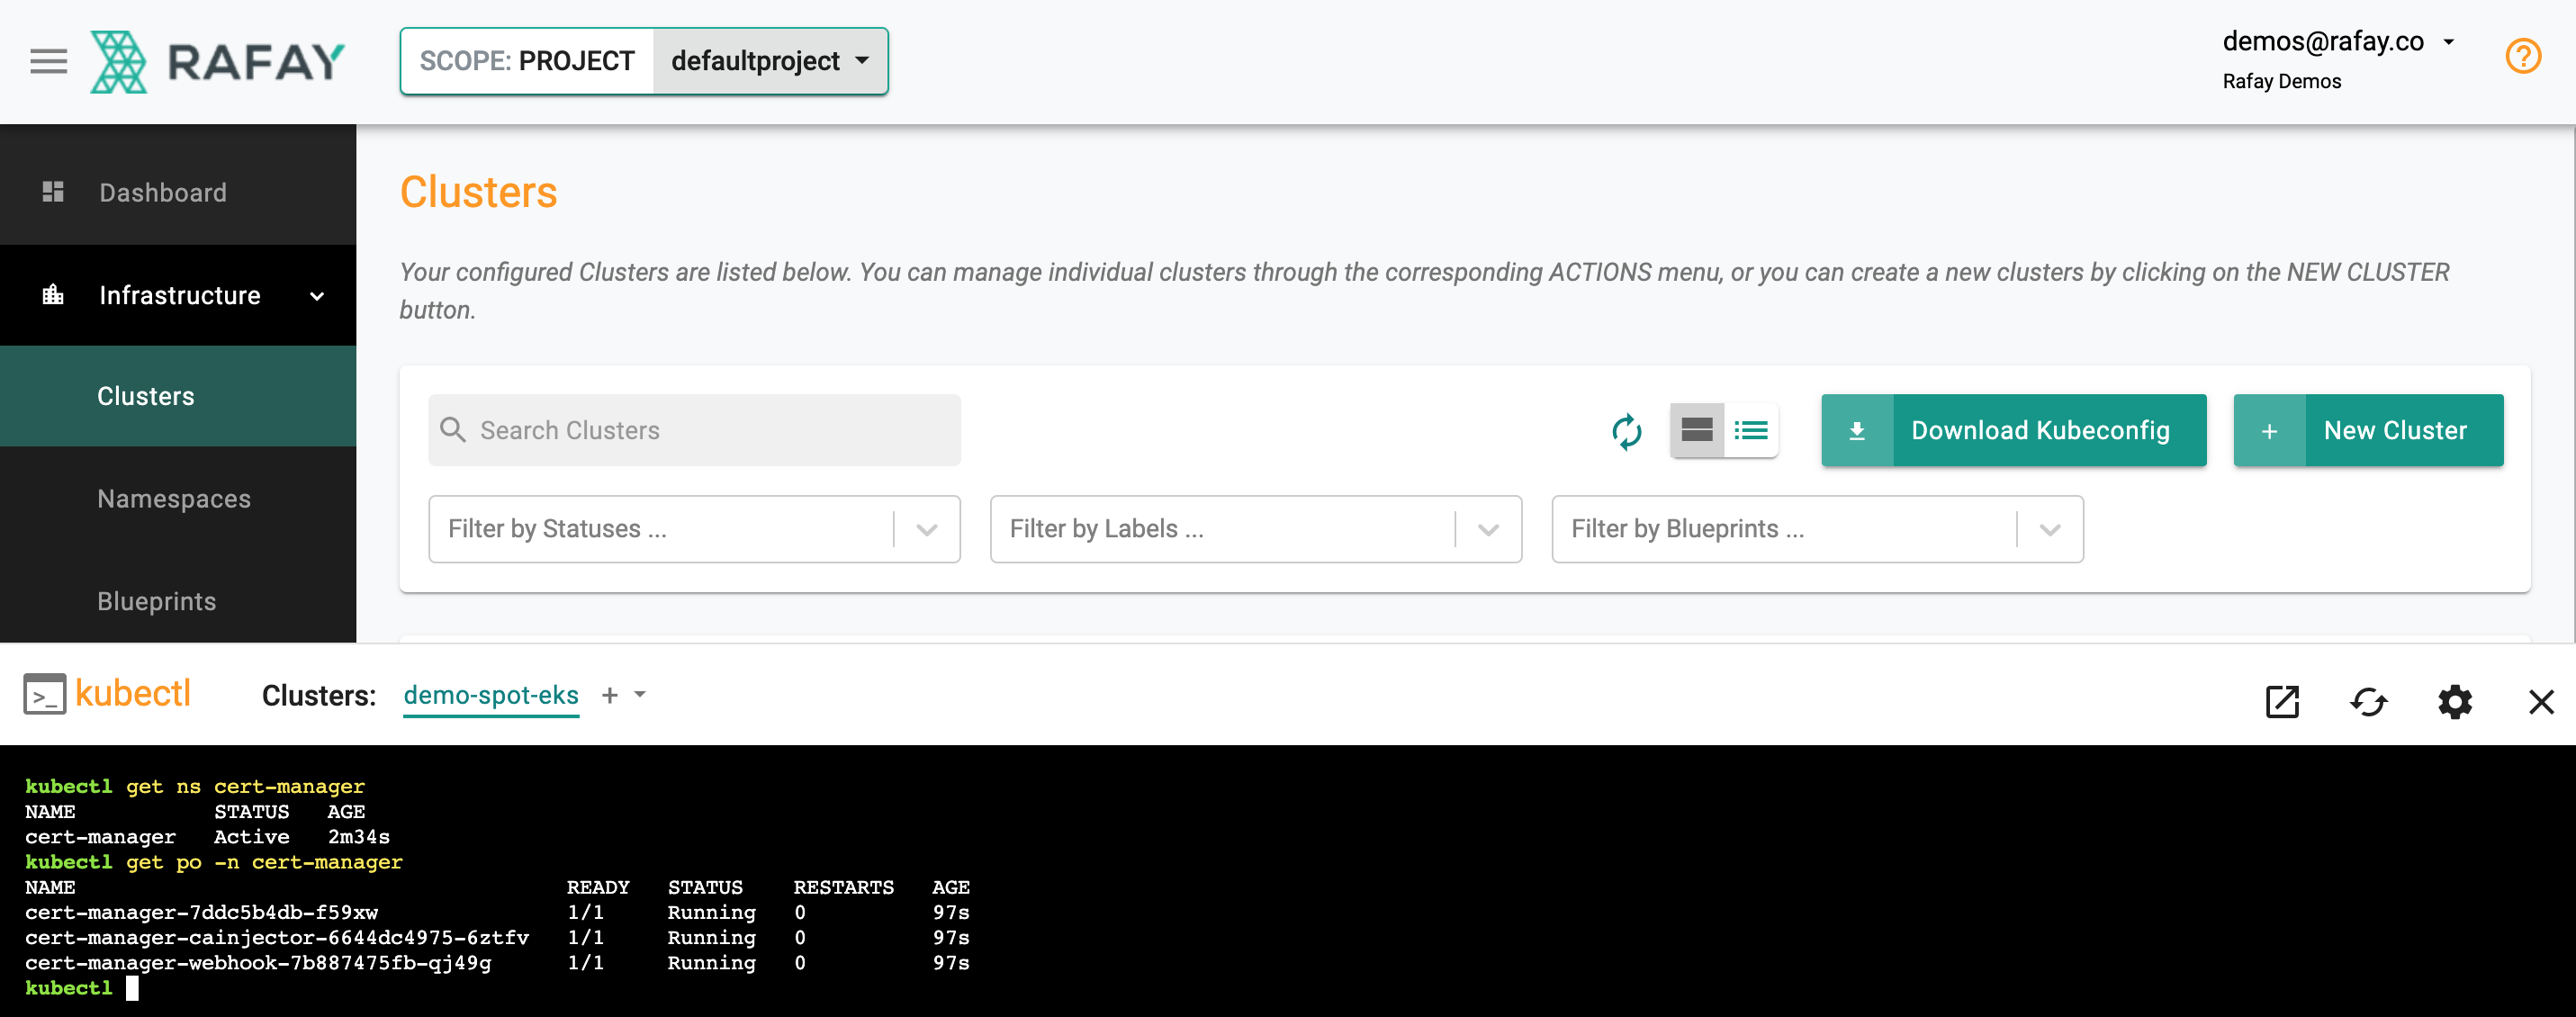
- Click on the Kubectl button on the cluster to open a virtual terminal
- First, we will verify if the cert-manager namespace has been created
kubectl get ns cert-manager
- Second, we will verify the pods in the "cert-manager" namespace
kubectl get po -n cert-manager
Shown below is an example for what you should see on a cluster where cert-manager has been deployed as a cluster blueprint.
Cert-manager creates a number of Custom Resources-CRDs on the cluster. You can view them by issuing the following command from the KubeCTL CLI utility.
kubectl get crd |grep cert-manager

certificaterequests.cert-manager.io          2021-02-24T19:57:09Z
certificates.cert-manager.io                 2021-02-24T19:57:09Z
challenges.acme.cert-manager.io              2021-02-24T19:57:10Z
clusterissuers.cert-manager.io               2021-02-24T19:57:10Z
issuers.cert-manager.io                      2021-02-24T19:57:11Z
orders.acme.cert-manager.io                  2021-02-24T19:57:12Z
Step 7: Add Cluster Issuer
In this step, we will be adding "Cluster Issuer". The Cluster Issuer is a cluster wide resource and can be leveraged by multiple workloads operating in the cluster.
- Provide the email address you will use for ACME registration
- Update the name of the secret for the ACME account private key
## Create ClusterIssuer Object
apiVersion: cert-manager.io/v1alpha2
kind: ClusterIssuer
metadata:
  name: letsencrypt-http
  namespace: default
spec:
  acme:
    # The ACME server URL
    server: https://acme-v02.api.letsencrypt.org/directory
    # Email address used for ACME registration
    email: user@example.com
    # Name of a secret used to store the ACME account private key
    privateKeySecretRef:
      name: letsencrypt-http
    solvers:
    - http01:
        serviceType: ClusterIP
        ingress:
          class: nginx
Step 8: Create Addon
- Login into the Web Console and navigate to your Project as an Org Admin or Infrastructure Admin
- Under Infrastructure, select "Namespaces" and create a new namespace called "cert-manager"
- Select "Addons" and "Create" a new Addon called "cluster-issuer"
- Ensure that you select "k8s YAML" for type and select the namespace as "cert-manager"
- Click CREATE to goto next step
- Select "New Version" and give it a name called "v1.2.0"
- Upload the cluster issuer yaml file "cluster-issuer.yaml" from the previous step
- Click "SAVE CHANGES"
Step 9: Update Blueprint
Now, we need to update the custom cluster blueprint that we created earlier for cert-manager using this addon.
- Under Infrastructure, select "Blueprints"
- Select "cert-manager" blueprint
- Select "New Version" and give it a version name. Ex: v2
- Under Add-Ons, select "ADD MORE" and choose the "cluster-issuer" addon created in previous step.
- Click "SAVE CHANGES"
Step 10: Apply Blueprint
Now, we are ready to apply this blueprint to a cluster.
- Click on Options for the target Cluster in the Web Console
- Select "Update Blueprint" and select the "cert-manager" blueprint from the dropdown and for the version select "v2" from the dropdown.
- Click on "Save and Publish".
This will start the deployment of the addons in the "cert-manager" blueprint to the targeted cluster. The blueprint sync process can take a few minutes. Once complete, the cluster will display the current cluster blueprint details and whether the sync was successful or not.
Recap
Congratulations! You have successfully created a custom cluster blueprint with the "cert-manager" addon and applied to a cluster. You also created a cluster issuer that can securely interact with Let's Encrypt to programmatically mint certificates. You can now use this blueprint on as many clusters as you require.