Node Labels
Kubernetes clusters administrators normally don’t need to choose a node to which the Pods should be scheduled. Instead, the selection of the appropriate node onto which to schedule the Pods is handled by the Kubernetes scheduler. Automatic node selection prevents users from selecting unhealthy nodes or nodes with a shortage of resources.
However, there are scenarios where you want certain pods to end up on specific nodes. For example:
- The pod needs to be scheduled on a node with the SSD attached to it.
- It is critical to schedule the pod on a particular node from the same availability zone (AZ) where the underling block storage is provisioned.
- Strong dependency between a pod and a service and therefore a need to colocate the same node (a web server and in-memory cache store)
Node Selector
nodeSelector is a Kubernetes feature designed for manual Pod scheduling. The idea behind the nodeSelector is to allow a Pod to be scheduled only on those nodes that have labels identical to the labels defined in the nodeSelector.
View Node Labels
To view labels associated with a node in a cluster,
- Click on Cluster
- Select the Nodes tab
- Select the specific node and expand it
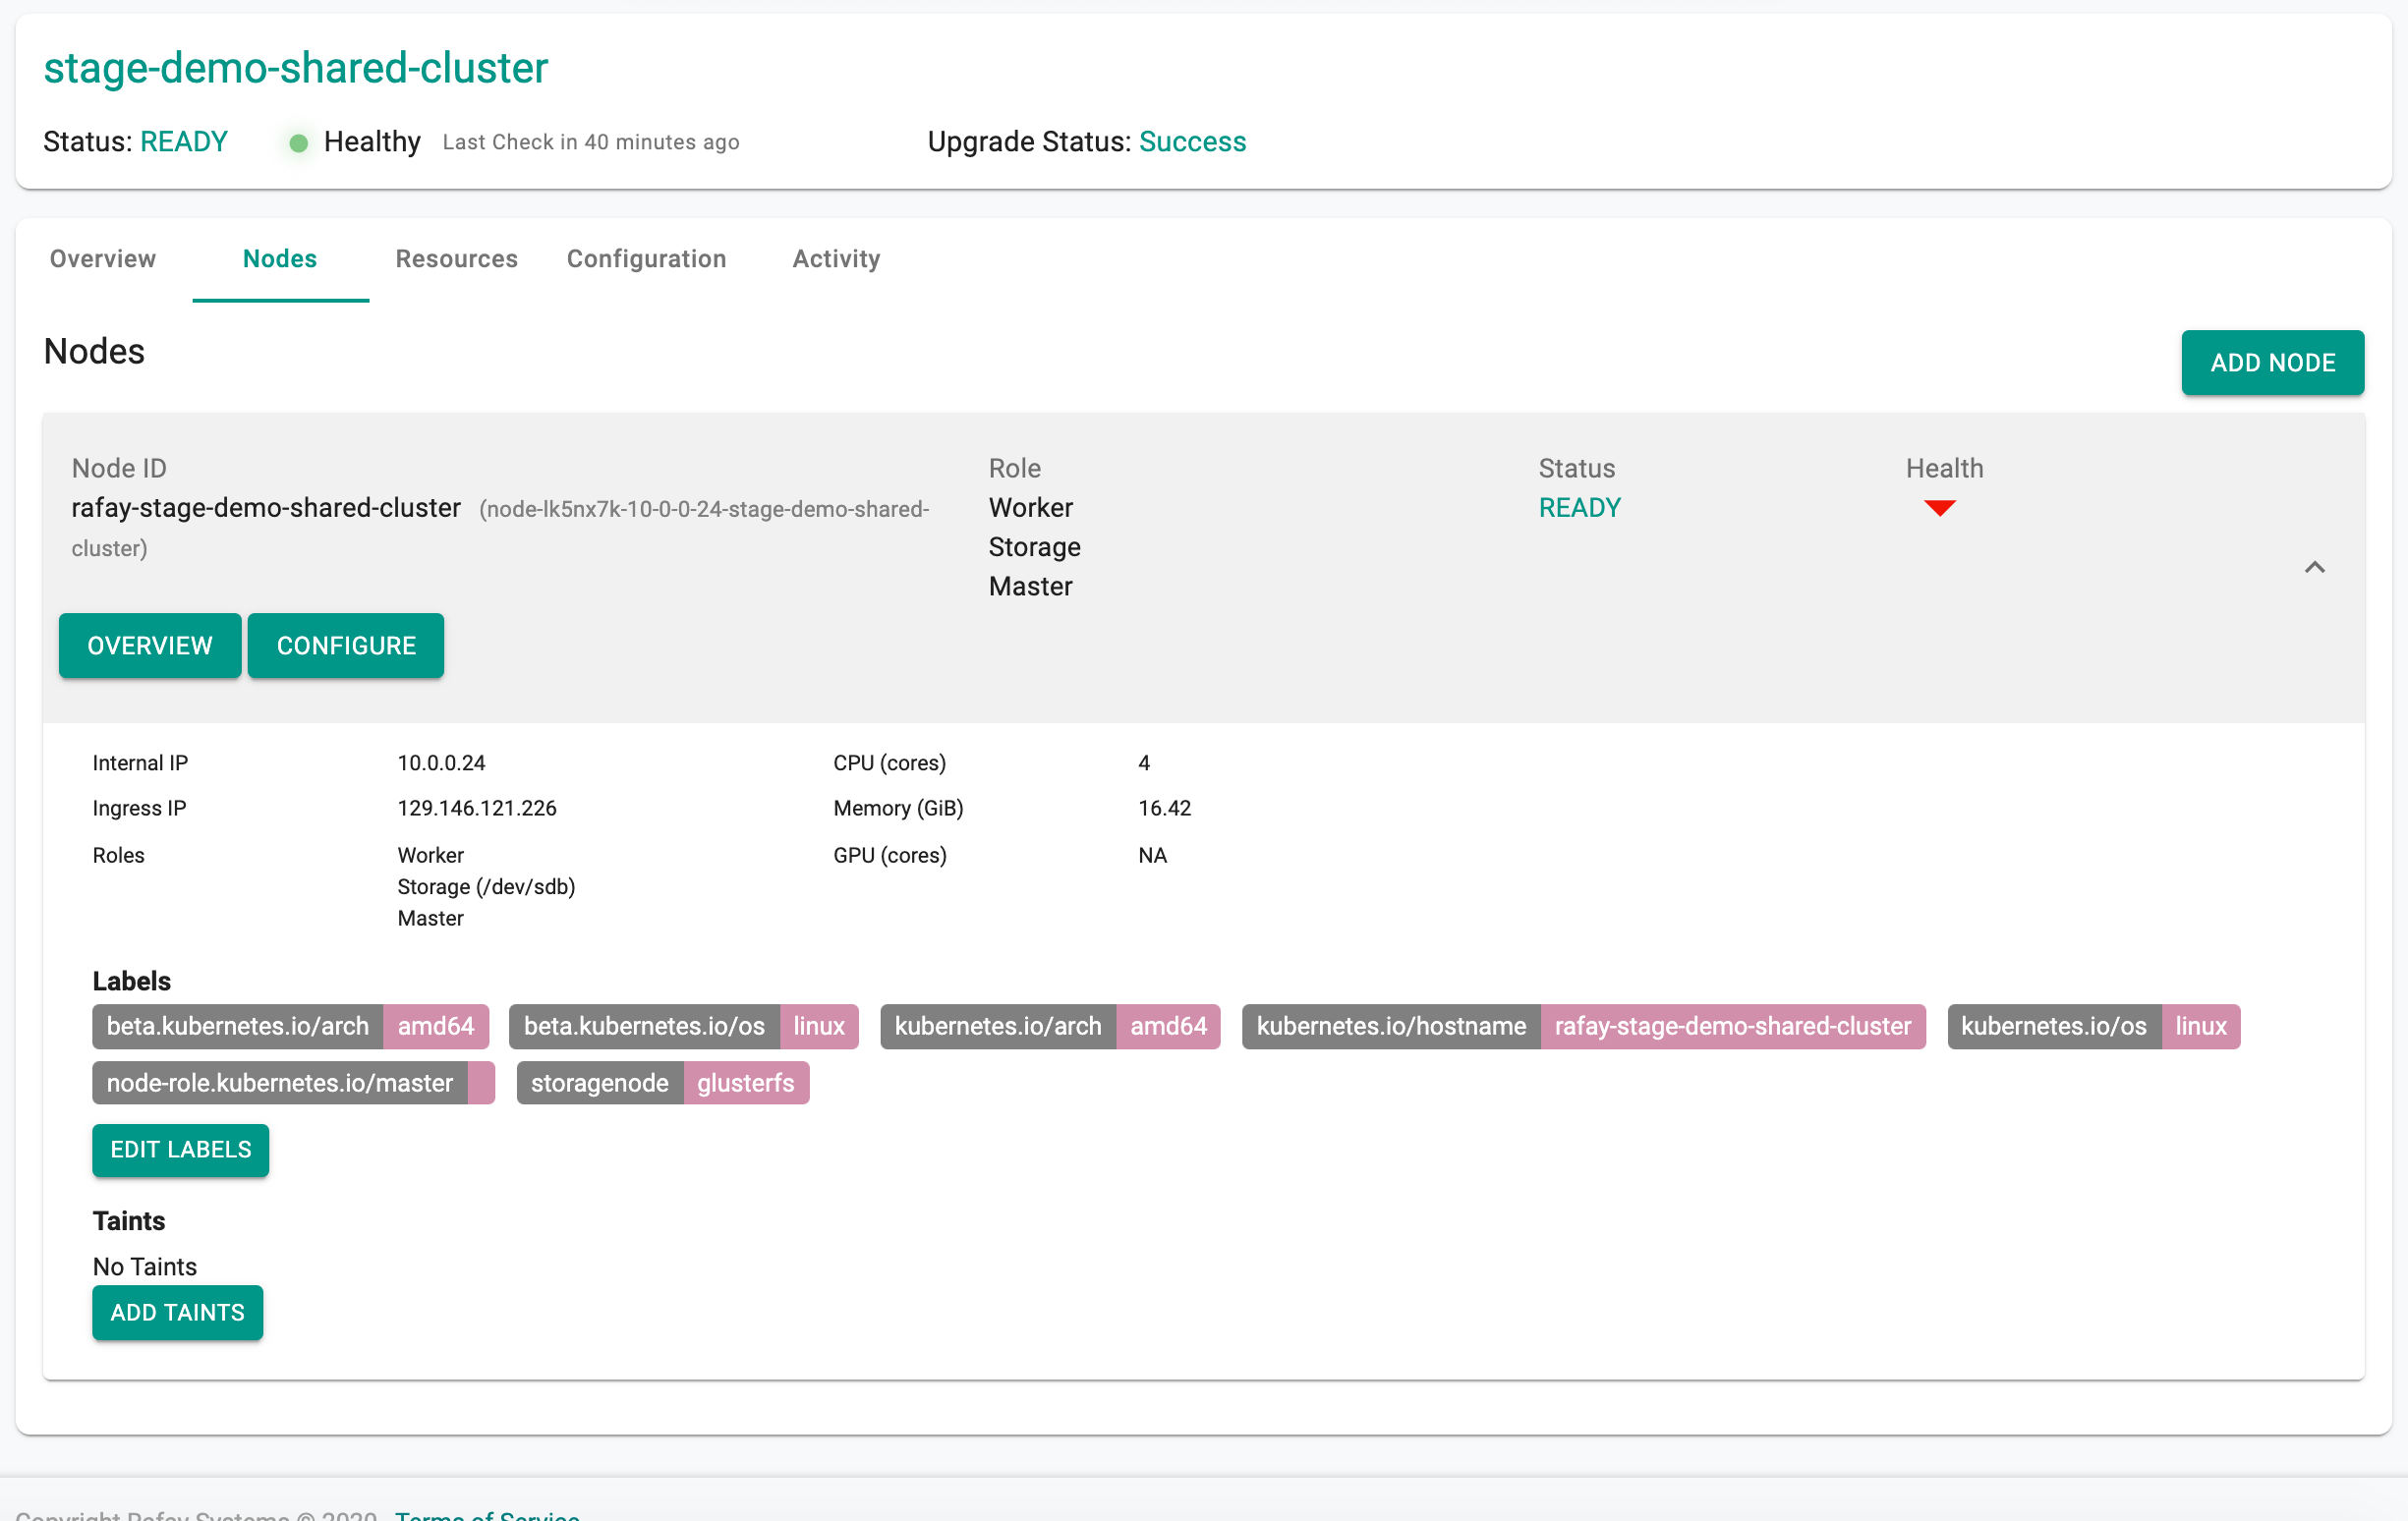
Nodes in Kubernetes are assigned "default" labels that cannot be updated by users. Any label that has a key beta.kubernetes.io/* or kubernetes.io/* is a default label.
Add/Remove Node Labels
To add/remove labels associated with a node in a cluster,
- Click on Cluster
- Select the Nodes tab
- Select the specific node and expand it
- Click on "Edit Labels" and follow instructions

- Nodes are synchronized into Inventory only when the required platform-recognized node-level labels are present.
-
Both labels are mandatory and serve distinct purposes:
-
paas.envmgmt.io/node-sync=true— enables synchronization of the Kubernetes node with Inventory. This label controls whether the node is eligible for inventory sync. -
paas.envmgmt.io/node-sync-datacenter=<datacenter-name>— specifies the Inventory data center in which the corresponding server entry to be created.
-
- Each node that meets the label requirements results in the creation of a separate server device. If multiple nodes have the labels, the same number of server devices are created.
- All server entries created from labeled nodes are automatically associated with the same cluster to which the nodes belong.
- The server name matches the node name, and hardware details such as CPU, memory, storage, and GPU information (if available) are populated automatically.
For more information on how synchronized nodes appear and are managed in Inventory, see Inventory – Servers.
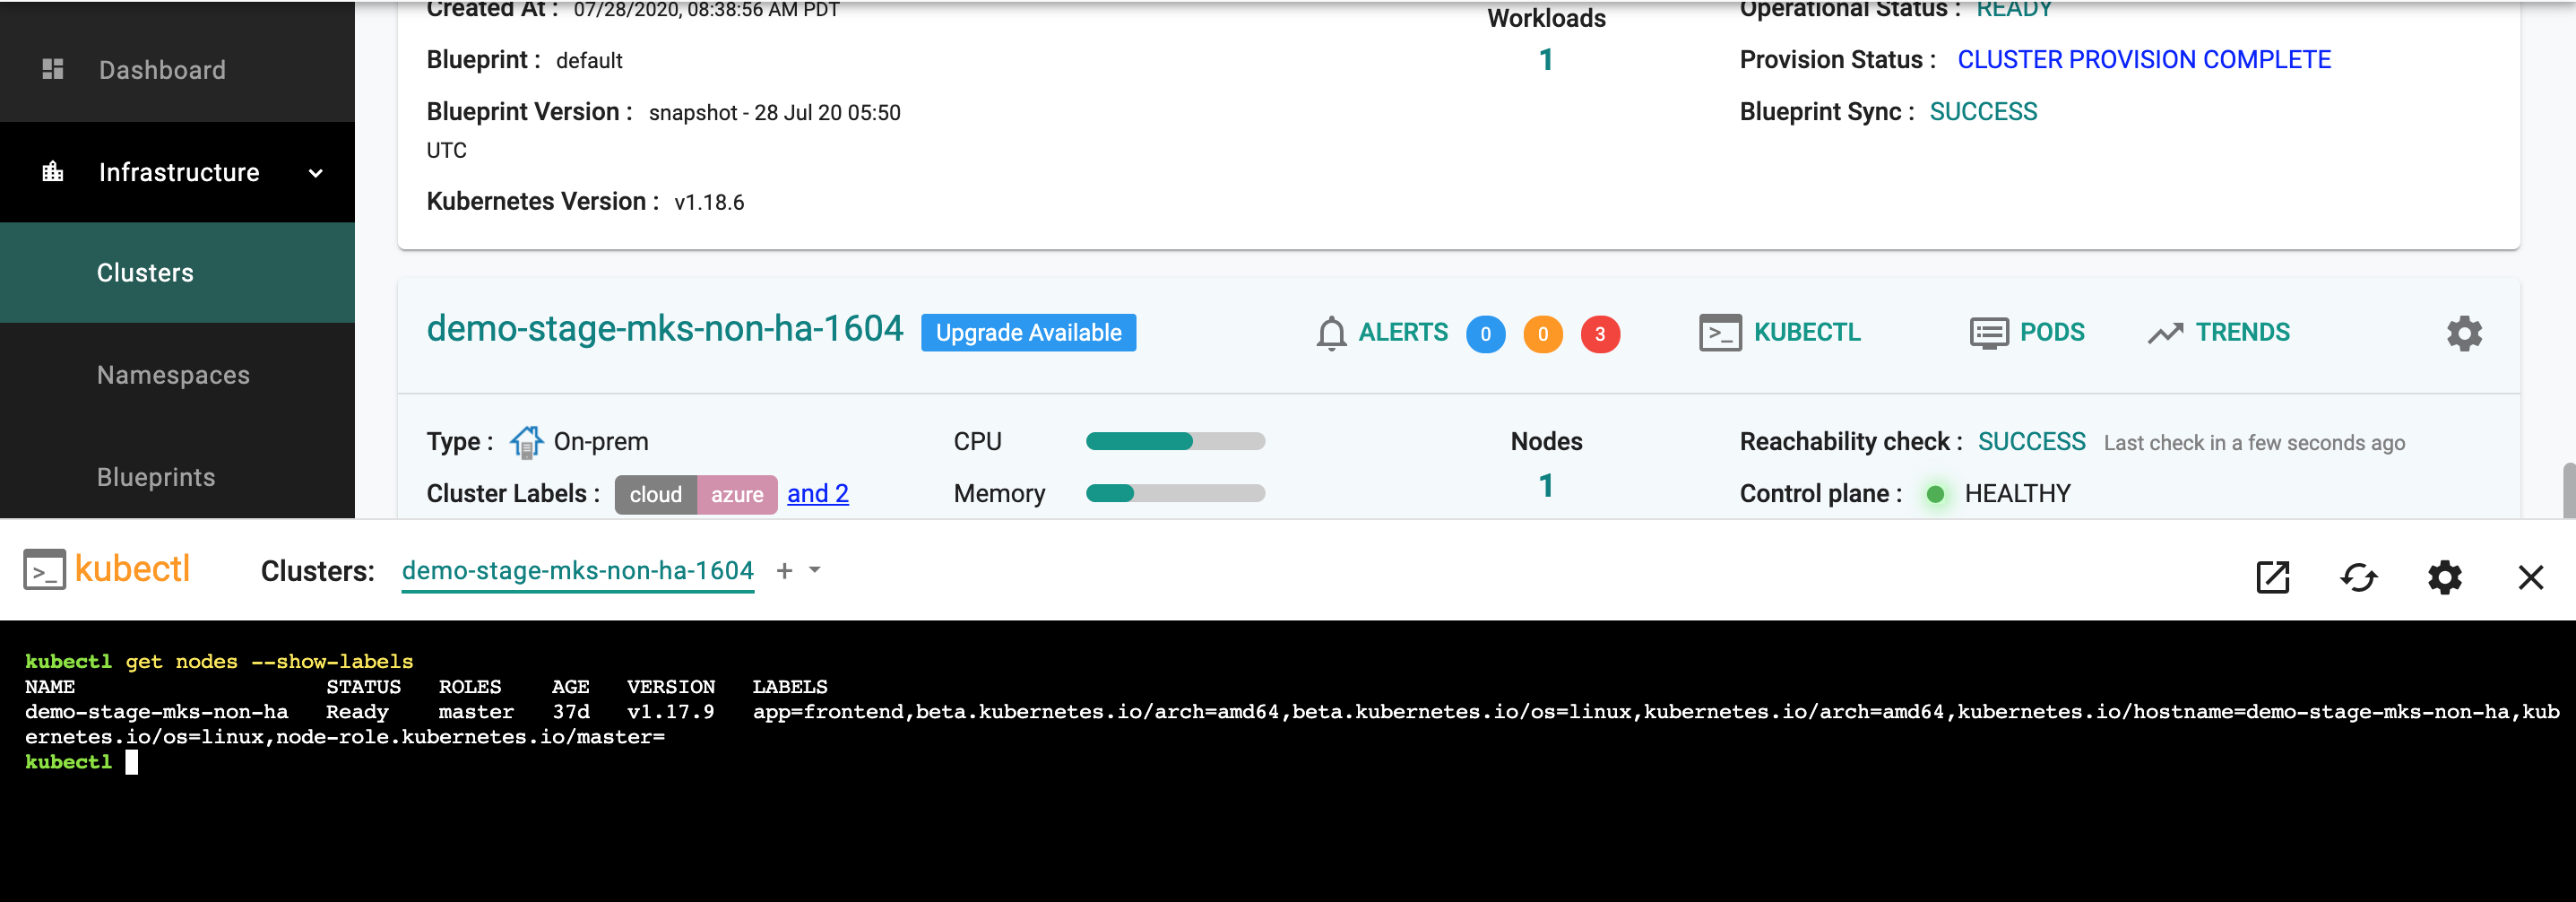
KubeCTL
To view labels associated with a node in a cluster using KubeCTL, in the Web Console, open the browser based KubeCTL shell and type the following command.
kubectl get nodes --show-labels
In the example below, the user has added a custom node label "app=frontend" using the Web Console workflow.