OpsVerse Agent
OpsVerse's Observability stack (ObserveNow) brings together your telemetry (metrics, logs, and APM traces) under one umbrella. OpsVerse's agent can be used to collect telemetry from a variety of infrastructure and applications. Once installed, the Agent will send several default metrics, logs, and any enabled traces to your ObserveNow instance. The OpsVerse agent can be installed in seconds on a variety of environments to begin sending your telemetry data to your ObserveNow backend.
What will you do
In this exercise:
- You will create a customized 'opsverse-agent' addon using OpsVerse's official Helm chart.
- You will use the addon in a custom cluster blueprint.
- You will then apply this cluster blueprint to a managed cluster.
Prerequisites
- You have already provisioned or imported one or more Kubernetes clusters using the controller.
- You have Helm CLI installed locally to download required Helm charts.
- You have at least one ObserveNow instance setup from OpsVerse. If not, you can provision one by visiting the OpsVerse Admin Console.
Step 1: Download Helm Chart
We will be using the OpsVerse Kubernetes Integration Helm chart from the official repository.
- Add the official OpsVerse helm repo to your Helm CLI if you haven't already added it.
helm repo add opsverse-public https://registry.devopsnow.io/chartrepo/public
- Download the OpsVerse Helm chart.
helm pull opsverse-public/observe-agent
Step 2: Customize Values
OpsVerse agent can be used to collect telemetry from a variety of infrastructure and applications. Login to OpsVerse admin console, click on ObserveNow card, navigate to Integrations, in the Agents section select infrastructure as Kubernetes from the dropdown and download opsverse-values.yaml file.
- Replace
<update-cluster-name>with your cluster name.
Step 3: Create Namespace
- Login to the Rafay Web Console and select a project.
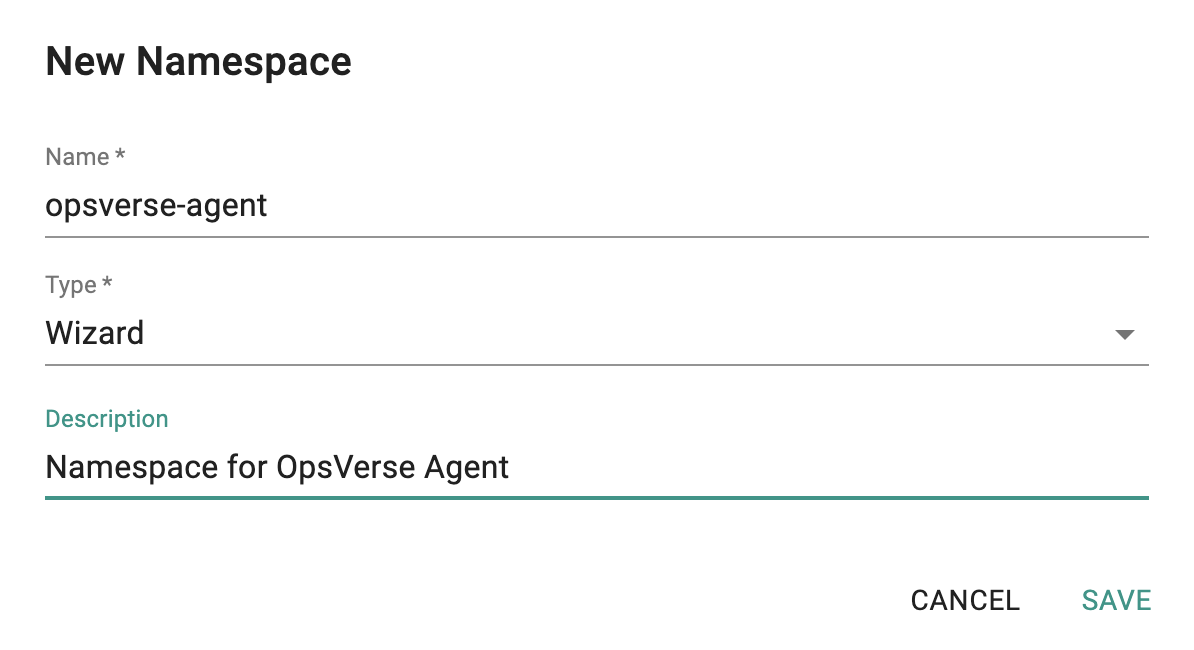
- Select 'Namespaces' under 'Infrastructure', then click 'New Namespace'.
- Enter
opsverse-agentas the namespace name, select 'Wizard' for type, then click 'Save'. - Click 'Save & Go to Placement'.
- In the 'Placement' section, select the cluster where you wish to deploy your namespace.
- Click 'Save & Go to Publish', then click 'Publish' to publish the namespace.
Step 4: Create Addon
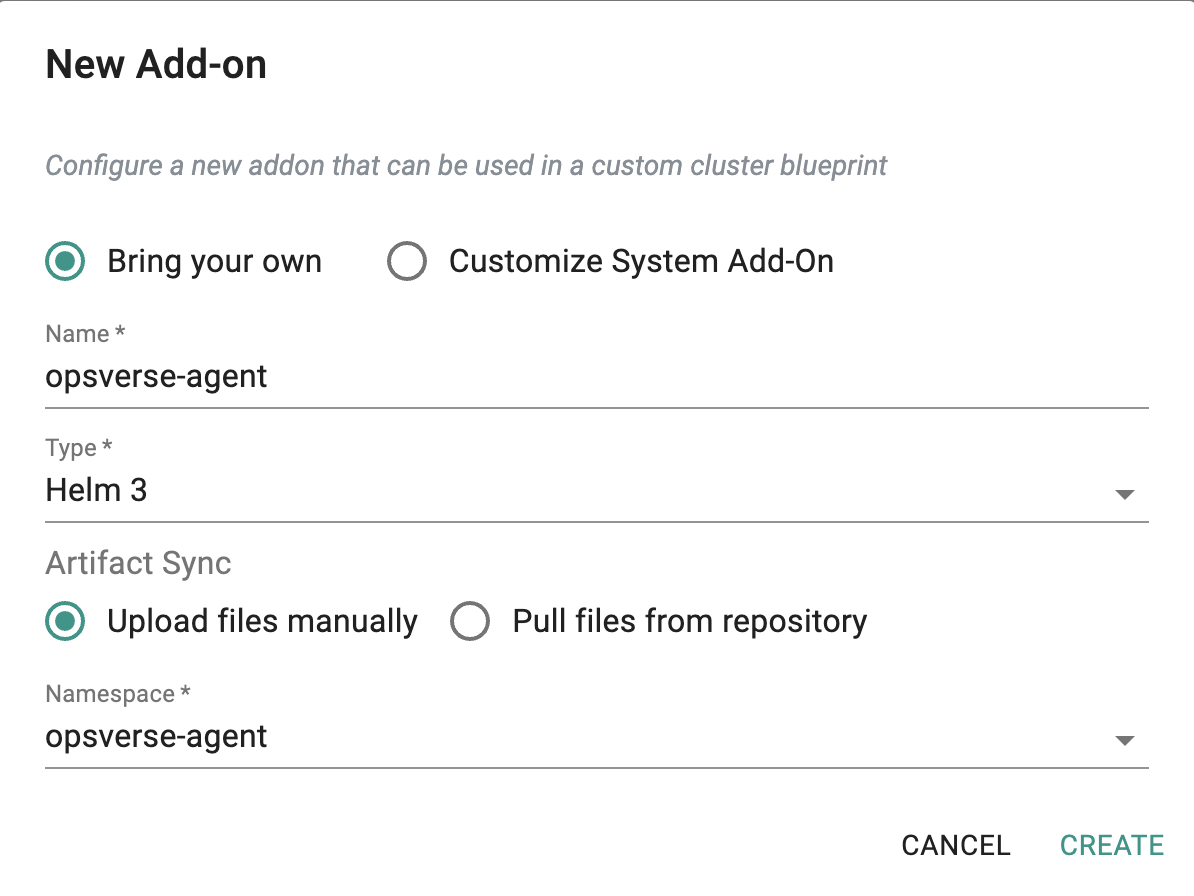
- Select 'Add-Ons' under Infrastructure, then click 'New Add-On > Create New Add-On'.
- Enter
opsverse-agentas the add-on name. - Select 'Helm 3' for type and select 'opsverse-agent' as the namespace. Use the option 'Upload files manually'.
- Click 'Create'.
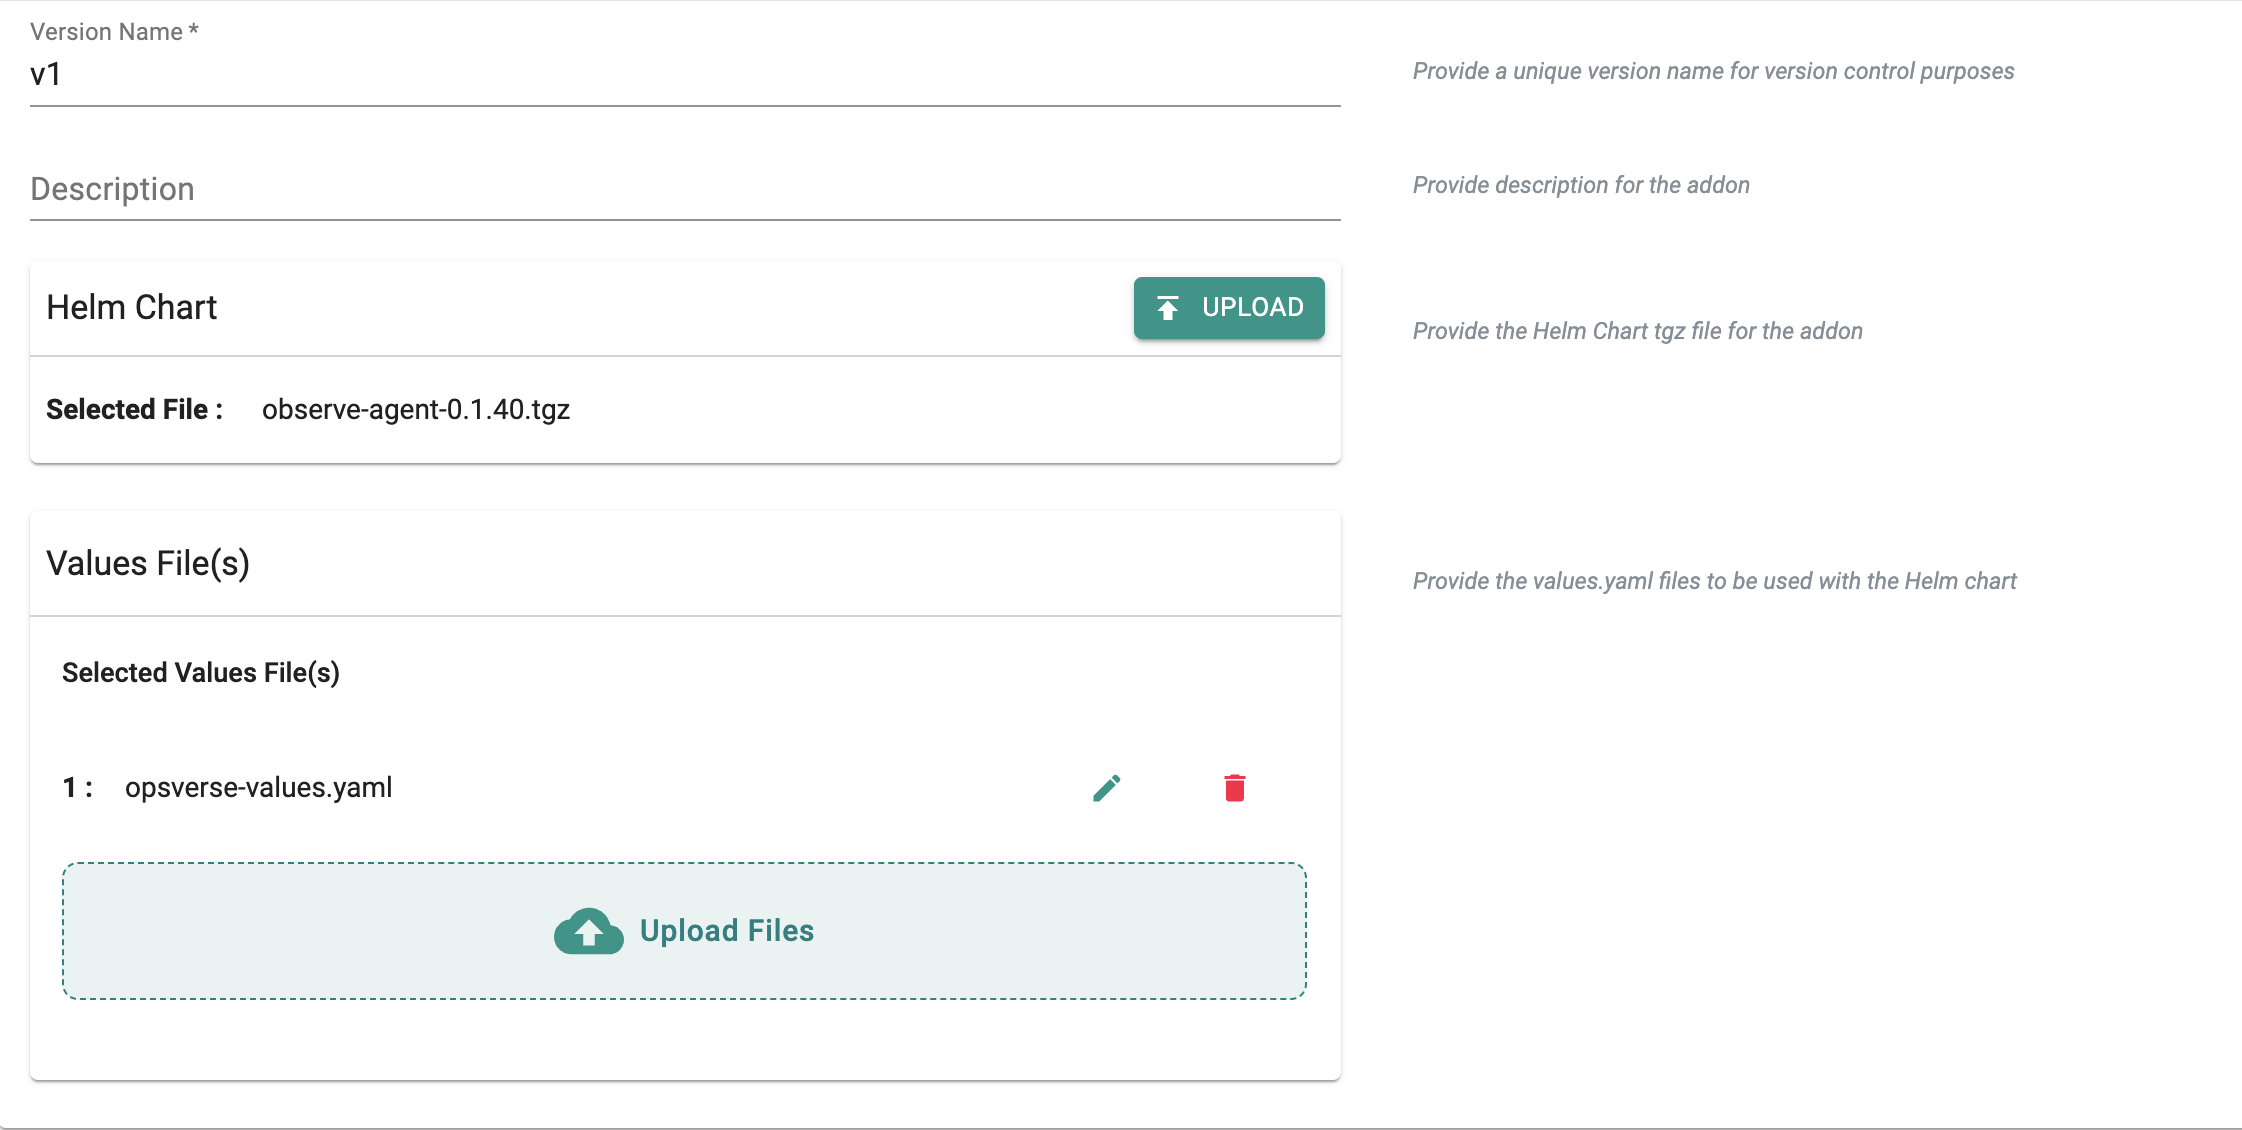
- Click on 'New Version' to create a new version of the addon, provide a unique version name for version, upload Helm chart (opsverse-agent-0.1.40.tgz file) and upload the values file (*opsverse-values.yaml).
- Ensure you publish it and optionally provide a version so that it can be tracked.
- Save the changes.
Step 5: Create Blueprint
Now, we are ready to assemble a custom cluster blueprint using the newly created OpsVerse addon. You can add other addons to the same custom blueprint.
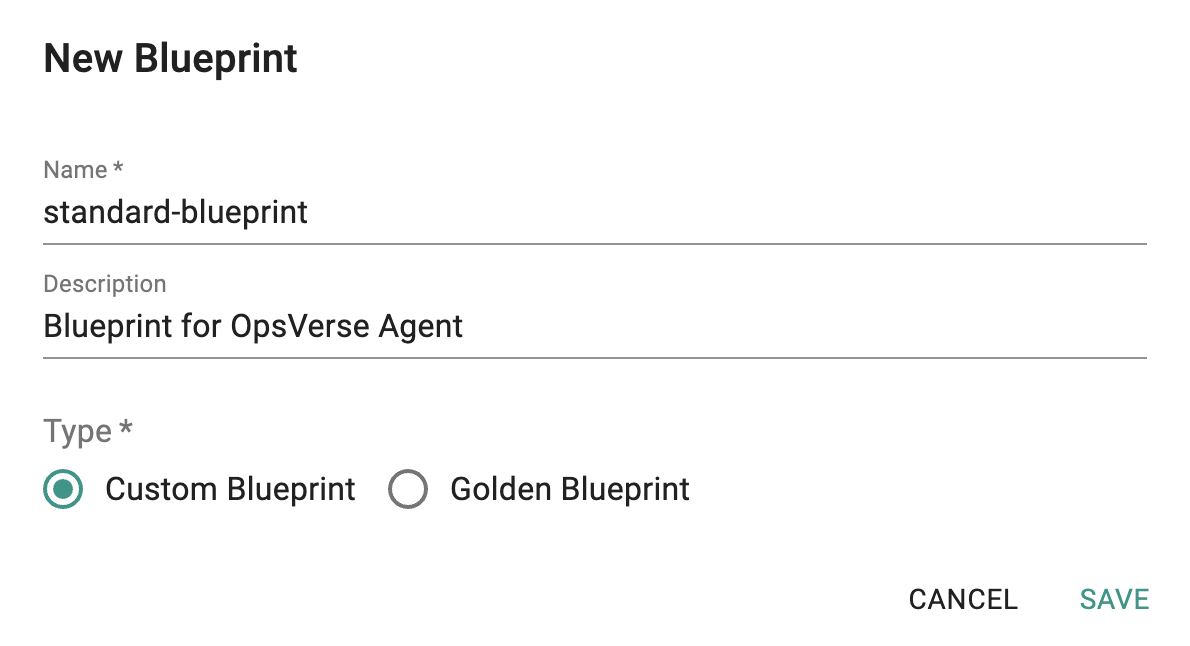
- Under Infrastructure, select 'Blueprints'.
- Click on 'New Blueprint', give it a name, select 'Custom Blueprint' as the type, and click 'Save'.
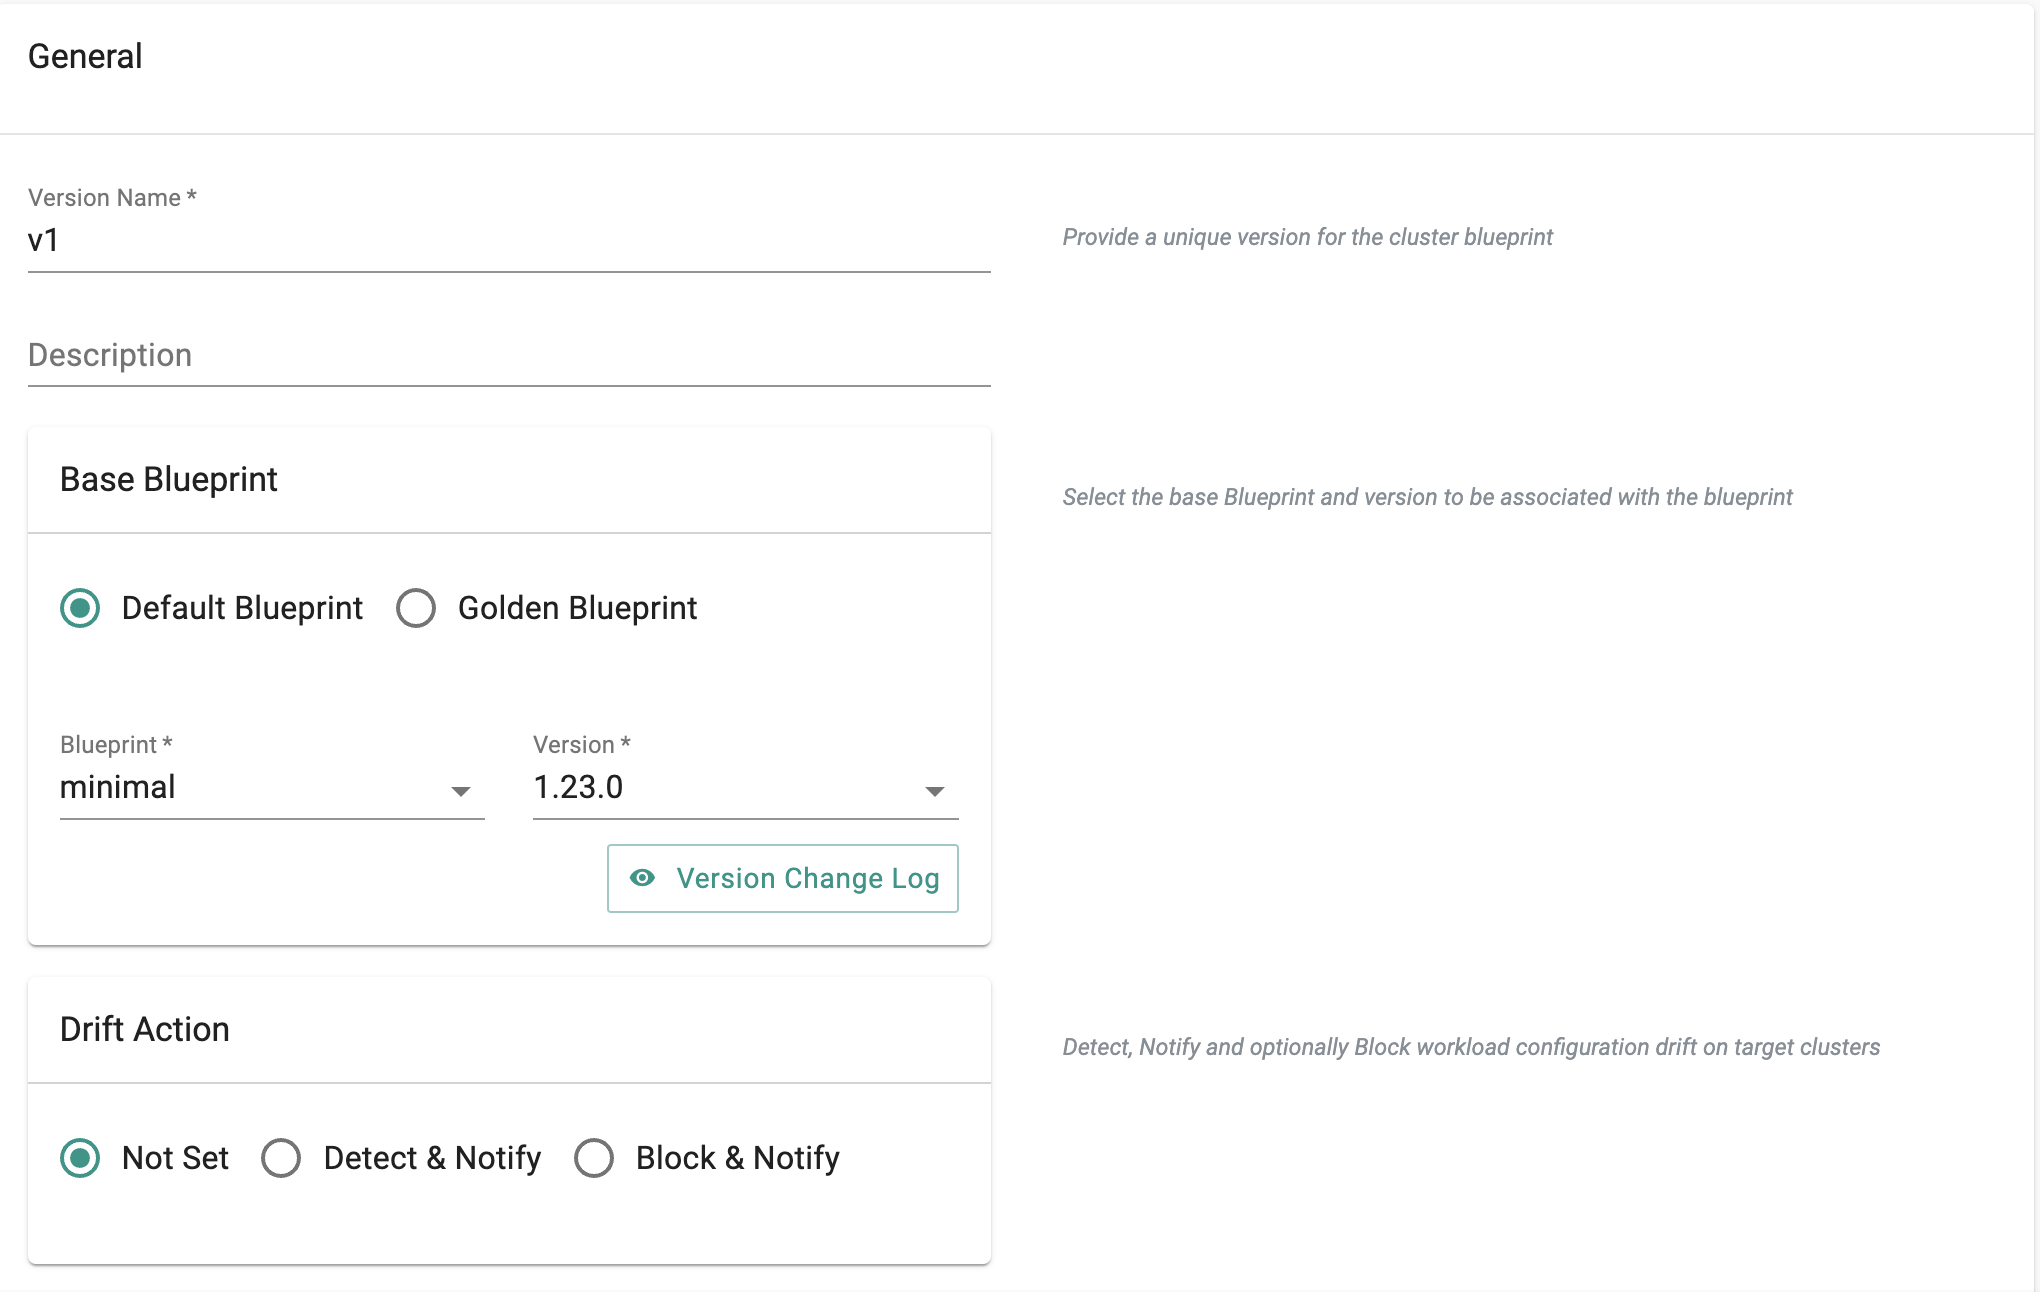
- Provide a unique version for the cluster blueprint and select 'Minimal' for the 'Base Blueprint'.
- Under Add-Ons, click 'Configure Add-Ons', select the add-on you just created, do not select any managed system addons under 'Managed System Add-Ons', and save the changes.

This will start the deployment of the addons configured in the "standard-blueprint" blueprint to the targeted cluster. The blueprint sync process can take a few minutes. Once complete, the cluster will display the current cluster blueprint details and whether the sync was successful or not.
Step 6: Apply Blueprint
Now, we are ready to apply this custom blueprint to a cluster.
- Under Infrastructure, select 'Clusters'.
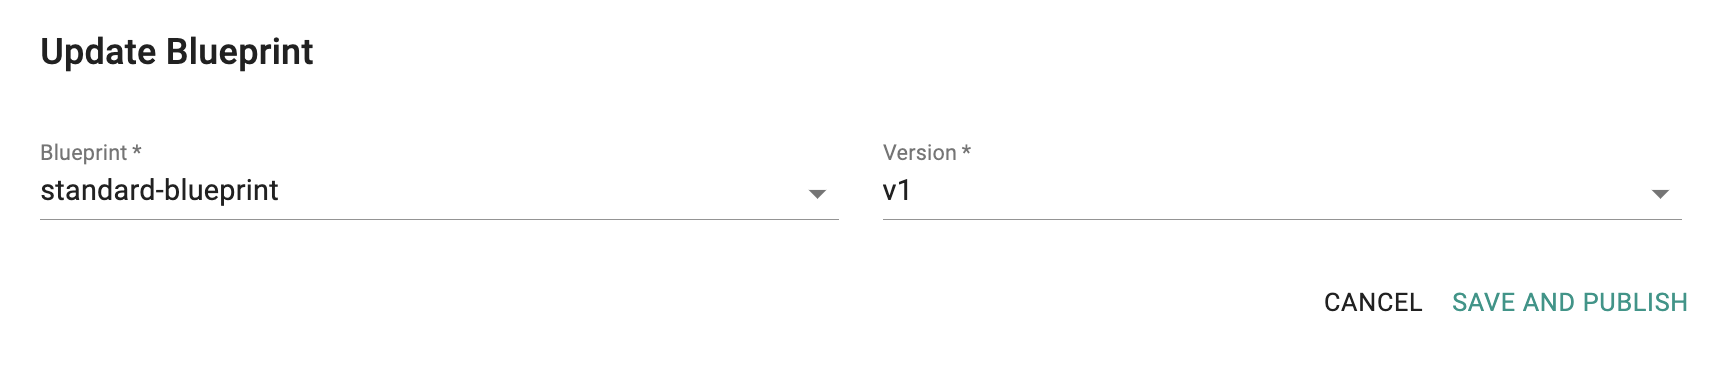
- Click on the gear icon of your cluster, click on 'Update Blueprint', and select the blueprint and the blueprint version that you created.
- Click on 'Save and Publish'.
Step 7: Verify Deployment
Users can optionally verify whether the correct resources have been created on the cluster. Click on the kubectl button on the cluster to open a virtual terminal
First, we will verify if the opsverse-agent namespace has been created.
kubectl get ns opsverse-agent
You should get a similar output below.
NAME             STATUS   AGE
opsverse-agent   Active   17h
Next, we will verify the pods in the opsverse-agent namespace.
kubectl get pods --namespace opsverse-agent
You should see something like the example below.
NAMESPACE        NAME                                                             READY   STATUS    RESTARTS   AGE
opsverse-agent   opsverse-agent-agent-6v2hw                                       1/1     Running   0          82s
opsverse-agent   opsverse-agent-agent-kwlqv                                       1/1     Running   0          82s
opsverse-agent   opsverse-agent-agent-vhwh9                                       1/1     Running   0          82s
opsverse-agent   opsverse-agent-kubestatemetrics-7f8d658455-fmtzw                 1/1     Running   0          82s
opsverse-agent   otel-collector-5dbddcd84-sz4vp                                   1/1     Running   0          82s
Step 8: Verify Metrics
To verify the metrics:
- Login to OpsVerse Admin Console and click on 'ObserveNow' card.
- Choose the ObserveNow instance that you have used to export the metrics using OpsVerse agent.
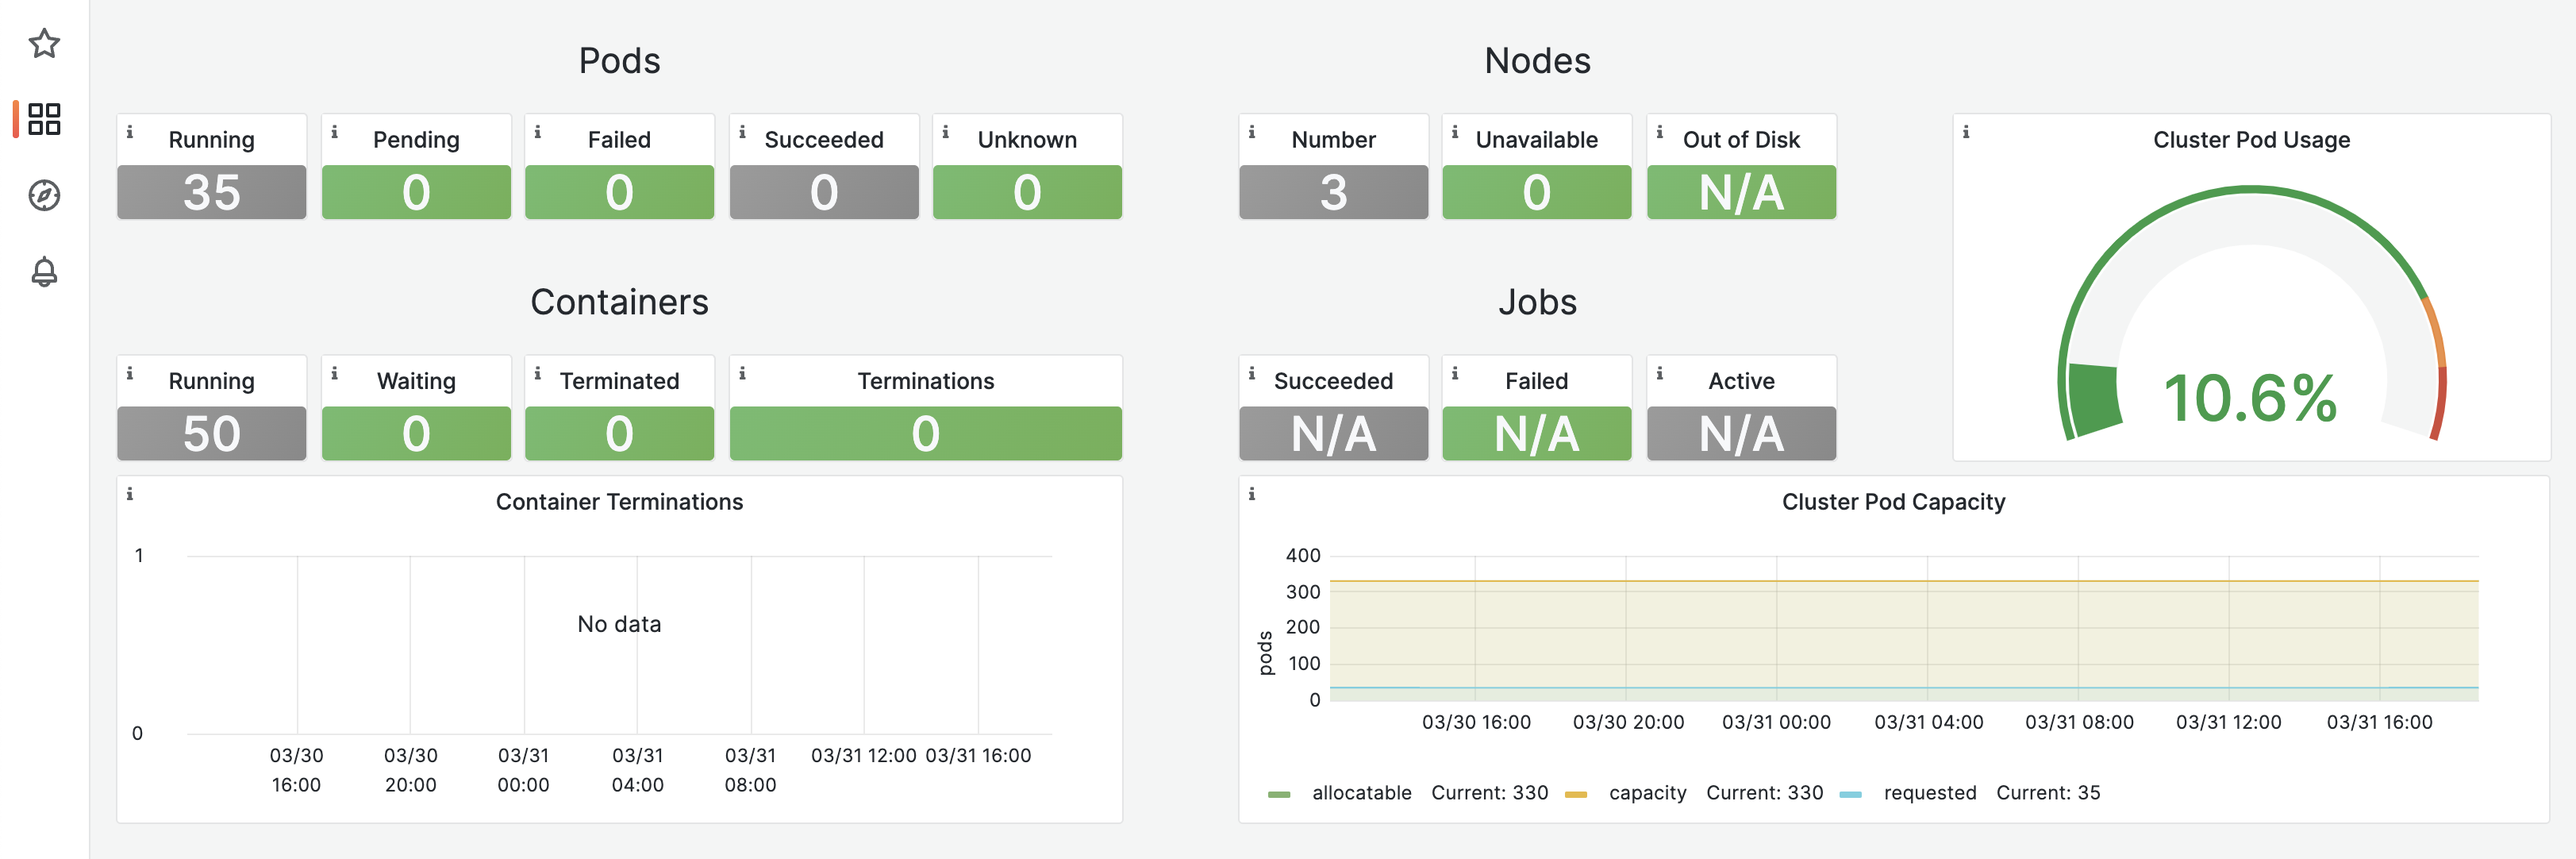
- Under 'Apps' section of your ObserveNow instance, click on Grafana icon and go to the 'Explore' section and select the cluster name and namespace to explore logs and metrics collected by the OpsVerse agent.
- Shown below is an illustrative example of the Kubernetes Dashboard built from the metrics collected by the OpsVerse agent.
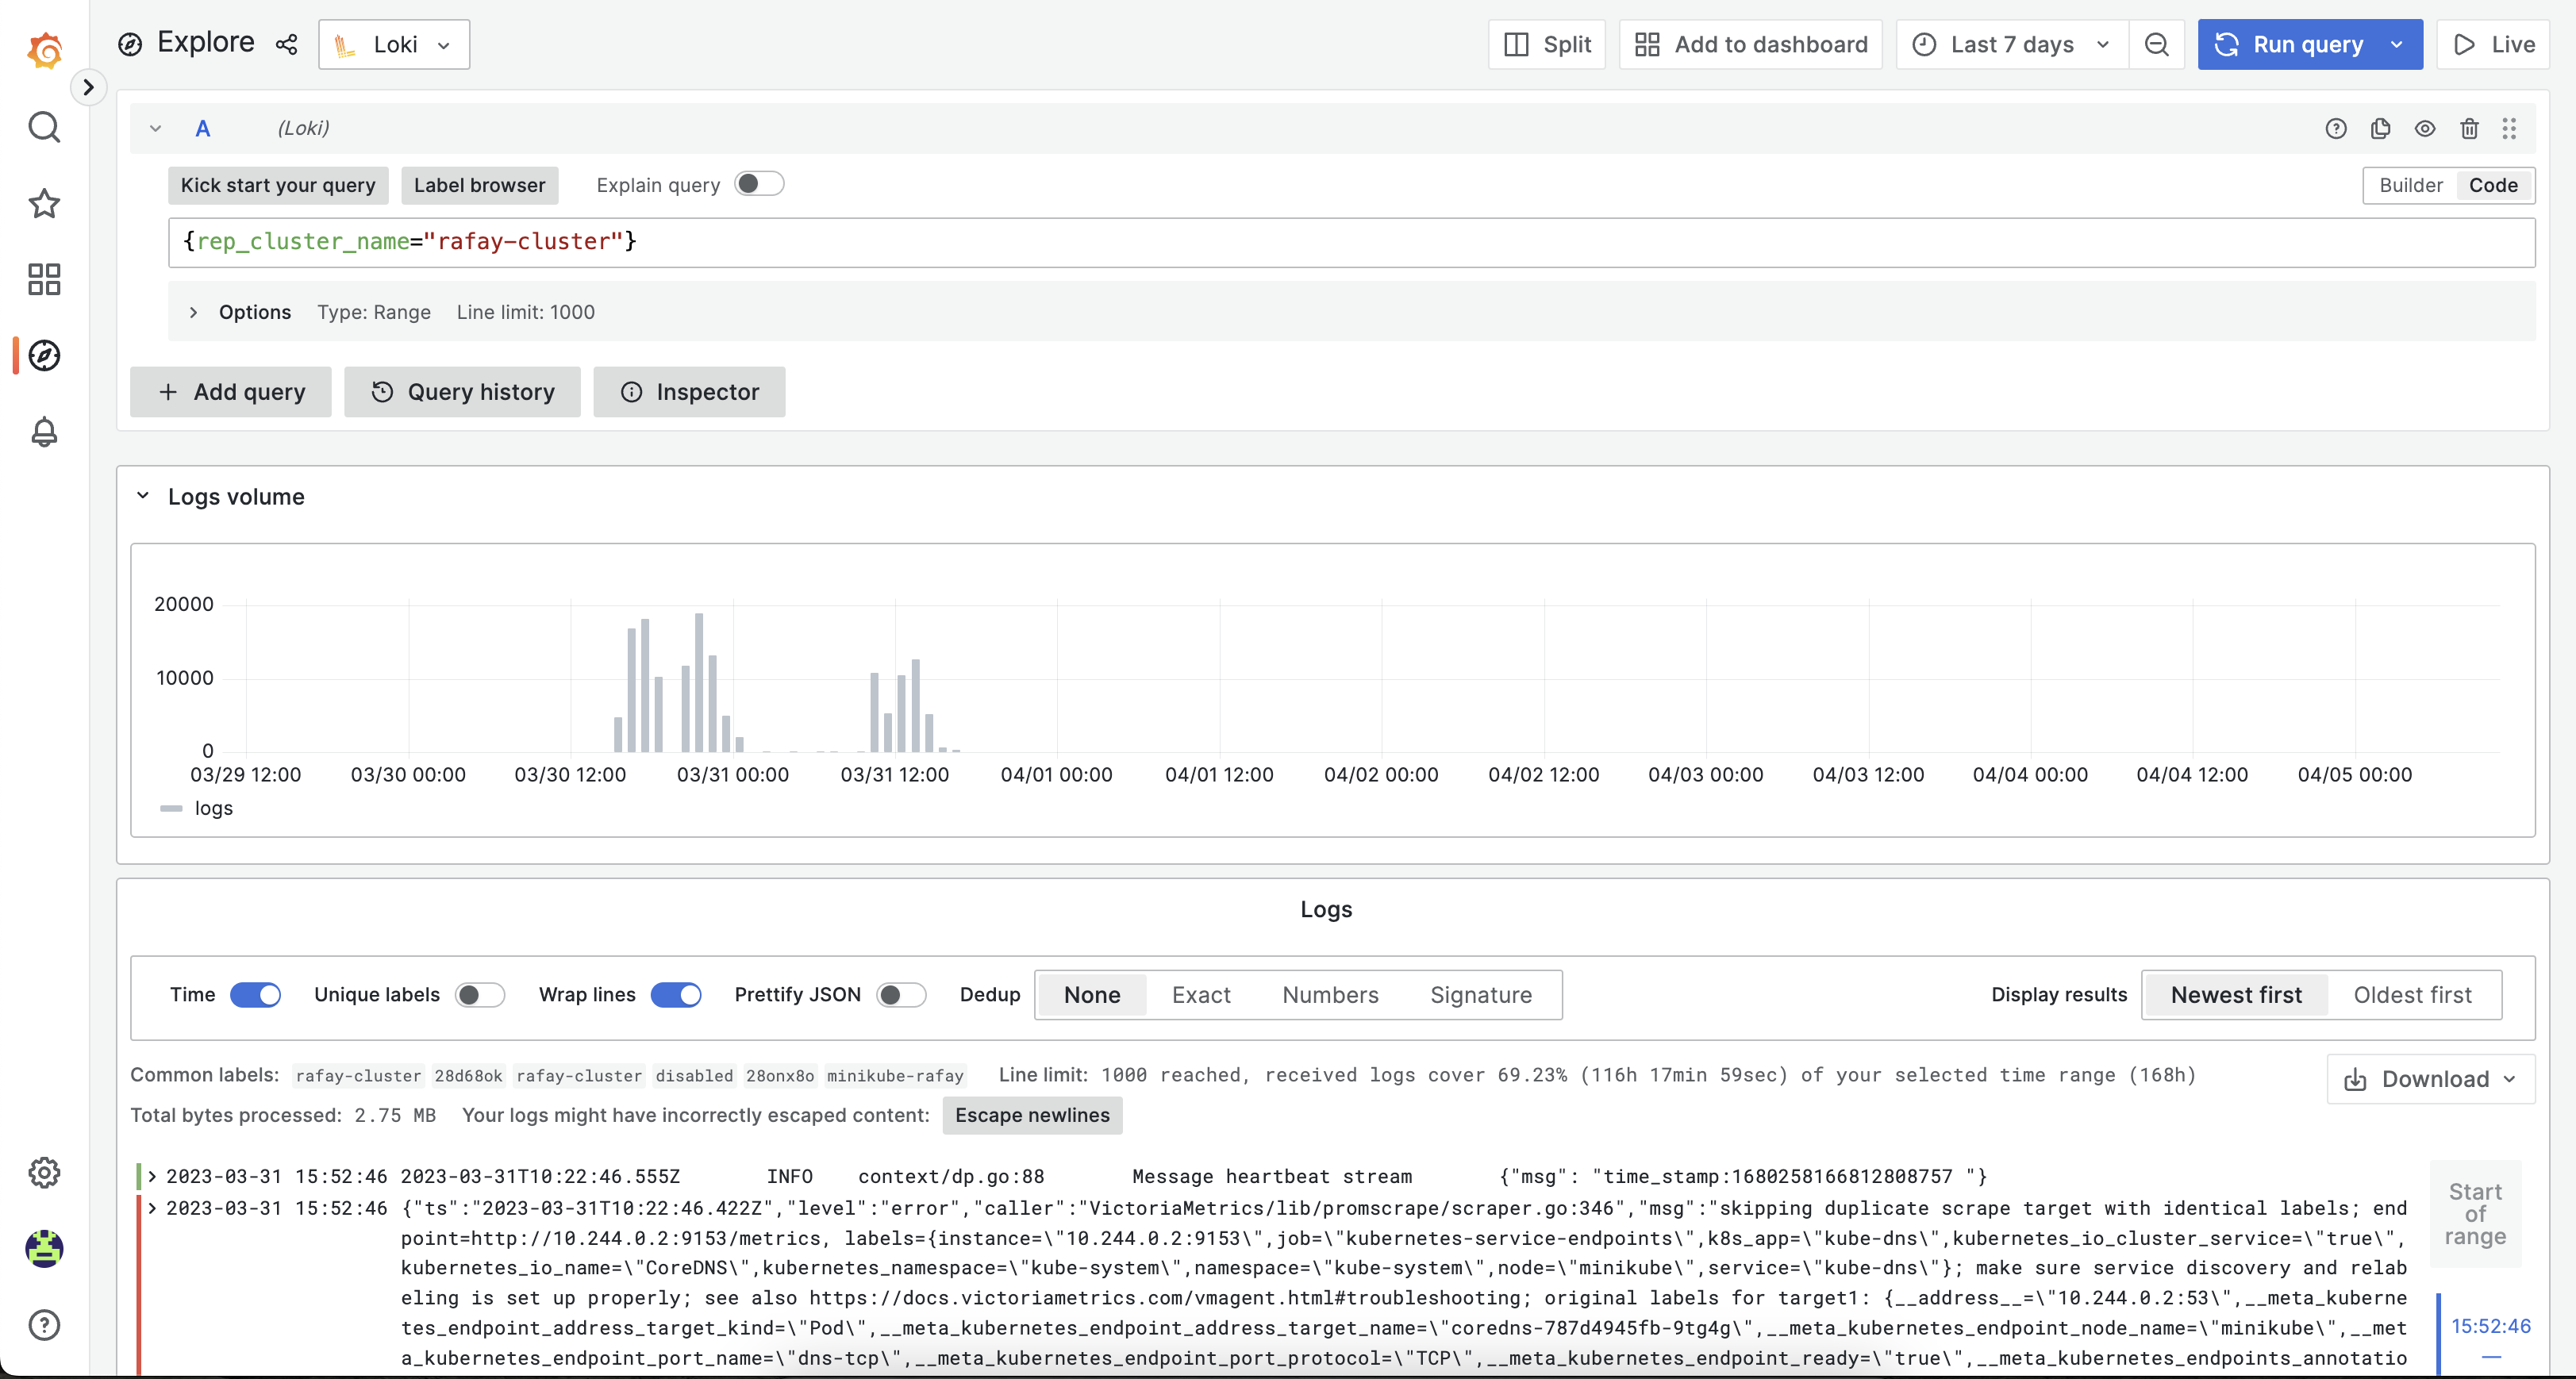
- Shown below is an illustrative example of the logs collected by the OpsVerse agent.
Recap
Congratulations! You have successfully created a custom cluster blueprint with the 'opsverse-agent' addon and applied to a cluster. You can now use this blueprint on as many clusters as you require.