Part 1: Provision
In this exercise, you will focus on provisioning a GKE cluster in Google Cloud using the web console or the RCTL CLI.
What Will You Do
In this part, you will:
- Create a new Project in your Org
- Create a Cloud Credential
- Provision an Google Cloud GKE cluster
- Verify cluster health
- Review available dashboards
Step 1: Create Project
In this step, we will create a new project which will serve as a logically isolated "operating environment" (sub tenant).
Note
Creating a project requires "Org Admin" privileges.
- Create a new project called "gke"
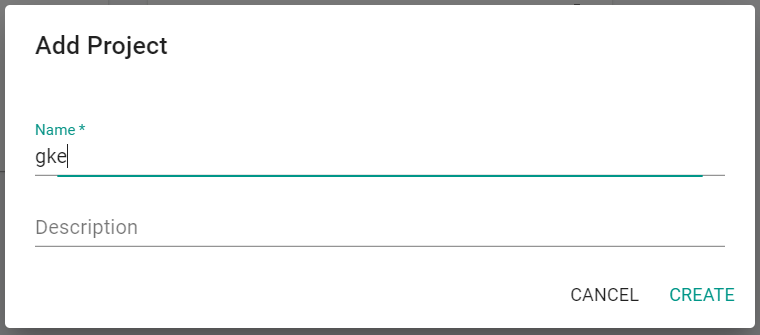
- Switch context to this project by clicking on the project in the web console
Step 2: Create Cloud Credential
Cloud credentials provide the controller with privileges to programmatically interact with your Google Cloud account so that it can manage the lifecycle of infrastructure associated with GKE clusters.
- Follow the step-by-step instructions to setup Google Cloud and obtain the required credentials.
- Follow the step-by-step instructions to create an GCP cloud credential on the controller.
- Validate the newly created cloud credential to ensure it is configured correctly.

Step 3: Configure & Provision Cluster
In this step, you will configure and customize your GCP GKE Cluster using either the web console or the RCTL CLI with a YAML based cluster specification.
- Navigate to the previously created project in your Org
- Select Infrastructure -> Clusters
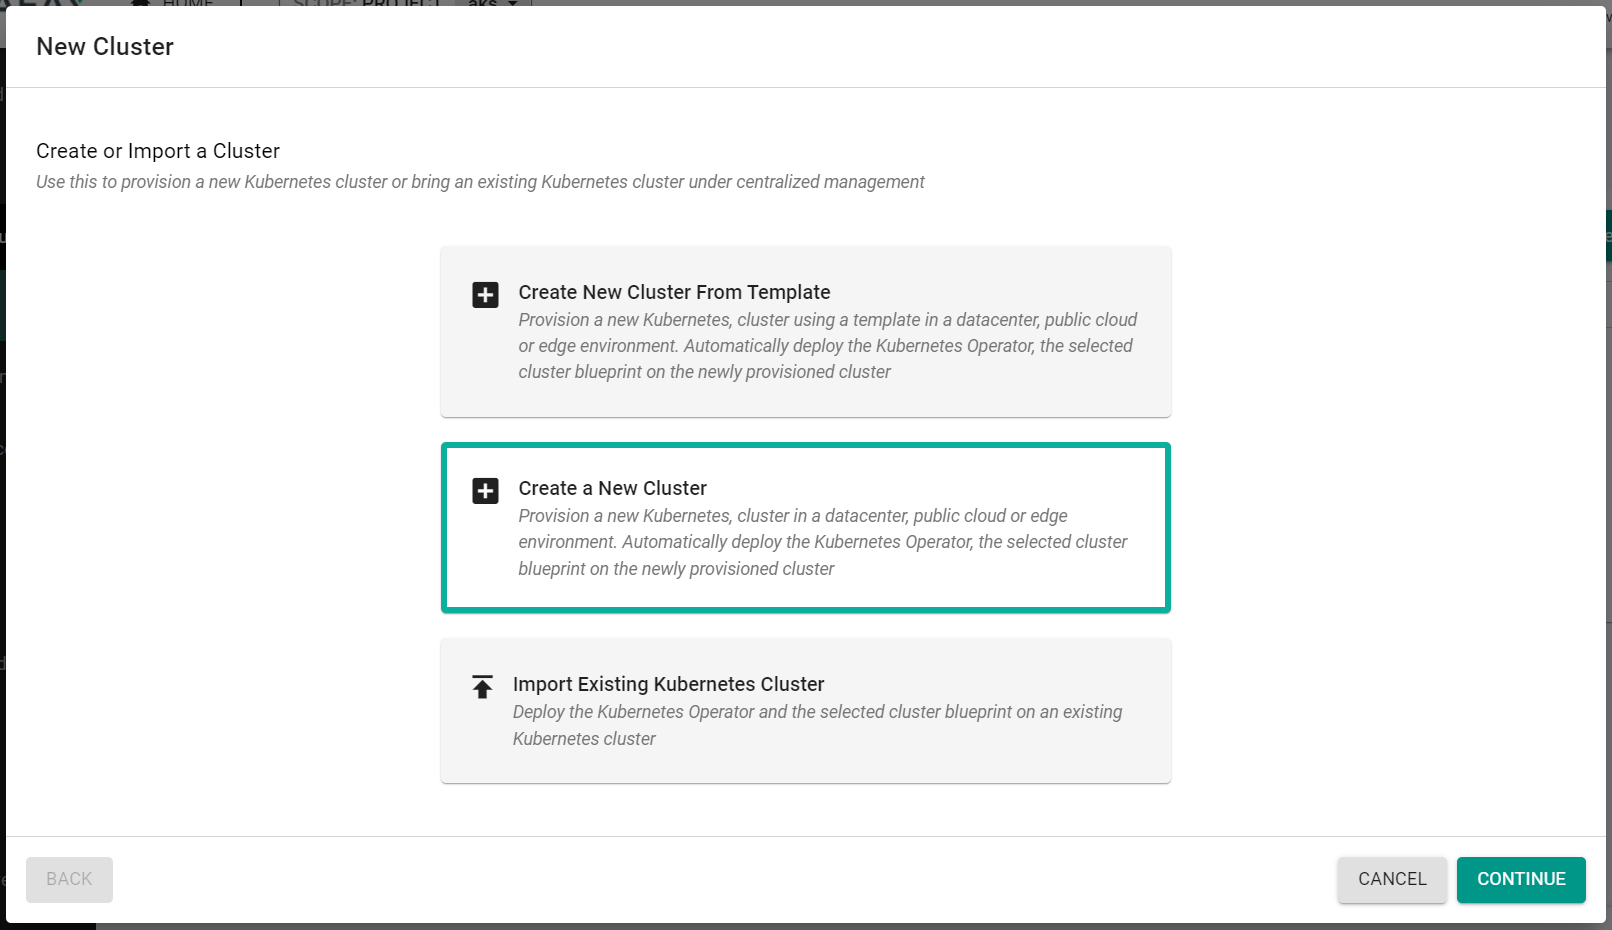
- Click "New Cluster"
- Select "Create a New Cluster"
- Click "Continue"
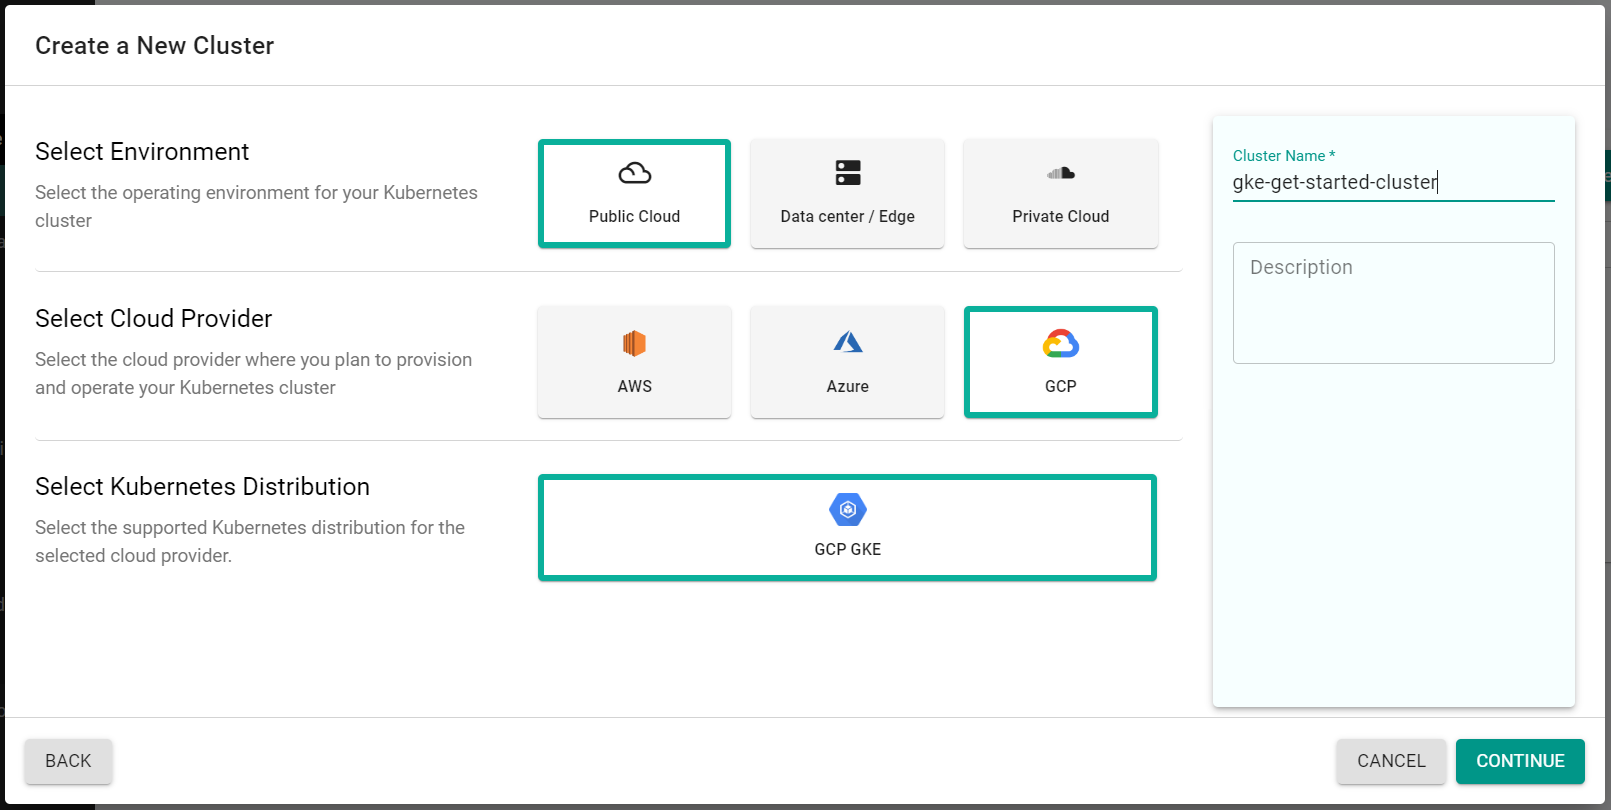
- Select "Public Cloud"
- Select "GCP"
- Select "GCP GKE"
- Enter a cluster name
- Click "Continue"
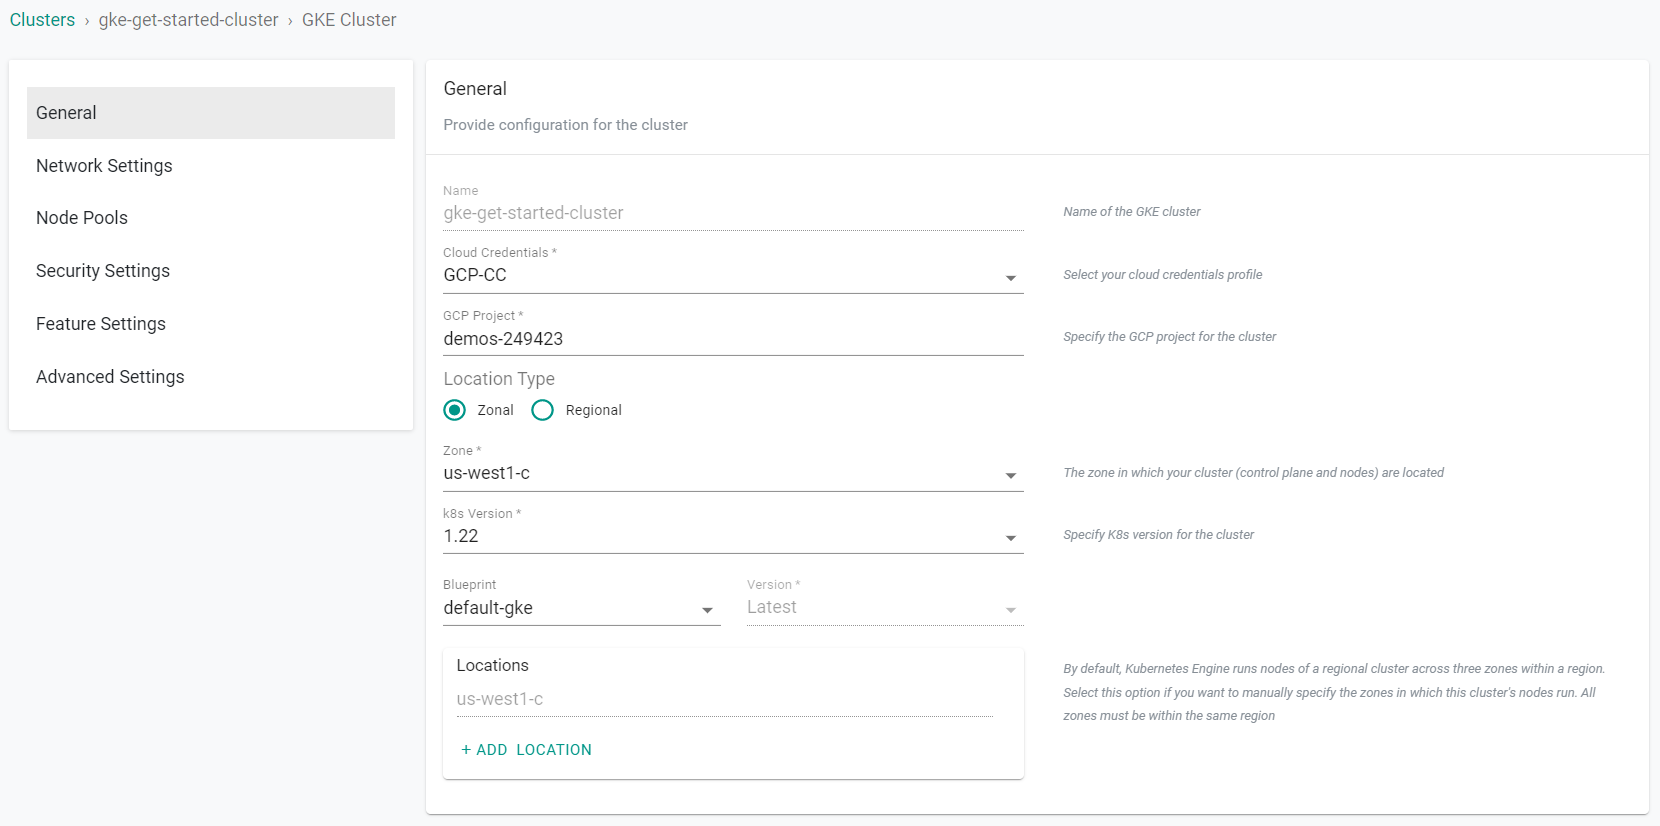
- Select the previously created "Cloud Credentials"
- Enter the "GCP Project" ID where the cluster will be created
- Select the "Zone" for the cluster
- Select the K8S Version for the cluster
- Select the "default-gke" blueprint
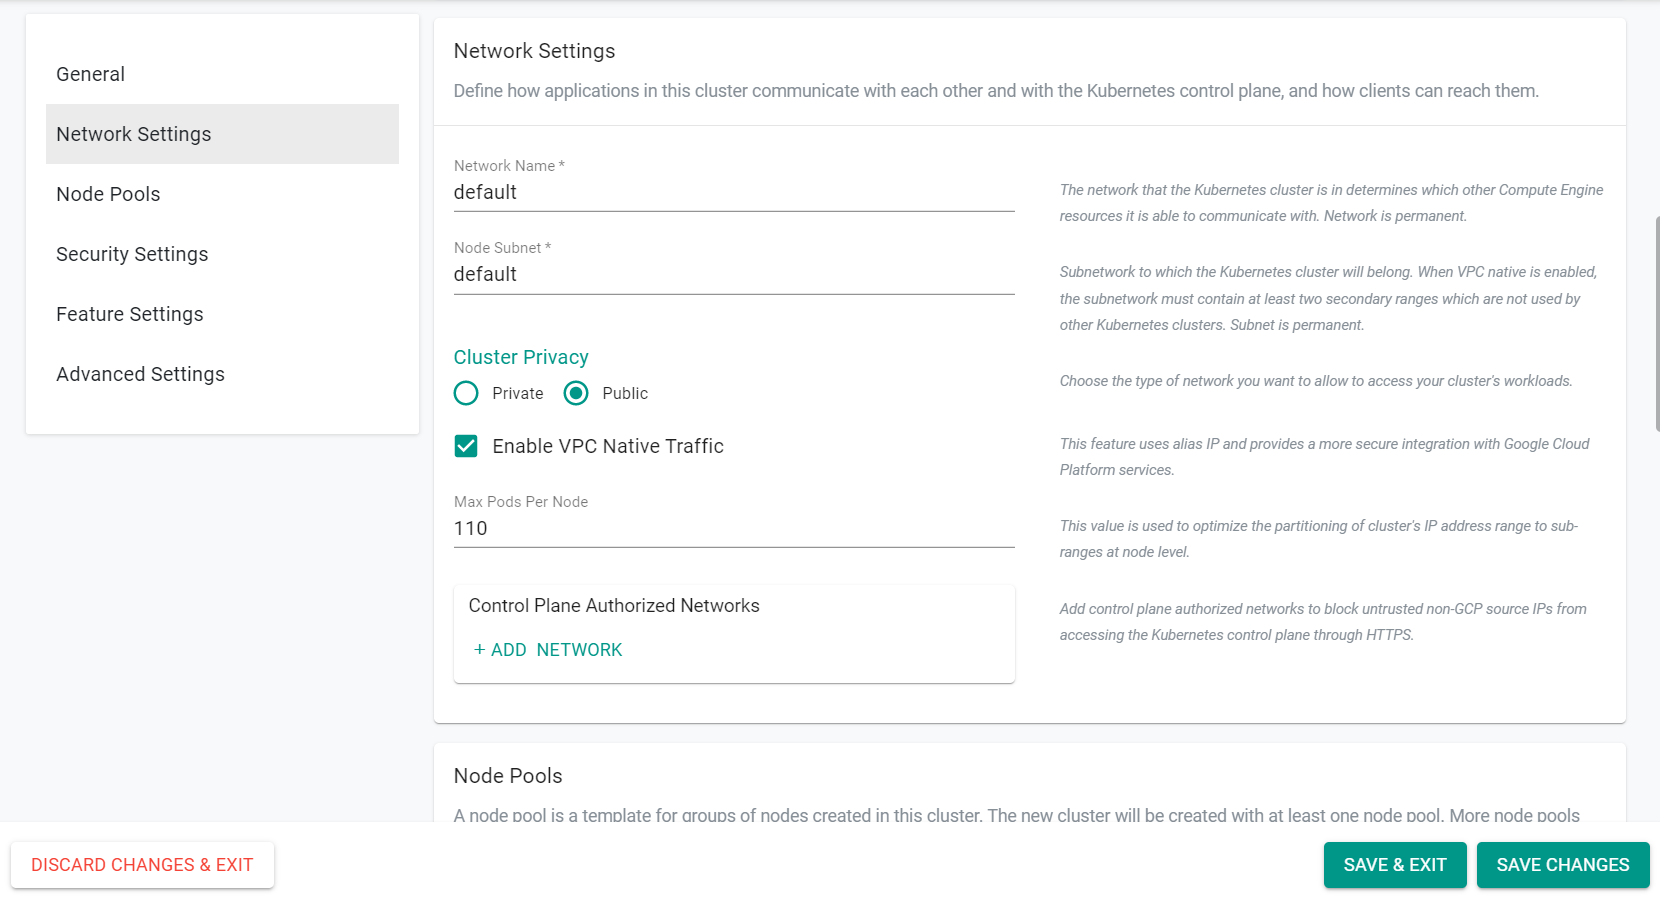
- Under the "Network Settings" section, change the "Cluster Privacy" to "Public"
- Click "Save Changes"
- Click "Provision"
Provisioning will take approximately 15 minutes to complete. The final step in the process is the blueprint sync for the default blueprint. This can take a few minutes to complete because this requires the download of several container images and deployment of monitoring and log aggregation components.
- Save the below specification file to your computer as "gke-cluster-basic.yaml". Note, the highlighted sections in the spec will need to be updated to match your environment.
apiVersion: infra.k8smgmt.io/v3
kind: Cluster
metadata:
  # The name of the cluster
  name: gke-get-started-cluster
  # The name of the project the cluster will be created in
  project: gke
spec:
  blueprint:
  # The name of the blueprint the cluster will use
    name: minimal
  # The version of the blueprint to be used
    version: latest
  # The name of the cloud credential that will be used to create the cluster
  cloudCredentials: GCP-CC
  config:
    # The kubernetes version of the control plane
    controlPlaneVersion: "1.29"
    features:
    # Enable the compute engine persistent disk driver, required for K8s version 1.25+
      enableComputeEnginePersistentDiskCSIDriver: true
  # The GCP project ID where the cluster resides
    gcpProject: demos-249423
    location:
      config:
    # The GCP geo-location where the cluster resides
        zone: us-west1-c
      type: zonal
    network:
      access:
        config: null
        type: public
      enableVPCNativetraffic: true
    # The maximum number of pods that can run on a node
      maxPodsPerNode: 110
      name: default
      subnetName: default
    nodePools:
    - machineConfig:
      # The size of the boot disk in GB on each node in the node pool
        bootDiskSize: 100
    # The type of disk used for the boot disk
        bootDiskType: pd-standard
    # The operating system used on the nodes
        imageType: COS_CONTAINERD
    # The size of the VMs that the nodes will run on
        machineType: e2-standard-4
    # The name of the  node pool
      name: default-nodepool
    # The kubernetes version that will run on the node pool
      nodeVersion: "1.28"
    # The desired number of nodes that can run in the node pool
      size: 3
  type: gke
-
Update the name section with the name of the cluster to be created and the project section with the name of the Rafay project you previously created
metadata: name: gke-get-started-cluster project: gke -
Update the cloudCredentials section with the name of the cloud credential that was previously created
cloudCredentials: GCP-CC -
Update the control plane version section with the kubernetes version for the control plane
controlPlaneVersion: "1.29" -
Update the zone sections with the GCP zone where the cluster will be created
defaultNodeLocations: - us-west1-c type: zonal zone: us-west1-c -
Update the name section with the name of the cluster to be created
name: gke-get-started-cluster -
Update the node version section with the kubernetes version for the nodes
nodeVersion: "1.28" -
Update the project section with the ID of the GCP project
project: demos-249423 - Save the updates that were made to the file
-
Execute the following command to provision the cluster from the specification file previously saved
./rctl apply -f gke-cluster-basic.yaml -
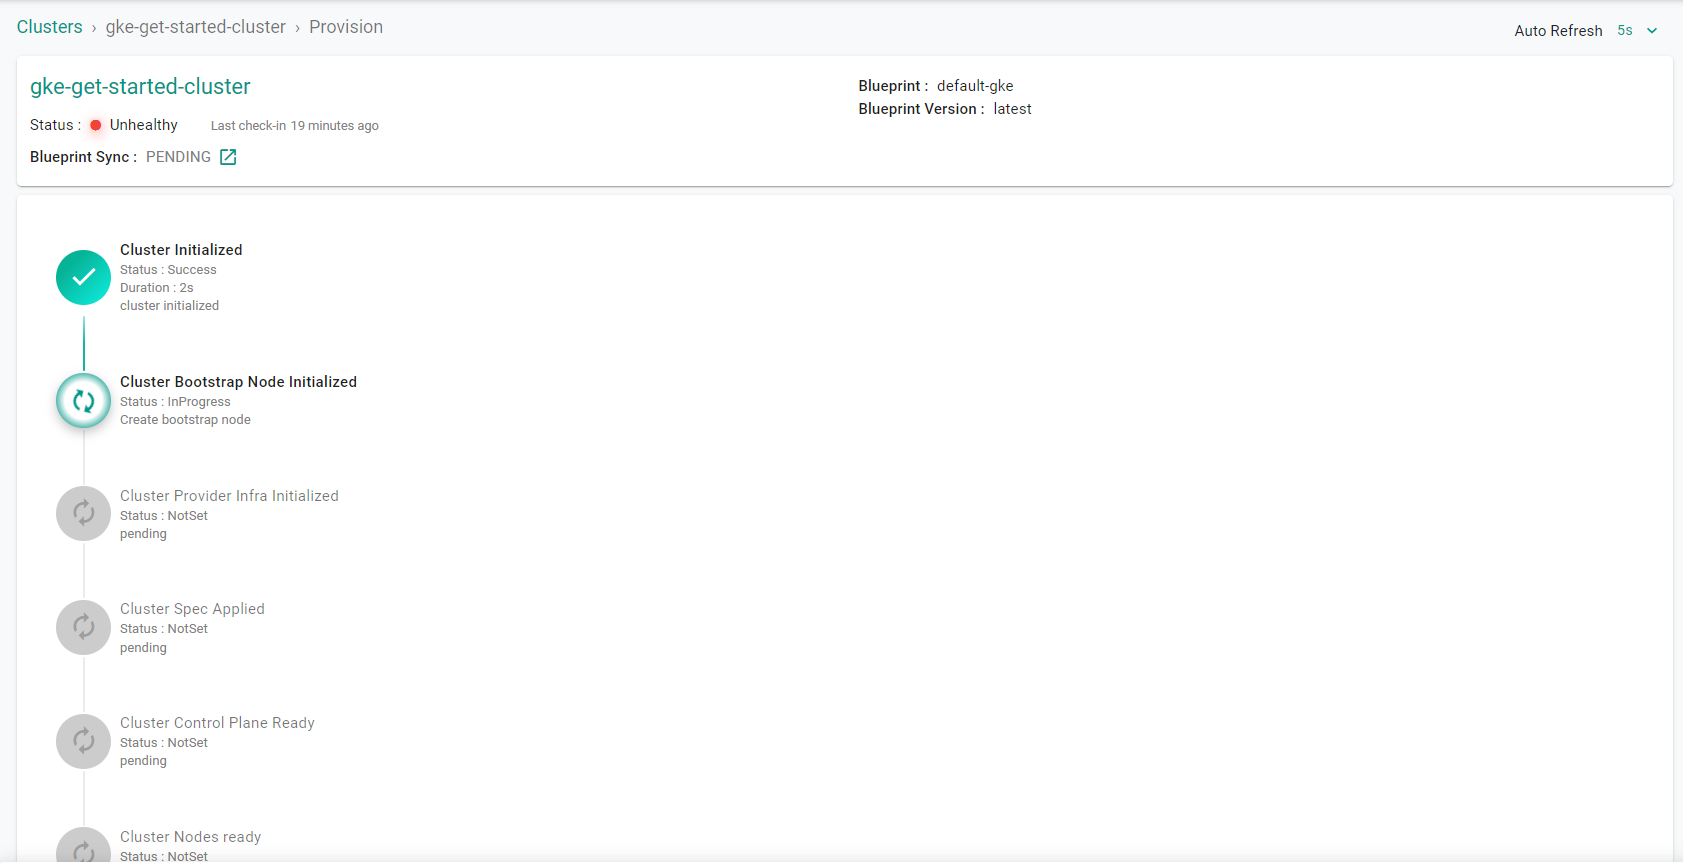
Login to the web console and click on the cluster name to view the cluster being provisioned
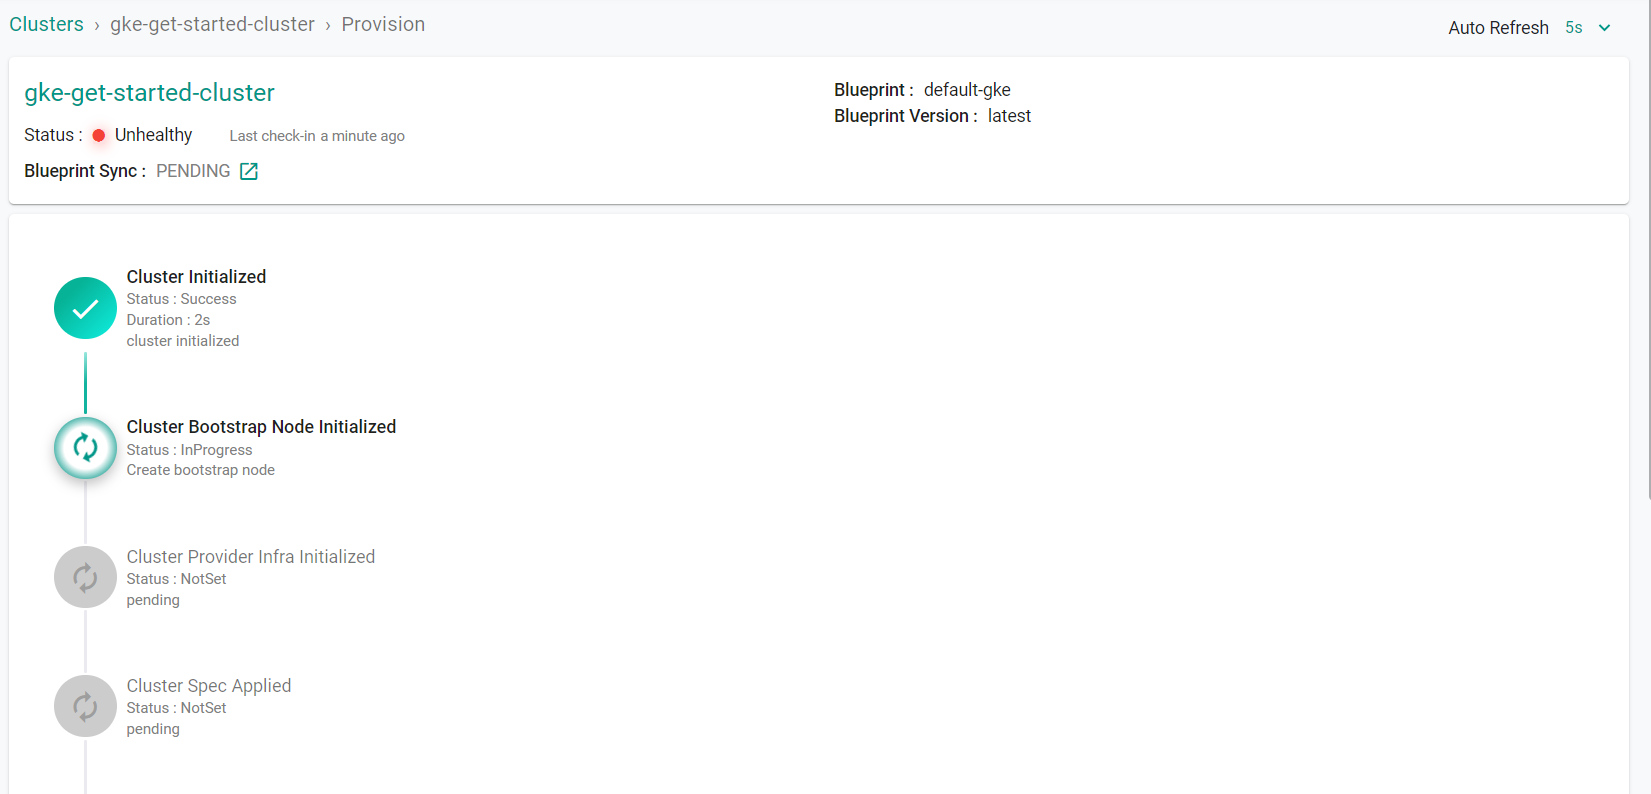
Provisioning the infrastructure will take approximately 15 minutes to complete. The final step in the process is the blueprint sync for the default blueprint's add-ons. This can take a few minutes to complete because this requires the download and deployment of several container images associated add-ons.
Once the cluster finishes provisioning, download the cluster configuration file and compare it to the specification file used to create the cluster. The two files will match.
- Go to Clusters -> Infrastructure.
- Click on the Settings Icon for the newly created cluster and select "Download Cluster Config"
Step 4: Verify Cluster
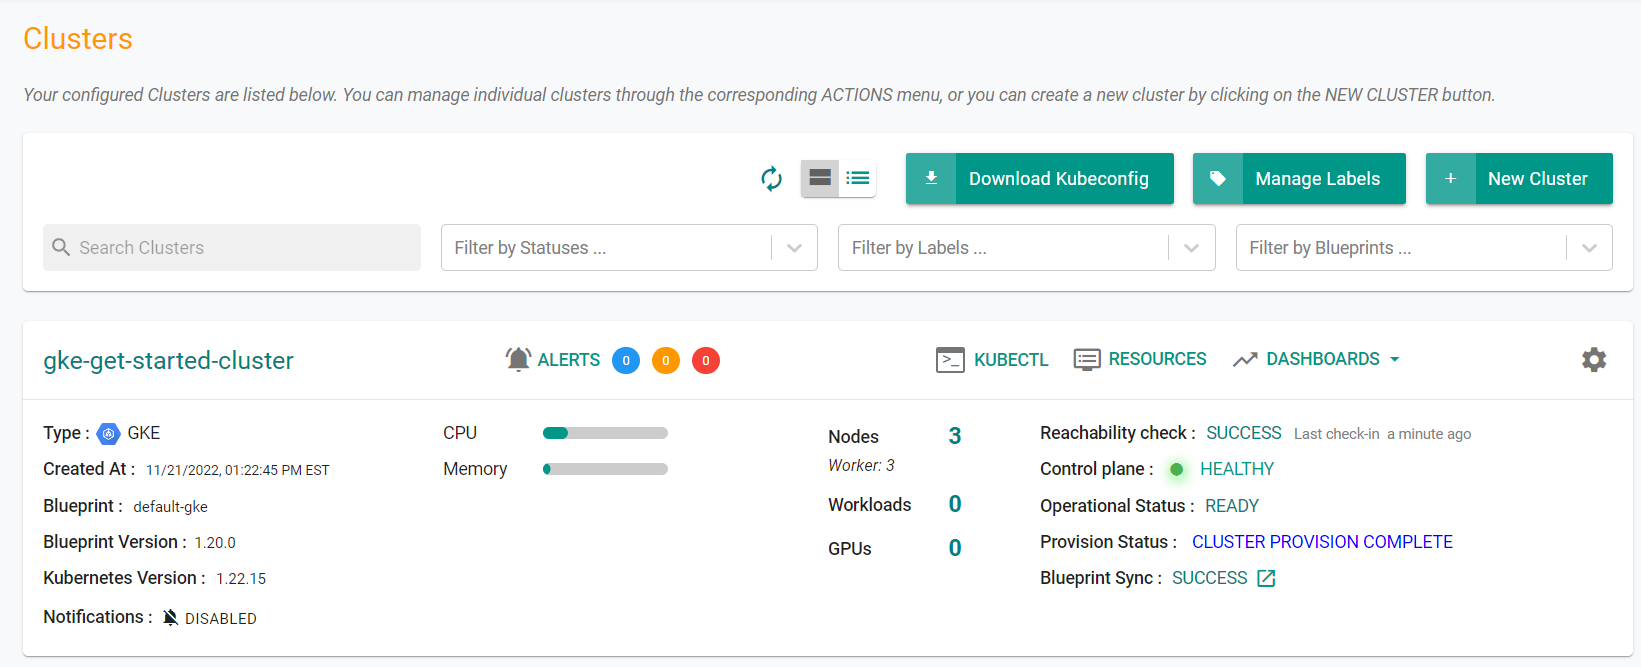
Once provisioning is complete, you should have a ready to use GCP GKE Cluster. We will verify the cluster by checking its health and status.
Step 4a: Cluster Status & Health
The Kubernetes management operator automatically deployed on the cluster by the controller will "maintain a heartbeat" with the controller and will "proactively monitor" the status of the components on the worker node required for communication with the control plane and the controller.
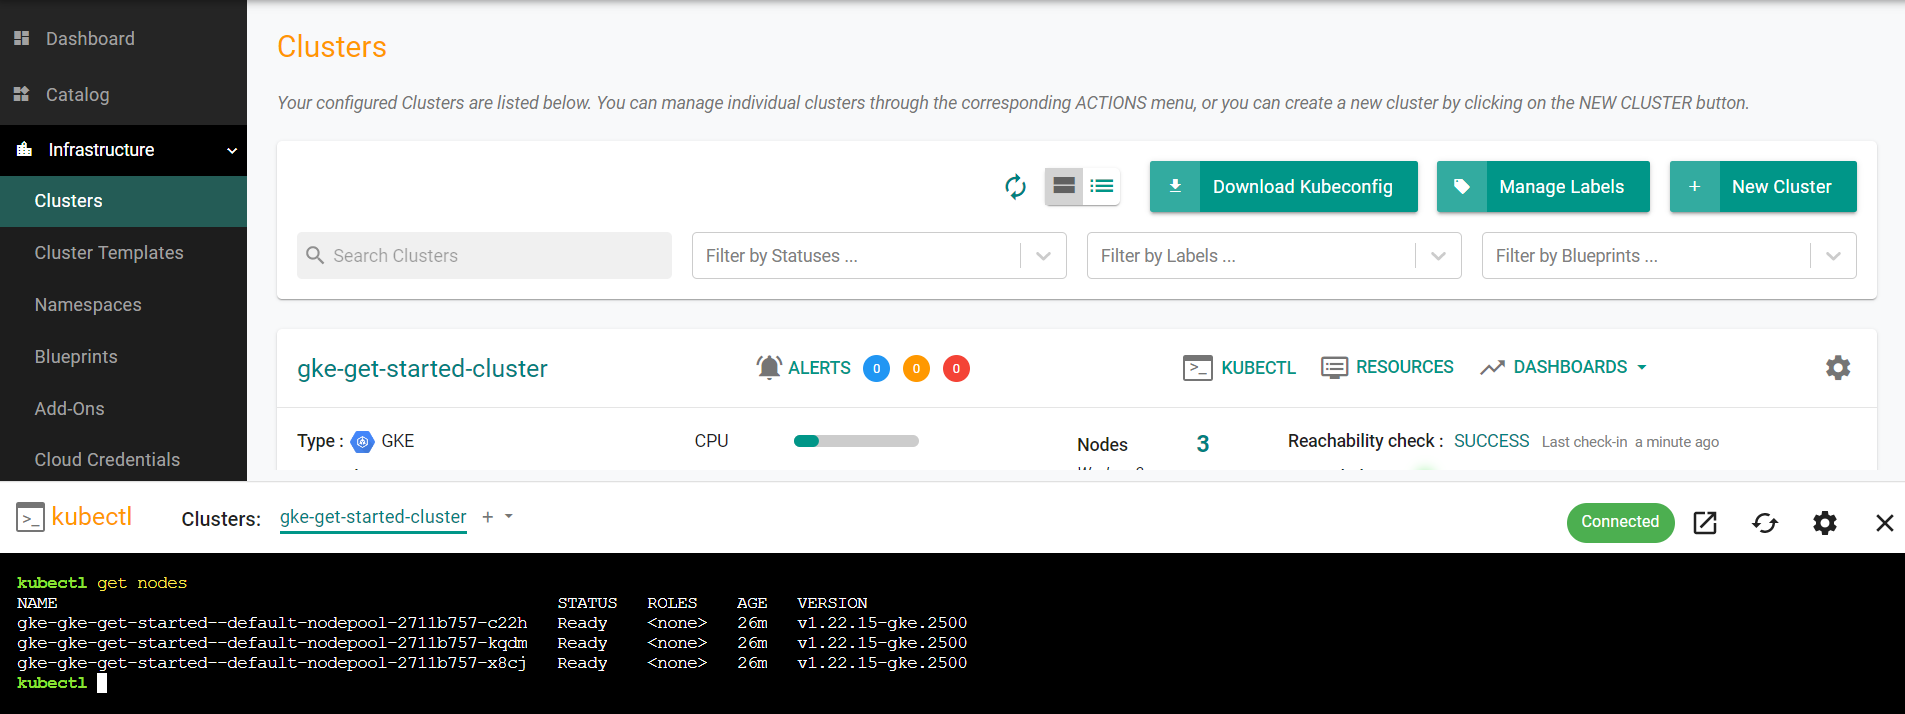
Step 4b : Zero Trust Kubectl
The controller provides a zero trust kubectl channel for authorized users.
- Click the "Kubectl" button on the cluster card.
- This will launch a web based kubectl shell for you to securely interact with the API server over a zero trust channel
Step 5: Dashboards
The default cluster blueprint automatically deploys Prometheus and related components required to monitor the GKE cluster. This data is aggregated from the cluster on the controller in a time series database. This data is then made available to administrators in the form of detailed dashboards.
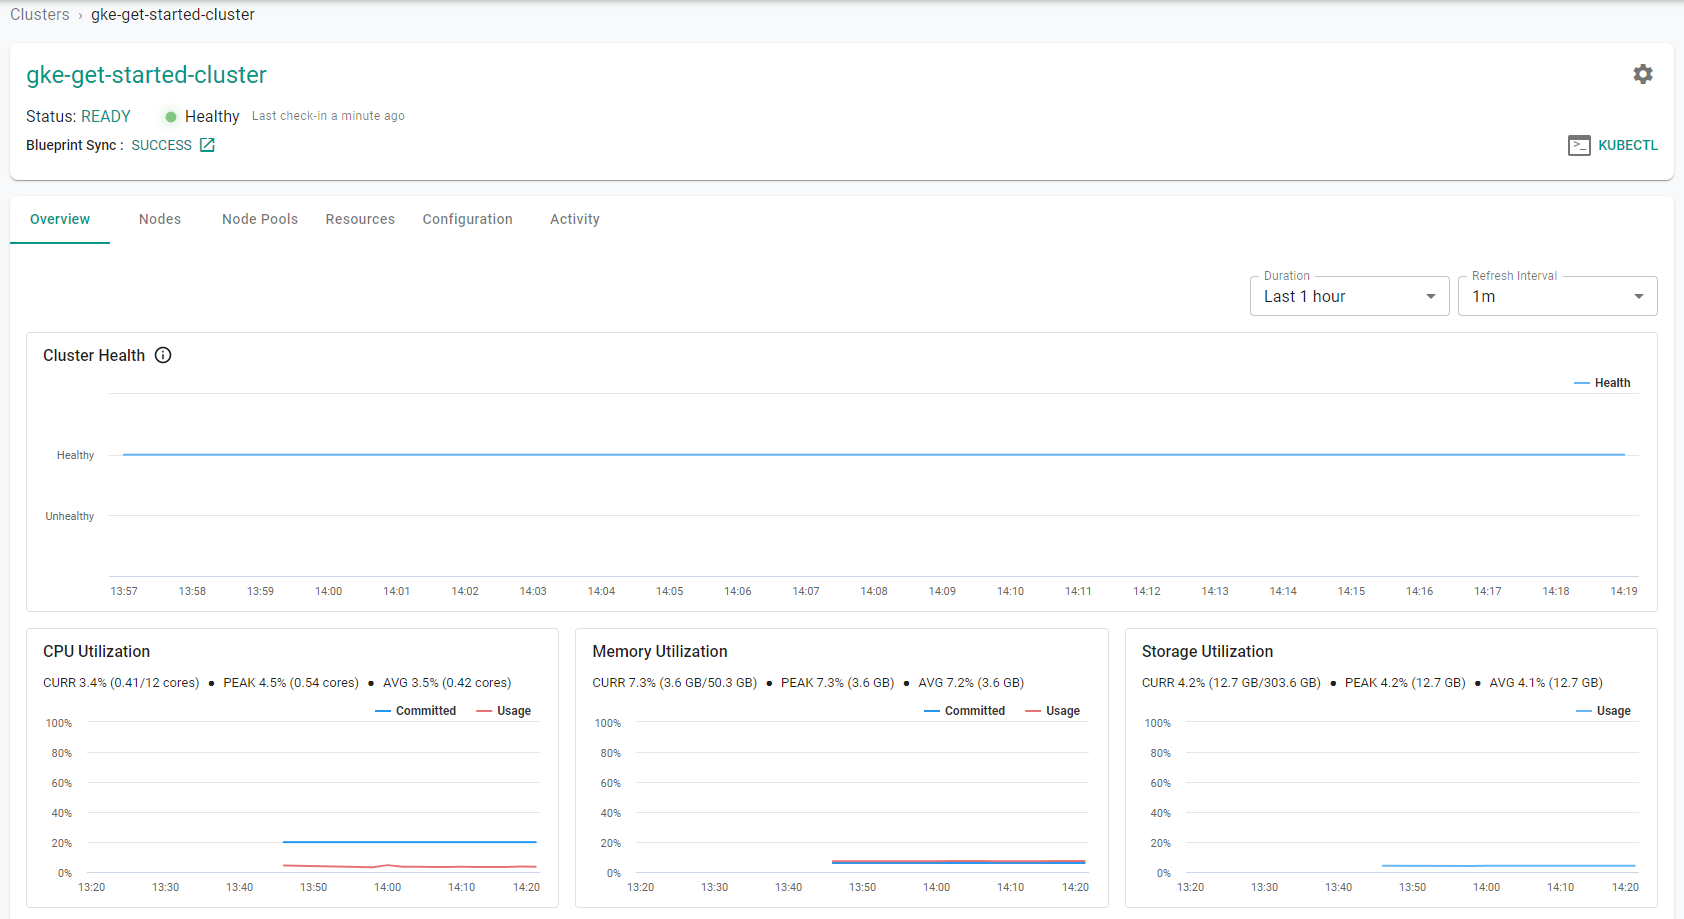
Step 5a: Cluster Dashboard
Click on the cluster name to view the cluster dashboard. You will be presented with time series data for the following
- Cluster Health
- CPU Utilization
- Memory Utilization
- Storage Utilization
- Number of Worker Nodes
- Number of workloads and their status
- Number of pods and their status
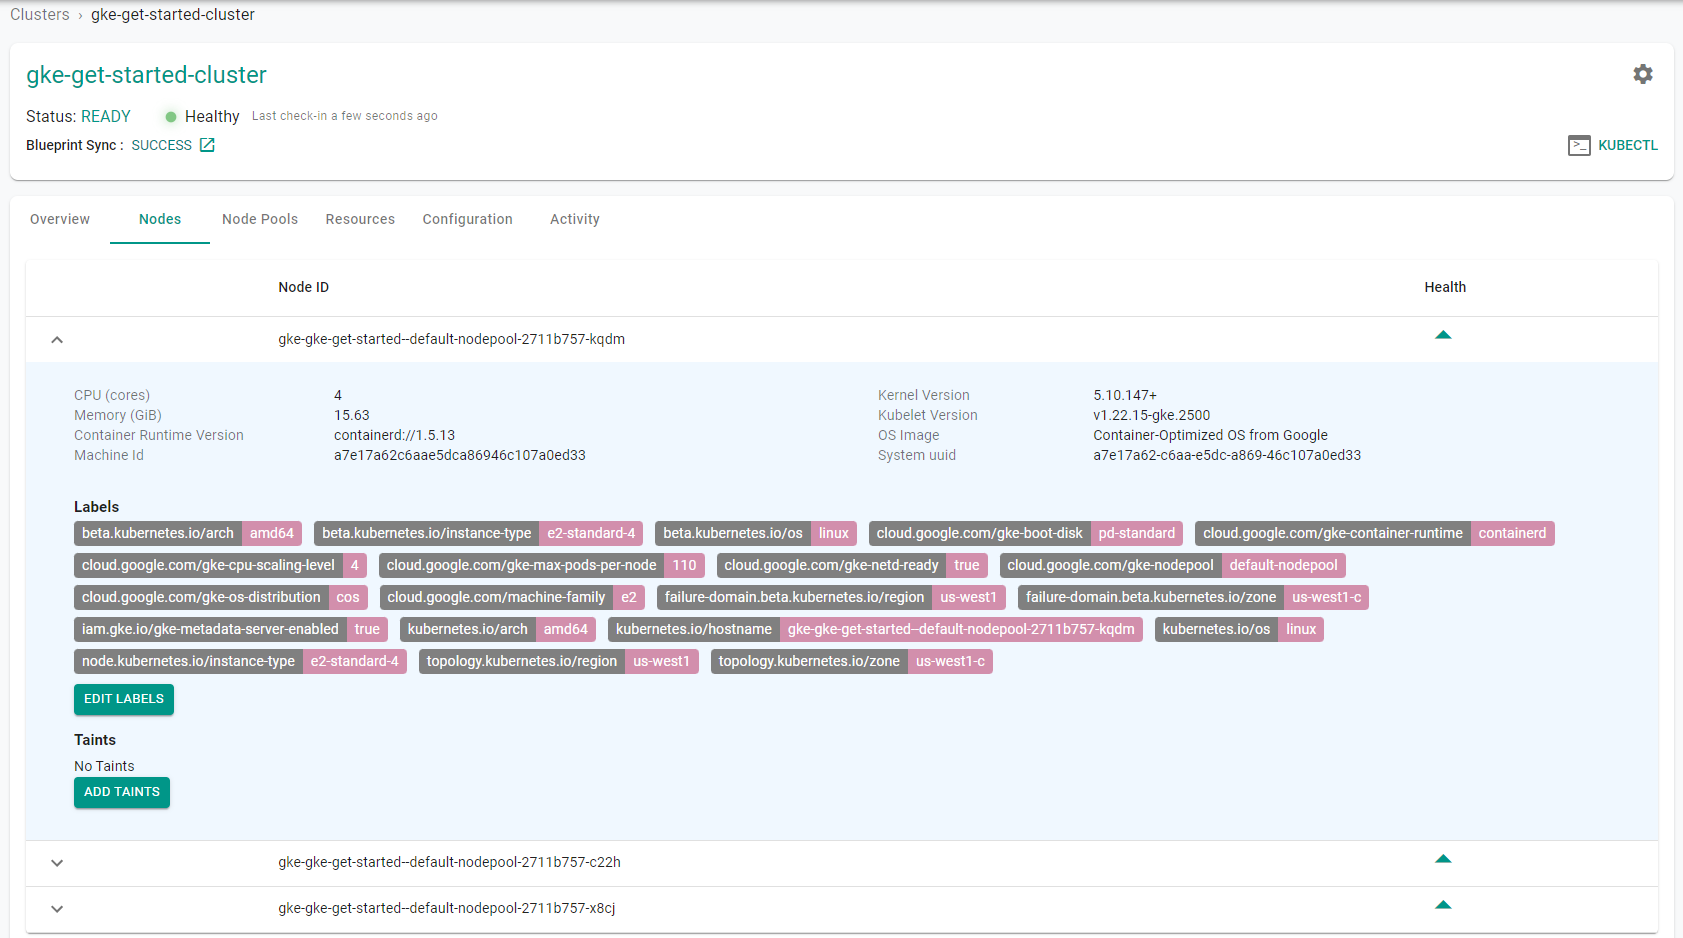
Step 5b: Node Dashboard
Click on the node tab and then select a node to view the node dashboard.
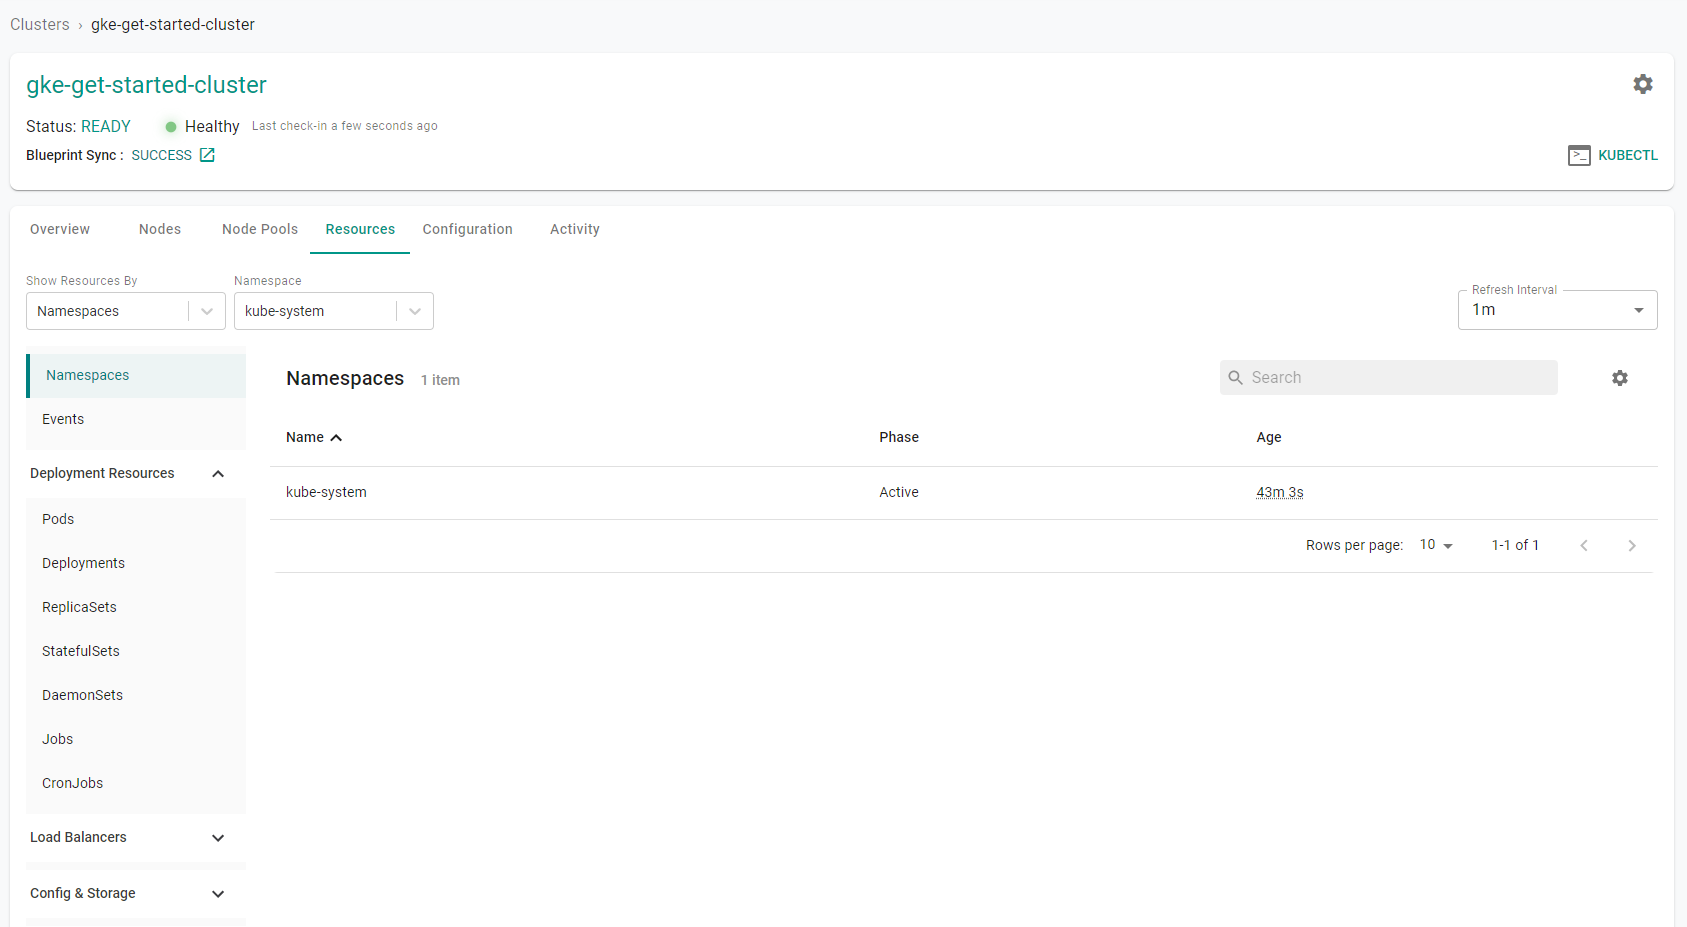
Step 5c: Kubernetes Resources
The dashboard also comes with an integrated Kubernetes dashboard.
- Click on "Resources" tab and you will be presented with all the Kubernetes resources organized using a number of filters.
Recap
Congratulations! At this point, you have
- Successfully configured and provisioned a GCP GKE cluster
- Used zero trust kubectl to securely access the GKE cluster's API server
- Used the integrated cluster, node and k8s dashboards to monitor and view details about the cluster