Part 3: Workload
What Will You Do
In this part of the self-paced exercise, you will deploy a "GPU workload" to your MKS cluster that has a GPU node.
Step 1: Namespace
In a typical production environment, administrators will have already created a "Kubernetes Namespace" for your workload. In this exercise, let us go ahead and create a namespace.
- Open Terminal (on macOS/Linux) or Command Prompt (Windows) and navigate to the folder where you forked the Git repository
- Navigate to the folder "
/getstarted/gpumks/workload" - Type the command
rctl create ns -f namespace.yaml
This step creates a namespace in your project. The controller can create a namespace on "multiple clusters" based on its placement policy.
rctl publish ns gputest
Verify
To verify that then namespace was successfully created on your MKS cluster
rctl get ns gputest
You should see results like the following. Note that the namespace was successfully created on your MKS cluster.
+---------+-------------+------------------------------+------------------+---------+--------+-------------+
| NAME    | TYPE        | CREATEDAT                    | DEPLOYEDCLUSTERS | ID      | LABELS | ANNOTATIONS |
+---------+-------------+------------------------------+------------------+---------+--------+-------------+
| gputest | RafayWizard | Thu Apr 27 21:17:34 UTC 2023 | demo-gpu-mks     | krwljpm | []     | []          |
+---------+-------------+------------------------------+------------------+---------+--------+-------------+
Step 2: Deploy Workload
The "gputest.yaml" file contains the declarative specification for our GPU Workload. Let us review it.
name: gputest
namespace: gputest
project: default
type: NativeYaml
clusters: demo-gpu-mks
payload: ./gpu-job.yaml
Note that the workload's name is "gputest" and it is of type "k8s YAML". The actual k8s YAML file is in the payload "gpu-job.yaml".
rctl create workload gputest.yaml
If there were no errors, you should see a message like below
Workload created successfully
Now, let us publish the newly created workload to the downstream clusters. The workload can be deployed to multiple clusters as per the configured "placement policy". In this case, you are deploying to a single MKS cluster with the name "demo-gpu-mks".
rctl publish workload gputest
Step 4: Verify
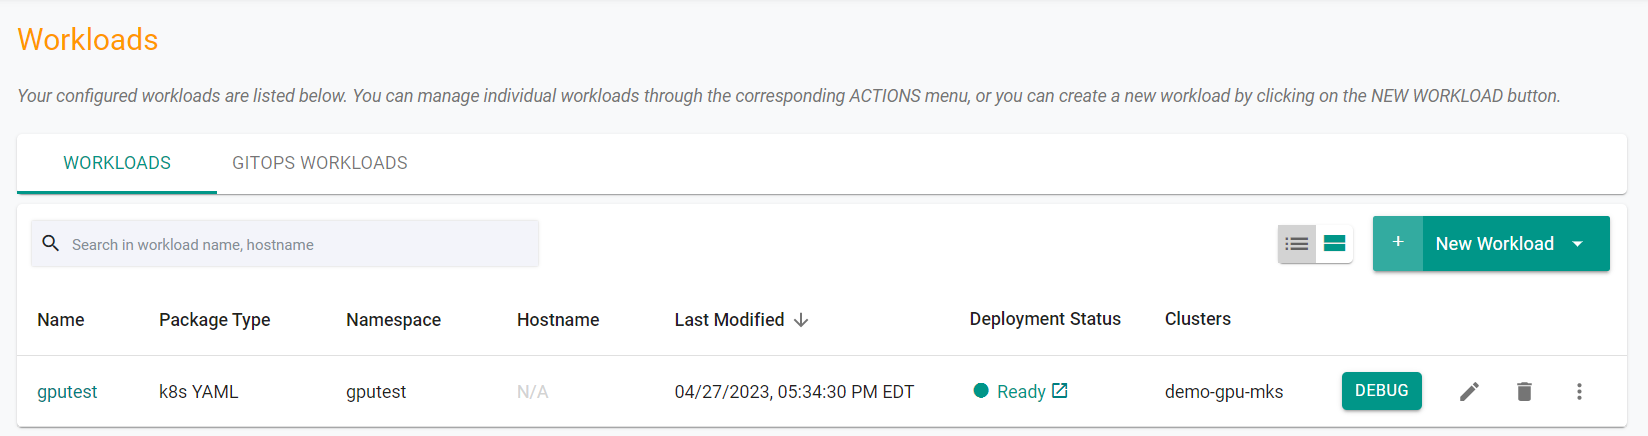
In the web console, click on Applications -> Workloads. You should see something like the following.
Step 5: GPU Dashboard
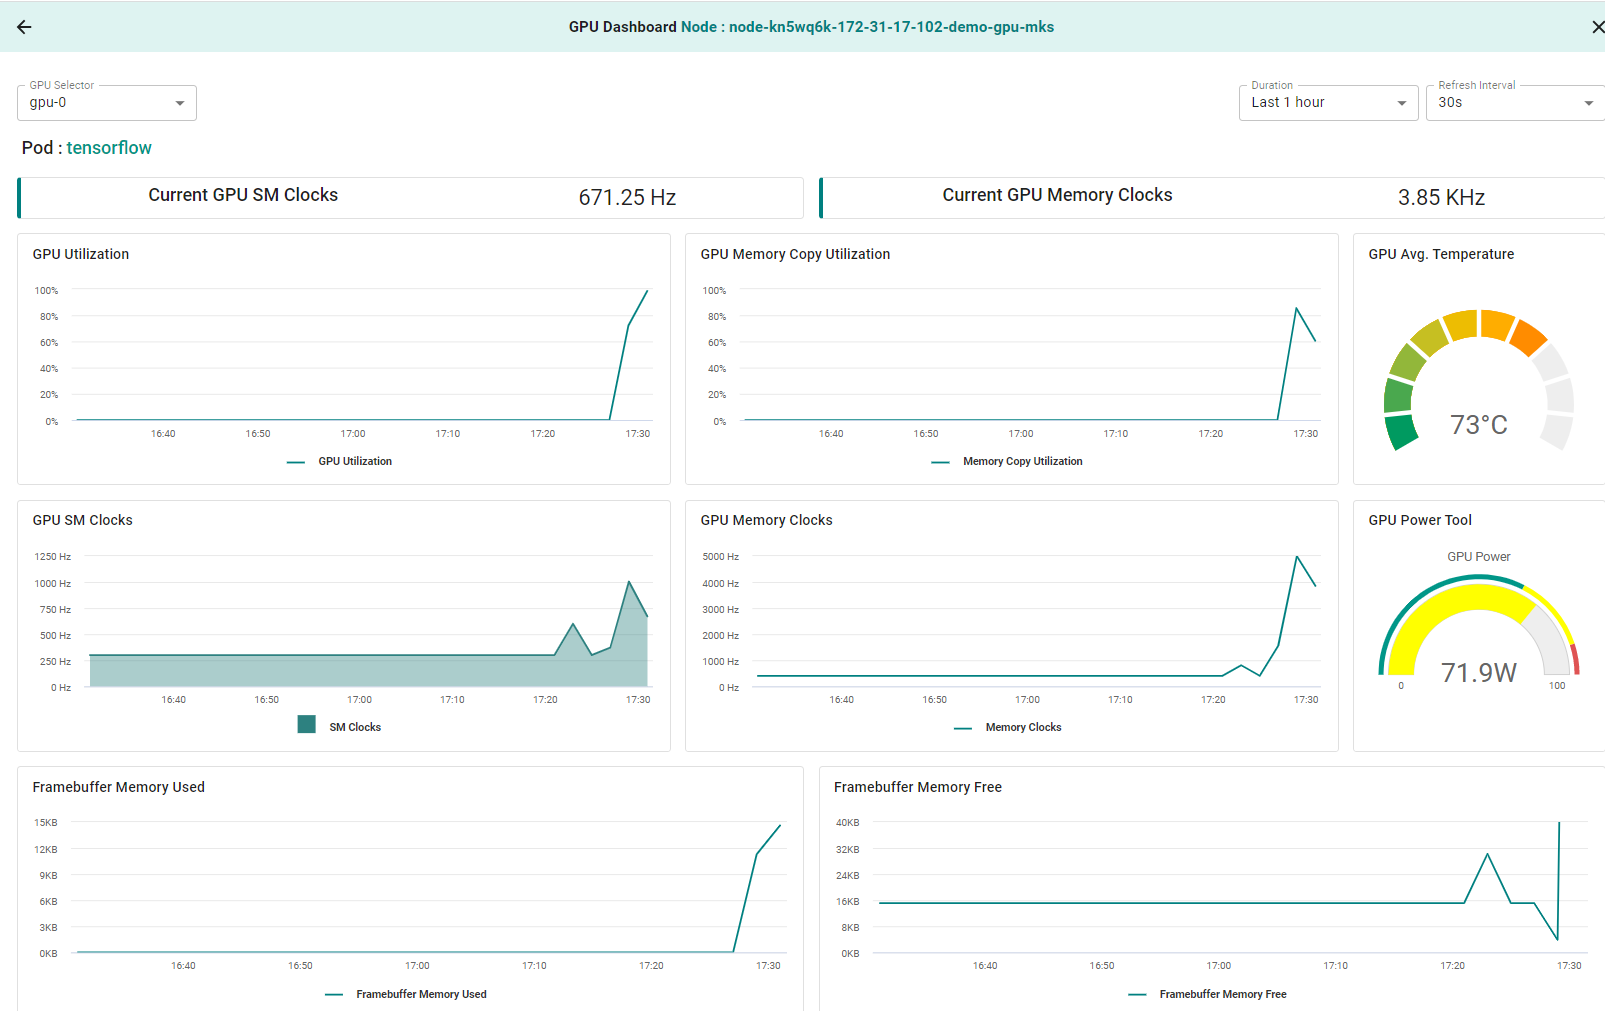
The GPU workload you deployed will consume the GPU attached to the MKS cluster. Administrators that wish to view GPU metrics have access to an "integrated GPU dashboard"
- Navigate to Infrastructure -> Clusters
- Click on GPU in the cluster card to open the GPU selector
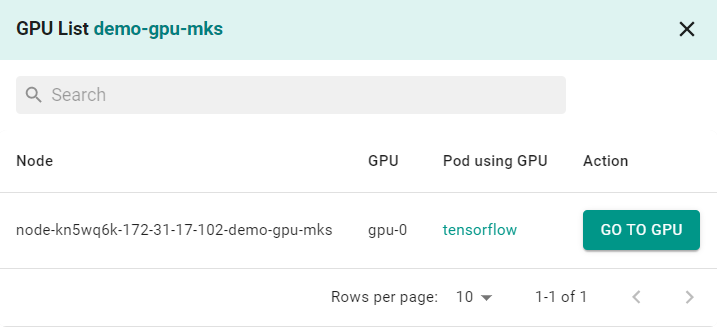
- Click Go to GPU to view its dashboard. You should see something like the following
Recap
Congratulations! At this point, you have successfuly
- Deployed a "GPU Workload" to the MKS Cluster and reviewed the integrated "GPU Dashboards"