Cluster Add-Ons
In this step, you will configure and package critical software add-ons into a Rafay cluster blueprint and deploy it to your Kubernetes cluster that you either provisioned or imported into your Rafay Org. The shared, multi-tenant host cluster will look like the following with all the add-ons configured.
| Software Add-On | Primary Purposes |
|---|---|
| Rafay Management Operator | Centralized Management, policy enforcement and zero trust Kubectl |
| Local Storage | Storage for compute instances |
| Ingress Nginx | Ingress Nginx Ingress Controller to expose web applications such as Jupyter notebooks |
| Nvidia GPU Operator | Software driver for Nvidia GPU hardware. We will use the GPU Simulator as an alternative if necessary |
| Rafay Monitoring | Centralized metrics and dashboards |
| Isolation | Rafay's Admission Controller for Kata providing microVM based isolation |
GPU Operator
The GPU Operator automates the deployment, configuration, and management of GPU drivers, runtime libraries, and monitoring components on GPU-enabled nodes. It simplifies GPU operations by ensuring that the necessary software stack (such as NVIDIA drivers, CUDA toolkit, and device plugins) is correctly set up within the cluster.
Depending on whether we have a real GPU or not, we will deploy this software add-on as part of a Rafay Cluster Blueprint. Follow the steps below for the instructions.
Real GPU
Important
Follow these steps ONLY if your cluster has real GPUs attached to it.
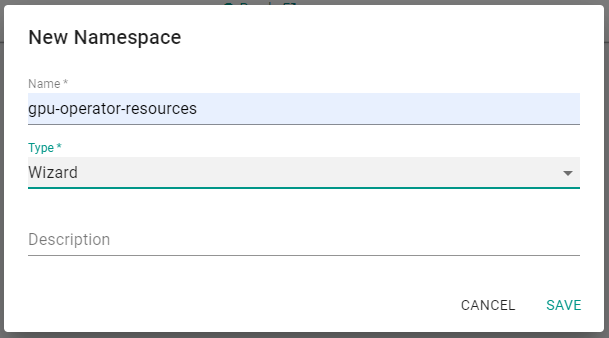
Step 1: Create Namespace for GPU Operator
In this step, you will create a namespace on the cluster for installing the Nvidia GPU Operator in.
- Under Infrastructure, select Namespaces and create a new namespace with name
gpu-operator-resources.
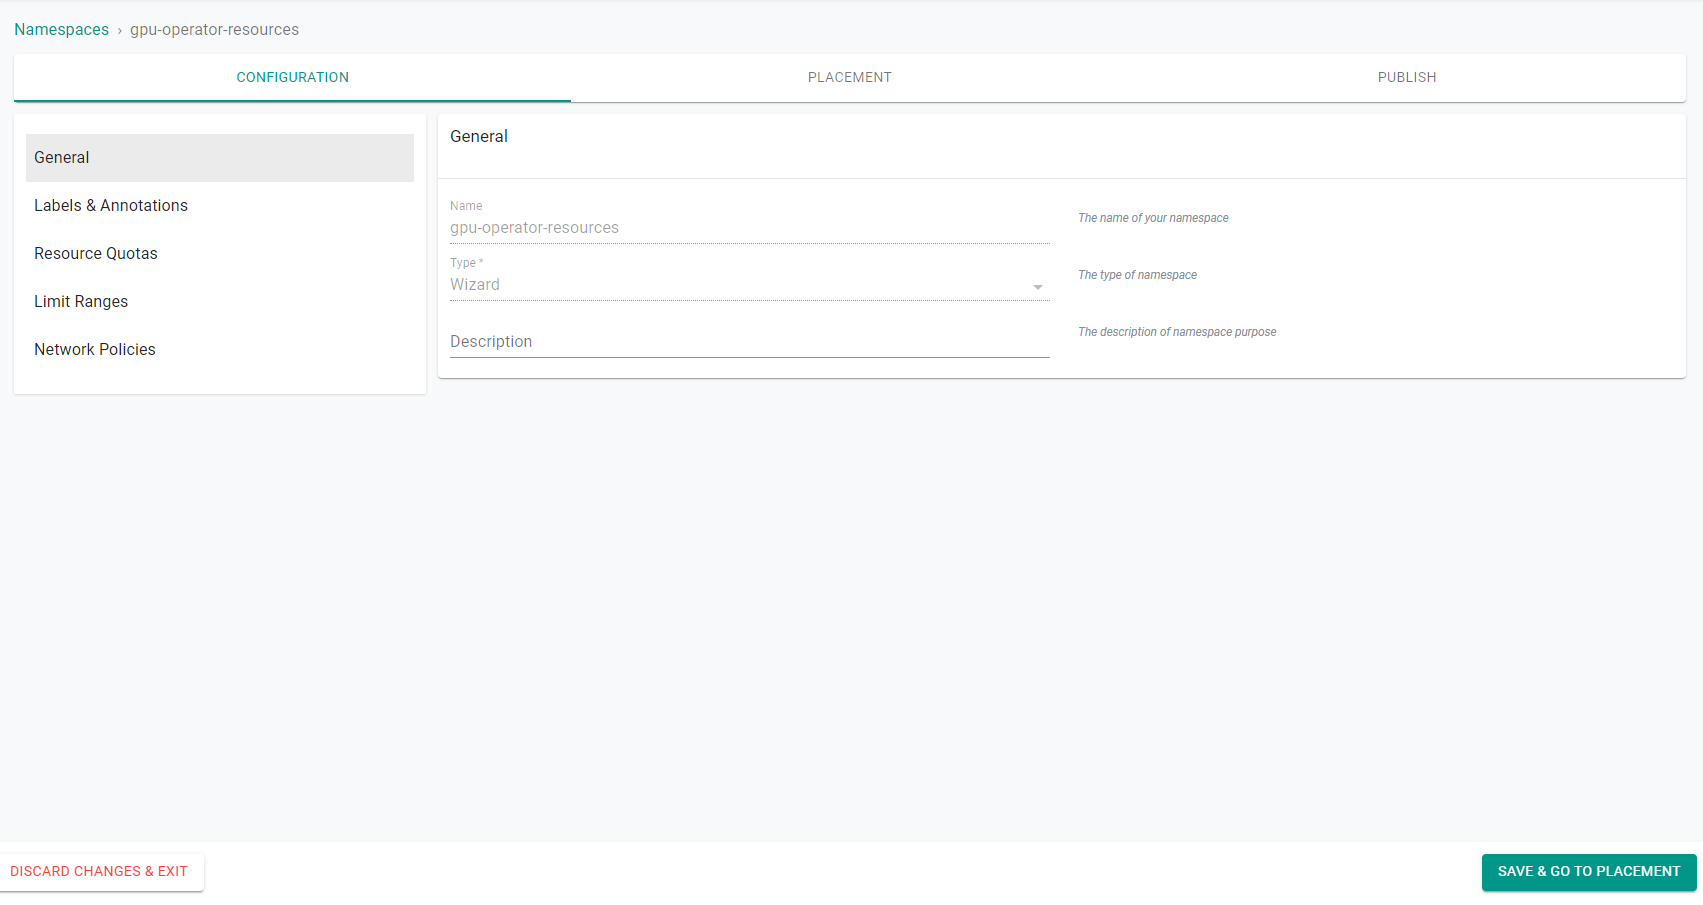
- Click Save and go to placement.
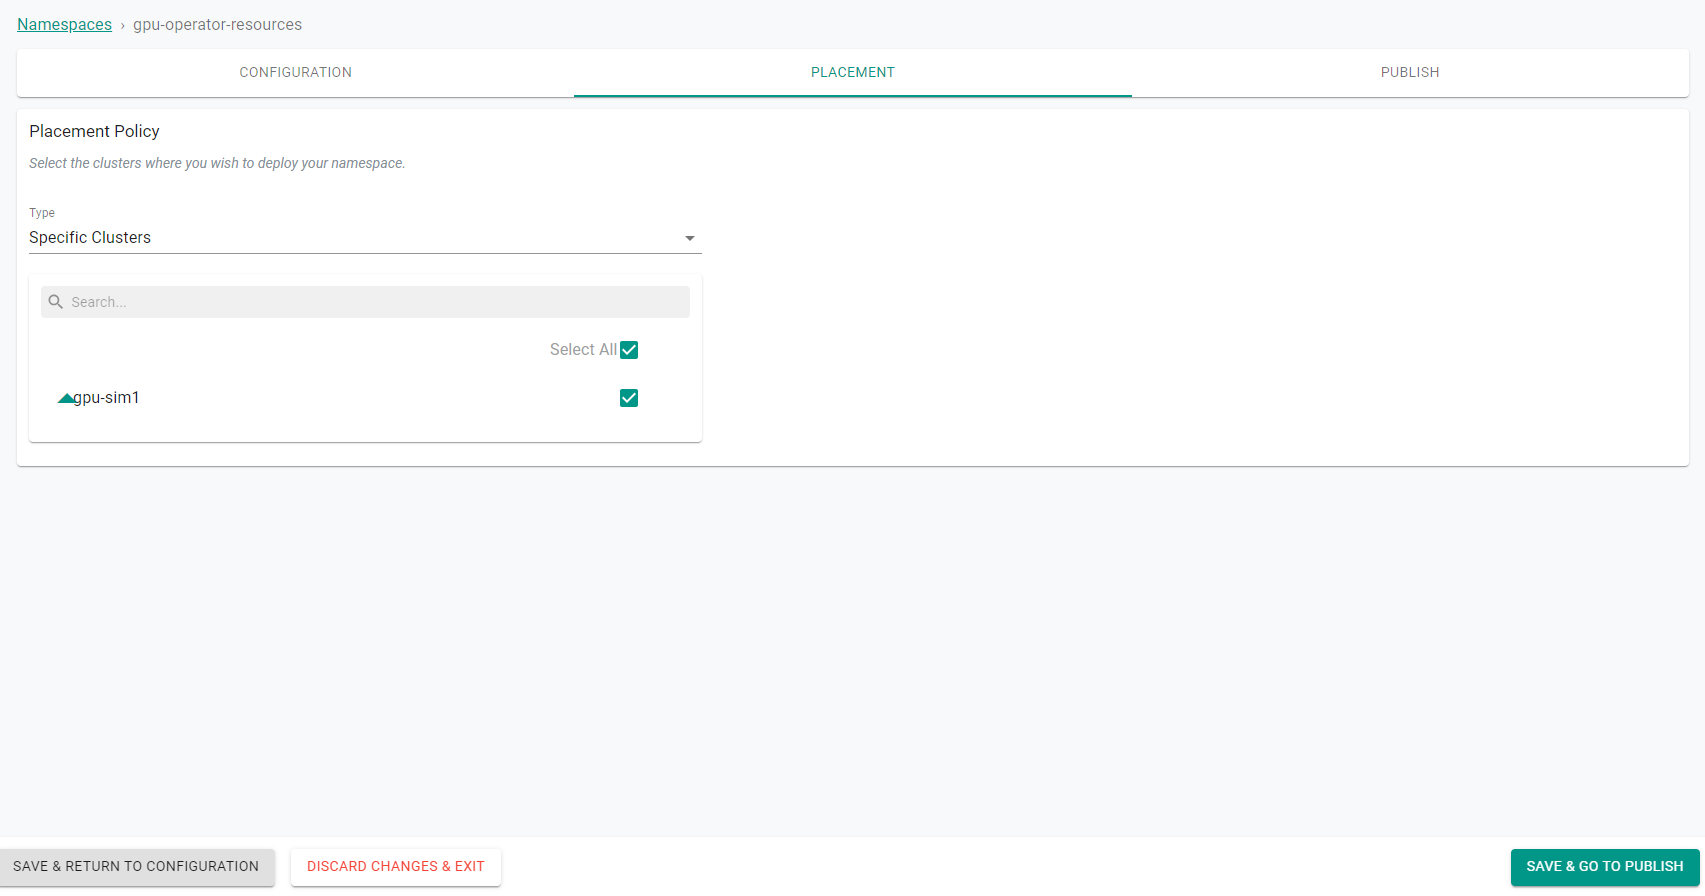
- Select the target cluster from the list of available clusters and click Save and go to publish.
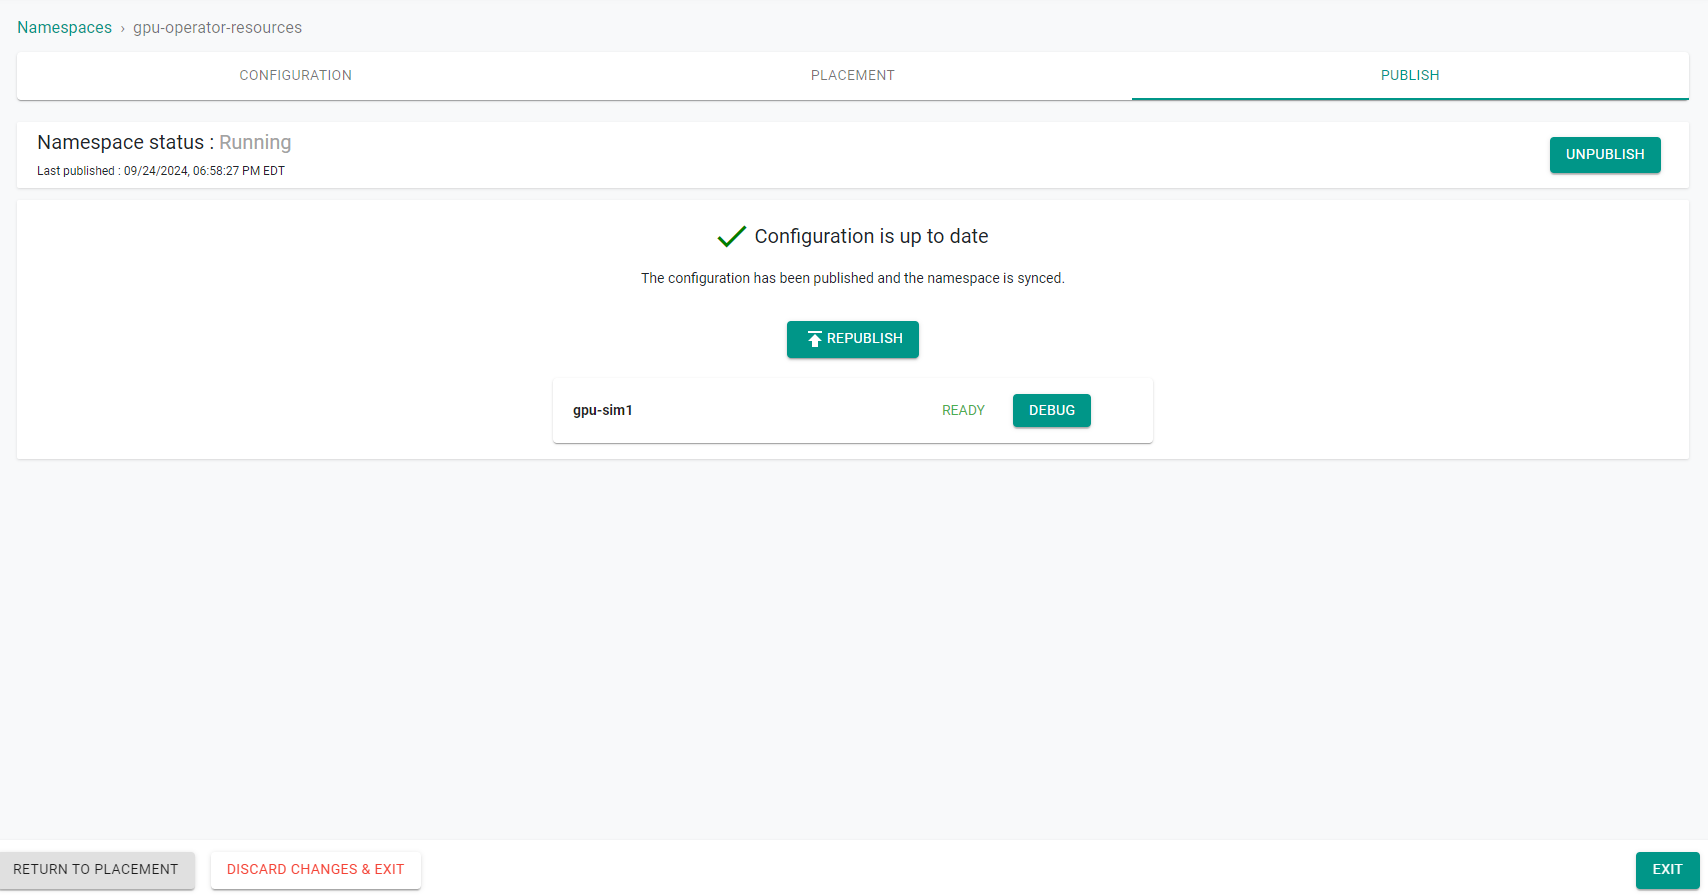
- Publish the namespace and make sure that it gets published successfully in the target cluster before moving to the next step.
Step 2: Create Nvidia GPU Operator Add-on
In this step, you will create an add-on from the system catalog for the GPU Operator.
- Navigate to Infrastructure -> Add-Ons
- Click New Add-On -> Create New Add-On from Catalog
- Search for gpu-operator and select the card
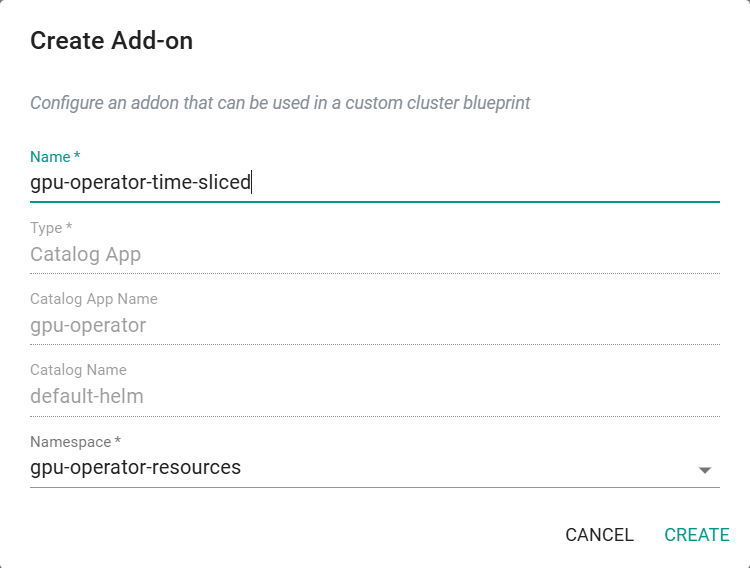
- Click Create Add-On
- Enter a name for the add-on and select the previously created namespace
- Click Create
Info
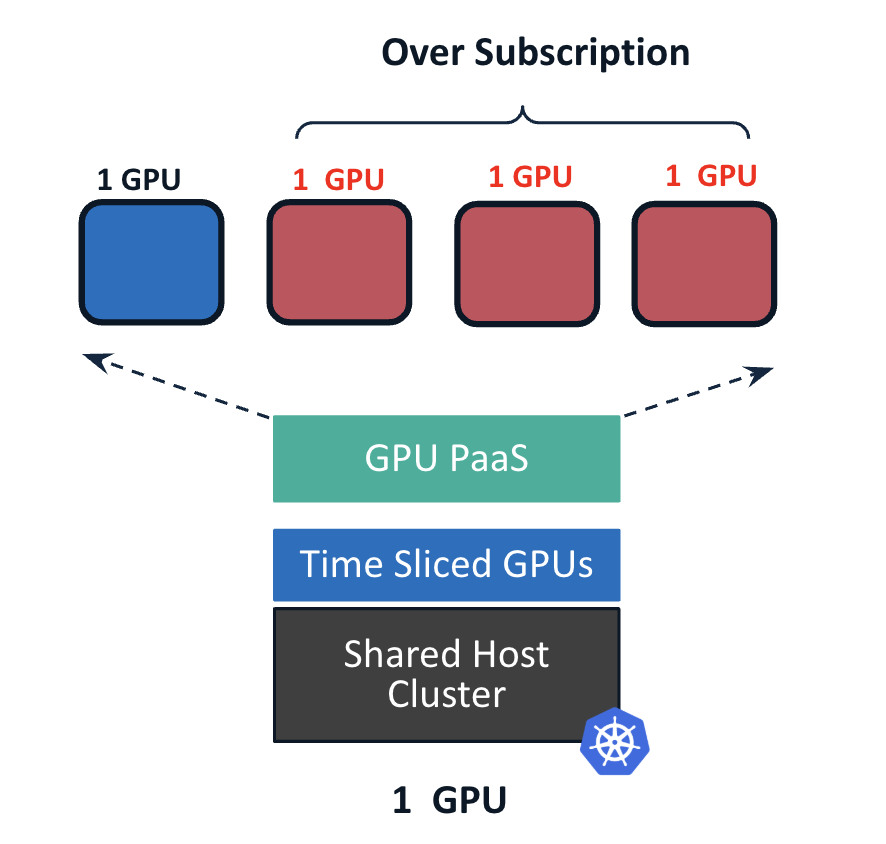
Since we have only a single GPU and we want to try allocating it to multiple users, we will oversubscribe the GPU using Time Slicing. As you can see from the YAML spec below, the single GPU will show up as 4 GPUs in our cluster.
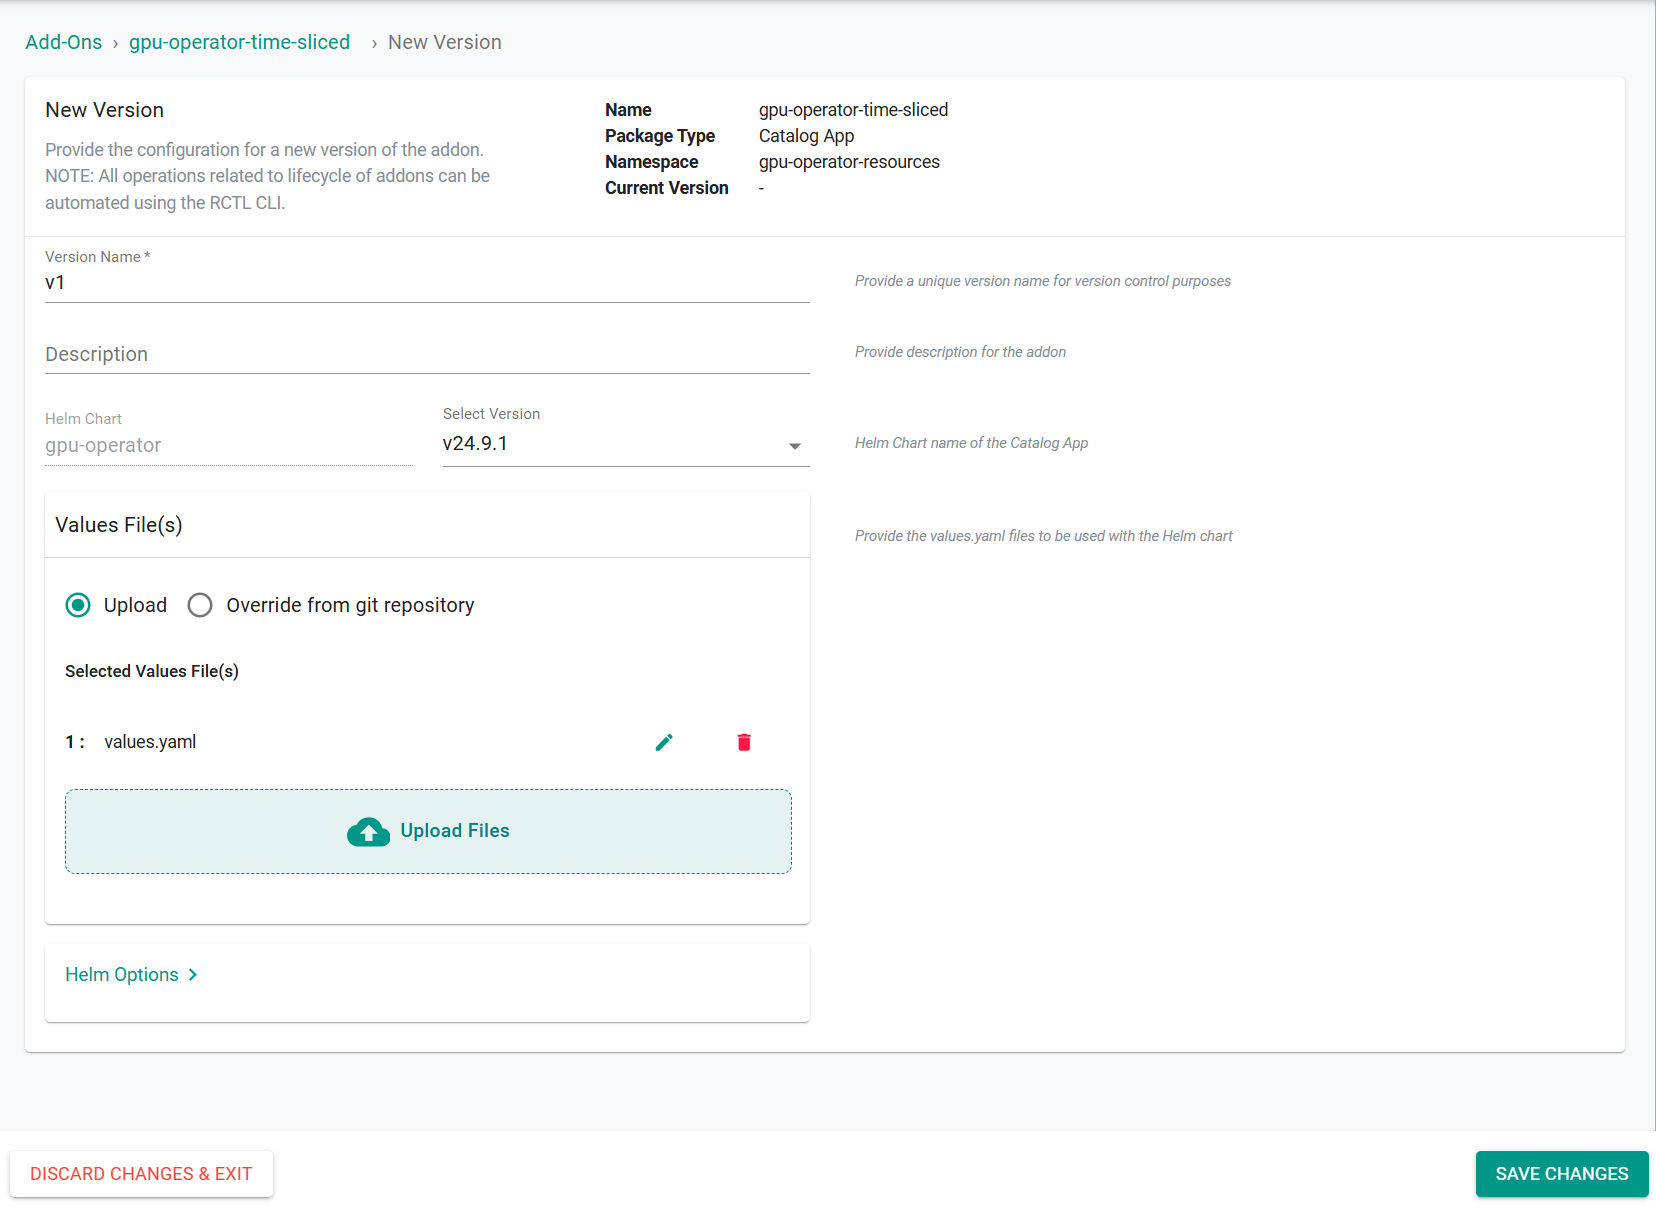
- Enter a version name
- Create a YAML file named
values.yamlwith the following content:
---
devicePlugin:
  config:
    create: true
    name: "time-slice-config"
    default: "time-slice-4"
    data:
      time-slice-4: |-
        version: v1
        flags:
          migStrategy: none
        sharing:
          timeSlicing:
            renameByDefault: true
            failRequestsGreaterThanOne: true
            resources:
            - name: nvidia.com/gpu
              replicas: 4
- Upload the
values.yamlin the add-on - Click Save Changes
Step 3: Create Custom Blueprint
In this step, you will create a custom cluster blueprint which contains the GPU Operator add-on.
- Navigate to Infrastructure -> Blueprints
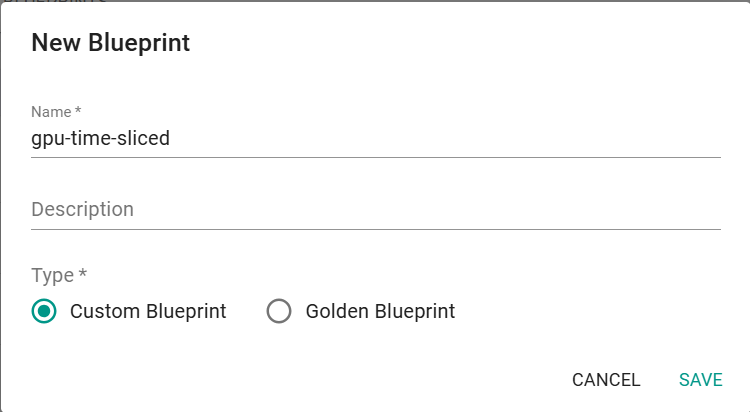
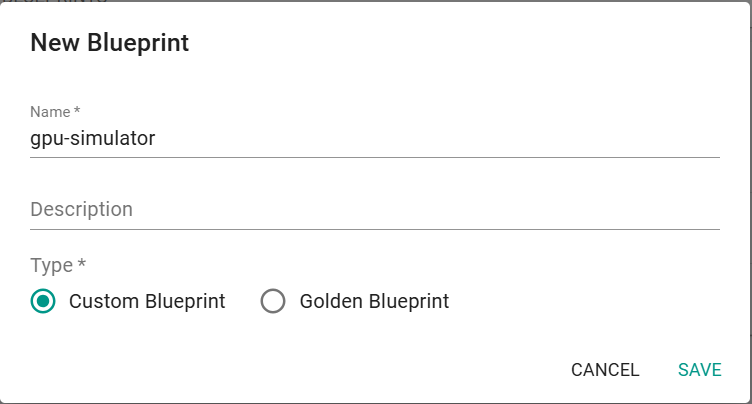
- Click New Blueprint
- Enter a name for the blueprint
- Click Save
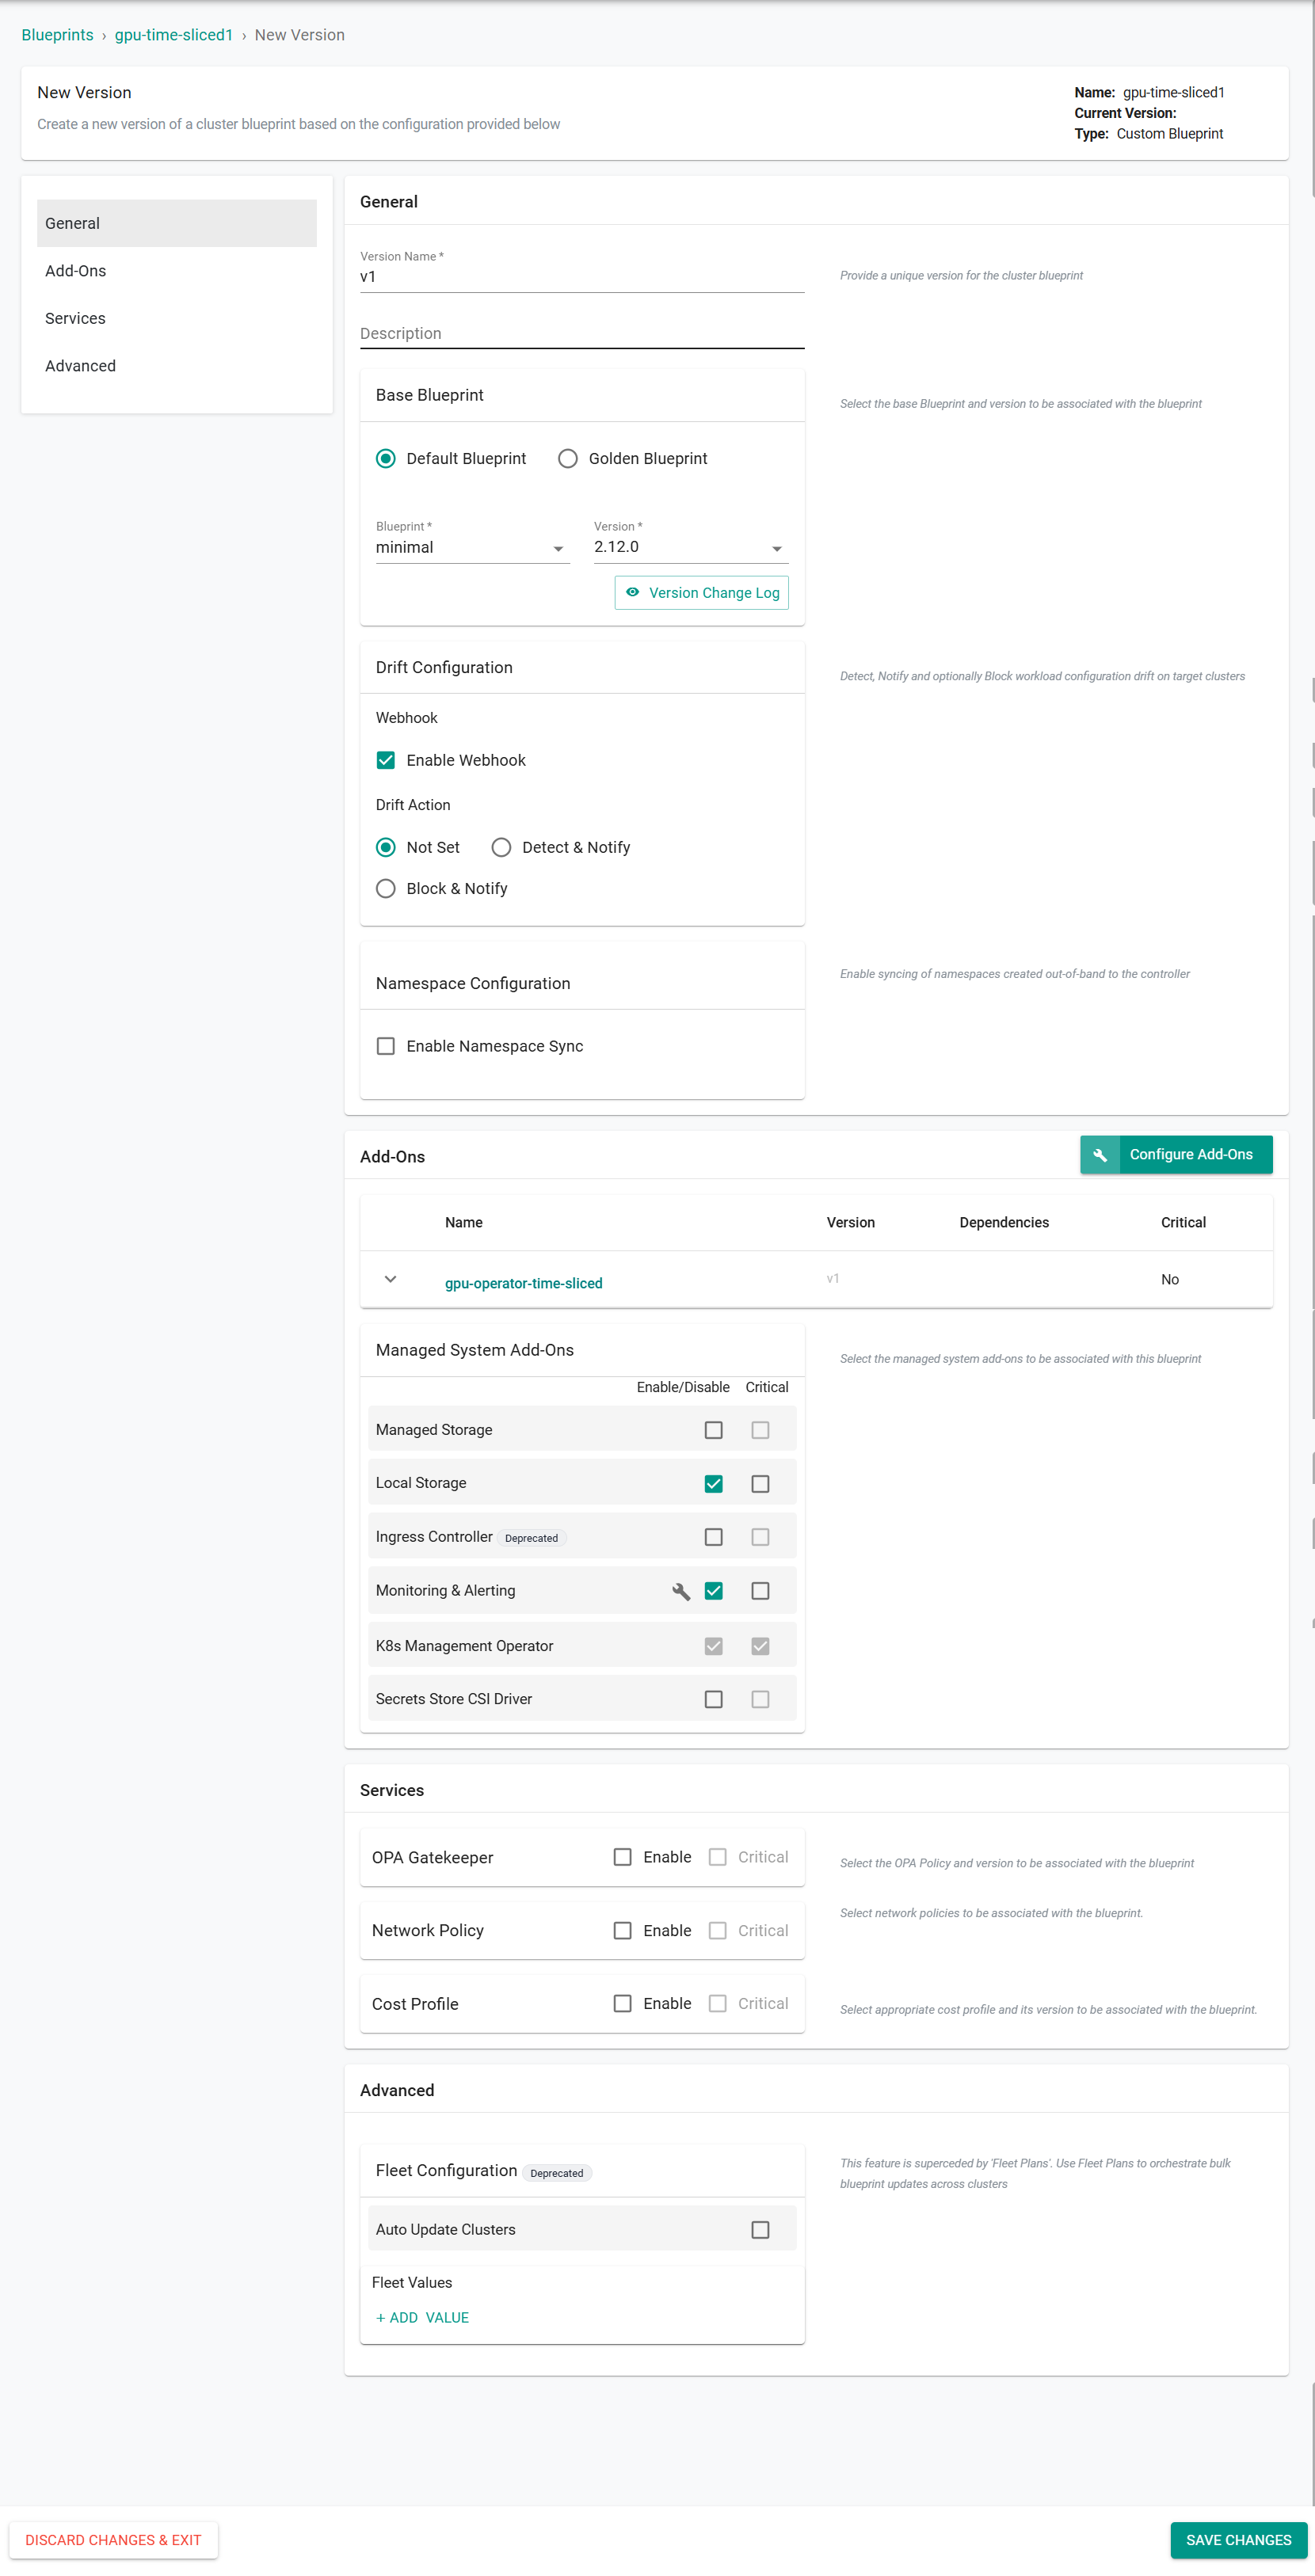
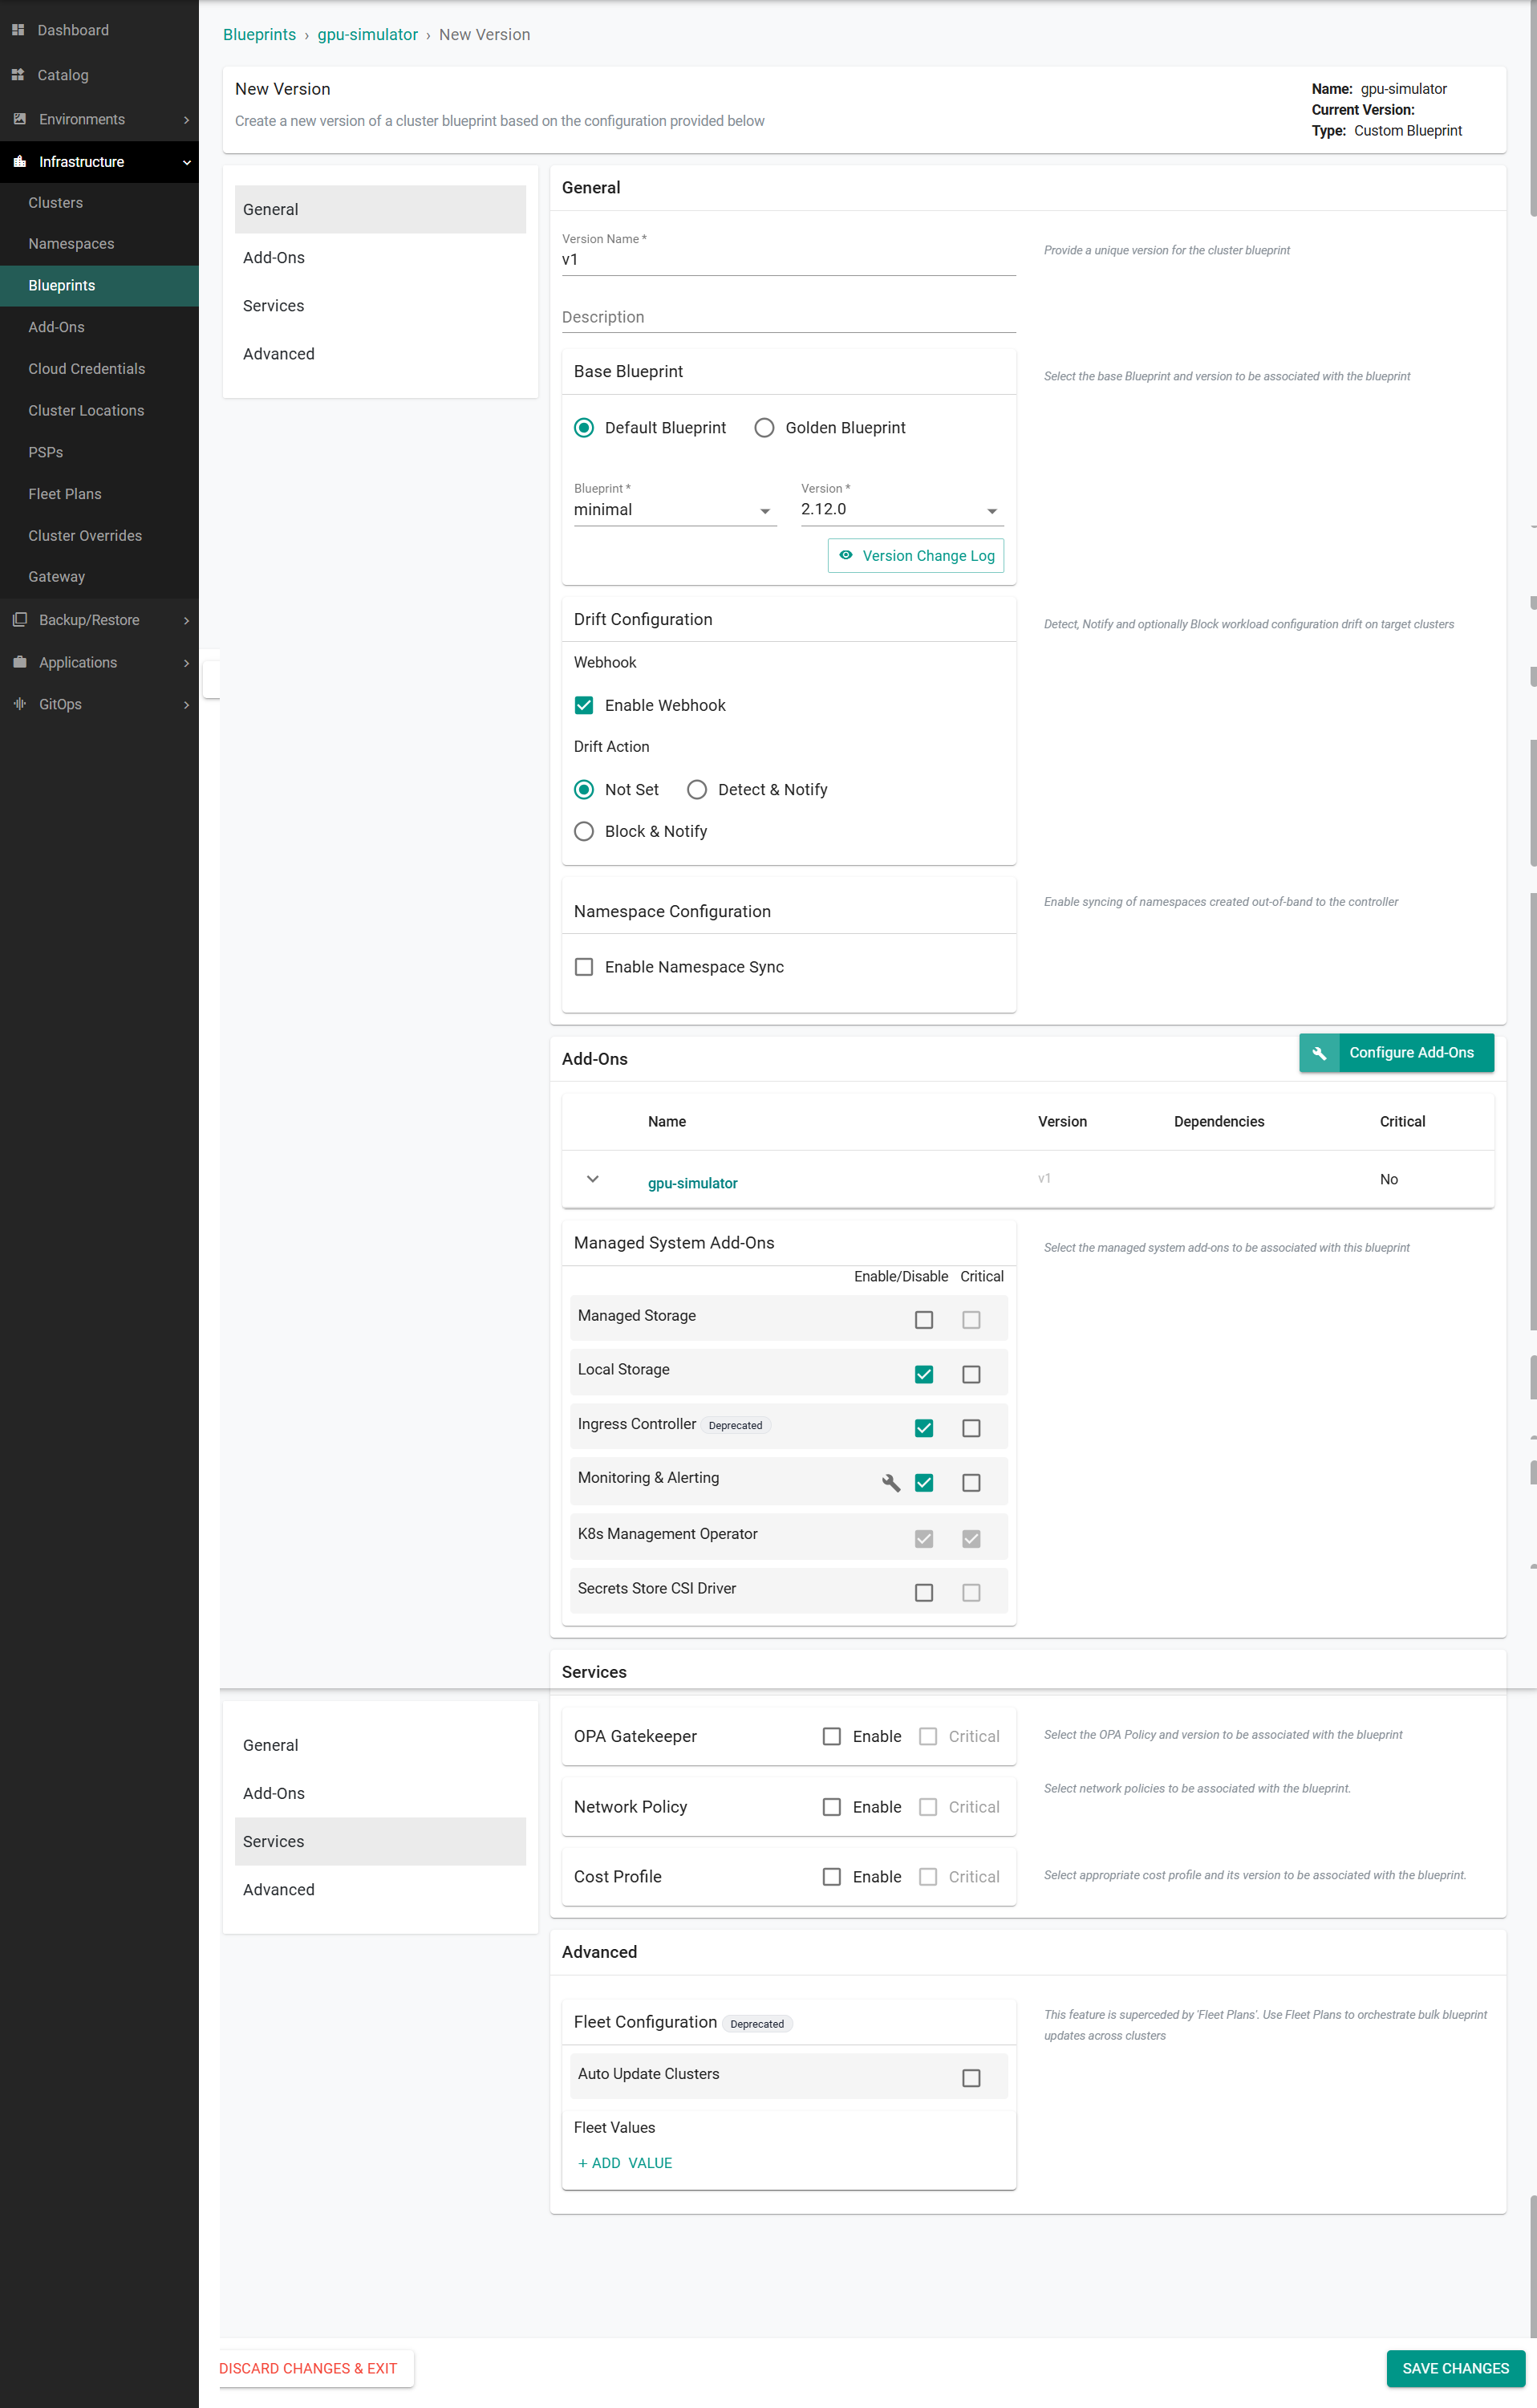
- Enter a version name
- Select Minimal for the default blueprint
- Click Configure Add-Ons
- Add the previously created add-on
- Click Save Changes
- Enable Local Storage and Monitoring & Alerting under Managed System Add-ons
- Click Save Changes
Step 4: Apply Blueprint
In this step, you will apply the blueprint to the cluster.
- Navigate to Infrastructure -> Clusters
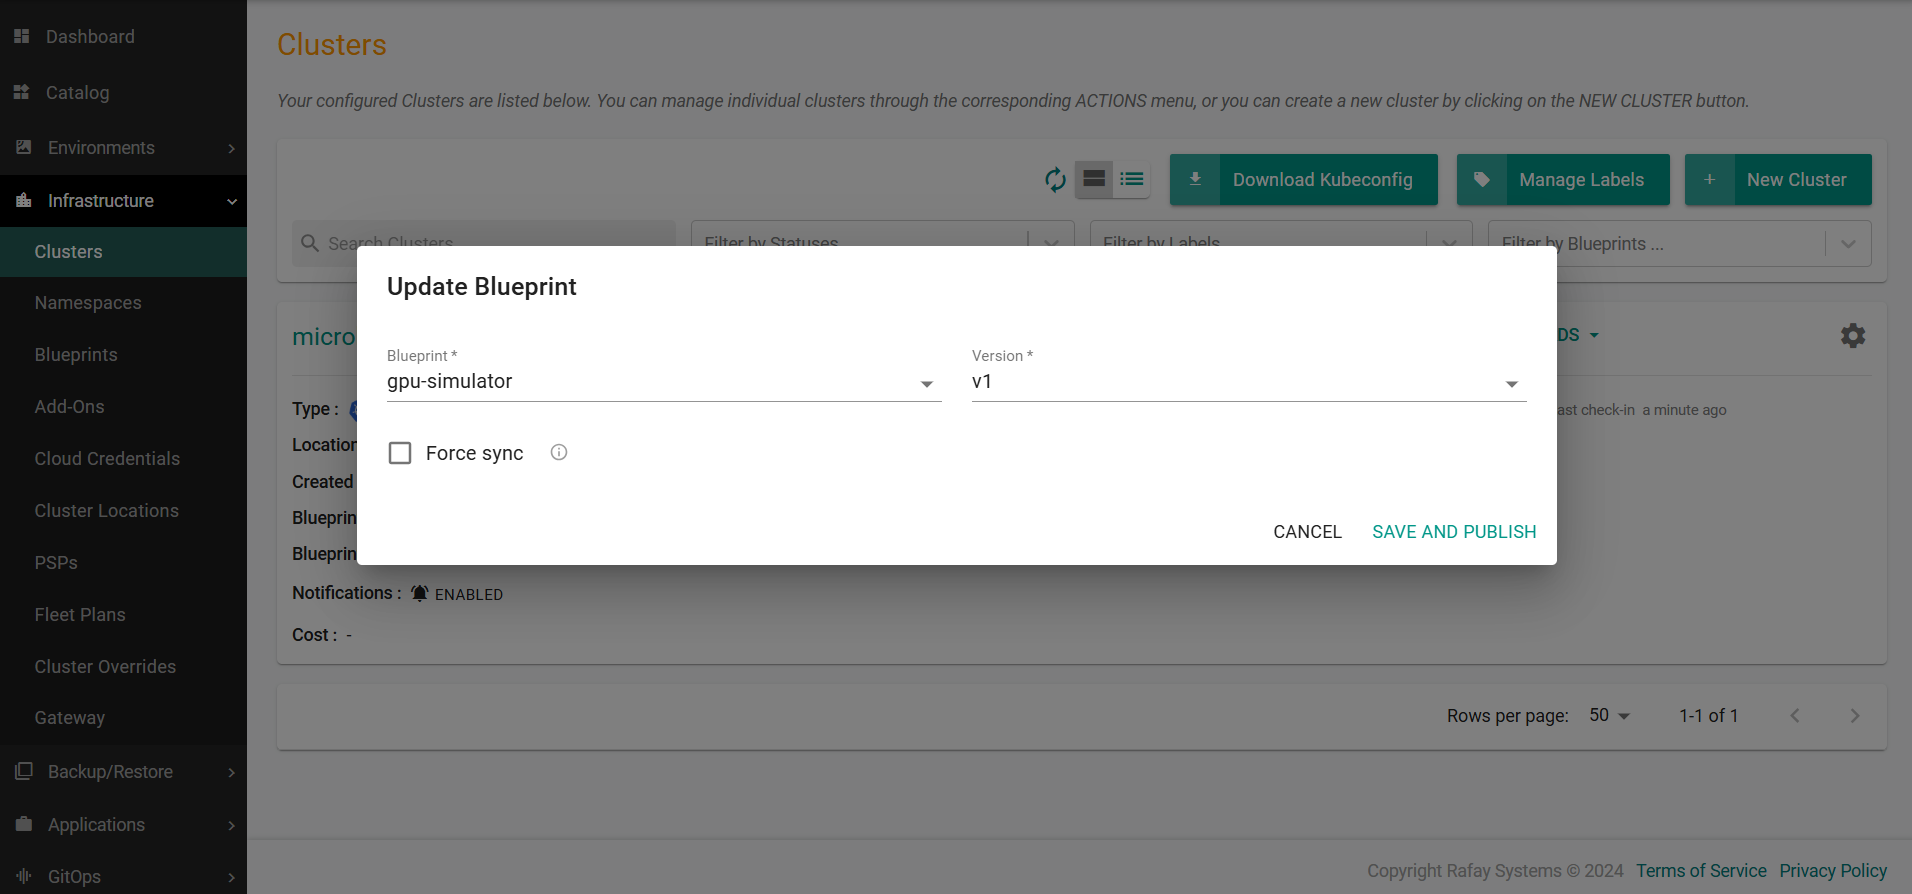
- Click on the gear icon on the cluster card and select Update Blueprint
- Select the previously created blueprint and click Save and Publish
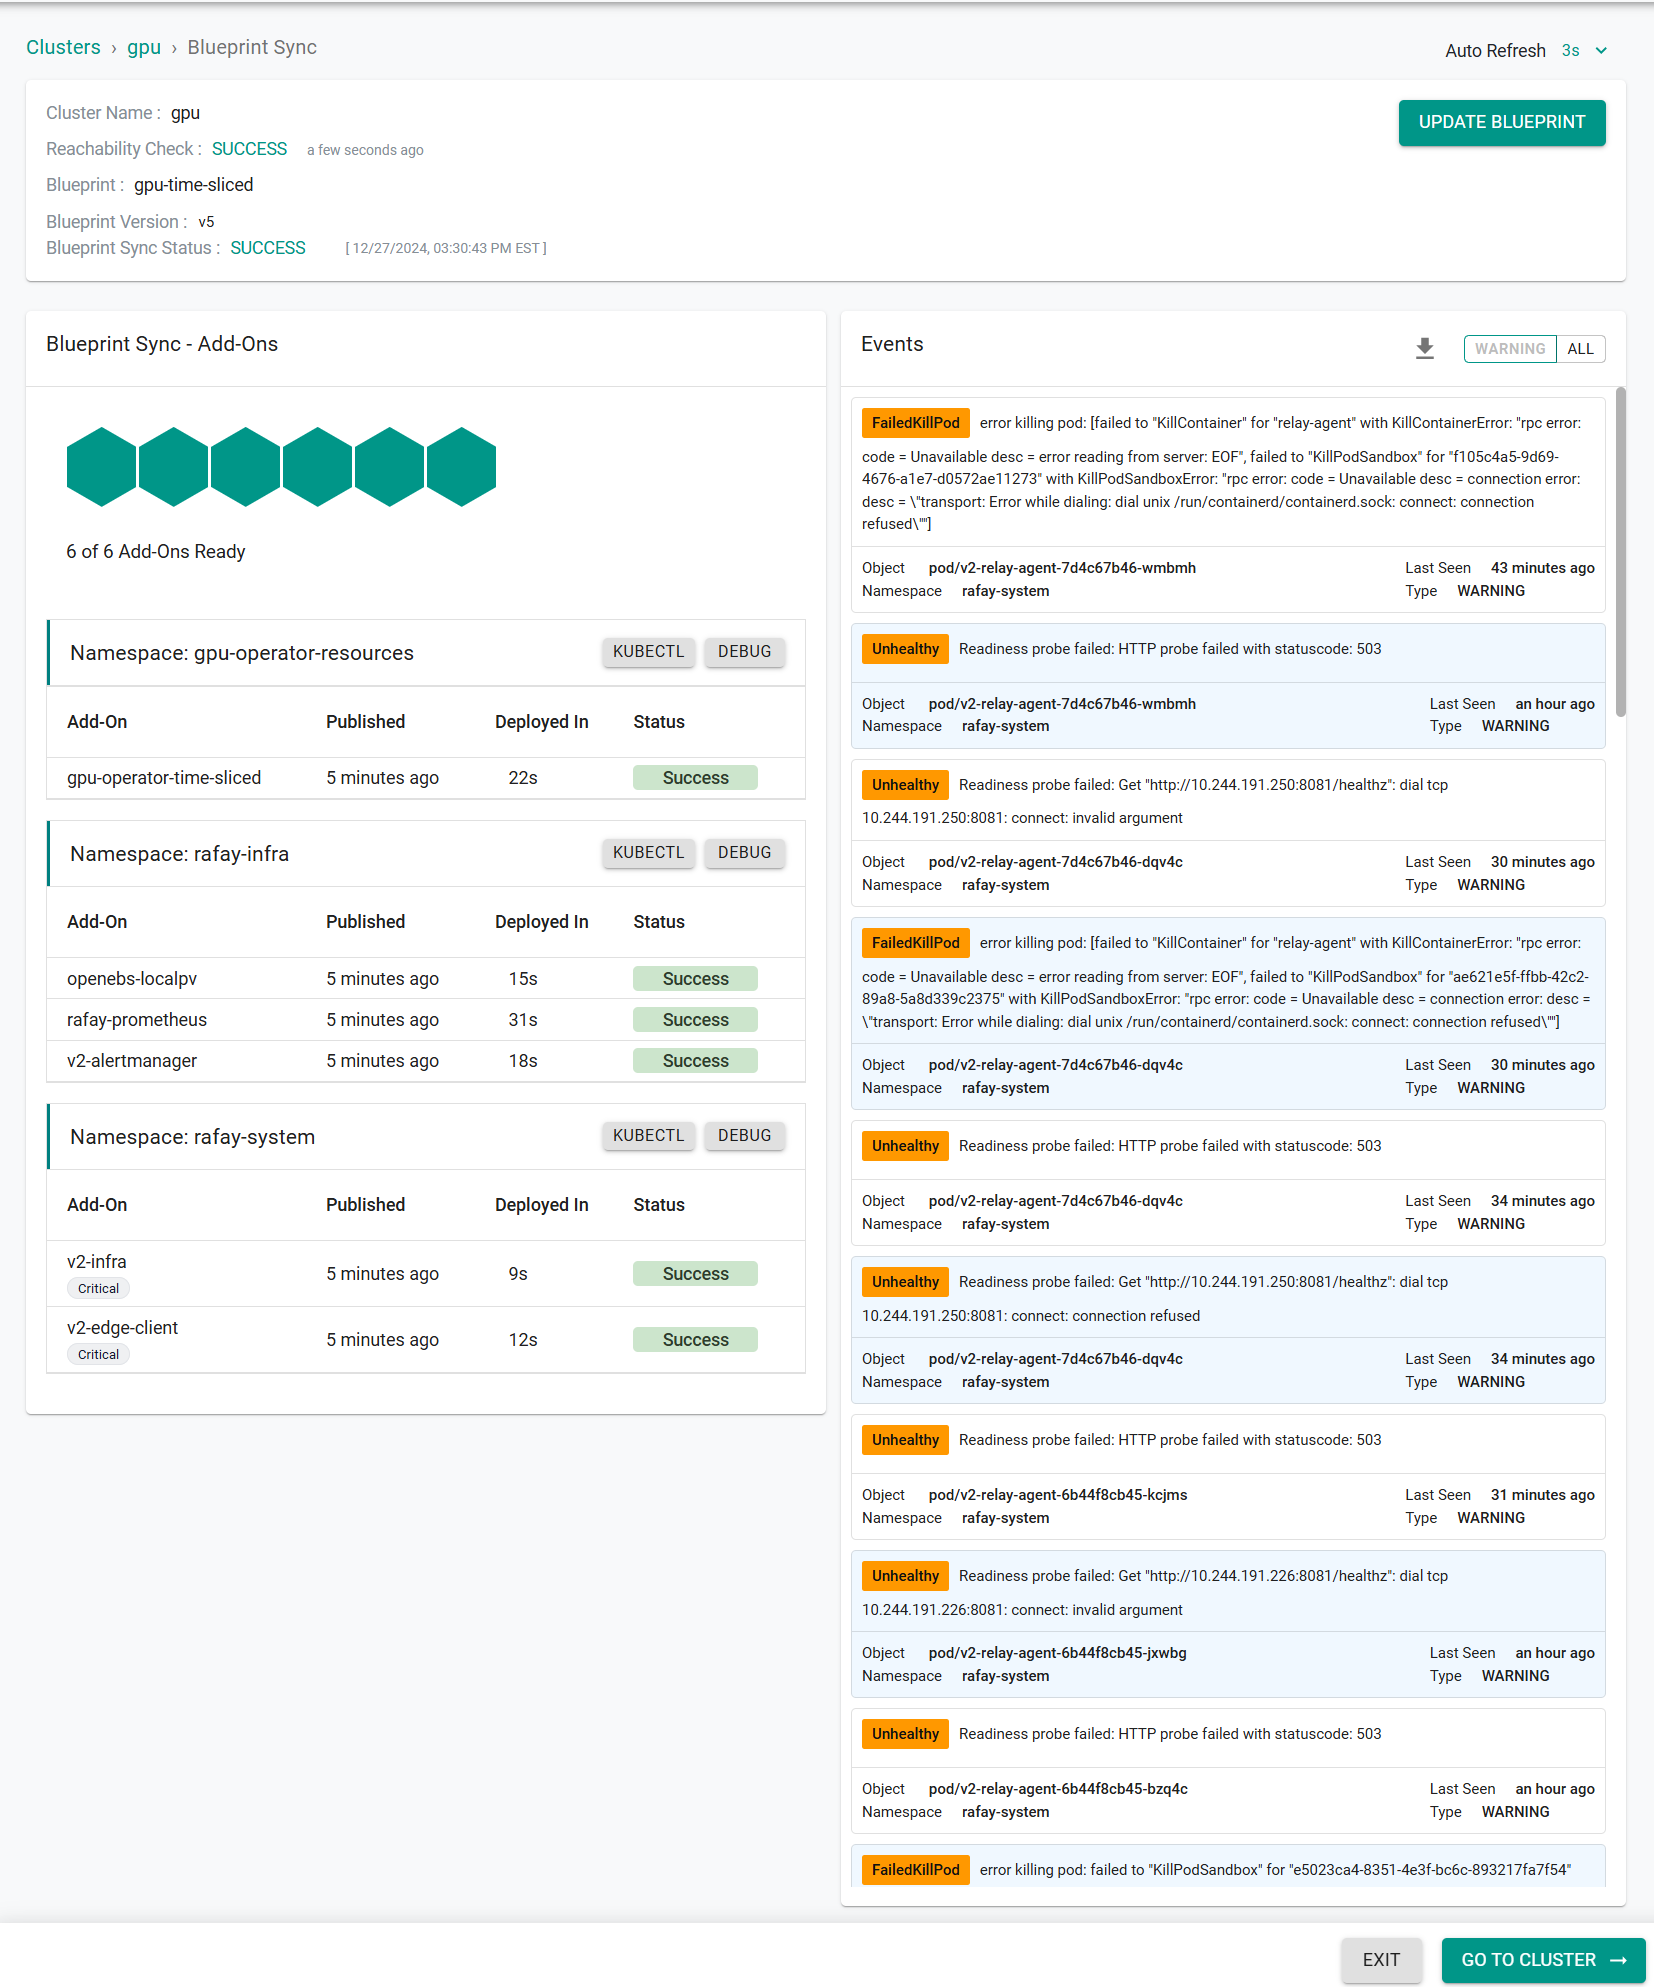
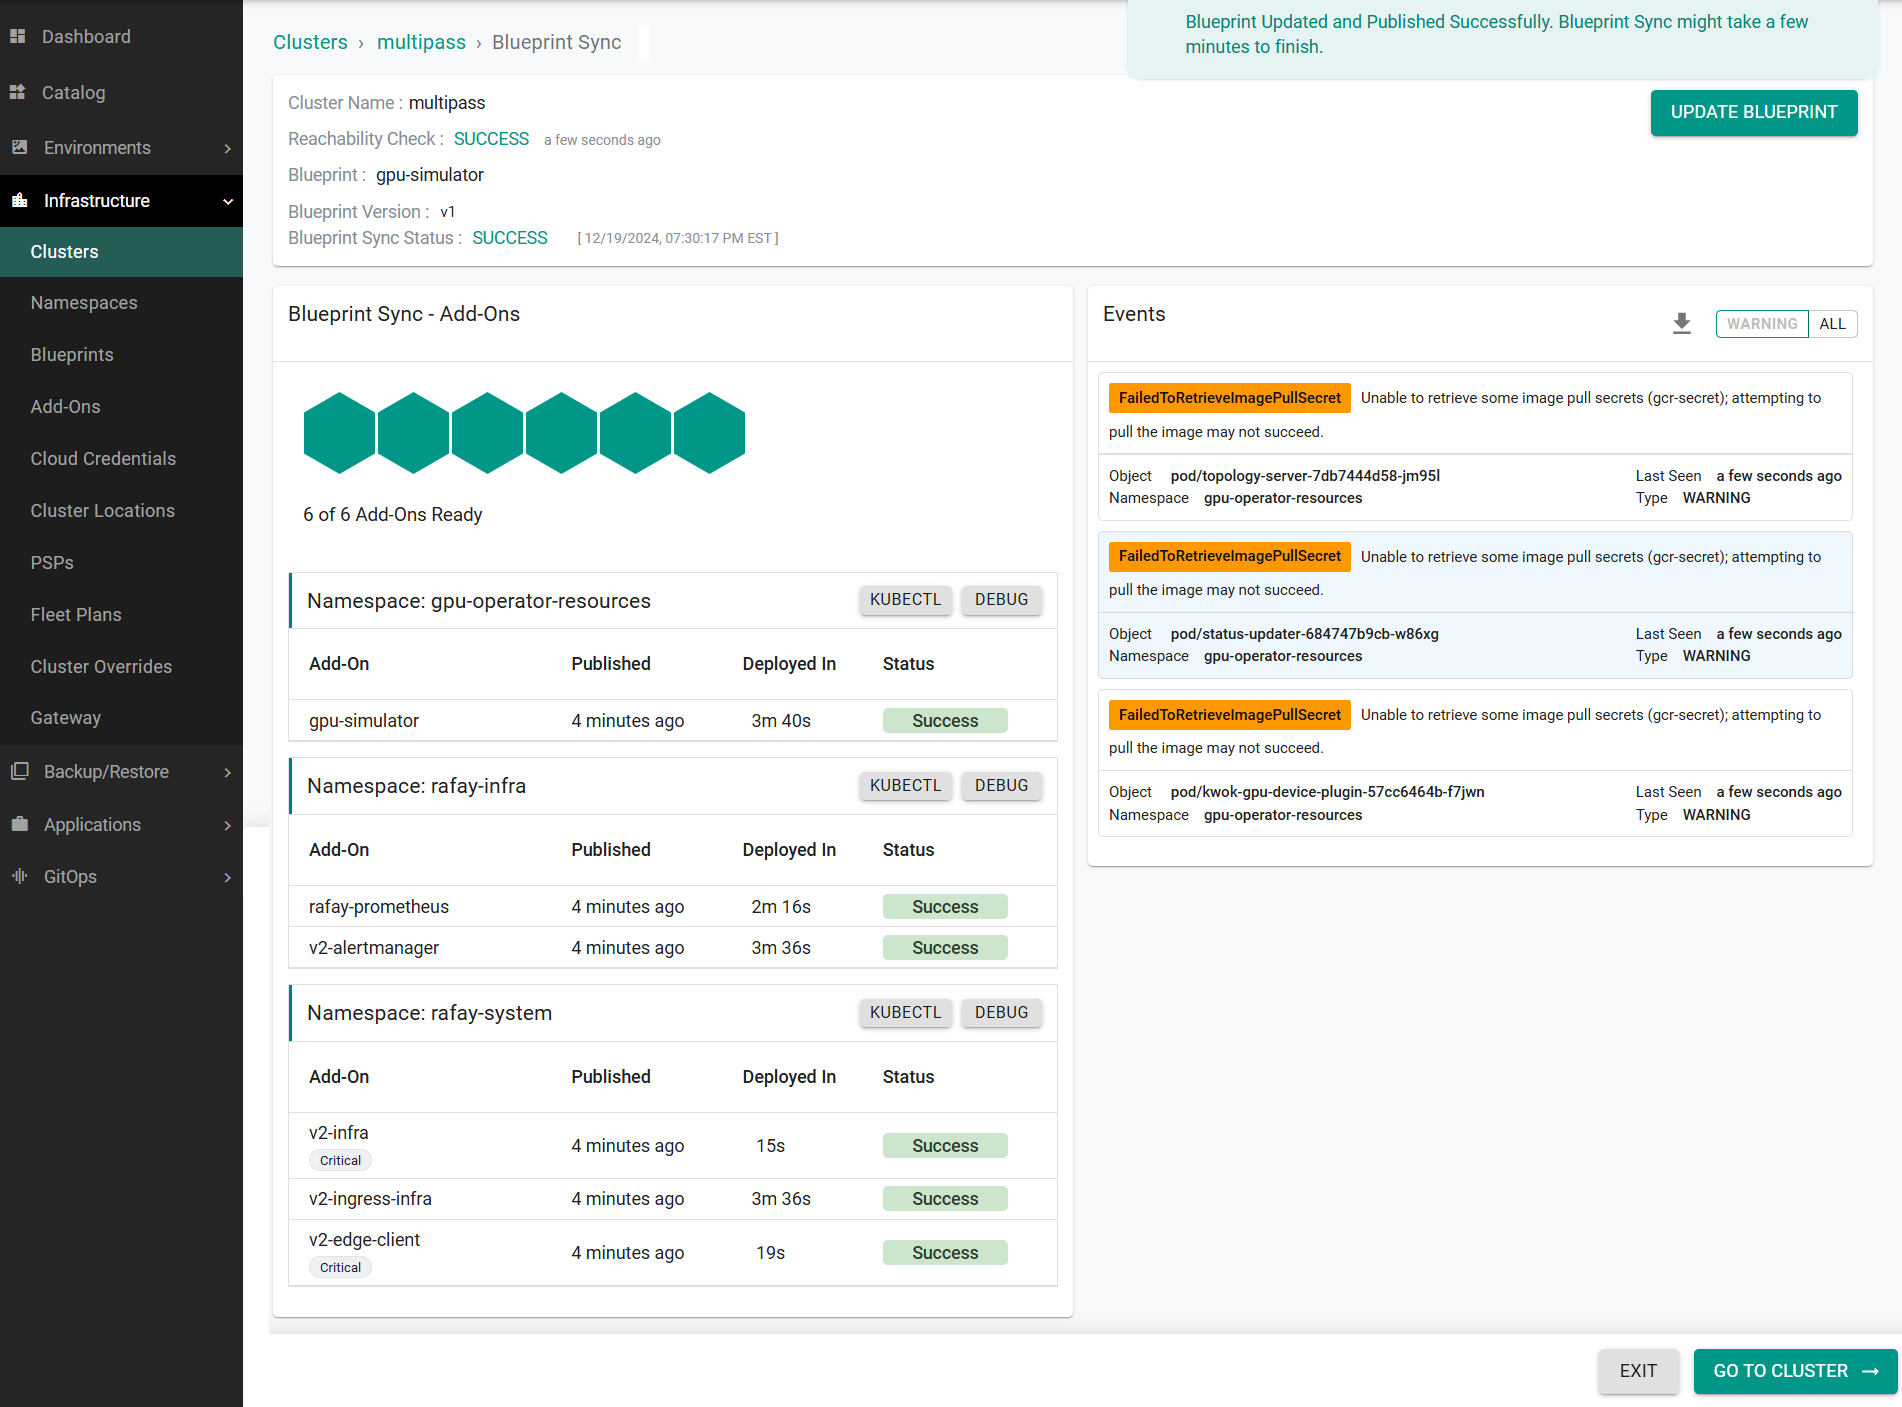
After a few minutes, the blueprint will be applied to the cluster.
By navigating to the cluster card, you will see the GPUs detected by the GPU Operator add-on.
Note
Notice that the cluster is reporting 4 GPUs although we have only one real GPU. We can now allocate these dynamically to end users when they request compute instances.
GPU Simulator
Important
Follow these steps ONLY if your cluster does not have real GPUs.
Step 1: Create Namespace for GPU Simulator
In this step, you will create a namespace on the cluster for installing the GPU Simulator in.
- Under Infrastructure, select Namespaces and create a new namespace with the following name
gpu-operator-resources
- Click Save and go to placement.
- Select the target cluster from the list of available clusters and click Save and go to publish.
- Publish the namespace and make sure that it gets published successfully in the target cluster before moving to the next step.
Step 2: Create GPU Simulator Add-on
In this step, you will create an add-on from the system catalog for the GPU simulator and configure it to present a large number of GPUs.
- Navigate to Infrastructure -> Add-Ons
- Click New Add-On -> Create New Add-On from Catalog
- Search for fake-gpu-operator and select the card
- Click Create Add-On
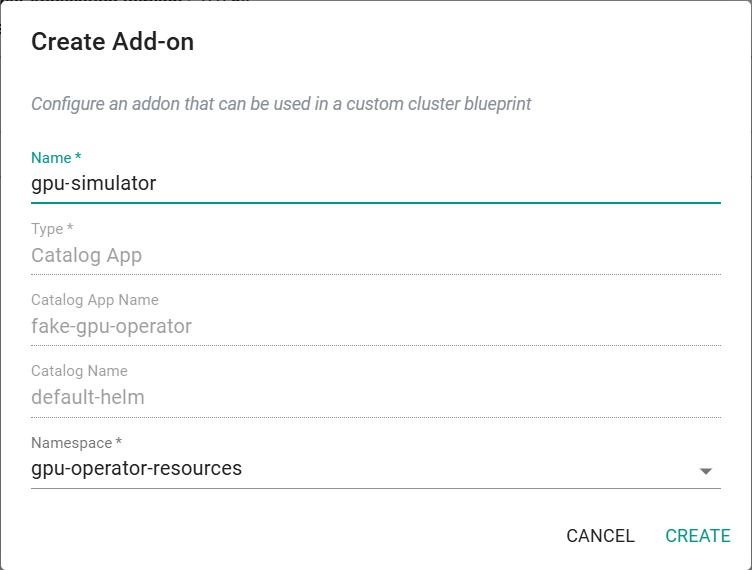
- Enter a name for the add-on and select the previously created namespace
- Click Create
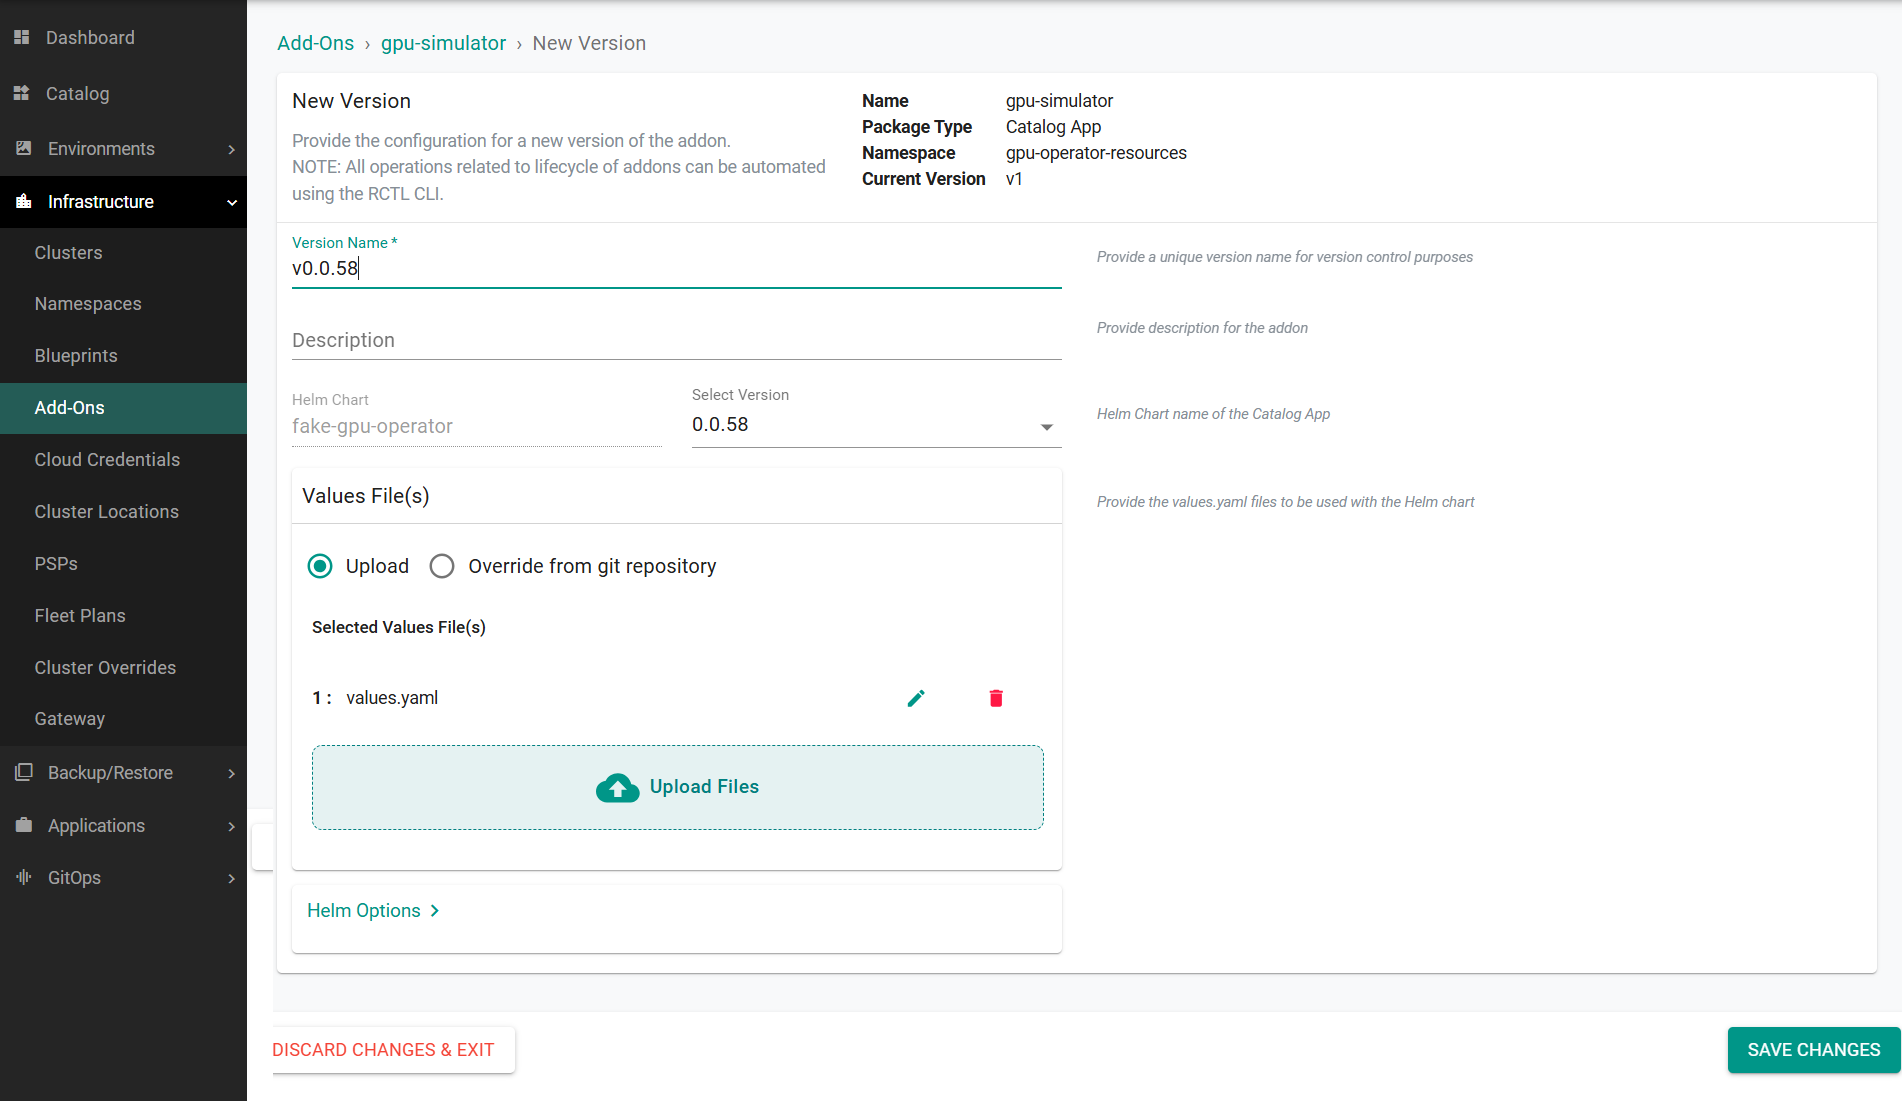
- Enter a version name
- Create a YAML file named
values.yamlwith the following content:
topology:
  # nodePools is a map of node pool name to node pool configuration.
  # Nodes are assigned to node pools based on the node pool label's value (key is configurable via nodePoolLabelKey).
  #
  # For example, nodes that have the label "run.ai/simulated-gpu-node-pool: default"
  # will be assigned to the "default" node pool.
  nodePools:
    A100:
      gpuProduct: NVIDIA-A100
      gpuCount: 8
    H100:
      gpuProduct: NVIDIA-H100
      gpuCount: 8
    T400:
      gpuProduct: NVIDIA-T400
      gpuCount: 8
- Upload the
values.yamlin the add-on - Click Save Changes
Step 3: Assign GPUs to Nodes
You can assign GPUs to nodes by applying a label to specific nodes. Run the following command being sure to update the node name and the node pool name. Since we have only a single node in our cluster, you can attach only a single node pool at a given time.
kubectl label node <node-name> run.ai/simulated-gpu-node-pool=<node-pool-name>
Note
The node pool names are defined in the values.yaml file used when deploying the workload. The options in the provided values.yaml file are A100, H100 and T400. Additional node pool groups can be added to the values.yaml file as needed.
Step 4: Create Custom Blueprint
In this step, you will create a custom cluster blueprint which contains the GPU simulator add-on.
- Navigate to Infrastructure -> Blueprints
- Click New Blueprint
- Enter a name for the blueprint
- Click Save
- Enter a version name
- Select Minimal for the default blueprint
- Click Configure Add-Ons
- Add the previously created add-on
- Click Save Changes
- Enable Local Storage and Monitoring & Alerting under Managed System Add-ons
- Click Save Changes
Step 5: Apply Blueprint
In this step, you will apply the blueprint to the cluster.
- Navigate to Infrastructure -> Clusters
- Click on the gear icon on the cluster card and select Update Blueprint
- Select the previously created blueprint and click Save and Publish
After a few minutes, the blueprint will be applied to the cluster.
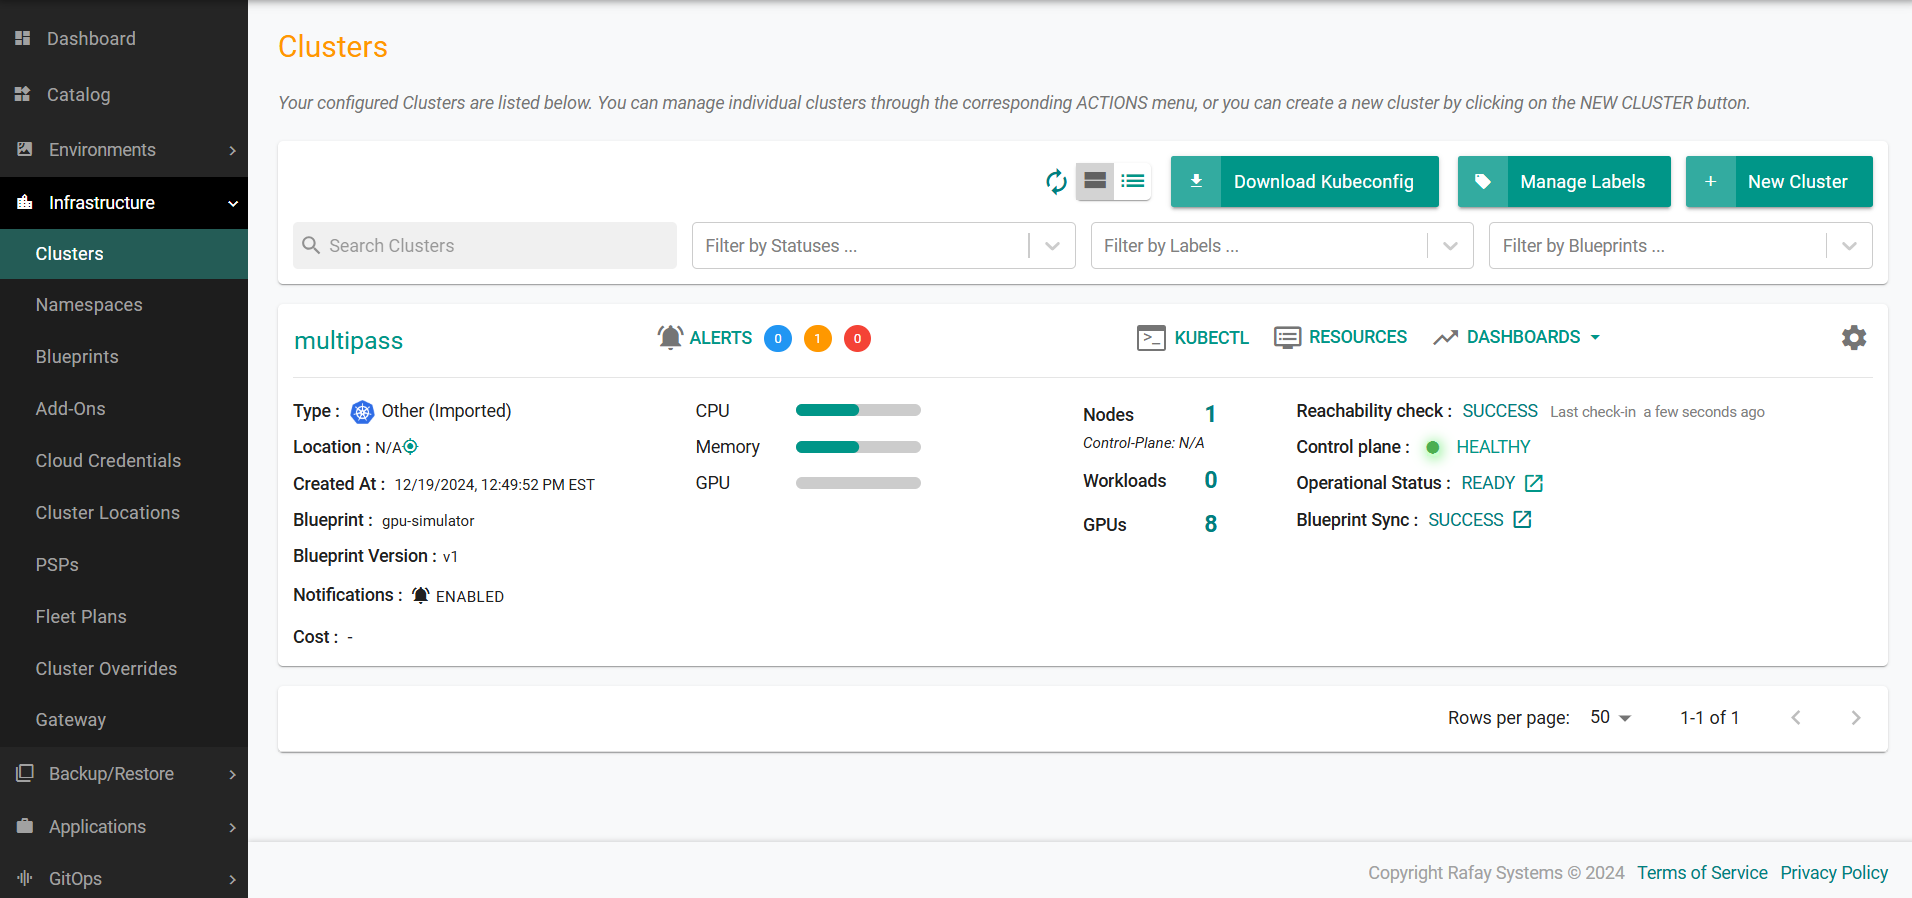
By navigating to the cluster card, you will see the simulated GPUs.
Notice that the cluster is reporting 8 simulated GPUs. We can now allocate these dynamically to end users when they request compute instances.

