Multus CNI — Frontend + Backend Network Design
Overview
This recipe describes how to configure Multus CNI as a secondary CNI on a Rafay MKS cluster running Cilium as the primary CNI. The result is a pod with two network interfaces — a primary interface managed by Cilium for control plane traffic, and a secondary interface managed by Multus for high-performance east-west data plane traffic.
┌─────────────────────────────────────────────────────────────┐
│                     AI/GPU Workload Pod                     │
│                                                             │
│   eth0 ──► Frontend Network (Cilium)                        │
│            └── K8s API, DNS, Services, Ingress              │
│                                                             │
│   net1 ──► Backend Network (Multus + ipvlan)                │
│            └── Gradient sync, KV cache, NVLink, Storage     │
└─────────────────────────────────────────────────────────────┘
This pattern is the standard approach for GPU/AI workloads where gradient synchronization (AllReduce), KV cache transfer, and storage I/O must not compete with Kubernetes control plane traffic.
Context and Background
Why Multus?
Kubernetes pods are born with a single network interface. Multus is a meta-CNI plugin that enables pods to have multiple network interfaces by delegating the primary interface to the existing CNI (Cilium) and attaching additional interfaces via separate NetworkAttachmentDefinition resources.
Why Cilium + Multus?
Cilium is a high-performance eBPF-based CNI with native support for Kubernetes network policy, Hubble observability, and kube-proxy replacement. Multus adds secondary interfaces without modifying Cilium's behavior. The two work together cleanly when configured correctly.
Prerequisites
- Rafay MKS cluster with Kubernetes 1.26+
rctlCLI configured and authenticatedkubectlaccess to the cluster- Node with at least two network interfaces
- Node secondary interface must be UP at the link layer
Identify node interfaces
Run directly on the node:
ip link show
Example output:
2: enp0s5   <UP>    mtu 9000   ← primary (Cilium uses this)
3: enp1s0   <DOWN>  mtu 1500   ← secondary interface — backend network
Bring up the secondary interface
The secondary interface may be DOWN if no IP is configured. Bring it up and make it persistent:
ip link set enp1s0 up
cat <<EOF > /etc/netplan/99-secondary-nics.yaml
network:
  version: 2
  ethernets:
    enp1s0:
      dhcp4: false
      dhcp6: false
EOF
chmod 600 /etc/netplan/99-secondary-nics.yaml
netplan apply
The secondary interface used as the Multus master does not need an IP address on the host. It only needs to be in the UP state at the link layer.
Step 1 — Create the Cilium Namespace
Create the cilium namespace on the Rafay controller. This namespace is required before the Cilium add-on can be created.
Create a file named cilium-namespace.yaml:
apiVersion: infra.k8smgmt.io/v3
kind: Namespace
metadata:
  name: cilium
  project: system-catalog
Apply:
rctl apply -f cilium-namespace.yaml --v3
Verify the namespace was created:
rctl get namespace cilium --v3 -p system-catalog

Step 2 — Save the Cilium Helm Values File
Save the following values to a file at artifacts/cilium/cilium-values.yaml. This file configures Cilium with the two settings required for Multus to work correctly alongside it.
# ---- CNI ----
# exclusive=false is REQUIRED for Multus to work alongside Cilium.
# Without this, Cilium renames 00-multus.conf to
# 00-multus.conf.cilium_bak on every node restart.
cni:
  exclusive: false

# ---- IPAM ----
ipam:
  mode: kubernetes

# ---- kube-proxy replacement ----
# REQUIRED for Multus to work without patching.
# Rafay MKS does not run kube-proxy when Cilium is the CNI.
# Without this, the Kubernetes ClusterIP (10.96.0.1) is unreachable
# from the host, causing the Multus daemon to time out on every pod
# that has a secondary network annotation.
kubeProxyReplacement: true

# ---- API Server ----
# Required when kubeProxyReplacement=true.
# Rafay MKS exposes the API server via Consul DNS.
k8sServiceHost: "k8master.service.consul"
k8sServicePort: "6443"

# ---- Operator ----
operator:
  replicas: 1

# ---- Routing ----
# routingMode replaces the deprecated "tunnel" option (removed in v1.15).
routingMode: tunnel
tunnelProtocol: vxlan

# ---- Hubble (observability) ----
hubble:
  enabled: true
  relay:
    enabled: true
  ui:
    enabled: false

# ---- Resources ----
resources:
  requests:
    cpu: 100m
    memory: 512Mi
  limits:
    cpu: 500m
    memory: 1Gi
Step 3 — Create the Cilium Add-on
The Cilium add-on delivers Cilium to every cluster using this blueprint. The add-on references the values file saved in the previous step.
Create a file named cilium-addon.yaml:
apiVersion: infra.k8smgmt.io/v3
kind: Addon
metadata:
  name: cilium
  project: system-catalog
  labels:
    # Mandatory labels — required for Rafay to recognise this add-on
    # as the primary CNI and configure the blueprint accordingly.
    rafay.type: cni
    rafay.cni.name: cilium
spec:
  namespace: cilium
  artifact:
    artifact:
      chartName: cilium
      chartVersion: 1.19.4
      catalog: default-helm
      chartVersion: 1.19.4
      valuesPaths:
        - name: file://artifacts/cilium/cilium-values.yaml
    type: Helm
  version: v1
Note:
default-rafay-helmis the Rafay system catalog that includes Cilium. Verify the catalog name in your org withrctl get catalog -p system-catalog. If the catalog name differs, update thecatalogfield accordingly.
Apply the add-on:
rctl apply -f cilium-addon.yaml --v3
Verify the add-on was created:
rctl get addon cilium --v3 -p system-catalog
In the console, navigate to Infrastructure -> Add-Ons to see the resource

Step 4 — Create the Multus Add-on
The Multus thick plugin add-on installs the Multus daemon on every node. It also requires the CNI reference plugins (ipvlan, macvlan, bridge) to be present on each node — these are not included in the Multus image and must be installed separately.
2a — Create the CNI plugins installer add-on
This DaemonSet runs once on each node to install the CNI reference plugins from the official containernetworking/plugins release.
Create artifacts/cni-plugins/cni-plugins-installer.yaml:
apiVersion: apps/v1
kind: DaemonSet
metadata:
  name: cni-plugins-installer
  namespace: kube-system
spec:
  selector:
    matchLabels:
      app: cni-plugins-installer
  template:
    metadata:
      labels:
        app: cni-plugins-installer
    spec:
      hostNetwork: true
      initContainers:
      - name: install-cni-plugins
        image: alpine:3.19
        command:
        - sh
        - -c
        - |
          set -ex
          wget -qO /tmp/cni-plugins.tgz \
            https://github.com/containernetworking/plugins/releases/download/v1.4.0/cni-plugins-linux-amd64-v1.4.0.tgz
          tar -xz -f /tmp/cni-plugins.tgz -C /opt/cni/bin/
          rm -f /tmp/cni-plugins.tgz
          echo "Installed plugins:"
          ls /opt/cni/bin/ | grep -E "macvlan|ipvlan|bridge"
        volumeMounts:
        - name: cni-bin
          mountPath: /opt/cni/bin
      containers:
      - name: pause
        image: gcr.io/google-containers/pause:3.2
      volumes:
      - name: cni-bin
        hostPath:
          path: /opt/cni/bin
          type: DirectoryOrCreate
      tolerations:
      - operator: Exists
Create cni-plugins-addon.yaml:
apiVersion: infra.k8smgmt.io/v3
kind: Addon
metadata:
  name: cni-plugins-installer
  project: system-catalog
spec:
  namespace: kube-system
  artifact:
    artifact:
      paths:
        - name: file://artifacts/cni-plugins/cni-plugins-installer.yaml
    type: Yaml
  version: v1
Apply:
rctl apply -f cni-plugins-addon.yaml --v3
In the console, navigate to Infrastructure -> Add-Ons to see the resource

2b — Create the Multus add-on
Download the Multus thick plugin manifest and save it to artifacts/multus/multus-daemonset-thick.yaml:
https://raw.githubusercontent.com/k8snetworkplumbingwg/multus-cni/master/deployments/multus-daemonset-thick.yml
Create multus-addon.yaml:
apiVersion: infra.k8smgmt.io/v3
kind: Addon
metadata:
  name: multus
  project: system-catalog
spec:
  namespace: kube-system
  artifact:
    artifact:
      paths:
        - name: file://artifacts/multus/multus-daemonset-thick.yaml
    type: Yaml
  version: v1
Apply:
rctl apply -f multus-addon.yaml --v3
Verify both add-ons were created:
rctl get addon --v3 -p system-catalog

Step 5 — Create the Cluster Blueprint
The blueprint assembles Cilium, the CNI plugins installer, and Multus into a single deployable unit. The add-ons are ordered so that Cilium is deployed before Multus.
Create multus-blueprint.yaml:
apiVersion: infra.k8smgmt.io/v3
kind: Blueprint
metadata:
  name: cilium-multus
  project: system-catalog
spec:
  base:
    name: minimal
    version: 3.1.5
  customAddons:
    - name: cilium
      version: v1
    - name: cni-plugins-installer
      version: v1
      dependsOn:
        - cilium
    - name: multus
      version: v1
      dependsOn:
        - cni-plugins-installer
  type: custom
  version: v1
Apply the blueprint:
rctl apply -f multus-blueprint.yaml --v3
Verify the blueprint was created:
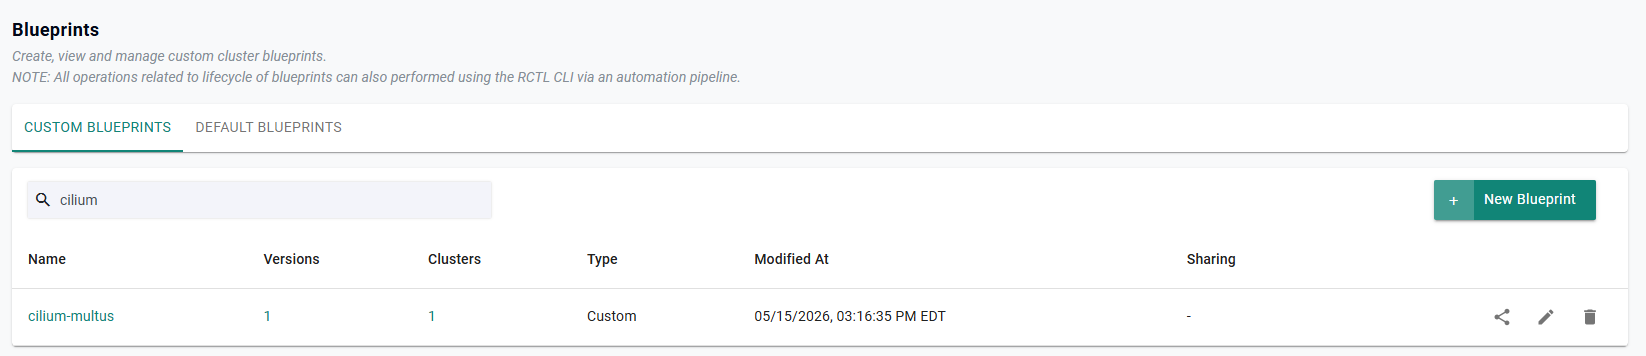
rctl get blueprints --v3 -p system-catalog
Step 6 — Deploy an MKS Cluster with the Blueprint
When provisioning a new MKS cluster, select the cilium-multus blueprint and set Cluster Networking to CNI-via-Blueprint. This tells Rafay that the CNI is delivered by the blueprint rather than the built-in CNI list.
Using the Rafay Web Console:
- Navigate to Infrastructure → Clusters → New Cluster
- Under Cluster Blueprint, select
cilium-multus - Under Advanced Settings → Cluster Networking, select CNI-via-Blueprint
- Complete the remaining cluster configuration and provision
Important: Selecting any CNI other than CNI-via-Blueprint will conflict with the Cilium add-on and cause provisioning to fail with:
The CNI provider conflicts with the blueprint's CNI as primary CNI.
The cluster provisioning and blueprint sync process takes several minutes. Monitor progress in the Rafay Web Console under Infrastructure → Clusters →
Once complete, verify Cilium and Multus are running on the cluster:
kubectl get pods -n cilium
kubectl get pods -n kube-system -l app=multus
Expected output:
NAMESPACE    NAME                          READY   STATUS    RESTARTS   AGE
cilium       cilium-xxxxx                  1/1     Running   0          5m
cilium       cilium-operator-xxxxx         1/1     Running   0          5m
kube-system  kube-multus-ds-xxxxx          1/1     Running   0          4m
Verify cni.exclusive=false is active:
kubectl get configmap cilium-config -n cilium \
  -o jsonpath='{.data.cni-exclusive}'
Expected: false
Verify Multus config is present on the node:
ls /etc/cni/net.d/
You should see 00-multus.conf alongside the Cilium config. If you see 00-multus.conf.cilium_bak, the cni.exclusive setting did not take effect.
Step 7 — Create the NetworkAttachmentDefinition
A NetworkAttachmentDefinition (NAD) defines the secondary network configuration for pods. Replace enp1s0 with your actual backend interface name.
ipvlan vs macvlan: Use
ipvlanon cloud or virtualized environments. It shares the parent MAC address, avoiding issues with switches that limit the number of MAC addresses per port. Usemacvlanon bare-metal where each NIC port can support multiple MACs.
cat <<EOF | kubectl apply -f -
apiVersion: k8s.cni.cncf.io/v1
kind: NetworkAttachmentDefinition
metadata:
  name: backend-network
  namespace: default
spec:
  config: '{
    "cniVersion": "0.3.1",
    "type": "ipvlan",
    "master": "enp1s0",
    "mode": "l2",
    "ipam": {
      "type": "host-local",
      "subnet": "192.168.100.0/24",
      "rangeStart": "192.168.100.10",
      "rangeEnd": "192.168.100.200",
      "gateway": "192.168.100.1"
    }
  }'
EOF
Verify the NAD was created:
kubectl get network-attachment-definitions
Expected output:
NAME              AGE
backend-network   5s
Step 8 — Deploy Test Pods
Deploy two pods to verify both networks are functioning and that pods can communicate over the secondary interface.
cat <<EOF | kubectl apply -f -
apiVersion: v1
kind: Pod
metadata:
  name: dual-network-test-1
  namespace: default
  annotations:
    k8s.v1.cni.cncf.io/networks: backend-network
spec:
  containers:
  - name: net-test
    image: nicolaka/netshoot:latest
    command: ["sleep", "infinity"]
    resources:
      requests:
        cpu: 100m
        memory: 128Mi
---
apiVersion: v1
kind: Pod
metadata:
  name: dual-network-test-2
  namespace: default
  annotations:
    k8s.v1.cni.cncf.io/networks: backend-network
spec:
  containers:
  - name: net-test
    image: nicolaka/netshoot:latest
    command: ["sleep", "infinity"]
    resources:
      requests:
        cpu: 100m
        memory: 128Mi
EOF
Wait for both pods to be ready:
kubectl wait pod/dual-network-test-1 pod/dual-network-test-2 \
  --for=condition=Ready --timeout=120s
Step 9 — Verify Both Network Interfaces
Check that each pod has both a Cilium-managed eth0 and a Multus-managed net1:
kubectl exec -it dual-network-test-1 -- ip addr show
kubectl exec -it dual-network-test-2 -- ip addr show
Expected output for each pod:
1: lo: ...
    inet 127.0.0.1/8
2: net1@if3: ...                                 ← Multus/ipvlan (backend)
    inet 192.168.100.11/24 scope global net1
51: eth0@if52: ...                               ← Cilium (frontend)
    inet 10.244.0.169/32 scope global eth0
With Cilium,
eth0may appear afternet1in the interface list and will have a high interface index. This is normal — Cilium attaches the primary interface differently from Calico.
Step 10 — Test Backend Network Connectivity
Get Pod 2's backend IP and ping it from Pod 1:
POD2_BACKEND_IP=$(kubectl exec dual-network-test-2 -- ip addr show net1 \
  | grep 'inet ' | awk '{print $2}' | cut -d/ -f1)
echo "Pod 2 backend IP: ${POD2_BACKEND_IP}"

kubectl exec -it dual-network-test-1 -- ping -c3 ${POD2_BACKEND_IP}
Expected output:
PING 192.168.100.10 (192.168.100.10) 56(84) bytes of data.
64 bytes from 192.168.100.10: icmp_seq=1 ttl=64 time=0.052 ms
64 bytes from 192.168.100.10: icmp_seq=2 ttl=64 time=0.024 ms
64 bytes from 192.168.100.10: icmp_seq=3 ttl=64 time=0.027 ms
GPU/AI Workload Pattern
For production AI/GPU workloads, direct NCCL and GLOO collective communications to the backend interface by setting the appropriate environment variables:
apiVersion: v1
kind: Pod
metadata:
  name: gpu-worker-0
  namespace: default
  annotations:
    k8s.v1.cni.cncf.io/networks: '[
      {
        "name": "backend-network",
        "interface": "net1",
        "namespace": "default"
      }
    ]'
spec:
  containers:
  - name: trainer
    image: nvcr.io/nvidia/pytorch:24.01-py3
    command: ["sleep", "infinity"]
    env:
    # Direct NCCL collective comms (AllReduce, AllGather) to net1
    - name: NCCL_SOCKET_IFNAME
      value: "net1"
    - name: NCCL_IB_DISABLE
      value: "1"
    # Direct Gloo collective comms to net1
    - name: GLOO_SOCKET_IFNAME
      value: "net1"
    resources:
      requests:
        nvidia.com/gpu: "1"
      limits:
        nvidia.com/gpu: "1"
eth0 carries only Kubernetes control plane traffic. All gradient synchronization and data plane operations flow through net1.
IPAM for Multi-Node Clusters
host-local IPAM (used in this guide) stores IP allocations on each node's local filesystem. On multi-node clusters, two pods on different nodes can receive the same IP from the backend subnet, causing routing conflicts.
For multi-node production clusters, use Whereabouts IPAM, which tracks allocations cluster-wide via Kubernetes CRDs:
kubectl apply -f https://raw.githubusercontent.com/k8snetworkplumbingwg/whereabouts/master/doc/crds/daemonset-install.yaml
kubectl apply -f https://raw.githubusercontent.com/k8snetworkplumbingwg/whereabouts/master/doc/crds/whereabouts.cni.cncf.io_ippools.yaml
kubectl apply -f https://raw.githubusercontent.com/k8snetworkplumbingwg/whereabouts/master/doc/crds/whereabouts.cni.cncf.io_overlappingrangeipreservations.yaml
Update the NAD to use Whereabouts:
cat <<EOF | kubectl apply -f -
apiVersion: k8s.cni.cncf.io/v1
kind: NetworkAttachmentDefinition
metadata:
  name: backend-network
  namespace: default
spec:
  config: '{
    "cniVersion": "0.3.1",
    "type": "ipvlan",
    "master": "enp1s0",
    "mode": "l2",
    "ipam": {
      "type": "whereabouts",
      "range": "192.168.100.0/24",
      "exclude": [
        "192.168.100.0/32",
        "192.168.100.255/32"
      ]
    }
  }'
EOF
Troubleshooting
failed to find plugin "ipvlan" in path [/opt/cni/bin]
The CNI reference plugins are not installed on the node. Run on the node directly:
wget -qO /tmp/cni-plugins.tgz   https://github.com/containernetworking/plugins/releases/download/v1.4.0/cni-plugins-linux-amd64-v1.4.0.tgz
tar -xz -f /tmp/cni-plugins.tgz -C /opt/cni/bin/
ls /opt/cni/bin/ | grep -E "macvlan|ipvlan|bridge"
Pod stuck in ContainerCreating with context deadline exceeded
The Multus daemon cannot reach the Kubernetes API server. Verify kubeProxyReplacement=true in the Cilium config:
kubectl get configmap cilium-config -n cilium \
  -o jsonpath='{.data.kube-proxy-replacement}'
If false, patch it and restart Cilium:
kubectl patch configmap cilium-config -n cilium \
  --type merge \
  -p '{"data": {"kube-proxy-replacement": "true"}}'
kubectl rollout restart daemonset/cilium -n cilium
Multus config renamed (00-multus.conf.cilium_bak)
Cilium's exclusive mode is still active. Verify:
kubectl get configmap cilium-config -n cilium \
  -o jsonpath='{.data.cni-exclusive}'
If true, patch and restart:
kubectl patch configmap cilium-config -n cilium \
  --type merge \
  -p '{"data": {"cni-exclusive": "false"}}'
kubectl rollout restart daemonset/cilium -n cilium
net1 shows NO-CARRIER or state DOWN
The secondary interface on the host is DOWN. Run on the node:
ip link set enp1s0 up
ip link show enp1s0
Secondary interface missing from pod
Verify the NAD exists in the same namespace as the pod and the annotation is correct:
kubectl get network-attachment-definitions -n <namespace>
kubectl get pod <pod-name> -o jsonpath='{.metadata.annotations}'
No connectivity between pods on different nodes
host-local IPAM assigns overlapping IPs across nodes. Switch to Whereabouts IPAM (see above). Also verify the backend subnet is routable between nodes at the network layer — ipvlan attaches directly to the host interface and depends on the underlying network for inter-node routing.