Install Baseline SKU Package
This document describes how to install the baseline SKU templates and bundled cluster images into the default-catalog project of the default organization for an air-gapped controller deployment.
Prerequisites
- Package URLs
- URL to download the installer package for profiles/templates and its dependencies
- URL to download the images used by templates (only needed for airgapped controller)
- Access to ops-console of the target Rafay Controller with Partner Admin access
-
A loader VM/host (Ubuntu, AMD64) with:
-
Disk: 150 GB free space minimum
The cluster image bundle alone is approximately 85 GB. Additional space is required for the extracted package contents.
-
Sufficient CPU and memory for image extraction and upload
- Network access to the controller endpoint and Ops Console
- Python 3.x installed on the loader VM
-
Setup
Step 1: Create a Partner API Key
Create a partner API key from the ops-console platform before proceeding.
-
Login to your controller ops-console (e.g.,
https://ops-console.<your-domain>)Your user ID must have Partner Admin access to create a partner API key.
-
Navigate to Users and find your username (it should have a Partner Admin role).
- Click the Option Menu (⋮) on the row.
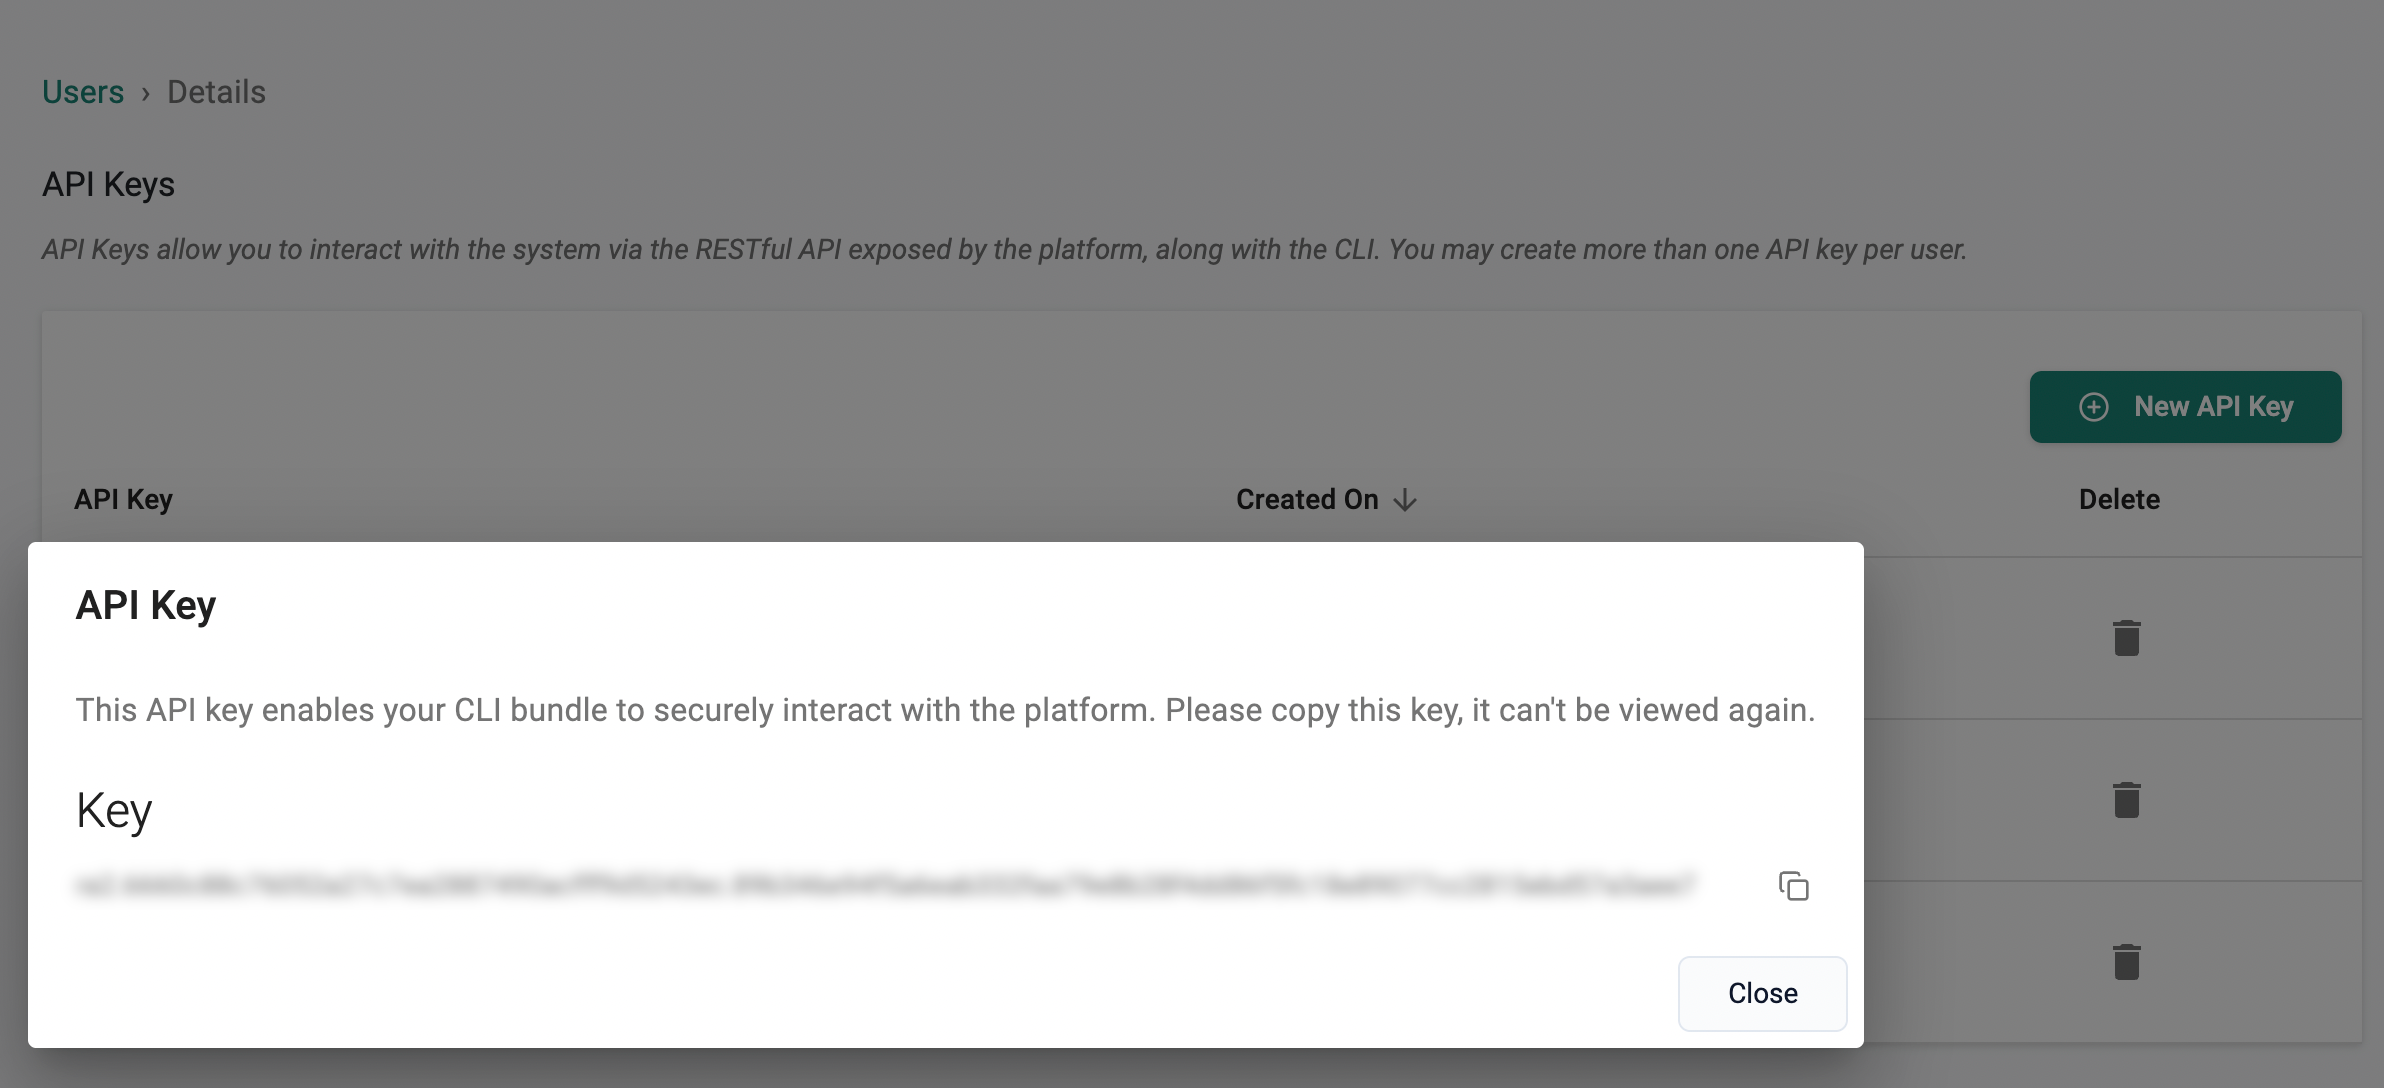
- Select Manage Keys under Actions.
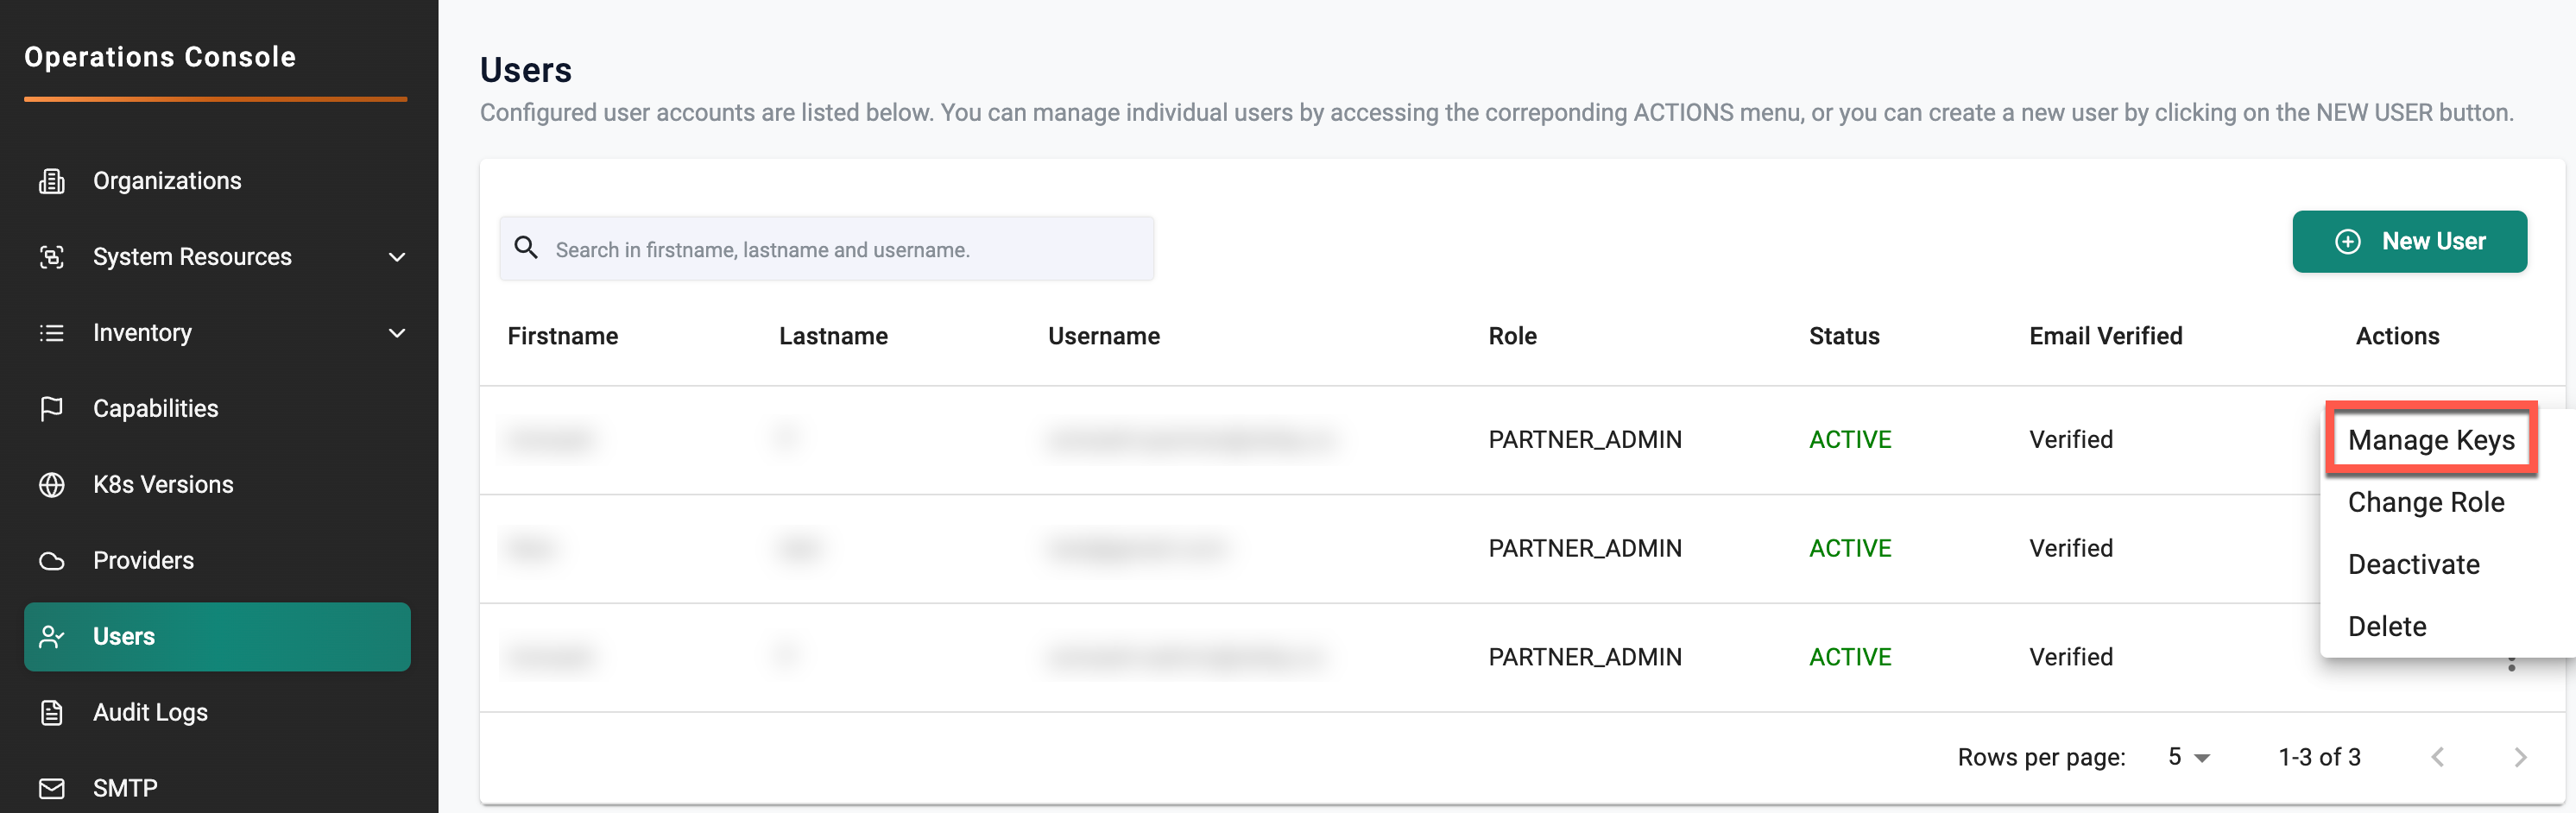
- Click New API Key to generate the partner API key.
- Store the key securely for future use.
Step 2: Download the Package
- Create a working directory and navigate into it:
mkdir -p ~/ncp-templates cd ~/ncp-templates - Download the SKU package and cluster image bundle:
wget https://<controller-url>/Automation/ncp-templates-v3.1.38-3.tar.gz wget https://<controller-url>/Automation/rafay-cluster-images-3.1.38.tar.gz - Extract the SKU package:
tar -xvzf ncp-templates-v3.1.38-3.tar.gz - Navigate into the extracted directory:
After extraction, the directory will contain the following files:
cd ncp-templatesChangelog.md loader-utility.py config.yaml catalog-templates/Note: Do not extract the cluster image tarball (
rafay-cluster-images-3.1.38.tar.gz) manually. The loader utility handles this automatically whenload_imagesis set toTruein the config.
Step 3: Update the Configuration
Open the config.yaml file and update the required values:
## environment
hostenv: <testbed-controller-fqdn>
opsenv: <ops-console-fqdn>

## API key
apikey: <partner-api-key>

## Project name
projectname: default-catalog

untar: True
load_images: True
images_file_name: rafay-cluster-images-3.1.38.tar.gz
Configuration Field Reference
| Field | Description |
|---|---|
hostenv |
Console URL of the target controller (e.g., console.<example.com>) |
opsenv |
Ops Console URL (e.g., ops-console.<example.com>) |
apikey |
Partner API key generated from the ops-console |
projectname |
Target project for loading templates. Default is default-catalog |
untar |
Set to True to allow the loader to extract the package automatically before processing |
load_images |
Set to True to load bundled cluster images to the controller nexus registry. Set to False for non-airgapped environments where templates will refer to the Rafay nexus registry instead |
images_file_name |
Filename of the downloaded cluster image tarball |
Important: Ensure
images_file_nameexactly matches the downloaded image bundle filename. If it does not match, the image upload step will fail even if the template creation step succeeds.Optional: Update
projectnameif templates need to be loaded into a project other thandefault-catalog.
Step 4: Run the Loader Utility
From the package directory, run:
python3 loader-utility.py
The utility performs the following actions in sequence:
- Validates template YAML files
- Creates environment templates
- Shares templates where required
- Uploads the bundled cluster images
- Loads SKU definitions into the default catalog
During the image upload step, you will see a progress bar similar to the following:
[Archive] Extracted to /tmp/rafay-cluster-images
Uploading images...

[                                                  ]  3%        1/27
[#                                                 ] 14%        4/27
[######                                            ] 55%       15/27
[##########                                        ] 77%       21/27
[##############                                    ]100%       27/27

[Archive] Extracting archive /home/ubuntu/demo-templates/demo-catalog-templates/demo-rafay-cluster-assets.tar.gz to /tmp/rafay-cluster-assets
Extracting Archive: <-----> 100.00%
[Archive] Extracted to /tmp/rafay-cluster-assets

Your Rafay cluster blueprint has initialized successfully!
Note: The image upload step can take 30–45 minutes while all 27 Rafay cluster images (~85 GB) are imported. Do not interrupt the process until you see the
Your Rafay cluster blueprint has initialized successfully!message.
Verify the Upload
Monitor the command output for success messages in the following format:
Validating file... catalog-templates/env-templates/<name>.yaml
Creating EnvironmentTemplate --> <name> with sharing
Environment Template '<name>' created successfully.
After the process completes, confirm the following:
- SKU templates are available in the Template Catalog from the Infra Portal
- Required environment templates are visible
- Cluster images are available for provisioning
- Profiles are accessible from Profile Catalog in SKU Studio