Gateway
To facilitate the installation of Kubernetes cluster into private data centers without a direct incoming connection from the management console, a gateway is necessary. Users can install the gateway by deploying an OVF in vSphere vCenter, retrieved from the controller
Prerequisites
Assure to have the below pre-requisites
- Resource pool configured
- Permissions for the vSphere Account
- Network Segment and Datastore availability
Important
Ensure the firewall allows the gateway VM to communicate with vCenter API
Step 1: Create Gateway
- Click Gateway on the left panel under the Infrastructure. Gateway page appears
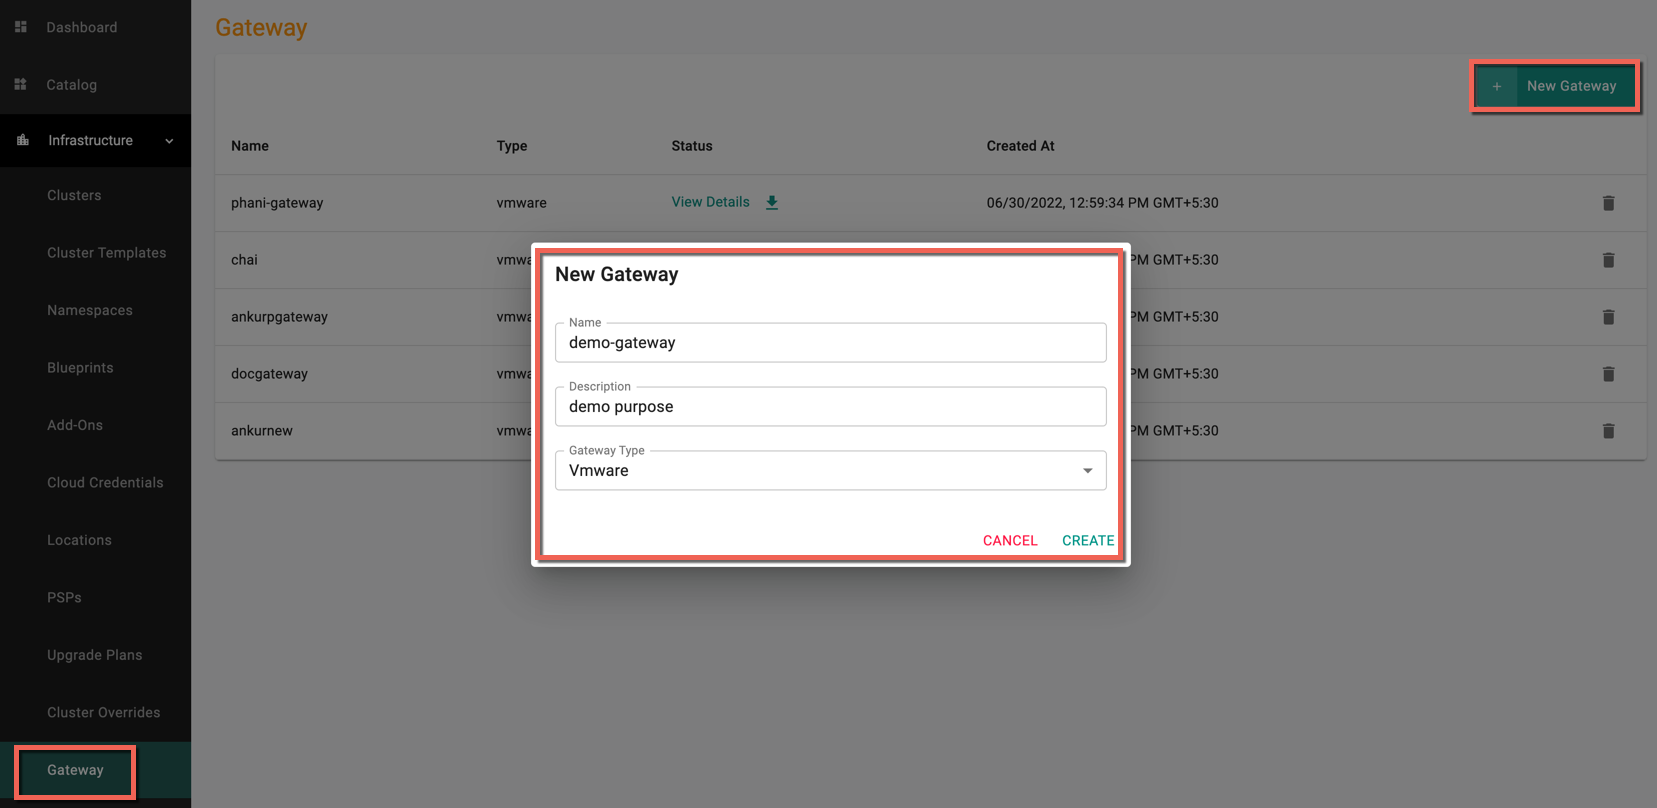
- Click New Gateway
- Provide a name and description
- Gateway Type Vmware is selected by default
- Click Create
Once created, you can view the gateway listed as shown below.

- Click View Details (or) download the file to get the OVF URL and the other details. Copy the OVF URL to deploy the gateway in vCenter
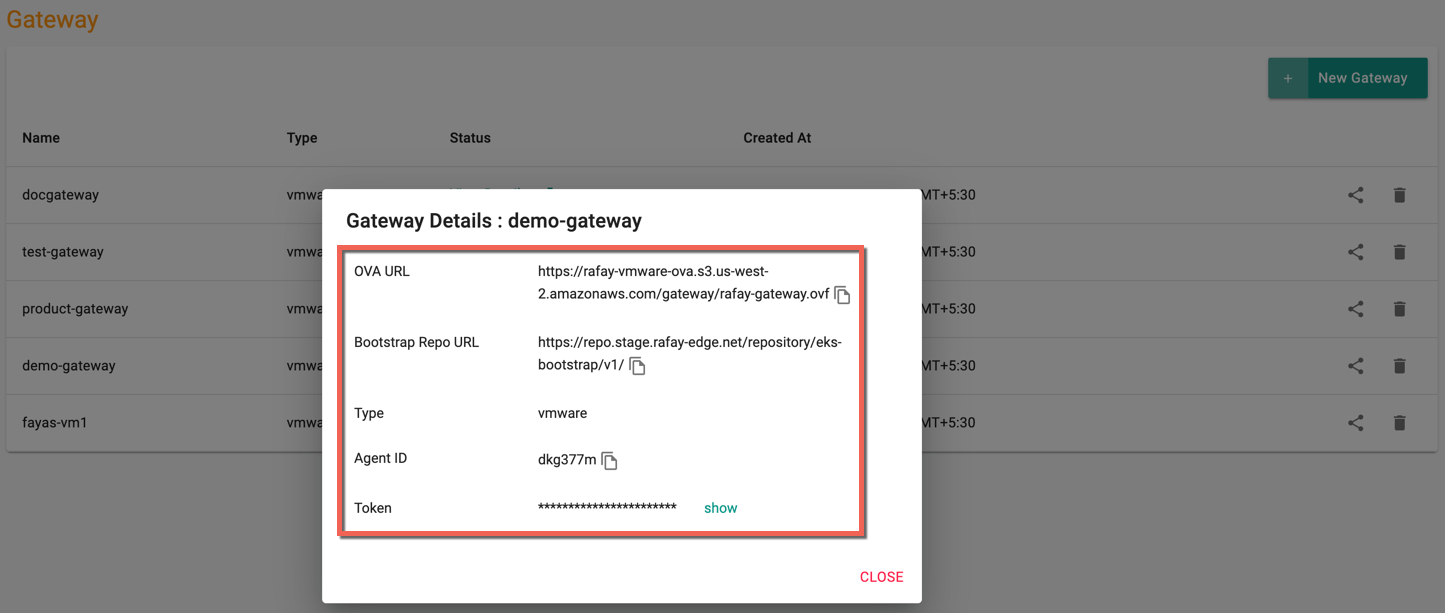
Next step is to install the gateway by deploying this OVF in vSphere vCenter
Step 2: Deploy OVF in Vcenter
Perform the below steps to deploy the OVF in vCenter, and create a connection between the vCenter and controller to create VMware clusters
- Login to the vCenter and right-click on the datacenter
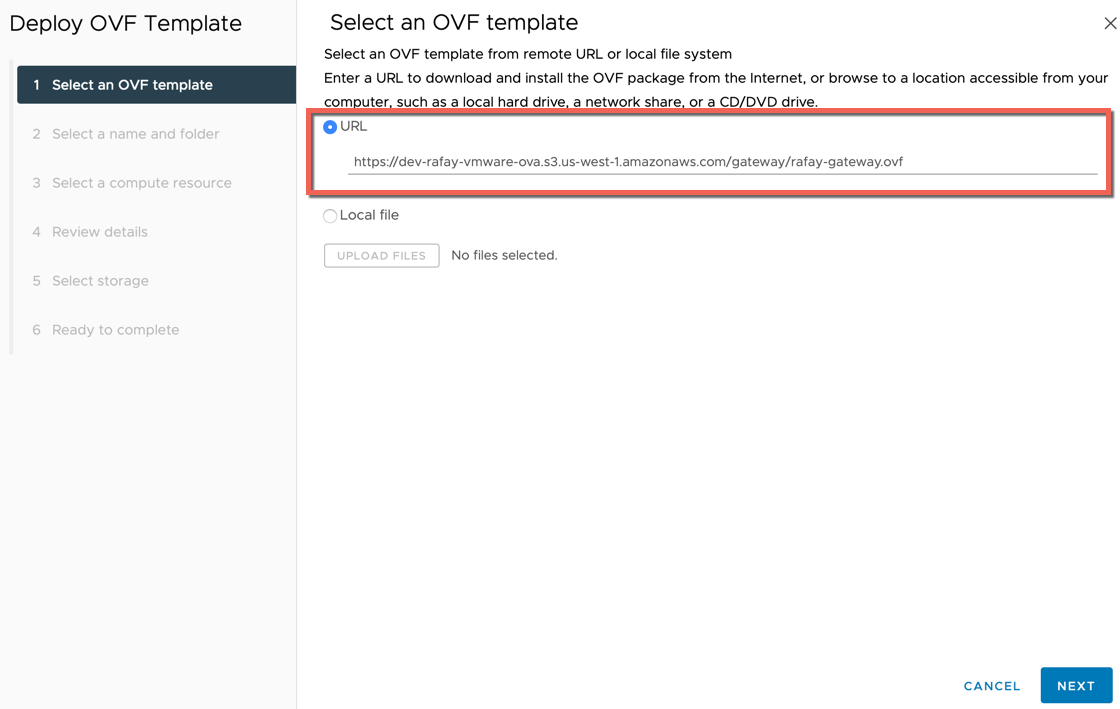
- Select Deploy OVF Template
!Deploy OVF Template](img/vcenter_ovf_temp.png)
- Copy/paste the OVF URL in the URL field and click Next
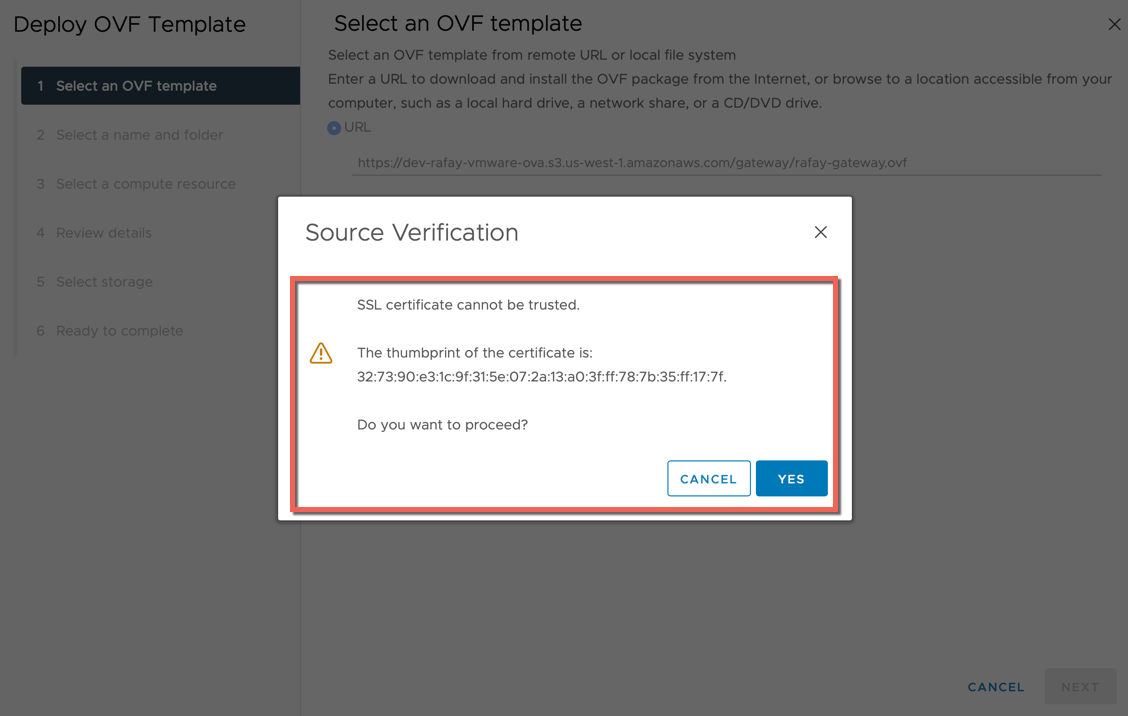
- Click Yes for the source verification and proceed
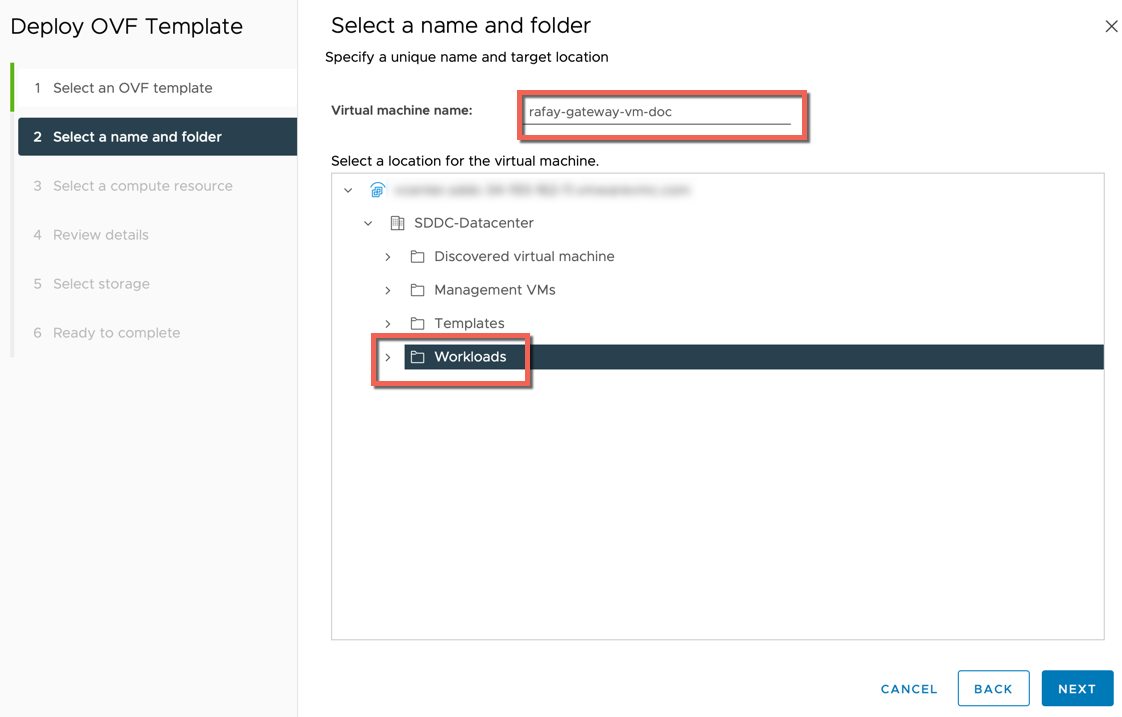
- Provide a name for the VM and select a location to deploy this VM. Below is an example of location with workload
- Click Next
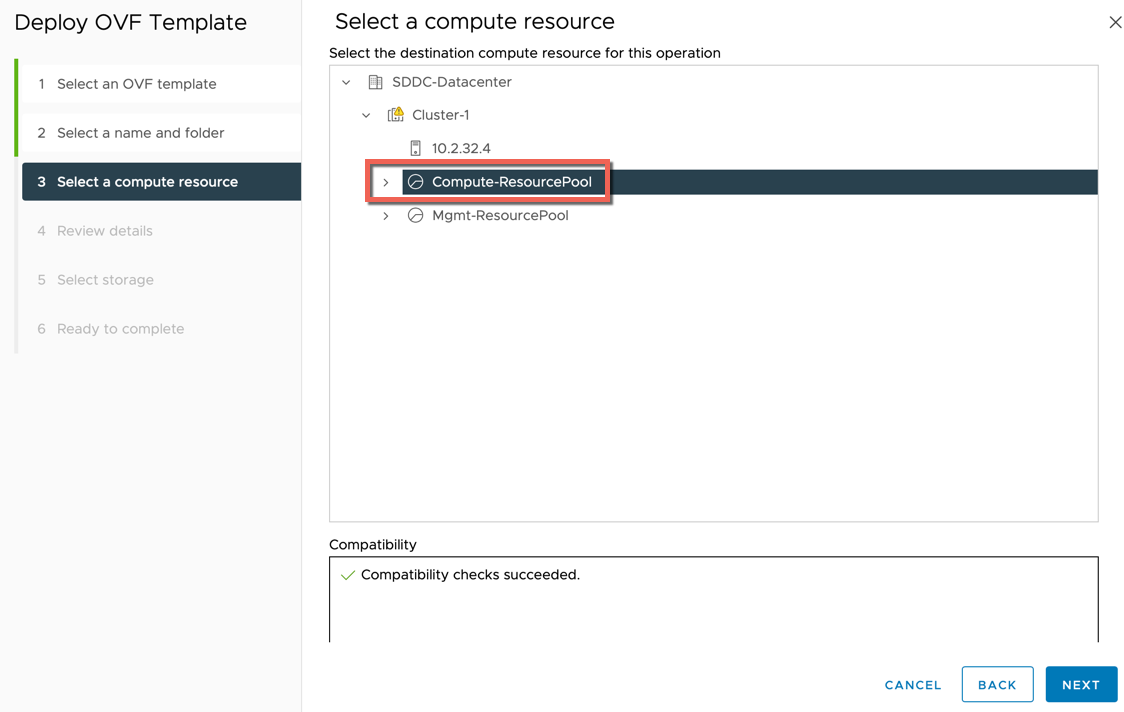
- Select a Compute Resource to allocate the resource pool for the VM and click Next
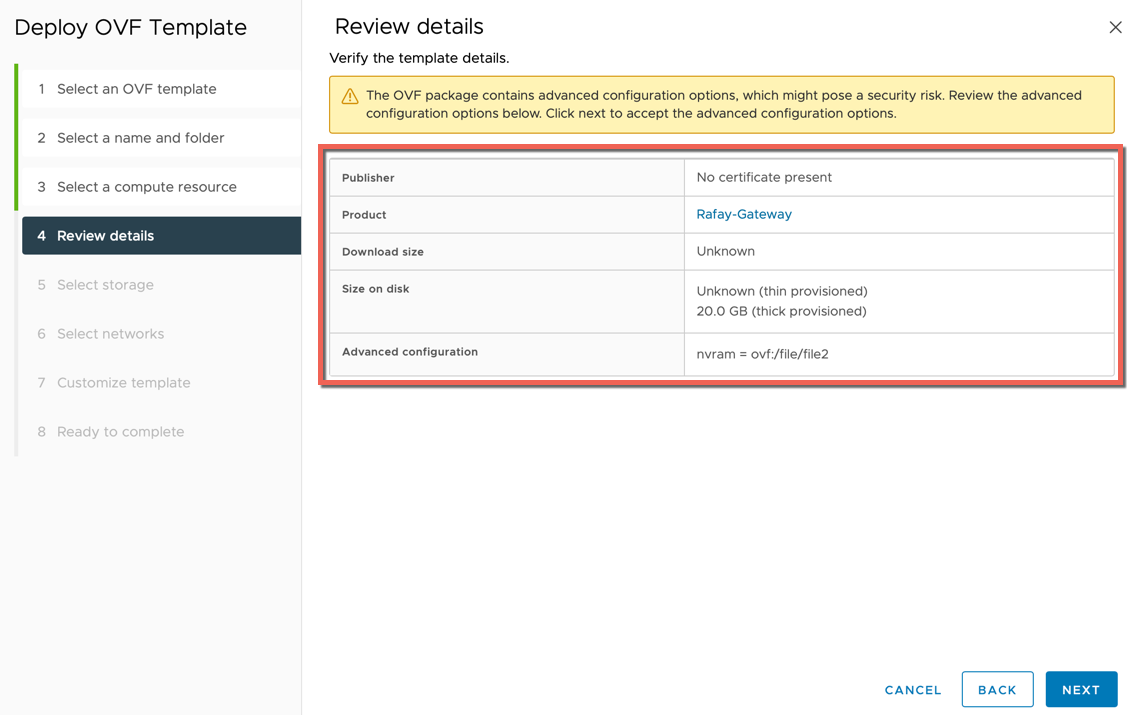
- Review Details screen appears showing the disk size and other details. Click Next
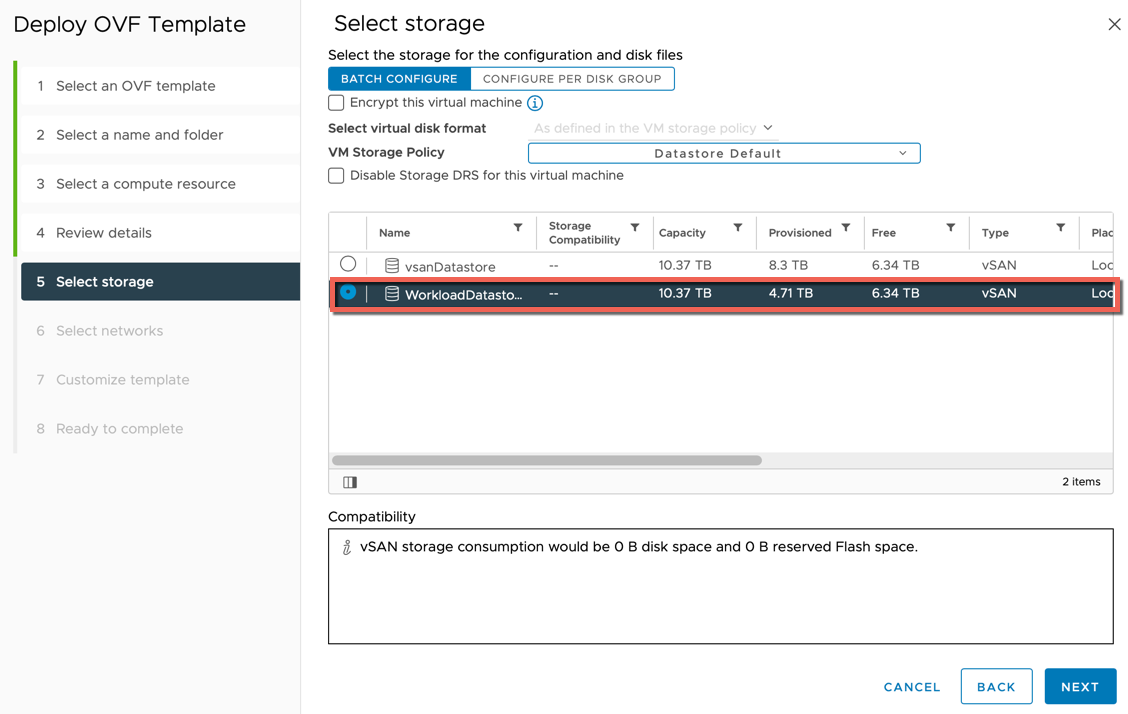
- Select the required storage to store the VM related resources and click Next
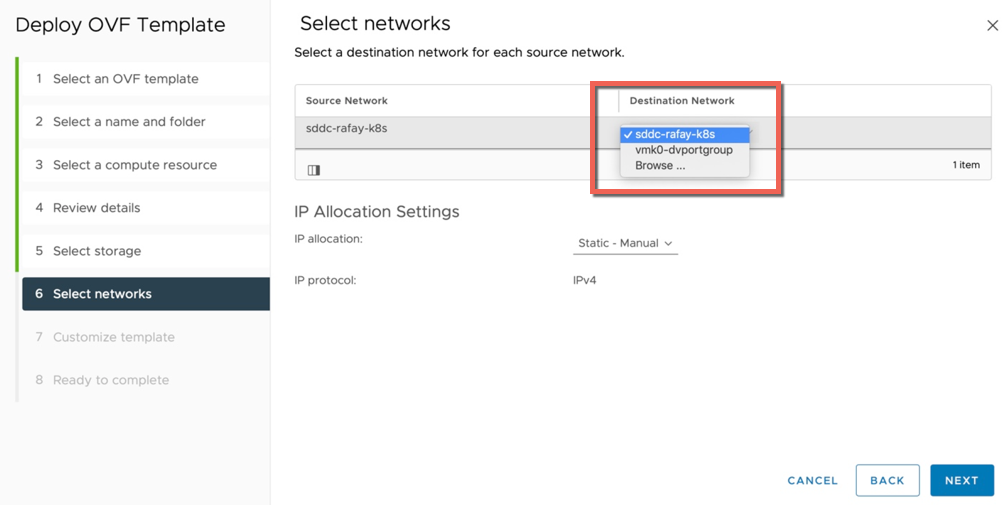
- Click the drop-down and select the required network (or) click Browse to view all the available networks and select one to deploy the VM
- Click Next
-
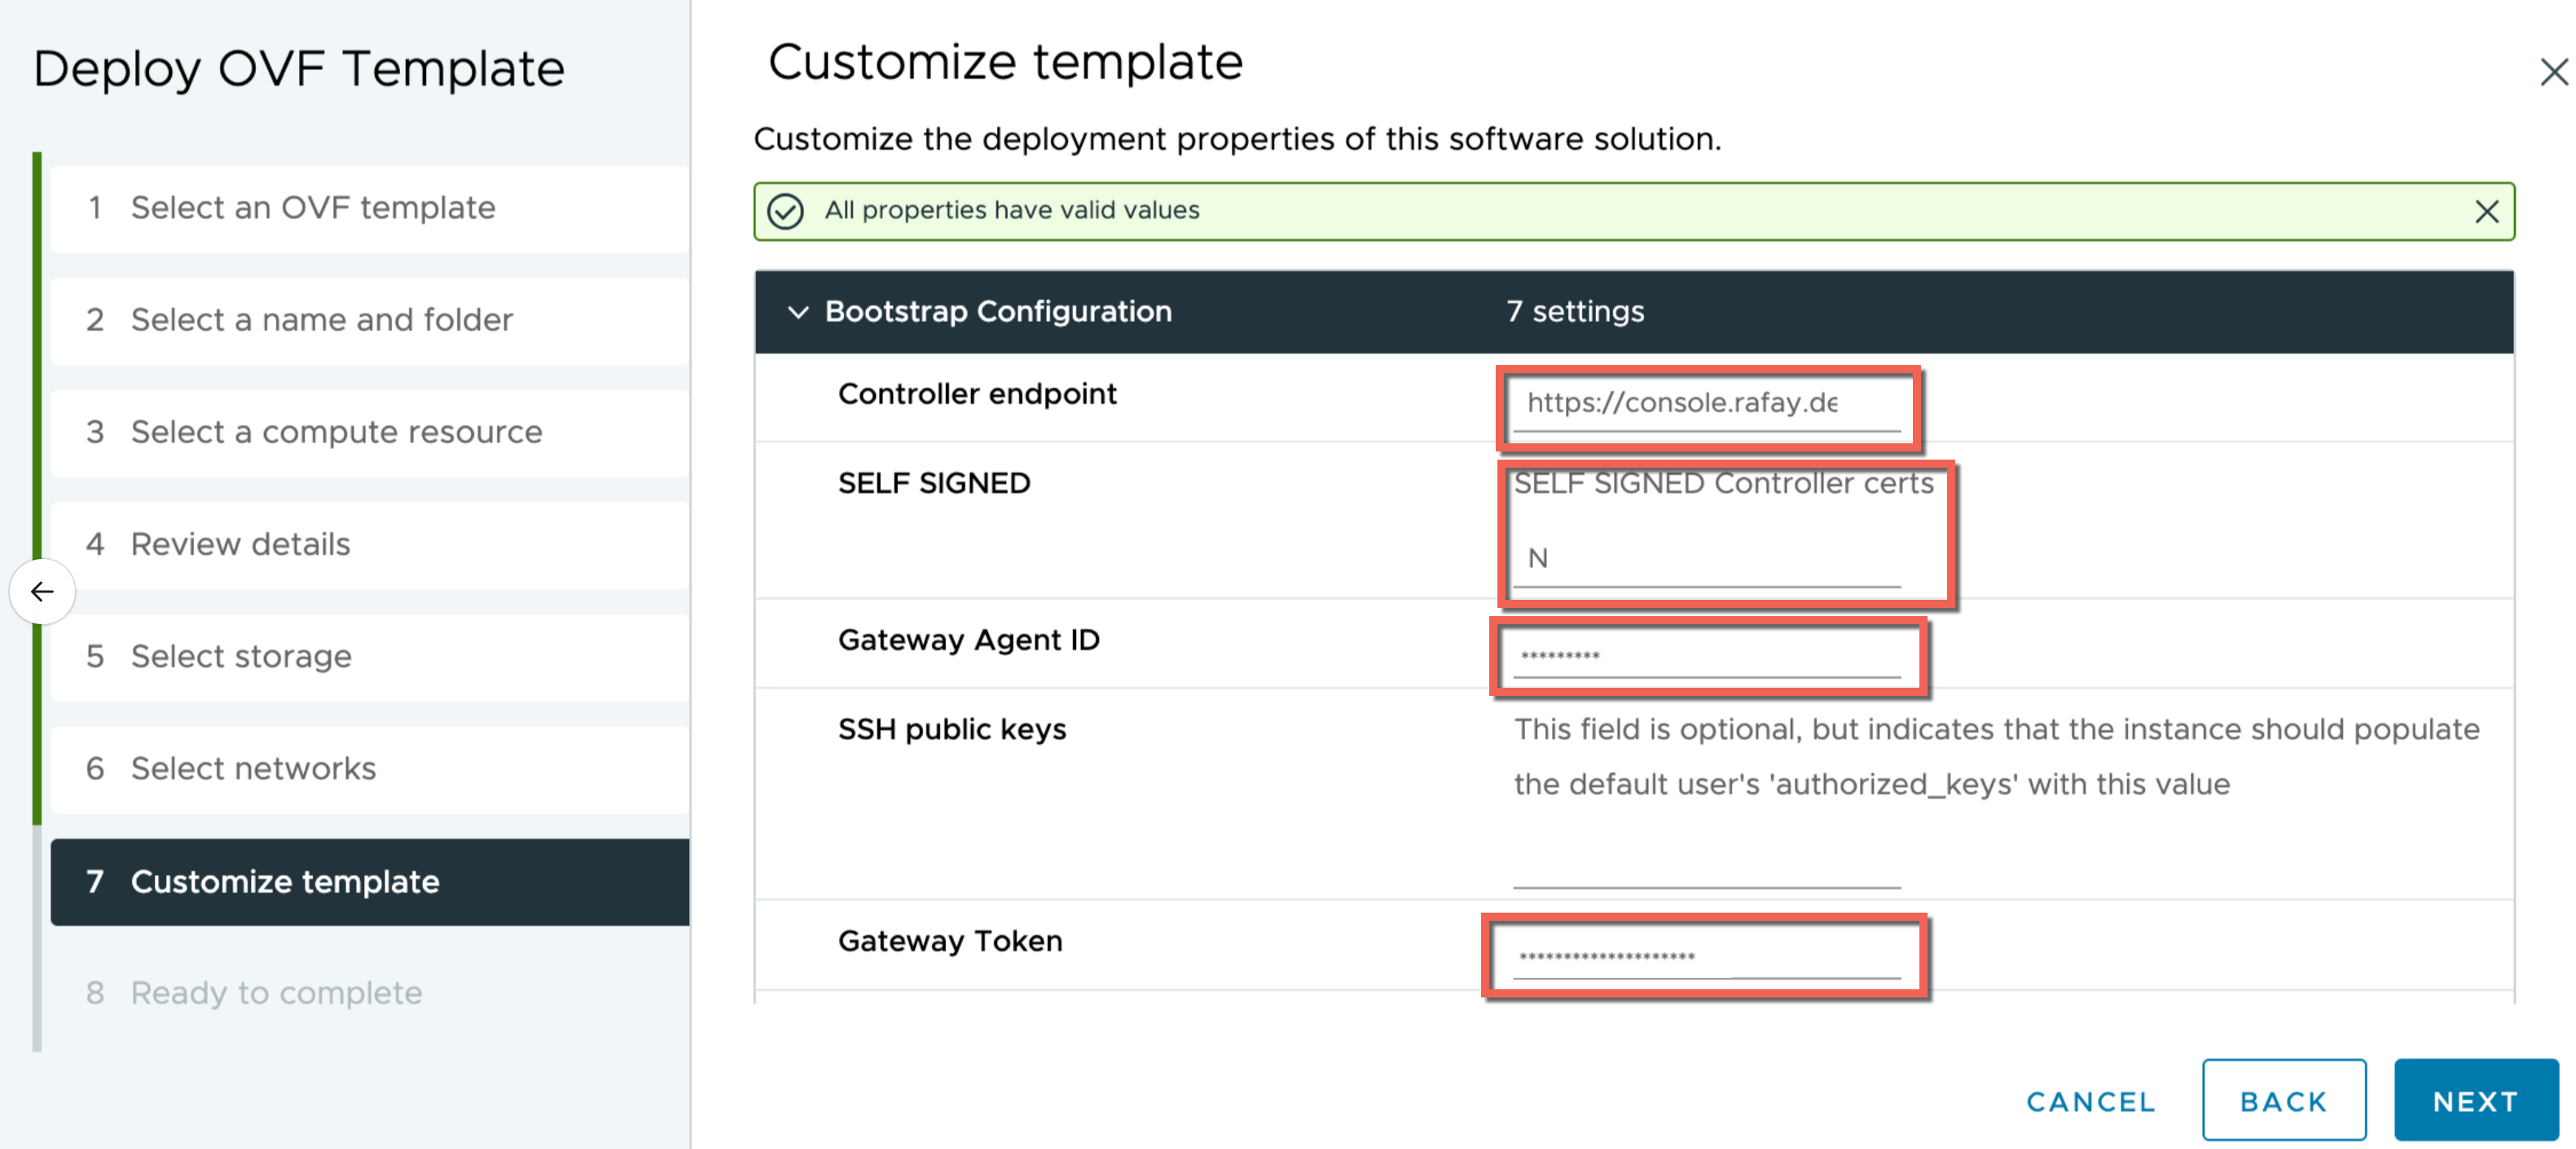
Customize Template screen appears with a form, asking for the below details:
- Controller endpoint (example: https://console.rafay.dev). For self-hosted controller: https://console.
- For a self-hosted controller running with self-signed certificates, users must set "SELF SIGNED" to "Y". The default value is "N"
- Gateway Agent ID
- Gateway Token
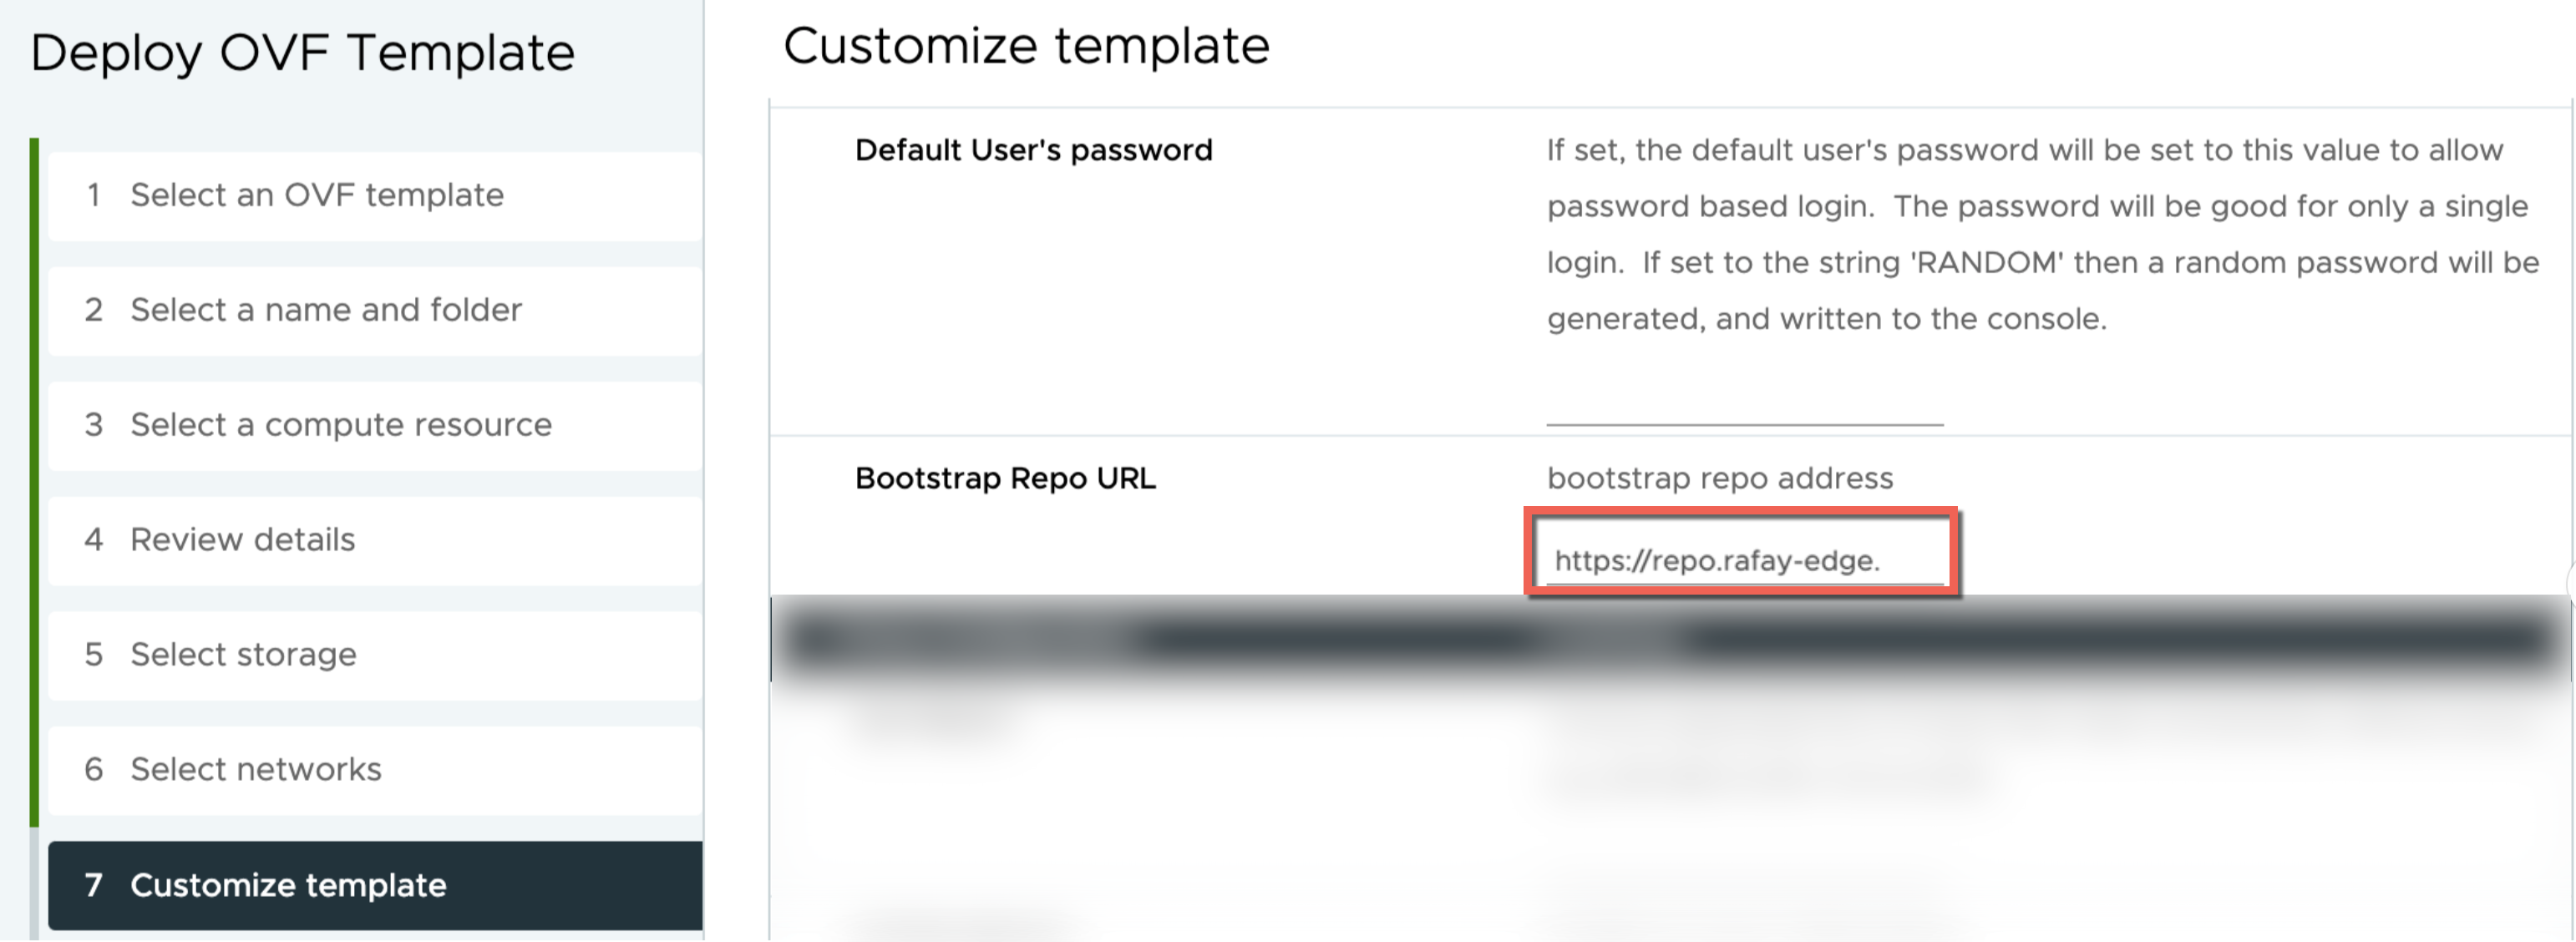
- Bootstrap Repo URL, the repo path where the bootstrap files are present
- Controller endpoint (example: https://console.rafay.dev). For self-hosted controller: https://console.
These three (5) pieces of information authorize the connectivity between vCenter and controller.
- Copy/paste the details from the controller
- Provide VM Static IP Configuration as shown below
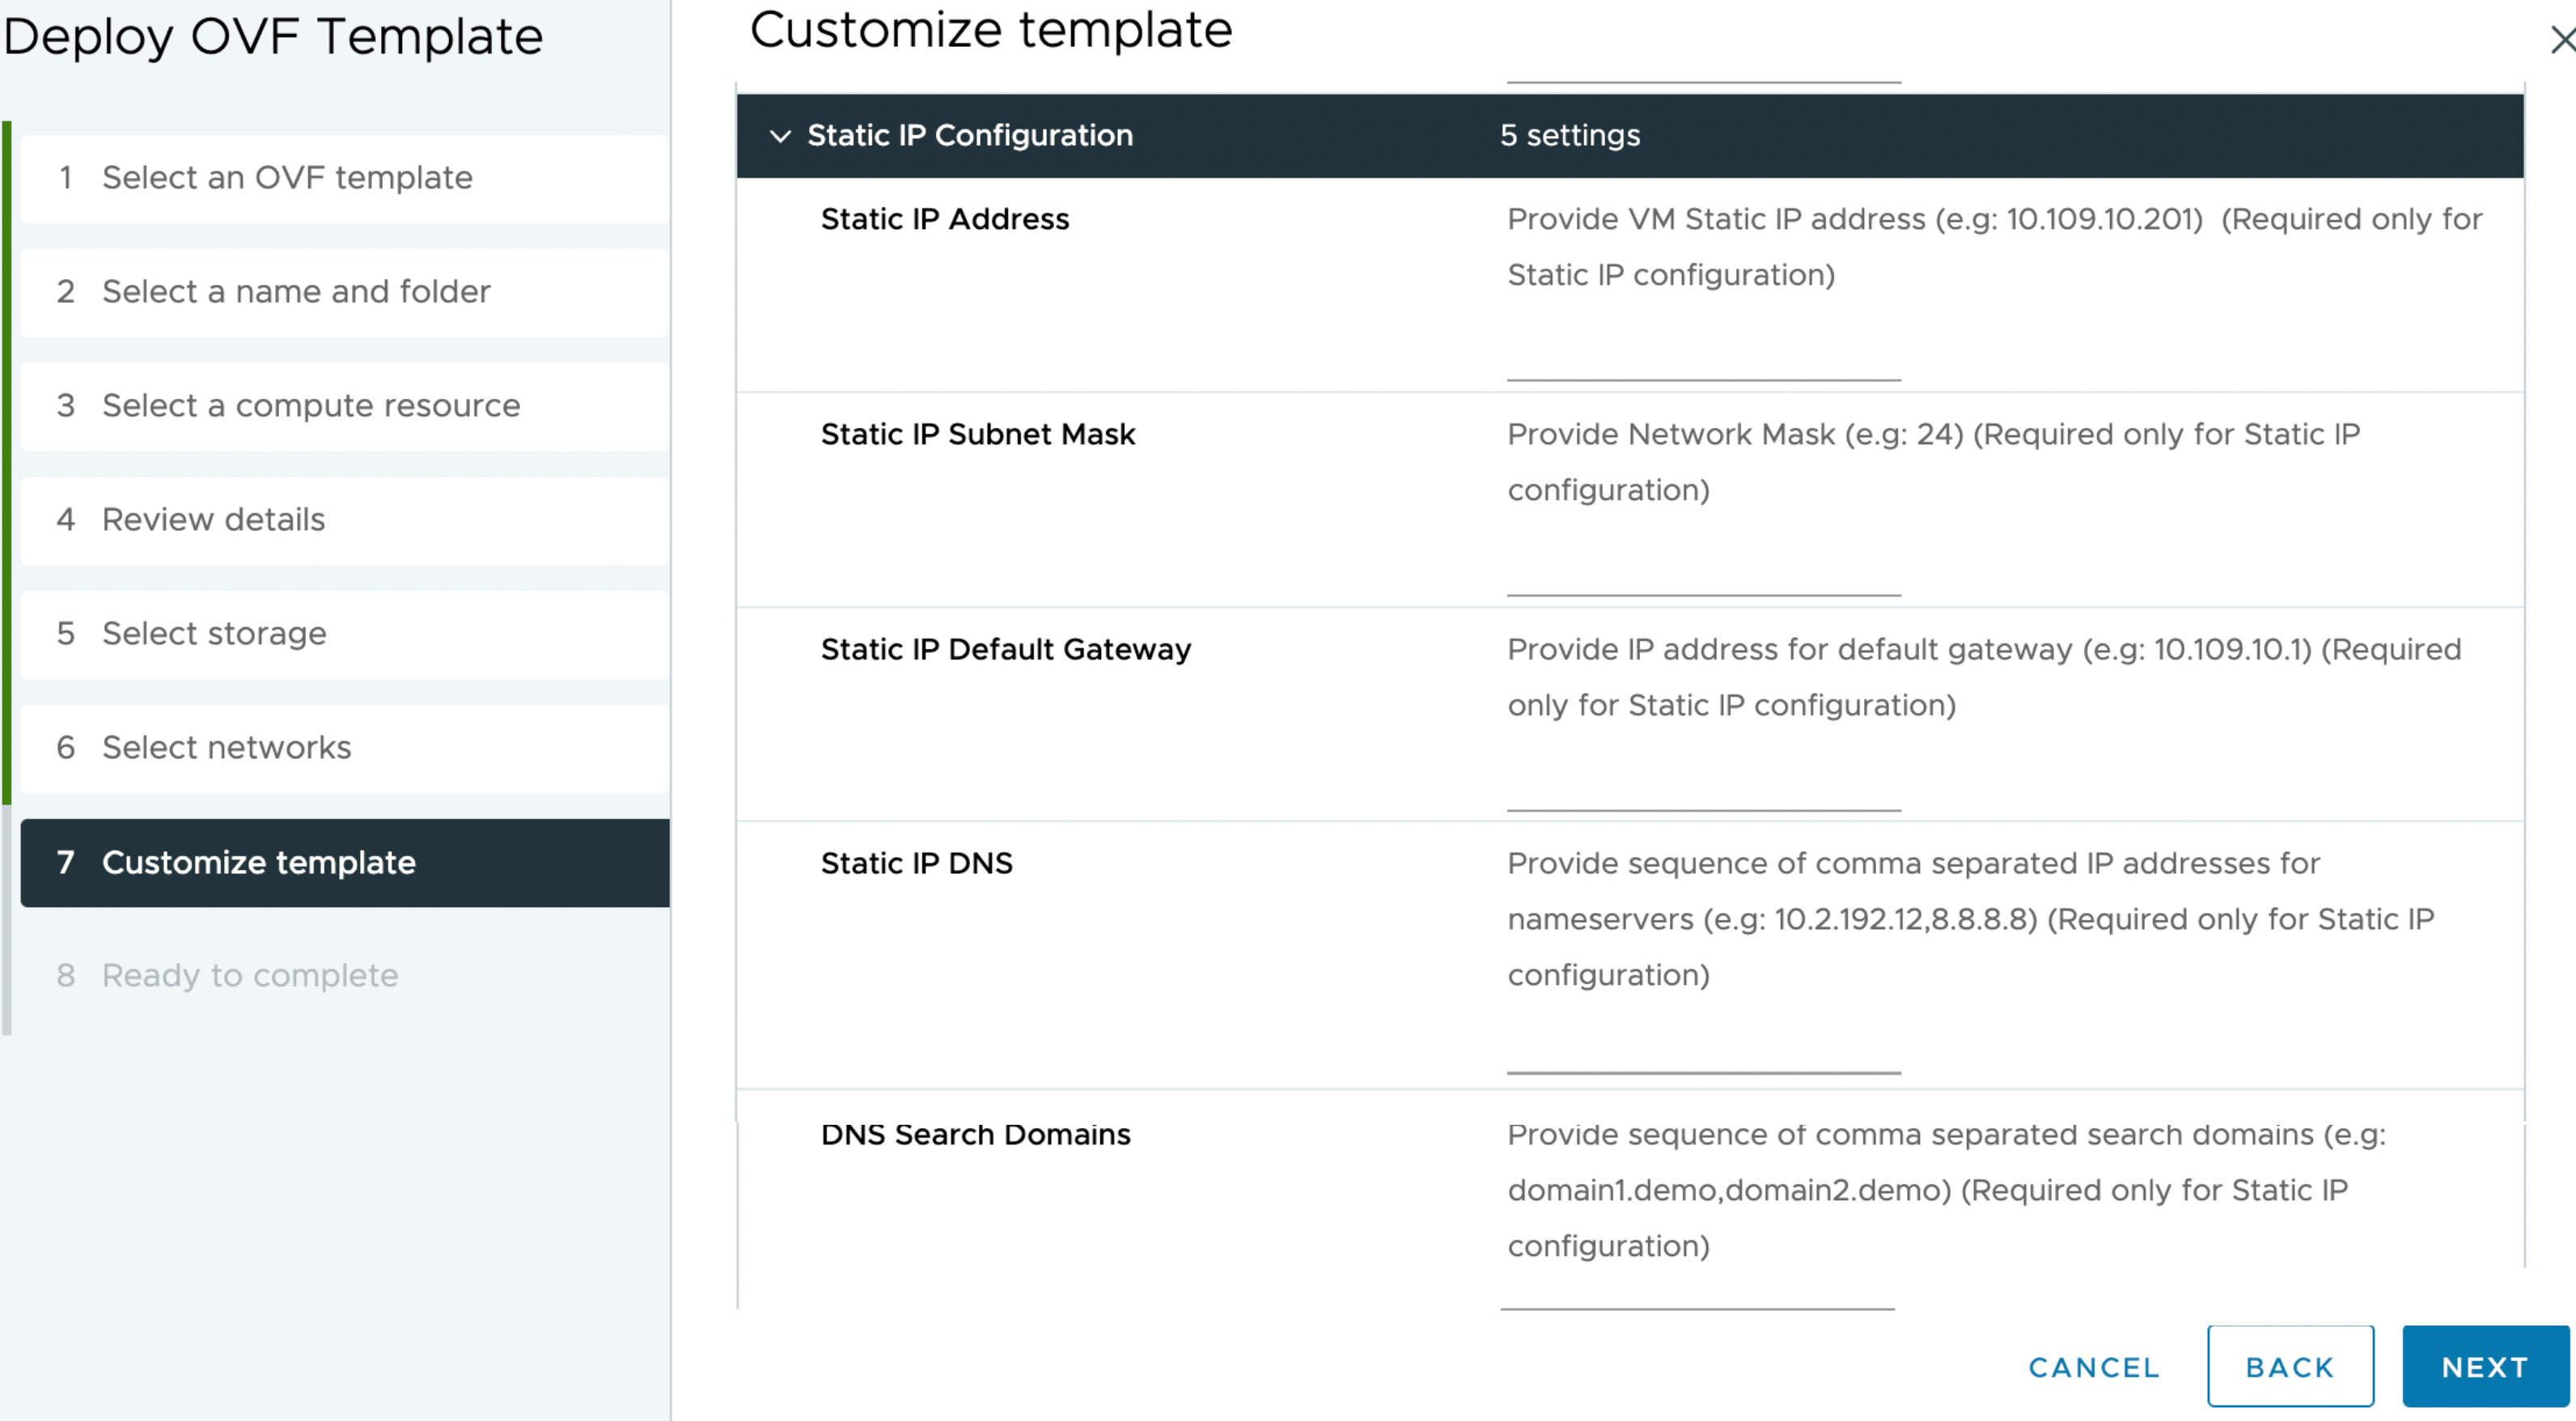
- Add the proxy configuration details if required
- Click Next

- A preview of all the information provided appears. Click Finish to complete the process

- The progress of VM deployment appears in the Recent Tasks as shown in the below example
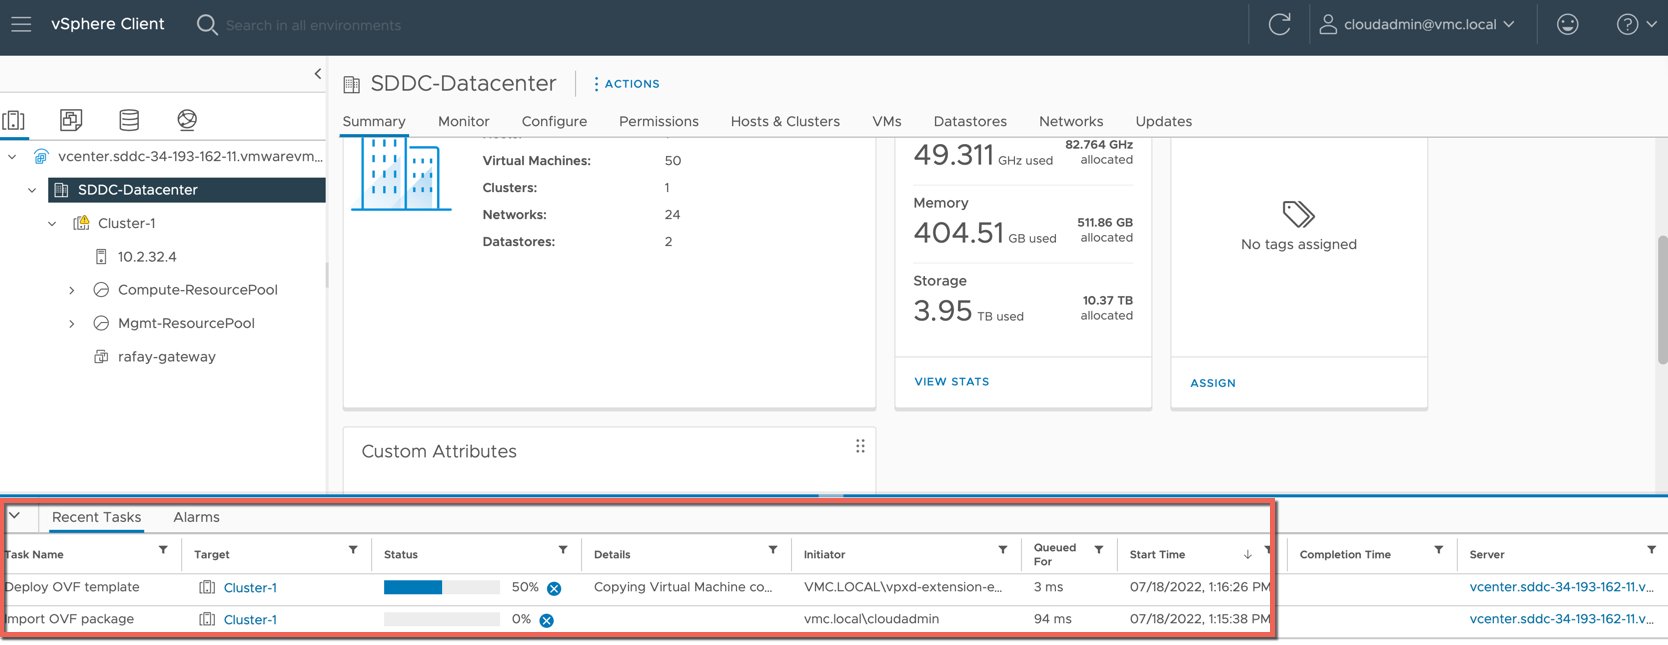
This completes the process